
When I sat down to design this little dress, I had three goals in mind. I wanted soft pastel colors that would work for spring photos and summer outings. I wanted that dreamy layered skirt effect without complicated construction. And I wanted the whole thing to feel special enough for a gift but practical enough for everyday wear.
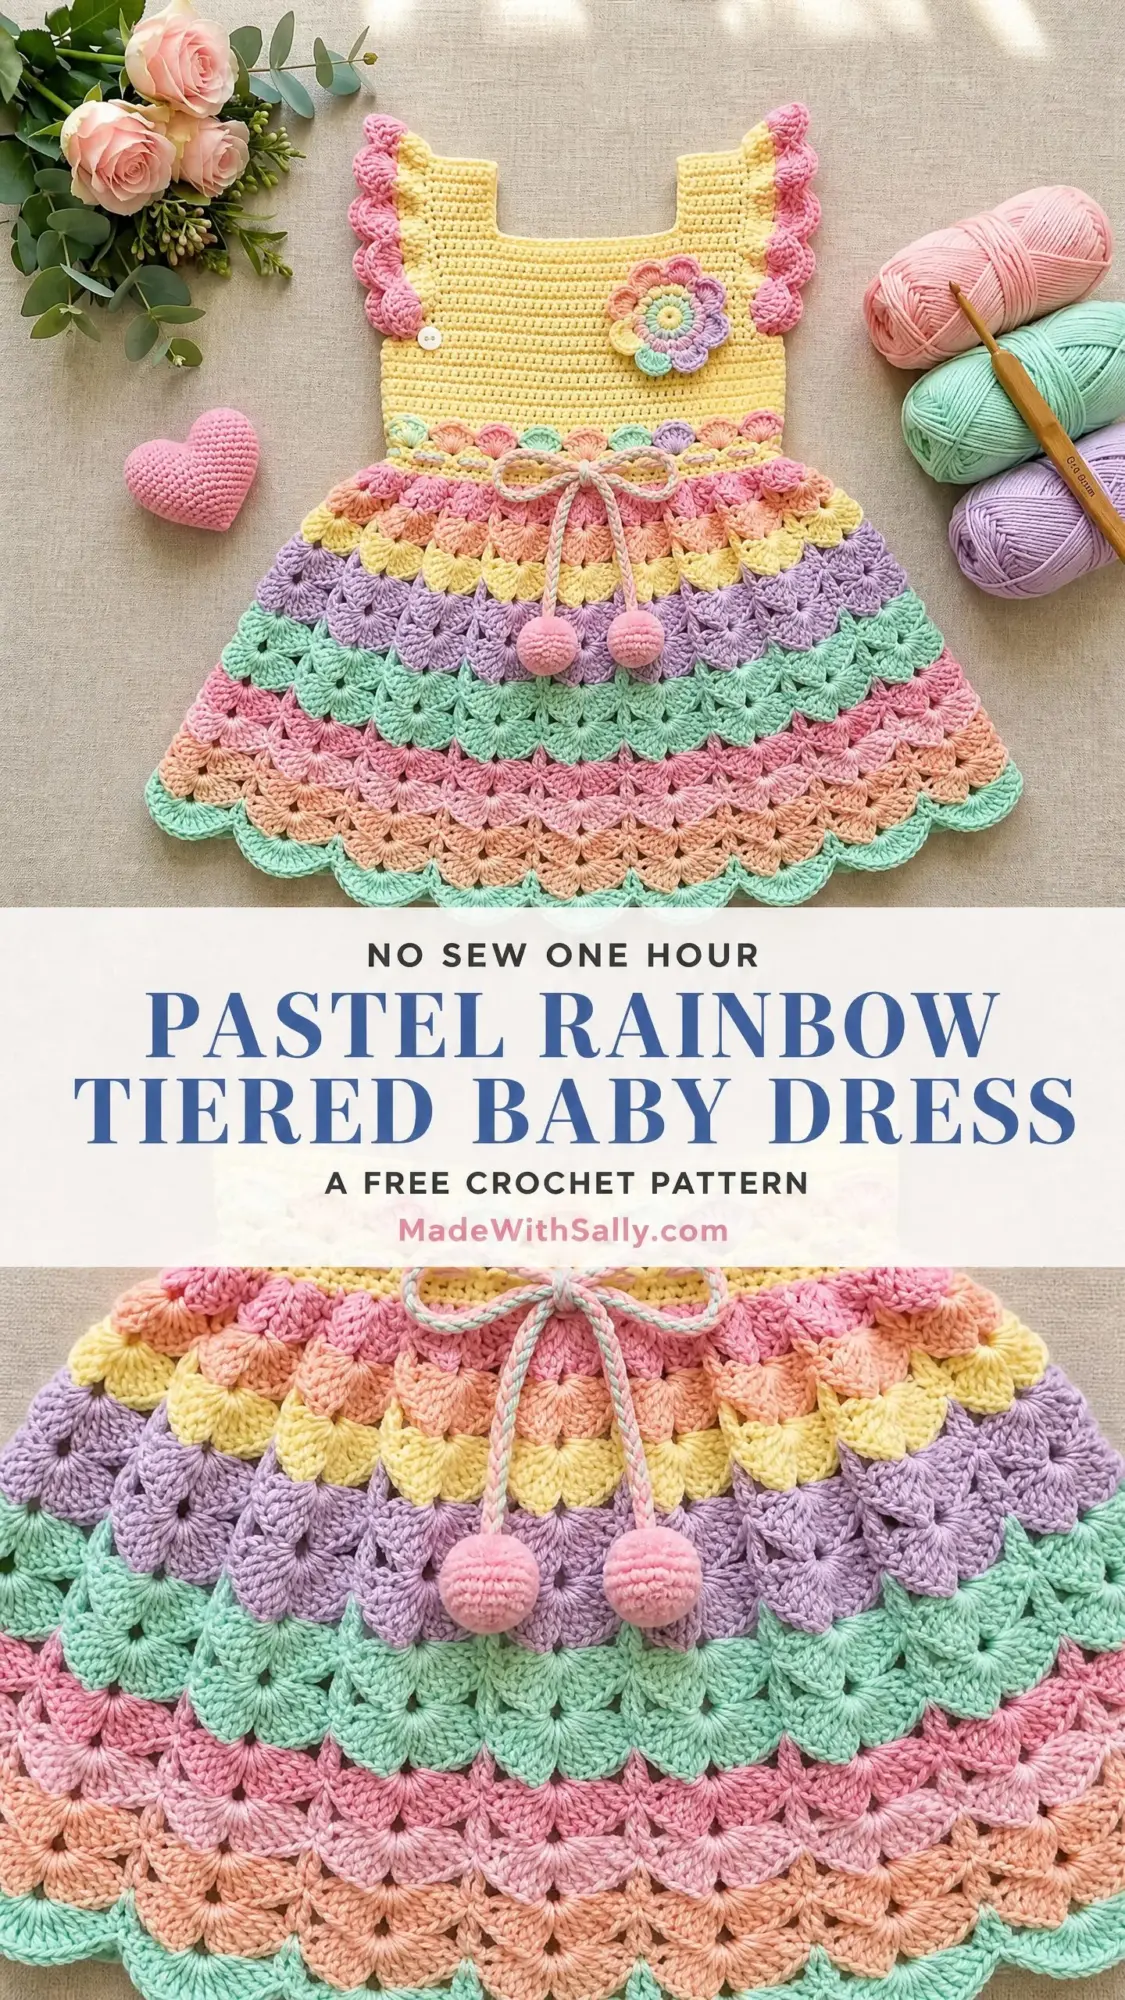
I am SO thrilled with how this turned out. The shell stitch creates those gorgeous scalloped tiers almost effortlessly, and the rainbow color progression makes every round feel like a tiny celebration. This is exactly the kind of project that reminds me why I fell in love with crochet in the first place.
If you have been eyeing those pastel skeins in your stash and wondering what to do with them, this is your sign. Let me walk you through every single step.
About This Crochet Pattern
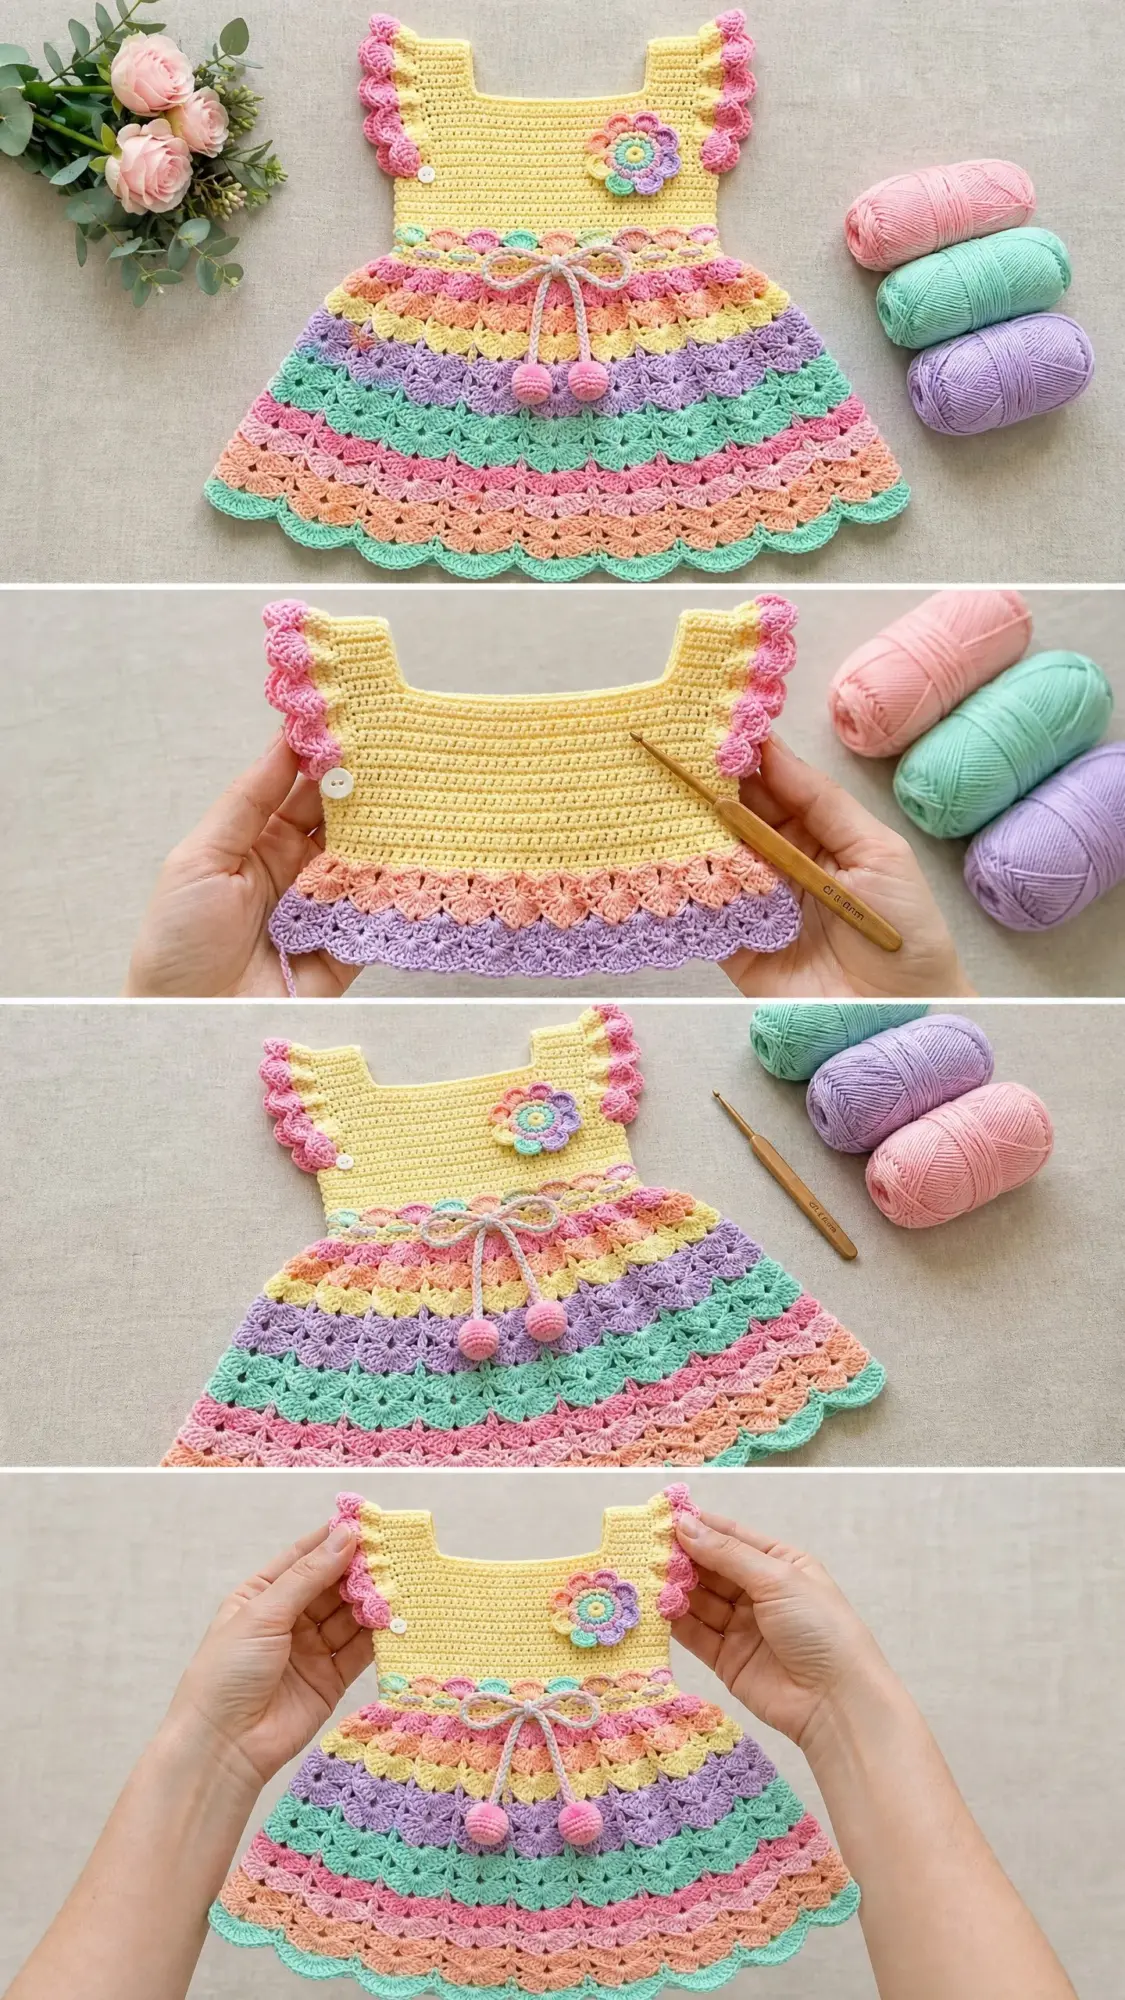
This Pastel Rainbow Tiered Baby Dress combines a simple single crochet bodice with a flowing shell stitch skirt. The construction is straightforward once you understand the flow. You work the bodice front and back as flat panels, seam them together, then pick up stitches at the waist and work the skirt in the round going downward.
The finished dress fits babies approximately 6 to 12 months old. The chest circumference measures about 18 inches with ease built in. From shoulder to hem, you are looking at roughly 13 inches total, with the skirt portion taking up about 7 inches of that length.
The skill level is intermediate. If you are comfortable with basic single crochet, double crochet, working in the round, and managing a few color changes, you can absolutely make this. The shell stitch might look fancy, but it follows a simple repeating rhythm that becomes second nature after a few rounds.
Materials You Will Need
Yarn: Light worsted weight or DK weight yarn, CYCA weight 3. Cotton or cotton blend works beautifully for baby garments because it breathes well and washes easily. You will need seven colors total.
Here is what I used:
Yarn Suggestions: Paintbox Yarns Simply DK works wonderfully and comes in every pastel shade imaginable. Drops Safran offers a nice cotton blend with beautiful drape. Lion Brand 24/7 Cotton DK gives excellent stitch definition if you want those shells to really pop.
Hook: US size E-4 (3.5 mm). Adjust if needed to meet gauge.
Notions: Yarn needle, stitch markers, scissors, 1 to 2 small white buttons about 10 mm in diameter, sewing needle and thread, small piece of cardboard for making pompoms.
Gauge
Getting gauge right matters here because this is a garment that needs to fit an actual baby.
In single crochet with recommended hook and yarn: 18 stitches and 22 rows equals 4 inches (10 cm), blocked.
In shell stitch for the skirt: 2 complete shell repeats (12 stitches) equals approximately 2.75 inches (7 cm). Three shell rows equals approximately 1.5 inches (4 cm).
Take time to swatch both stitch patterns before diving in. A half millimeter change in hook size can shift your finished measurements significantly.
Abbreviations and Stitch Definitions
Let me define every abbreviation you will encounter. I am including plain English explanations so nothing feels confusing.
Special Stitches
Shell Stitch: Work 5 double crochets all into the same stitch or space. This creates one complete shell with that beautiful fan shape. In the skirt, shells are separated by chain 1 spaces and anchored into the chain 1 spaces of the previous round.
Picot: Chain 3, then slip stitch into the first of those 3 chains. This creates a small decorative loop used at the hem.
Shell Edging for Flutter Trim: Work 5 double crochets into the same stitch, skip 2 stitches, slip stitch into next stitch. Repeat across. This gives you that sweet ruffled effect along the armholes.
Pattern Notes Before You Begin
Read through these before starting. They will save you confusion later.
1. The bodice front and back are worked separately as flat panels, then seamed at the sides.
2. The skirt is worked in the round, joined at the waist after side seams are closed.
3. Color changes in the skirt happen at the beginning of each round.
4. For the bodice, chain 1 at the beginning of each row does NOT count as a stitch.
5. For the skirt shell rounds, chain 3 at the beginning counts as the first double crochet of your first shell.
6. All shell rounds are worked with right side facing, joined without turning.
7. After the foundation shell round, all shells are worked into chain 1 spaces, not into the top of stitches.
Bodice Back Panel Instructions
The bodice back is worked flat in rows of single crochet, starting at the waist and working up toward the shoulders.
Foundation Chain: With Color A, chain 43. This gives you 42 working stitches.
Row 1 (WS): Single crochet in 2nd chain from hook and in each chain across. Turn. (42 sc)
Row 2 (RS): Chain 1, single crochet in each stitch across. Turn. (42 sc)
Rows 3 through 16: Repeat Row 2. Turn after each row. (42 sc per row)
Your panel should measure approximately 3 inches from the foundation edge.
Armhole Shaping for Back
Row 17 (RS): Slip stitch across first 4 stitches (these create the armhole edge), chain 1, single crochet in next 34 stitches, leave last 4 stitches unworked. Turn. (34 sc)
Row 18: Chain 1, decrease over first 2 stitches, single crochet to last 2 stitches, decrease. Turn. (32 sc)
Row 19: Chain 1, decrease over first 2 stitches, single crochet to last 2 stitches, decrease. Turn. (30 sc)
Row 20: Chain 1, single crochet in each stitch across. Turn. (30 sc)
Rows 21 through 28: Repeat Row 20. Turn after each row. (30 sc per row)
Your back panel should now measure approximately 5.5 inches from foundation.
Back Shoulder and Neck Shaping
You will work each shoulder separately.
Left Shoulder:
Row 29 (RS): Chain 1, single crochet in first 9 stitches. Turn. (9 sc)
Rows 30 through 33: Chain 1, single crochet in each stitch across. Turn. (9 sc)
Fasten off Color A. Left shoulder complete.
Right Shoulder:
With right side facing, skip the center 12 stitches for the back neck opening. Join Color A in the 22nd stitch from the left edge.
Row 29 (RS): Chain 1, single crochet in same stitch and next 8 stitches. Turn. (9 sc)
Rows 30 through 33: Chain 1, single crochet in each stitch across. Turn. (9 sc)
Fasten off Color A. Right shoulder complete.
Button Loop: With Color G, join at top right corner of back neck opening. Chain 8, slip stitch into the same corner to form a loop. Fasten off. You will sew a button to the left side later.
Bodice Front Panel Instructions
The front is identical to the back through Row 28, then has shallower neck shaping for a slightly higher front neckline.
Foundation Chain: With Color A, chain 43. (42 working stitches)
Rows 1 through 20: Work exactly as Bodice Back Rows 1 through 20. You should have 30 single crochets after armhole shaping.
Rows 21 through 26: Chain 1, single crochet in each stitch across. Turn. (30 sc per row)
Front Neck Shaping
Row 27 (RS): Chain 1, single crochet in first 11 stitches. Turn. (11 sc) This is the right shoulder as worn.
Row 28: Chain 1, decrease, single crochet to end. Turn. (10 sc)
Row 29: Chain 1, single crochet to last 2 stitches, decrease. Turn. (9 sc)
Rows 30 through 33: Chain 1, single crochet in each stitch across. Turn. (9 sc)
Fasten off. Right front shoulder complete.
Left Front Shoulder:
With right side facing, skip center 8 stitches for front neck. Join Color A in 20th stitch from right edge.
Row 27 (RS): Chain 1, single crochet in same stitch and next 10 stitches. Turn. (11 sc)
Row 28: Chain 1, single crochet to last 2 stitches, decrease. Turn. (10 sc)
Row 29: Chain 1, decrease, single crochet to end. Turn. (9 sc)
Rows 30 through 33: Chain 1, single crochet in each stitch across. Turn. (9 sc)
Fasten off. Left front shoulder complete.
Seaming the Bodice
Align front and back panels with wrong sides together (right sides facing out). Using a yarn needle and Color A, work a slip stitch seam or mattress stitch through both layers at each side edge. Join from waist up to the base of the armhole shaping. Do not seam shoulders yet.
For shoulder seams, align the 9 stitches of front and back at each shoulder. Slip stitch or mattress stitch through both layers across all 9 stitches. Repeat for both shoulders.
Your bodice is now a closed tube with two armhole openings and a neck opening. It should measure approximately 6 inches from shoulder to waist and 18 inches around at the waist.
Armhole Edging and Flutter Trim
Work this around each armhole separately.
Round 1: With right side facing, join Color B at the base of one armhole at the side seam. Chain 1, work single crochet evenly around the entire armhole opening, placing approximately 30 single crochets total. Join with slip stitch to first single crochet. Do not turn. (30 sc)
Round 2 (Flutter): Chain 1. Work 5 double crochets in first single crochet, skip 2 single crochets, slip stitch in next single crochet. Repeat around. You should have 10 shells. Join with slip stitch. (10 shells)
Fasten off Color B. Repeat for the second armhole.
Neckline Edging
Round 1: With right side facing, join Color B at center back neck. Chain 1, work single crochet evenly around entire neckline, placing approximately 42 single crochets. Join with slip stitch to first single crochet. (42 sc)
Round 2: Chain 1, single crochet in each stitch around. Join with slip stitch. (42 sc)
Fasten off Color B.
Skirt Foundation
Now for the fun part. The skirt is worked downward in the round from the waist.
Round 1 (Waist Join): With right side facing, join Color A at the right side seam at the lower waist edge. Chain 1, work single crochet evenly across the waist of both front and back panels. Your target is 90 single crochets total around the full waist. Place a stitch marker at the beginning and at the side seam position. Join with slip stitch to first single crochet. Do not turn. (90 sc)
The original bodice had 42 stitches per panel. Add slight increases at the side seams to reach 90 total. Distribute evenly if needed.
Round 2 (Shell Foundation, Color A): Chain 3 (counts as first double crochet), work 2 more double crochets in the same stitch as chain 3. This is a half shell to start. Chain 1, skip 2 single crochets. Work (5 double crochets in next single crochet, chain 1, skip 2 single crochets) around to last 2 stitches, work 2 double crochets in same stitch as starting chain 3 to complete the opening shell. Join with slip stitch to top of chain 3. (15 shells)
Change to Color B at the join.
Skirt Tier Instructions
All remaining rounds are worked into chain 1 spaces of the previous round.
Standard Skirt Round: Chain 3 (counts as first double crochet), work 4 more double crochets into the same chain 1 space. This completes your first shell. Chain 1, skip 5 double crochets of previous round. Work (5 double crochets into next chain 1 space, chain 1, skip 5 double crochets) around. Join with slip stitch to top of chain 3.
Follow this color sequence:
Rounds 3 and 4 (Color B): Work Standard Skirt Round. (15 shells each)
Change to Color C.
Rounds 5 and 6 (Color C): Work Standard Skirt Round. (15 shells each)
Change to Color A.
Rounds 7 and 8 (Color A): Work Standard Skirt Round. (15 shells each)
Change to Color D.
Rounds 9 and 10 (Color D): Work Standard Skirt Round. (15 shells each)
Change to Color E.
Rounds 11 and 12 (Color E): Work Standard Skirt Round. (15 shells each)
Change to Color B.
Rounds 13 and 14 (Color B): Work Standard Skirt Round. (15 shells each)
Change to Color C.
Rounds 15 and 16 (Color C): Work Standard Skirt Round. (15 shells each)
Change to Color E.
Rounds 17 and 18 (Color E): Work Standard Skirt Round. (15 shells each)
Your skirt should now measure approximately 6 inches from the waist join.
Hem Scallop Border
Round 19 (Color E): Join in any chain 1 space. Work (single crochet, chain 3, 4 double crochets, chain 3, slip stitch into 3rd chain from hook to create picot, single crochet) all into the same chain 1 space. Slip stitch across the 5 double crochets of the next shell. Repeat around. Join with slip stitch to first single crochet. Fasten off. (15 scalloped points at hem)
Waist Tie Cord
Cut 6 strands of Color F, each 36 inches long. Hold all strands together and anchor one end (a doorknob works great). Twist the strands tightly in one direction until they start to kink. Fold the twisted length in half, allowing it to twist back on itself naturally. Knot each end and trim to neaten. Your finished cord should be approximately 15 inches long.
Using a yarn needle, weave the cord through the chain 1 spaces between Rounds 2 and 3 at the waist. Thread through every other space. Pull gently to adjust fit and tie in a bow at the front center.
Pompoms
Make 2 small pompoms using Color B and Color E. Wind yarn approximately 30 times around a small piece of cardboard about 1.5 inches wide. Slide off the cardboard, tie tightly in the center with a separate strand, and cut the loops. Trim into a round shape. Attach one pompom to each end of the waist cord.
Flower Embellishment
Round 1: Magic ring, chain 1, work 6 single crochets into ring, join with slip stitch to first single crochet. (6 sc)
Round 2: Chain 1, work 2 single crochets in each stitch around, join with slip stitch. (12 sc)
Round 3: Work (chain 3, double crochet, chain 3, slip stitch) in same stitch, skip 1 stitch. Repeat (slip stitch, chain 3, double crochet, chain 3, slip stitch) in each alternate stitch around. You will have 6 petals. Fasten off, leaving a tail for sewing.
For a layered look, work a second smaller round in a contrasting color. Join in back loops of Round 2 stitches and repeat the petal sequence.
Add a small center using Color F with a French knot or a tiny button.
Sew the completed flower to the upper right area of the bodice front, slightly below the neckline.
Button Attachment
Sew 1 small white button to the left side of the back neck opening to align with your button loop. Add a second button at center back if you want extra security, working a corresponding chain 6 loop at the same height.
Finishing and Blocking
Weave in all ends securely on the wrong side. Thread each tail through several stitches in multiple directions before trimming close.
For cotton yarn, wet blocking gives the best results. Soak the dress in cool water for 10 to 15 minutes. Gently squeeze out excess water without wringing. Lay flat on a blocking mat or clean towel. Shape the bodice to measurements and fan the skirt tiers outward so shells lie flat. Pin at hem points if needed. Allow to dry completely.
Size Customization Tips
For 12 to 18 months: Add 6 stitches to the foundation chain of each bodice panel (chain 49 for 48 working stitches). Adjust waist join to 102 stitches. Add 2 shell rounds to the skirt.
For 18 to 24 months: Add 12 stitches to foundation chain (chain 55 for 54 working stitches). Adjust waist join to 108 stitches. Add 4 shell rounds.
For 0 to 6 months: Subtract 6 stitches from foundation chain (chain 37 for 36 working stitches). Adjust waist join to 78 stitches (13 shells). Remove 2 shell rounds from skirt.
Always keep your shell stitch multiple at 6 for the skirt to work correctly.
Care Instructions
Hand wash in cool water with gentle detergent. Rinse thoroughly. Do not wring. Lay flat to dry. If your yarn is labeled machine washable, use the gentle cycle in a mesh laundry bag. Avoid high heat in the dryer.
Thank you so much for choosing this pattern for your next project. I genuinely hope you love making this little dress as much as I loved designing it. There is something incredibly satisfying about watching those rainbow tiers grow round by round.
If you make this pastel rainbow baby dress, I would absolutely love to see it. Tag me on Instagram or share a photo in my Facebook group. And if you want to come back to this crochet tutorial later, go ahead and pin it to your favorite Pinterest board. Drop a comment below if you have any questions or just want to share your finished project. Happy hooking!
