
I pulled out an old spiral notebook last week while cleaning my craft room, and tucked between pages of half-finished sketches was this butterfly earring design. I had drawn it years ago after spotting a morpho butterfly at the botanical garden. The iridescent blues stayed with me, and I remember thinking, "I need to capture that in thread."
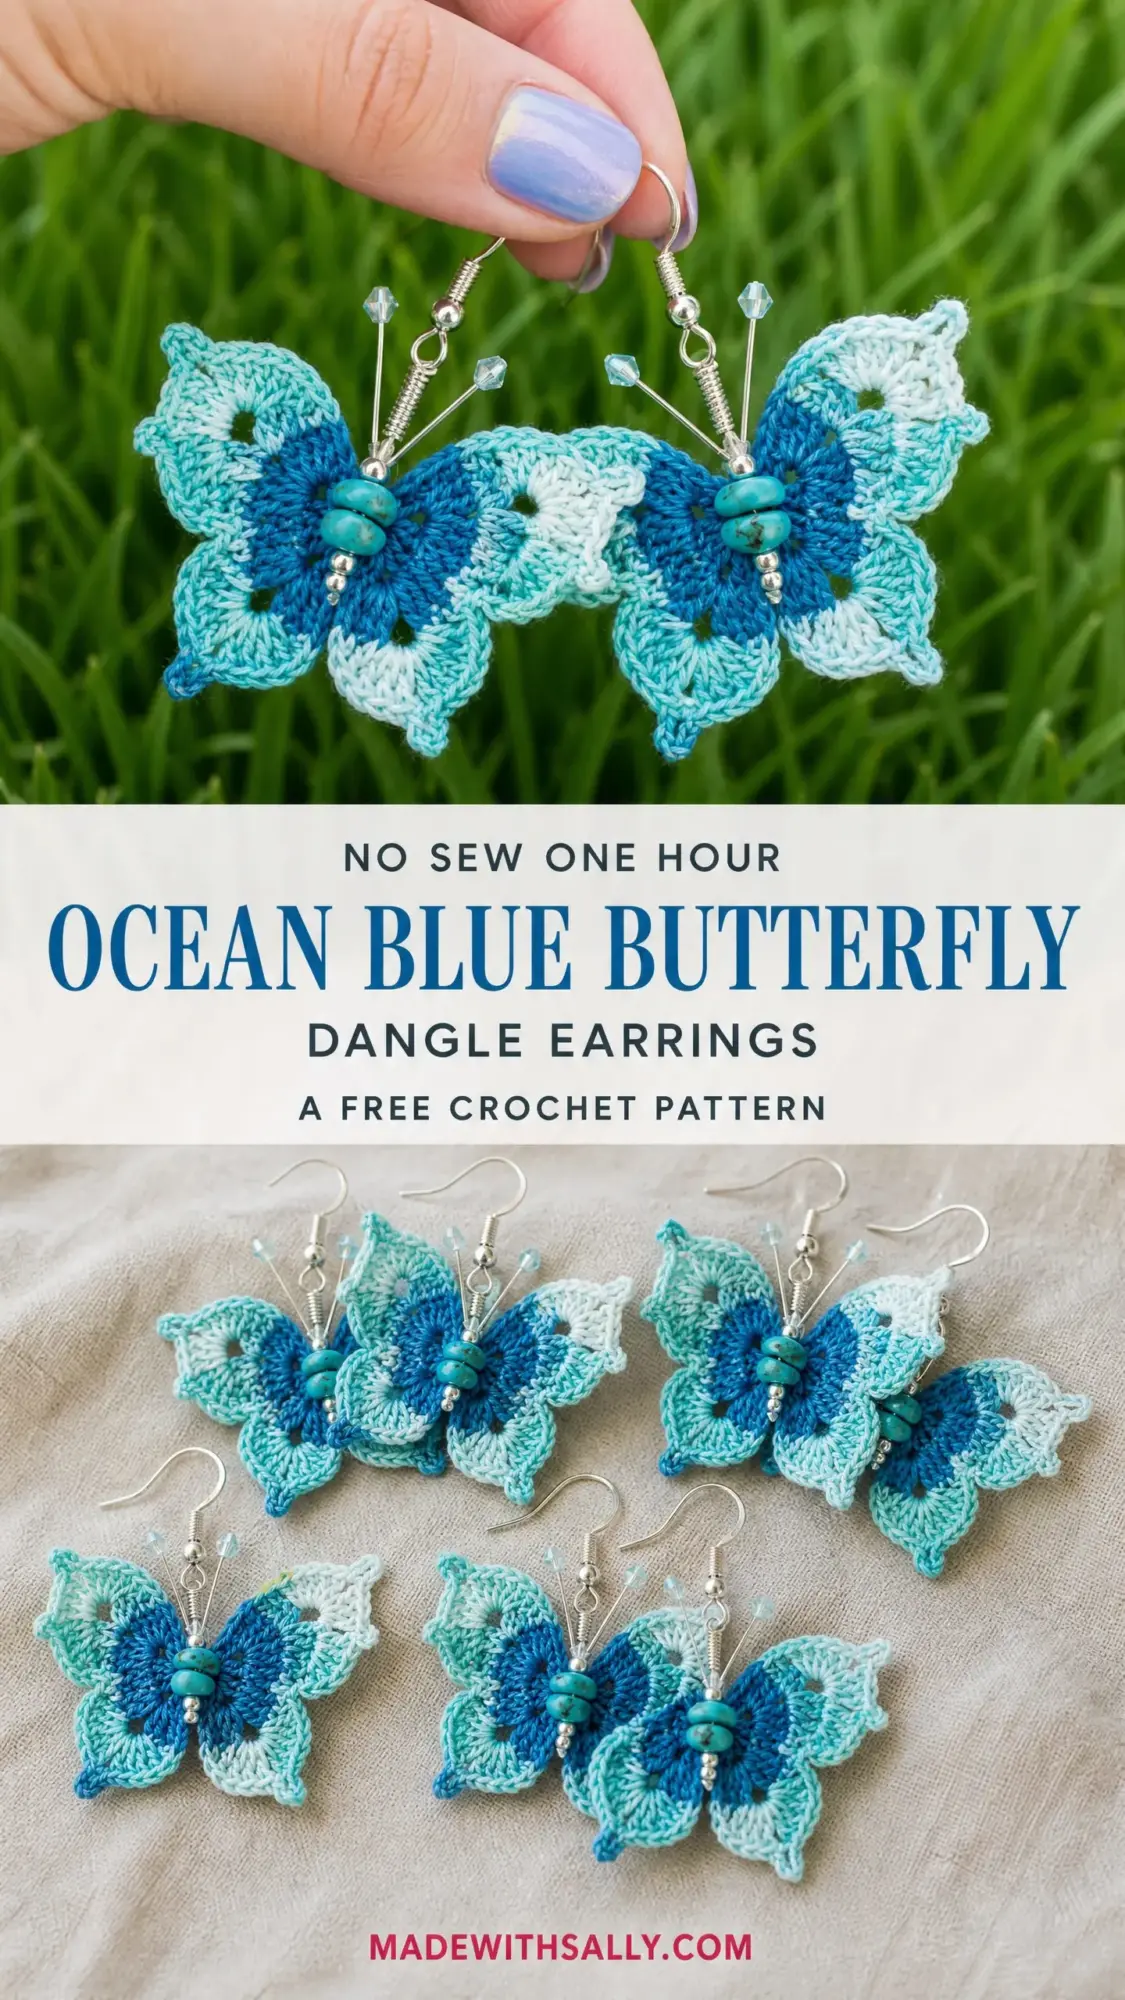
Well, life got busy. The notebook got buried. But finding those sketches again felt like reuniting with an old friend. I spent the next few evenings bringing the design to life, tweaking the wing shapes until they looked just right. I named them my Ocean Blue Butterflies because the variegated thread reminded me of sunlight dancing on tropical water.
These earrings are delicate, dimensional, and surprisingly lightweight. The lace texture creates that realistic multi-lobed wing silhouette, while the turquoise bead body and crystal-tipped antennae add just enough sparkle. If you have been curious about thread crochet jewelry, this is a beautiful place to start.
Why You Will Love This Butterfly Earring Pattern
Thread crochet jewelry might seem intimidating at first glance. Those tiny stitches and fine hooks can look fussy. But here is the truth: if you can work a double crochet and a chain stitch, you already have the skills you need.
Each butterfly is made from two separate wing pieces joined at the center. This construction method means you are never juggling too many stitches at once. The wings stay flat and manageable throughout the entire process.
The variegated thread does all the color work for you. No changing colors mid-row. No weaving in dozens of ends. Just let that beautiful blue, teal, and white thread create natural transitions as you stitch.
Finished size: Each butterfly measures approximately 1.75 inches wide by 1.5 inches tall, not including the ear wire or antennae. The full earring drop from the ear wire hook to the bottom of the butterfly is approximately 2.5 inches.
Time estimate: Plan for about 2 to 3 hours per pair, including assembly. If you have experience with thread crochet, you might finish closer to 1.5 hours.
Skill level: Intermediate. You should be comfortable with shell stitches, working into chain spaces, slip stitch joins, and assembling multiple components including beads and wire.
Materials You Will Need
Gathering your supplies before you start makes the whole process smoother. Here is everything you need for one pair of earrings.
Crochet Thread
Size 10 cotton crochet thread in a variegated blue, teal, and white colorway. You will need approximately 15 yards per earring, so 30 yards total for the pair.
Thread suggestions:
Lizbeth Size 10 Crochet Thread in a hand-dyed or variegated ocean colorway such as "Ocean Turquoise" offers excellent stitch definition and a wide range of beautiful colorways.
DMC Cebelia Size 10 Cotton Crochet Thread is typically solid, but you can combine two closely related shades such as DMC 3846 (light bright turquoise) and 995 (dark electric blue) to create a similar effect.
Aunt Lydia’s Classic Crochet Thread Size 10 in a variegated colorway such as "Monet" works beautifully, as does any custom-dyed indie thread in aqua tones.
Avoid polyester thread for this project. It tends to be slippery and resists blocking, which makes shaping the wings difficult.
Hook
Steel crochet hook size 7 (1.65 mm) or size needed to obtain gauge.
Findings and Embellishments (per earring)
Tools
Gauge
With size 7 (1.65 mm) steel hook and size 10 crochet thread:
1 shell (5 double crochet) equals approximately 0.4 inches wide.
10 rows of double crochet equals approximately 1 inch tall.
Gauge is not critical for jewelry as long as both earrings are worked with the same hook and tension to ensure they match. However, correct gauge ensures the finished butterfly measures close to the stated dimensions.
Abbreviations and Stitch Definitions
Let me walk you through every abbreviation before we begin. No surprises later.
ch: chain
sl st: slip stitch
sc: single crochet, a short stitch made by inserting your hook, pulling up a loop, then yarning over and drawing through both loops
hdc: half double crochet
dc: double crochet, a taller stitch made by yarning over before inserting your hook, pulling up a loop, then working off two loops twice
tr: treble crochet
sk: skip
sp: space
ch-sp: chain space
st(s): stitch(es)
rep: repeat
beg: beginning
yo: yarn over
MR: magic ring, also called adjustable ring
pm: place marker
rem: remaining
RS: right side
WS: wrong side
rnd: round
lp(s): loop(s)
Special Stitches
These decorative stitches create the beautiful wing texture. Take a moment to practice them before starting if they are new to you.
Shell Stitch (shell)
Work 5 double crochet all into the same stitch or chain space. This creates a fan-shaped group that forms each wing lobe.
Step 1: Yarn over, insert hook into indicated stitch or space.
Step 2: Pull up a loop. Yarn over, draw through 2 loops. You have made your first dc.
Step 3: Repeat Steps 1 and 2 four more times into the same stitch or space.
You now have 5 dc total in the same location. This completes 1 shell.
Large Shell Stitch (lg-shell)
Work 7 double crochet all into the same stitch or chain space. Used for the larger upper wing lobes.
Follow the same method as the shell stitch above, but work 7 dc into the same location instead of 5.
Picot
Chain 3, slip stitch into the first chain made (the chain closest to the hook). This creates a small decorative knot at the tip of each wing lobe. Think of it as a tiny crown.
V-Stitch (V-st)
Work (1 dc, ch 2, 1 dc) all into the same stitch or chain space. This creates a small V shape with an open center.
Pattern Notes Before You Begin
Read through these tips. They will save you frustration later.
Each butterfly is made of two separate wing units: one upper wing unit and one lower wing unit. These are joined together at a central point, then the body assembly (beads and wire) is added.
Each wing unit is crocheted as a flat piece worked in rows with turning chains.
The ear wire is attached last through a small loop at the top of the butterfly body assembly.
The antennae are made from silver headpins bent and shaped after assembly, not from crochet.
When working with size 10 thread and a fine steel hook, pull your loops up slightly taller than usual. This prevents overly tight stitches that make it hard to insert your hook on the next row. Give yourself some breathing room.
All counts in parentheses at the end of a row reflect total stitches or stitch groups present across the working edge.
The pattern is written for one butterfly (one earring). Repeat all steps for the second earring.
Right side and wrong side matter for this pattern. The RS is the side facing outward when worn. Both sides look nearly identical due to the lace structure, but the RS has a slightly cleaner stitch appearance.
Upper Wing Unit Instructions
The upper wing unit is made of two upper wings joined at the center. It is worked in rows. This is the larger of the two wing pieces.
Foundation: Ch 4, sl st to first ch to form a small ring. Alternatively, use a tight magic ring.
Row 1 (RS): Ch 3 (counts as first dc here and throughout), work 2 dc into ring, ch 2, work 3 dc into ring, turn. (6 dc, 1 ch-2 sp)
Row 2: Ch 3, dc into first dc (V-st started), dc into next dc, dc into next dc, (2 dc, ch 2, 2 dc) into ch-2 sp (center shell over gap), dc into next dc, dc into next dc, 2 dc into top of turning ch, turn. (12 dc, 1 ch-2 sp)
Row 3: Ch 3, work lg-shell (7 dc) into first dc, sk 2 dc, sc into next dc, sc into next dc, (3 dc, ch 2, 3 dc) into ch-2 sp, sc into next dc, sc into next dc, sk 2 dc, lg-shell (7 dc) into last dc (top of turning ch), turn. (2 lg-shells of 7 dc each, 4 sc, 1 central group of 6 dc, 1 ch-2 sp)
Row 4: Ch 1, sc into first dc of lg-shell, ch 3, picot, ch 3, sk 3 dc of lg-shell, sc into center (4th) dc of lg-shell, ch 3, picot, ch 3, sk 3 dc of lg-shell, sc into last dc of lg-shell, ch 2, sk 2 sc, sc into first dc of center group, ch 1, (2 dc, ch 3, picot, ch 3, 2 dc) into ch-2 sp (center top arch), ch 1, sc into last dc of center group, ch 2, sk 2 sc, sc into first dc of second lg-shell, ch 3, picot, ch 3, sk 3 dc, sc into center dc of second lg-shell, ch 3, picot, ch 3, sk 3 dc, sc into last dc of second lg-shell. Do not turn.
Fasten off, leaving a 6-inch tail for joining.
Checkpoint: Your upper wing unit should measure approximately 1.75 inches wide and 0.75 inches tall. It should have two symmetrical wing lobes, each tipped with two picots, and a small arch at the center top where the ear wire assembly will attach.
Lower Wing Unit Instructions
The lower wings are slightly shorter and rounder than the upper wings. They are worked similarly but with standard shells instead of large shells.
Foundation: Ch 4, sl st to first ch to form a small ring.
Row 1 (RS): Ch 3 (counts as dc), work 2 dc into ring, ch 2, work 3 dc into ring, turn. (6 dc, 1 ch-2 sp)
Row 2: Ch 3, dc into first dc, dc into next 2 dc, (2 dc, ch 2, 2 dc) into ch-2 sp, dc into next 2 dc, 2 dc into top of turning ch, turn. (12 dc, 1 ch-2 sp)
Row 3: Ch 3, shell (5 dc) into first dc, sk 2 dc, sc into next dc, sc into next dc, (2 dc, ch 2, 2 dc) into ch-2 sp, sc into next dc, sc into next dc, sk 2 dc, shell (5 dc) into top of turning ch, turn. (2 shells of 5 dc each, 4 sc, 1 central group of 4 dc, 1 ch-2 sp)
Row 4: Ch 1, sc into first dc of shell, ch 2, picot, ch 2, sk 2 dc of shell, sc into center (3rd) dc of shell, ch 2, picot, ch 2, sk 2 dc, sc into last dc of shell, ch 2, sk 2 sc, sc into first dc of center group, (dc, ch 2, dc) into ch-2 sp (V-st for lower center notch), sc into last dc of center group, ch 2, sk 2 sc, sc into first dc of second shell, ch 2, picot, ch 2, sk 2 dc, sc into center dc of second shell, ch 2, picot, ch 2, sk 2 dc, sc into last dc of second shell. Do not turn.
Fasten off, leaving a 6-inch tail for joining.
Checkpoint: Your lower wing unit should measure approximately 1.5 inches wide and 0.6 inches tall. It should be visibly smaller than the upper wing unit with a rounder, more compact silhouette.
Joining the Wing Units
Hold the upper wing unit with the RS facing you and the center arch at the top.
Hold the lower wing unit with the RS facing you and the V-stitch notch at the bottom.
Align the two units so the foundation rings are stacked on top of each other, upper wing unit in front.
Using the tail from either unit and a tapestry needle, whipstitch through both foundation rings 3 to 4 times to secure them together firmly. The rings will form the butterfly body center point.
Do not fasten off the tail yet. Use remaining tail ends to tidy any gaps between the two units at the center seam. Weave in all thread ends securely.
Body and Antenna Assembly
This is where your butterfly really comes to life. Take your time with the wire work.
Step 1: Antennae
Take one silver headpin. Using round-nose pliers, create a tiny loop at the non-pointed end. This loop will anchor the antennae to the body center.
Bend the headpin at a gentle V-angle approximately 0.5 inches from the loop end so that it forms two separate antenna arms.
Thread 1 crystal bicone bead onto each arm.
Using chain-nose pliers, bend each arm tip slightly outward to create a natural antenna curve and to prevent the crystal beads from sliding off. If needed, use a tiny amount of jewelry adhesive on the bead hole to lock them in place.
Step 2: Body
Cut a second headpin to approximately 1 inch.
Thread in this order: 2 silver seed beads, 1 turquoise nugget bead, 2 silver seed beads.
This forms the body of the butterfly.
Step 3: Attach Antennae and Body
Pass the looped end of the antenna headpin through the center of the joined butterfly wing units from front to back.
Pass the body headpin through the same center point, layered directly behind the antenna headpin.
Using round-nose pliers, create a wrapped loop or simple loop at the bottom of the body headpin to secure all components together. Trim any excess wire.
Step 4: Ear Wire
Open the loop on the French hook ear wire slightly using chain-nose pliers.
Slip the loop at the top of the antenna headpin (or attach through the top center arch of the upper wing unit) onto the ear wire loop.
Close the ear wire loop firmly.
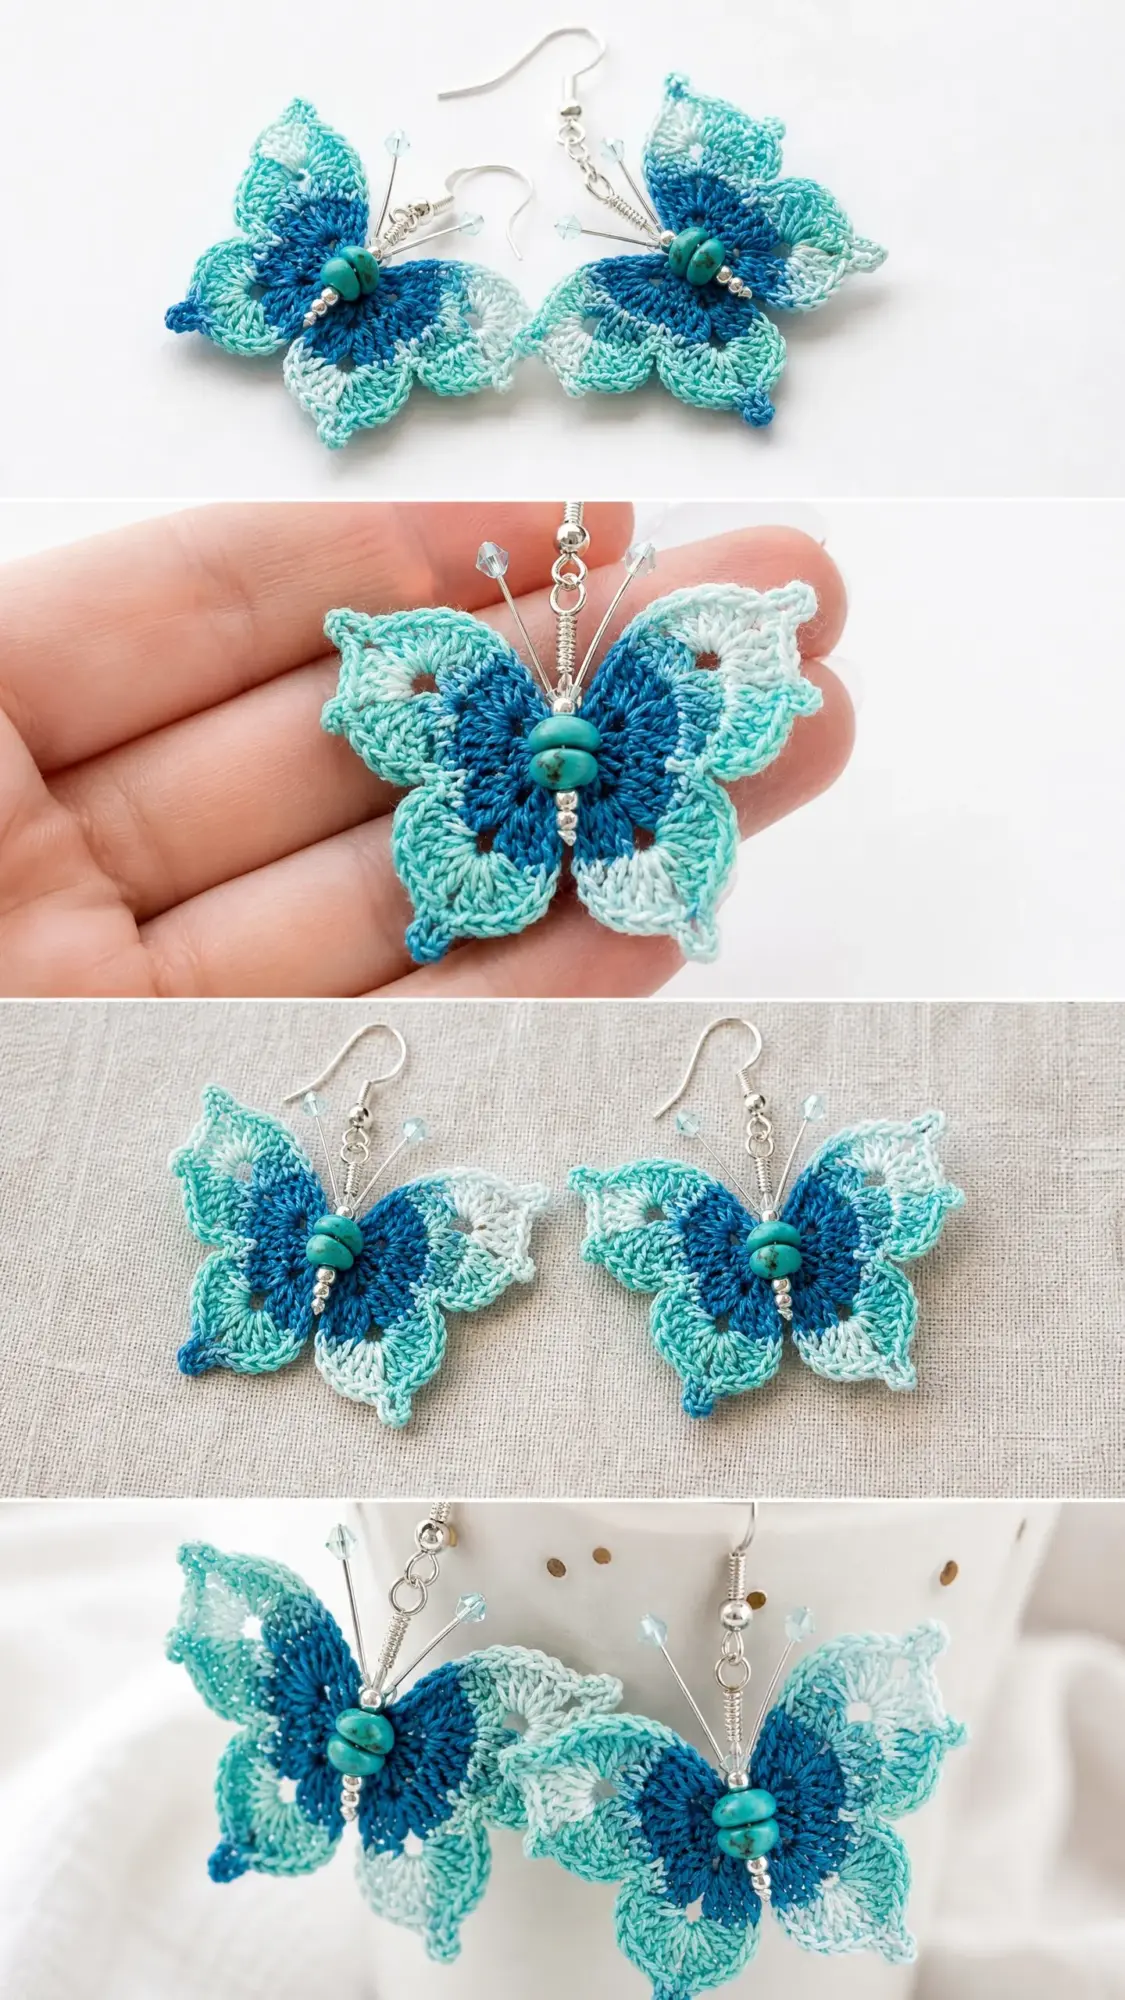
Assembly checkpoint: The completed earring should hang freely with the butterfly body centered, the wings splayed symmetrically to either side, the turquoise bead body visible at center front, and the antennae angled upward and outward. The ear wire exits from the top center.
Size Customization Tips
Want to adjust the size? Here are your options.
For larger butterflies: Switch to size 3 crochet thread (bedspread weight) and a size 2 (2.2 mm) steel hook. Add one additional row to both the upper and lower wing units before the picot edging row. This yields a butterfly approximately 2.5 inches wide.
For smaller butterflies: Switch to size 20 crochet thread and a size 10 (1.30 mm) steel hook. Omit Row 3 and work the picot edging directly onto Row 2. This yields a miniature butterfly approximately 1.25 inches wide.
For wider wings: Work a lg-shell (7 dc) in place of a standard shell (5 dc) in the lower wing unit as well.
Finishing and Blocking
Thread crochet pieces benefit greatly from wet blocking or starch stiffening. This step makes a real difference in the final appearance.
Method 1 (Wet Block): Soak the finished crocheted butterfly (before attaching hardware) in cool water for 5 to 10 minutes. Gently squeeze out excess water in a clean towel. Pin the butterfly flat on a blocking board, spreading each wing lobe to its fullest natural shape. Allow to dry completely, several hours or overnight.
Method 2 (Stiffening): Mix 1 part craft glue with 1 part water. Dip the crocheted butterfly and wring gently. Pin into shape on a non-stick surface such as wax paper. Allow to dry completely. This method produces a stiffer earring that holds its shape better with wear and movement.
Once dry, attach all hardware as described in the Body and Antenna Assembly section.
Weave in any remaining thread ends securely with a tapestry needle before attaching hardware. Trim ends close to the fabric.
Care Instructions
Hand wash gently in cool water with mild soap if the earrings become soiled. Avoid submerging if the butterfly has been stiffened with craft glue, as this may dissolve the stiffener.
Lay flat to dry. Do not tumble dry, iron, or use high heat.
Store in a small jewelry pouch or box to protect the antennae wire from bending out of shape. Gently reshape antennae with pliers if distorted.
Final Thoughts on This Butterfly Earring Crochet Pattern
These Ocean Blue Butterfly Dangle Earrings are the kind of project that makes you fall in love with thread crochet. The wings come together quickly, the variegated thread creates stunning color transitions with zero effort, and the finished earrings are genuinely wearable.
They make wonderful gifts for butterfly lovers, jewelry enthusiasts, or anyone who appreciates handmade accessories. You could easily customize the colors to match a favorite outfit or create a whole collection in different colorways.
Thank you so much for choosing this pattern. I hope you enjoy making these as much as I enjoyed designing them. If you create your own pair, I would love to see them! Tag me on Instagram or share a photo in our Facebook group.
If this pattern is going to live in your project queue for a bit, go ahead and save it to your Pinterest boards so you can find it easily when you are ready to start. And please drop a comment below if you make these butterflies. I love hearing about your finished projects and seeing how you put your own spin on the design.
