
I’ve been looking for the perfect bridal crochet accessory pattern for months now, and this one stopped me in my tracks. The dimensional roses, the delicate sage leaves, the pearl accents. It’s exactly the kind of heirloom piece that makes handmade feel truly special. Whether you’re crafting for a wedding, a photo shoot, or just because you deserve something beautiful, this is my favourite floral headband pattern and I’m thrilled to share it with you.
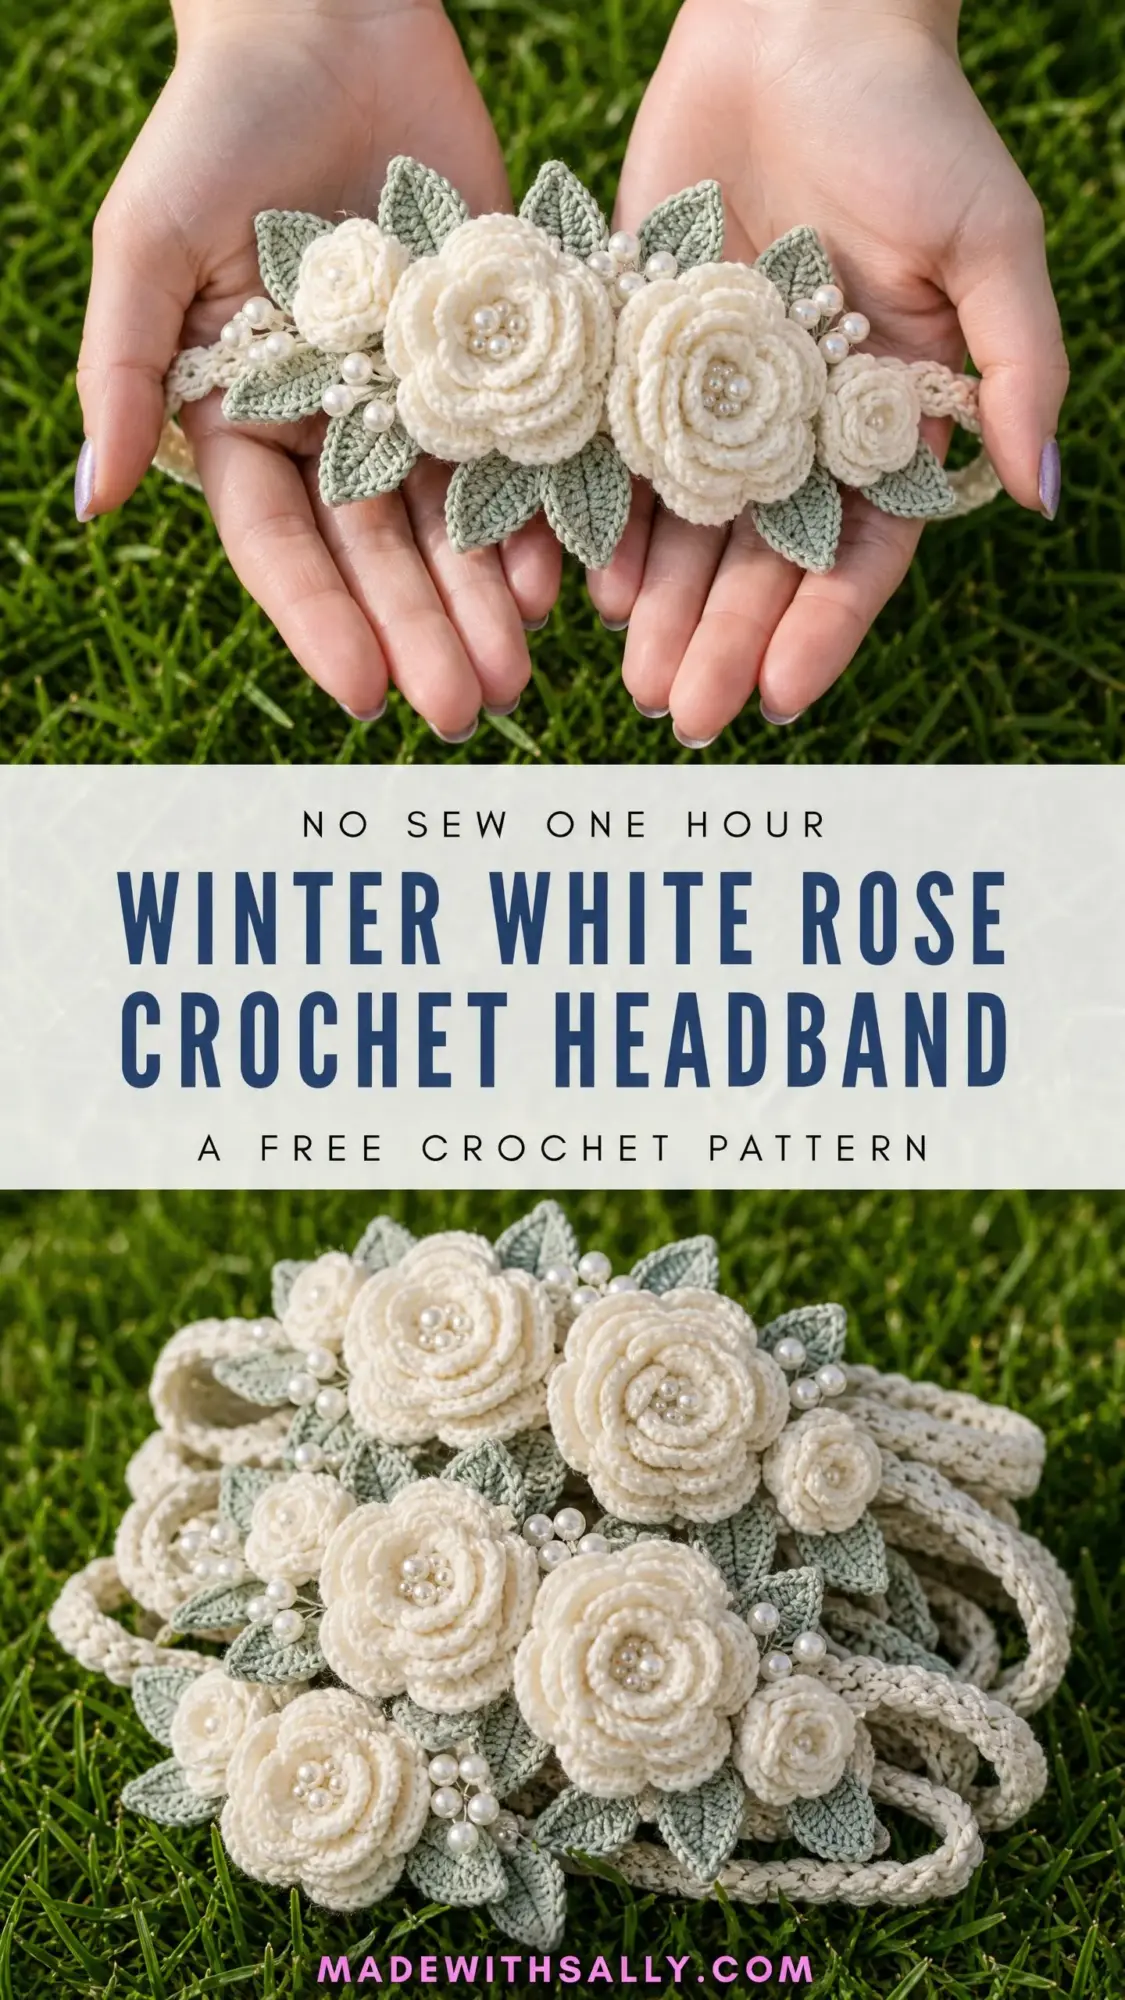
The construction is clever without being complicated. You’ll build each rose in tiers, working petals into chain loops that stack naturally into that gorgeous spiral shape. The leaves use simple increases and decreases around a foundation chain. And the band itself? Just back loop single crochet worked flat and seamed into a slim cord. Nothing scary here.
If you’ve never made three-dimensional crochet flowers before, this is a wonderful place to start. I’ll walk you through every step, every stitch count, every little trick I know. Let’s make something stunning together.
About This Crochet Pattern
This Winter White Rose Crochet Headband features three layered roses in graduated sizes, eight to ten textured leaves in sage green, and clusters of pearl beads for that elegant finishing touch. The slim crocheted band fits comfortably around most adult heads and provides a sturdy base for the floral arrangement.
The finished headband measures approximately 22 inches (56 cm) around, fitting most adult heads. The floral cluster spans about 5 inches (12.5 cm) wide and sits 2.5 inches (6.5 cm) tall at its highest point. The band itself is just 0.25 inches (0.6 cm) wide, giving that delicate, refined look.
Skill level: Intermediate. The band is beginner-friendly, but the roses require working in continuous rounds and assembling layered petals. If you’ve crocheted in the round before and joined motifs together, you’re ready for this.
Time estimate: Approximately 4 to 6 hours total, including assembly and embellishment. I recommend spreading this across a couple of crafting sessions so you can give each rose the attention it deserves.
Materials You’ll Need
Gather everything before you start. There’s nothing worse than running out of yarn halfway through your second rose.
Yarn:
Yarn suggestions that work beautifully:
Avoid fuzzy or heavily plied wool yarns. They’ll obscure the pretty spiral texture of your roses. You want something smooth and firm.
Hook: US B-1 / 2.25 mm crochet hook, or size needed to obtain gauge.
Notions:
Gauge
18 single crochet stitches and 20 rows = 2 inches (5 cm), worked in continuous rounds with Color A on a US B-1 / 2.25 mm hook, after light blocking.
Gauge matters here. It affects how well your band fits and how your roses proportion out. Take five minutes to swatch. Your future self will thank you.
Abbreviations and Special Stitches
Let me walk you through every stitch you’ll use. Even if you know these, a quick refresher never hurts.
Standard Abbreviations (US Terms):
Special Stitches:
Rose Petal Shells: These build your layered petals. Each size creates a different petal proportion.
Surface Slip Stitch (for leaf veins): Insert hook from front to back through the fabric. Yarn over with Color B held at the back. Pull through to the front, then pull through the loop on your hook. This creates a raised chain line on the leaf surface without bulk on the wrong side.
Pattern Notes Before You Begin
A few things to keep in mind as you work:
1. The headband band is worked as a flat back loop only single crochet strip, then the long edges are slip stitched together to form a slim tube.
2. You’ll make three roses in graduated sizes: one large (center), two medium (flanking), and two small rosebud accents at the edges.
3. Leaves are made separately and layered beneath the roses during assembly.
4. All rounds are worked with the right side facing unless stated otherwise.
5. Do not turn between rounds unless specified.
6. Important: Fasten off and leave long tails (at least 10 inches / 25 cm) on all motifs for sewing. You’ll need these tails during assembly.
The Headband Band Instructions
Let’s start with the foundation of your headband.
With Color A and US B-1 hook, ch 6.
Row 1: sc in 2nd ch from hook and in each ch across. Turn. (5 sc)
Row 2: ch 1, sc in BLO of each sc across. Turn. (5 sc)
Repeat Row 2 until the strip measures 22 inches (56 cm), or your desired head circumference minus approximately 0.5 inches (1.25 cm) to account for the joining seam.
For average sizing, this will be approximately 220 rows total. Count your rows or measure frequently.
Checkpoint: Your strip should lie flat, measure 22 inches (56 cm) long and 0.5 inches (1.25 cm) wide. It should have a neat ribbed texture from the BLO working.
Fasten off, leaving a 12-inch (30 cm) tail.
Joining the Band Into a Circle
Hold the two short ends together with RS facing outward. Using the tail and tapestry needle, whip stitch through the end stitches of both short edges together (5 stitches joining to 5 stitches), creating a seamless loop.
Then, with Color A threaded on the tapestry needle, whip stitch the two long edges of the strip together along the entire length. Roll the strip into a cord as you go, enclosing the raw edges inside. This creates the slim rounded band.
Weave in all ends securely.
Large Rose Instructions (Make 1)
The rose is built in three tiers of petals worked into chain spaces of a foundation spiral. This is where the magic happens.
Rose Foundation Ring
With Color A, MR, ch 1, work 10 sc into ring, pull ring closed, sl st to first sc to join. (10 sc)
Tier 1: Innermost Petals (Small)
Rnd 1: (ch 3, sk 1 st, sl st in next st) 5 times. (5 ch-3 loops)
Rnd 2: Into each ch-3 loop work one small petal: (sc, hdc, 3 dc, hdc, sc). (5 small petals, 35 sts total across all petals)
At end of Rnd 2, sl st behind the first petal to the back of the foundation ring.
Tier 2: Middle Petals (Medium)
Rnd 3: Working behind Tier 1 petals, insert hook into the sl st or post of the stitches of the foundation ring between petals: (ch 4, sk behind 1 petal, sl st to base of next petal on foundation) 5 times. (5 ch-4 loops)
Rnd 4: Into each ch-4 loop work one medium petal: (sc, hdc, 5 dc, hdc, sc). (5 medium petals, 45 sts total across all petals)
At end of Rnd 4, sl st behind the second tier petals to the back of the work.
Tier 3: Outer Petals (Large)
Rnd 5: Working behind Tier 2 petals, (ch 5, sk behind 1 petal, sl st to base of next petal from Tier 2) 5 times. (5 ch-5 loops)
Rnd 6: Into each ch-5 loop work one large petal: (sc, hdc, 2 dc, 2 tr, 2 dc, hdc, sc). (5 large petals, 55 sts total across all petals)
Fasten off, leaving a 12-inch (30 cm) tail for sewing. Gently spiral and shape the petals so outer petals curl downward and inner petals cup upward, forming the classic rose shape.
Medium Roses Instructions (Make 2)
These flank your center rose and use the same technique with slightly fewer petals per tier.
Rose Foundation Ring
With Color A, MR, ch 1, work 8 sc into ring, pull ring closed, sl st to first sc to join. (8 sc)
Tier 1: Small Petals
Rnd 1: (ch 3, sk 1 st, sl st in next st) 4 times. (4 ch-3 loops)
Rnd 2: Into each ch-3 loop work one small petal: (sc, hdc, 3 dc, hdc, sc). (4 small petals, 28 sts total)
Sl st behind to foundation ring.
Tier 2: Medium Petals
Rnd 3: (ch 4, sl st to next base point) 4 times. (4 ch-4 loops)
Rnd 4: Into each ch-4 loop work one medium petal: (sc, hdc, 5 dc, hdc, sc). (4 medium petals, 36 sts total)
Sl st behind to foundation ring.
Tier 3: Large Petals
Rnd 5: (ch 5, sl st to next base point) 4 times. (4 ch-5 loops)
Rnd 6: Into each ch-5 loop work one large petal: (sc, hdc, 2 dc, 2 tr, 2 dc, hdc, sc). (4 large petals, 44 sts total)
Fasten off, leaving a 12-inch (30 cm) sewing tail.
Small Rosebuds Instructions (Make 2)
These tightly curled accent flowers appear at the outer edges of your cluster. They’re worked flat and rolled.
With Color A, ch 15.
Row 1: sc in 2nd ch from hook, hdc in next ch, dc in next 3 chs, tr in next 3 chs, dc in next 3 chs, hdc in next ch, sc in last ch. (14 sts)
Row 2: ch 1, turn. Working in FLO only: sc in first 2 sts, hdc in next st, 2 dc in next st, (dc, tr, dc) in next st, dc in next 3 sts, hdc in next 2 sts, sc in last 2 sts. (16 sts)
Fasten off leaving a long tail. Roll the strip tightly from one end to form a bud, with the WS on the outside and the wider curved Row 2 forming the visible petals. Tack with a few stitches through the base to hold the roll.
Leaf Instructions
Make 8 to 10 leaves total in Color B. The leaves graduate in size, so make 4 larger leaves and 4 to 6 smaller leaves.
Large Leaf (Make 4)
With Color B, ch 13.
Rnd 1 (first side): sc in 2nd ch from hook, hdc in next ch, dc in next 3 chs, hdc in next 3 chs, sc in next 2 chs, hdc in next ch, 3 sc in last ch (tip). Do not turn. Now work back along the other side of the foundation chain. (13 sts on first side including tip increase)
Rnd 1 continued (second side): hdc in next ch, sc in next 2 chs, hdc in next 3 chs, dc in next 3 chs, hdc in next ch, sc in last ch, sl st to first sc to join. (12 sts on second side; 28 sts total including the 3-sc tip)
Checkpoint: The large leaf should measure approximately 2 inches (5 cm) long and 0.75 inches (2 cm) wide.
Rnd 2 (optional border for definition): ch 1, sc evenly around the entire leaf, working 3 sc at the tip for the point, sl st to join. Fasten off.
Small Leaf (Make 4 to 6)
With Color B, ch 9.
Rnd 1 (first side): sc in 2nd ch from hook, hdc in next ch, dc in next 2 chs, hdc in next 2 chs, sc in next ch, 3 sc in last ch (tip).
Rnd 1 continued (second side): sc in next ch, hdc in next 2 chs, dc in next 2 chs, hdc in next ch, sc in last ch, sl st to first sc to join. (20 sts total including tip)
Fasten off.
Adding Leaf Veins (Optional But Recommended)
Using Color B threaded on a tapestry needle, or with a crochet hook using surface slip stitch, work a single line from base to tip along the center of each leaf. Then add two to three short diagonal lines angling outward from the center toward each edge. This adds the beautiful textured vein detail visible in the finished piece.
Pearl Bead Clusters
Cut three lengths of Color A yarn, each approximately 6 inches (15 cm) long.
For each cluster, thread 3 to 5 pearl beads onto a single length using a beading needle. Knot the yarn below the lowest bead and above the top bead to secure the cluster at approximately 0.5 inches (1.25 cm) height.
Make 3 clusters total. You’ll sew these between the roses during assembly.
Assembly Instructions
This is where everything comes together. Take your time here. The arrangement makes all the difference.
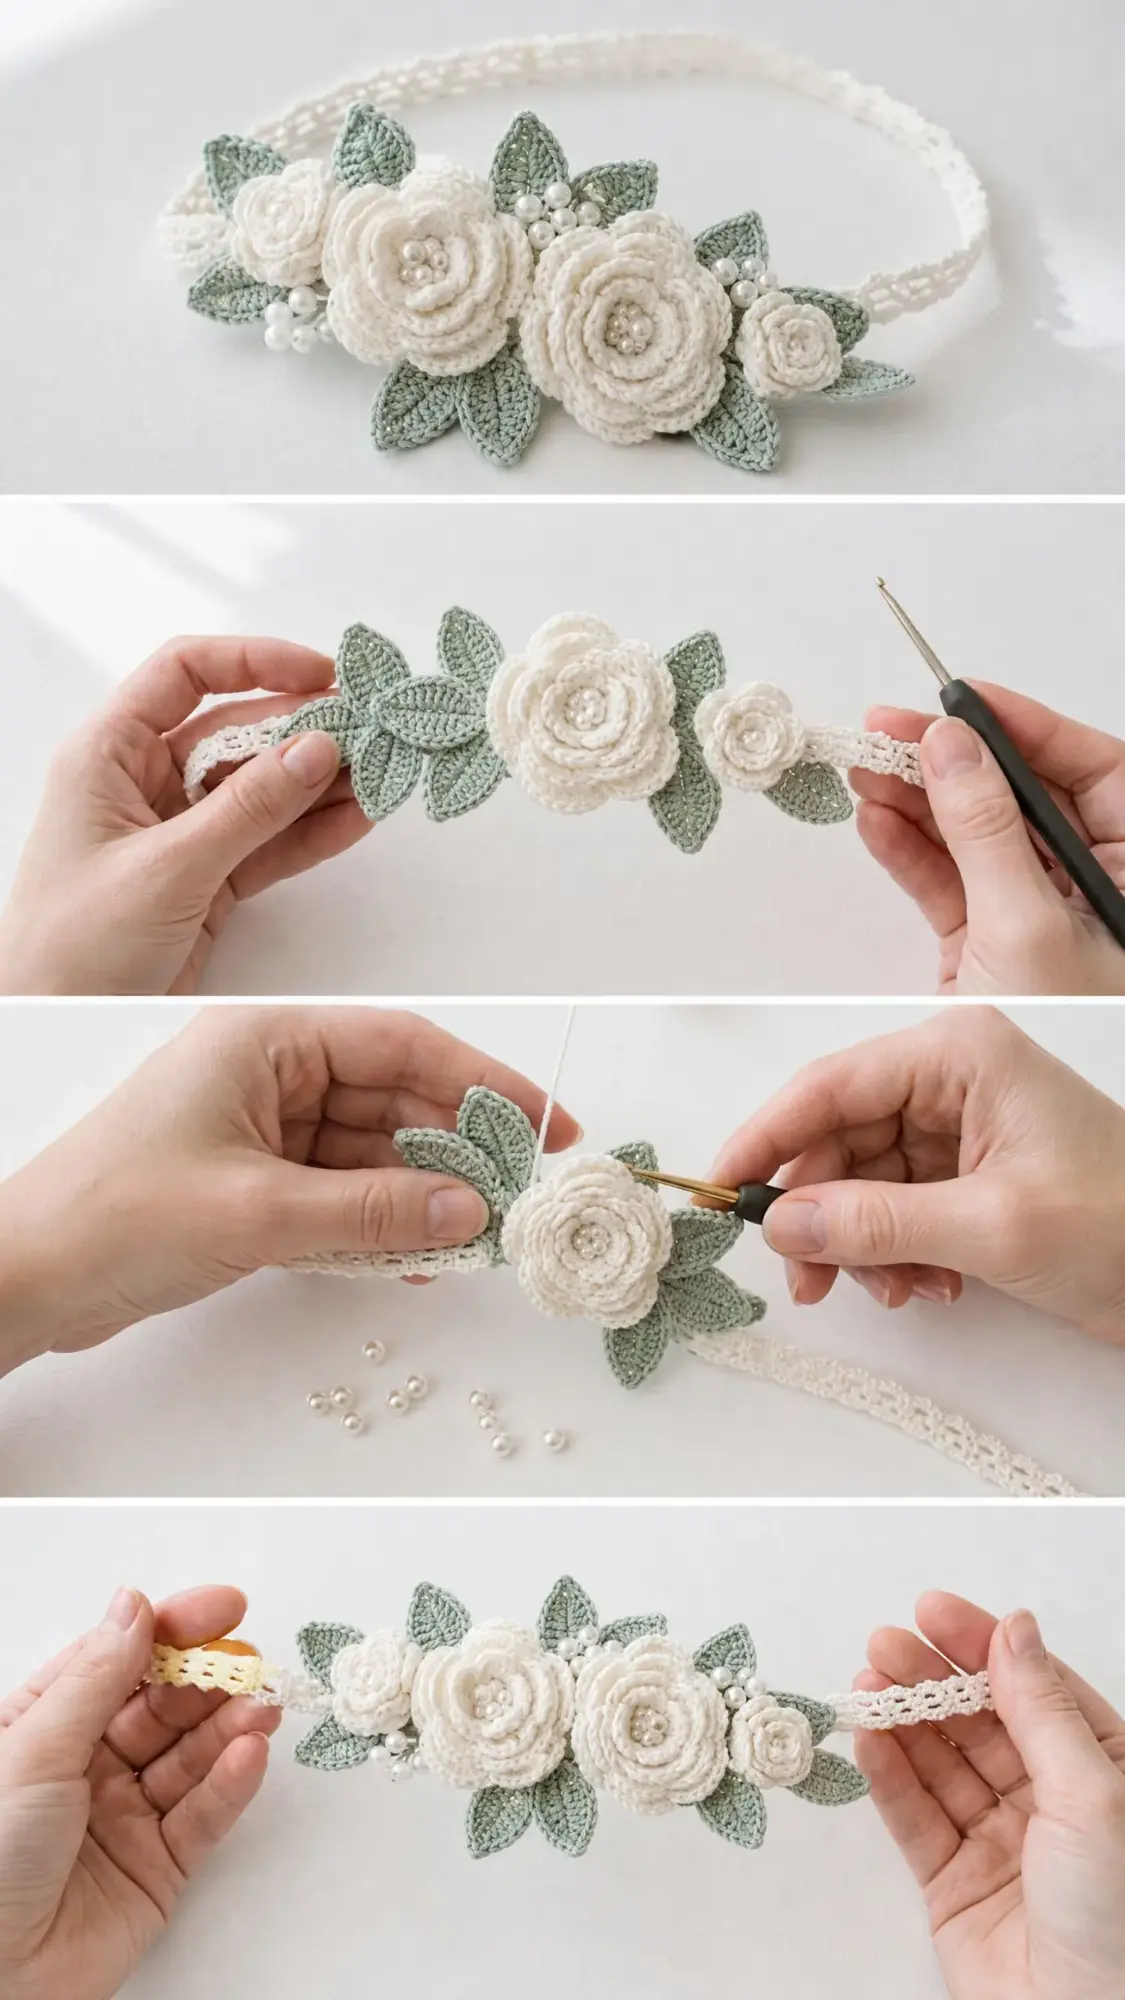
Step 1: Position the large rose at the center of the headband, approximately at the top-center position where it will rest on the forehead or crown. Pin in place.
Step 2: Position one medium rose to the left and one to the right of the large rose, overlapping slightly so petals interlock naturally. Pin in place.
Step 3: Position the two small rosebuds at the far left and far right of the cluster.
Step 4: Slide 4 to 5 large leaves beneath the rose cluster, fanning them outward so the leaf tips extend beyond the rose edges in all directions. Position smaller leaves in gaps between the larger ones.
Step 5: Using tapestry needles and long yarn tails, sew each leaf to the headband band first. Tack through the leaf base and through the band fabric twice for security.
Step 6: Sew the rosebuds on top of the outer leaves.
Step 7: Sew the medium roses on top, then sew the large center rose on top of those. Stitch through all layers at the base so everything is firmly connected.
Step 8: Tuck the pearl bead clusters into the gaps between flowers and tack the base of each cluster to the headband.
Step 9: Add a pearl bead or two to the center of each rose by threading through the center ring several times. Secure firmly.
Checkpoint after full assembly: The floral cluster should span approximately 5 inches (12.5 cm) across the top of the band and sit approximately 2.5 inches (6.5 cm) tall at the highest rose. The band should remain smooth and not pucker at the attachment points.
Finishing and Blocking
Weave in all remaining ends securely, working tails in at least two directions to prevent unraveling.
To block the roses, lightly mist with water or blocking spray and shape each rose by hand. Curl outer petals slightly downward and cup the center petals inward. Allow to dry completely on a flat surface or a head form for best shaping.
Optional stiffening (highly recommended for bridal use): Dissolve one part white craft glue in two parts water and apply with a small brush to the rose and leaf surfaces only. Shape while damp. Allow to dry fully, approximately 2 hours, before wearing.
The band itself does not need blocking.
Size Customization Tips
To make the band larger: Add rows to the band strip in multiples of 2 rows per 0.25 inches (0.6 cm) of extra length needed.
To make the band smaller: Subtract rows in the same increments. Most child sizes will need approximately 16 to 18 inches (40 to 46 cm) around.
To make a larger statement headband: Increase the number of outer petal tiers on each rose by one tier and work into ch-6 loops with (sc, hdc, 3 dc, 3 tr, 3 dc, hdc, sc) as the extra outer petal.
To make a hair clip version: Work the floral cluster on a 3-inch (7.5 cm) length of band only and glue or stitch a metal alligator clip to the wrong side.
Care Instructions
Hand wash in cool water with a small amount of gentle soap. Gently press out excess water in a clean towel. Do not wring or twist. Reshape the flowers by hand while damp. Lay flat to dry.
If stiffener was applied, surface wipe only with a slightly damp cloth. Do not submerge.
Store the headband flat or loosely coiled to avoid crushing the roses. Avoid prolonged exposure to direct sunlight to prevent yellowing of the cream yarn.
You Did It!
Thank you so much for choosing this Winter White Rose Crochet Headband pattern for your next project. I hope you love making it as much as I loved putting this tutorial together. These dimensional roses look impressive, but now you know the secret: they’re just layered petal shells worked into chain loops. Not so scary after all.
I would absolutely love to see your finished headband. Tag me on Instagram or share in our Facebook group. Seeing your creations is genuinely the best part of my day.
If this pattern made you smile, go ahead and save it to your Pinterest boards so you can find it whenever inspiration strikes. And please leave a comment below if you make one. I read every single one, and your feedback helps other makers decide to give it a try too. Happy crocheting!
