
This is hands down ONE OF THE MOST impressive little projects you can make in a single afternoon. I’m talking 4 to 6 hours from start to a piece of wearable art that looks like it belongs in a boutique jewelry case.
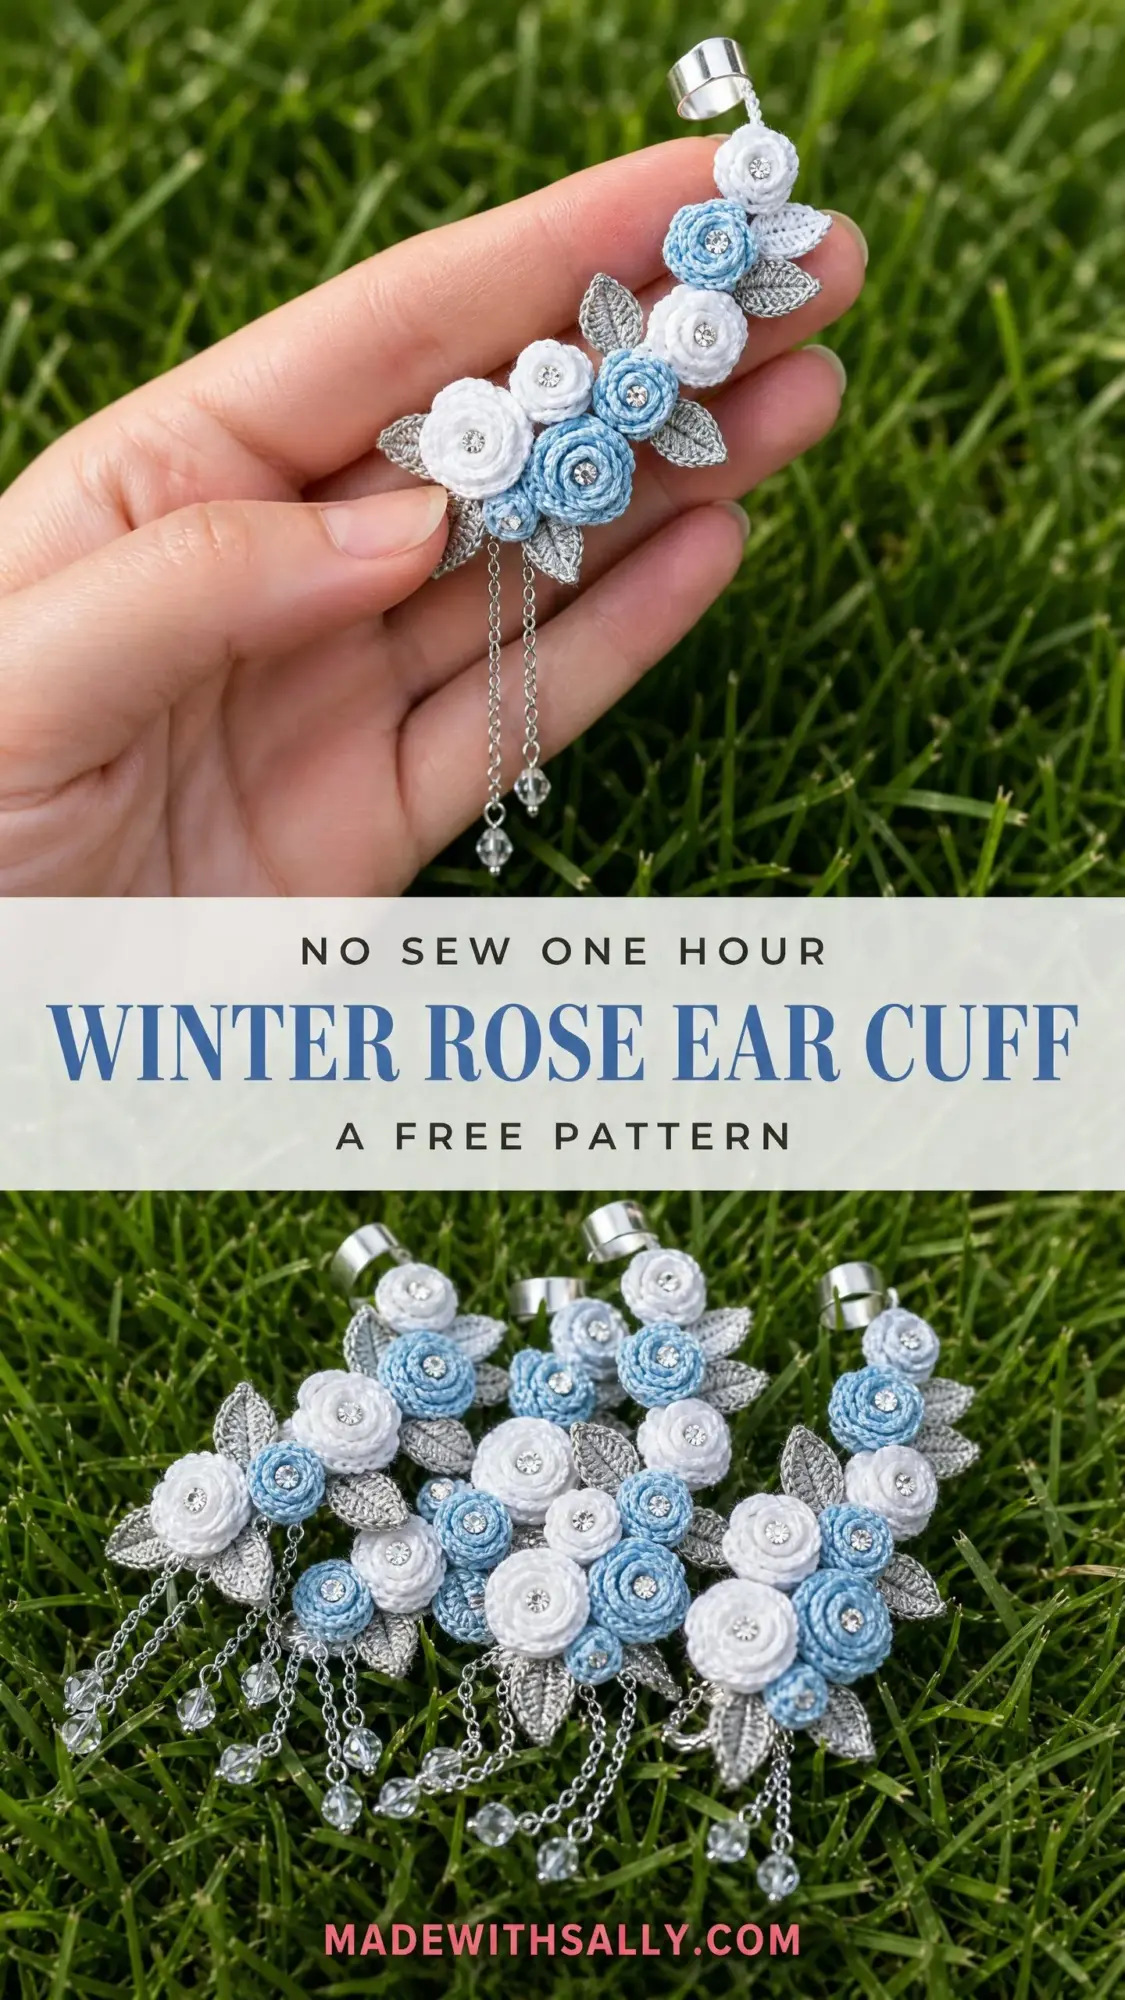
Seriously, when you hold up a finished ear cuff dripping with delicate crocheted roses and tiny crystal drops, nobody believes you made it yourself. It’s that good. The tiny roses, the silver leaves, the elegant chains. It all comes together into something genuinely stunning.
And here’s the best part. If you can single crochet (sc) and double crochet (dc), you can absolutely make this. The individual pieces are small and manageable. You’re not wrestling with complicated charts or confusing construction. Just tiny motifs, some simple assembly, and a little bit of jewelry magic at the end.
About This Winter Rose Ear Cuff Crochet Pattern
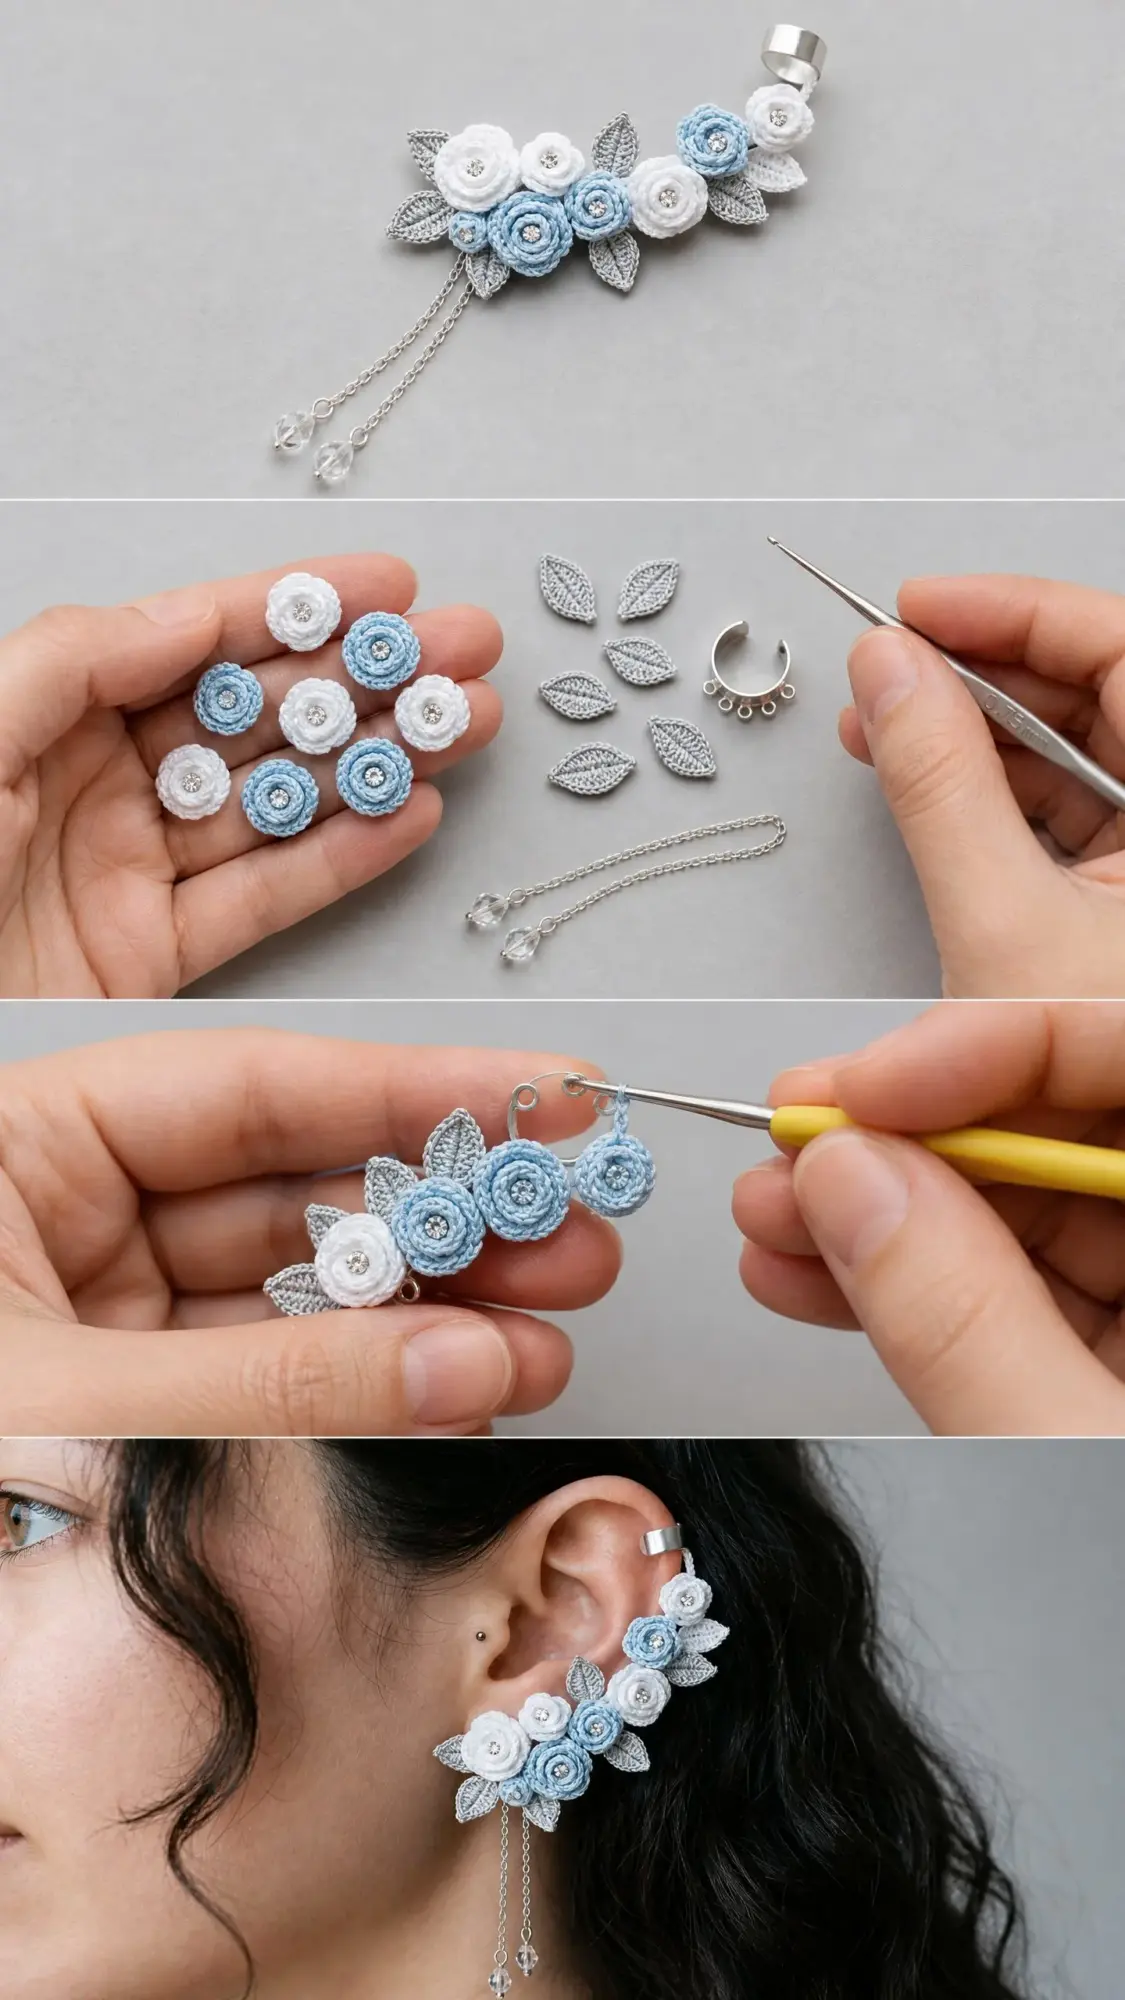
This ear cuff wraps along the outer curve of your ear from the helix down toward the lobe. It features five crocheted roses in dusty blue and white, surrounded by seven silver grey crocheted leaves. Two delicate silver chains with crystal drop beads hang from the bottom edge, adding movement and sparkle.
The roses sit in two layers of dimensional petals that cup outward like real flower blooms. The leaves fan out behind them like a bouquet backing. A silver ear cuff band holds everything at the top, while an ear stud or wire anchors the bottom against your lobe.
It’s romantic, elegant, and perfect for winter weddings, holiday parties, or anytime you want to feel like a snow queen.
Skill Level
This pattern is intermediate level. The individual roses and leaves use only basic stitches, but you’ll need comfort with working very small rounds, joining multiple tiny motifs together, and finishing with jewelry hardware.
If you’ve never worked with thread weight yarn before, I’d suggest practicing a leaf or two first to get a feel for the small gauge. The stitches are the same ones you already know. They’re just tinier.
Finished Measurements
Floral cluster: approximately 2.75 inches wide by 1.25 inches tall (7 cm by 3 cm)
Total length including chain drops: approximately 4.5 inches (11.5 cm) from the top of the ear cuff to the bottom of the crystal beads
Each individual rose measures approximately 0.6 inch (1.5 cm) in diameter at the stated gauge.
Materials Needed
Crochet thread, size 10 cotton thread:
Hook: Steel crochet hook size 7 (1.65 mm)
Notions:
Jewelry Hardware:
Backing:
Recommended Thread
Lizbeth Size 10 Crochet Thread by Handy Hands works beautifully for this project. It has a consistent twist and smooth surface that makes small motif work a dream.
DMC Traditions Crochet Thread Size 10 is another excellent choice. It’s widely available, colorfast, and holds stitch definition well in dimensional roses.
Aunt Lydia’s Classic Crochet Thread Size 10 is a trusted budget option with tons of color choices. It has a slightly softer hand than DMC, which can actually make petal shaping a bit easier.
Any size 10 crochet cotton will work. Just avoid threads with a very stiff finish for the roses, as they resist the dimensional shaping you need for pretty petals.
Gauge
With size 7 (1.65 mm) steel hook and size 10 cotton thread:
5 sc = approximately 0.5 inch (1.3 cm)
5 rows of sc = approximately 0.5 inch (1.3 cm)
Gauge matters here. Your finished roses need to be small enough to sit naturally on the ear. A rose worked at this gauge measures approximately 0.6 inch (1.5 cm) in diameter. If your rose is larger, try a smaller hook. If it’s smaller, try a larger hook.
Abbreviations
Special Stitches
Petal Stitch
In one stitch or chain space, work the following sequence without joining: (hdc, dc, tr, dc, hdc). This creates one rounded petal. Each petal counts as one unit when tallying your work.
Leaf Stitch
Ch 8. Starting in the second ch from hook: sc, hdc, dc, tr, dc, hdc going up one side. Work 3 sc into the tip chain. Then hdc, dc, tr, dc, hdc, sc going back down the other side. Sl st into the first sc to close. This creates one complete leaf shape.
Don’t worry if this seems confusing. I’ll walk you through it step by step in the leaf instructions below.
Pattern Notes Before You Begin
1. Make all leaves and all roses before starting assembly. It’s much easier to arrange everything when all your pieces are ready.
2. Roses are worked in a flat spiral. The petals lift away from the base because they’re worked in chain spaces rather than directly into the fabric.
3. You’ll make 5 roses total: 3 in dusty blue (Color A) and 2 in white (Color B).
4. You’ll make 7 leaves total: all in silver grey (Color C).
5. Do not join at the end of rose rounds unless told to. Use a stitch marker to track where each round begins.
6. When weaving in thread ends on these tiny pieces, weave through at least four stitches in two directions, then trim close. Don’t knot the thread first. Knots create lumps.
7. Block all leaves before assembly. Don’t block the roses or you’ll flatten those gorgeous dimensional petals.
Rose Pattern
Make 3 in Color A (dusty blue). Make 2 in Color B (white).
Base Round Setup:
Create a magic ring with your chosen color.
Rnd 1: Ch 1 (does not count as a st). Work 10 sc into the magic ring. Pull tail to close ring. Do not join. Place stitch marker in the first sc. (10 sc)
Rnd 2: Working in blo only: (ch 3, sk 1 st, sl st in next st) 5 times. You’ll work 5 sl sts and create 5 ch 3 spaces. (5 ch 3 spaces)
Rnd 3: For each ch 3 space, work one petal stitch: sl st into the ch 3 space, work (hdc, dc, tr, dc, hdc) into the same ch 3 space, then sl st into the next sl st between spaces. Repeat for all 5 spaces. (5 petals)
Rnd 4: Working behind the petals of Rnd 3 and into the front loops of Rnd 1 that were left unworked in Rnd 2: sl st into the first unworked front loop (the loop sitting behind the first petal). (Ch 4, sl st into the next unworked front loop behind the next petal) 5 times. You’ll have 5 ch 4 spaces sitting behind the first layer of petals. (5 ch 4 spaces)
Rnd 5: For each ch 4 space, work one larger petal: sl st into the ch 4 space, work (hdc, dc, tr, tr, dc, hdc) into the same ch 4 space, then sl st into the next sl st between spaces. Repeat for all 5 spaces. (5 petals)
Fasten off leaving an 8 inch tail for assembly.
Your finished rose has two layers of petals. The inner petals from Rnd 3 are slightly smaller. The outer petals from Rnd 5 fan out around them. Gently shape the petals outward with your fingers.
Optional: Using a sewing needle and clear thread, attach one small crystal rhinestone or seed bead to the center of each rose over the magic ring opening.
Leaf Pattern
Make 7 in Color C (silver grey).
Ch 8.
Going up one side (starting in the second ch from hook):
Sc in the second ch, hdc in the third ch, dc in the fourth ch, tr in the fifth ch, dc in the sixth ch, hdc in the seventh ch. (6 sts along one side)
At the tip (the eighth ch):
Work 3 sc all into this tip ch. This creates the pointed tip and pivots your work. (3 sc at tip)
Going back down the other side:
Hdc in the next ch along the bottom of the foundation, dc in the next ch, tr in the next ch, dc in the next ch, hdc in the next ch, sc in the last ch. (6 sts along the other side)
Sl st into the very first sc worked (the base of the leaf).
Fasten off leaving a 6 inch tail.
Total stitches per leaf: 15 sts plus the slip stitch join.
Checkpoint: Each finished leaf should measure approximately 0.75 inch (2 cm) long and 0.375 inch (1 cm) wide at the widest point. If your leaf is too wide, try working the tr stitches as dc stitches instead.
Blocking Your Leaves
Before assembly, block all seven leaves. This step makes a huge difference in how professional your finished piece looks.
Lightly mist each leaf with water. Pin it to a foam blocking mat with the right side facing up. Use two pins at the tip and one pin at the base to hold the leaf open and flat. Allow to dry fully, approximately 1 to 2 hours.
Do not block the roses. You’ll flatten those beautiful dimensional petals.
Felt Backing
Cut your felt or ultrasuede piece to approximately 1.25 inches wide by 0.625 inch tall (3.2 cm by 1.6 cm). Round the corners slightly with scissors.
This backing stabilizes all your thread ends and gives you a clean surface for attaching the ear hardware.
Assembly Instructions
Take your time with assembly. This is where everything comes together.
Step 1: Arrange Your Components
Lay everything out on a flat surface before you sew anything. Arrange the roses in a gentle diagonal arc that mirrors the curve of your outer ear, going from upper right to lower left:
1. One blue rose (top position)
2. One white rose
3. One blue rose
4. One white rose
5. One blue rose (bottom position)
The colors should alternate when viewed from the front.
Step 2: Position the Leaves
Arrange seven leaves around and behind the roses:
The leaves should fan outward like a bouquet backing.
Step 3: Connect the Leaves
Thread your tapestry needle with approximately 18 inches (46 cm) of Color C thread. Using a whipstitch (a simple stitch that wraps over the edge), sew each leaf lightly to its neighbors where they overlap. Don’t sew them to a base yet. Just connect leaf to leaf loosely to hold your arrangement.
Step 4: Attach the Roses
Place the roses onto the leaf arrangement. The back of each rose (the flat side with the magic ring) sits against the tops of the leaves.
Using the long thread tails on each rose, sew each rose down through the leaves and through neighboring roses where they overlap. Pass the needle through the base ring of each rose and catch a strand of thread in the leaf beneath it. Repeat 3 to 4 times per rose to secure firmly. Each rose should feel stable, not wobbly.
Step 5: Add the Felt Backing
Place the felt backing against the back of your entire cluster, covering all thread tails and the backs of the magic rings.
Using a single strand of Color C thread, whipstitch around the perimeter of the felt, catching a thread of the back layer of the crochet cluster as you go. Use approximately 14 to 16 whipstitches evenly spaced around the edge.
Step 6: Attach the Chain Drops
Using a sharp needle or jewelry awl, pierce two small holes at the lower center edge of the felt. Space them approximately 0.25 inch (6 mm) apart.
Open two jump rings using your jewelry pliers. Attach one end of each silver chain length to one jump ring, then close the rings through the pierced holes in the felt. The two chains should hang from the lower center of the cluster.
Step 7: Add Crystal Beads
Attach one crystal drop bead to the bottom of each chain using a jump ring. Both chains should hang at equal length with one crystal drop at the bottom of each.
Step 8: Attach the Ear Cuff
Apply a small amount of clear jewelry adhesive to the back surface of your silver ear cuff finding. Press the upper back edge of the felt backing firmly against the adhesive.
Position the ear cuff so it sits at the top of the cluster. When worn, the cuff should rest on your helix while the floral cluster hangs along the outer edge of your ear down toward your lobe.
Allow the adhesive to cure according to manufacturer instructions. Usually 15 to 30 minutes for initial set, 24 hours for full cure.
Step 9: Attach the Ear Stud
Attach your ear stud or ear wire finding to the lower back of the felt backing, approximately 0.25 inch (6 mm) up from the bottom edge.
If using a stud post, pierce through the felt and secure the post butterfly on the front side (which faces your ear when worn). If using an ear wire, use a jump ring through a small hole in the felt.
This lower attachment point anchors the floral cluster against your ear at the lobe while the ear cuff holds the top.
Final Checkpoint: Your finished piece should measure approximately 4.5 inches (11.5 cm) from the top of the ear cuff to the bottom of the crystal drops. The floral cluster itself should be approximately 2.75 inches (7 cm) wide. The piece should sit flat and not twist when held by the ear cuff.
Size Customization Tips
For a smaller, more delicate version: Use size 20 crochet thread with a size 10 steel hook (1.30 mm). All motifs will reduce by approximately 25 to 30 percent. Reduce the leaf foundation from ch 8 to ch 6.
For a larger, more dramatic version: Use size 5 crochet thread with a size 5 steel hook (1.90 mm). All motifs will increase by approximately 25 percent. You can add a third layer of petals by repeating the Rnd 4 and Rnd 5 technique using ch 5 spaces.
To adjust the number of roses: For a smaller 3 rose version, use 2 blue roses and 1 white rose with 5 leaves. For a 7 rose version spanning more of the ear, add 1 more rose in each color and increase leaves to 9.
Color variations: The dusty blue and white combination suggests winter or bridal themes. For a warmer look, try blush pink and ivory. For autumn, consider burgundy and gold.
Care Instructions
Spot clean only. Do not submerge in water, as the metal hardware and adhesive will deteriorate.
To clean, dampen a soft cloth with mild soap and water and gently dab the thread surfaces. Air dry completely before wearing.
Store flat in a small jewelry box or pouch. Don’t store under pressure or bent, as the dimensional roses may flatten.
Avoid prolonged direct sunlight, which can fade the thread colors over time.
Troubleshooting Tips
Roses too floppy: Make sure you’re pulling your magic ring completely closed and working at the correct gauge. A looser gauge creates roses that don’t hold their shape well.
Leaves curling: This happens when your tension is too tight. Try relaxing your hands or going up a hook size. Blocking also helps flatten stubborn leaves.
Petals not dimensional: The petals get their lift from being worked in chain spaces rather than directly into stitches. Make sure you’re working into the chain space (the hole), not into the chain stitches themselves.
Assembly feels unstable: Add more stitches when attaching roses to leaves. Each rose should be sewn down 3 to 4 times minimum. The felt backing also adds significant stability.
Thank you so much for choosing this ear cuff pattern for your next project. I really hope you love making it as much as I loved designing it. If you have any questions along the way, don’t hesitate to reach out.
Tag me on Instagram or share your finished piece in my Facebook group. I absolutely love seeing your makes, and it brightens my whole day when one of these little rose ear cuffs pops up in my feed.
If you found this crochet tutorial helpful, I’d love it if you saved it to your Pinterest boards so you can find it again later. And please drop a comment below if you make one. I’d love to hear which color combination you chose.
