
I’ve been looking for the perfect bridal crochet accessory for months now, and this winter white rose bracelet is hands down my favourite find. The dimensional rose, the delicate lace leaves, and those tiny crystal accents create something truly breathtaking.
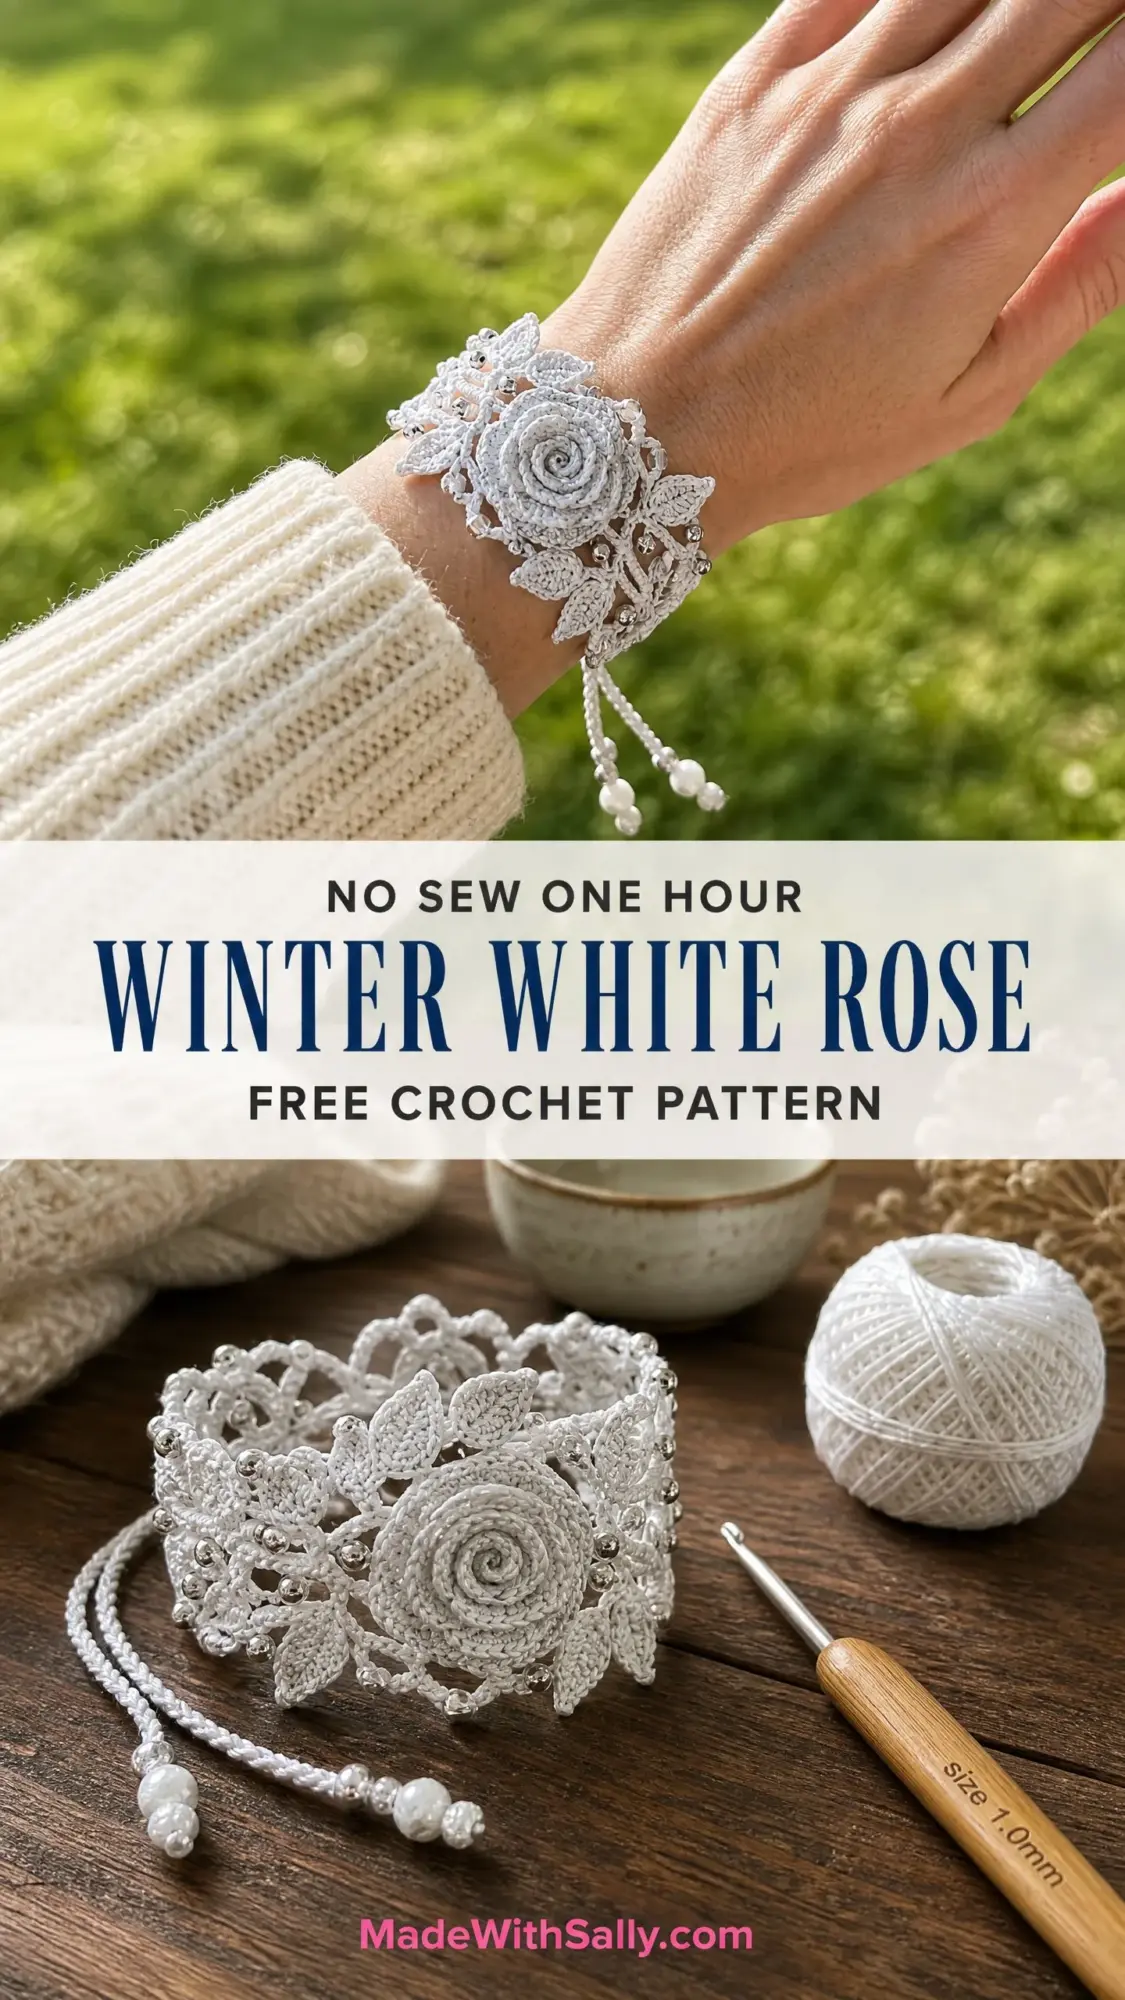
This is thread crochet at its finest. Not going to sugarcoat it. This pattern requires patience and skill, but the result is a wearable piece of art that looks like it belongs in a boutique window.
If you’ve been wanting to challenge yourself with fine thread work, or you need a stunning handmade gift for a bride, this is the project to try. Let me walk you through everything you need to know.
About This Winter White Rose Bracelet Pattern
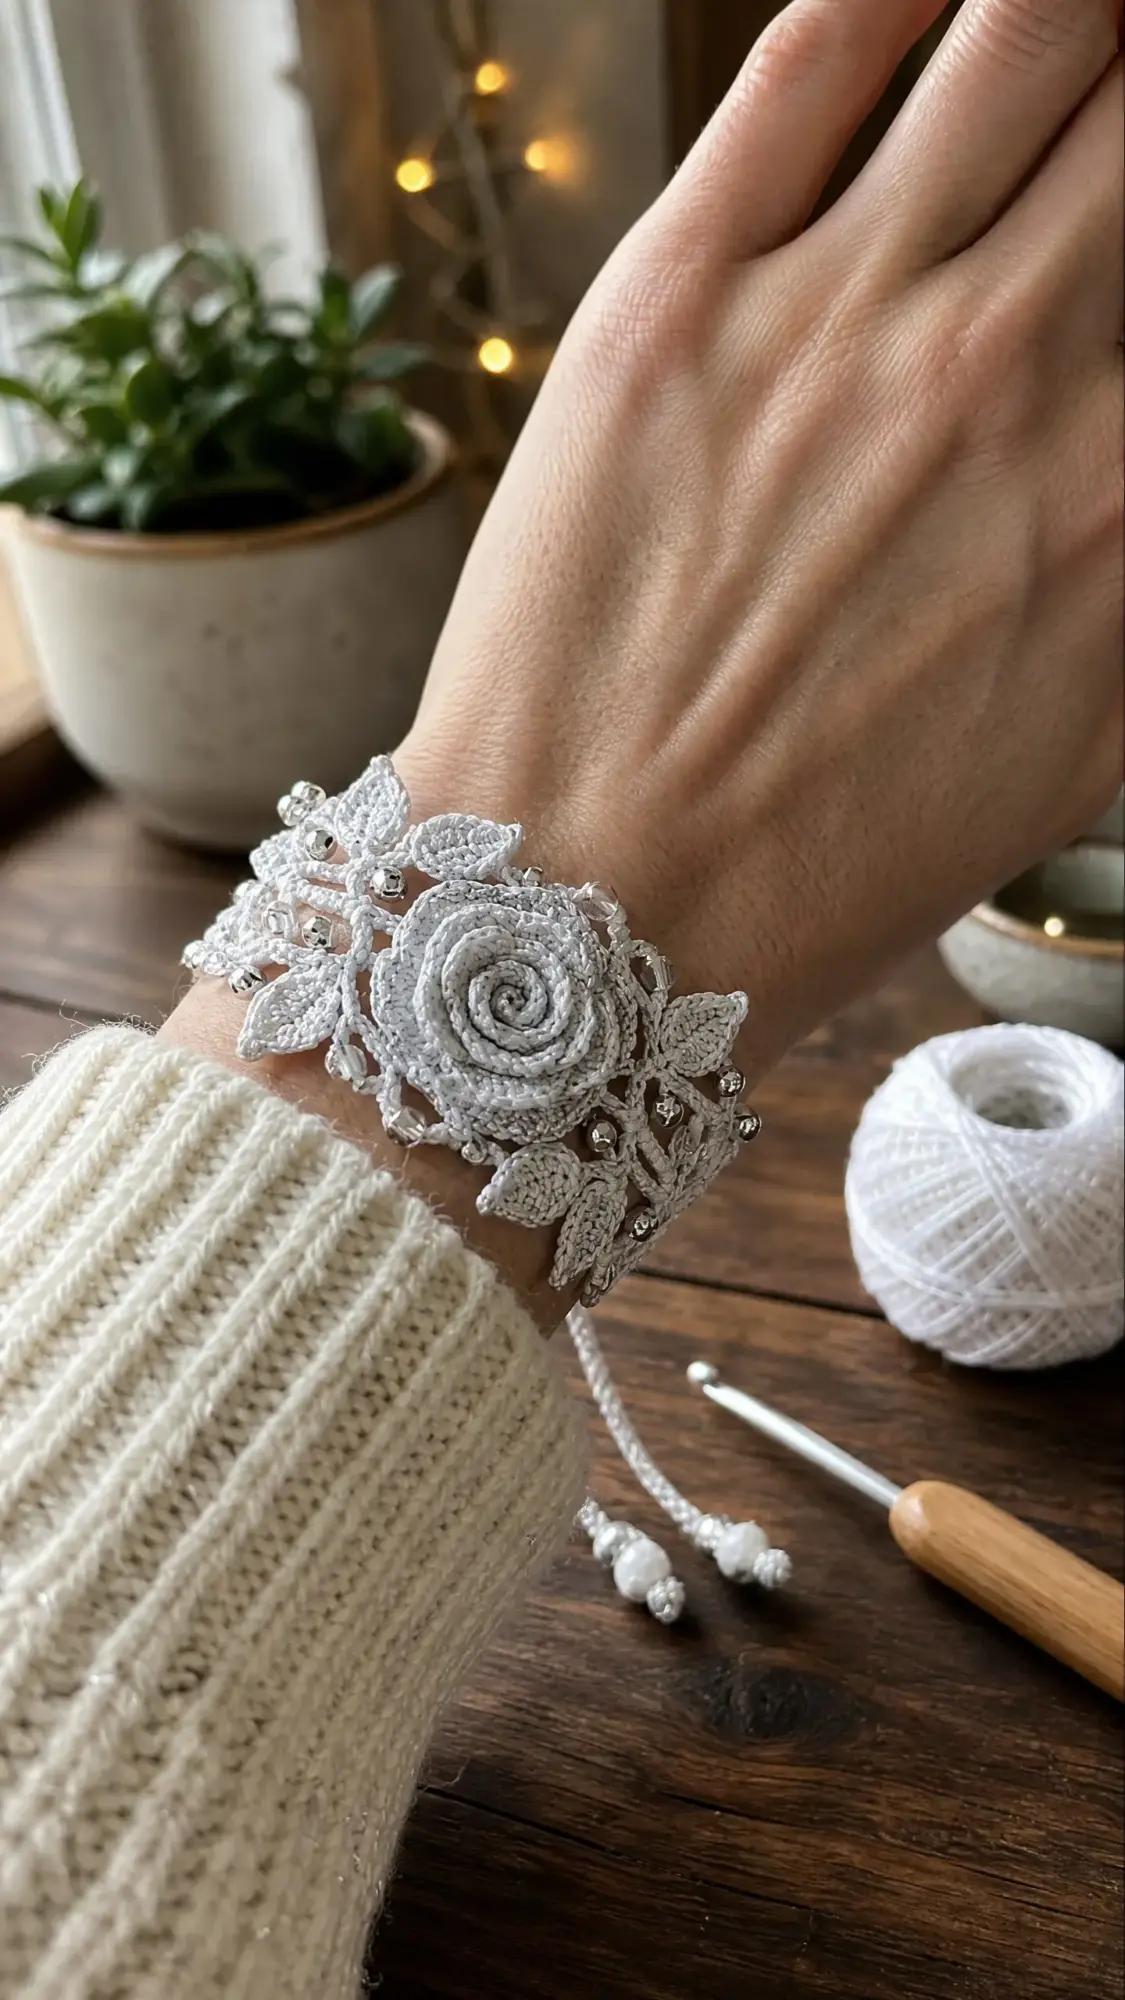
This delicate wrist bracelet features a dimensional crocheted rose as its centerpiece, surrounded by layered lace leaves and accented with rhinestone or crystal beads. The band closes with a sliding adjustable cord closure finished with small beads at each end.
The bracelet is worked in fine thread using a 1.0 mm steel crochet hook, producing an elegant lace weight piece appropriate for bridal wear, formal events, or special occasions. The construction happens in stages: adjustable closure cord first, then the lace base band, then the individual leaf motifs, then the rose, then assembly and bead embellishment.
Skill Level: Advanced. This crochet pattern requires comfort with thread crochet, working in the round, surface slip stitches, joining motifs, and precise bead placement. The rose is built from a tight spiral and the leaves require shaping increases and decreases in fine thread. I recommend completing at least two thread crochet projects before attempting this piece.
Time Estimate: 6 to 9 hours for an experienced thread crocheter. Allow additional time for bead placement and finishing.
Finished Measurements
The bracelet band measures approximately 2.25 inches wide by 6 inches in circumference when adjusted to an average wrist (57 mm wide by 152 mm circumference). The rose centerpiece measures approximately 1.25 inches (32 mm) in diameter. The full adjustable range of the sliding closure allows the bracelet to fit wrists measuring 5.5 to 7 inches (140 to 178 mm) in circumference.
Materials You Will Need
Thread:
Hook:
Notions:
Recommended Yarn Suggestions
Option 1: Coats and Clark South Maid Size 10 Crochet Thread, White (Article 149). Widely available with consistent twist and excellent stitch definition at this gauge. 350 yards per ball, so one ball is more than sufficient.
Option 2: DMC Traditions Crochet Thread Size 10, White (Article 985). Slightly mercerized finish gives a subtle sheen appropriate for bridal use. 400 yards per ball.
Option 3: Lizbeth Size 10 Crochet Thread by Handy Hands, color White (101). Higher twist cotton with excellent drape and a clean finish. 122 yards per ball, so one ball per bracelet.
Substitution note: Use any size 10 crochet cotton thread (also labeled as bedspread weight). Do not substitute size 20 or finer thread without recalculating gauge. Avoid thread with a fuzzy or bouclé texture as it will obscure the stitch definition in the rose and leaf motifs.
Gauge
With 1.0 mm hook and size 10 crochet thread:
For the lace base band specifically:
Gauge is critical for this project. The bracelet band must fit the wrist, and the rose must sit proportionately on the band. Work a gauge swatch before beginning. Adjust hook size if necessary.
Abbreviations and Stitch Definitions
Before we dive into the step by step instructions, let me define all the stitches you will encounter in this crochet tutorial.
Special Stitches for This Pattern
Shell Stitch (shell): Work 5 dc all into the same stitch or space. This counts as one shell motif across 5 dc.
Picot: Chain 3, slip stitch into the first chain made. This forms a small loop embellishment at the tip of leaves and along lace edges.
Leaf Motif: Each leaf is worked flat in rows, beginning with a foundation chain and shaped with increases along the central spine and decreases toward the tip.
Rose Spiral: The rose is worked by creating a long strip that gradually widens, then rolling it from the center outward and tacking with sewing thread at the base to hold the coiled shape.
Sliding Adjustable Cord Closure: Two cord tails are threaded through a small crocheted tube so that the cords slide freely while the tube functions as the adjustable lock.
Pattern Notes Before You Begin
1. The bracelet consists of five separate components that are assembled at the end: the lace base band, four leaf motifs (two larger, two smaller), and one rose. Work each component to completion before joining.
2. The lace base band forms the foundation of the bracelet. It is rectangular, approximately 2.25 inches wide and 5.5 inches long before the closure cord is attached.
3. Rhinestones are sewn on after blocking, not during construction, so they do not interfere with stitching.
4. The optional silver or grey thread is used only for the innermost 2 rounds of the rose spiral to create shadow depth. If you prefer a fully white bracelet, use white thread throughout.
5. When working with a 1.0 mm hook and size 10 thread, keep your tension consistent and slightly relaxed. Thread crochet tends toward tightness. If your stitches are difficult to enter, loosen your grip.
6. Stitch counts are given in parentheses at the end of each row or round.
Component 1: Lace Base Band Instructions
The band is worked flat in rows using a ch-5 arch lace pattern. It measures approximately 2.25 inches wide and 5.5 inches long before the closure is attached.
Foundation Chain
Chain 41. This gives you 40 working chains plus 1 turning chain.
Row 1 (WS)
Sc in 2nd ch from hook, (ch 5, sk 4 ch, sc in next ch) rep across to end. Turn. (8 ch-5 arches, 9 sc)
Row 2 (RS)
Ch 5, sk first sc, sc in center ch of first ch-5 arch (the 3rd of the 5 ch), (ch 5, sc in center ch of next ch-5 arch) rep across, ch 2, dc in last sc to form final half arch. Turn. (8 ch-5 arches, 1 ch-2 dc half arch at each end)
Row 3
Ch 1, sc in top of dc (or into ch-2 sp at base of the final dc), (ch 5, sc in next sc) rep across, ending sc in 3rd ch of turning ch-5. Turn. (9 sc, 8 ch-5 arches)
Rows 4 through 13
Continue alternating Row 2 and Row 3 pattern.
Do not fasten off. Proceed directly to the edging.
Checkpoint: After completing Row 13, the lace base band should measure approximately 2.25 inches (57 mm) wide and 5.5 inches (140 mm) long. Block lightly before proceeding to edging if desired.
Edging (worked around all 4 sides of the base band)
With RS facing and thread attached at any corner:
Rnd 1 (edging): Ch 1, sc evenly around all 4 sides of the band, working 3 sc in each corner stitch, and sc into each sc and into the top of each ch-5 arch along the long sides. Along the short sides (ends of rows), work approximately 2 sc per row end. Join with sl st to first sc. Fasten off. (Approximately 110 to 120 sc around the perimeter)
Rnd 2 (picot edging): Attach thread to any corner sc. Ch 1, sc in first st, (ch 3, sl st in first ch of ch-3 just made, sc in next 3 sts) rep around, working the picot every 4 sts. At corners, work (sc, picot, sc) in the corner st. Join with sl st to first sc. Fasten off. Weave in ends.
Component 2: Large Leaf Motifs (Make 2)
Each large leaf measures approximately 1 inch (25 mm) long and 0.5 inch (13 mm) wide at widest point.
Foundation
Ch 12.
Row 1 (RS, bottom spine)
Sl st in 2nd ch from hook, sc in next ch, hdc in next ch, dc in next 3 ch, hdc in next ch, sc in next ch, sl st in next ch. Do not turn. Continue working along the opposite side of the foundation chain: sc in same ch as last sl st, sc in next 2 ch, hdc in next ch, dc in next 3 ch, hdc in next ch, sc in next ch, sl st in last ch. Turn. (22 sts total around both sides of leaf)
Row 2 (WS, shaping round)
Ch 1, sl st in first st, sc in next 2 sts, hdc in next st, dc in next 3 sts, (dc, ch 1, dc) in center tip st, dc in next 3 sts, hdc in next st, sc in next 2 sts, sl st in last st. Turn. (24 sts plus 1 ch-1 sp at tip)
Row 3 (RS, vein row)
Ch 1, sl st in first 2 sts, sc in next 2 sts, hdc in next 2 sts, dc in next 2 sts, (tr, ch 2, tr) in ch-1 sp at tip, dc in next 2 sts, hdc in next 2 sts, sc in next 2 sts, sl st in next 2 sts. (26 sts plus ch-2 at tip)
Work picot at tip by working (sl st, ch 3, sl st in first ch, sl st) into the ch-2 sp at the very tip before fastening off. Leave a 6 inch tail for joining.
Make 2 large leaves.
Component 3: Small Leaf Motifs (Make 4)
Each small leaf measures approximately 0.625 inch (16 mm) long.
Foundation
Ch 8.
Row 1 (RS)
Sl st in 2nd ch from hook, sc in next ch, hdc in next ch, dc in next ch, hdc in next ch, sc in next ch, sl st in last ch. Do not turn. Work back along the opposite side of the foundation ch: sc in next 2 ch, hdc in next ch, dc in next ch, hdc in next ch, sc in next ch, sl st in last ch. Turn. (14 sts total around leaf)
Row 2 (WS)
Ch 1, sl st in first st, sc in next 2 sts, hdc in next st, (dc, ch 1, dc) in tip st, hdc in next st, sc in next 2 sts, sl st in last st. (16 sts plus ch-1 at tip)
Work picot at tip before fastening off: (sl st, ch 3, sl st in first ch, sl st) into ch-1 sp at tip. Leave a 6 inch tail for joining.
Make 4 small leaves.
Component 4: The Rose
The rose is built from two parts: a base disc and a petal strip that gets coiled and sewn.
Base Disc (worked in the round)
Using white thread, make a magic ring (adjustable loop).
Rnd 1: Ch 1, work 6 sc into the ring. Pull ring closed. Join with sl st to first sc. (6 sc)
Rnd 2: Ch 1, 2 sc in each st around. Join with sl st to first sc. (12 sc)
Rnd 3: Ch 1, (sc in next st, 2 sc in next st) rep around. Join with sl st to first sc. (18 sc)
Rnd 4: Ch 1, (sc in next 2 sts, 2 sc in next st) rep around. Join with sl st to first sc. (24 sc)
Rnd 5: Ch 1, (sc in next 3 sts, 2 sc in next st) rep around. Join with sl st to first sc. (30 sc)
Fasten off. Set aside.
Rose Petal Strip
The petal strip is worked flat in rows. It begins narrow at the center of the rose and grows wider as it spirals outward.
If using optional silver or grey thread for center shading: work Rows 1 through 4 in silver or grey, then switch to white for Rows 5 onward.
Foundation Chain: Ch 5.
Row 1: Sc in 2nd ch from hook, sc in next 3 ch. Turn. (4 sc)
Row 2: Ch 1, 2 sc in first st, sc in next 2 sts, 2 sc in last st. Turn. (6 sc)
Row 3: Ch 1, sc in all 6 sts. Turn. (6 sc)
Row 4: Ch 1, 2 sc in first st, sc in next 4 sts, 2 sc in last st. Turn. (8 sc)
Row 5 (switch to white if using two colours): Ch 1, sc in all 8 sts. Turn. (8 sc)
Row 6: Ch 1, 2 sc in first st, sc in next 6 sts, 2 sc in last st. Turn. (10 sc)
Row 7: Ch 1, sc in all 10 sts. Turn. (10 sc)
Row 8: Ch 1, sc in all 10 sts. Turn. (10 sc)
Row 9: Ch 1, 2 sc in first st, sc in next 8 sts, 2 sc in last st. Turn. (12 sc)
Row 10: Ch 1, sc in all 12 sts. Turn. (12 sc)
Row 11: Ch 1, sc in all 12 sts. Turn. (12 sc)
Row 12: Ch 1, 2 sc in first st, sc in next 10 sts, 2 sc in last st. Turn. (14 sc)
Row 13: Ch 1, sc in all 14 sts. Turn. (14 sc)
Row 14: Ch 1, sc in all 14 sts. Turn. (14 sc)
Row 15: Ch 1, sc in all 14 sts. Turn. (14 sc)
Row 16: Ch 1, 2 sc in first st, sc in next 12 sts, 2 sc in last st. Turn. (16 sc)
Row 17: Ch 1, sc in all 16 sts. Turn. (16 sc)
Row 18: Ch 1, sc in all 16 sts. Turn. (16 sc)
Row 19: Ch 1, sc in all 16 sts. Turn. (16 sc)
Row 20: Ch 1, sc in all 16 sts. Do not turn. Do not fasten off. (16 sc)
Petal Edge Ruffle
With RS facing, ch 1. Working along the top long edge of the petal strip (the edge opposite the foundation chain), work (sc, ch 2, sc) in the end of every row, working into the row end stitches. At every 3rd row end, work (sc, ch 3, sc) instead to create a slightly more open arch at the petal edges. Fasten off. (Approximately 40 to 44 small picot arches along the ruffle edge)
Rose Assembly
Starting at the narrow end of the strip (the foundation chain end), tightly roll the strip toward the wide end. As you roll, position each successive layer slightly lower than the previous so the outer petals open and fan outward. Thread a tapestry needle with a double strand of white sewing thread and sew through the base of the coil multiple times to secure the spiral. Do not sew the upper petal edges. They should remain free and slightly open.
Place the coiled rose onto the base disc with the wrong side of the disc touching a flat surface. The center of the coil should align with the center of the disc. Sew the base of the coil to the disc around its circumference. Fasten off all threads securely.
Checkpoint: The completed rose should measure approximately 1.25 inches (32 mm) in diameter. The center should show a tight, neat spiral, and the outer petals should have visible height and slight openness.
Component 5: Adjustable Closure Cord
Make 2 Closure Cords
For each cord: Ch 40. Fasten off, leaving a 4 inch tail at each end.
Thread 3 pearl beads onto one end of each cord. Tie an overhand knot after the beads to secure them in place. Trim the tail and apply a small drop of craft glue to the knot if desired.
Crocheted Sliding Tube (make 1)
Ch 8, join with sl st to first ch to form a ring, being careful not to twist.
Rnd 1: Ch 1, sc in each ch around. Join with sl st to first sc. (8 sc)
Rnd 2: Ch 1, sc in each st around. Join with sl st to first sc. (8 sc)
Rnd 3: Ch 1, sc in each st around. Join with sl st to first sc. (8 sc)
Fasten off. Thread both cords through the tube (one from each end) so that pulling one cord extends that side while pulling the other extends the opposite side. The tube should slide along both cords with moderate resistance. If the tube slides too loosely, work the tube using tighter tension or add one more round.
Final Assembly
Step 1: Block All Pieces
Before assembly, wet block the base band, all leaf motifs, and the rose. Pin the base band to the blocking board to the finished dimensions (2.25 inches by 5.5 inches). Pin each leaf flat with the tip pointing upward. Allow all pieces to dry completely. Apply spray starch or fabric stiffener to the leaves and base band only. Do not stiffen the rose petals as they need to remain slightly soft for dimensional appearance.
Step 2: Arrange Leaves on the Band
Position the 2 large leaves toward the center of the band, overlapping slightly at the stem bases, angling outward from the center. Arrange 2 small leaves on either side of the large leaves. Arrange the remaining 2 small leaves at the outer edges, pointing upward. Using a tapestry needle and the tail ends left on each leaf, sew each leaf securely to the RS of the base band.
Step 3: Attach the Rose
Center the rose over the leaf arrangement. Using white thread and a tapestry needle, sew the base disc of the rose to the base band and leaf stems below it. The rose should sit elevated above the leaves, not flush with the band surface.
Step 4: Attach Rhinestones
Using a beading needle and white thread, sew rhinestones at the following positions: 2 rhinestones at the upper left and right of the rose base, 3 rhinestones distributed among the large leaves, 4 rhinestones scattered among the small leaves, and 2 rhinestones along the upper and lower edge of the band at center. Approximately 11 to 13 rhinestones total. Adjust placement to your eye.
Step 5: Attach Closure Cords
At each short end of the lace base band, fold the end of one closure cord under by approximately 0.5 inch and sew securely to the WS of the band using whipstitch with white thread. The beaded ends should extend beyond the band on each side. The sliding tube should be centered between the two beaded ends.
Size Customization Tips
To increase the band circumference: add 5 chains to the foundation (which adds one full arch repeat, approximately 0.75 inch of width). Add or remove rows from the lace pattern in pairs to maintain arch alignment.
To increase the band width: add rows to the lace pattern. Each 2 row increment adds approximately 0.1 inch to the width. A wider band will require additional leaf motifs.
To make a narrower bracelet: reduce the foundation chain by 5 stitches and reduce the number of small leaf motifs by 2.
Care Instructions
Hand wash in cool water with a small amount of mild soap. Do not machine wash or machine dry. Rinse thoroughly. Gently press in a towel to remove water and re-block to shape if needed. Lay flat to dry. Avoid contact with perfume, hairspray, or body lotion as these can discolor the white thread and dull the rhinestones over time. Store flat in a small box or zip lock pouch to prevent the dimensional rose from being crushed.
You Made It!
Thank you so much for choosing this winter white rose bracelet crochet pattern. I know thread crochet takes patience and dedication, and I truly appreciate you trusting me to guide you through it. The finished piece is absolutely stunning, and I hope you feel proud of every tiny stitch.
If you make this bracelet, I would love to see it! Tag me on Instagram or share a photo in my Facebook group. Seeing your creations is the best part of sharing patterns.
If you loved this pattern, go ahead and pin it to your Pinterest boards so you can find it again later. And please drop a comment below if you give it a try. I read every single one, and your feedback means the world to me. Happy crocheting!
