
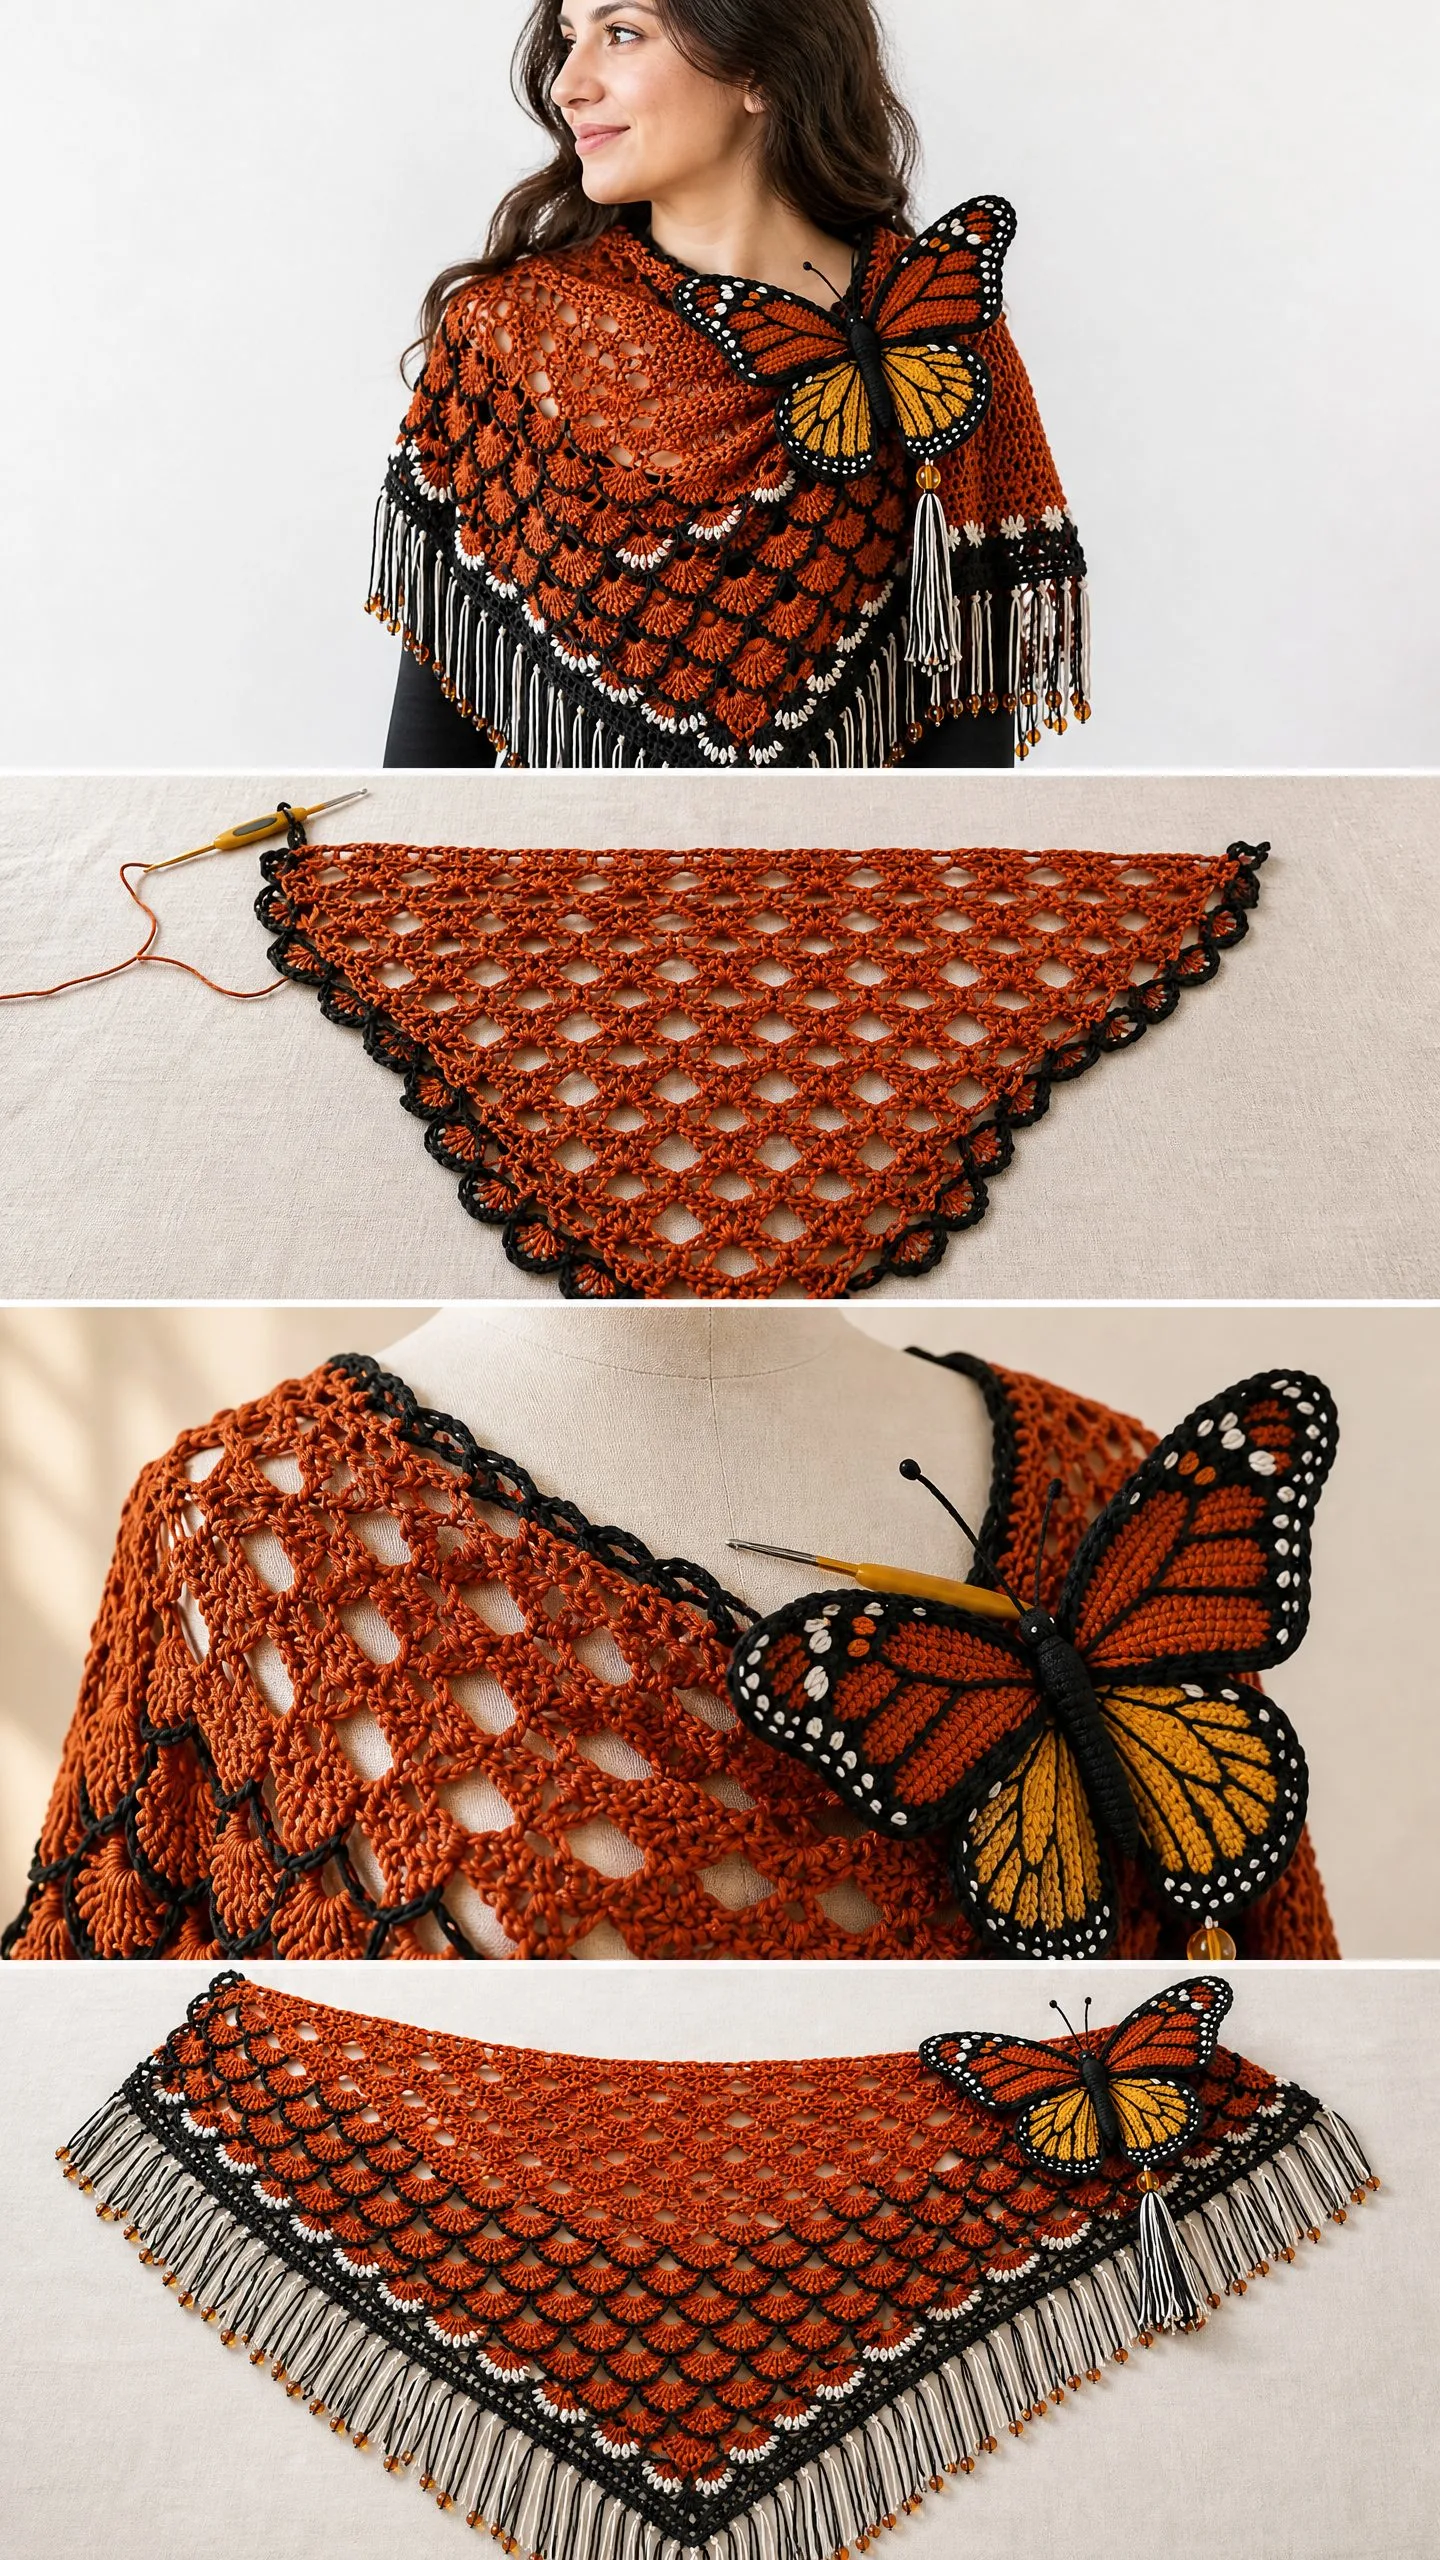
A warm, dramatic shawl keeps the autumn chill away while making a statement. This Autumn Monarch Butterfly Shawl wraps you in burnt orange, black, and golden amber, with overlapping shell fans that mimic butterfly wings and a stunning four-piece monarch appliqué resting on the chest. The construction uses double crochet clusters, applied fans, and surface slip stitch outlines, making it an intermediate to advanced project that works up into a true showpiece.
Get the Ad-Free PDF Pattern
You can find the free pattern below, or you can purchase the ad-free printable PDF from my shop.
Get the Printable PDF →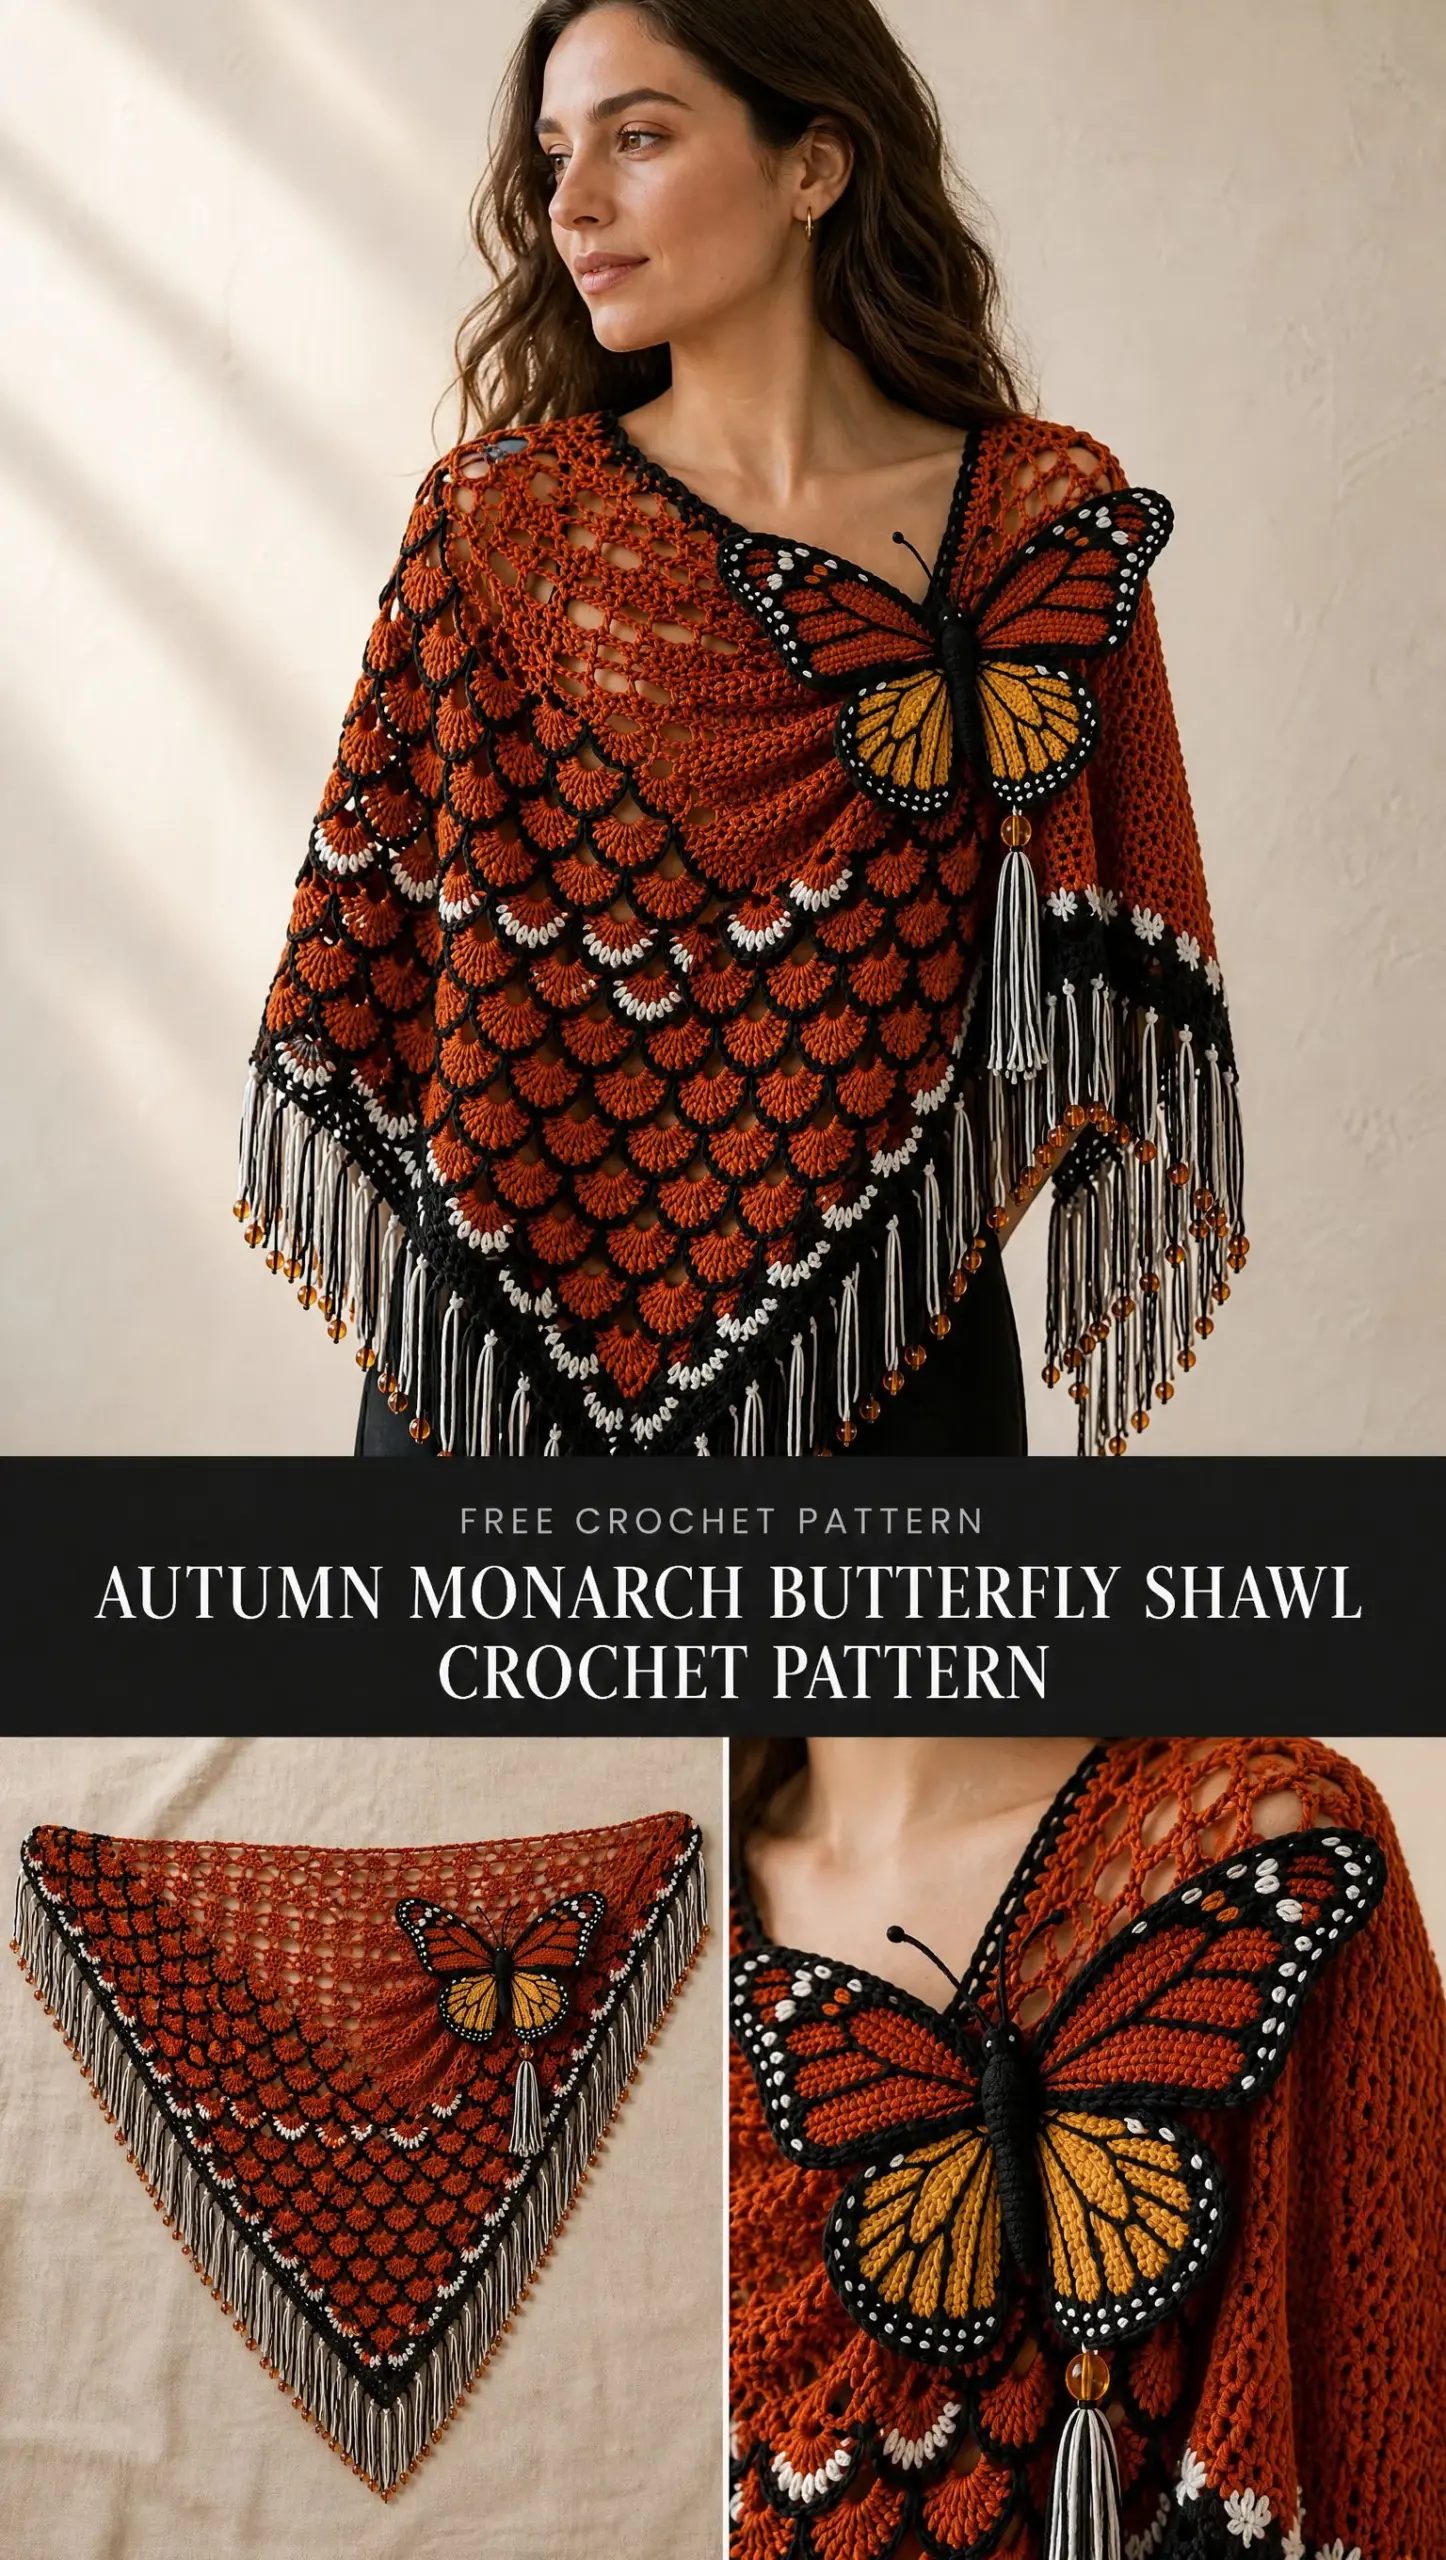
If you have been searching for a wearable art project or a gift that will genuinely take someone’s breath away, this is it. The shawl measures approximately 150 to 160 cm across the wingspan and 75 to 80 cm from neck to point, plus a 15 cm beaded fringe. Every technique is explained step by step, so you can work through it at your own pace.
Whether you plan to wear it to a festival, a wedding, or just around the house on crisp mornings, this pattern delivers both warmth and beauty. Let me walk you through exactly how to make it.
Materials You Will Need
Gather everything before you start. Having your supplies ready makes the project flow smoothly and prevents frustrating interruptions.
Yarn
Allow an extra 15 percent for gauge variation. The drape matters here because the shawl has substantial weight from the layered fans, and stiff yarn will not hang properly.
Hooks and Tools
If beads are not suitable for your yarn or you prefer a simpler finish, use yarn knots instead.
Abbreviations and Stitch Definitions
Understanding the abbreviations makes the pattern much easier to follow. Here is every term you will encounter.
Important: Turning chains do not count as a stitch unless explicitly stated. A cluster means 3 dc worked into the same space.
Gauge and Finished Size
Target size: Approximately 150 to 160 cm wingspan by 75 to 80 cm center depth, excluding the 15 cm fringe.
Gauge check: Block a 10-row practice triangle. The long edge should measure about 38 to 40 cm. If your swatch is too small, go up a hook size. If too large, go down. Use the same hook for the full piece once gauge is correct.
These are target measurements. The pattern has not been physically tested, so making a gauge swatch is essential before committing to the full project.
Section 02: Triangle Foundation
This section builds the base of your shawl using a classic center-increase triangle worked flat.
Conventions
Work flat and turn each row. In this section, ch 3 counts as the first dc. A cluster is 3 dc into the same space. Place a removable marker in the center ch-2 space and move it up as you work. The two ends form the straight neck edge, and the marked space forms the lower point.
Row 1 (Color A)
Make an adjustable ring. Ch 3, 2 dc, ch 2, 3 dc into ring. Tighten the ring. Turn.
Count: 2 clusters, 6 dc, 1 center space.
Row 2
Ch 3, 2 dc in first st, ch 1. Work (3 dc, ch 2, 3 dc) in center space. Ch 1, 3 dc in last st (top of turning ch). Turn.
Count: 4 clusters, 12 dc, 2 side ch-1 spaces.
Row 3
Ch 3, 2 dc in first st, ch 1. 3 dc in the side ch-1 sp, ch 1. Work (3 dc, ch 2, 3 dc) in center. Ch 1, 3 dc in next side ch-1 sp, ch 1. 3 dc in last st. Turn.
Count: 6 clusters, 18 dc, 4 side ch-1 spaces.
Rows 4 Through 40
Ch 3, 2 dc in first st, ch 1. Work 3 dc in every side ch-1 space, with ch 1 between clusters and before the center. In center, work (3 dc, ch 2, 3 dc). Ch 1, then 3 dc in each remaining side space, separating clusters with ch 1. Ch 1, 3 dc in last st. Turn.
Keep all rows in color A.
Count Check Formula
At row n, you should have: 2n clusters, 6n dc, 2n-2 side ch-1 spaces, plus the center ch-2 space.
Stop at row 40 and fasten off. Be careful not to mistake the turning chain for a side space.
Section 03: Raised Fans and Edging
The raised fans create the signature monarch wing scale effect. This is where the shawl transforms from a simple triangle into something spectacular.
Fan Placement
Lay the shawl with the right side facing up and the neck edge horizontal. Apply fans to rows 12, 14, 16, and every second row through row 38. Use the ch-1 spaces of each selected row. The fan tops lie over the row above, creating shallow overlapping scales.
This adds substantial weight, so check the drape after completing two fan rows. If it feels too heavy or stiff, consider switching to a lighter yarn.
Working One Fan Row (Color A)
Join A with sl st to the middle dc of the outermost cluster. Work 5 dc into the next ch-1 space, then sl st into middle dc of next cluster. Repeat to center. Fasten off before the center ch-2 space.
Repeat separately on the other half of the shawl. Each half has n-1 fans on row n. Do not work fans into the center space.
Fan Outlines (Color B)
For each fan row, join B at its first anchor. Sl st loosely through the top of each of the 5 fan dc, then sl st in anchor. Repeat along the fans. Keep the strand loose enough that the shawl stays flat. Fasten at each center and end.
On fan rows 16, 24, and 32, use D (ivory) for the middle 3 sl sts of alternate fans. This creates the white accent spots visible in the finished piece.
Outer Border Round 1 (Color B)
Join at a neck corner. Along the two sloping edges (the outermost row 40), sc in each dc and each ch-1 space. Work (sc, ch 2, sc) in the center point. At the far neck corner, ch 1, then work about 2 sc into each dc row-end along the straight neck edge. Ease the count to avoid rippling. Join to first sc.
Border Round 2
Ch 1, sc in first st. Along each slope, repeat: ch 3, skip 2 sc, sc in next sc. If 1 or 2 stitches remain at a corner, skip those together. Work (sc, ch 3, sc) into the point. Work 1 sc per sc along the neck edge. Join and fasten off.
The scallops must lie flat. Adjust only the final skip at each corner, not the body counts.
Section 04: Butterfly Pieces
The butterfly is made in four pieces plus a body, then assembled and attached to the shawl. Switch to your 3 mm hook for this section.
Upper Wings (Make 2 in Color A)
Ch 3.
Row 1: Sc in second ch and next ch. (2 sts)
Ch 1 and turn each row. The turning ch never counts.
Rows 2 through 10: 2 sc in first st, sc to last st, 2 sc in last st. You increase 2 sts each row. Row 10 has 20 sts.
Rows 11 through 14: Sc across. (20 sts)
Rows 15 through 18: Sc2tog, sc to last 2, sc2tog. Counts: 18, 16, 14, 12.
Fasten off. The narrow starting end joins the body.
Lower Wings (Make 2 in Color C)
Ch 7.
Round 1: 2 sc in second ch, sc in next 4, 3 sc in last ch. Work down underside: sc in next 4, sc in last ch beside starting increase. (14 sts)
Mark first st and work continuously.
Round 2: 2 sc in each of first 2 sts, sc 4, 2 sc in each of next 3, sc 4, 2 sc in last st. (20 sts)
Round 3: (sc, inc) twice, sc 4, (sc, inc) three times, sc 4, sc, inc. (26 sts)
Round 4: (2 sc, inc) twice, sc 4, (2 sc, inc) three times, sc 4, 2 sc, inc. (32 sts)
Sl st next st, fasten off.
Outline and Veins (Colors B and D)
Sc evenly around each wing in B, using 1 sc per stitch and about 1 per sc row-end. Add 1 extra sc at any corner that curls.
Embroider 4 radiating B lines from each narrow base toward the outer edge, using short backstitches without pulling tight. Add evenly spaced D French knots or tiny straight stitches inside the dark outline to mimic the white spots on a real monarch.
Body (Color B)
Ch 25. Sc in second ch and each remaining ch. (24 sts)
Work 3 more rows of 24 sc, turning with ch 1. Fold lengthwise and whipstitch the long edges together, lightly stuffing with yarn ends if desired.
Sew the two upper wings to the upper two-thirds and lower wings to the lower third. Set wings at slightly upward angles. Stitch ch-12 antennae to the top and knot the ends. Avoid wire, as it can poke through and is not safe for wearables.
Section 05: Assembly and Finish
Attaching the Butterfly
Block the wing pieces lightly and pin the arrangement first. Sew the body and wing bases to the upper right chest area. Add small stabilizing tacks halfway along each wing if it flops.
Keep your needlework on the fabric surface and do not catch unrelated layers. A finished wingspan around 25 to 30 cm is a useful target. Adjust hook or yarn only after making a trial wing.
Fringe
Cut 32 cm strands in B and D. Fold 2 strands together, pull the fold through one border ch-3 loop, then pass tails through fold and snug. This is a basic lark’s head knot.
Repeat in every second border loop along the two slopes, alternating color pairs. If adding beads, thread one onto each selected tail and secure with a double knot. Trim to an even 15 cm after blocking.
Butterfly Tassel
Wrap B and D together 20 times around a 16 cm card. Tie the top firmly and cut the bottom. Bind 1 cm below top and sew under the butterfly body. Add an optional bead only if attachment is secure. Keep tassel removable for washing.
Blocking and Care
Soak according to yarn label instructions. Support all the weight when lifting. Press between towels and pin the triangle evenly. Keep the butterfly raised on a folded towel while drying. Never hang the wet shawl.
Hand wash gently if compatible with yarn and dry flat.
Fit and Troubleshooting
For a smaller shawl: Stop at an even row and omit fan rows beyond it. Keep the same count formula.
Cupping: Increase hook size or loosen surface outlines.
Ruffling: Remove excess border stitches.
Heavy butterfly: Use lighter yarn or tack wing edges in more places.
Confirm gauge, drape, bead security, and neck comfort on the completed sample before wearing or gifting.
Tips for Success
This is an intermediate to advanced project, but breaking it into sections makes it manageable. Here are my suggestions:
1. Work the foundation first and block it. This lets you check gauge and drape before investing time in the fans.
2. Do the fans in batches. Complete all the A-color fans, then go back and add the B outlines. Working systematically prevents confusion.
3. Make a test butterfly wing. The small pieces work up quickly, and you can adjust your hook or tension before committing.
4. Pin before you sew. The butterfly placement affects how the shawl hangs. Try it on or drape it on a mannequin before stitching anything permanently.
5. Use stitch markers generously. Mark the center space, mark the beginning of rounds, mark anything that helps you stay oriented.
Why This Pattern Works
The Autumn Monarch Butterfly Shawl combines several classic crochet techniques in a fresh way. The triangle foundation is a traditional granny-style construction that grows predictably. The applied fans add texture without complicated stitch patterns. The butterfly uses basic shaping that intermediate crocheters already know.
What makes it special is how these elements come together. The black outlines pop against the burnt orange. The ivory accents catch light like real wing spots. The fringe adds movement and the optional beads bring a subtle sparkle.
It is a project that looks far more complex than it actually is, which is the best kind of pattern.
Final Thoughts on the Autumn Monarch Butterfly Shawl Crochet Pattern
This shawl is a labor of love, but the result is worth every stitch. You end up with a wearable piece of art that celebrates one of nature’s most beautiful creatures. The construction is methodical, the techniques are satisfying, and the finished shawl draws compliments everywhere you wear it.
Take your time with this one. Enjoy the process. And when you finish, wear it proudly.
Thank you so much for choosing this pattern. I hope you love making it as much as I loved designing it. If you create one, I would absolutely love to see it! Tag me on Instagram or share a photo on Facebook. Seeing your finished projects is the best part of this whole thing.
Save this Autumn Monarch Butterfly Shawl crochet pattern to your Pinterest boards so you can find it when you are ready to start. And if you make it, please leave a comment below. I read every single one, and your photos and feedback make my day.
Want a Quick & Easy Printable Version?
Get a clean, beautifully formatted PDF of this pattern — easy to follow step by step, ready to print or save on any device. No scrolling, no distractions, just the pattern.
Get the Printable PDF →