
Looking for a handmade table setting that feels fresh, elegant, and perfect for spring brunches or summer garden parties? This Blue Chamomile Placemat and Napkin Ring set is exactly what you need. The pattern uses half double crochet stitches for the main body, simple single crochet and double crochet for the decorative border, and sweet little chamomile flowers to tie everything together.
Get the Ad-Free PDF Pattern
You can find the free pattern below, or you can purchase the ad-free printable PDF from my shop.
Get the Printable PDF →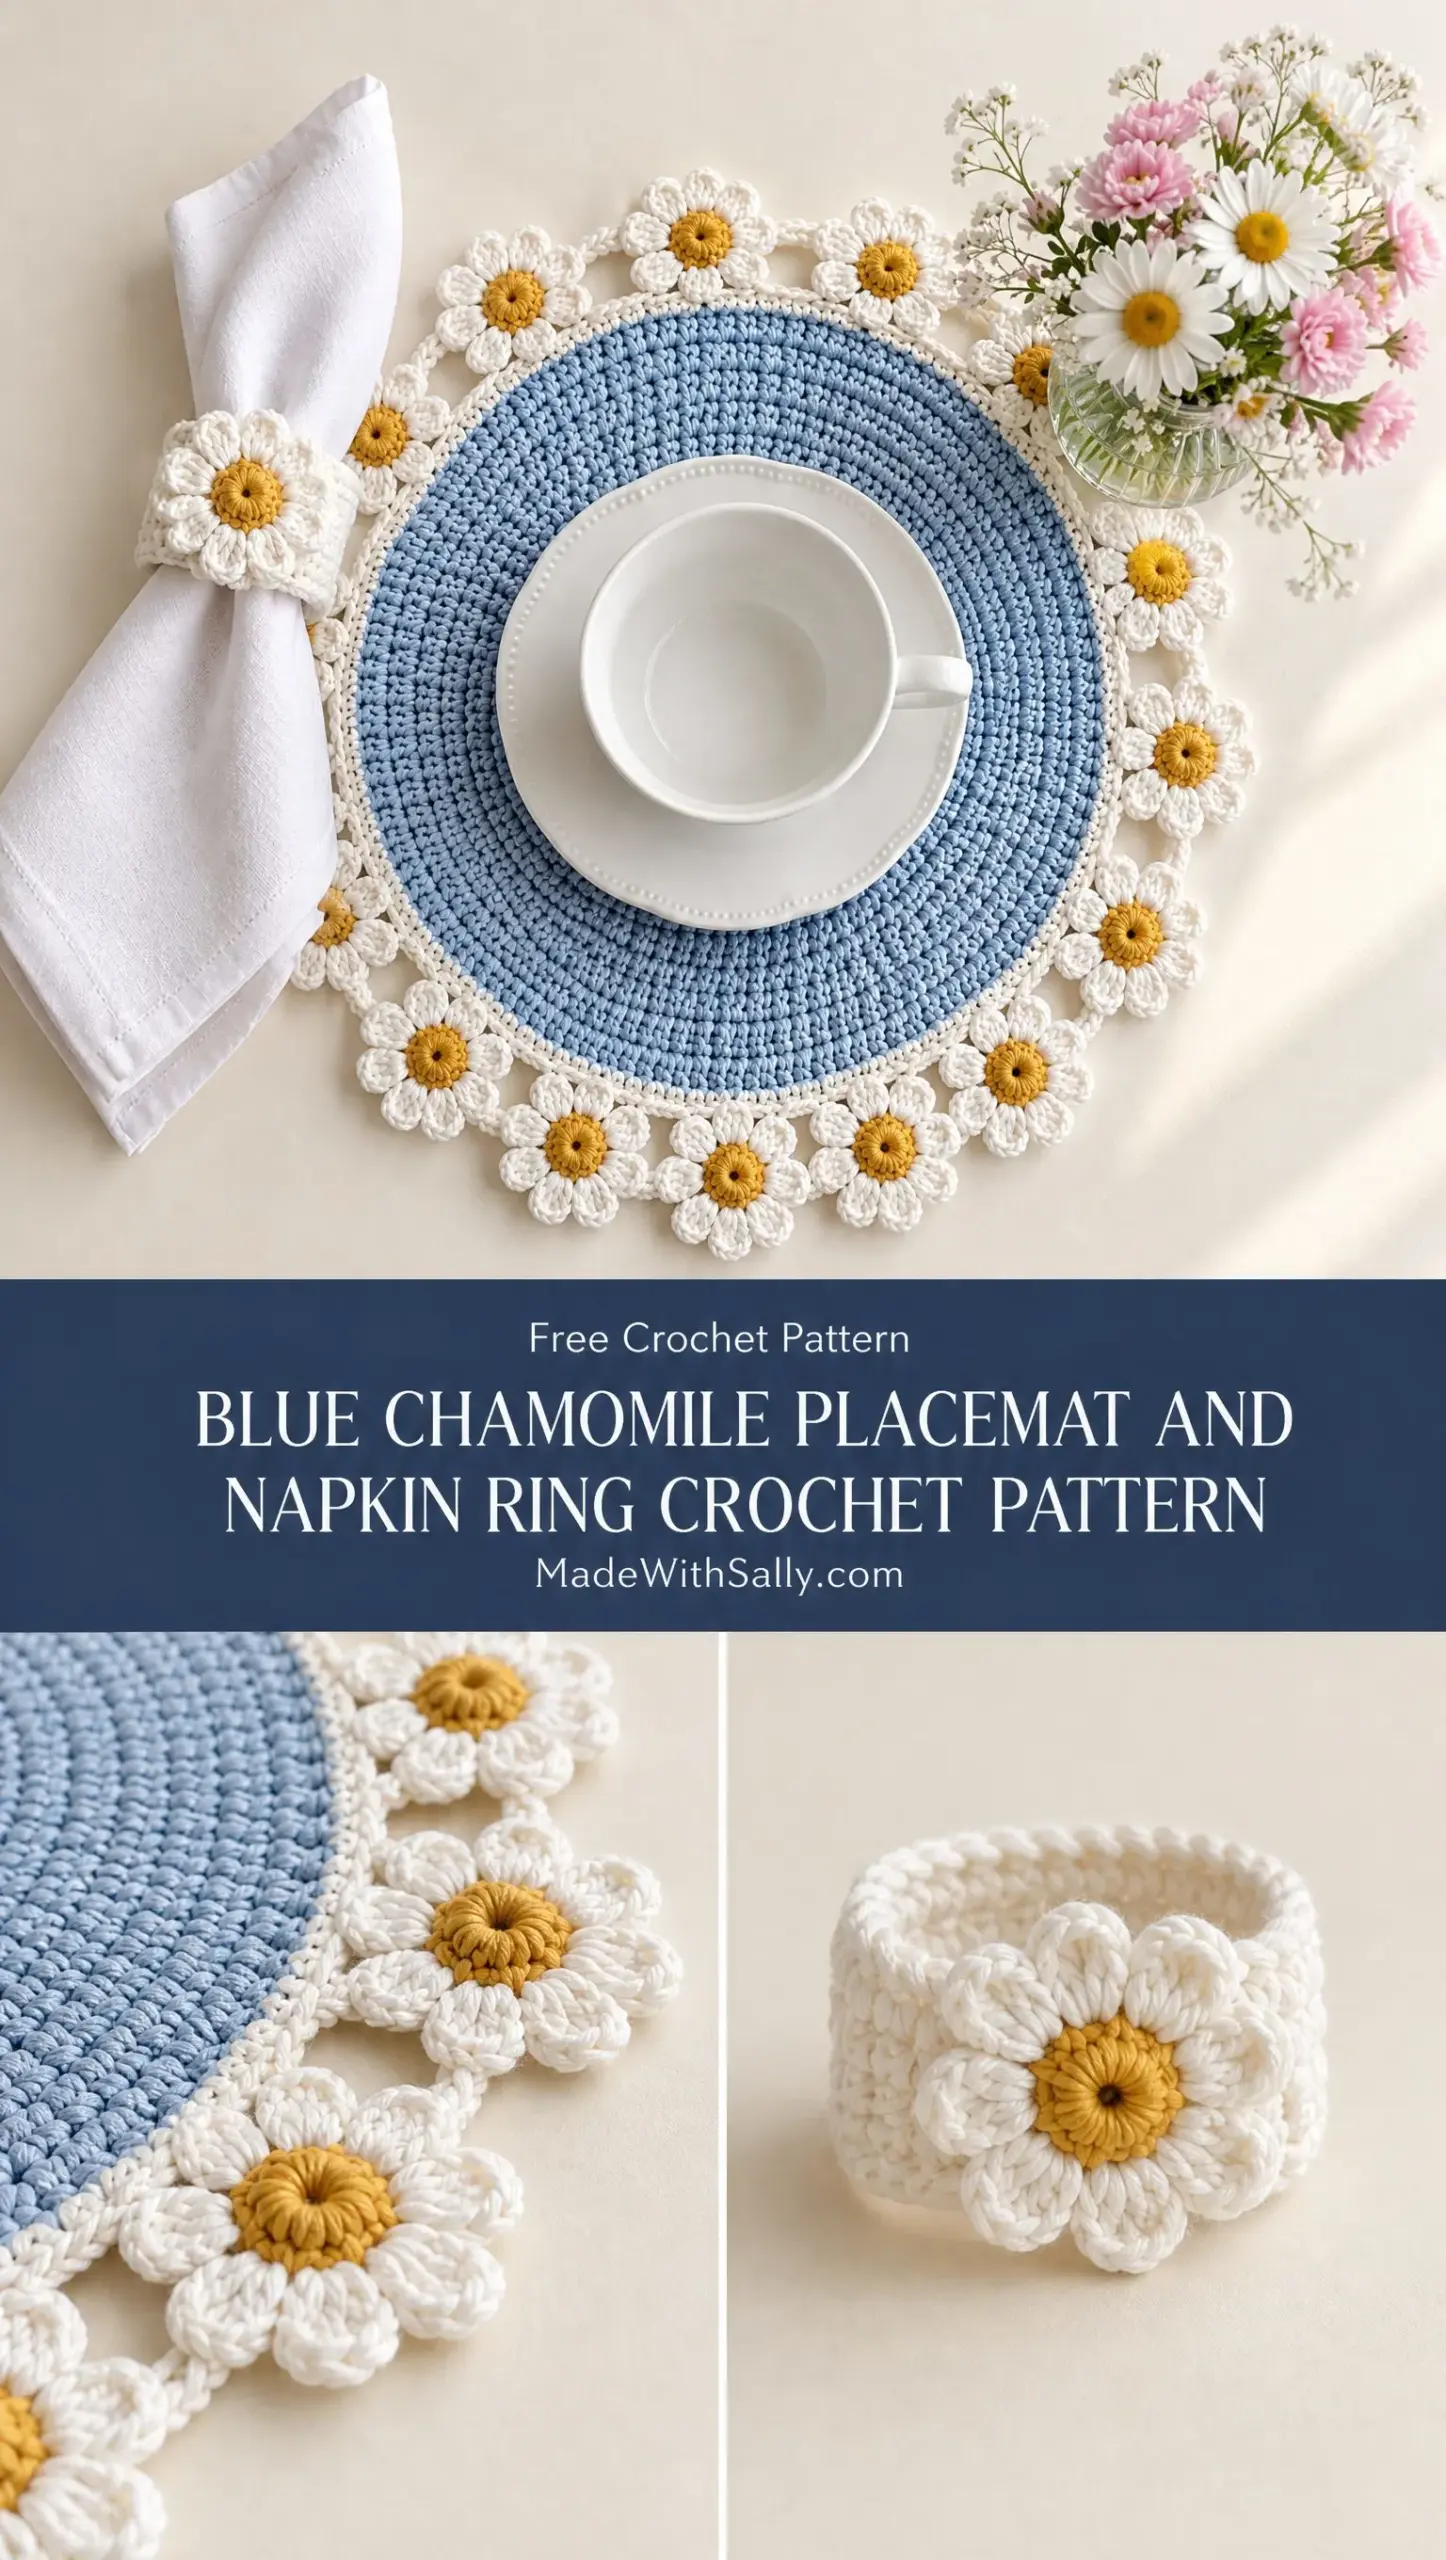
It works up into a generous 38 to 42 cm diameter placemat that fits standard dinner plates beautifully. The matching napkin ring adds that extra touch of charm to your table. Whether you are making a set for yourself or crafting a thoughtful housewarming gift, this project delivers impressive results without requiring advanced skills.
The combination of powder blue, ivory, and honey yellow creates a classic cottage aesthetic that looks far more complicated than it actually is. If you are comfortable with working in the round and can follow a basic increase pattern, you have everything you need to make this stunning table set.
About This Pattern
This Blue Chamomile Placemat and Napkin Ring crochet pattern is rated as intermediate level. The main placemat construction is straightforward half double crochet worked in rounds, which is very approachable. The chamomile flowers and assembly add a bit more complexity, but nothing that should intimidate you if you have made a few projects before.
The finished placemat measures approximately 38 to 42 cm (15 to 16.5 inches) in diameter. That is a perfect size for dinner plates with a lovely decorative border peeking out around the edges. The napkin ring circumference is adjustable, so you can size it to fit your specific napkins.
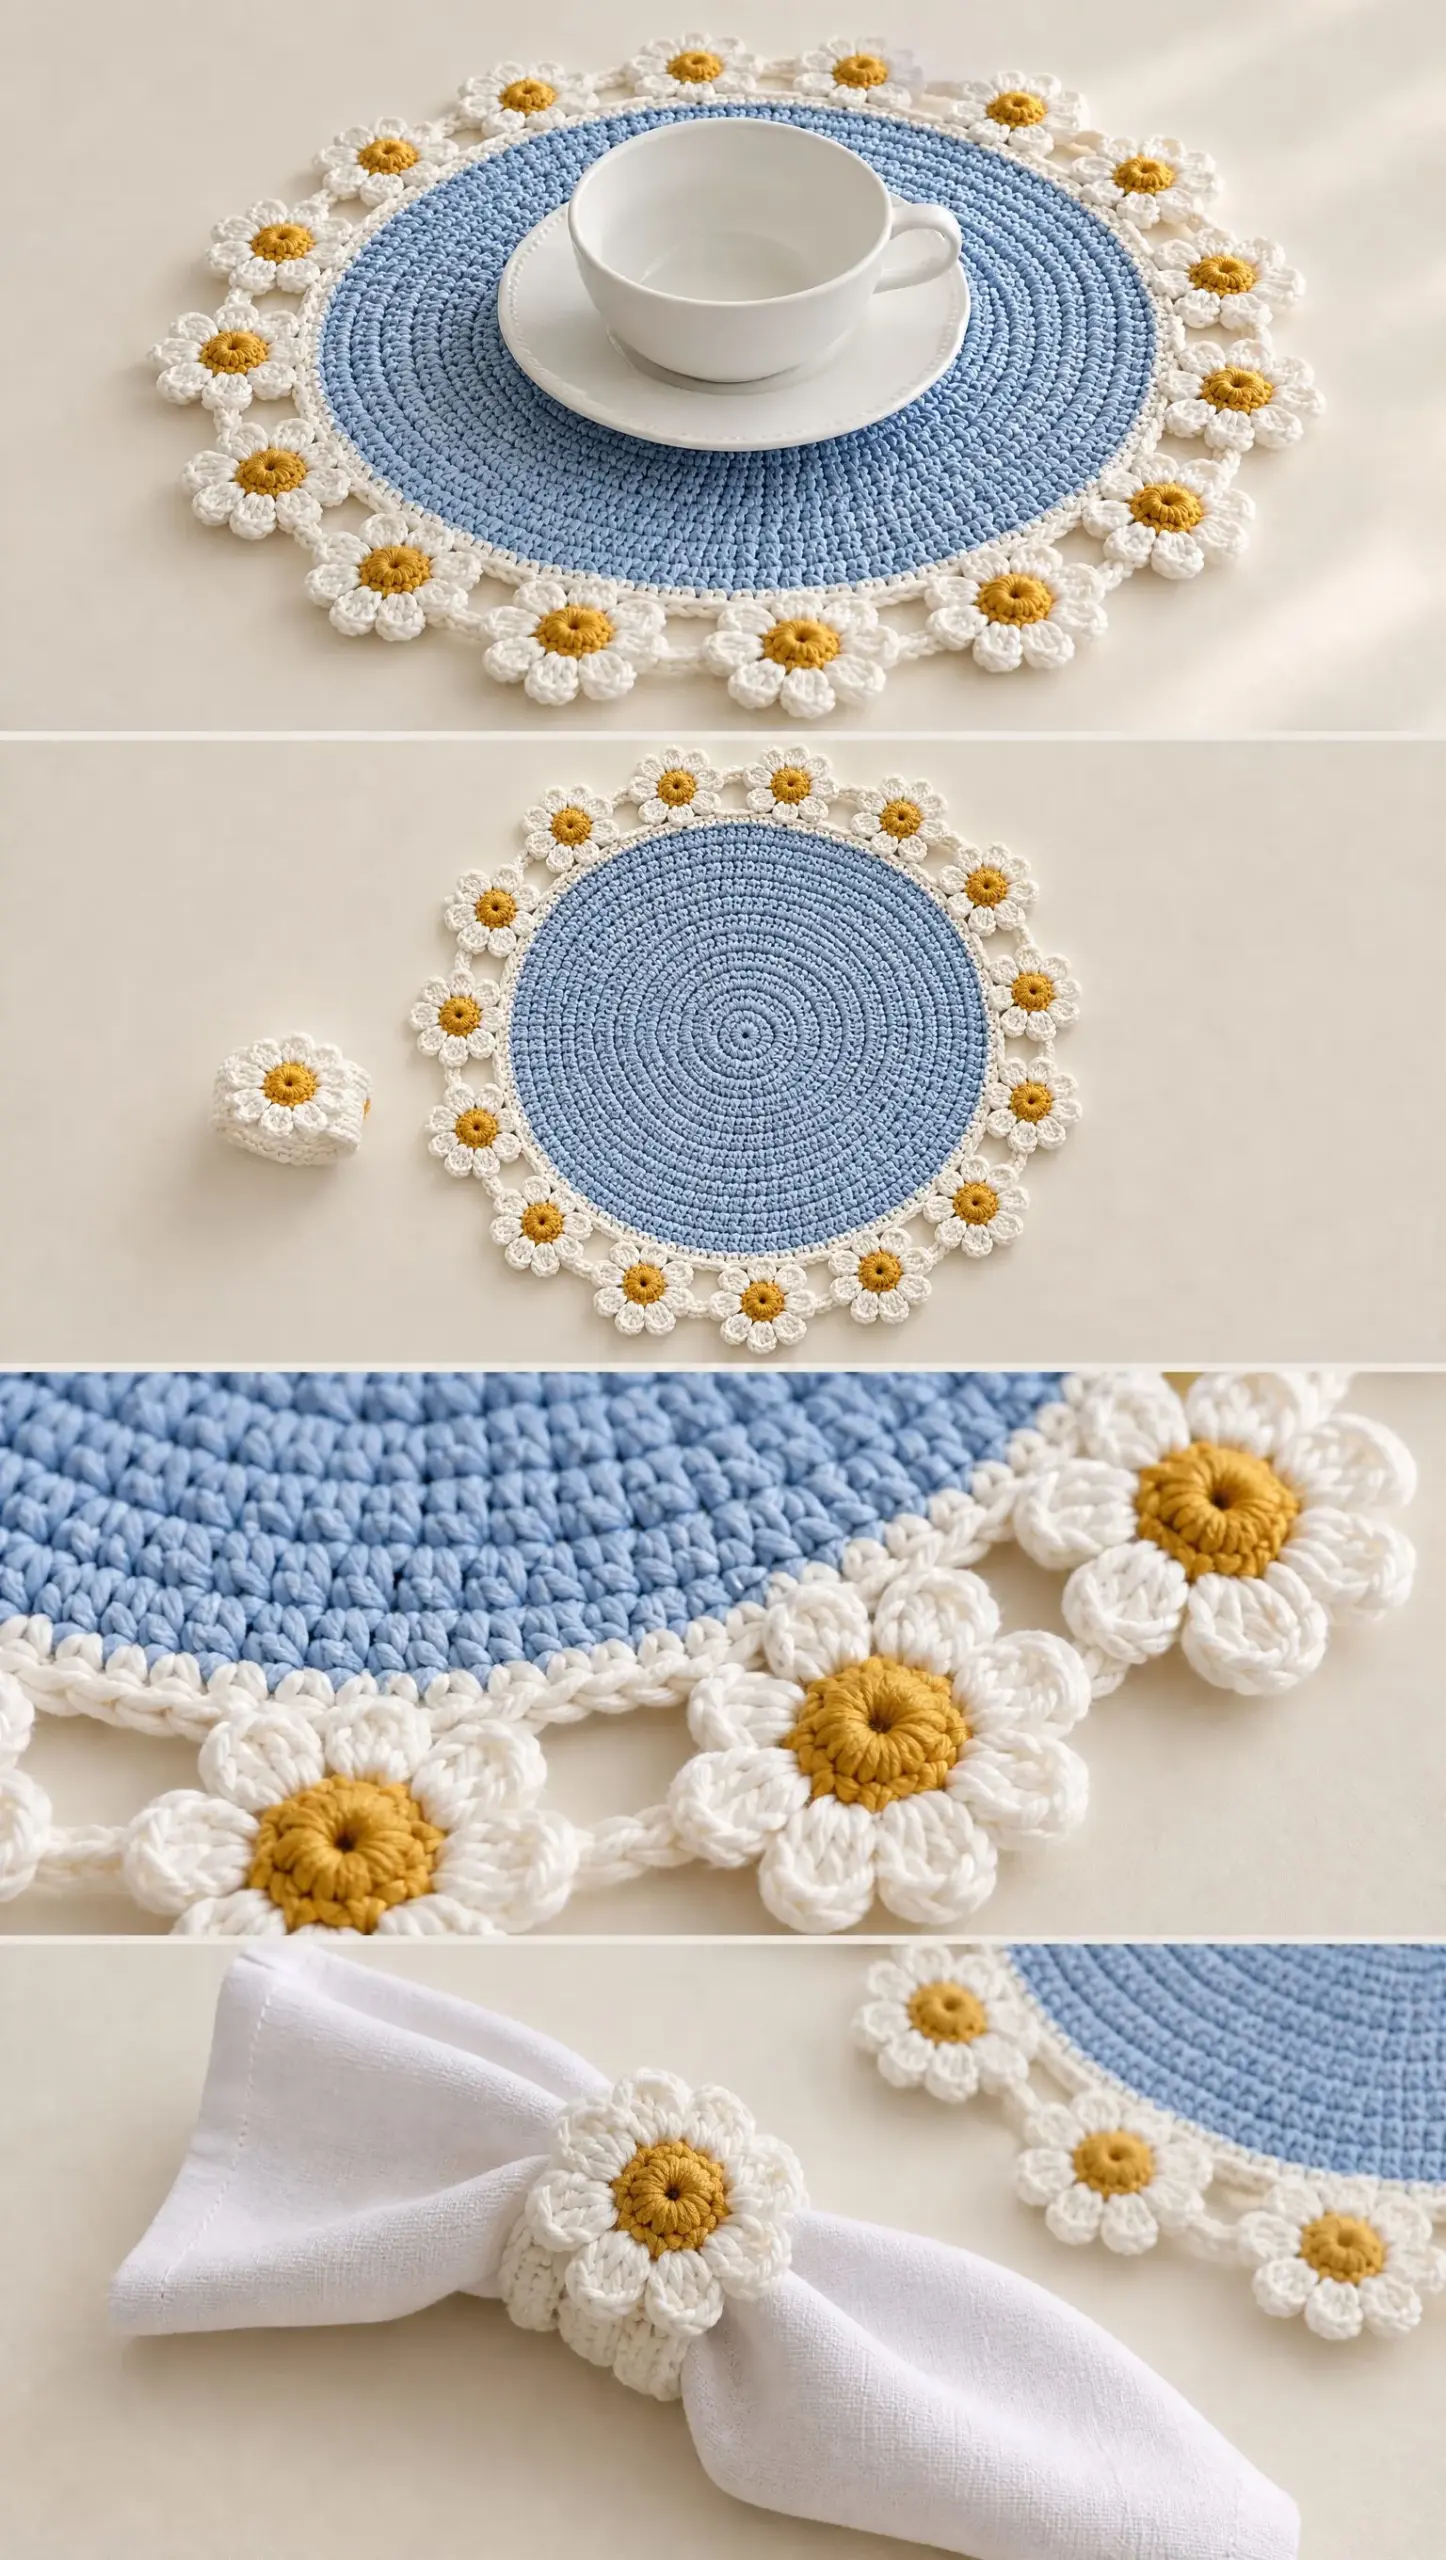
What makes this pattern special is the three-dimensional chamomile flower border. Each tiny flower is made separately and then connected with delicate chain bridges before being sewn to the ivory rim. The result looks intricate and professional, but the individual components are quite simple to create.
Materials You Will Need
Before you start, gather all your supplies. Having everything ready makes the process so much more enjoyable.
Yarn:
Tools:
Cotton yarn is essential for this project. It provides excellent stitch definition, holds its shape beautifully, and can be blocked to achieve that perfectly flat, professional finish. Cotton is also practical for table linens since it washes well and resists stains better than many other fibers.
Gauge
Getting gauge right matters for this pattern. Your placemat needs to lie flat, and the increases are calculated based on specific stitch dimensions.
Approximately 16 half double crochet (hdc) stitches x 12 rows = 10 cm square
Take time to make a gauge swatch before diving in. If your swatch is too small, go up a hook size. If it is too large, go down a hook size. This small step saves frustration later.
Stitches and Abbreviations
Let me walk you through every stitch used in this pattern. Even if you know these already, a quick refresher never hurts.
Magic ring: A technique for starting crochet in the round that creates a tight, closed center with no hole. You wrap yarn around your fingers, work your first stitches into the loop, then pull the tail to close it tight.
Chain stitch (ch): The most basic crochet stitch. Yarn over, pull through the loop on your hook. Chains create foundation rows and turning chains.
Slip stitch (sl st): Insert hook into stitch, yarn over, pull through both the stitch and the loop on your hook in one motion. Used for joining rounds and creating invisible connections.
Single crochet (sc): Insert hook into stitch, yarn over and pull up a loop (two loops on hook), yarn over and pull through both loops. A short, tight stitch.
Half double crochet (hdc): Yarn over, insert hook into stitch, yarn over and pull up a loop (three loops on hook), yarn over and pull through all three loops. Taller than single crochet but shorter than double crochet. This is the main stitch for the placemat body.
Double crochet (dc): Yarn over, insert hook into stitch, yarn over and pull up a loop (three loops on hook), yarn over and pull through two loops, yarn over and pull through remaining two loops. Creates a taller, more open fabric.
Treble crochet (tr): Yarn over twice, insert hook into stitch, yarn over and pull up a loop, then yarn over and pull through two loops three times. An even taller stitch.
Increase (inc): Working 2 stitches in one stitch to add width and shape your circle.
Picot stitch: A small decorative bump created by chaining a few stitches and slip stitching back into the base.
Part 1: Blue Half Double Crochet Placemat
This is the foundation of your project. The powder blue center creates a beautiful solid base for all the decorative elements.
Round 1:
With powder blue yarn, make a magic ring. Chain 2 (this counts as your first hdc). Work 11 hdc into the ring. Join with slip stitch to the top of the starting chain 2. (12 hdc)
Pull that magic ring nice and tight so you do not have a hole in the center.
Round 2:
Chain 2. Work 2 hdc in every stitch around. Join with slip stitch. (24 hdc)
You have just doubled your stitch count. Your circle should already be taking shape.
Round 3:
Chain 2. Alternate 1 hdc in next stitch and 2 hdc in next stitch around. Join with slip stitch. (36 hdc)
This alternating increase pattern keeps your circle flat and even.
Round 4:
Chain 2. Work 1 hdc in each stitch, increasing evenly around every third stitch. Join with slip stitch.
Rounds 5 through 18:
Continue working hdc in spiral rounds. Increase evenly each round so the circle remains flat. The key here is to smoothly spread increases around the work instead of stacking them directly above previous increases.
Why does this matter? When you stack increases in the same place round after round, you create corners instead of a smooth circle. By offsetting your increases, you maintain that beautiful round shape.
A helpful tip: Place a stitch marker at the beginning of each round so you do not lose track of where you are. Count your stitches every few rounds to make sure you are on track.
Final Blue Round:
Work one final round of hdc without increases to stabilize the center. This creates a firm edge for attaching the ivory rim.
Fasten off and weave in your end. Your blue center is complete!
Part 2: Ivory Rim
Now we add the elegant white border that frames the blue center and provides the foundation for attaching the chamomile flowers.
Attach ivory yarn to any stitch along the edge of your blue placemat.
Round 1:
Work single crochet evenly around the edge. Join with slip stitch.
Count your stitches here. You want an even number for the next round to work correctly.
Round 2:
Chain 3, skip one stitch, slip stitch into next stitch to create a small open chain loop. Repeat this pattern around the entire edge.
These chain loops create the lacy foundation for your scalloped edge.
Round 3:
Inside each chain space, work: 1 sc, 3 dc, 1 sc.
This creates the soft scalloped white rim that gives the placemat its finished, feminine look.
Fasten off and weave in ends. Set the placemat aside while you make the flowers.
Part 3: Chamomile Flower Border
This is where the magic happens. You will make approximately 12 to 14 individual chamomile flowers, then connect them into a beautiful border.
Flower Center
With honey yellow yarn, make a magic ring.
Work 10 sc into ring.
Join with slip stitch and fasten off.
Pull the magic ring closed completely. You want a tight, puffy center that looks like the real thing.
Petals
Attach ivory yarn to any stitch on your yellow center.
In each stitch around the yellow center, work: (sl st, ch 2, 3 dc, ch 2, sl st)
This sequence creates one rounded petal. Repeat around all 10 stitches.
Fasten off and weave in your ends. Your first chamomile flower is complete!
Repeat until you have 12 to 14 flowers total. The exact number depends on the circumference of your finished placemat. Lay them around the edge to check spacing before you start joining.
Joining Flowers
Now we connect all those sweet little flowers into a cohesive border.
Arrange flowers evenly around the placemat edge. Use ivory yarn and create chain bridges between flowers:
1. Join flower edge with yarn
2. Chain 6 to 8 (adjust based on spacing)
3. Attach to next flower with a slip stitch
Repeat until the full border is connected in a continuous ring.
Once your flower chain is complete, sew the flower chain border securely to the ivory rim of the placemat. Use your tapestry needle and ivory yarn, taking small stitches on the back of the work where they will not show.
Part 4: Crochet Napkin Ring
No table setting is complete without a matching napkin ring. This one features a larger chamomile flower as its centerpiece.
Ring Base
With ivory yarn, chain enough stitches to wrap around a folded napkin comfortably. Most standard napkins need about 20 to 24 chains, but measure yours to be sure.
Join into a circle with a slip stitch, being careful not to twist your chain.
Round 1:
Single crochet around. Join with slip stitch.
Rounds 2 through 5:
Work half double crochet rounds until the band reaches approximately 4 cm wide.
Fasten off and weave in ends.
Flower Decoration
For the napkin ring, you will make one larger chamomile flower that becomes the focal point.
Center:
With honey yellow yarn, make a magic ring.
Work 12 sc into ring.
Join with slip stitch and fasten off.
Notice this center has 12 stitches instead of 10, making it slightly larger than the placemat flowers.
Petals:
Attach ivory yarn to the yellow center.
Around each stitch work: (sl st, ch 3, 4 dc, ch 3, sl st)
The longer chains and extra double crochet create bigger, showier petals.
Layer:
For extra dimension, make a second smaller petal layer using the original placemat flower instructions. Sew it on top of the larger flower for a raised, dimensional effect.
Attach the completed flower securely to the front of the napkin ring using your tapestry needle and ivory yarn.
Finishing
You are almost there! These final steps make the difference between a nice project and a stunning one.
Weave in all ends thoroughly. For table linens that will be washed, weave each end through at least 2 inches of stitches in different directions.
Block the placemat and flowers lightly with steam or damp blocking. Lay the placemat on a flat surface, pin it into a perfect circle if needed, and either hover a steam iron over it (without touching) or spritz it with water and let it dry completely.
Shape the circle flat and allow to dry completely before use. Blocking truly transforms the finished piece.
Care Instructions
Your handmade table set deserves gentle care to keep it beautiful for years.
Pattern Notes and Tips
Keep tension consistent for a smooth circular placemat. If your tension varies, your circle may become wavy or cup-shaped.
Increase spacing may need adjustment depending on your yarn thickness and personal tension. If your placemat is cupping (bowl-shaped), you need more increases. If it is ruffling (wavy edges), you need fewer increases.
Cotton yarn gives the best stitch definition and structure for this project. Acrylic will work in a pinch, but it will not block as crisply and may not hold its shape as well over time.
Count your stitches regularly. It is much easier to fix a mistake one round back than to discover it ten rounds later.
Use stitch markers to track your rounds and increase placement. Locking stitch markers work best since they will not fall out as you work.
Make It Your Own
While this pattern uses the classic chamomile color combination of powder blue, ivory, and honey yellow, feel free to customize it for your decor. Sage green with cream flowers would be lovely. Dusty rose with white and gold centers could be stunning for a romantic table setting. Navy blue with bright white flowers makes a bold statement.
The construction technique stays the same regardless of colors. Just make sure you have enough contrast between your main placemat color and the flower petals so those beautiful chamomiles really pop.
Why This Pattern Works
This Blue Chamomile Placemat and Napkin Ring crochet pattern hits the sweet spot between impressive and achievable. The half double crochet base is rhythmic and relaxing to work. The individual flowers are small enough to make during short crochet sessions. And the assembly process lets you see your table set come together piece by piece.
It is the kind of project that looks like it took forever but actually comes together faster than you might expect. Each flower takes only a few minutes. The main placemat, once you find your rhythm, practically crochets itself.
These make wonderful gifts for housewarmings, bridal showers, Mother’s Day, or anyone who appreciates handmade home goods. A set of four placemats with matching napkin rings is a truly special present that shows real thought and care.
I really hope you enjoy making this beautiful chamomile table set as much as I enjoyed putting this pattern together. It is such a satisfying project to see come together, and I know your finished set is going to look absolutely stunning on your table.
If you are excited to try this pattern, go ahead and save it to your Pinterest boards so you can find it easily when you are ready to start. And please, if you make this placemat and napkin ring set, leave a comment below or tag me on Instagram or Facebook. I would absolutely love to see your finished creations and hear which colors you chose!
Want a Quick & Easy Printable Version?
Get a clean, beautifully formatted PDF of this pattern — easy to follow step by step, ready to print or save on any device. No scrolling, no distractions, just the pattern.
Get the Printable PDF →