
Go dig through your yarn stash right now. I know you have those pretty cotton skeins in soft blues and greens that you have been saving for "the right project." This is that project.
Get the Ad-Free PDF Pattern
You can find the free pattern below, or you can purchase the ad-free printable PDF from my shop.
Get the Printable PDF →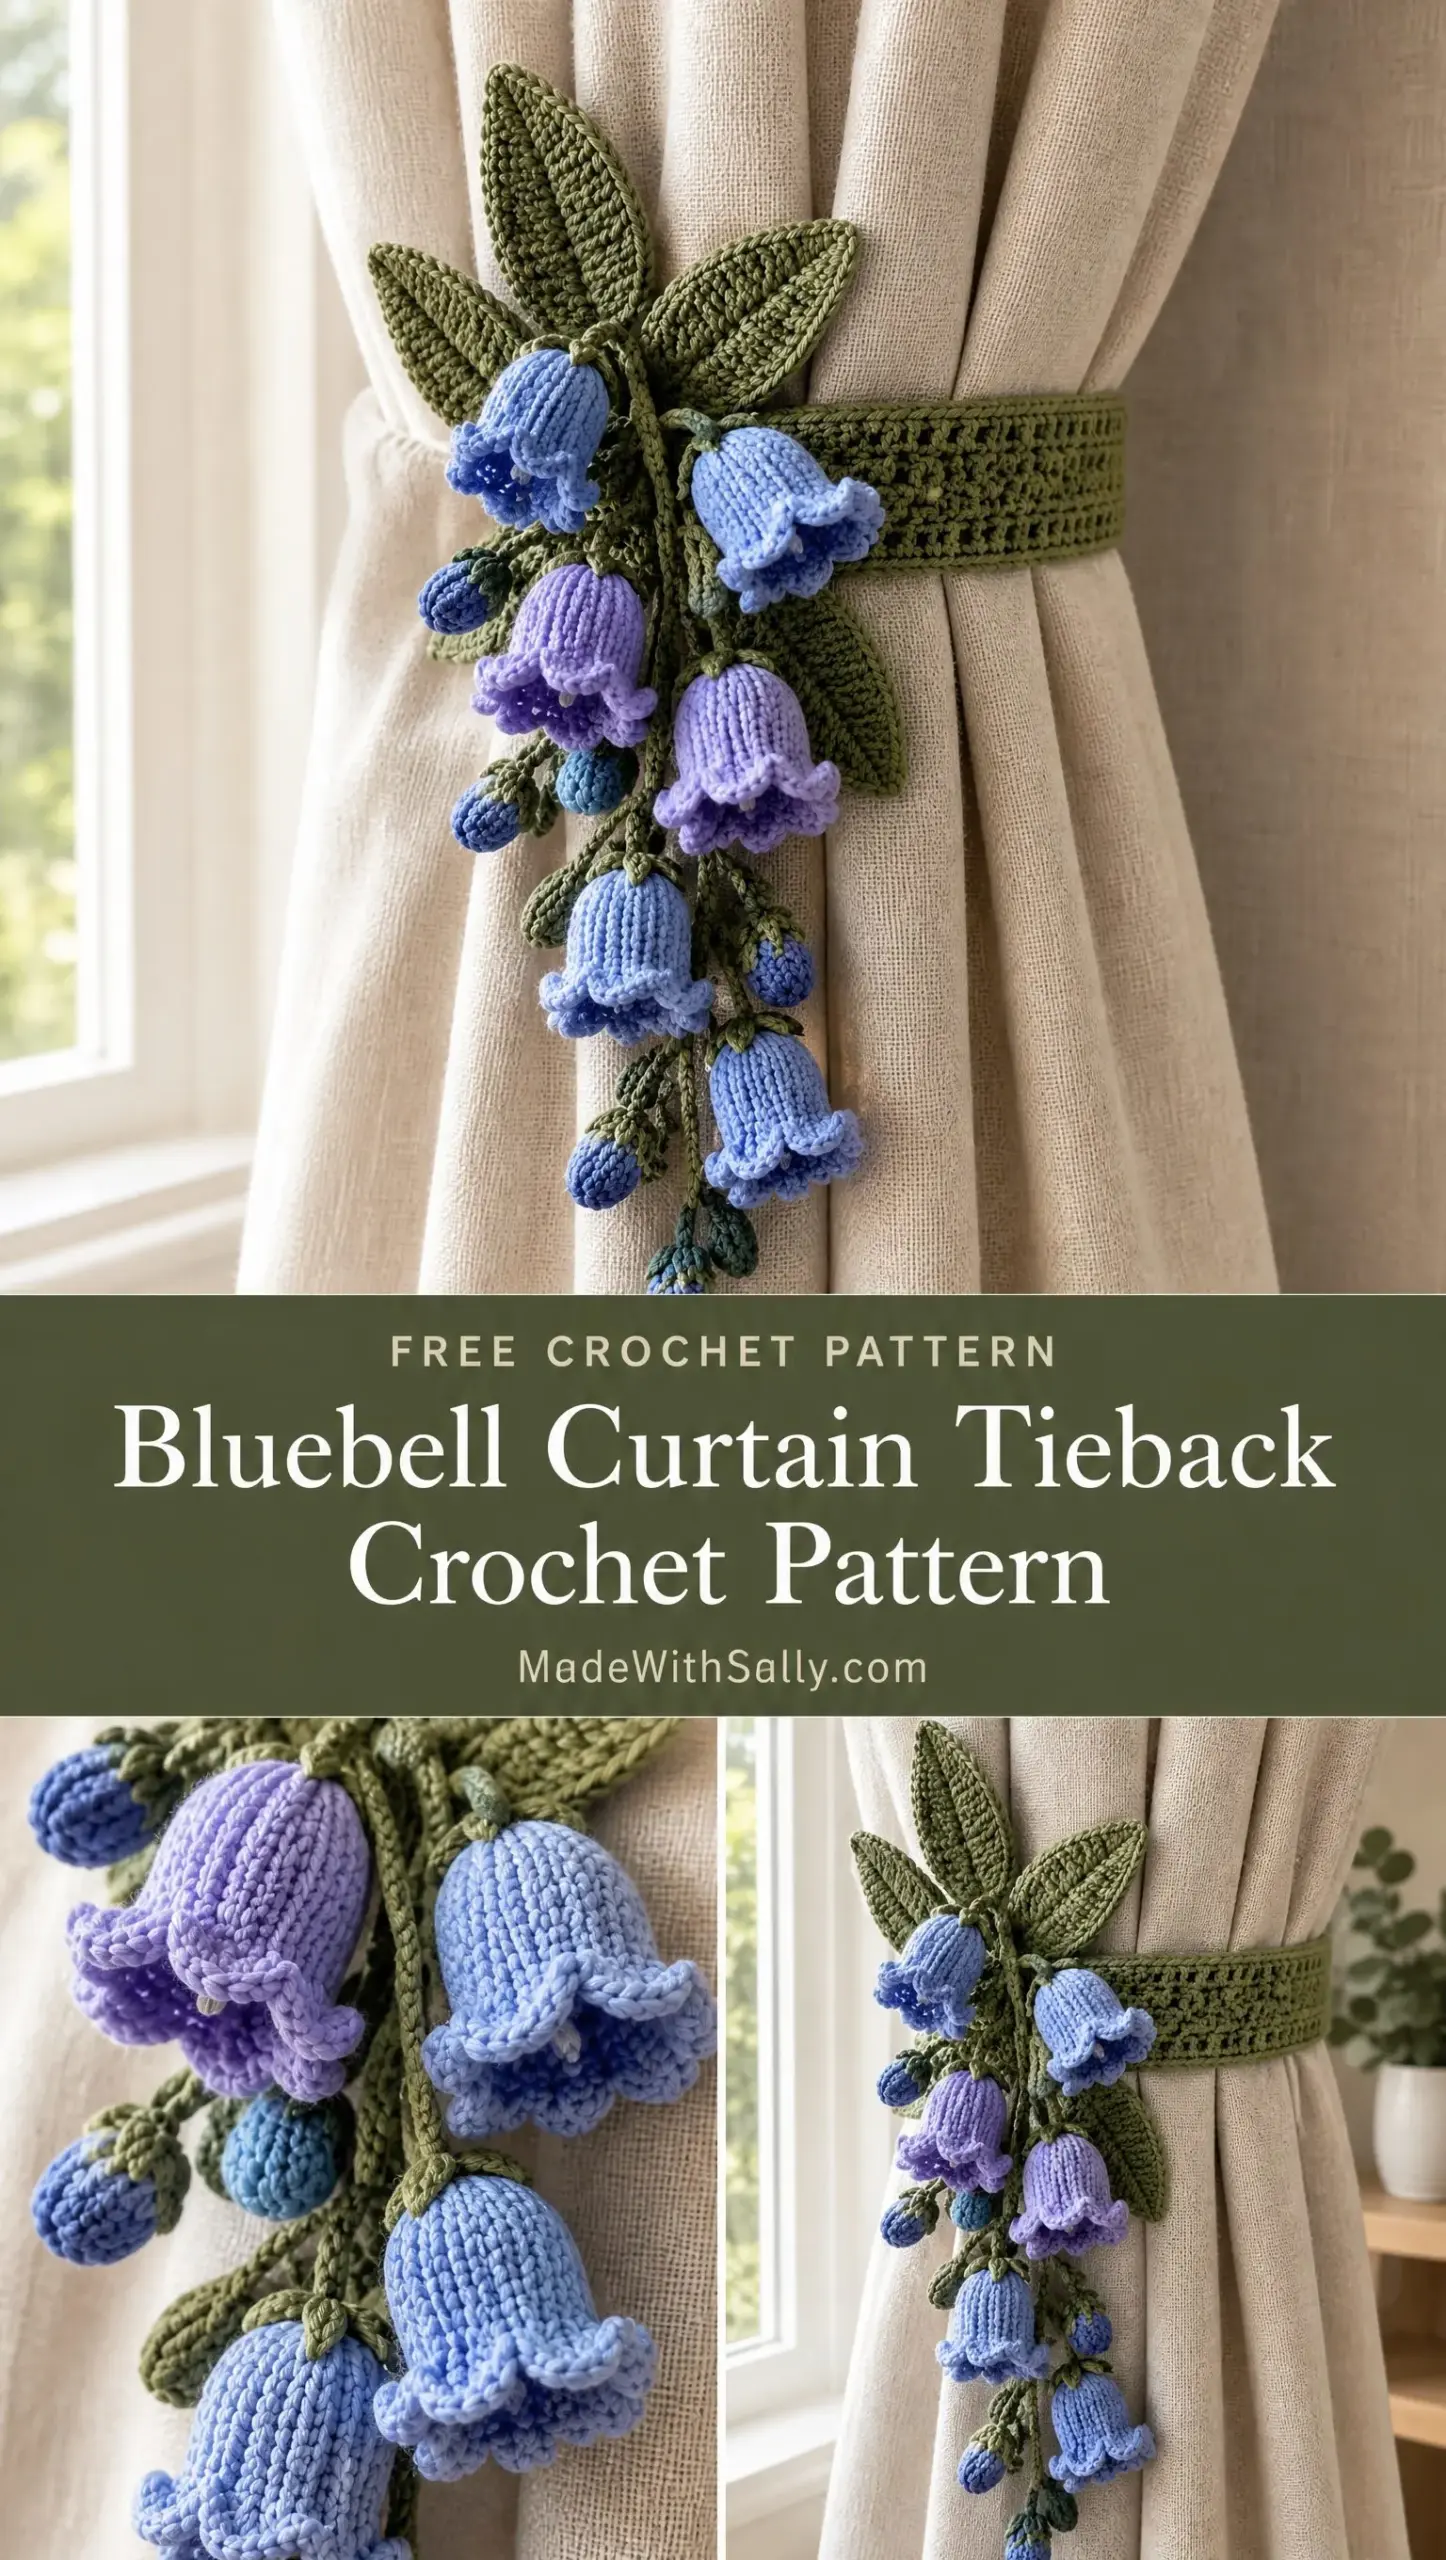
The construction on this tieback is genuinely interesting. You will create hollow bell-shaped flowers worked in the round, a textured tube band using back loop only stitches, and delicate branching chains that mimic real bluebell stems. Everything comes together in a cascading floral spray that looks far more complicated than it actually is.
I will be honest with you. This pattern sits at an intermediate skill level. You need to be comfortable with working in the round, shaping, and assembly. But if you have made amigurumi or any kind of 3D crochet flowers before, you already have the skills to make this beautiful.
Why This Bluebell Tieback Works So Well
The finished piece brings a cottage garden feel into any room. The bluebells hang naturally, catching light and adding soft movement to your window treatment. Unlike stiff fabric tiebacks, this crocheted version has a gentle flexibility that drapes beautifully around gathered curtains.
What I love most is how the different blue shades create depth. The pattern calls for powder blue, periwinkle, and soft violet, which gives you that natural color variation you see in real bluebell woods. Against the pale sage green band and foliage, the effect is stunning.
Materials You Will Need
Yarn:
Tools:
Cotton yarn works best for this project because it holds the bell shapes crisply and has a lovely subtle sheen. The medium-fine weight gives you delicate flowers without being so thin that the work becomes tedious.
Finished Measurements
The band length is adjustable based on your curtain width. You will simply chain more or fewer stitches at the foundation stage to customize the fit.
Abbreviations and Stitch Definitions
Let me walk you through every stitch abbreviation used in this pattern. If you are newer to crochet patterns, bookmark this section.
ch (chain): The foundation stitch. Yarn over, pull through the loop on your hook. This creates a chain link.
sl st (slip stitch): Insert hook into stitch, yarn over, pull through both the stitch and the loop on your hook in one motion. This is your shortest, flattest stitch.
sc (single crochet): Insert hook into stitch, yarn over and pull up a loop (two loops on hook), yarn over and pull through both loops. A basic short stitch.
hdc (half double crochet): Yarn over first, then insert hook into stitch, yarn over and pull up a loop (three loops on hook), yarn over and pull through all three loops at once. Slightly taller than single crochet.
dc (double crochet): Yarn over, insert hook into stitch, yarn over and pull up a loop, yarn over and pull through two loops, yarn over and pull through remaining two loops. A tall stitch that creates the pretty scallops on your bell edges.
inc (increase): Work two stitches into the same stitch. This adds width to your piece.
dec (decrease): Work two stitches together as one. This narrows your piece.
st (stitch): Refers to a single stitch.
BLO (back loop only): Instead of inserting your hook under both loops at the top of a stitch, you only go under the back loop. This creates a ridged texture.
Construction Overview
This tieback is made in four sections that you will assemble at the end:
1. Textured sage curtain band
2. Hollow bluebell flower bells
3. Branching green chains and leaves
4. Assembly and concealed closure
I recommend making all your components first, then laying everything out before you start stitching pieces together. This lets you arrange the flowers and leaves exactly how you want them.
The Sage Textured Band Pattern
This band forms the foundation of your tieback. The back loop only technique creates beautiful horizontal ridges that catch the light.
Foundation:
Chain 55 stitches or enough to wrap comfortably around the gathered curtain.
Row 1:
Sc in second chain from hook and across. Chain 1, turn.
Row 2:
Sc in BLO across. Chain 1, turn.
Row 3:
Hdc across. Chain 1, turn.
Row 4:
Sc in BLO across.
Repeat Rows 2 to 4 until the band reaches 5 to 7 cm width.
Finishing the Band:
Fold the band lengthwise and crochet or sew the long edges together, creating a neat textured tube. Add a hidden snap, button loop, or concealed closure at the ends.
The tube construction gives the band body and structure. It wraps around your curtain without flopping or twisting.
Bluebell Flower Pattern
Each flower is a small hollow bell with a scalloped opening. This is where the magic happens. These little bells look incredibly realistic when finished.
Flower Body:
With bluebell color yarn:
Round 1:
Make a magic ring. Work 6 sc into ring. Join.
If you have never made a magic ring before, it is simply an adjustable loop that you work your first stitches into. You can then pull the tail to close any gap in the center. There are many video tutorials online if you need a visual.
Round 2:
Inc in each stitch around. (12 sts)
Round 3:
Sc around.
Round 4:
Sc, inc around. (18 sts)
Rounds 5 through 8:
Sc around to create a narrow bell shape.
Round 9:
Sc around while lightly decreasing toward the top attachment point.
The decreases in Round 9 help narrow the top of the bell where it will attach to the stem. You do not need to follow a strict decrease count here. Just work a few decreases evenly spaced to close up the top slightly.
Scalloped Bell Rim:
This is what gives your bluebells that characteristic wavy edge.
Attach yarn at the open edge.
Work:
sl st, 3 dc in next stitch, sl st in next stitch
Repeat around to create soft bell scallops.
The pattern of slip stitch, three double crochets, slip stitch creates little fans around the bell opening. These naturally curl outward like real bluebell petals.
Create flowers in mixed sizes and colors:
I suggest making at least 8 to 12 flowers total. You can always make more if you want a fuller spray. Mix up the colors as you go.
Optional: Add a tiny bit of stuffing inside each bell to help it hold its shape. This is not required, but it does give the flowers more body.
Branching Chains and Stems
Use sage green yarn for all stems and branches.
Main stem:
Chain 25 to 35 stitches depending on desired length.
Side branches:
Attach yarn and make smaller chains of 8 to 15 stitches at staggered heights.
Secure each flower to a branch with invisible whip stitches.
When you attach your flowers, angle them so they face downward, just like real bluebells hang from their stems. This natural positioning makes all the difference in the final look.
Ribbed Leaves Pattern
Make three elongated leaves. These add fullness and frame your flower cluster beautifully.
Leaf:
Chain 14.
Row 1:
Sc along one side of chain, 3 sc in end stitch, then sc back along opposite side.
This creates an oval shape as you work around both sides of the foundation chain.
Row 2:
Work hdc through BLO to create rib texture, increasing slightly around the tip.
Row 3:
Sc around and taper the pointed end.
The BLO technique on the leaves matches the textured band and gives your leaves realistic vein-like ridges.
Sew leaves around the flower cluster:
This arrangement creates movement and visual interest. Do not worry about perfect symmetry. Real plants are not symmetrical either.
Assembly Instructions
Now comes the fun part. Putting everything together.
1. Position the floral spray slightly left of center on the sage band.
2. Stitch stems securely to the band.
3. Add flowers at staggered heights for a natural cascade.
4. Hide all yarn tails inside the band and stems.
5. Check that flowers remain lightweight and flexible.
6. Attach the finished tieback around a gathered linen curtain.
Take your time with assembly. This is where your artistic eye comes in. Step back frequently and look at the overall arrangement. Move things around until you love how it looks.
Finishing Tips for Best Results
Use tight, even stitches so the bells hold their shape. Loose stitches will cause your flowers to droop and lose their definition.
Steam lightly through a cloth to relax cotton fibers. Do not press directly with a hot iron, as this can flatten your stitches.
Block leaves and flowers individually before assembly. Pin them to a blocking mat in their desired shape and mist with water. Let them dry completely.
Reinforce flower connections for long-lasting use. Go over your attachment points twice with the tapestry needle. These tiebacks will be handled regularly, so secure stitching matters.
Customization Ideas
Once you master this basic pattern, consider these variations:
Different color schemes: Try cream and dusty pink for a romantic look, or white and silver-grey for something more modern.
Add beads: Tiny pearl beads at the center of each bell add sparkle and weight that helps the flowers hang naturally.
Scale up or down: Use thicker yarn and a larger hook for a chunky, farmhouse style tieback. Use thread weight yarn and a tiny hook for an ultra-delicate version.
More flowers: Double the number of bells for a fuller, more dramatic cascade.
Troubleshooting Common Issues
Bells losing shape: Your tension may be too loose. Try going down a hook size or consciously working tighter stitches.
Flowers look flat: Make sure you are creating enough rounds before the scalloped edge. The rounds 5 through 8 section builds the bell depth.
Stems too stiff: Chain stitches naturally have some stiffness. This is actually good for stems, as it helps them hold their shape.
Assembly looks messy: Take your time hiding yarn tails. Use a smaller tapestry needle to weave ends deep inside the band and stems where they will never show.
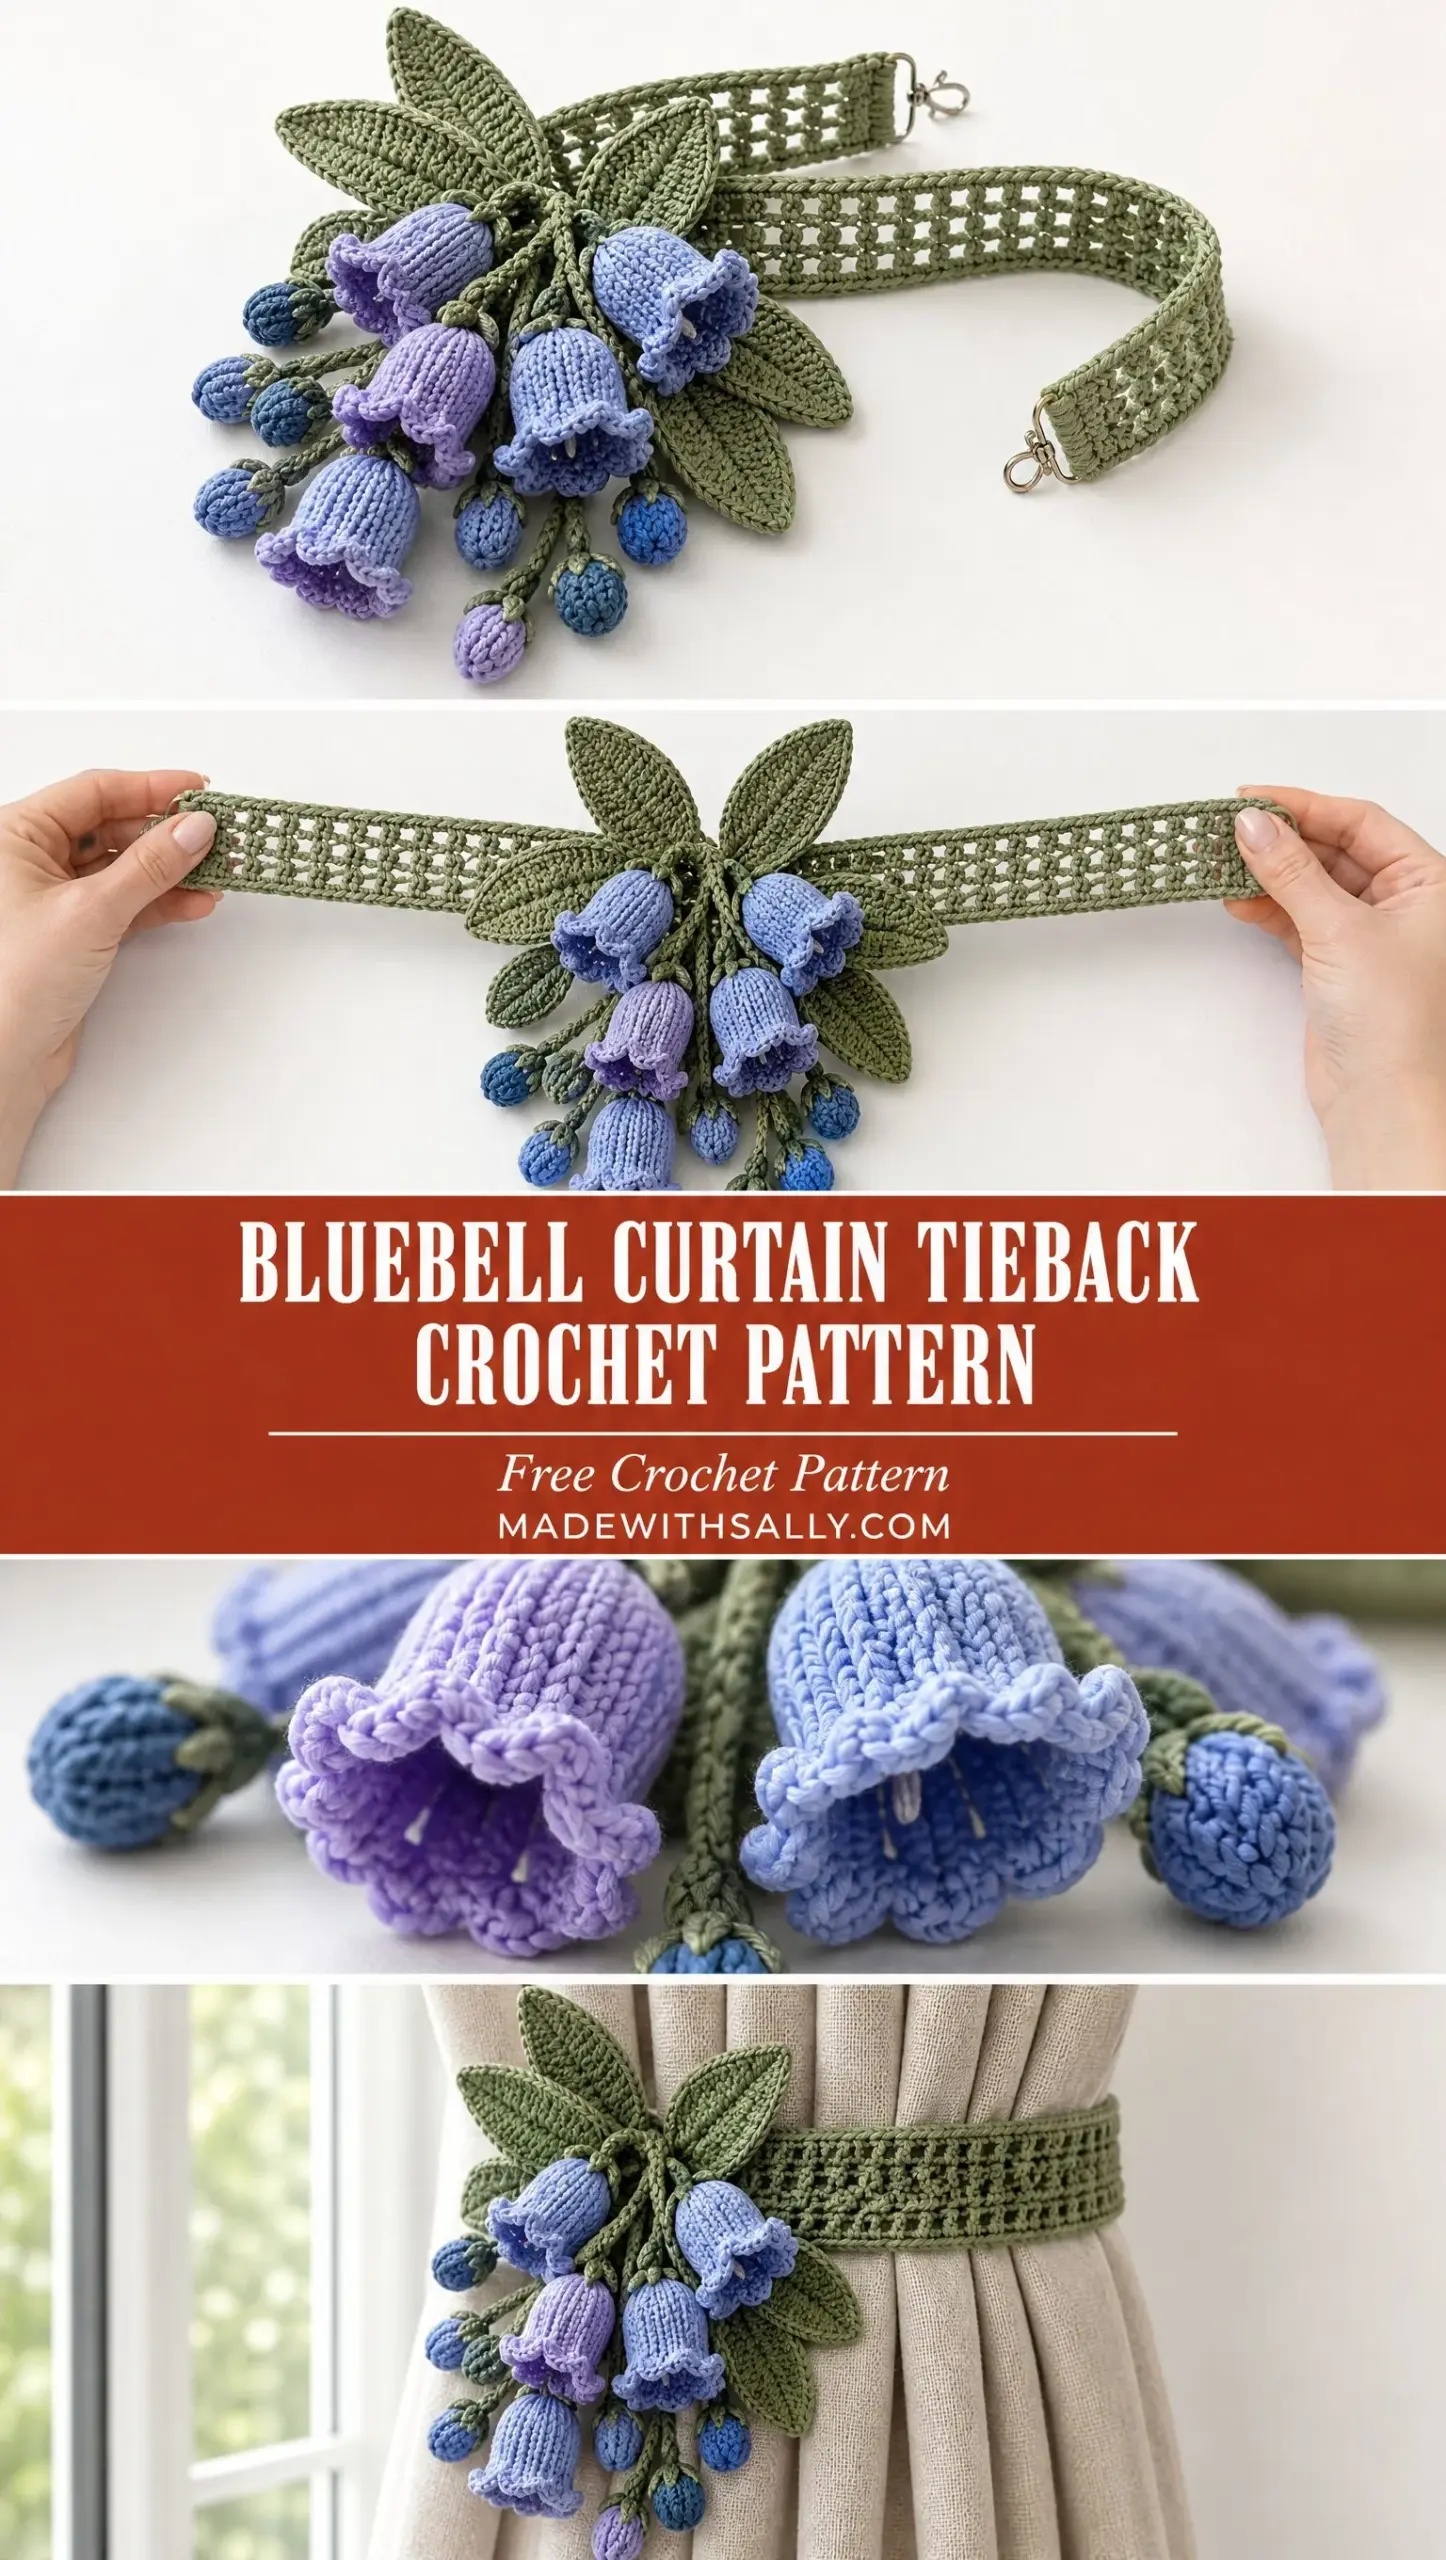
Your Bluebell Curtain Tieback Is Complete
You have created something truly special. This crochet pattern combines several techniques into one elegant home decor piece that will bring joy every time you see it.
The cascading bluebells, the textured sage band, the delicate leaves. Everything works together to create a tieback that looks like it belongs in a high-end home boutique.
Thank you so much for choosing this pattern. I hope it brought you as much satisfaction to make as it did for me to design. If you create your own bluebell tieback, I would absolutely love to see it. Share your finished photos on Instagram or in my Facebook group. Seeing your makes is honestly the best part of my day.
Save this bluebell curtain tieback crochet pattern to your Pinterest boards so you can find it whenever you are ready to start. And if you make one, please drop a comment below. I love hearing about your projects and seeing how everyone puts their own spin on the design.
Want a Quick & Easy Printable Version?
Get a clean, beautifully formatted PDF of this pattern — easy to follow step by step, ready to print or save on any device. No scrolling, no distractions, just the pattern.
Get the Printable PDF →