
When I sat down to design this tote, I had a very specific vision in mind. I wanted something that felt elegant enough for an evening out but practical enough to actually use. The mandala construction had to be the star, with that gorgeous dimensional flower center catching the light just right.
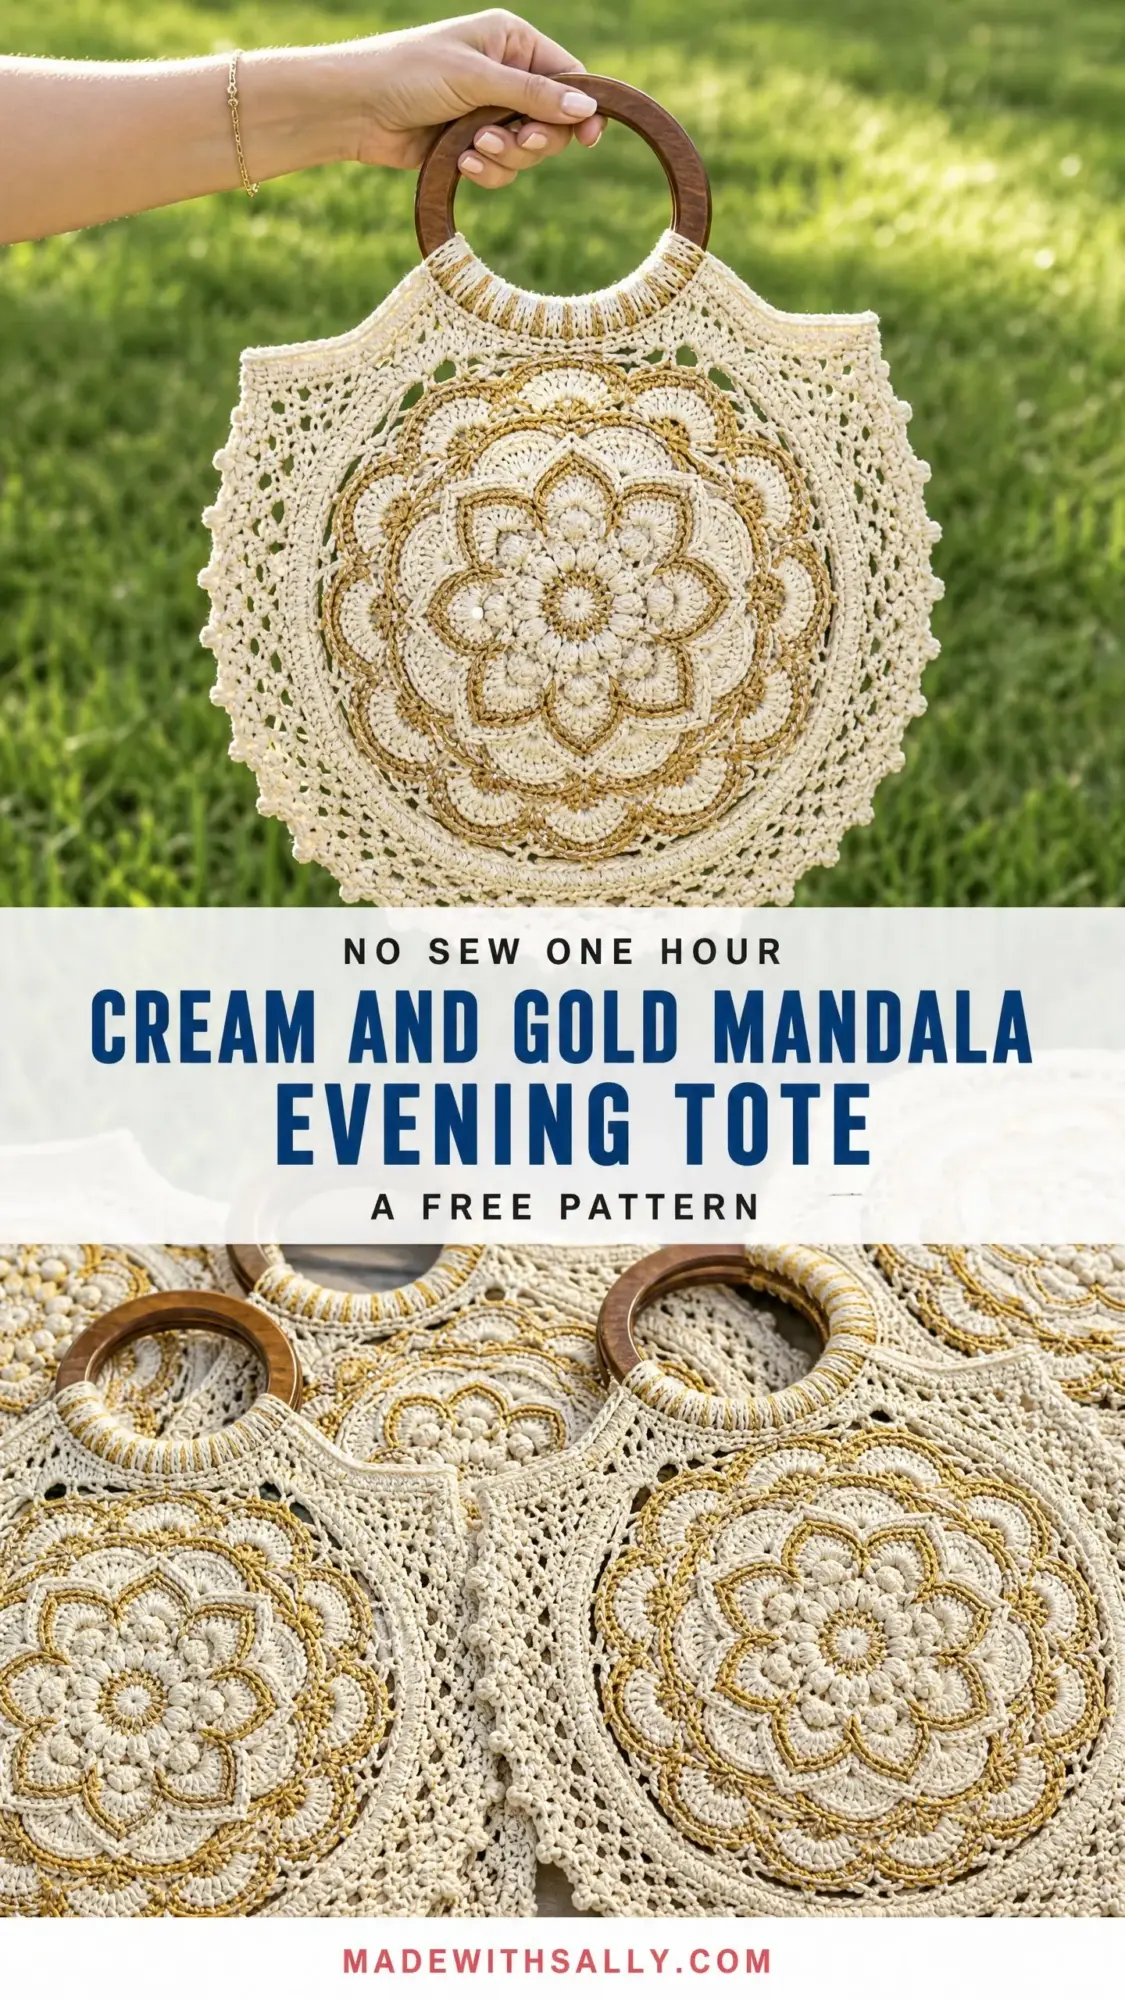
I spent weeks playing with stitch combinations to get the layered petal effect. The bobbles needed to pop forward. The lace border had to frame everything without overwhelming the center motif. And that subtle gold accent running through the inner rounds? That took some trial and error to get the balance right.
I am SO pleased with how this cream and gold mandala evening tote turned out. The wooden ring handles give it a boho sophistication that I absolutely love. Every time I carry it, someone asks where I got it. And honestly? That never gets old.
About This Crochet Pattern
This stunning mandala tote bag features two identical circular panels joined to create a structured bag with serious visual impact. The construction method is clever but approachable. You work each mandala flat in the round, starting from a magic ring and building outward through 18 rounds of increasingly intricate lacework.
The raised center motif uses front post double crochet (FPdc) stitches and 5-dc bobbles to create that three-dimensional flower effect you see in the photos. The gold accent yarn weaves through just a few strategic rounds, giving warmth and shimmer without overwhelming the cream base.
Skill level: Advanced intermediate. If you have completed a doily, a granny square bag, or any lace project before, you can absolutely handle this. The techniques include working in the round, post stitches, bobbles, and joining motifs. Nothing here is impossible, just take it one round at a time.
Time estimate: Plan for 20 to 28 hours total. Each mandala panel takes roughly 8 to 10 hours. Assembly, edging, and finishing add another 4 to 8 hours. This is not a weekend project, but every hour is worth it.
Finished Measurements
Your completed bag will measure:
Materials You Will Need
Yarn A (Main Color, Cream):
Approximately 650 yards / 595 meters of DK weight 100% cotton or cotton-blend yarn in natural cream or off-white.
Yarn B (Accent Color, Gold):
Approximately 80 yards / 73 meters of DK weight or light worsted metallic or cotton-blend yarn in champagne, wheat, or soft gold. This accent yarn appears only in select center rounds.
Yarn Suggestions:
Substitution note: Any DK weight (category 3) cotton works beautifully. Avoid stretchy or fuzzy yarns. Lace stitches need clean definition to shine.
Hooks:
Notions:
Gauge
Using Yarn A and US E-4 / 3.5 mm hook in double crochet:
16 dc x 9 rows = 4 inches / 10 cm square, blocked.
Mandala gauge check: After completing Round 6, your piece should measure approximately 4.5 inches / 11.5 cm in diameter.
Gauge matters here because your two panels must match perfectly. Block your swatch before starting the actual project.
Abbreviations and Stitch Definitions
Let me walk you through every stitch you will encounter. Understanding these before you begin makes the pattern flow much more smoothly.
Basic Abbreviations:
Special Stitches for This Mandala Tote Pattern
These special stitches create the dimensional texture that makes this bag so eye-catching. Read through each one before you start crocheting.
5-DC Bobble (BOB)
This stitch creates those beautiful raised bumps in the center motif.
1. YO, insert hook into indicated stitch or space.
2. YO, pull up a loop. YO, pull through 2 loops. (One incomplete dc made.)
3. Repeat steps 1 and 2 four more times in the same stitch or space. You will have 6 loops on hook.
4. YO, pull through all 6 loops on hook.
5. Ch 1 to close and lock the bobble.
The bobble pushes to the right side of your work. That closing ch-1 counts as the top of the bobble.
Picot-3
A tiny decorative point that adds elegance to the border.
1. Ch 3.
2. Sl st into the first ch made (the base of the ch-3).
Shell Stitch (SHELL)
Work [2 dc, ch 2, 2 dc] all into the same stitch or space. This creates a 4-dc shell with a ch-2 center arch.
Large Shell (LSHELL)
Work [3 dc, ch 2, 3 dc] all into the same stitch or space. This creates a 6-dc shell with a ch-2 center arch.
Front Post Double Crochet (FPdc)
This stitch wraps around the post (vertical bar) of a stitch from the previous round, creating a raised ridge on the right side.
1. YO, insert hook from front to back to front around the post of the indicated stitch.
2. YO, pull up a loop. [YO, pull through 2 loops] twice.
Back Post Double Crochet (BPdc)
The opposite of FPdc. Insert your hook from back to front to back around the post. This stitch recedes behind the fabric surface.
Front Post Treble Crochet (FPtr)
1. YO twice, insert hook from front to back to front around the post of the indicated stitch.
2. YO, pull up a loop. [YO, pull through 2 loops] three times.
Pattern Notes Before You Begin
Read these through completely. They will save you confusion later.
1. You will make two identical mandala panels, one for the front and one for the back.
2. The gold accent (Yarn B) appears only in Rounds 4, 5, and 8. All other rounds use Yarn A.
3. Work with the right side always facing. Do not turn unless specifically instructed. Join each round with a sl st to the first stitch.
4. The beginning ch-3 counts as the first dc throughout the mandala rounds unless otherwise noted.
5. The two finished panels are joined with a sc seam along the bottom curve and both side edges. The top remains open for handles.
6. Block each panel before assembly. This step is critical. Cotton lace curls before blocking, and that is completely normal.
7. Stitch counts at the end of each round reflect working stitches, not chains within chain spaces.
Step by Step Instructions: Mandala Panel (Make 2)
Work Rounds 1 through 18 in Yarn A unless instructed to switch to Yarn B.
Round 1
Make a magic ring.
Ch 3 (counts as first dc). Work 11 dc into the ring. Join with sl st to the top of the beginning ch-3. Pull ring closed. (12 dc)
Round 2
Ch 3, dc in the same stitch as join. 2 dc in each remaining stitch around. Join with sl st to top of beginning ch-3. (24 dc)
Round 3
Ch 3, FPdc around the post of the same stitch as join. Dc in next st, FPdc around the post of the next st. Repeat from to around. Join with sl st to top of beginning ch-3. (24 sts: 12 dc, 12 FPdc)
Round 4 (Switch to Yarn B)
Fasten off Yarn A. Join Yarn B with sl st in any dc (non-FPdc) stitch from Round 3.
Ch 1 (does not count as st). Sc in the same st. Ch 3, sk the FPdc, sc in the next dc. Repeat from to around, ending with ch 3, sk last FPdc. Join with sl st to first sc. Fasten off Yarn B. (12 sc, 12 ch-3 spaces)
Round 5 (Continue with Yarn B)
Join Yarn B with sl st in any ch-3 space.
Sl st into ch-3 sp, ch 3, 2 dc in same sp, ch 2, 3 dc in same sp. This forms the first LSHELL. LSHELL in next ch-3 sp. Repeat from to in each remaining ch-3 space around. Join with sl st to top of beginning ch-3. Fasten off Yarn B. (12 large shells: 72 dc total, 12 ch-2 spaces)
Round 6 (Yarn A)
Join Yarn A with sl st in any ch-2 space of a LSHELL.
Ch 1 (does not count as st). Sc in ch-2 sp. Ch 5, sc in next ch-2 sp. Repeat from to around, ending with ch 5. Join with sl st to first sc. (12 sc, 12 ch-5 spaces)
Round 7 (Yarn A)
Sl st into the ch-5 space. Ch 3 (counts as dc). 6 dc in same ch-5 space. 7 dc in next ch-5 space. Repeat from to around. Join with sl st to top of beginning ch-3. (84 dc)
Round 8 (Switch to Yarn B)
Join Yarn B with sl st in the 4th dc of any 7-dc group (the center dc).
Ch 1 (does not count as st). BOB in same st. Ch 5, sk 3 dc, sc in next dc (last dc of group), ch 5, sk 3 dc of next group, BOB in 4th dc of next group. Repeat from to around, ending last repeat with ch 5, sk 3 dc of last group, sc in last dc of last group, ch 5, sk 3 dc. Join with sl st to top of first BOB. Fasten off Yarn B. (12 BOBs, 12 sc, 24 ch-5 spaces)
Round 9 (Yarn A)
Join Yarn A with sl st in any ch-5 space before a sc.
Ch 1 (does not count as st). Sc in same ch-5 sp. Ch 3. Sc in the sc. Ch 3. Sc in next ch-5 sp. Ch 5. Sc in next ch-5 sp. Ch 3. Sc in the sc. Ch 3. Sc in next ch-5 sp. Ch 5. Repeat from to around. Join with sl st to first sc. (36 sc, 24 ch-3 spaces, 12 ch-5 spaces)
Round 10 (Yarn A)
Sl st across into the first ch-3 sp. Ch 1. Sc in ch-3 sp. Ch 3. Sc in next ch-3 sp. Ch 7. Sc in next ch-3 sp. Ch 3. Sc in next ch-3 sp. Repeat from to around, ending with ch 7. Join with sl st to first sc. (24 sc, 12 ch-3 spaces, 12 ch-7 spaces)
Round 11 (Yarn A)
Sl st into the ch-3 sp. Ch 1. Sc in ch-3 sp. Ch 4. [3 dc, ch 3, 3 dc] in ch-7 sp (ARCH SHELL). Ch 4. Sc in next ch-3 sp. Repeat from to around. Join with sl st to first sc. (12 sc, 12 ARCH SHELLS, 24 ch-4 spaces)
Round 12 (Yarn A)
Sl st across to the ch-3 space at center of first ARCH SHELL. Ch 1. Sc in ch-3 sp. Ch 5. Sc in sc between two ARCH SHELLS. Ch 5. Sc in ch-3 sp of next ARCH SHELL. Repeat from to around, ending with ch 5. Join with sl st to first sc. (24 sc, 24 ch-5 spaces)
Round 13 (Yarn A)
Sl st into ch-5 sp. Ch 3 (counts as dc). 4 dc in same sp. 5 dc in next ch-5 sp. Repeat from to around. Join with sl st to top of beginning ch-3. (120 dc)
Round 14 (Yarn A)
Ch 5 (counts as dc + ch 2). Sk 2 dc. Dc in next dc. Ch 2. Sk 2 dc. Repeat from to around. Join with sl st to 3rd ch of beginning ch-5. (40 dc, 40 ch-2 spaces)
Round 15 (Yarn A)
Sl st into ch-2 sp. Ch 1. Sc in ch-2 sp. Ch 4. Sc in next ch-2 sp. Repeat from to around, ending with ch 4. Join with sl st to first sc. (40 sc, 40 ch-4 spaces)
Round 16 (Yarn A)
Sl st into ch-4 sp. Ch 3 (counts as dc). 2 dc in same sp. 3 dc in next ch-4 sp. Repeat from to around. Join with sl st to top of beginning ch-3. (120 dc)
Round 17 (Yarn A)
Ch 3 (counts as first dc). Dc in each of next 2 dc. Ch 2. Dc in each of next 3 dc. Ch 2. Repeat from to around. Join with sl st to top of beginning ch-3. (120 dc in groups of 3, 40 ch-2 spaces)
Round 18 (Yarn A) – Final Mandala Round
Sl st into ch-2 sp. Ch 1. [Sc, ch 3, sc] in same ch-2 sp (picot cluster). [Sc, ch 3, sc] in next ch-2 sp. Repeat from to around. Join with sl st to first sc. Fasten off Yarn A. Weave in ends. (80 sc, 40 ch-3 picot loops)
Checkpoint: Before blocking, your mandala should measure approximately 13 to 13.5 inches / 33 to 34 cm in diameter. After blocking, it should reach 14 inches / 35.5 cm.
Make a second identical panel.
Blocking Your Mandala Panels
Do not skip this step. I know blocking can feel tedious, but it transforms your mandala from a slightly curled circle into the flat, crisp, professional-looking panel you see in the photos.
1. Soak each panel in cool water for 15 to 20 minutes.
2. Gently squeeze out excess water. Do not wring.
3. Lay flat on blocking mats.
4. Pin the outer edge into a perfect circle, using plenty of pins around the picot border.
5. Allow to dry completely before unpinning.
Assembly Instructions
Now for the satisfying part where your two panels become an actual bag.
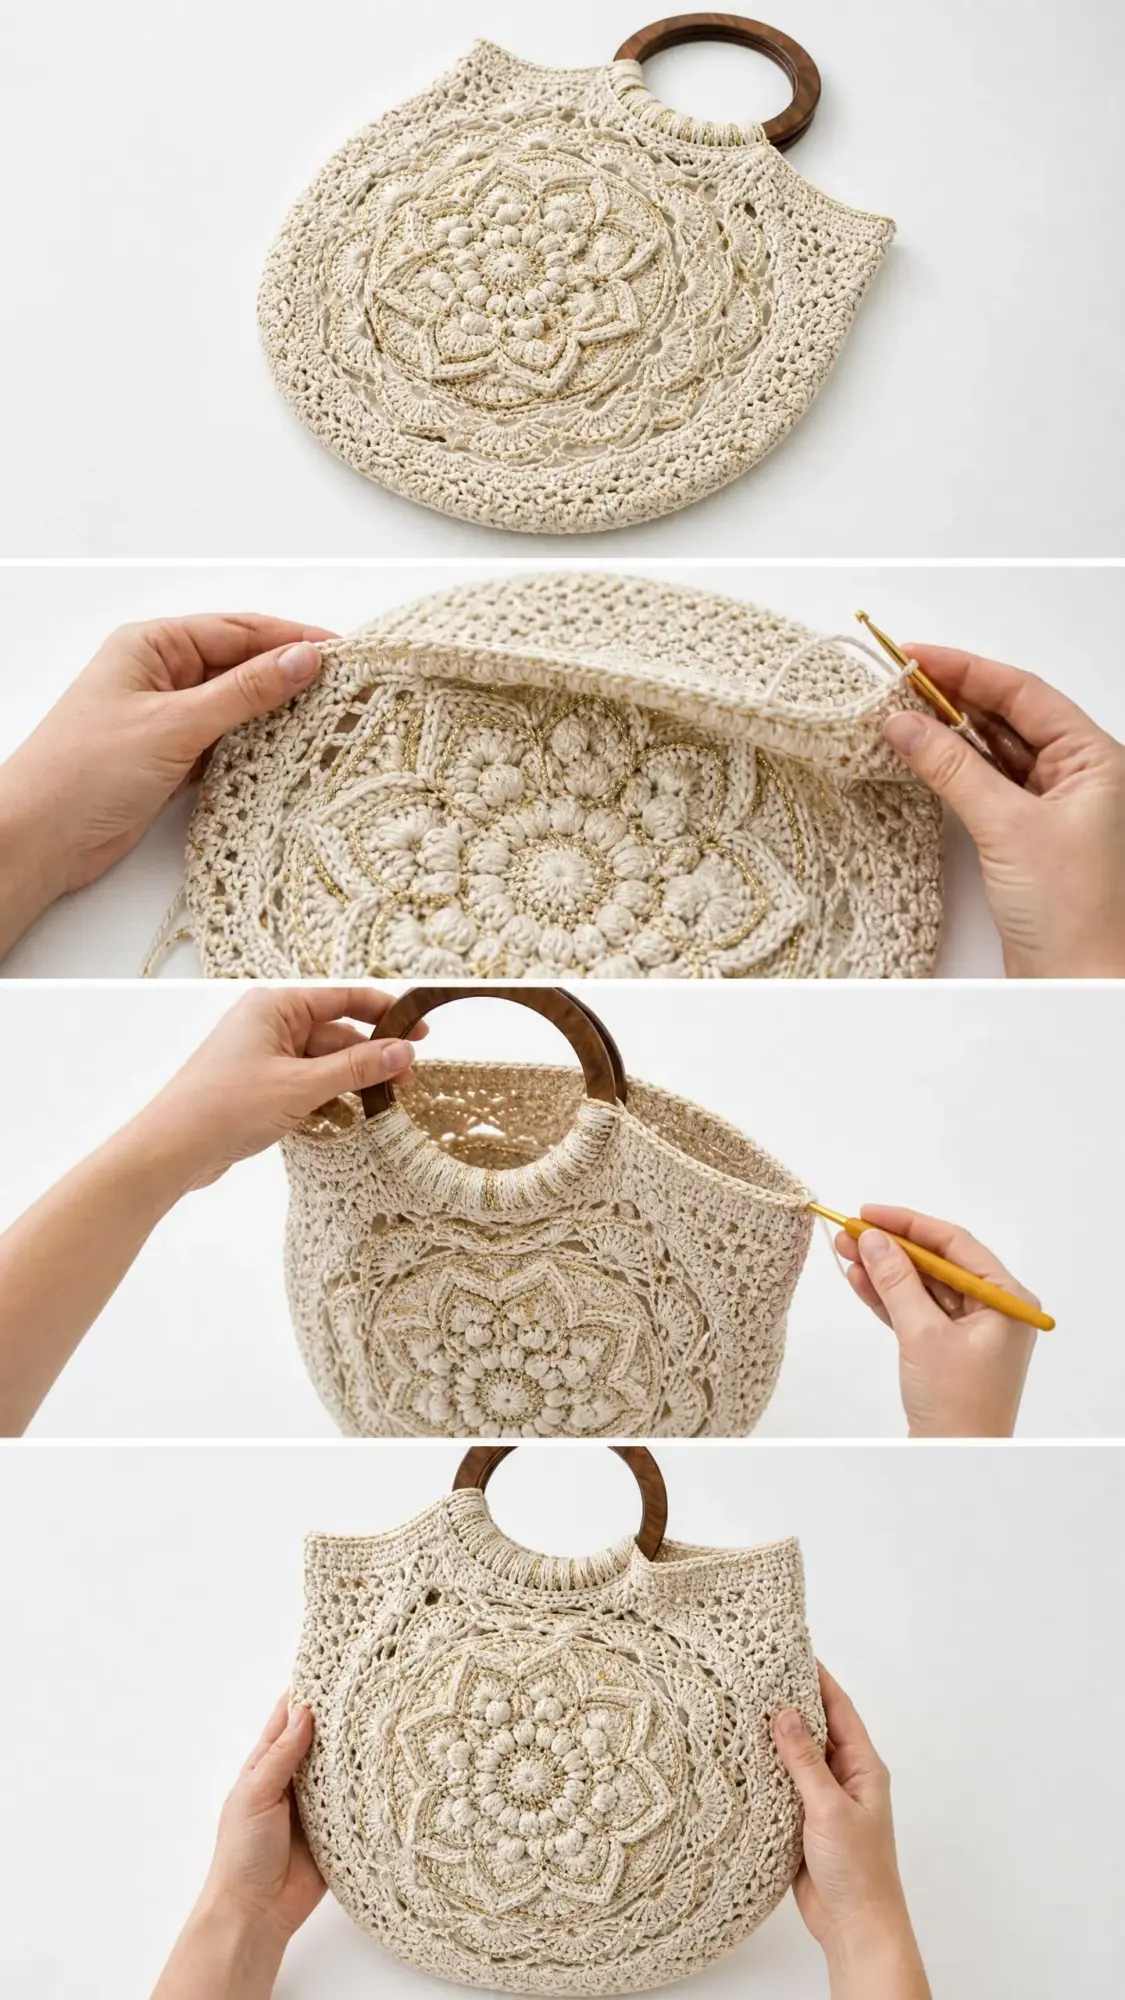
Step 1: Lay both blocked panels with wrong sides facing outward and right sides facing inward. Align the mandala motifs so they mirror each other.
Step 2: Using Yarn A and the US F-5 / 3.75 mm hook, join with a sl st at the point that will become the lower side seam edge (approximately the 3 o’clock position on the circle).
Step 3: Working through both layers simultaneously, sc evenly around the lower portion of the circle from the right side seam point, across the bottom, to the left side seam point. This covers approximately the bottom 200 degrees of the circle. Work 1 sc per picot loop or dc group along the Round 18 edge of both panels together. Approximately 56 to 60 sc total. Fasten off and weave in ends.
Step 4: Turn the bag right side out through the top opening.
Step 5: The unsewn top edges curve naturally upward. These will attach to your wooden ring handles.
Optional Side Gusset Shaping
This adds the narrow side profile visible in the photos. It is optional but recommended.
Using Yarn A and E-4 / 3.5 mm hook, join at the left side join point at the top edge.
Row 1 (WS facing): Ch 1. Work 20 sc evenly down the left side edge. Turn.
Row 2: Ch 1. Sc in each sc across. Turn. (20 sc)
Row 3: Ch 1. Sc2tog, sc to last 2 sts, sc2tog. Turn. (18 sc)
Row 4: Ch 1. Sc in each sc across. Turn. (18 sc)
Row 5: Ch 1. Sc2tog, sc to last 2 sts, sc2tog. Turn. (16 sc)
Row 6: Ch 1. Sc in each sc across. Fasten off. (16 sc)
Repeat on the right side seam edge.
Handle Attachment
Step 1: Identify the top arc of the front panel, approximately 6 inches / 15 cm across.
Step 2: Fold this top arc over the flat lower edge of the wooden ring handle, bringing approximately 0.75 inch / 2 cm of fabric behind the ring.
Step 3: Using Yarn A and E-4 / 3.5 mm hook, work sc through both the folded layer and bag body simultaneously. Space stitches to gather the arc evenly, approximately 30 to 34 sc across. Fasten off.
Step 4: Repeat for the back panel and second ring handle.
Checkpoint: Hold the bag by the handles. The body should hang straight with the mandala centered on each face. If the fabric bunches unevenly, redo the sc join and redistribute the gathering.
Finishing Touches
Weave in all ends securely, at least 2 inches in two directions. This bag will be used and possibly washed.
Lightly block the finished bag by spritzing with water and shaping over a rounded form like a bowl or inflated balloon.
Optional lining: Cut two pieces of lining fabric to the mandala shape plus 0.5 inch seam allowance. Stitch around bottom and sides, leaving top open. Place inside bag with wrong sides together. Fold top edge under and hand stitch below handle attachment. A pale gold satin or neutral muslin works beautifully.
Size Customization Tips
Smaller version (11 inch diameter): Stop at Round 15, use a US D-3 / 3.25 mm hook, and use 3-inch ring handles.
Larger version (16 inch diameter): Add 2 additional lace rounds after Round 18. Use a US G-6 / 4 mm hook and worsted weight cotton.
More gold accent: Use Yarn B in additional rounds like 6, 9, or 12.
Subtler gold effect: Use Yarn B only in Round 5.
Care Instructions
Machine wash on gentle in a mesh bag with cool water and mild detergent, or hand wash. Do not wring. Press between clean towels to remove water. Reshape and lay flat or hang over a rounded form to dry. Do not tumble dry. Store stuffed with tissue paper to maintain shape.
You Did It!
This cream and gold mandala evening tote crochet pattern is truly a labor of love. Every bobble, every picot, every post stitch builds toward something gorgeous. When you carry it out for the first time and someone stops to admire it, you will know every hour was worth it.
Thank you so much for choosing this pattern. I hope you love making it as much as I loved designing it. If you want to share your finished tote, I would absolutely love to see it. Tag me on Instagram or post to my Facebook group.
If this pattern is going on your to-make list, be sure to save it to your Pinterest boards so you can find it easily when you are ready to start. And please drop a comment below if you make one. I love seeing your creations and hearing how the pattern worked up for you!
