
The Story Behind This Beach-Ready Design
I call this one the "Coastal Drift Tote," and it has been living in my notebook for almost three years now. The original sketch came from a trip to the Oregon coast, where I spent an entire afternoon watching the water shift from pale turquoise near the shore to deep navy blue where it met the horizon. I knew I wanted to capture that gradient in yarn somehow.
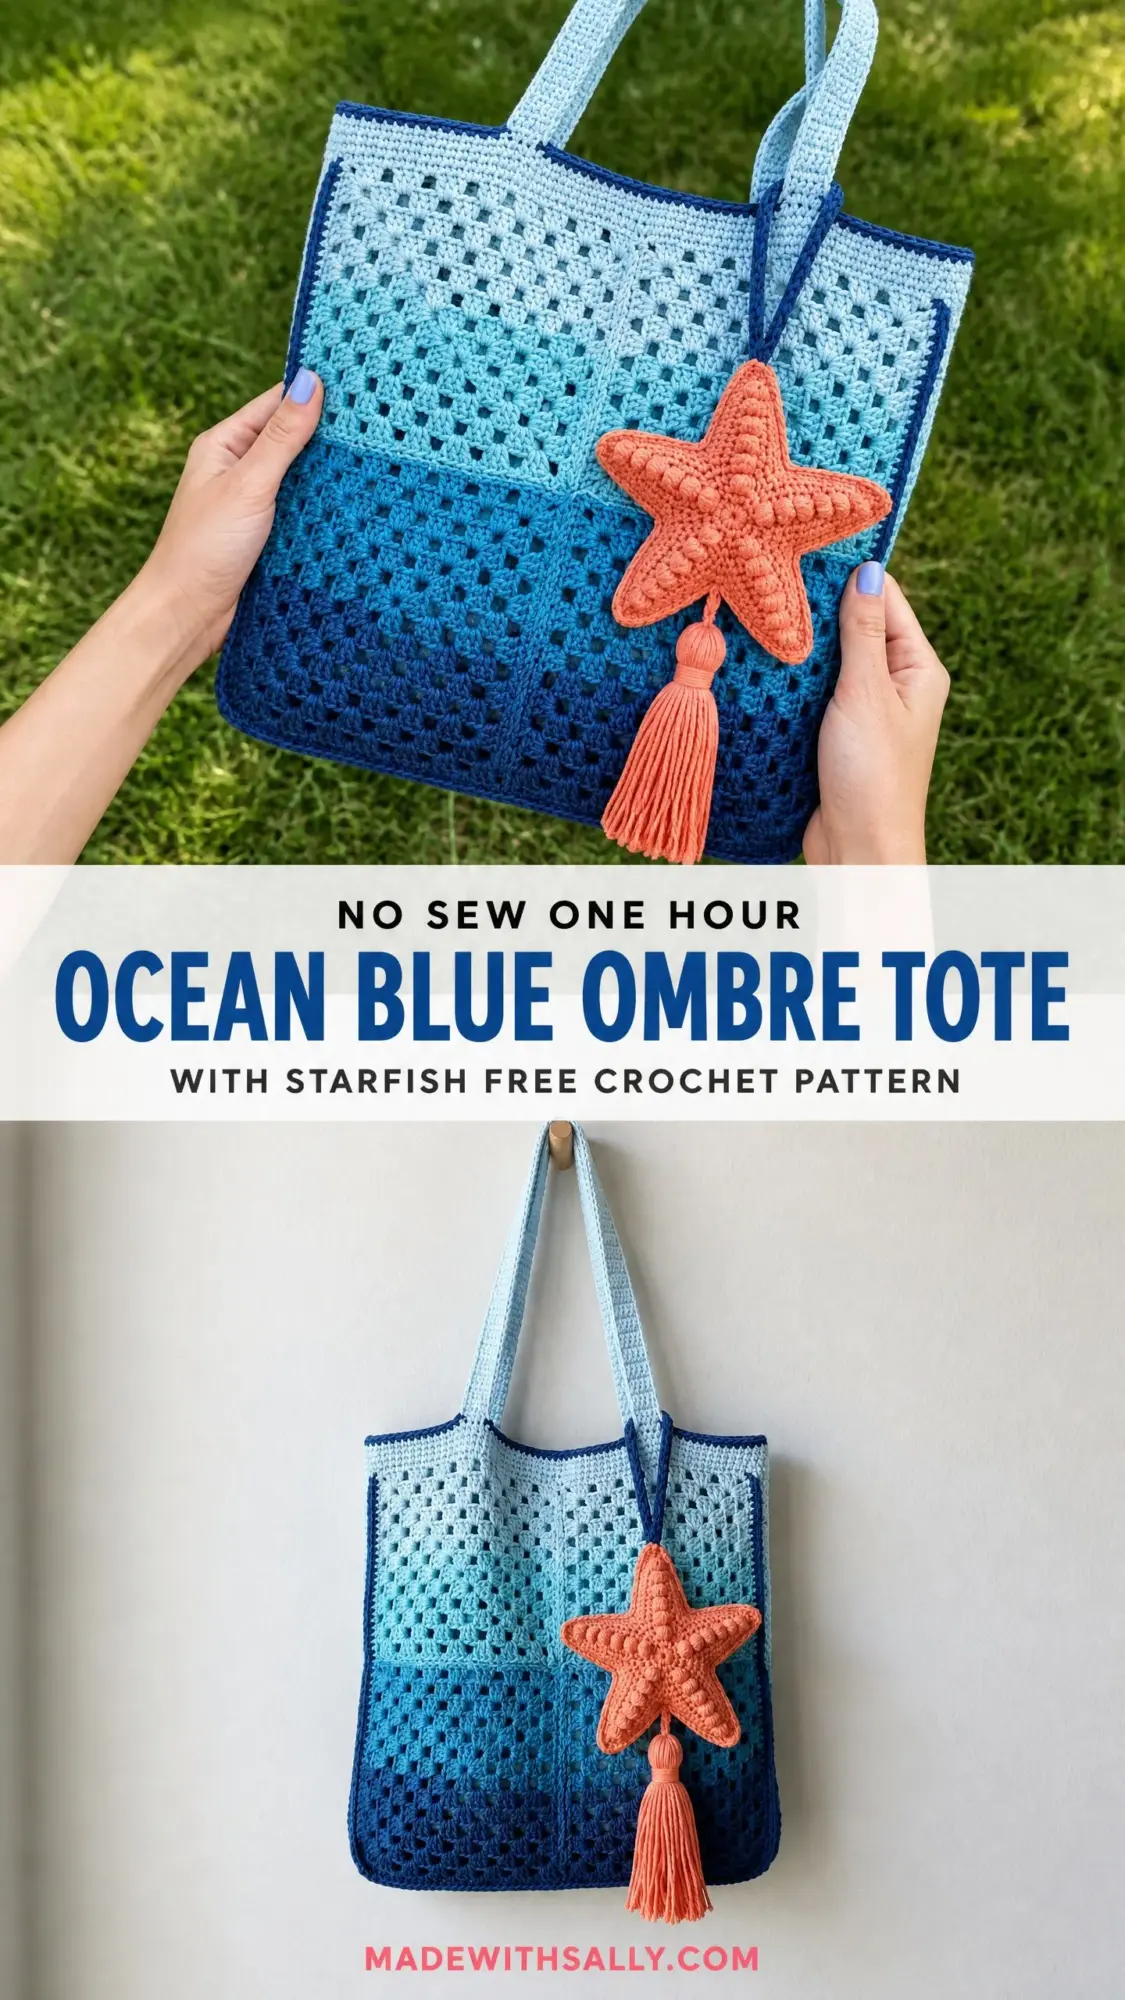
I finally pulled out that notebook page last summer when my sister asked if I could make her something special for her beach vacation. She wanted a roomy tote that could hold towels, sunscreen, and a good book. Something sturdy but pretty. Something that felt like the ocean itself.
This crochet pattern is the result of that request. Eight granny squares joined into a structured bag body, a continuous gusset for depth, sturdy shoulder straps, and a playful starfish charm to tie the whole coastal theme together. It took some trial and error to get the ombre flow just right, but I am genuinely thrilled with how this ocean blue ombre tote turned out.
What Makes This Tote Special
This is not your average granny square bag. The ombre color effect flows seamlessly from pale sky blue at the bag opening down through aqua and teal to deep navy at the base. It genuinely looks like layered ocean water when you step back and admire the finished piece.
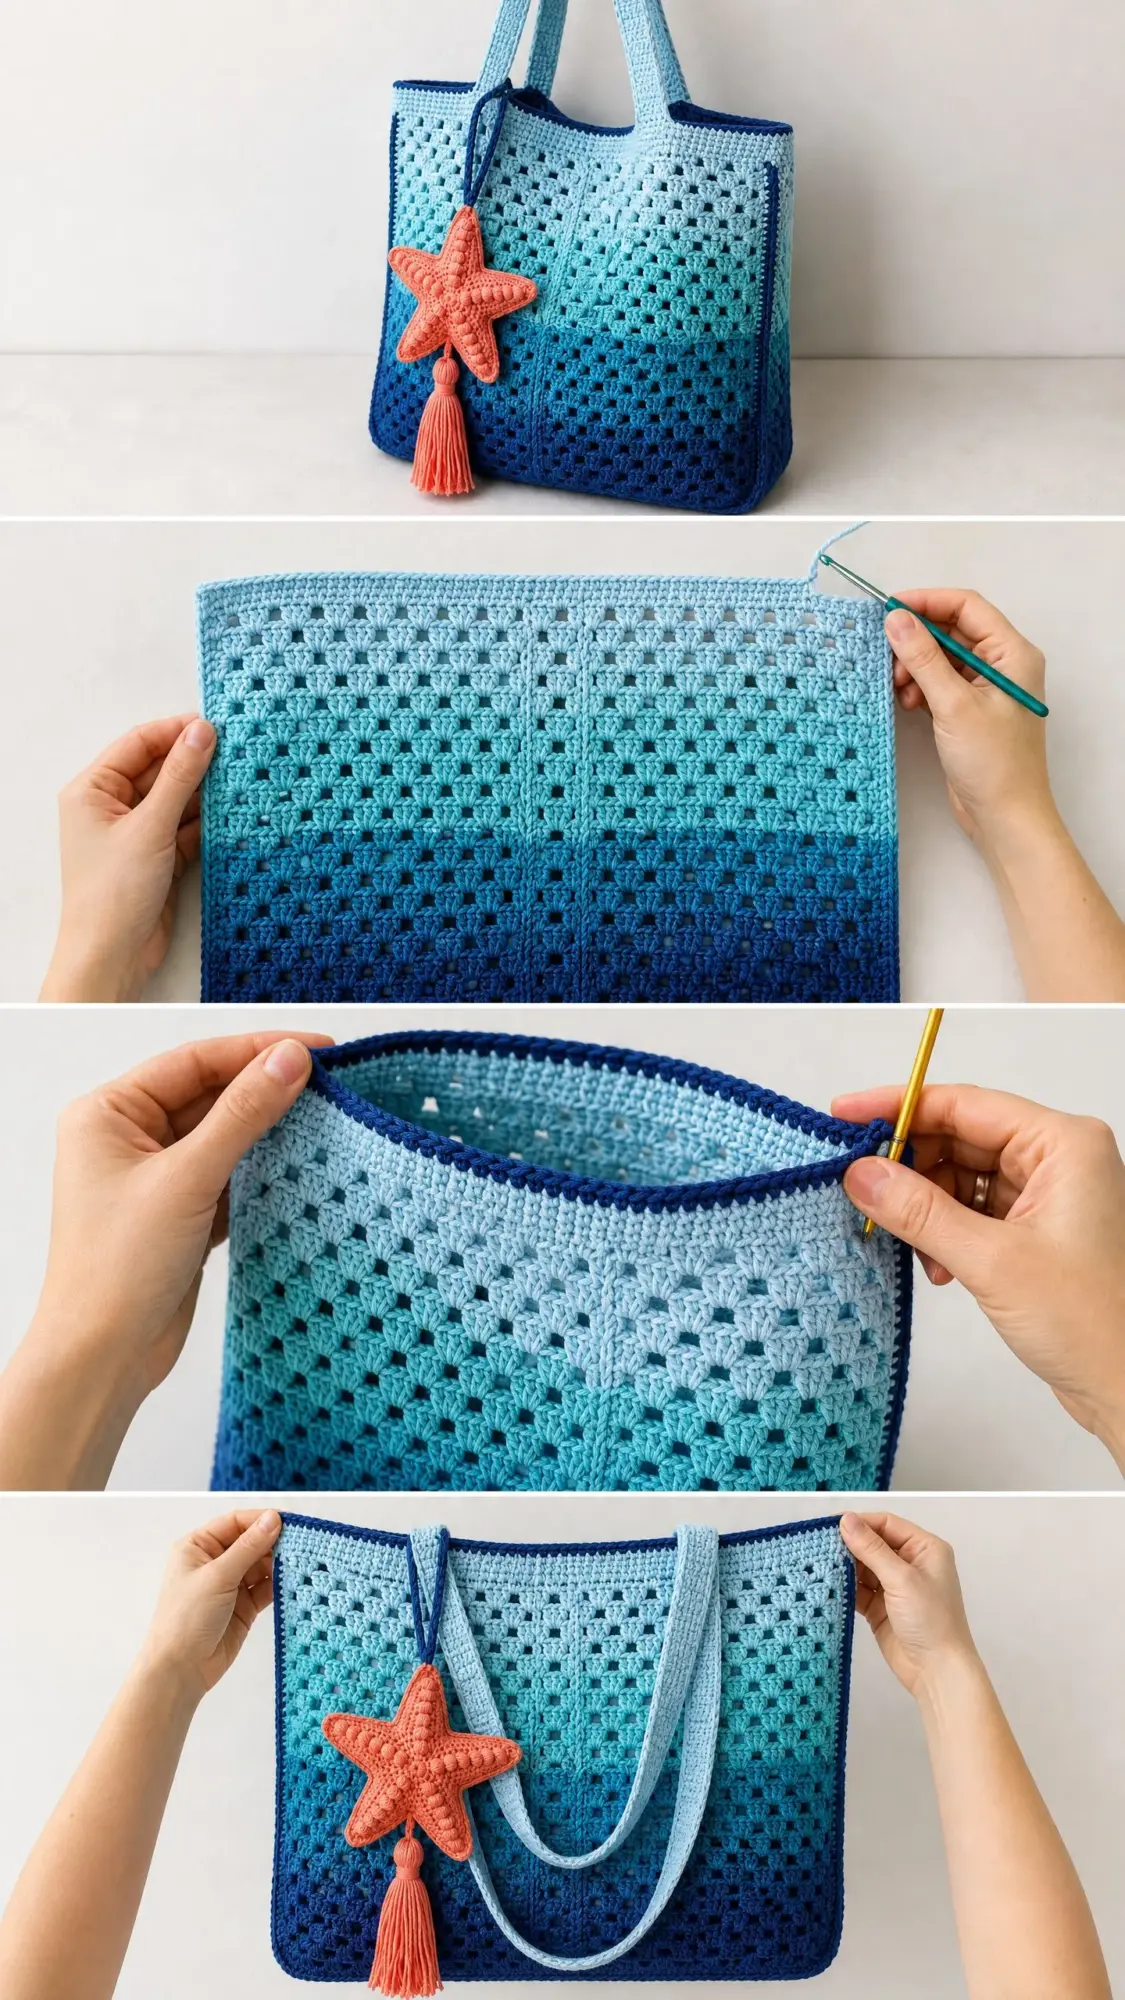
The construction is clever but approachable. You will work eight individual granny squares, each following the same color sequence. When assembled into a 2×2 grid for the front and back panels, the colors align perfectly to create that stunning gradient effect. A single crochet gusset strip gives the bag real structure and depth, about 3 inches worth, so it can actually hold things without flopping over.
The removable starfish charm with its coordinating coral peach tassel adds a whimsical touch. You can clip it on or take it off depending on your mood.
Skill Level
Intermediate. If you are comfortable making basic granny squares, changing yarn colors neatly, and seaming pieces together, you can absolutely make this tote. The individual squares are accessible to confident beginners. The trickier parts involve planning your ombre color flow across all eight squares, executing clean flat seams, and working the dimensional starfish charm with its surface texture and shaping.
Do not let the word "intermediate" scare you off. I will walk you through every step.
Finished Dimensions
Bag body (excluding straps): approximately 13 inches wide by 13 inches tall (33 cm by 33 cm)
Strap length from top edge: approximately 22 inches (56 cm), giving a comfortable shoulder drop
Bag depth (side gusset): approximately 3 inches (7.5 cm)
Starfish charm: approximately 5 inches (13 cm) point to point
Each granny square: approximately 6.5 inches (16.5 cm) blocked
Time Estimate
Plan for 12 to 18 hours total across all components. That breaks down to roughly 6 to 8 hours for the eight bag body squares, 2 to 3 hours for the straps, 2 to 3 hours for the starfish charm, and about 1 hour for assembly and finishing. This makes a wonderful project to work on across a few weekends.
Materials You Will Need
Yarn
Worsted weight (weight category 4), cotton or cotton-acrylic blend recommended for structure and washability.
Total yardage by color:
Yarn Suggestions
Lion Brand 24/7 Cotton works beautifully for this project. It is 100 percent mercerized cotton with excellent stitch definition, machine washable, and holds its shape well for a tote bag. Look for Baby Blue (A), Robin Egg (B), Peacock (C), Navy (D), and Peach (E).
Paintbox Yarns Simply DK held double gives a worsted weight equivalent with lovely color options.
We Are Knitters The Cotton is a premium option with a softer drape and slight sheen.
Avoid very stretchy yarns like pure acrylic for the bag body. The tote may lose its shape when loaded with your beach essentials.
Hooks
Adjust hook size as needed to meet gauge.
Notions
Gauge
With J / 6.0 mm hook: One completed 6-round granny square (blocked) equals 6.5 inches by 6.5 inches (16.5 cm by 16.5 cm).
In single crochet (for strap check): 16 sc by 18 rows equals 4 inches by 4 inches (10 cm by 10 cm) with I / 5.5 mm hook.
Gauge matters here. All eight squares must measure the same to seam cleanly and produce the stated finished bag dimensions. Swatch at least one complete square and block it before making all eight.
Abbreviations and Stitch Definitions
Before we dive in, here are all the terms you will encounter:
Special Stitches
Granny Cluster: Work 3 double crochet stitches individually into the same chain space, one after the other. This is the classic open granny square cluster that creates those signature holes.
Corner Shell: Into a corner chain 2 space, work a 3dc cluster, chain 2, then another 3dc cluster. This forms each corner of your granny squares.
Surface Slip Stitch: With right side facing, attach yarn at your starting point. Insert hook through the fabric from front to back, yarn over, pull up a loop through the fabric and through the loop already on hook. Continue along the surface to create a raised decorative line.
Ocean Blue Ombre Tote Pattern Instructions
Part 1: Granny Squares (Make 8)
Each square is worked in 6 rounds. All 8 squares are identical.
Color sequence per square:
Round 1 (Color D):
Make a magic ring (or chain 4 and join with slip stitch to form a ring).
Chain 3 (counts as first dc throughout), work 2 dc into ring, chain 2, (3 dc into ring, chain 2) 3 times. Join with slip stitch to top of beginning chain 3. Fasten off Color D.
Result: 4 corners, each with a 3dc cluster and chain 2 space. (12 dc, 4 ch-2 sps)
Round 2 (Color C):
Join Color C with slip stitch into any corner chain 2 space.
Chain 3, work 2 dc into same corner space, chain 2, 3 dc into same corner space (first corner made), chain 1.
(Work corner shell into next corner chain 2 space, chain 1) 3 times.
Join with slip stitch to top of beginning chain 3. Fasten off Color C.
Result: 4 corners each with (3dc, ch2, 3dc), connected by chain 1 spaces. (24 dc, 4 ch-2 corner sps, 4 ch-1 sps)
Round 3 (Color C):
Join Color C with slip stitch into any corner chain 2 space.
Chain 3, 2 dc into same space, chain 2, 3 dc into same space, chain 1.
3 dc into next chain 1 space, chain 1.
(Corner shell into next corner chain 2 space, chain 1, 3 dc into next chain 1 space, chain 1) 3 times.
Join with slip stitch to top of beginning chain 3. Fasten off Color C.
Result: 4 corners each with (3dc, ch2, 3dc), 2 side clusters per side. (36 dc, 4 ch-2 corner sps, 8 ch-1 sps)
Round 4 (Color B):
Join Color B with slip stitch into any corner chain 2 space.
Chain 3, 2 dc into same space, chain 2, 3 dc into same space, chain 1.
(3 dc into next chain 1 space, chain 1) twice.
(Corner shell into next corner chain 2 space, chain 1, (3 dc into next chain 1 space, chain 1) twice) 3 times.
Join with slip stitch to top of beginning chain 3. Fasten off Color B.
Result: 4 corners each with (3dc, ch2, 3dc), 3 side clusters per side. (48 dc, 4 ch-2 corner sps, 12 ch-1 sps)
Round 5 (Color A):
Join Color A with slip stitch into any corner chain 2 space.
Chain 3, 2 dc into same space, chain 2, 3 dc into same space, chain 1.
(3 dc into next chain 1 space, chain 1) 3 times.
(Corner shell into next corner chain 2 space, chain 1, (3 dc into next chain 1 space, chain 1) 3 times) 3 times.
Join with slip stitch to top of beginning chain 3. Do NOT fasten off. Continue with Round 6.
Result: 4 corners each with (3dc, ch2, 3dc), 4 side clusters per side. (60 dc, 4 ch-2 corner sps, 16 ch-1 sps)
Round 6 (Color A continued):
Chain 3, 2 dc into same space (this is the corner space where Round 5 ended), chain 2, 3 dc into same space, chain 1.
(3 dc into next chain 1 space, chain 1) 4 times.
(Corner shell into next corner chain 2 space, chain 1, (3 dc into next chain 1 space, chain 1) 4 times) 3 times.
Join with slip stitch to top of beginning chain 3. Fasten off Color A.
Result: 4 corners each with (3dc, ch2, 3dc), 5 side clusters per side. (72 dc, 4 ch-2 corner sps, 20 ch-1 sps)
Checkpoint: Each finished square should measure approximately 6.5 inches by 6.5 inches after blocking. If your squares are smaller, try a larger hook. If larger, try a smaller hook. All 8 squares must match before you continue.
Part 2: Assembling Panels
The front panel and back panel are each made from 4 granny squares arranged in a 2 wide by 2 tall grid.
Orient all squares so the outermost round (Color A, sky blue) is visible at all edges. The navy center of each square creates the ombre effect, appearing darker toward the center region of your assembled panel.
Joining method (flat join with Color D):
Hold two squares with wrong sides together. With Color D and J hook, insert hook through corresponding chain 1 spaces or corner spaces of both squares simultaneously, join with slip stitch. Continue slip stitch through each corresponding space and stitch pair across the joining edge.
Step 1: Join 2 squares side by side horizontally using Color D slip stitch join along one vertical edge. This creates the top half of the front panel. Repeat for the back panel.
Step 2: Join 2 more squares side by side horizontally to make the bottom half of the front panel. Repeat for the back panel.
Step 3: Join the top half panel strip to the bottom half panel strip with a horizontal slip stitch join in Color D.
Checkpoint: Front panel and back panel should each measure approximately 13 inches wide by 13 inches tall after seaming.
Part 3: Gusset Strip
The gusset strip creates the bag’s 3 inch depth. It runs along the bottom and up both sides.
With Color D and I / 5.5 mm hook:
Foundation chain: Chain 13.
Row 1: Single crochet in 2nd chain from hook and in each chain across. Turn. (12 sc)
Row 2: Chain 1, single crochet in each single crochet across. Turn. (12 sc)
Repeat Row 2 until gusset strip measures approximately 29 inches (74 cm) total. Fasten off Color D, leaving a long tail for seaming.
Checkpoint: Gusset strip should be approximately 3 inches wide and 29 inches long.
Part 4: Bag Body Assembly
Step 1: With yarn needle and Color D, seam the gusset strip to the front panel along the bottom edge and then up each side edge using whip stitch or mattress stitch. Pin generously before seaming.
Step 2: Seam the back panel to the other edge of the gusset strip along the bottom and both sides.
Step 3: With Color D and J hook, work a single round of single crochet around the top opening of the bag. Work approximately 1 sc per dc stitch and 1 sc per chain 1 space. At each top corner, work 3 sc into the corner space to keep the opening flat. Join with slip stitch.
Step 4: Work 1 round of slip stitch in Color D around the top opening edge. This creates the clean navy piping visible in the photos. Join with slip stitch. Fasten off Color D.
Part 5: Straps (Make 2)
Straps are worked as a flat strip of single crochet using Color A with I / 5.5 mm hook, then edged with Color D slip stitches.
Foundation chain: Chain 9.
Row 1: Single crochet in 2nd chain from hook and in each chain across. Turn. (8 sc)
Row 2 onward: Chain 1, single crochet in each single crochet across. Turn. (8 sc)
Repeat Row 2 until strap measures 32 inches (81 cm). Fasten off Color A, leaving a long tail.
Strap edging with Color D:
Join Color D at one short end of the strap. Work slip stitch along the entire long edge, 1 slip stitch per single crochet row end. At the far short end, work 3 slip stitch into the corner. Continue slip stitch along the second long edge back to the start. Join and fasten off.
Make 2 straps.
Attaching straps:
Position straps with each end approximately 3 inches in from the side edge of the bag opening. With yarn needle and Color A, sew each strap end securely to the inside of the top edge. Reinforce with a square and X stitch pattern for strength.
Part 6: Starfish Charm
The starfish is worked in two identical halves, then joined while stuffing lightly. Use Color E and J / 6.0 mm hook throughout.
Starfish Arm (Make 10, which is 5 for front half, 5 for back half):
Foundation chain: Chain 2.
Round 1: Work 6 sc into 2nd chain from hook. Do not join. Place marker. (6 sc)
Round 2: Work 2 sc in each sc around. (12 sc)
Round 3: (Sc in next sc, 2 sc in next sc) 6 times. (18 sc)
Now work flat in rows:
Row 4 (RS): Chain 1, sc in next 9 sc. Turn. (9 sc)
Row 5: Chain 1, inv dec over first 2 sts, sc in each st to last 2, inv dec. Turn. (7 sc)
Row 6: Chain 1, sc in each sc across. Turn. (7 sc)
Row 7: Chain 1, inv dec over first 2 sts, sc in each st to last 2, inv dec. Turn. (5 sc)
Row 8: Chain 1, sc in each sc across. Turn. (5 sc)
Row 9: Chain 1, inv dec, sc in next sc, inv dec. Turn. (3 sc)
Row 10: Chain 1, sc 3 across. Turn. (3 sc)
Row 11: Chain 1, inv dec over first 2 sts, sc in last st. (2 sc)
Row 12: Chain 1, sc2tog. (1 sc) Fasten off. Leave a 6 inch tail.
Assembling the starfish:
Arrange 5 arms in a radial pattern with the wide ends meeting at the center. Whip stitch the bases together. This forms the front half. Repeat for the back half.
Adding surface texture (front half only):
Attach yarn at the tip of one arm. Work surface slip stitches from the tip down toward the center along the spine of each arm. Work 2 to 3 parallel lines per arm for that ridged starfish texture.
Joining starfish halves:
Hold front and back with wrong sides together. Work single crochet around the outer edge through both layers, stuffing lightly before closing the last arm. Fasten off, leaving a 10 inch tail.
Starfish charm cord:
With Color D and J hook, make a chain approximately 8 inches long. Fasten off. Fold chain in half. Thread both ends through the top of the starfish at the juncture of two arms. Secure inside and attach the looped end to the bag strap.
Part 7: Tassel
Cut a 10 inch length of Color E yarn and set aside. Wrap Color E around a 4 inch piece of cardboard approximately 40 times. Slide the 10 inch yarn length under all wraps at the top and tie tightly. Slide loops off the cardboard. Wrap another 10 inch length around all loops about 0.5 inches from the tied top, knot tightly, and hide ends inside. Cut all loops at the bottom and trim to approximately 3 inches.
Attach the tassel to the bottom arm of the starfish using a lark’s head knot.
Tips for Success
Block those squares. Seriously, blocking makes all the difference. Cotton blocks beautifully with wet blocking or steam. Your seams will be so much easier if all eight squares are exactly the same size.
Weave in ends as you go. With all those color changes, you will have a lot of tails. Weaving them in after each round saves you from an overwhelming finishing session later.
Pin before seaming. Take your time with assembly. Pin generously to keep everything aligned.
Reinforce your straps. This bag will be carrying beach towels, water bottles, maybe a few shells you found. Make sure those strap attachments are rock solid.
Make It Your Own
Want a flat tote instead? Skip the gusset strip entirely and seam the front and back panels together on three sides.
Prefer different colors? This ombre technique works with any color family. Try sunset colors (cream, peach, coral, burgundy) or forest tones (sage, olive, hunter green, charcoal).
Not into starfish? The bag looks beautiful on its own. Or try a shell charm, a simple pom pom, or a fabric bow.
Thank you so much for choosing this ocean blue ombre tote pattern. I hope you love making it as much as I loved designing it. There is something really satisfying about watching those granny squares come together into something so beautiful and functional.
If you make this tote, I would absolutely love to see it. Tag me on Instagram or share a photo in our Facebook group. Nothing makes my day like seeing your finished projects out in the wild, especially at the beach where this bag truly belongs.
Save this pattern to your Pinterest boards so you can find it when you are ready to start. And please drop a comment below if you make one. I read every single comment and love hearing how your projects turn out.
