
The Story Behind This Stunning Bag
I call her the Starburst Traveler, and she started life as a scribbled sketch in a coffee-stained notebook about three years ago. I was sitting in a waiting room, flipping through a vintage craft magazine, when I spotted an old pinwheel quilt block. Something clicked. I grabbed my pen and started mapping out how those radiating wedges might translate into crochet, working outward from a magic ring instead of piecing fabric squares together.
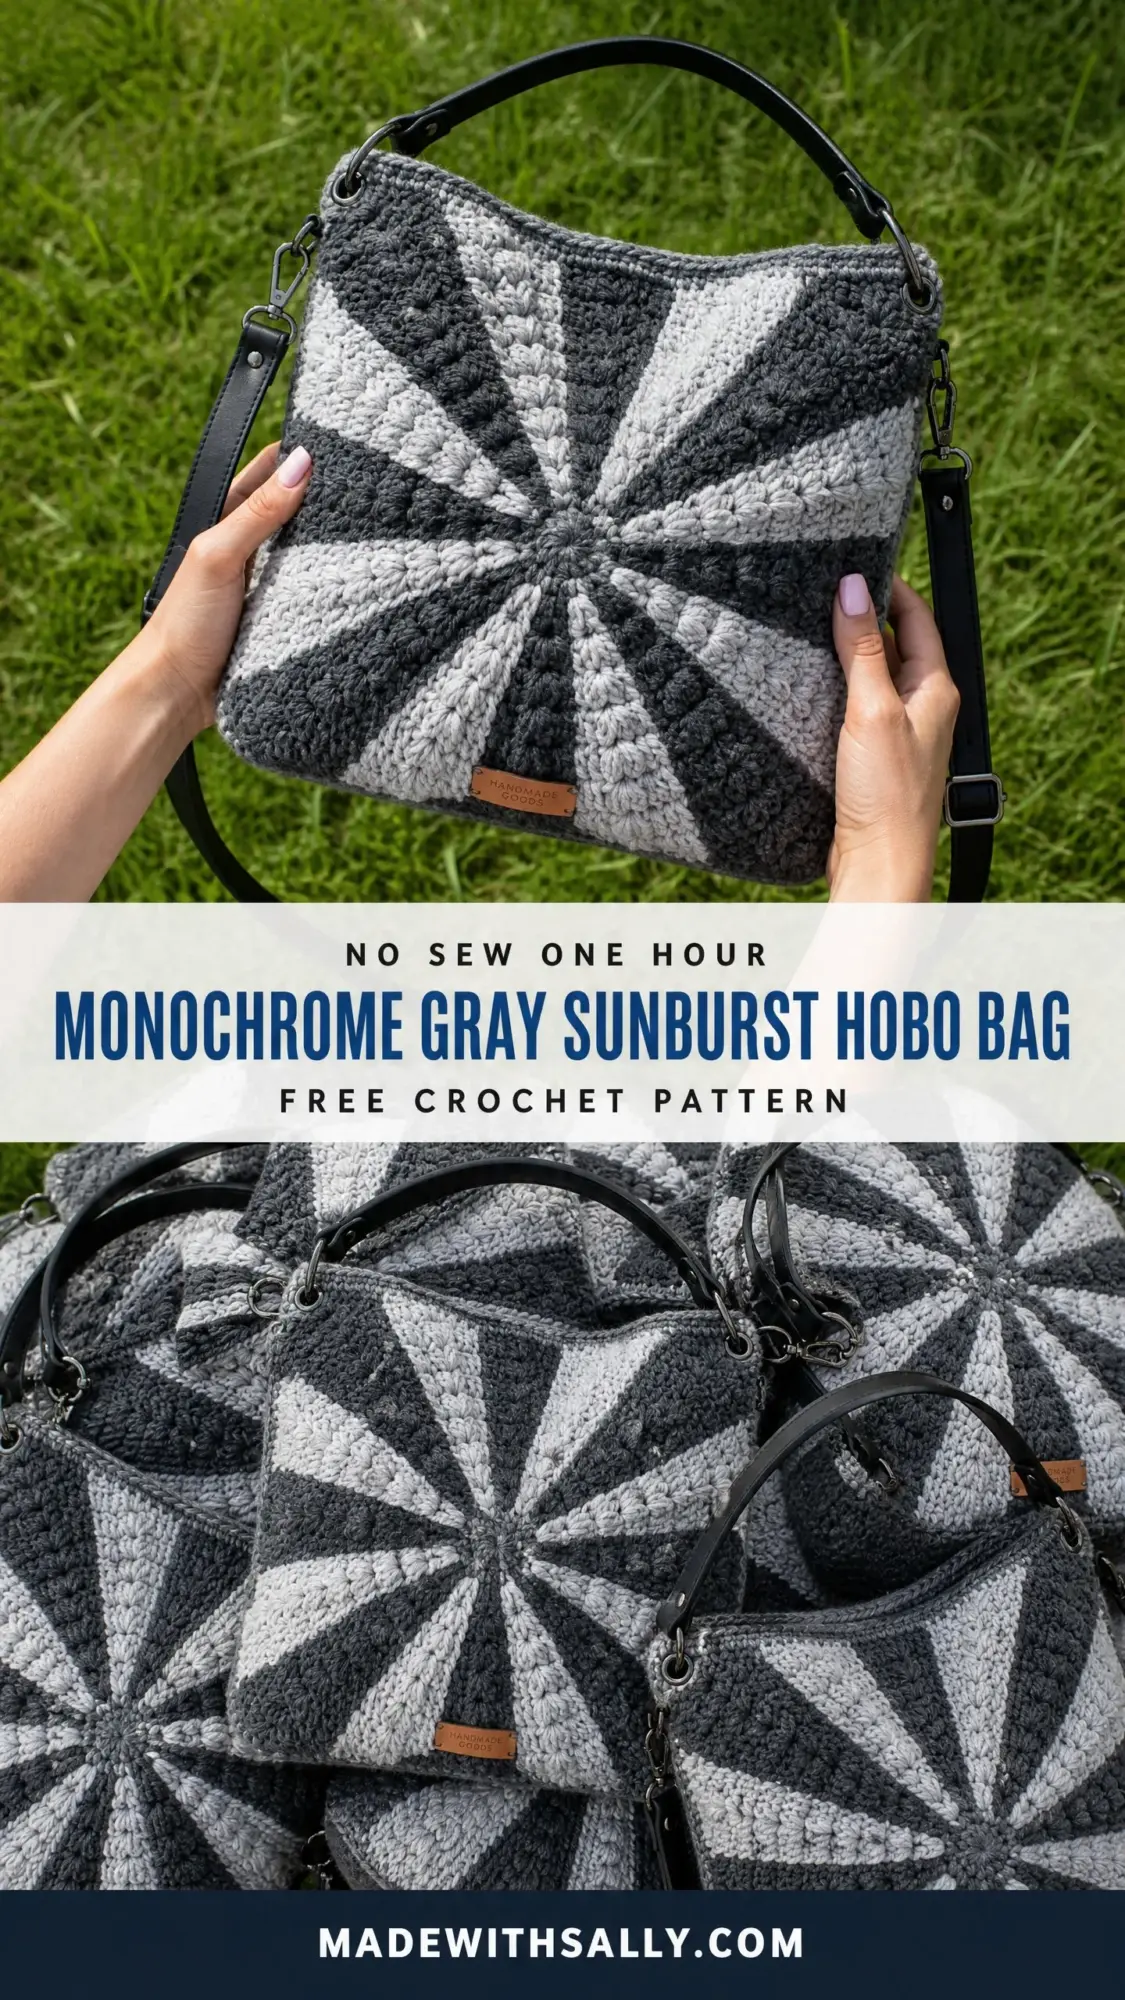
That notebook page traveled with me for ages before I finally sat down to work out the math. The tapestry colorwork took some trial and error. My first attempt looked more like a lumpy pizza than a sleek hobo bag. But after countless swatches and a few frogged panels, I landed on this version with its dramatic sunburst motif in charcoal and silver gray.
Now the Starburst Traveler is ready to share. She is bold without being flashy, structured enough to hold her shape, and surprisingly practical for everyday use. If you have been wanting to try tapestry colorwork but felt intimidated, this is your sign. The technique is more forgiving than it looks, and the payoff is absolutely worth it.
Why You Will Love This Crochet Pattern
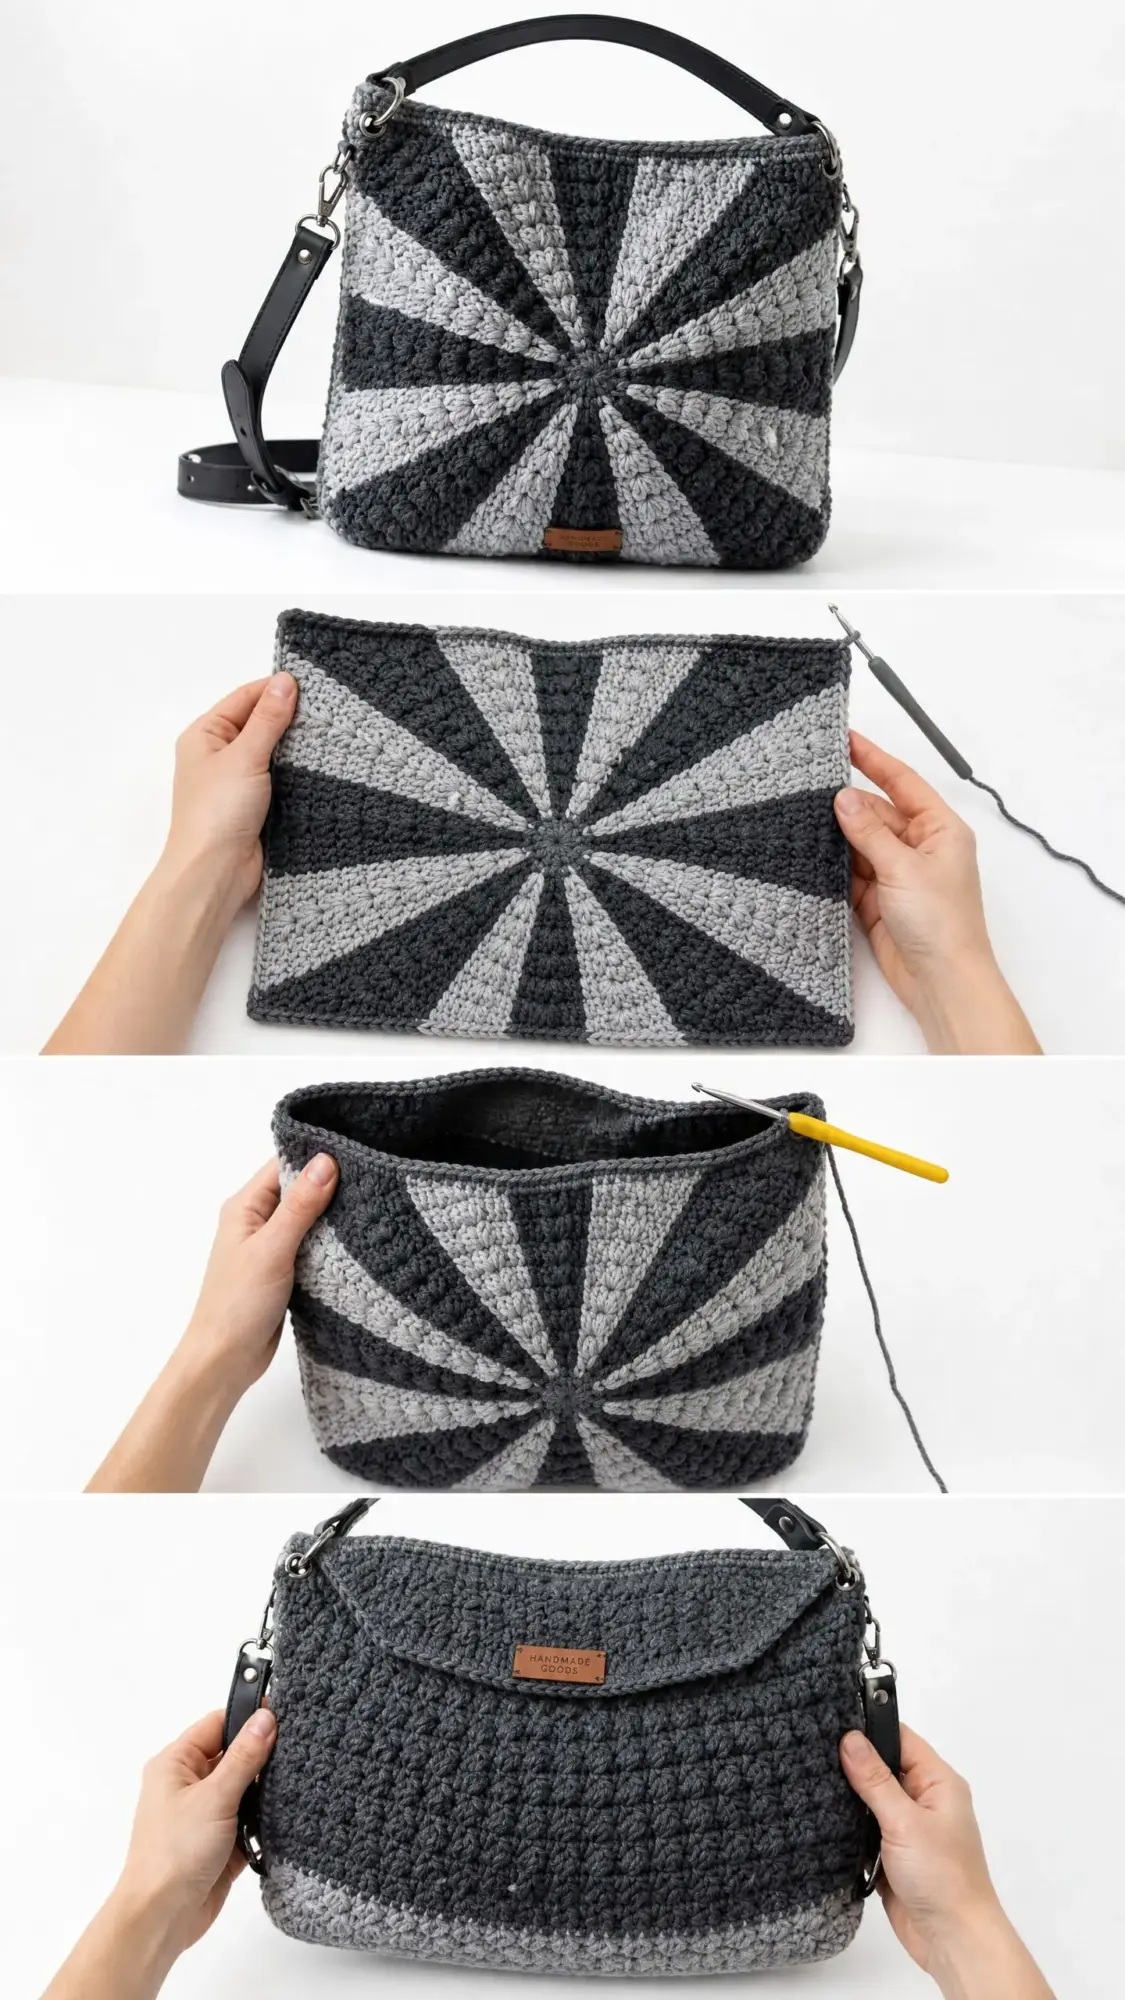
This monochrome gray sunburst hobo bag combines striking visual impact with approachable construction. The pinwheel design radiates from a center magic ring, creating those eye-catching wedges you see in the finished piece. Two identical panels form the front and back, joined by a simple gusset strip that gives the bag its structured silhouette.
The color palette keeps things sophisticated. Dark charcoal and light silver gray alternate across ten wedges, creating contrast without competing with your outfit. The black leather handle and adjustable crossbody strap mean you can carry it multiple ways depending on your day.
What makes this crochet tutorial special is the tapestry technique. You carry both colors throughout each round, switching between them at precise points to create those clean color boundaries. It sounds complicated, but once you get the rhythm, it becomes almost meditative.
Skill Level
This pattern is rated Advanced Beginner to Intermediate. You should feel comfortable with:
If you have never tried tapestry colorwork before, do not worry. The pattern walks you through it step by step. I recommend making a small practice swatch of about 20 stitches by 10 rows before diving into the actual panels.
Time Estimate
Plan for approximately 18 to 26 hours total, depending on your experience with colorwork. Each sunburst panel takes roughly 6 to 8 hours. Assembly, the border, and finishing add another 3 to 4 hours.
This is not a weekend project, but it is absolutely a satisfying long-term make.
Finished Dimensions
Materials Needed
Yarn
You will need bulky weight yarn (weight 5) in two colors:
Recommended Yarns:
Avoid yarns with excessive fuzz or halo effect. You want good stitch definition so those sunburst wedges really pop.
Hook
US K-10.5 / 6.5 mm crochet hook, or the size needed to achieve gauge.
Notions
Optional:
Gauge
With your US K-10.5 / 6.5 mm hook:
12 stitches by 14 rows = 4 inches / 10 cm in single crochet worked in rows.
In the round: Your completed 10-round panel should measure approximately 10 inches / 25.5 cm in diameter before edging.
Gauge matters here. The finished bag dimensions depend on hitting these numbers. Always swatch, block your swatch, and measure before starting.
Abbreviations
Let me break down every abbreviation you will encounter:
Special Techniques
Tapestry Single Crochet (TSC)
This technique lets you carry the unused color yarn along the back of your work, hiding it inside your stitches. Both colors stay active throughout each round.
Step 1: Begin each stitch with your currently active color as normal.
Step 2: Lay the unused (carried) color yarn along the top of the previous round’s stitches, positioning it inside the stitch as you insert your hook.
Step 3: Work the stitch over the carried yarn so it gets captured inside the stitch body.
Step 4: When the pattern calls for a color change, complete the stitch in the current color up to the last yarn-over. Then pick up the new color and pull it through to finish the stitch. The new color is now active.
Step 5: Continue carrying the old color inside subsequent stitches until you need it again.
Tension tip: Keep your carry tension firm but not so tight that it puckers the fabric. Practice this on your gauge swatch first.
Magic Ring (MR)
Step 1: Make a loop by wrapping yarn twice around your index finger, crossing the tail over the working yarn.
Step 2: Insert your hook into the center of the loop, catch the working yarn, and pull up a loop.
Step 3: Chain the required number of starting stitches.
Step 4: Work the required stitches into the ring.
Step 5: Pull the tail end to close the ring tightly, then join with a slip stitch to the first stitch (not the chain).
Pattern Notes Before You Begin
1. The bag consists of two identical sunburst panels (front and back), one rectangular gusset strip, and a top border.
2. The sunburst has 10 wedges total: 5 in Color A and 5 in Color B, alternating around the circle.
3. All rounds are worked on the right side. Do not turn. Join each round with a slip stitch to the first stitch.
4. Color changes happen at the beginning of each new wedge section. Carry the unused color continuously using the TSC technique.
5. Stitch counts grow by 10 increases per round (one per wedge), keeping your panel flat and circular.
6. Weave in yarn tails as you go. With colorwork, you can carry tails within stitches for several inches before trimming.
Sunburst Panel Instructions (Make 2)
Before you start, set up your wedge color chart. The 10 wedges alternate between CA and CB. Odd-numbered wedges (1, 3, 5, 7, 9) are worked in Color A. Even-numbered wedges (2, 4, 6, 8, 10) are worked in Color B.
Round 1
With CA, make a MR. Ch 2 (does not count as a stitch). Work 10 sc into the MR. Pull ring closed. Join with sl st to first sc. (10 sc)
Place a stitch marker in every other stitch (stitches 1, 3, 5, 7, 9). These mark the start of your CA wedges. The stitches between them are CB wedge starts.
Round 2
Join CB at any CB-start stitch marker. Working in TSC throughout, work 2 sc into each stitch around, maintaining colors: 2 sts in CB into each CB stitch, 2 sts in CA into each CA stitch. (20 sc: 10 CA, 10 CB)
Round 3
Working in TSC, for each 2-stitch group from round 2, work sc into the first stitch and 2 sc (inc) into the second stitch. Maintain color boundaries strictly. (30 sc: 15 CA, 15 CB)
Each wedge now has 3 stitches.
Round 4
Working in TSC, sc in first 2 sts of each wedge, 2 sc in last st of each wedge. 10 increases total. (40 sc: 20 CA, 20 CB)
Each wedge: 4 stitches.
Round 5
Working in TSC, sc in first 3 sts of each wedge, 2 sc in last st of each wedge. (50 sc: 25 CA, 25 CB)
Each wedge: 5 stitches.
Round 6
Working in TSC, sc in first 4 sts of each wedge, 2 sc in last st of each wedge. (60 sc: 30 CA, 30 CB)
Each wedge: 6 stitches.
Round 7
Working in TSC, sc in first 5 sts of each wedge, 2 sc in last st of each wedge. (70 sc: 35 CA, 35 CB)
Each wedge: 7 stitches.
Round 8
Working in TSC, sc in first 6 sts of each wedge, 2 sc in last st of each wedge. (80 sc: 40 CA, 40 CB)
Each wedge: 8 stitches.
Round 9
Working in TSC, sc in first 7 sts of each wedge, 2 sc in last st of each wedge. (90 sc: 45 CA, 45 CB)
Each wedge: 9 stitches.
Round 10
Working in TSC, sc in first 8 sts of each wedge, 2 sc in last st of each wedge. (100 sc: 50 CA, 50 CB)
Each wedge: 10 stitches.
CHECKPOINT: Your panel should measure approximately 7 to 7.5 inches / 18 to 19 cm across. Adjust hook size if needed and restart if you are significantly off.
Round 11
Working in TSC, sc in first 9 sts of each wedge, 2 sc in last st of each wedge. (110 sc: 55 CA, 55 CB)
Round 12
Working in TSC, sc in first 10 sts of each wedge, 2 sc in last st of each wedge. (120 sc: 60 CA, 60 CB)
Round 13
Working in TSC, sc in first 11 sts of each wedge, 2 sc in last st of each wedge. (130 sc: 65 CA, 65 CB)
Round 14
Working in TSC, sc in first 12 sts of each wedge, 2 sc in last st of each wedge. (140 sc: 70 CA, 70 CB)
Round 15
Working in TSC, sc in first 13 sts of each wedge, 2 sc in last st of each wedge. (150 sc: 75 CA, 75 CB)
Round 16
Working in TSC, sc in first 14 sts of each wedge, 2 sc in last st of each wedge. (160 sc: 80 CA, 80 CB)
Round 17
Working in TSC, sc in first 15 sts of each wedge, 2 sc in last st of each wedge. (170 sc: 85 CA, 85 CB)
Round 18
Working in TSC, sc in first 16 sts of each wedge, 2 sc in last st of each wedge. (180 sc: 90 CA, 90 CB)
Round 19
Working in TSC, sc in first 17 sts of each wedge, 2 sc in last st of each wedge. (190 sc: 95 CA, 95 CB)
Round 20
Working in TSC, sc in first 18 sts of each wedge, 2 sc in last st of each wedge. (200 sc: 100 CA, 100 CB)
Fasten off both colors. Weave in all ends securely.
FINAL CHECKPOINT: Each completed panel should measure approximately 13.5 to 14 inches / 34 to 35.5 cm in diameter. Both panels must be identical in size.
Gusset Strip Instructions
The gusset forms the base and side walls. It is a simple rectangle, 5 stitches wide, worked in rows.
With CA and US K-10.5 / 6.5 mm hook, ch 6.
Row 1: Sc in second ch from hook and in each ch across. Ch 1, turn. (5 sc)
Rows 2 through approximately 116: Sc in each st across. Ch 1, turn. (5 sc per row)
Continue until the strip measures approximately 34 inches / 86.5 cm. This should span from one top edge, down around the bottom, and up the other side.
Fasten off, leaving a long tail of approximately 36 inches / 91.5 cm for seaming.
Assembly Instructions
Step 1: Block both panels before seaming. This makes everything easier.
Step 2: Position panels with wrong sides facing outward. The seams will end up on the inside.
Step 3: Mark the top opening on each panel: approximately 12 inches / 30.5 cm across. This becomes your bag mouth.
Step 4: Pin the gusset strip to one panel’s outer edge, starting at one top-opening marker, working around the bottom, ending at the opposite marker.
Step 5: Using a yarn needle and CA, whip stitch or single crochet seam the gusset to the first panel.
Step 6: Attach the second panel to the other long edge of the gusset the same way.
Step 7: Ease any extra length at the corners with small gathering stitches.
Step 8: Turn the bag right side out.
Top Border Instructions
With RS facing, join CA at one top opening marker with a sl st.
Round 1: Sc evenly around the entire top opening edge. Aim for approximately 60 to 70 sc total. Join with sl st.
Round 2: Sc in each st around. Join.
Round 3: Sc in each st around. Join. Fasten off. Weave in end.
If the top edge gaps, work decreases evenly in round 2. If it draws in, add increases.
Hardware and Finishing
Position D-ring tabs approximately 1.5 inches from each top corner on both front and back panels (4 tabs total). Secure with Chicago screws or rivets through the top border.
Attach your handle to the front D-rings and clip your crossbody strap to the side D-rings.
Sew your decorative tag at the lower center front, approximately 3 inches from the bottom.
Blocking and Care
Wet blocking: Submerge panels in cool water, gently press out excess (do not wring), pin to dimensions, and let dry completely.
For wool yarns: Hand wash in cool water with wool-safe detergent. Lay flat to dry.
For acrylic yarns: Machine wash on gentle in a mesh bag. Reshape while damp and lay flat.
Store your finished bag stuffed with tissue paper to maintain its shape.
Final Thoughts on This Hobo Bag Crochet Pattern
This monochrome gray sunburst hobo bag is one of those projects that looks impressive on your arm but teaches you valuable skills along the way. The tapestry technique, the circular-to-structured shaping, the hardware attachment. Every step builds your confidence as a maker.
Thank you so much for choosing this pattern. I genuinely hope you love making the Starburst Traveler as much as I loved designing her. If you finish one, please tag me on Instagram or share in my Facebook group. Seeing your versions is honestly the best part of my week.
If this pattern caught your eye, go ahead and save it to your Pinterest boards so you can find it when you are ready to start. And if you make one, I would absolutely love to hear about it in the comments below. Your feedback means the world, and it helps other crocheters decide if this is the right project for them too.
