
I’ve been looking for the perfect festive bag pattern for ages. Something that feels classic but still makes a statement. This Christmas Granny Square Handbag is my favourite find, and I’m thrilled to share it with you today.
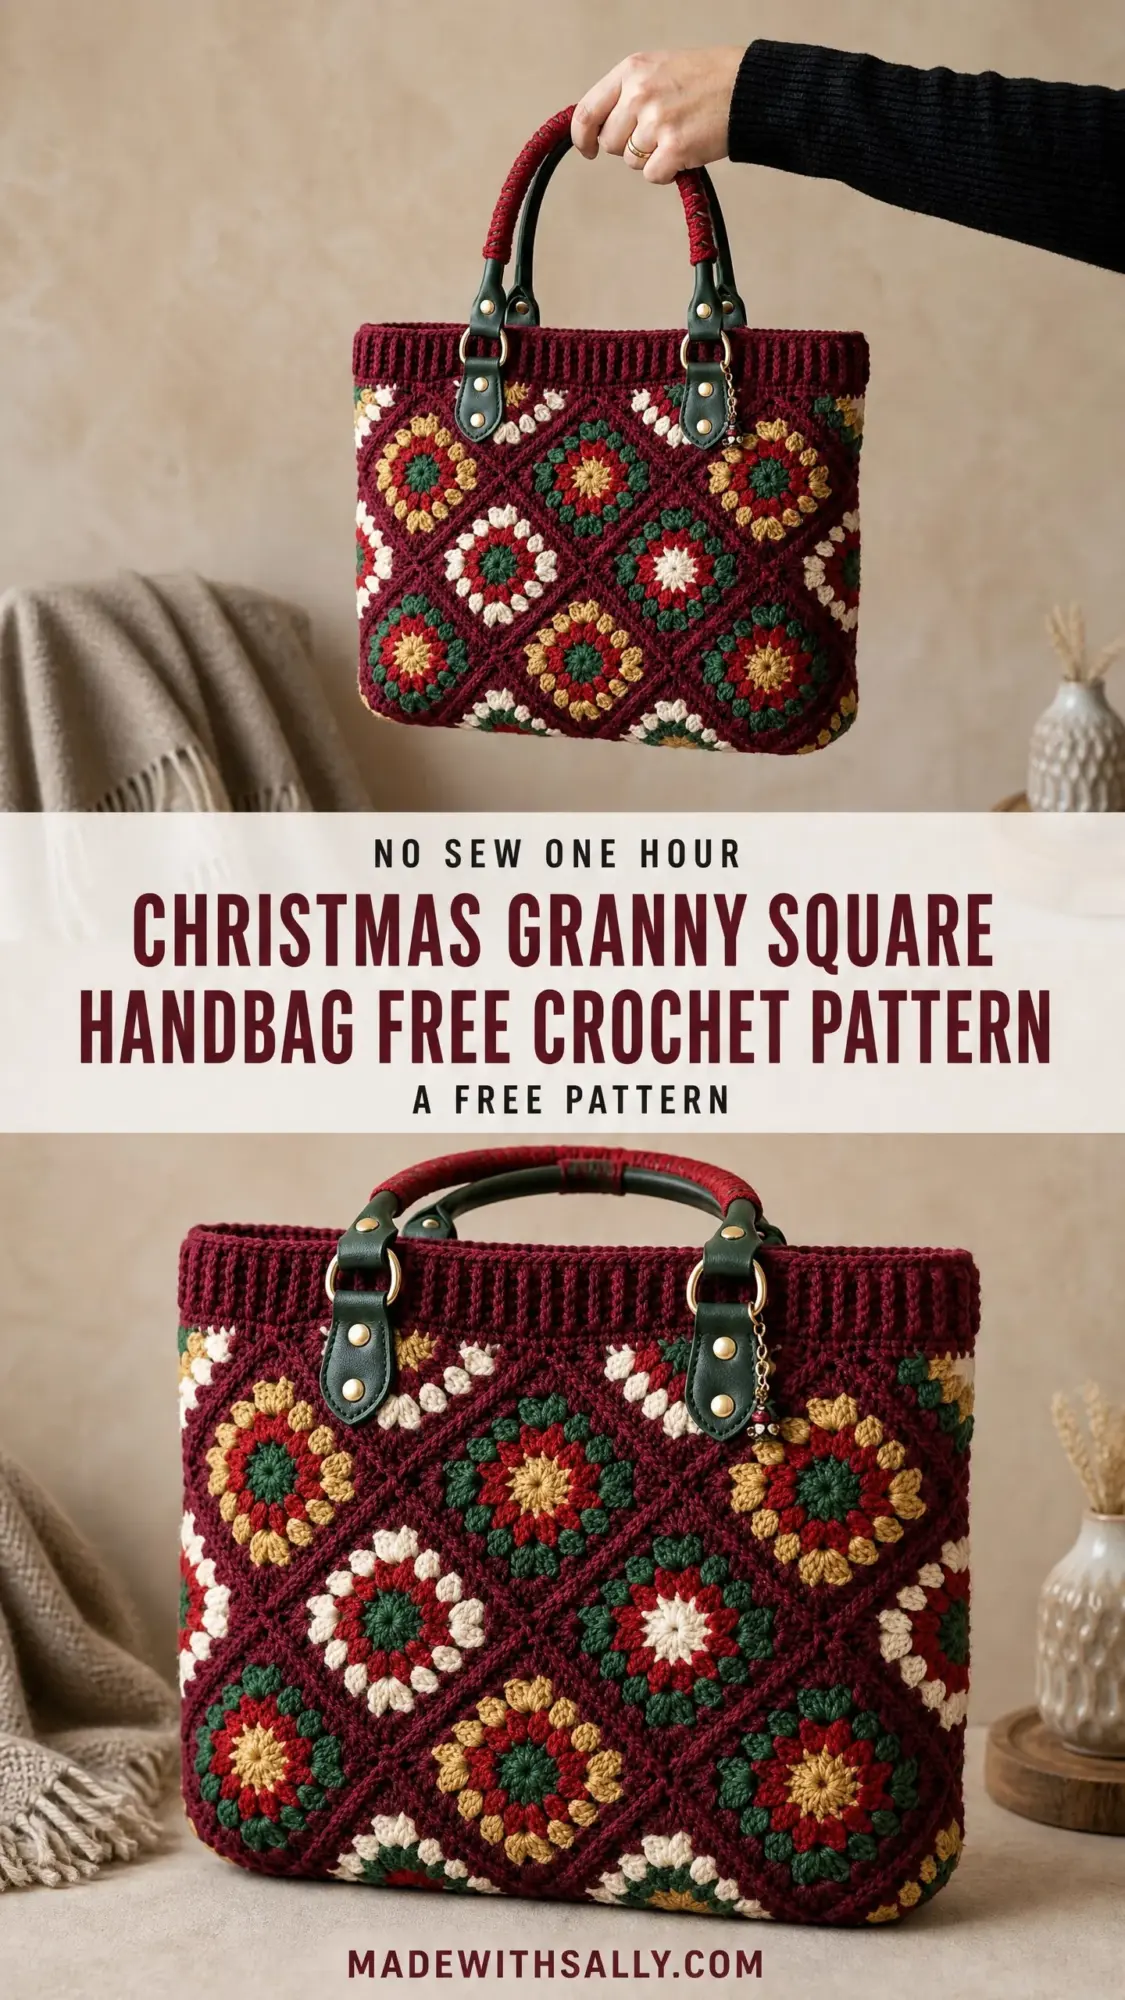
The moment I saw this design, I knew it was special. Those gorgeous granny squares set on point, the rich burgundy paired with forest green and golden yellow, the structured tote shape with leather handles. It’s the kind of bag that gets compliments everywhere you go.
Whether you’re making this for yourself or as a handmade holiday gift, you’re in for a treat. The construction is straightforward if you’re comfortable with basic granny squares, and the finished result looks far more complicated than it actually is.
About This Crochet Pattern
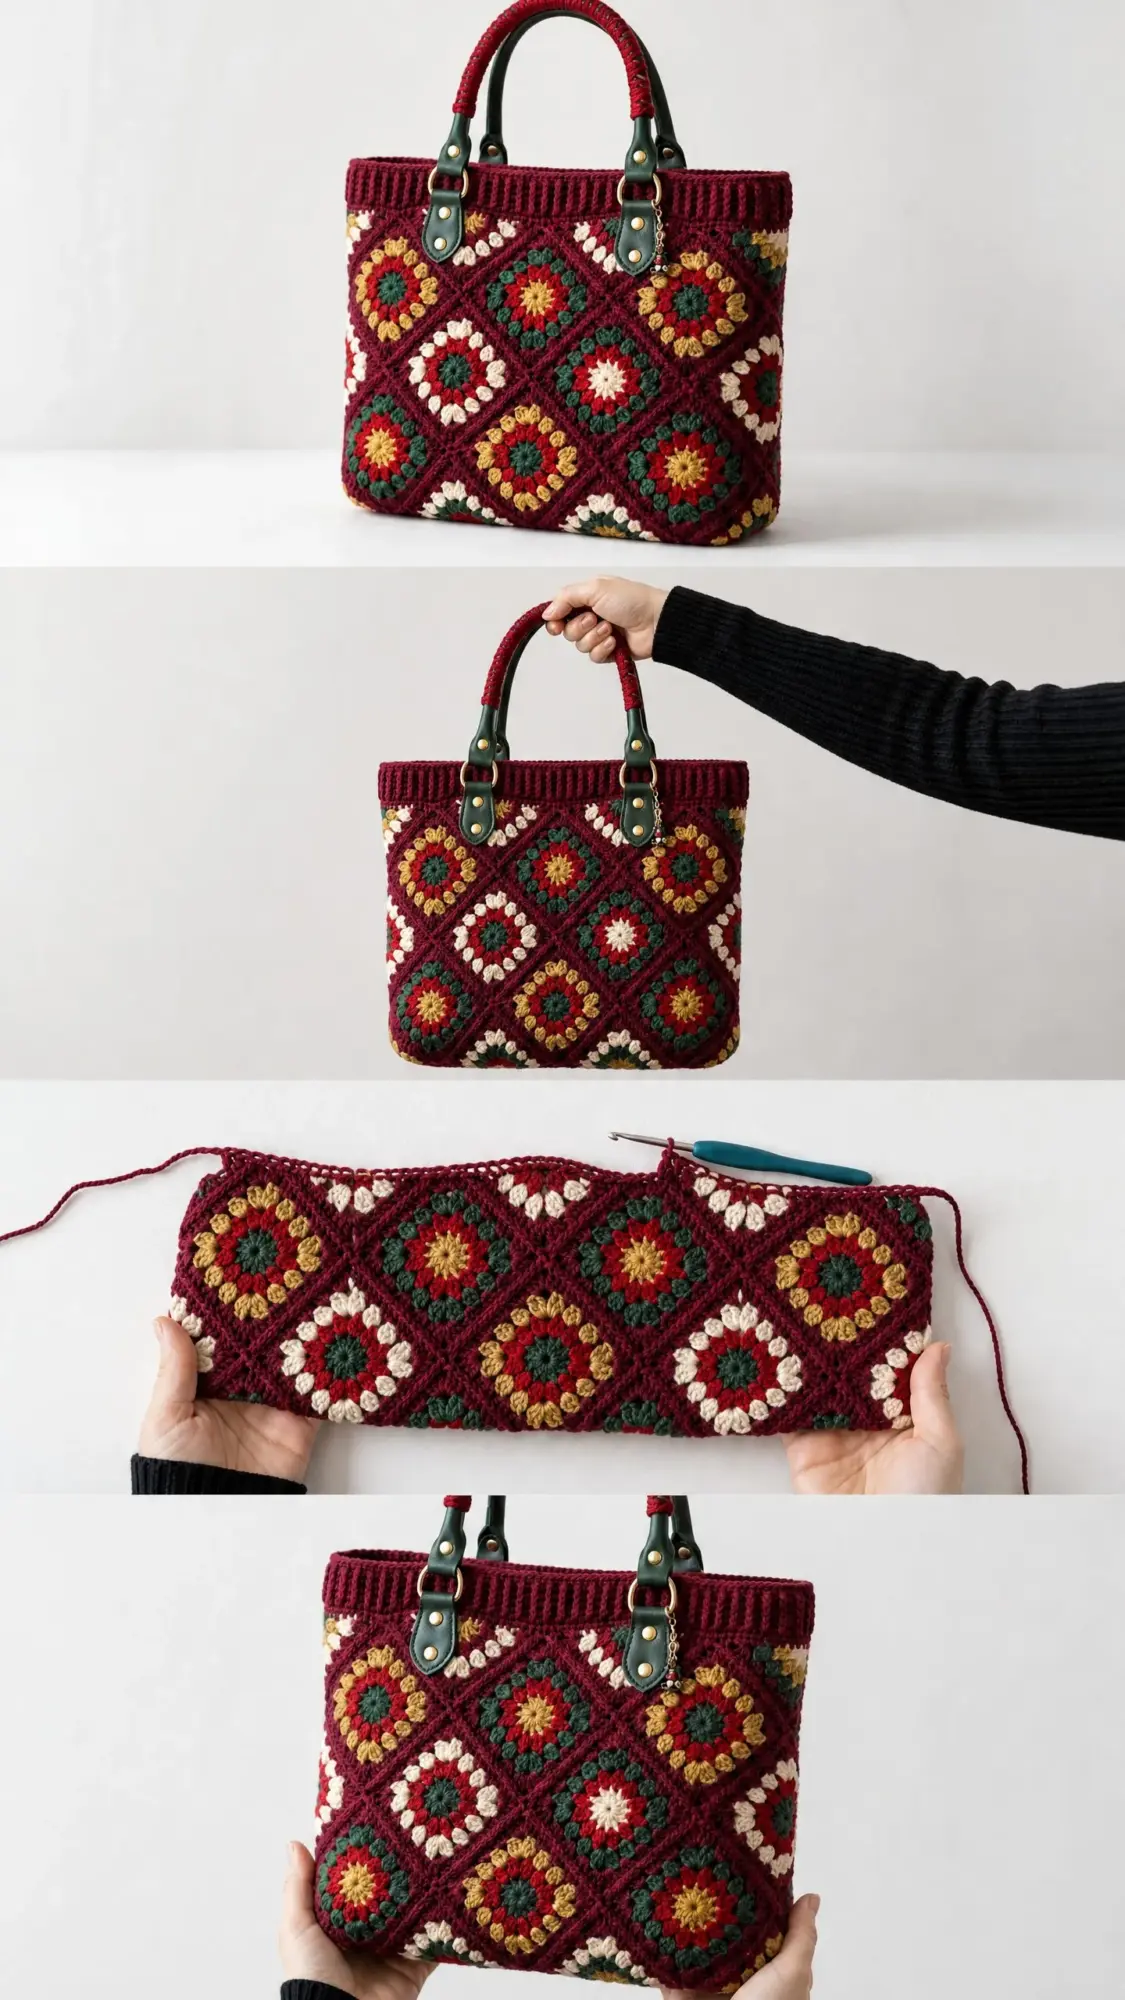
This structured tote-style handbag features classic granny squares arranged in a festive colorway that screams cozy winter vibes. The squares sit on point, which means they’re rotated 45 degrees so they read as diamonds rather than traditional squares. Half-squares fill in the edges to create that clean rectangular silhouette.
The bag includes a ribbed crochet border along the top opening, leather strap handles attached with gold rivets and D-rings, and a twisted rope accent wrapping each handle. A small decorative charm adds the finishing touch.
Skill Level: Intermediate. You should be comfortable working granny squares in rounds with multiple color changes, joining motifs with slip stitches, working flat ribbing, and attaching hardware.
Time Estimate: Approximately 18 to 24 hours total, including blocking time.
Finished Measurements
Here’s what you’re working toward:
Materials You’ll Need
Yarn
You’ll need worsted weight yarn in five colors:
Yarn Suggestions:
Lion Brand Wool-Ease works beautifully for this project. Try Cranberry for Color A, Forest Green Heather for Color B, Mustard for Color C, Fisherman for Color D, and Red for Color E. This 80% acrylic and 20% wool blend holds structure well and gives excellent stitch definition.
Cascade 220 Superwash is another gorgeous option if you want something more luxurious. It blocks beautifully and has a lovely hand.
Hook
US size H-8 / 5.0 mm, or whatever size you need to achieve gauge.
Notions
Gauge
One full granny square (4 rounds) = 3.75 inches by 3.75 inches (9.5 cm by 9.5 cm) after blocking.
For the ribbing pattern using single crochet (sc) worked through back loop only: 16 stitches = 4 inches (10 cm); 18 rows = 4 inches (10 cm).
Gauge matters here. Even small variations per square multiply across the joined panel and affect your finished dimensions significantly. Block your swatch square before measuring.
Abbreviations and Stitch Definitions
Let me walk you through every stitch you’ll encounter:
Color Sequence Guide
This is where the magic happens. Different color combinations create that beautiful mixed-color effect across the bag.
Type X Square
Used on front panel: top-center, center-left, bottom-center positions, and back panel mirror positions.
Type Y Square
Used on front panel: center-center and back panel center.
Type Z Square
Used on front panel: top-left, top-right, center-right, bottom-left, bottom-right positions and back panel mirror positions.
Square Counts
Each panel uses 9 full squares. Front panel = 3 Type X + 1 Type Y + 5 Type Z. Back panel = same. Total full squares needed = 18. You’ll also need 12 half-squares (6 per panel).
Half-Square Color Sequence
Full Granny Square Instructions
Make 18 full squares total. Each square is worked in rounds, joined at the end of each round, then a new round begins in the new color.
Round 1
With the color indicated for Round 1, make a magic circle (mc).
Ch 3 (counts as first dc here and throughout Round 1 only).
Work 2 dc into the mc. Ch 2. (First corner made.)
(Work 3 dc into mc, ch 2) 3 times. (Three more corners made.)
Join with sl st to top of beginning ch-3.
Pull mc snug.
Fasten off.
Stitch count: 12 dc total, 4 ch-2 corner spaces.
Round 2
Join the color indicated for Round 2 with a standing dc (or sl st and ch 3) into any ch-2 corner sp.
Work (2 dc, ch 2, 3 dc) into same corner sp. (Corner cluster pair made.)
Ch 1.
(Work (3 dc, ch 2, 3 dc) into next ch-2 corner sp, ch 1) 3 times.
Join with sl st to top of first dc (or ch-3).
Fasten off.
Stitch count: 24 dc total, 4 ch-2 corner spaces, 4 ch-1 side spaces.
Round 3
Join the color indicated for Round 3 with standing dc into any ch-2 corner sp.
Work (2 dc, ch 2, 3 dc) into same corner sp.
Ch 1.
Work 3 dc into next ch-1 side sp.
Ch 1.
(Work (3 dc, ch 2, 3 dc) into next ch-2 corner sp, ch 1, work 3 dc into next ch-1 side sp, ch 1) 3 times.
Join with sl st to top of first dc.
Fasten off.
Stitch count: 36 dc total, 4 ch-2 corner spaces, 8 ch-1 spaces (2 per side).
Round 4
Join Color A with standing dc into any ch-2 corner sp.
Work (2 dc, ch 2, 3 dc) into same corner sp.
Ch 1.
Work 3 dc into next ch-1 sp.
Ch 1.
Work 3 dc into next ch-1 sp.
Ch 1.
(Work (3 dc, ch 2, 3 dc) into next ch-2 corner sp, ch 1, (work 3 dc into next ch-1 sp, ch 1) twice) 3 times.
Join with sl st to top of first dc.
Fasten off.
Stitch count: 48 dc total, 4 ch-2 corner spaces, 12 ch-1 spaces (3 per side).
Checkpoint 1
After completing all 18 full granny squares and blocking, each square should measure 3.75 inches by 3.75 inches. The colors should be vivid and the corners should lie flat without curling or puckering. If your squares are smaller, switch to a larger hook. If larger, switch to a smaller hook.
Half-Square Instructions
Make 12 half-squares total (6 for front panel, 6 for back panel).
The half-square begins like a full granny square but pivots to flat rows after Round 2 to create a right triangle.
Foundation
With Color C, make a magic circle.
Ch 3 (counts as dc), work 2 dc into mc, ch 2, work 3 dc into mc, ch 2, work 3 dc into mc.
Do not join into a round.
You now have 3 clusters of 3 dc and 2 ch-2 spaces.
Fasten off Color C.
Stitch count: 9 dc, 2 ch-2 corner spaces.
Row 1 (RS, in Color B)
Join Color B into first ch-2 sp.
Ch 3 (counts as dc), work 2 dc into same ch-2 sp, ch 1.
Work 3 dc loosely across the center area, ch 1.
Work (3 dc, ch 2, 3 dc) into the second ch-2 corner sp.
Turn.
Fasten off Color B.
Stitch count: 15 dc, 1 ch-2 corner at one end.
Row 2 (in Color A)
Join Color A at flat beginning edge.
Ch 1, sc evenly across the two legs of the triangle, working 3 sc into each corner ch-2 sp and 1 sc into each dc, and sk all ch-1 sp.
At the end, work 1 sc into the final st.
Do not work across the hypotenuse yet.
Fasten off.
Hypotenuse Edging (in Color A)
Reattach Color A at one tip of the hypotenuse. Ch 1. Work sc evenly across the long diagonal edge, approximately 1 sc per 2 dc rows, ending with an even number of stitches. Fasten off.
After blocking, each half-square should have two legs of 3.75 inches and sit cleanly as a right triangle.
Joining the Squares
This step brings everything together. You’ll use a flat slip stitch join throughout.
Step 1: Lay out front panel squares in the on-point arrangement on a flat surface.
Step 2: Begin by joining squares in diagonal rows. Join the bottom-corner square to the two squares that touch it diagonally, forming the bottom V of the diamond shape.
Step 3: For each join, place two squares WS together with RS facing out on both sides.
Step 4: With Color A and hook, sl st through the back loop of the edge stitch on the near square and the back loop of the corresponding edge stitch on the far square simultaneously.
Step 5: Work sl st across the entire shared edge, ch-2 corner spaces included. Work sl st, ch 1, sl st to mirror the ch-2 sp of each square.
Step 6: At the end of the join, fasten off Color A.
Step 7: At 4-square intersections where 4 squares meet at a single corner point, work a small sl st tack by inserting hook through all 4 corner ch-2 spaces and working a sl st to close the center junction neatly.
Join all rows diagonally until the full 3-by-3 grid is assembled, then attach the half-squares to the outer edges.
Repeat all steps for the back panel.
Side Gusset Panels
Make 2. These create the 3.5-inch depth of the bag.
Foundation chain: Ch 15.
Row 1: Dc into 4th ch from hook, dc in each ch across. Turn. (13 dc)
Row 2: Ch 3 (counts as dc), dc in each st across. Turn. (13 dc)
Repeat Row 2 until the gusset strip measures approximately 34 inches (86 cm) long.
After the strip is complete, work one round of sc all around the perimeter of the strip in Color A. Ch 1, sc in each dc across long edge, 3 sc in corner, sc in each row-end down short side, 3 sc in corner, continue around. Fasten off.
Assembling the Bag Body
Step 1: With RS facing outward on both pieces, hold one gusset strip against one side edge of the front panel, WS to WS.
Step 2: Using Color A and the flat sl st join method, join the gusset strip to the front panel along the two side edges and bottom edge.
Step 3: Repeat to join the same gusset strip to the back panel along the same three edges.
Step 4: The top of the bag is left open for the top band.
Ribbed Top Band
The ribbed band is worked in rows, picking up stitches along the top opening edge.
Pick-up Row
With Color A, starting at one back corner of the top opening, insert hook into the edge stitch and work sc evenly around the entire top opening perimeter.
Work approximately 1 sc per dc across the top of each panel, and 1 sc per end-row along the short gusset sides.
Based on bag dimensions, work approximately 120 sc total.
Join with sl st to first sc to form a ring. (120 sc)
Ribbing Round 1
Ch 1. Work 1 sc blo in each sc around. Join with sl st to first sc. (120 sc)
Repeat Ribbing Round 1 for a total of 8 rounds.
Fasten off and weave in ends.
Handle Attachment
Step 1: Determine handle placement. Each handle is centered on the front and back panels. Measure in 3 inches from each side edge on the front panel top and mark two attachment points, approximately 5 inches apart. Repeat on back panel.
Step 2: Thread each leather handle’s D-ring strap through the ribbed band at the marked attachment points, folding the strap end to the inside of the bag.
Step 3: Using gold rivets or Chicago screws, punch through the strap and crochet fabric. Sandwich a small 1-inch square of scrap leather between the strap and fabric on the inside for reinforcement.
Step 4: Set all rivets securely. You need 8 rivets total.
Step 5: Clip the decorative charm onto one D-ring if desired.
Rope-Wrapped Handle Accent
Cut approximately 60 inches of Color A yarn. Beginning at one D-ring end of the handle, wrap the yarn tightly around the handle in a spiral, keeping wraps even and close together. Secure both ends with craft glue or by threading the tail under several wraps with a tapestry needle.
Care Instructions
Hand wash in cool water with gentle detergent. Do not machine wash if leather handles are attached. Lay flat to dry. Do not wring or twist. Store in a dust bag when not in use to protect the leather handles.
Final Thoughts
This Christmas Granny Square Handbag crochet pattern creates something truly special. It’s the kind of handmade accessory that becomes an heirloom piece, pulled out every holiday season and treasured for years to come. The combination of traditional granny squares with modern hardware and structured construction gives you the best of both worlds.
Take your time with the blocking and joining. Those details make all the difference in how polished your finished bag looks. And don’t stress about perfection. Handmade means one of a kind, and that’s exactly what makes it beautiful.
Thank you so much for choosing this pattern. I hope you love making it as much as I loved putting this tutorial together for you. If you’d like to save this Christmas Granny Square Handbag pattern for later, go ahead and pin it to your Pinterest boards. And please leave a comment below if you make one. I would absolutely love to see your finished bags and hear which color combinations you chose!
