
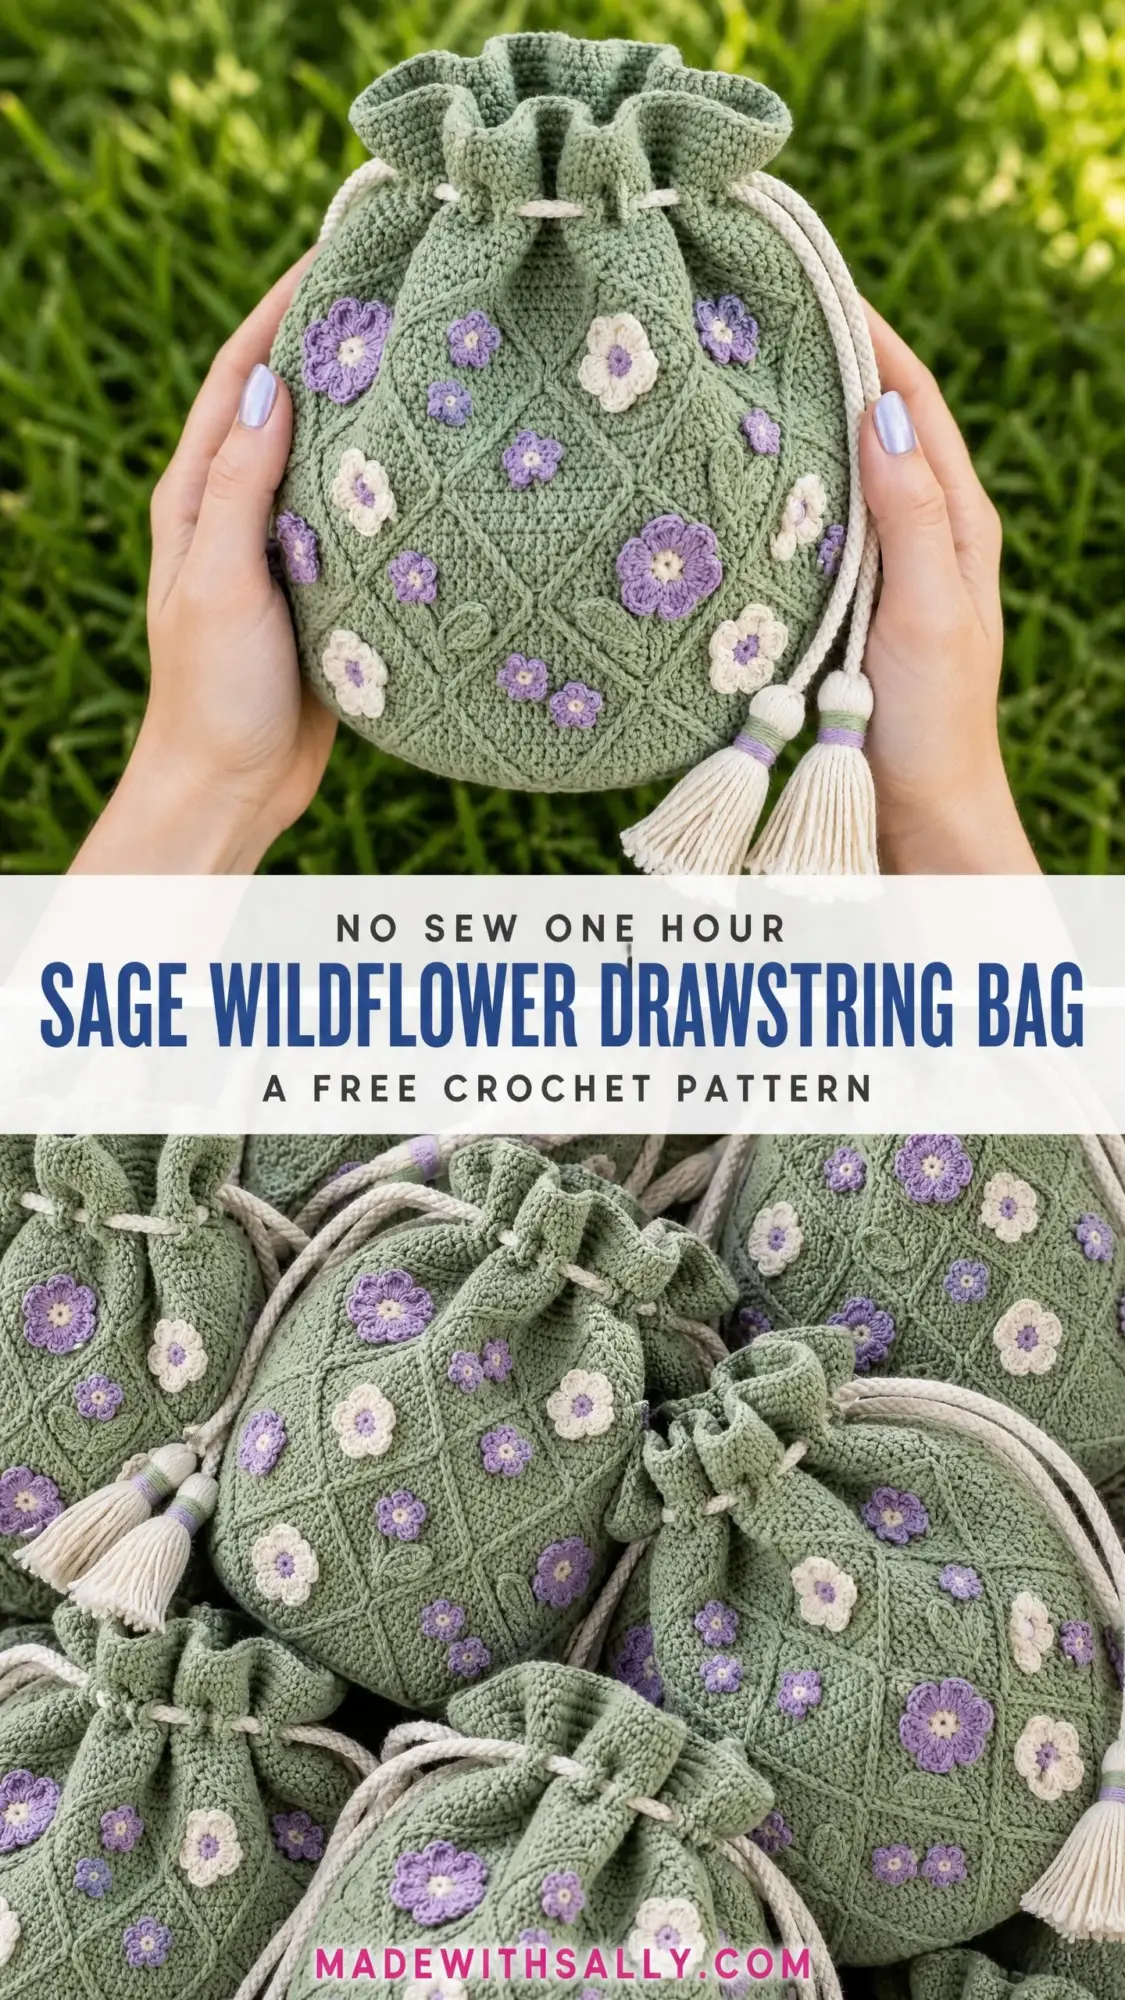
THIS is the bag that’s going to make everyone ask where you bought it. I’m not even exaggerating. The crossed stitch lattice, the dimensional flowers, those adorable tassels at the bottom of the drawstring. It looks like something from a boutique craft fair, but you’re going to make it yourself.
Now, fair warning. This isn’t a weekend project. We’re talking 18 to 25 hours of crochet time spread across the body, the flowers, and all the finishing details. But here’s the thing. Every single one of those hours is worth it when you pull this beauty out of your project bag and watch jaws drop.
If you’ve been looking for a project that really shows off your skills and gives you something gorgeous to use or gift, you’ve found it. Let’s dive in.
About This Crochet Pattern
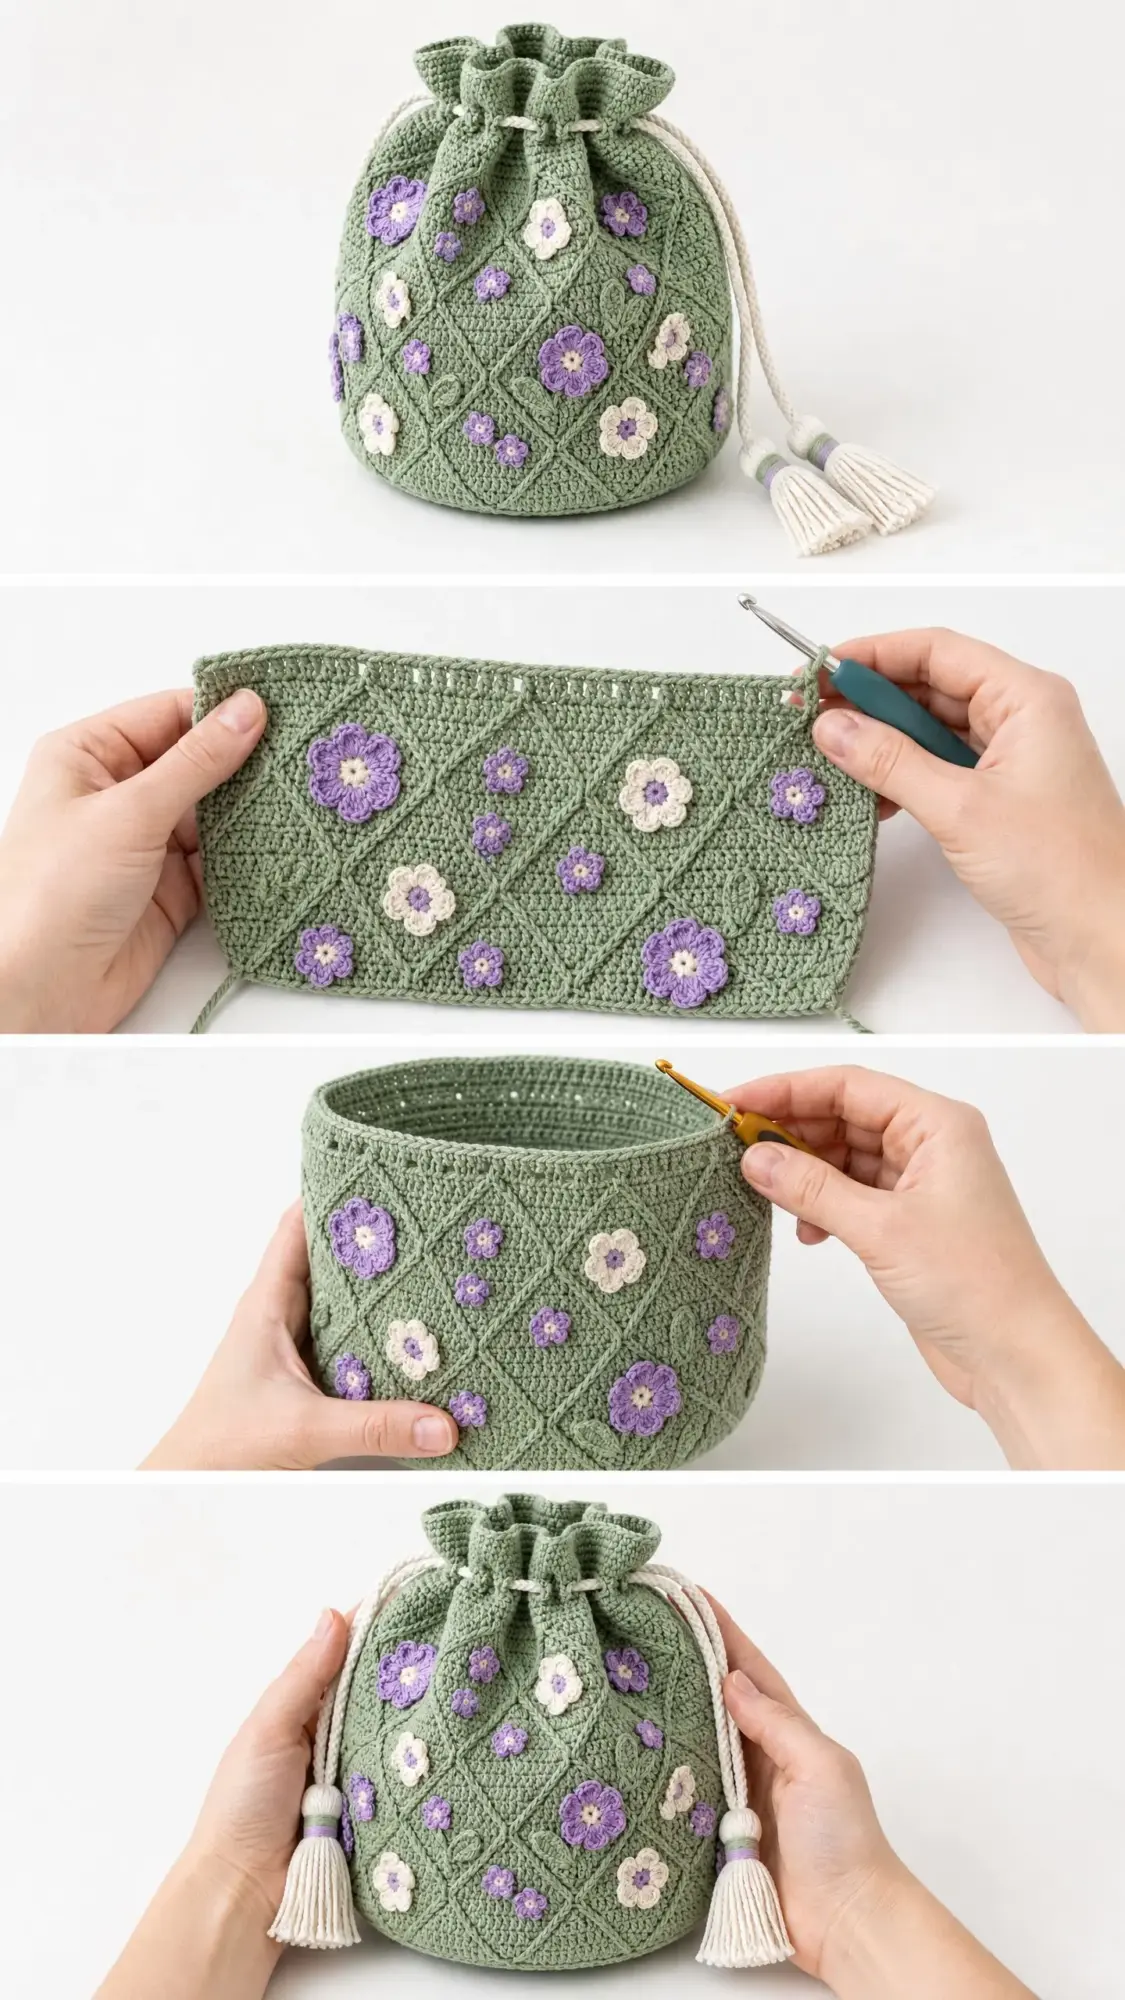
This stunning drawstring bag features a sage green body worked entirely in the round from the bottom up. The star of the show is the diagonal lattice texture created through crossed double crochet stitches. These form raised diamond shapes across the entire surface of the bag.
The dimensional wildflowers in purple and cream are crocheted separately and sewn onto the finished body. They nestle perfectly at each lattice intersection, creating that scattered garden look that makes this bag so special. A twisted rope drawstring threads through eyelets at the top, and two wrapped tassels with striped collars complete the design.
The bag has a gently rounded silhouette. It’s wider at the middle and narrows slightly at both the base and top, giving it that classic reticule or pouch shape. Think vintage charm meets modern craftsmanship.
Skill Level
This pattern is rated intermediate to advanced intermediate. You should be comfortable working in the round, reading stitch counts carefully, and executing front post and back post stitches. The flower appliques are straightforward but require careful finishing.
Don’t let that intimidate you though. If you’ve completed a few projects worked in the round and you’re ready to try something with more texture, this is an excellent next step. I’ll walk you through every technique.
Finished Dimensions
The completed bag measures approximately 10 inches wide at the widest point by 11 inches tall, not including the drawstring or tassels. The circumference at the widest point is approximately 31 inches.
In metric, that’s about 25.5 cm wide by 28 cm tall, with a circumference of approximately 79 cm.
Materials Needed
Yarn
Main Color (MC): Sage green, approximately 400 yards or 366 meters of worsted weight yarn (Category 4)
Color A (CA): Light purple or lavender, approximately 80 yards or 73 meters of worsted weight yarn (Category 4)
Color B (CB): Cream or off-white, approximately 80 yards or 73 meters of worsted weight yarn (Category 4)
Yarn Suggestions
Option 1: Lion Brand Yarn Comfy Cotton Blend. This gives excellent stitch definition for the lattice pattern and has a satisfying slight sheen. You’ll need 2 skeins MC, 1 skein CA, 1 skein CB.
Option 2: Paintbox Yarns Simply DK held double to achieve worsted gauge. This is budget-friendly with an outstanding color range. You’ll need approximately 4 skeins MC, 1 skein CA, 1 skein CB.
Option 3: Paintbox Yarns Cotton Aran. This produces a structured bag that holds its shape beautifully. You’ll need 3 skeins MC, 1 skein CA, 1 skein CB.
Substitution tip: Any smooth worsted weight yarn with good stitch definition will work. Avoid fuzzy or textured yarns as they’ll obscure the lattice pattern. Cotton or cotton blends are recommended over 100% acrylic because they produce a firmer, more structured bag.
Hooks
US size H-8 / 5.0 mm for the bag body
US size G-6 / 4.0 mm for the flowers
Notions
Gauge
With MC and H-8 / 5.0 mm hook, working single crochet (sc) in the round:
16 stitches x 18 rounds = 4 inches / 10 cm square
To make a gauge swatch, chain 20 and work single crochet back and forth for 22 rows. Block lightly and measure the center 4 inches.
Important: Gauge is critical for this bag. The lattice pattern creates a slightly denser fabric than plain single crochet, so gauge is taken in plain sc. If your gauge is off, change your hook size accordingly.
Abbreviations
Before we start, let’s go through all the abbreviations you’ll encounter:
Special Stitches
Crossed Double Crochet (CrDC)
This stitch creates the diagonal lattice texture. Each CrDC works over a 2-stitch unit.
Step 1: Skip the next stitch. Insert hook into the stitch AFTER the skipped stitch. Yarn over and pull up a loop. Yarn over and draw through 2 loops. Yarn over and draw through remaining 2 loops. You’ve completed one dc into the second stitch.
Step 2: Now insert hook into the SKIPPED stitch, working in front of (on top of) the dc you just made. Complete another dc.
One CrDC unit equals 2 dc stitches worked over 2 stitch positions, with the left dc crossing in front of the right dc. This creates a left-leaning cross.
Wildflower Motif
The flowers are worked in joined rounds. Full instructions are in the Flower Motifs section below.
Step by Step Crochet Pattern Instructions
Section 1: Oval Flat Bottom
The base is an oval worked in the round. This creates the wider, rounder bottom profile.
With MC and H-8 / 5.0 mm hook, chain 13.
Round 1: Starting in the second chain from hook, work 1 sc in each of the next 11 chains. Work 3 sc in the last chain (this is the turning end). Rotate work to crochet along the opposite side of the foundation chain. Work 1 sc in each of the next 10 chains. Work 2 sc in the last chain. Join with sl st to first sc. (26 sc)
Round 2: Ch 1. Work 2 sc in first st (inc). Sc in next 10 sts. Work 2 sc in each of next 3 sts (3 incs at oval end). Sc in next 10 sts. Work 2 sc in each of next 2 sts. Join with sl st to first sc. (32 sc)
Round 3: Ch 1. Work (sc 1, inc) in first 2 sts. Sc in next 10 sts. Work (inc, sc 1, inc, sc 1, inc) across next 5 sts. Sc in next 10 sts. Work (sc 1, inc) in next 2 sts. Join. (38 sc)
Round 4: Ch 1. Sc in first 2 sts. Inc in next st. Sc in next 10 sts. (Inc, sc 1) 3 times. Inc. Sc in next 10 sts. Inc in next st. Sc in last st. Join. (44 sc)
Round 5: Ch 1. Sc in first 3 sts. Inc in next st. Sc in next 10 sts. (Inc, sc 2) 3 times. Inc. Sc in next 10 sts. Inc in next st. Sc in last 2 sts. Join. (50 sc)
Round 6: Ch 1. Sc in first 4 sts. Inc in next st. Sc in next 10 sts. (Inc, sc 3) 3 times. Inc. Sc in next 10 sts. Inc in next st. Sc in last 3 sts. Join. (56 sc)
Round 7: Ch 1. Sc in first 5 sts. Inc in next st. Sc in next 10 sts. (Inc, sc 4) 3 times. Inc. Sc in next 10 sts. Inc in next st. Sc in last 4 sts. Join. (62 sc)
Round 8: Ch 1. Sc in first 6 sts. Inc in next st. Sc in next 10 sts. (Inc, sc 5) 3 times. Inc. Sc in next 10 sts. Inc in next st. Sc in last 5 sts. Join. (68 sc)
Checkpoint 1: After Round 8, your oval base should measure approximately 8 inches long and 5 inches wide.
Section 2: Sides, Plain Transition Rounds
These rounds establish a straight tube working up from the oval base.
Round 9: Ch 1. Working in BLO only, sc in each st around. Join. (68 sc)
Round 10: Ch 1. Sc in each st around (both loops). Join. (68 sc)
Round 11: Ch 1. Sc in each st around. Join. (68 sc)
Working Round 9 in the back loop only creates a neat fold line at the base edge.
Checkpoint 2: After Round 11, the bag tube should be approximately 1 inch tall above the base fold line.
Section 3: Body Shaping, Increase Section
The bag expands slightly from the base to its widest point.
Round 12: Ch 1. (Sc in next 16 sts, inc in next st) 4 times. Join. (72 sc)
Round 13: Ch 1. Sc in each st around. Join. (72 sc)
Round 14: Ch 1. (Sc in next 17 sts, inc in next st) 4 times. Join. (76 sc)
Round 15: Ch 1. Sc in each st around. Join. (76 sc)
Round 16: Ch 1. (Sc in next 18 sts, inc in next st) 4 times. Join. (80 sc)
Round 17: Ch 1. Sc in each st around. Join. (80 sc)
Round 18: Ch 1. (Sc in next 19 sts, inc in next st) 4 times. Join. (84 sc)
Round 19: Ch 1. Sc in each st around. Join. (84 sc)
Round 20: Ch 1. (Sc in next 20 sts, inc in next st) 4 times. Join. (88 sc)
Round 21: Ch 1. Sc in each st around. Join. (88 sc)
Count carefully. You must have exactly 88 stitches before starting the lattice section.
Checkpoint 3: After Round 21, the bag should measure approximately 4.5 inches tall from the fold line.
Section 4: Lattice Body Pattern
This is where the magic happens. The stitch count remains 88 throughout this entire section.
Round 22 (Lattice Round): Ch 2 (does not count as a stitch). Work CrDC across all sts as follows: (Skip next st, dc in next st, dc in skipped st) 44 times. Join with sl st to first dc. (88 sts)
Round 23: Ch 1. Sc in each st around. Join. (88 sc)
Round 24 (Offset Lattice Round): Ch 1. Sc in first st. Ch 2 (does not count as a stitch). Work CrDC across next 86 sts: (skip next st, dc in next st, dc in skipped st) 43 times. Sc in last st. Join. (88 sts)
Round 25: Ch 1. Sc in each st around. Join. (88 sc)
Now repeat Rounds 22 through 25 for the lattice pattern.
Rounds 26-29: Repeat Rounds 22-25.
Rounds 30-33: Repeat Rounds 22-25.
Rounds 34-37: Repeat Rounds 22-25.
Rounds 38-41: Repeat Rounds 22-25.
Checkpoint 4: After Round 41, the bag body should measure approximately 8.5 to 9 inches tall from the base fold line. Confirm you have 88 stitches.
Section 5: Top Decrease Section
These rounds taper the bag slightly at the top.
Round 42: Ch 1. (Sc in next 20 sts, sc2tog) 4 times. Join. (84 sc)
Round 43: Ch 1. Sc in each st around. Join. (84 sc)
Round 44: Ch 1. (Sc in next 19 sts, sc2tog) 4 times. Join. (80 sc)
Round 45: Ch 1. Sc in each st around. Join. (80 sc)
Round 46: Ch 1. (Sc in next 18 sts, sc2tog) 4 times. Join. (76 sc)
Round 47: Ch 1. Sc in each st around. Join. (76 sc)
Section 6: Drawstring Channel
Round 48 (Eyelet Round): Ch 1. (Sc in next 3 sts, ch 2, skip next 2 sts) 15 times. Sc in last st. Join. (46 sc + 15 ch-2 spaces = 76 stitch positions)
Round 49: Ch 1. (Sc in next 3 sc, work 2 sc into ch-2 sp) 15 times. Sc in last sc. Join. (76 sc)
Round 50: Ch 1. Sc in each st around. Join. (76 sc)
Round 51: Ch 1. Sc in each st around. Join. (76 sc)
Section 7: Top Ruffle Edging
This creates the slightly gathered look at the opening.
Round 52: Ch 1. (Sc in next st, inc in next st) 38 times. Join. (114 sc)
Round 53: Ch 1. Sc in each st around. Join. (114 sc)
Round 54: Ch 1. Hdc in each st around. Join. (114 hdc)
Round 55: Ch 1. Sl st in each st around. Fasten off and weave in end. (114 sl st)
Checkpoint 5: The finished bag body should measure approximately 11 inches tall and 10 inches wide at the widest point.
Flower Motifs
Make approximately 22 to 24 flowers total. The sample uses about 12 purple (CA) flowers with cream centers and 11 cream (CB) flowers with purple centers.
With G-6 / 4.0 mm hook and your chosen petal color, make a magic ring.
Round 1: Ch 1. Work 10 sc into the magic ring. Pull ring closed. Join with sl st to first sc. (10 sc)
Round 2 (Petals): For each petal: sl st into next sc, ch 3, work 2 dc into the same stitch at the base of the ch-3, work 2 dc into the next sc, ch 3, sl st back into the same sc as the last dc. Repeat 5 times total for 5 petals. Join with sl st to base of first petal. (5 petals)
Round 3 (Center): Join center color into the center magic ring from the front. Work 5 sc into the center ring. Join. Fasten off, leaving a 12-inch tail for sewing.
Finished flowers should measure approximately 1.25 to 1.5 inches across.
Assembly and Finishing
Blocking
Wet blocking is strongly recommended. Submerge the bag body in cool water, gently squeeze to saturate, and roll in a clean dry towel. Shape over a rounded form or stuff with plastic bags wrapped in a towel. Allow to dry completely for 24 to 48 hours.
Block flowers flat on a blocking mat, pinning each petal open while wet.
Flower Placement
Pin flowers to the body at the intersections of the lattice diamond pattern. Aim for flowers to sit at the center of each diamond, not at the lattice lines. Alternate CA and CB flowers across the surface.
Using the long yarn tails and a yarn needle, sew each flower to the bag body with small invisible stitches. Don’t pull too tightly or the fabric will pucker.
Drawstring
Cut 4 lengths of cream yarn, each approximately 120 inches long. Fold in half so you have 8 working ends. Hold the looped end and attach to a fixed point.
Divide into 2 groups of 4 strands. Twist Group 1 tightly clockwise until it wants to kink. Do the same with Group 2. Hold both together and let them twist around each other counter-clockwise. Tie an overhand knot at each end.
Thread through the eyelet round, weaving in and out through all the ch-2 spaces.
Tassels
Make 2 tassels by winding cream yarn 35 times around a 3-inch piece of cardboard. Slip off and tie at the top. Attach to the drawstring ends. Wrap the tassel neck with alternating stripes of cream and sage green yarn for the striped collar effect. Trim the bottom evenly to approximately 2 inches.
Care Instructions
Hand wash in cool water with mild soap. Do not machine wash or tumble dry. Reshape while damp and air dry flat or stuffed. Do not bleach or iron directly.
Size Customization Tips
To make the bag taller: Work additional repeats of Rounds 22 through 25 before the decrease section. Each full repeat adds approximately 1 inch of height.
To make the bag wider: After Round 21, continue increasing by 4 stitches every 2 rounds for 2 to 4 more rounds before beginning the lattice. Keep the total divisible by 8.
To make the bag smaller: Stop the increase section earlier, for example at Round 18 with 84 stitches.
Thank you so much for choosing this pattern. I really hope you love making this bag as much as I loved designing it. If you make one, I’d absolutely love to see it! Tag me on Instagram or share a photo on Facebook. Your creations always make my day.
If you found this crochet tutorial helpful, save it to your Pinterest boards so you can find it easily when you’re ready to start. And please drop a comment below if you give it a try. I read every single one!
