
This one is going to BLOW YOUR MIND. I am SO excited to share this pattern because it looks incredibly impressive, but the construction is actually way more straightforward than you might think. The Lavender Fields Granny Tote Bag uses one of my favorite stitches of all time, the classic granny cluster, and works up into this gorgeous gradient masterpiece that will have everyone asking where you bought it.
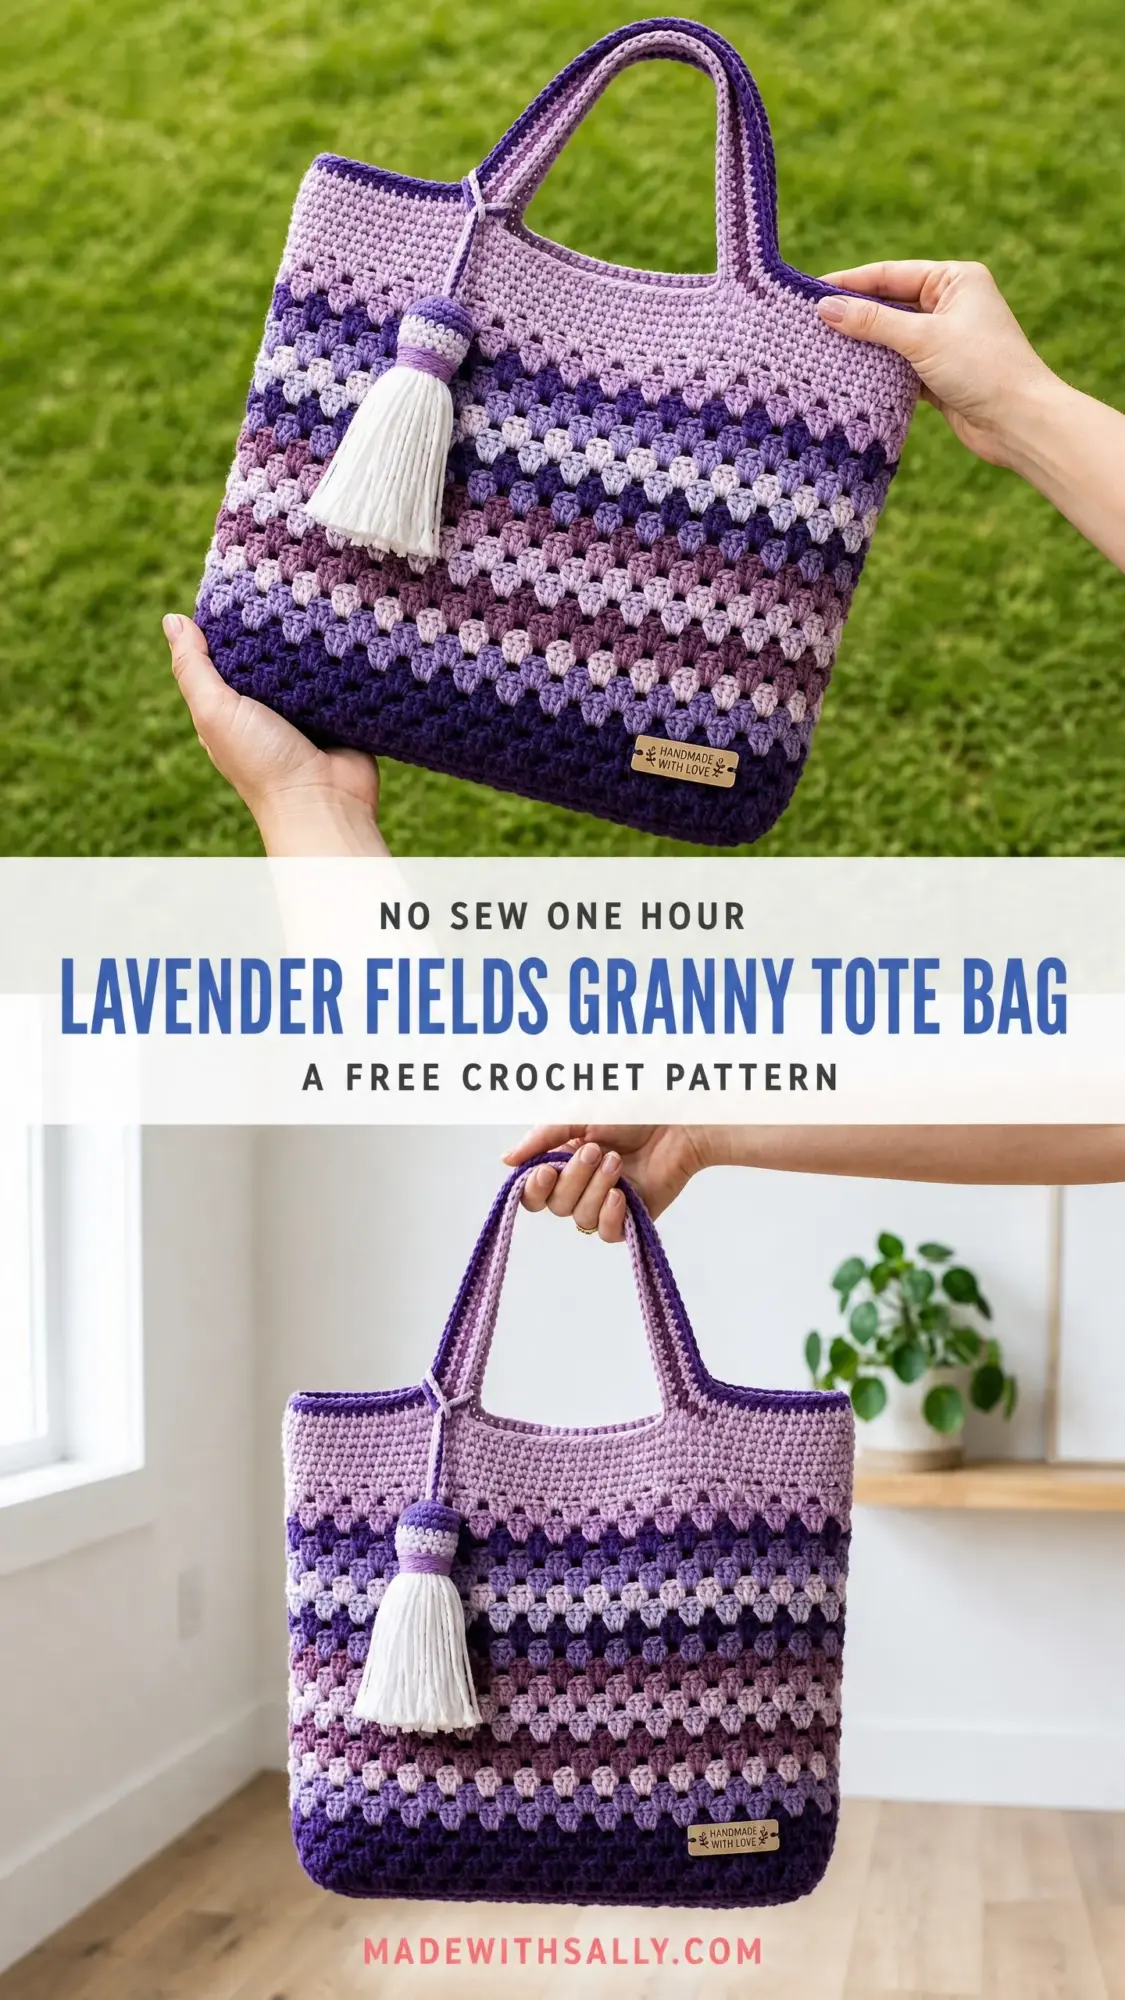
The best part? Once you get into the rhythm of the granny stripe rounds, this bag practically crochets itself. You could realistically finish this beauty in a weekend of dedicated crafting, or stretch it out over a relaxing week of evening sessions.
If you have been wanting to make something that looks like it belongs in a boutique but does not require a PhD in crochet engineering, you have found your project. This tote makes an AMAZING gift, and honestly, you are going to want to keep the first one for yourself.
About This Crochet Pattern
The Lavender Fields Granny Tote is a structured, flat-bottomed bag featuring beautiful horizontal stripes in a gradient of purple tones. The design starts with deep violet at the base and transitions through medium purple, mauve, dusty lavender, and soft lilac toward the top. A decorative white tassel with a crocheted bead cap adds a charming finishing touch.
This crochet tutorial walks you through every single step. You will start by creating a firm rectangular base worked flat in rows. Then you will pick up stitches around all four sides to begin working in rounds. The granny stripe pattern creates those gorgeous textured rows that give this bag its signature look. Finally, you will make sturdy double-layer handles and attach them securely.
The finished bag measures approximately 14.5 inches wide, 13 inches tall, and 4 inches deep. The handle drop is about 10 inches, making it perfect for carrying over your shoulder or in the crook of your arm.
Skill Level
This pattern is rated intermediate. You should be comfortable working in joined rounds, managing multiple yarn colors, and following stitch counts carefully through repeat sections. If you have completed several projects and feel confident with basic stitches, you will absolutely succeed with this one.
That said, if you are a determined beginner who takes your time and reads through the entire pattern first, you can totally tackle this. The stitches themselves are not complicated. The challenge comes from keeping track of color changes and maintaining consistent tension throughout the body rounds.
Time Estimate
Plan for 12 to 18 hours of work if you crochet at an average pace. This includes the base, body, handles, tassel construction, and all finishing work.
Materials Needed
Yarn: Worsted weight yarn, which is also called weight category 4. I strongly recommend cotton or a cotton blend for this project because it gives the bag structure and prevents slouching. You will need approximately 800 to 900 yards total, divided across five colors.
Hook: US Size J or 6.0 mm crochet hook
Additional supplies:
Yarn Suggestions
Lion Brand 24/7 Cotton in shades Violet, Purple, Mauve, Lavender, and Blush works beautifully here. This 100 percent mercerized cotton produces clean stitch definition and holds its shape well.
Paintbox Yarns Simply DK held double throughout is another excellent option. Holding it double achieves worsted weight gauge while giving a slightly drapier result.
WeCrochet Comfy Worsted in the purple colorway family adds a slight stretch and softness while maintaining good durability.
If you substitute yarn, make sure it achieves the stated gauge. Cotton or cotton-blend yarns are strongly recommended over pure acrylic for this project.
Gauge
For the granny stripe pattern using double crochet clusters in multiples of 3:
For single crochet used in the base:
Please take time to make a gauge swatch. If your gauge is off, adjust your hook size. Gauge matters here because it affects the final dimensions of your bag.
Abbreviations
Special Stitches
Granny Cluster (GC)
This is the star of the show. A granny cluster is simply 3 double crochets worked into the same space and joined at the top. Here is exactly how to work one:
1. Yarn over and insert hook into the designated chain space or stitch
2. Yarn over and pull up a loop so you have 3 loops on hook
3. Yarn over and pull through 2 loops so you have 2 loops remaining
4. Yarn over, insert hook into the same space again
5. Yarn over and pull up a loop so you have 4 loops on hook
6. Yarn over and pull through 2 loops so you have 3 loops remaining
7. Yarn over, insert hook into the same space one more time
8. Yarn over and pull up a loop so you have 5 loops on hook
9. Yarn over and pull through 2 loops so you have 4 loops remaining
10. Yarn over and pull through all remaining 4 loops
You have just made one granny cluster. It is 3 double crochets grouped together into one neat little bundle.
Crocheted Tassel Bead
This creates the decorative cap for your tassel. Work it in the round using Colors A or B.
Round 1: Make a magic ring, work 6 sc into ring. (6 sc)
Round 2: 2 sc in each st around. (12 sc)
Round 3: [Sc in next st, 2 sc in next st] 6 times. (18 sc)
Rounds 4 through 6: Sc in each st around. (18 sc)
Round 7: [Sc2tog, sc in next st] 6 times. (12 sc)
Stuff lightly with polyfill or yarn scraps.
Round 8: [Sc2tog] 6 times. (6 sc)
Fasten off, leaving a long tail for sewing closed and attaching to the tassel.
Pattern Instructions
Section 1: Base
The base creates a firm rectangular foundation approximately 14.5 inches long by 4 inches wide.
Using Color A and your 6.0 mm hook, chain 53.
Row 1 (RS): Sc in 2nd ch from hook and in each ch across. Turn. (52 sc)
Rows 2 through 16: Ch 1, which does not count as a stitch, sc in each st across. Turn. (52 sc)
After Row 16, do not fasten off. Your base should measure approximately 14.5 inches long and 4 inches wide.
Section 2: Transition to Rounds
Now you will pick up stitches around all four sides of the base rectangle to begin working in rounds.
With Color A still attached at the end of Row 16, do not turn. You will work along all four edges.
Setup Round:
Work along the long top edge: Ch 1, sc evenly across the top, placing sc into each of the 52 row-edge stitches. (52 sc along top)
At the corner, work 3 sc into the corner stitch. Place a stitch marker in the center sc of this corner group.
Work 16 sc evenly down the short right side, one sc per row end. (16 sc)
At the corner, work 3 sc into the corner stitch. Place marker in center sc.
Work 52 sc along the bottom long edge, working into the unused loops of the foundation chain. (52 sc)
At the corner, work 3 sc into the corner stitch. Place marker in center sc.
Work 16 sc evenly up the short left side. (16 sc)
At the corner, work 3 sc into the corner stitch. Place marker in center sc.
Sl st to join to first sc of the round. (Total: 148 sc)
Section 3: Granny Stripe Setup Round
This round converts your single crochet border into the chain space grid needed for granny stripe rounds.
With Color A, join to any corner marker stitch.
Ch 3, which counts as dc. Work 2 more dc in same corner st to complete your first corner cluster. Ch 1.
Along the long side: [Sk 2 sts, GC in next st, ch 1] 17 times. (17 clusters)
At next corner: GC in corner st, ch 1.
Along the short side: [Sk 2 sts, GC in next st, ch 1] 5 times. (5 clusters)
At next corner: GC in corner st, ch 1.
Along the next long side: [Sk 2 sts, GC in next st, ch 1] 17 times.
At next corner: GC in corner st, ch 1.
Along the last short side: [Sk 2 sts, GC in next st, ch 1] 5 times.
Sl st to join to top of first ch-3 cluster. (48 cluster-spaces total)
Remove stitch markers from corners.
Section 4: Body Granny Stripe Rounds
Each round follows this pattern: Ch 3, which counts as first dc of first cluster. Work 2 dc in same ch-1 space to complete first GC. Ch 1. [GC in next ch-1 sp, ch 1] around. Sl st to join to top of beginning ch-3.
All rounds produce 48 cluster-spaces.
Color Sequence:
Round 1 (Color A): Ch 3, 2 dc in same ch-1 sp, ch 1, [GC in next ch-1 sp, ch 1] 47 times, sl st to join. (48 cluster-spaces)
Continue following the color sequence above, working each round the same way. When changing colors, fasten off the old color at the end of the round and join the new color.
After Round 22, do not fasten off. Continue to the top edging.
Section 5: Top Edging
The top edging creates a clean, firm rim using single crochet.
Edging Round 1: Ch 1, sc in the top of each dc and into each ch-1 sp around. Sl st to join. (192 sc)
Edging Rounds 2 and 3: Ch 1, sc in each sc around. Sl st to join. (192 sc)
Fasten off and weave in end.
Section 6: Handles (Make 2)
Using Color A and your 6.0 mm hook, chain 5.
Row 1: Sc in 2nd ch from hook and in each ch across. Turn. (4 sc)
Rows 2 through 85: Ch 1, sc in each st across. Turn. (4 sc)
Fold the strip in half lengthwise. Using matching yarn, slip stitch along the open long edge to seam the handle closed into a tube. Fasten off.
Repeat for the second handle.
Section 7: Attaching Handles
Position handles on the front and back of the bag, centered on the long sides.
Pin each handle so its two ends are approximately 4 inches from the center of the panel and about 2 inches inward from the side seam. The handle ends should overlap the top edging by 1 inch on the inside.
Using a tapestry needle and matching yarn, sew each handle end firmly to the inside of the top edging. Sew in a square stitch pattern and reinforce with an X through the center for durability.
Section 8: Tassel
Step 1: Make the Crocheted Tassel Bead following the special stitch instructions above. Use Color B for most of the bead with one round of Color D in the middle for an accent stripe.
Step 2: Cut 30 to 40 strands of white or cream yarn, each measuring 12 inches long.
Step 3: Hold all strands together and fold in half. Thread the folded loop end through the bottom opening of the tassel bead. Pull snugly so the bead sits at the top.
Step 4: Cut an 18-inch strand of Color D. Wrap it tightly around the tassel approximately 1.5 inches below the bead. Knot firmly.
Step 5: Trim tassel ends evenly to approximately 5 inches below the bead.
Step 6: Attach the tassel to the base of the front left handle, wrapping around the handle and knotting on the inside.
Section 9: Label (Optional)
Sew a small decorative label to the lower front of the bag, centered just above the bottom edge.
Finishing and Blocking
Weave in all yarn ends securely using a tapestry needle.
For cotton yarn, wet block the bag by submerging it in cool water, gently pressing out excess water in a towel, and shaping it over a box matching your target dimensions. Allow to dry completely.
Insert an optional rigid base into the bottom of the finished bag to maintain structure.
If desired, hand-sew a fabric lining to the inside top edge of the bag.
Care Instructions
Machine wash on gentle cycle in cold water if using cotton yarn. Lay flat to dry and reshape while damp. Do not tumble dry. Hand wash is recommended if you have added a fabric lining.
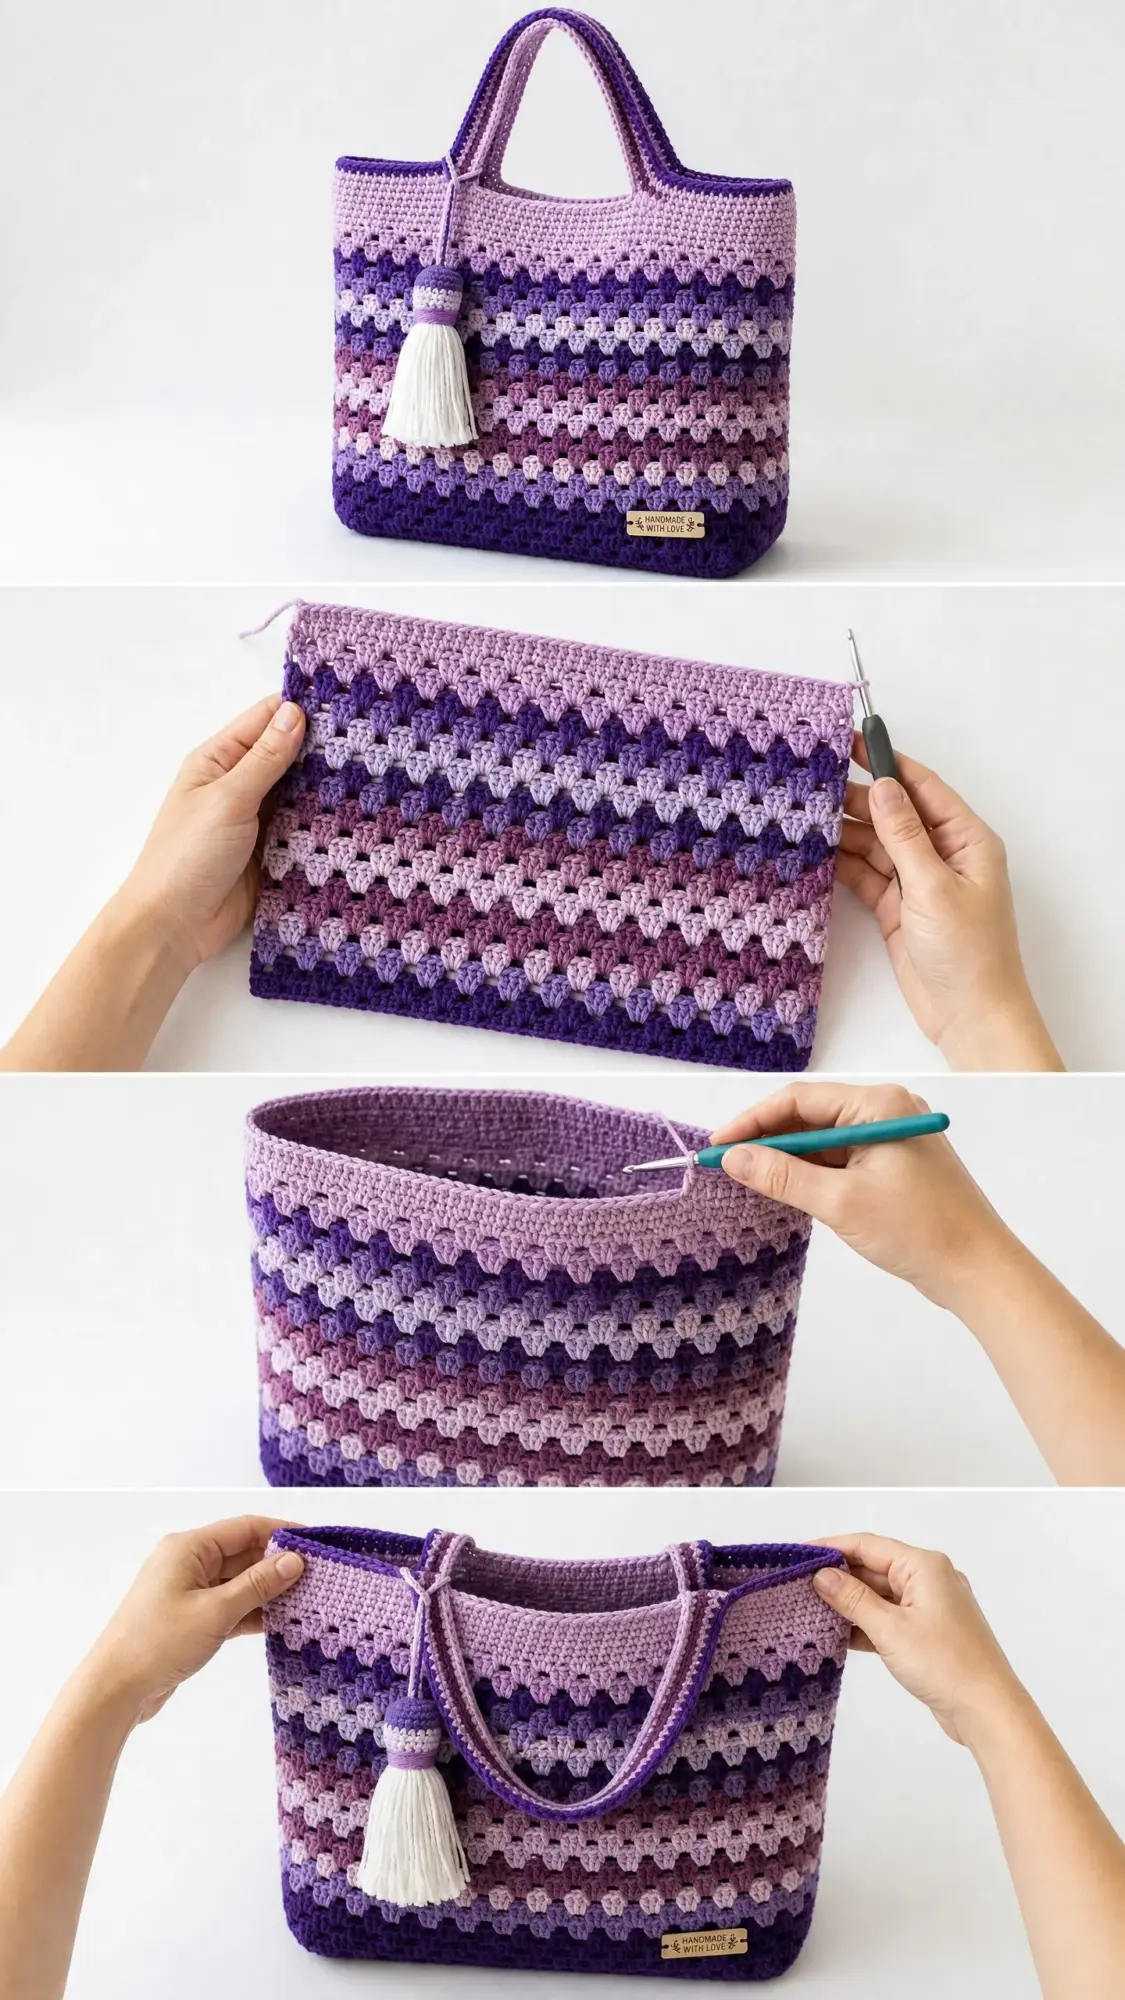
You Did It!
Thank you so much for choosing this pattern for your next project. I truly hope you love making this Lavender Fields Granny Tote Bag as much as I loved designing it. The gradient effect is absolutely stunning in person, and you are going to feel so proud carrying this around.
If you make this bag, I would LOVE to see it! Tag me on Instagram or share a photo in my Facebook group. Seeing your finished projects is honestly the best part of my day.
If this pattern sparked some inspiration, go ahead and save it to your Pinterest boards so you can find it easily when you are ready to start. And please drop a comment below if you make one. I love hearing how your projects turn out and seeing which color combinations you choose!
