
Think crocheting a baby dress is beyond your skill level? I hear this all the time. The lace stitches look complicated. The construction seems confusing. The whole project feels intimidating before you even pick up your hook.
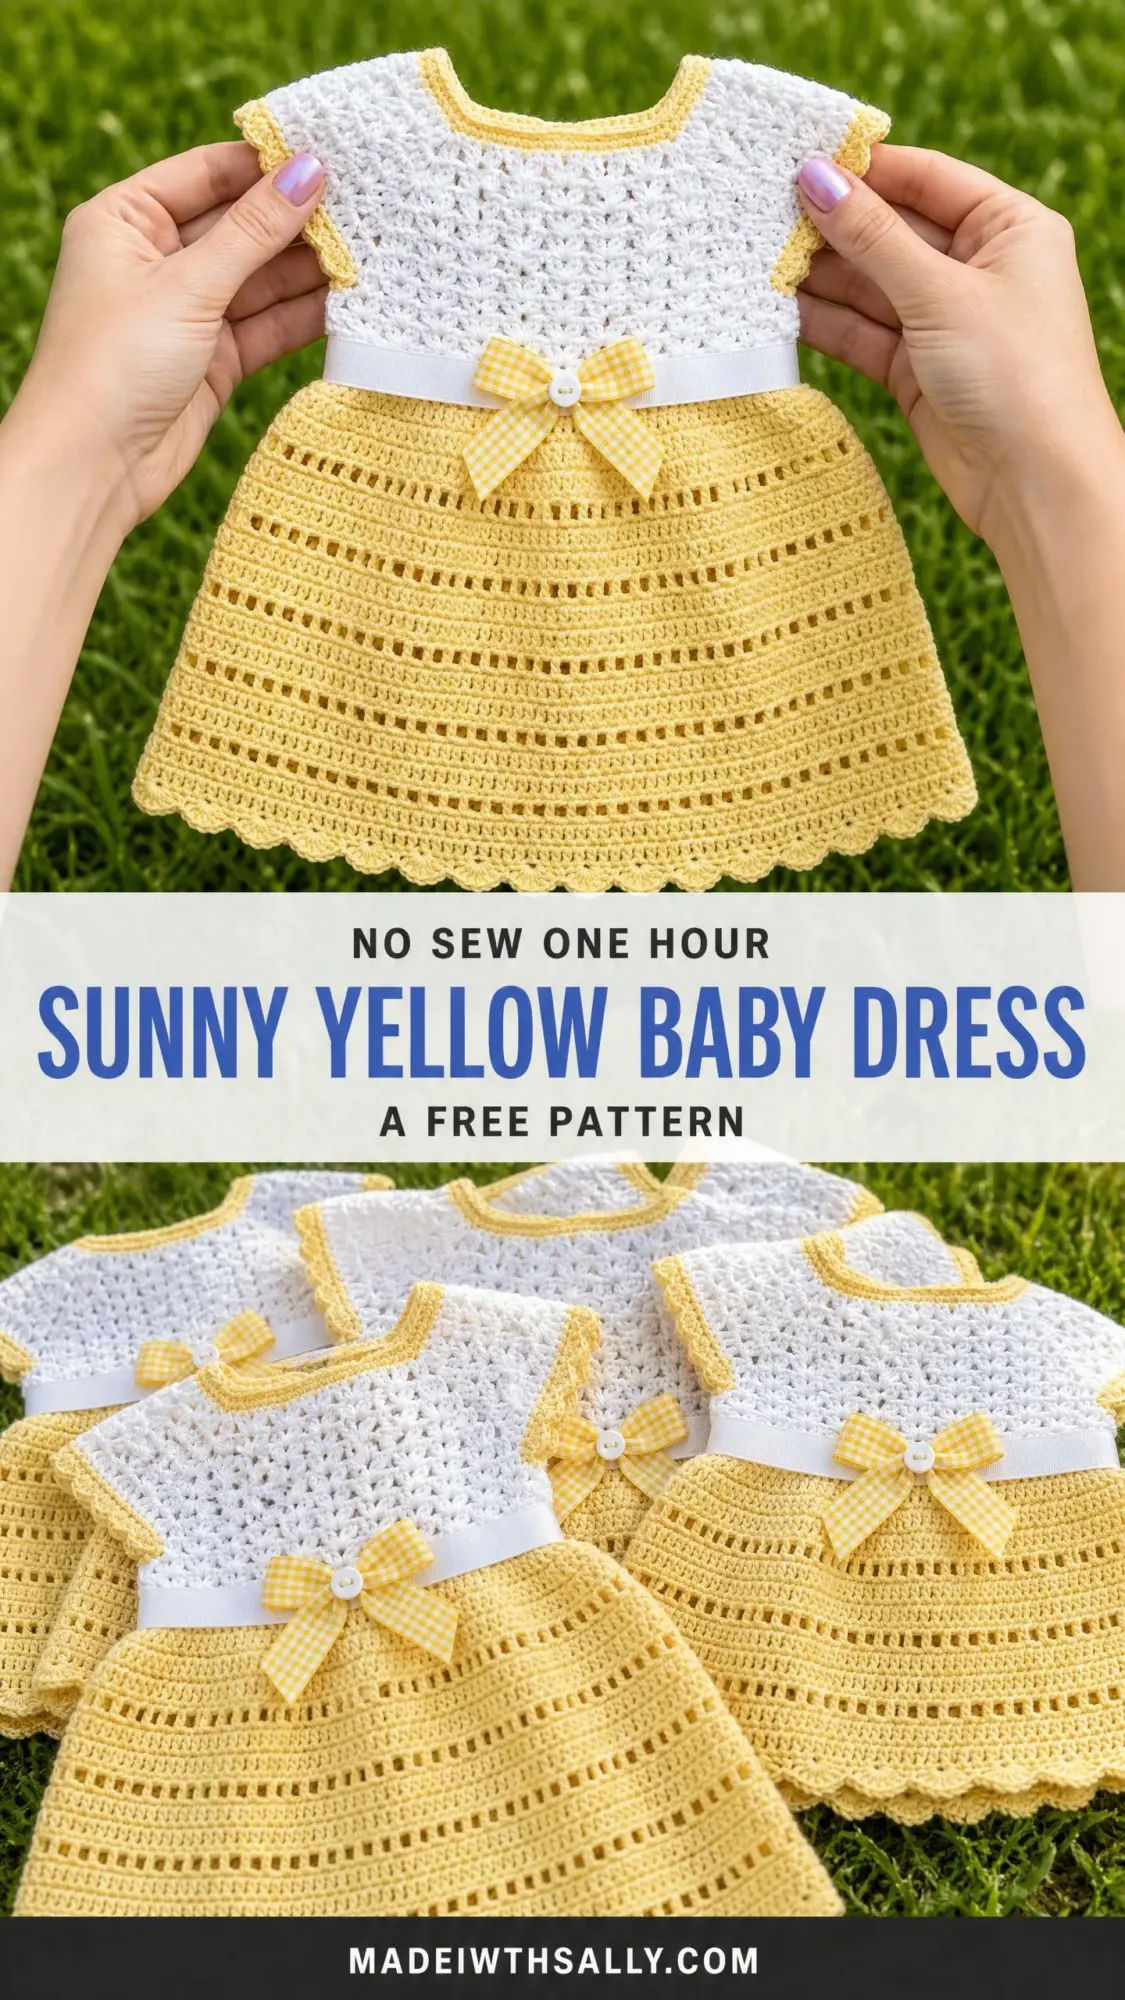
Here is the truth. If you can work a double crochet and a single crochet, you already have the skills you need. This sunny yellow baby dress breaks down into simple, manageable sections. The bodice uses a shell stitch that looks fancy but follows a predictable repeat. The skirt is just double crochet and chain spaces worked in the round.
Whether you have completed a few dishcloths or dozens of blankets, this pattern meets you where you are. I am going to walk you through every single step with clear explanations and plenty of checkpoints along the way.
Why This Baby Dress Pattern Works for Multiple Skill Levels
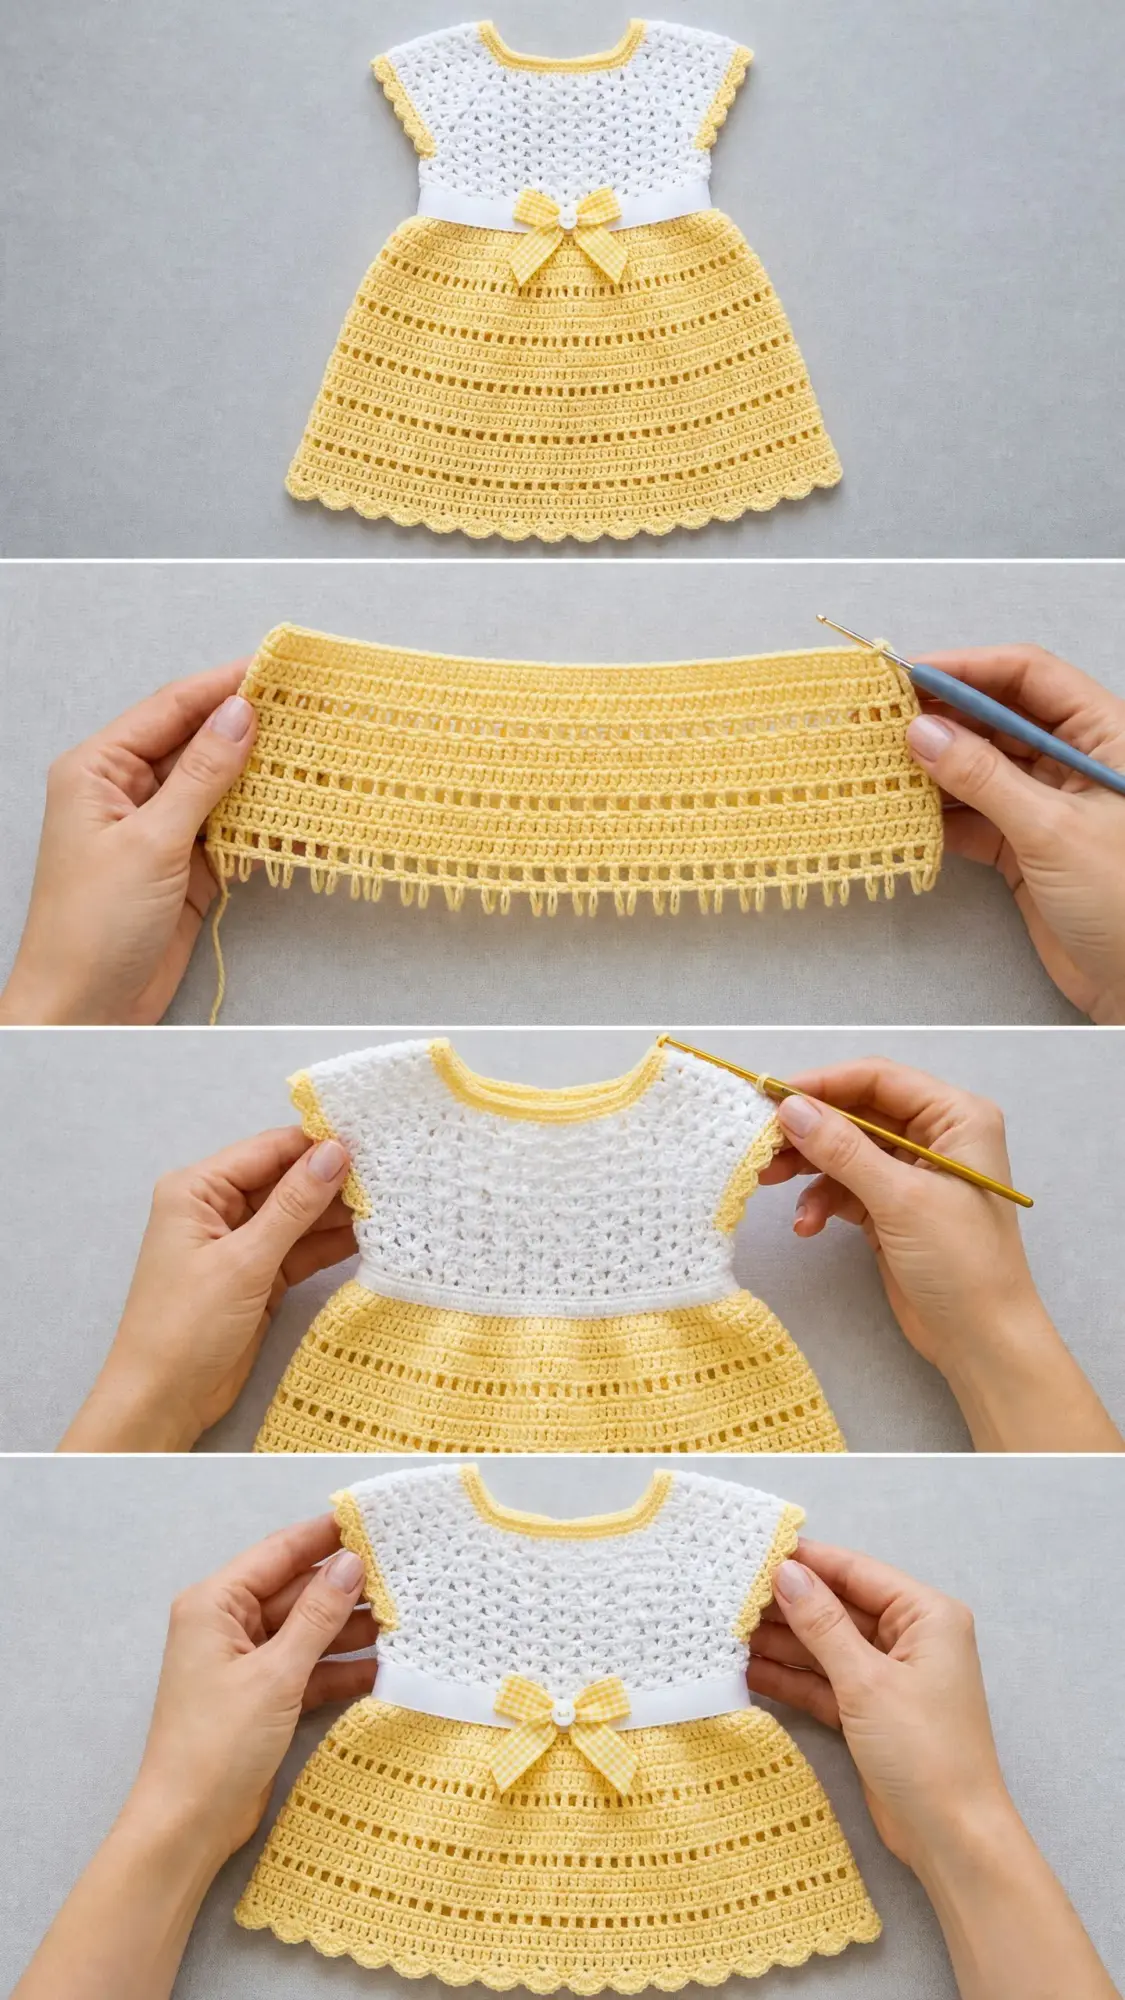
The secret to this baby dress is its construction method. You work from the top down, starting at the neckline and ending at the hem. This approach lets you try the dress on as you go, which is perfect if you are making it for a specific baby.
The bodice features a shell stitch pattern. A shell is simply six double crochet stitches all worked into the same stitch or space. When you line up multiple shells with single crochets between them, you get that beautiful lacy texture you see in the white portion of the dress.
The yellow skirt alternates between solid double crochet rounds and mesh rounds. Mesh is just double crochets separated by chain one spaces, creating those horizontal lines of openwork. The combination produces a ridged lace effect that looks intricate but works up quickly.
Finished Measurements
This crochet pattern includes instructions for three sizes:
Newborn to 3 months: Chest 14 inches, length from shoulder to hem 11 inches
3 to 6 months: Chest 16 inches, length from shoulder to hem 12.5 inches
6 to 12 months: Chest 18 inches, length from shoulder to hem 14 inches
The pattern is written for the 3 to 6 month size. Numbers in brackets indicate adjustments for the 6 to 12 month size.
Materials You Will Need
Yarn A (White): DK weight yarn, approximately 120 yards for the smaller size or 150 yards for the larger size
Yarn B (Yellow): DK weight yarn, approximately 200 yards for the smaller size or 260 yards for the larger size
Hook: US size G-6 / 4.0 mm
Notions:
Yarn Suggestions
Lion Brand Pound of Love works beautifully for this project. One skein of White handles the bodice with plenty to spare. Grab one skein of Buttercup for the yellow sections.
Paintbox Yarns Simply DK is another excellent choice. You will need one ball in Pure White and two balls in Buttercup Yellow.
For warmer climates, try Drops Safran in 100% Egyptian cotton. Purchase one ball in Off White and two balls in Yellow. Keep in mind that cotton has less stretch, so checking your gauge becomes especially important.
Gauge
Getting the right gauge ensures your dress fits properly. With your G-6 hook:
Shell stitch pattern (bodice): One full shell repeat plus 2 stitches equals 2.25 inches wide. Four rows equal 2 inches tall.
Double crochet rows (skirt): 18 double crochets equal 4 inches. Eight rows equal 4 inches.
Take time to make a gauge swatch. The bodice gauge matters most for achieving the correct chest measurement.
Abbreviations and Stitch Definitions
Let me define every abbreviation before we begin. Knowing these terms will make the pattern much easier to follow.
ch = chain. Wrap yarn over hook and pull through the loop on your hook.
sl st = slip stitch. Insert hook, yarn over, pull through stitch and loop on hook in one motion.
sc = single crochet. Insert hook, yarn over, pull up a loop, yarn over, pull through both loops.
dc = double crochet. Yarn over, insert hook, yarn over, pull up a loop, yarn over, pull through two loops, yarn over, pull through remaining two loops.
dc2tog = double crochet two together. A decrease that combines two stitches into one.
sk = skip. Pass over the indicated number of stitches without working into them.
ch-sp = chain space. The gap created by a chain in the previous row.
RS = right side. The side that faces outward when worn.
WS = wrong side. The side that faces the body when worn.
t-ch = turning chain. The chain worked at the beginning of a row to bring your hook up to the correct height.
Special Stitches
Shell Stitch
Work 6 double crochets all into the same stitch or space. This creates a fan shape. In this pattern, shells are separated by a chain one space and a single crochet worked into the center of the previous row’s shell.
Scallop Edging
This pretty finishing technique creates the wavy border you see on the neckline, sleeves, and hem.
1. Slip stitch into the first stitch
2. Chain 1
3. Work 1 single crochet into the same stitch
4. Skip 2 stitches
5. Work 5 double crochets into the next stitch
6. Skip 2 stitches
7. Work 1 single crochet into the next stitch
8. Repeat steps 4 through 7 around
Each scallop repeat uses 6 stitches total.
Mesh Row
Chain 3, skip 1 double crochet, double crochet in the next double crochet, then work chain 1, skip 1 double crochet, double crochet in the next double crochet across the row. This creates an open mesh with chain one spaces between each double crochet post.
Step by Step Crochet Pattern Instructions
Front Bodice Panel
Using Yarn A (white) and your G-6 hook, begin at the neckline.
Foundation chain: Chain 49 for the 3 to 6 month size or chain 55 for the 6 to 12 month size.
Row 1 (RS): Single crochet in the second chain from hook. Work (chain 1, skip 2 chains, 6 double crochets in the next chain, chain 1, skip 2 chains, single crochet in the next chain) 8 times for the smaller size or 9 times for the larger size. Turn. (8 or 9 shells established)
Row 2 (WS): Chain 1, single crochet in the first single crochet. Work (single crochet in the chain 1 space, single crochet in each of 6 double crochets, single crochet in the chain 1 space, single crochet in the single crochet) across. Turn. (73 sc for smaller size, 82 sc for larger size)
Row 3 (RS): Chain 1, single crochet in the first single crochet. Work (chain 1, skip 3 single crochets, 6 double crochets in the next single crochet, chain 1, skip 3 single crochets, single crochet in the next single crochet) 8 or 9 times. Turn. (8 or 9 shells)
Rows 4 through 6: Repeat Rows 2 and 3, ending with a Row 2.
Row 7 (RS, increase row): This row adds width to the bodice. Chain 1, work 6 double crochets in the first single crochet, chain 1, skip 2 single crochets, single crochet in the next single crochet. Continue in pattern across, then work 6 double crochets in the last single crochet. Turn. (10 or 11 shells)
Row 8 (WS): Chain 1, single crochet in the top of the first double crochet, single crochet in each remaining double crochet of the first shell, then continue the single crochet pattern across to match Row 2. Turn. (91 sc for smaller size, 100 sc for larger size)
Rows 9 through 12: Continue in pattern, maintaining 10 or 11 shells on RS rows.
Checkpoint: After Row 12, your front bodice panel should measure approximately 3 inches tall. You should have 10 shells for the smaller size or 11 shells for the larger size.
Armhole Shaping for Front Bodice
Row 13 (RS): This row divides the bodice for the armholes. Chain 1, single crochet in the first single crochet. Work 2 shell repeats for the right armhole border and place these stitches on a holder. Continue across the center 6 or 7 shells for the front panel. Place the remaining 2 shell repeats on a holder for the left armhole border.
Continue working only the front center panel:
Rows 14 through 18: Work in pattern over the center panel only. (6 or 7 shells on RS rows, 55 or 64 sc on WS rows)
Checkpoint: After Row 18, the front bodice should measure approximately 5.5 inches tall. Fasten off Yarn A.
Back Bodice Panel
The back bodice is worked in two halves to create a center back opening for easy dressing.
Right Back Half
Using Yarn A, chain 28 for the smaller size or chain 31 for the larger size.
Row 1 (RS): Single crochet in the second chain from hook. Work (chain 1, skip 2 chains, 6 double crochets in the next chain, chain 1, skip 2 chains, single crochet in the next chain) 4 times. Single crochet in the last chain. Turn. (4 shells)
Rows 2 through 12: Continue in pattern, matching the rhythm of the front bodice. (37 sc on WS rows, 4 shells on RS rows)
For the 6 to 12 month size only: Add one increase shell at Row 6, then continue with 5 shells for Rows 7 through 12.
Rows 13 through 18: Work armhole shaping by continuing only over the center 2 shells for the smaller size or 3 shells for the larger size. Fasten off.
Left Back Half
Work as the Right Back Half, mirroring the placement. Fasten off after Row 18.
Assembling the Bodice
Shoulder seams: With right sides together, align the top edges of the front and back panels. Using your tapestry needle and Yarn A, seam the outer 2 shell width on each side. Leave the neck opening clear. Turn right side out.
Side seams: Align the side edges of the front and back panels. Seam from the armhole down to the waist edge on both sides. Leave the armhole openings for the cap sleeves.
Neckline Edging
Join Yarn B (yellow) to the right back center opening.
Round 1: Chain 1, single crochet evenly around the entire neckline. Work approximately 48 single crochets for the smaller size or 54 for the larger size. The count must be a multiple of 6. Join with a slip stitch. (48 or 54 sc)
Round 2 (scallop edging): Work the scallop edging pattern around the entire neckline. Join with a slip stitch. Fasten off Yarn B.
Button Loops
Rejoin Yarn B at the top right corner of the right back center edge.
Row 1: Chain 1, single crochet down the opening edge, placing approximately 10 single crochets. Turn.
Row 2: Chain 1, single crochet in the first 2 single crochets. Work (chain 4, skip 2 single crochets, single crochet in the next single crochet) twice to create 2 button loops. Single crochet to the end. Fasten off.
Sew 2 buttons to the left back center edge to match the loops.
Cap Sleeves (Make 2)
Join Yarn B to the underarm point of one armhole opening.
Round 1: Chain 1, single crochet evenly around the armhole. Work 24 single crochets for the smaller size or 30 for the larger size. Join with a slip stitch. (24 or 30 sc)
Round 2 (scallop edging): Work the scallop edging pattern around all stitches. Join with a slip stitch. Fasten off.
Repeat for the second sleeve.
Skirt
The skirt is picked up at the bottom edge of the bodice and worked downward in the round.
Waistband Setup
Join Yarn B to the bottom right side seam.
Pickup Round 1: Chain 3 (counts as first double crochet), double crochet evenly around the entire bottom edge of the bodice. Work 84 double crochets for the smaller size or 96 for the larger size. Join with a slip stitch. (84 or 96 dc)
Round 2 (ribbon channel): Chain 4 (counts as double crochet plus chain 1), skip the next double crochet. Work (double crochet in the next double crochet, chain 1, skip 1 double crochet) around. Join with a slip stitch to the third chain of the beginning chain 4. (42 or 48 dc posts, 42 or 48 chain 1 spaces)
This mesh row creates the channel for threading the ribbon later.
Skirt Body
Round 3 (increase round): Chain 3, double crochet in each chain space and each double crochet around. Work 2 double crochets in every 7th stitch for the smaller size or every 8th stitch for the larger size. Join. (96 or 108 dc)
Round 4 (mesh row): Chain 4, skip 1 double crochet. Work (double crochet in the next double crochet, chain 1, skip 1 double crochet) around. Join. (96 or 108 total positions)
Round 5 (plain round): Chain 3, double crochet in each chain space and double crochet around. Join. (96 or 108 dc)
Rounds 6 through 19: Continue alternating between mesh rounds and plain rounds, working increase rounds at Rounds 7, 11, and 15. Each increase round adds 12 stitches by working 2 double crochets at evenly spaced intervals.
Your final stitch count before the hem should be 132 double crochets for the smaller size or 144 for the larger size.
Checkpoint: The skirt should measure approximately 5 inches for the smaller size or 6 inches for the larger size from the pickup round to Round 19.
Skirt Hem Scallop Edging
Round 20: Work the scallop edging pattern around all stitches from Round 19. You will have 22 scallop repeats for the smaller size or 24 for the larger size. Join with a slip stitch. Fasten off Yarn B.
Finishing Your Baby Dress
Weave in all yarn ends securely on the wrong side.
Ribbon: Thread the 18 inch length of white grosgrain ribbon through the mesh channel at Round 2 of the skirt. Begin and end at center front.
Bow: Attach the yellow gingham bow to the center front of the ribbon at the waistline. Sew through the ribbon and the small white button at the center of the bow to secure.
Back closure buttons: Sew the two back closure buttons to the left back center opening edge. Space them approximately 0.75 inches apart, beginning 0.5 inches from the top edge.
Blocking
Wet blocking gives your dress the best finished look. Soak the completed dress in cool water for 10 to 15 minutes. Gently press out excess water without wringing. Lay flat on a blocking mat or clean towel.
Pin the scallop edging at the neckline, sleeve edges, and hem outward to open the scallops fully. Pin the skirt to finished measurements. Allow to dry completely before removing pins.
Attach the ribbon and bow after blocking.
Care Instructions
Machine wash cold on the gentle cycle. Lay flat to dry. Do not tumble dry or bleach. Remove the ribbon and bow before washing and reattach after drying.
Tips for Success with This Baby Dress Crochet Pattern
Count your shells regularly. The shell pattern is easy to track once you get into the rhythm, but losing count can throw off your sizing. Place a stitch marker at the beginning of each row to help.
Check your gauge before starting. This step matters more than you might think. Even a small difference in gauge can significantly change the finished chest measurement.
Try the dress on as you go. If you are making this for a specific baby, gently slip the bodice over a similarly sized stuffed toy or rolled towel to check the fit before continuing.
Block before judging. The dress may look a bit uneven before blocking. Trust the process. Blocking opens up the lace stitches and evens out any tension variations.
Take photos of your progress. If you need to set the project aside, photos help you remember exactly where you left off.
This sunny yellow baby dress makes a beautiful gift for baby showers, first birthdays, or any special occasion. The classic combination of white and yellow works for any season, and the lightweight construction keeps little ones comfortable.
I hope you love making this dress as much as I enjoyed designing it. If you found this crochet tutorial helpful, save it to your Pinterest boards so you can find it easily when you are ready to start. And please leave a comment below if you make this pattern. I would absolutely love to see your finished baby dresses and hear which color combinations you chose.
