
Go ahead and dig into that stash. You know the one. Those beautiful purple skeins you bought because the color was too gorgeous to leave behind, but you never found the right project. This is the project.
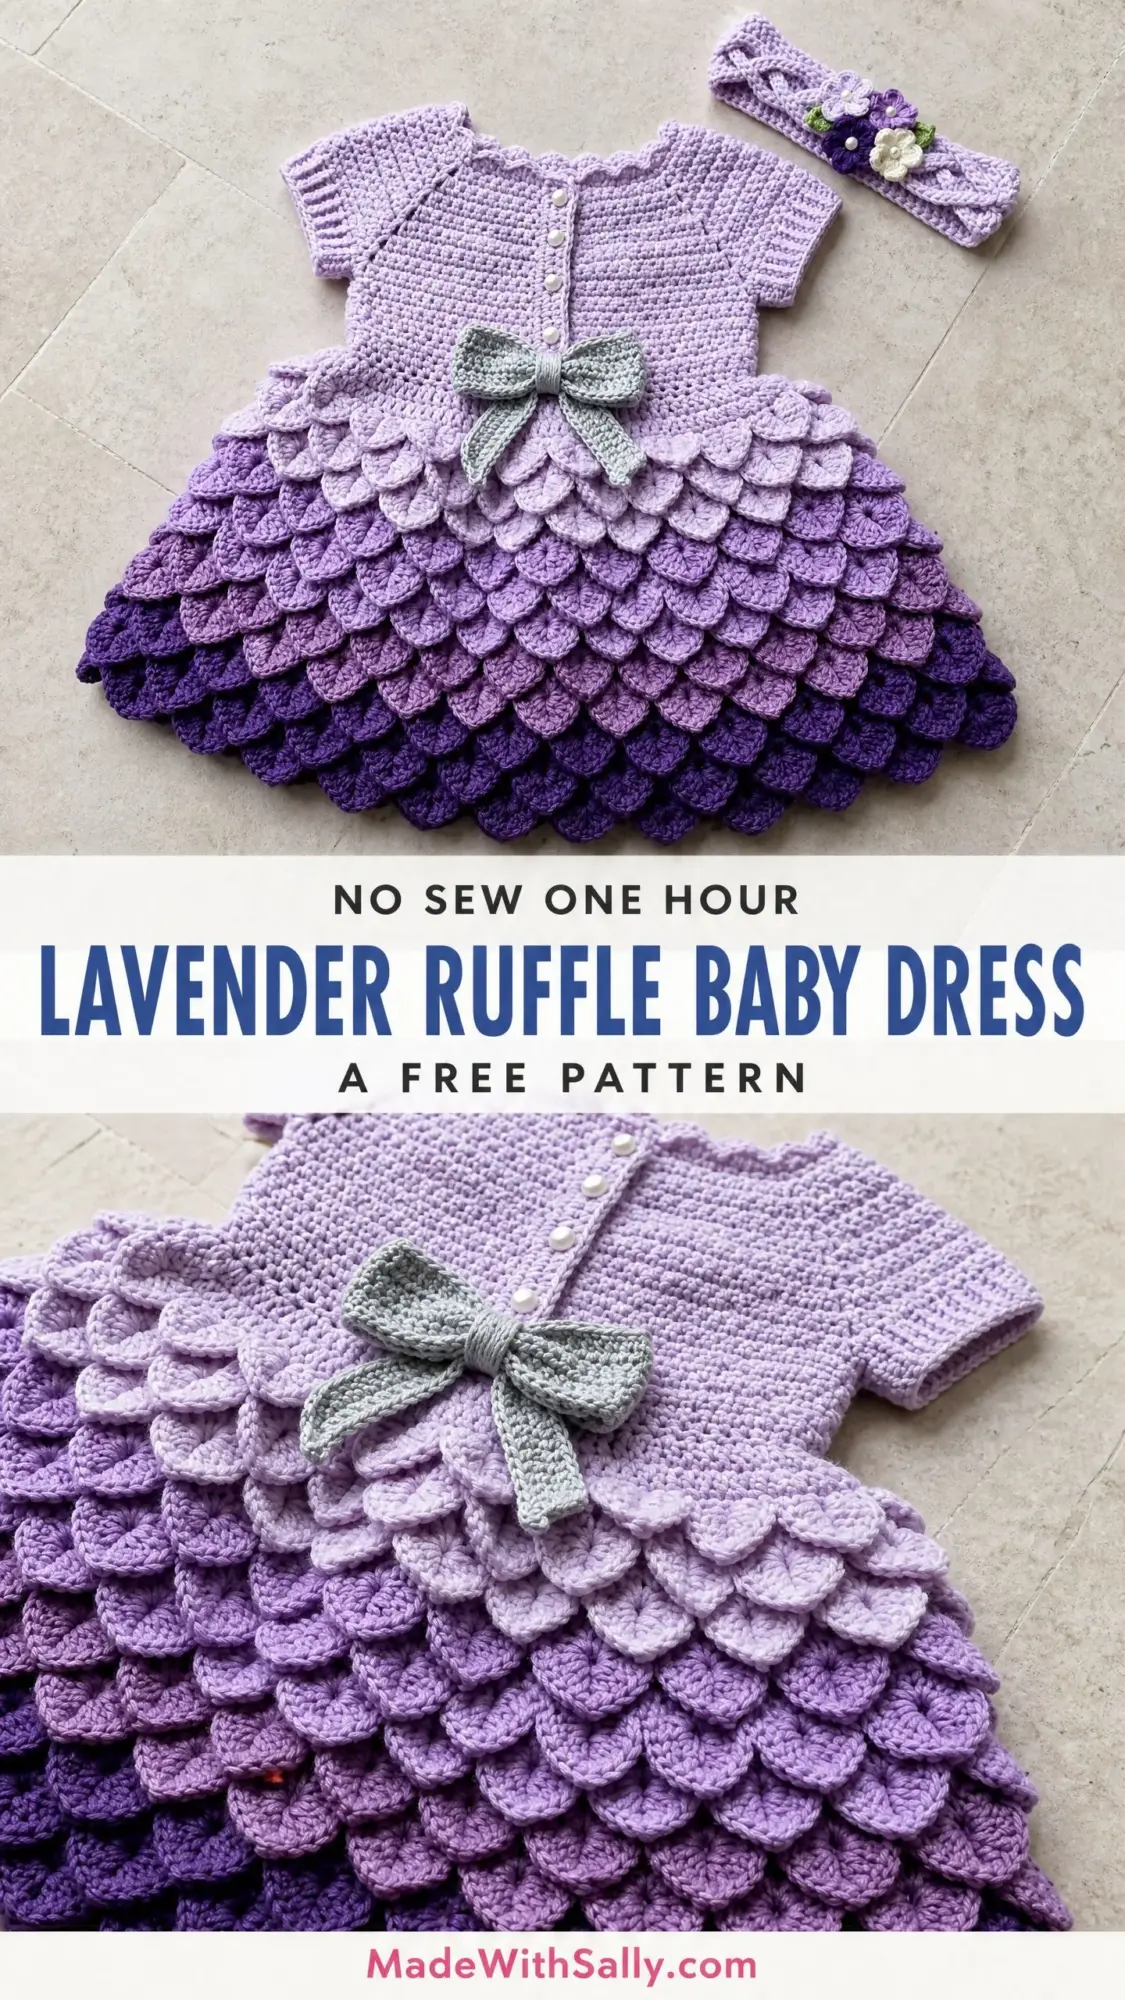
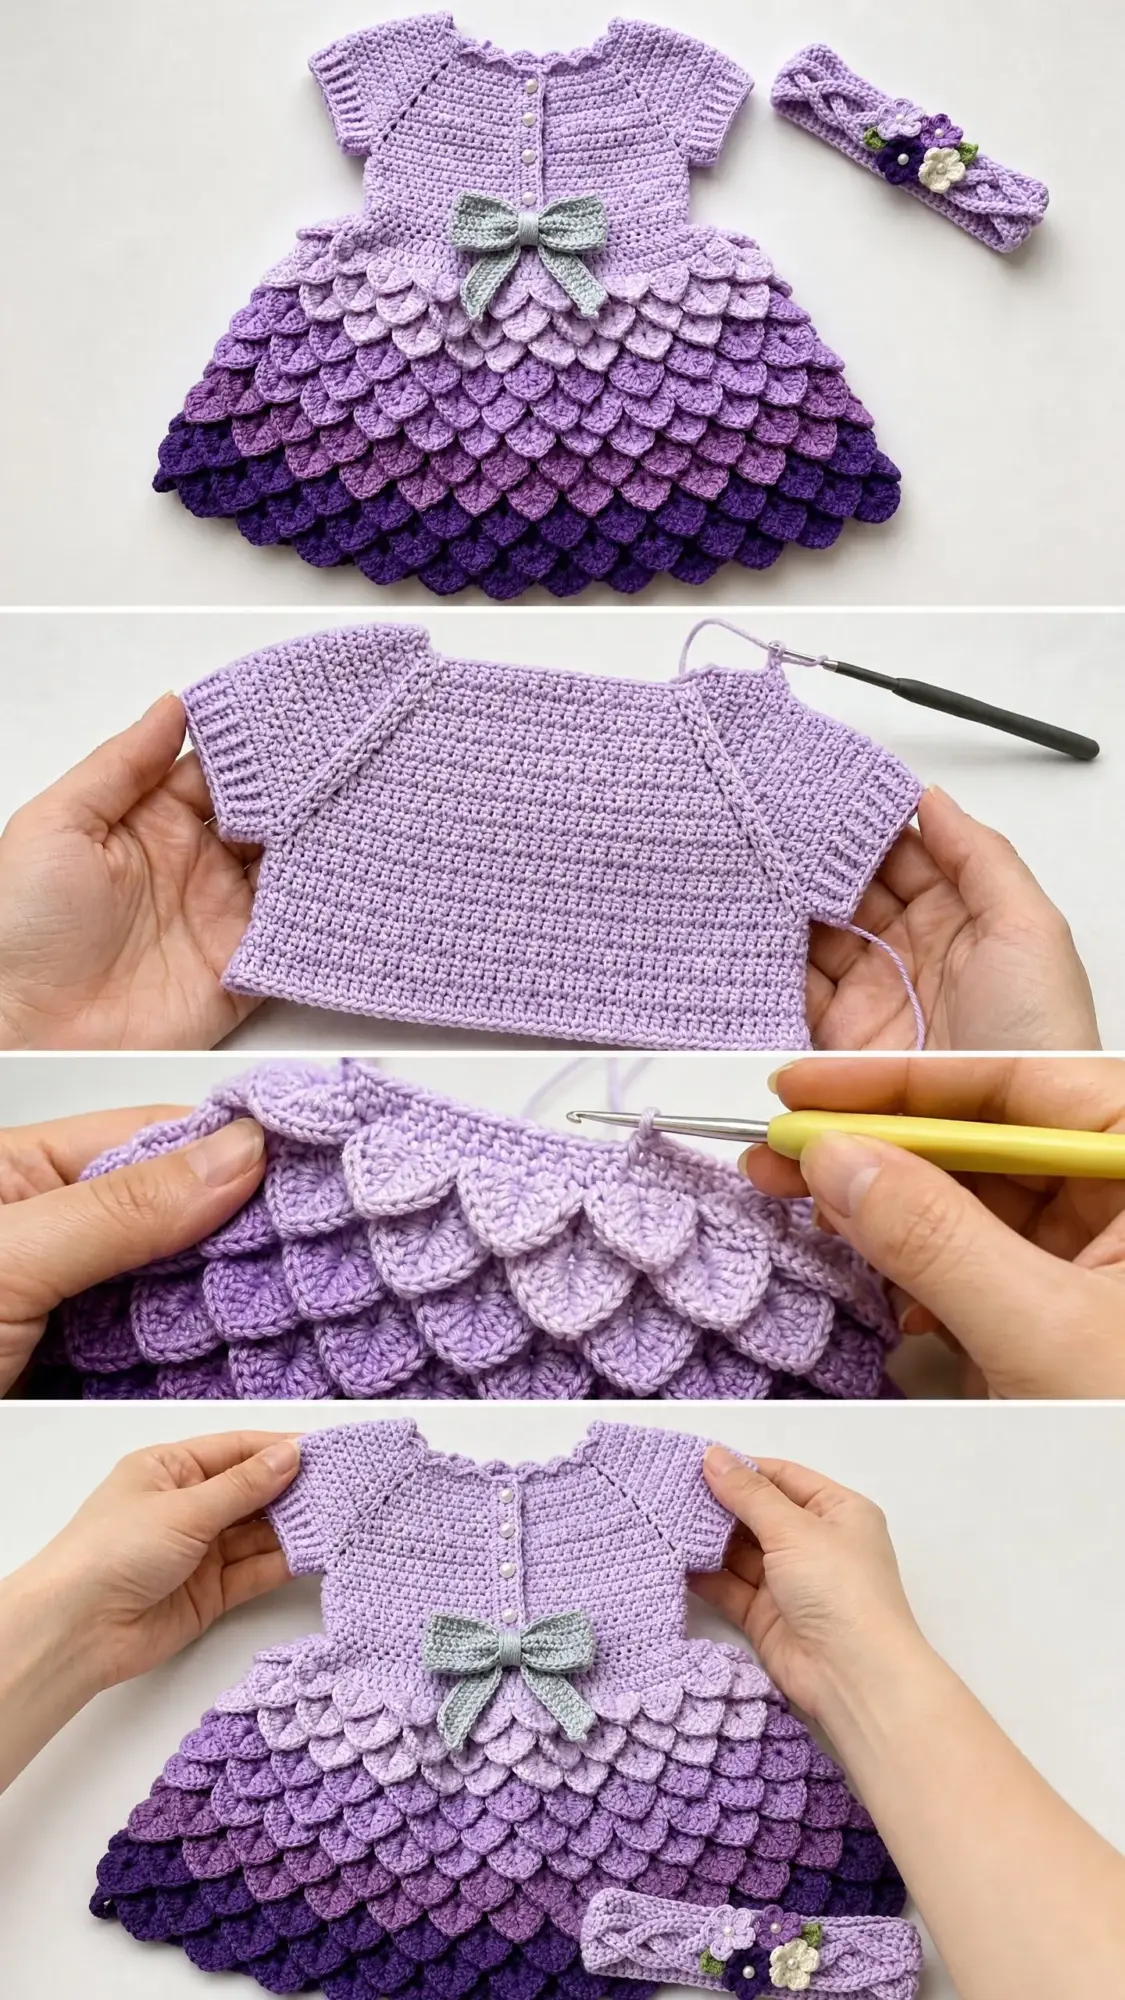
This lavender ruffle baby dress uses a technique called the crocodile stitch to create those stunning overlapping scales on the skirt. The construction is genuinely interesting. You start at the neckline and work your way down through a raglan yoke, then transition into a fitted bodice before the real magic happens with six tiers of dimensional ruffles. The ombre effect from pale lavender to deep purple? Absolutely worth the effort.
I will be honest with you. This pattern sits at the intermediate to advanced level. If you have never tried crocodile stitch before, set aside some practice time with scrap yarn first. But if you are comfortable working in the round, reading stitch counts, and managing color changes, you can absolutely make this dress. The results are showstopping.
Why This Crochet Pattern Stands Out
The layered skirt on this baby dress creates an effect that looks far more complicated than it actually is. Each tier of crocodile stitch scales overlaps the one below, building up texture and dimension that photographs beautifully and feels special in person. The color graduation from pale lavender at the bodice through medium violet to deep purple at the hem gives the dress movement and visual interest.
The pattern includes a matching headband with crocheted flower embellishments, making this a complete set perfect for baby showers, christenings, first birthdays, or professional photo sessions. The silver gray bow at the waistline adds a sophisticated accent that ties the whole design together.
Materials You Will Need
Gather these supplies before you begin:
Yarn (Worsted Weight, Category 4):
Recommended Yarn Options:
Tools:
Gauge
18 sc x 20 rows = 4 inches / 10 cm in single crochet (sc), blocked
Crocodile stitch gauge: One scale measures approximately 1 inch wide and 0.75 inch tall. One complete scale tier measures approximately 1.25 inches tall.
Please do not skip the gauge swatch. This is a fitted garment, and proper gauge ensures the dress fits correctly. Adjust your hook size up or down as needed.
Finished Measurements
This pattern is written for size 6 to 12 months:
Abbreviations and Stitch Definitions
Let me walk you through every stitch abbreviation you will encounter:
Special Stitches
Crocodile Stitch (cs)
This stitch creates those beautiful overlapping scales. Here is how it works:
Step 1: Find your two target dc posts from the foundation row below. These two posts form one scale position.
Step 2: Work 5 dc down the left post. Insert your hook from right to left around the post, then work 5 double crochets wrapping around that post from top to bottom.
Step 3: Chain 1. This anchors the bottom center of your scale.
Step 4: Work 5 dc up the right post. Insert your hook from left to right around the post, then work 5 double crochets from bottom to top.
Step 5: Your completed scale fans out from the top of the two posts with 5 dc on each side and a ch-1 at the bottom center.
The foundation row for each scale tier consists of dc pairs with ch-2 spaces between them. The ch-2 spaces create gaps for the next tier’s foundation row.
Scallop Edging
Insert hook into st, draw up lp, yo, pull through all lps on hook (sc made), [ch 2, 2 dc] in same st, sk 1 st, sc in next st, [ch 2, 2 dc] in same sc just made; rep from across.
Bow
Foundation: Ch 21.
Row 1: Sc in 2nd ch from hook and in each ch across. (20 sc) Ch 1, turn.
Rows 2 through 8: Sc in each sc across. (20 sc) Ch 1, turn after each row except last.
Fasten off, leaving a 12-inch tail. Fold the rectangle so short ends meet at center back. Pinch the center to gather. Wrap Color D around the center 8 to 10 times tightly and knot to secure. The bow measures approximately 2.5 inches wide.
Crocheted Flower (make 2 in Color A, 1 in Color C)
Ch 4, sl st to form ring.
Rnd 1: Ch 1, work 8 sc into ring, sl st to first sc. (8 sc)
Rnd 2: [Ch 3, sl st in next sc] 8 times. (8 petal loops)
Fasten off, leaving tail for sewing. Add a pearl bead to center if desired.
Leaf (make 2 in green yarn, optional)
Ch 7, sl st in 2nd ch from hook, sc in next, hdc in next, dc in next, hdc in next, sc in last, ch 1, working back along opposite side of ch: sc in next, hdc in next, dc in next, hdc in next, sc in next, sl st in last, sl st to beginning. Fasten off.
Step by Step Instructions
Section 1: Yoke (Worked Flat, Then in the Round)
The yoke begins at the neckline with a flat back opening that closes with buttons.
Foundation Chain: With Color A and G-6 hook, ch 48.
Row 1 (RS): Sc in 2nd ch from hook, sc in next 6 ch (left back), pm in last sc, sc in next 4 ch (left sleeve), pm in last sc, sc in next 22 ch (front), pm in last sc, sc in next 4 ch (right sleeve), pm in last sc, sc in next 9 ch (right back). (47 sc) Turn.
Your stitch distribution: Left Back 7, Left Sleeve 4, Front 22, Right Sleeve 4, Right Back 9. The extra 2 stitches on the right back create the button overlap band.
Row 2 (WS, increase row): Ch 1, sc in each st to first marker, work increases at each raglan point as follows: 2 sc in next st, sm, 2 sc in next st. Continue in sc to end, working the same increase at each of the 4 markers. (55 sc) Turn.
Row 3 (RS): Ch 1, sc in each st across. (55 sc) Turn.
Row 4 (WS, increase row): Repeat the increase pattern of Row 2. (63 sc) Turn.
Row 5 (RS): Ch 1, sc in each sc across. (63 sc) Turn.
Row 6 (WS, increase row): Work increases at 4 raglan points. (71 sc) Turn.
Row 7 (RS): Ch 1, sc in each sc across. (71 sc) Turn.
Row 8 (WS, increase row): Work increases at 4 raglan points. (79 sc) Turn.
Row 9 (RS): Ch 1, sc in each sc across. (79 sc) Turn.
Row 10 (WS, increase row): Work increases at 4 raglan points. (87 sc) Turn.
Row 11 (RS): Ch 1, sc in each sc across. (87 sc) Turn.
Row 12 (WS, increase row): Work increases at 4 raglan points. (95 sc) Turn.
Row 13 (RS): Ch 1, sc in each sc across. (95 sc) Turn.
Row 14 (WS, increase row): Work increases at 4 raglan points. (103 sc) Turn.
Row 15 (RS): Ch 1, sc in each sc across. (103 sc) Turn.
Checkpoint: Your piece should measure approximately 3 inches tall from the foundation chain and span approximately 11.5 inches across when laid flat.
Row 16 (Joining Row): With RS facing, ch 3 (for underarm), sk all 11 left sleeve sts (place them on a stitch holder), sc in first front st, sc across 36 front sts, ch 3 (for underarm), sk all 11 right sleeve sts (place on holder), sc in first right back st, sc across to end of right back, then sc across left back, sl st to join into round.
Your body stitch count: 30 back sts + 3 underarm ch + 36 front sts + 3 underarm ch = (72 sts)
Section 2: Bodice (Worked in the Round)
Rnds 1 through 10: Sc in each st around, working 1 sc into each of the 3 ch sts at each underarm. (72 sc)
Checkpoint: After Rnd 10, the bodice measures approximately 2 inches from the underarm join. Total dress height from shoulder: approximately 5 to 5.5 inches.
Rnd 11 (Waist Decrease Round): Sc in next 7 sc, sc2tog; rep from around. (64 sc)
Rnd 12: Sc in each sc around. (64 sc)
Do not fasten off.
Section 3: Skirt Foundation and Scale Tiers
The skirt consists of 6 tiers of crocodile stitch scales. Keep the right side facing outward at all times.
Tier 1 Foundation Round
Rnd 13: Ch 3 (counts as first dc), dc in same st as join. Ch 2, sk 2 sts, [dc, dc] in next st; rep from around, ending ch 2, sk 2 sts, sl st to top of ch-3. (16 dc pairs, 16 ch-2 sps)
Tier 1 Scale Round
Rnd 14: With RS facing, join yarn in a ch-2 sp. Work 1 cs over the next dc pair, sl st in next ch-2 sp; rep from around. (16 cs)
Tier 2 Foundation Round
Rnd 15: Join yarn at the top of any dc pair from Rnd 13. Ch 3, dc in same sp, ch 2, [dc, dc] in top of next pair; rep from around, ch 2, sl st to top of ch-3. (16 dc pairs, 16 ch-2 sps)
Rnd 16: Work 1 cs over each dc pair around. (16 cs)
Tier 3 Foundation Round (Increase Tier)
Rnd 17: Add 4 dc pairs evenly spaced: [Dc, dc] in top of next dc pair, ch 2, [dc, dc] in same sp (increase), ch 2, [dc, dc] in top of next dc pair, ch 2, [dc, dc] in top of next dc pair, ch 2, [dc, dc] in top of next dc pair, ch 2; rep from 3 more times. (20 dc pairs, 20 ch-2 sps)
Rnd 18: Change to Color B. Work 1 cs over each dc pair around. (20 cs)
Checkpoint: The skirt measures approximately 3.75 inches from the waist.
Tier 4 Foundation Round
Rnd 19: With Color B, [dc, dc] in top of next pair, ch 2; rep from around, sl st to close. (20 dc pairs, 20 ch-2 sps)
Rnd 20: Work 1 cs over each dc pair around. (20 cs)
Tier 5 Foundation Round (Increase Tier)
Rnd 21: Add 4 dc pairs evenly spaced. (24 dc pairs, 24 ch-2 sps)
Rnd 22: Change to Color C. Work 1 cs over each dc pair around. (24 cs)
Tier 6 Foundation Round
Rnd 23: With Color C, [dc, dc] in top of next pair, ch 2; rep from around, sl st to close. (24 dc pairs, 24 ch-2 sps)
Rnd 24: Work 1 cs over each dc pair around. (24 cs)
Fasten off Color C.
Final Checkpoint: The skirt measures approximately 7.5 inches from the waist. Total dress length from shoulder: approximately 14 inches.
Section 4: Sleeves (Worked in the Round)
Return to held sleeve stitches. You have 11 held sts plus 3 underarm ch sts = 14 sts per sleeve.
Setup Rnd: Join Color A at center of underarm chain. Pick up and sc in each of 3 underarm ch sts, sc in each of 11 held sleeve sts. (14 sc) Pm and join.
Rnds 1 through 7: Sc in each sc around. (14 sc)
Sleeve Cuff Rnd: Work scallop edging: Sc in next sc, [ch 2, 2 dc] in same sc, sk 1 sc; rep from around, sl st to join. (7 scallops)
Fasten off. Repeat for second sleeve.
Section 5: Neckline and Button Band
Row 1: Join Color A at top right corner of back opening with RS facing. Ch 1, work sc evenly along the right back edge (approximately 15 sc), sc across neckline foundation chain (approximately 47 sc), work approximately 15 sc up the left back edge. (approximately 77 sc) Ch 1, turn.
Row 2: Sc in each sc across. (77 sc) Ch 1, turn.
Row 3 (Buttonhole Row): Sc in first 3 sc, ch 1, sk 1 sc (buttonhole made), sc in next 4 sc; rep from 2 more times (3 buttonholes total), sc to end. Ch 1, turn.
Row 4: Sc in each sc across, working 1 sc into each ch-1 buttonhole space. (77 sc)
Fasten off. Work a row of sl st along the top neckline edge for a clean finish if desired.
Neckline Scallop: Join Color A at left back edge top. Work scallop edging along the neckline only: Sc in next st, [ch 2, 2 dc] in same st, sk 1 st; rep from across neckline. Fasten off.
Sew 3 pearl buttons to the left back edge, aligned with the buttonholes.
Section 6: Bow Assembly
Make the bow following the special stitches instructions. Sew the completed bow to the front waistline, centered horizontally at the junction of the bodice and skirt.
Section 7: Headband
With Color A and G-6 hook, ch 71.
Row 1: Sc in 2nd ch from hook and in each ch across. (70 sc) Ch 1, turn.
Rows 2 through 4: Sc in each sc across. (70 sc) Ch 1, turn after each row except last.
Work scallop edging along one long edge: sc in next sc, [ch 2, 2 dc] in same sc, sk 1 sc; rep from across. (35 scallops)
Fasten off, leaving a 12-inch tail. Fold the band into a loop, overlapping the short ends by 0.5 inch, and sew together securely.
Sew the 3 crocheted flowers with 2 leaves at the overlap join. Add pearl centers to flowers if desired.
Size Customization Tips
For Newborn (0 to 3 months): Remove 2 increase rows from the yoke (Rows 12 through 15), giving approximately 87 sts at separation. Remove 2 bodice rounds. Remove Tier 6 from the skirt. Final length: approximately 12 inches.
For 12 to 18 months: Add 2 more increase rows to the yoke after Row 15, giving approximately 119 sts at separation. Add 2 additional bodice rounds. Add a Tier 7 scale round with 28 pairs total. Final length: approximately 16 inches.
Finishing and Blocking
Weave in all yarn ends securely, drawing ends through at least 1 inch of stitching in two directions. Wet block the finished dress by submerging in cool water, gently pressing without wringing, rolling in a clean towel, then laying flat on a blocking mat. Pin the skirt hem to the desired shape. Allow to dry completely for 12 to 24 hours.
For acrylic yarn, steam blocking with a garment steamer held 1 inch above the surface helps open up the crocodile stitch scales for maximum definition. Never press an iron directly on acrylic.
Care Instructions
Machine wash on gentle cycle in cold water. Lay flat to dry. Do not tumble dry, bleach, or iron directly on acrylic yarn. Store folded or hanging to preserve the dimensional scales.
You Did It!
Thank you so much for choosing this crochet pattern for your next project. I know this one takes time and focus, but the finished dress is truly special. The kind of handmade piece that becomes a family keepsake. I would absolutely love to see your finished lavender ruffle baby dress, so please tag me on Instagram or share in our Facebook group.
If you loved this pattern, save it to your Pinterest boards so you can find it easily when you are ready to make another one. And if you do make this dress, drop a comment below. I read every single one and would love to hear how it turned out for you.
