
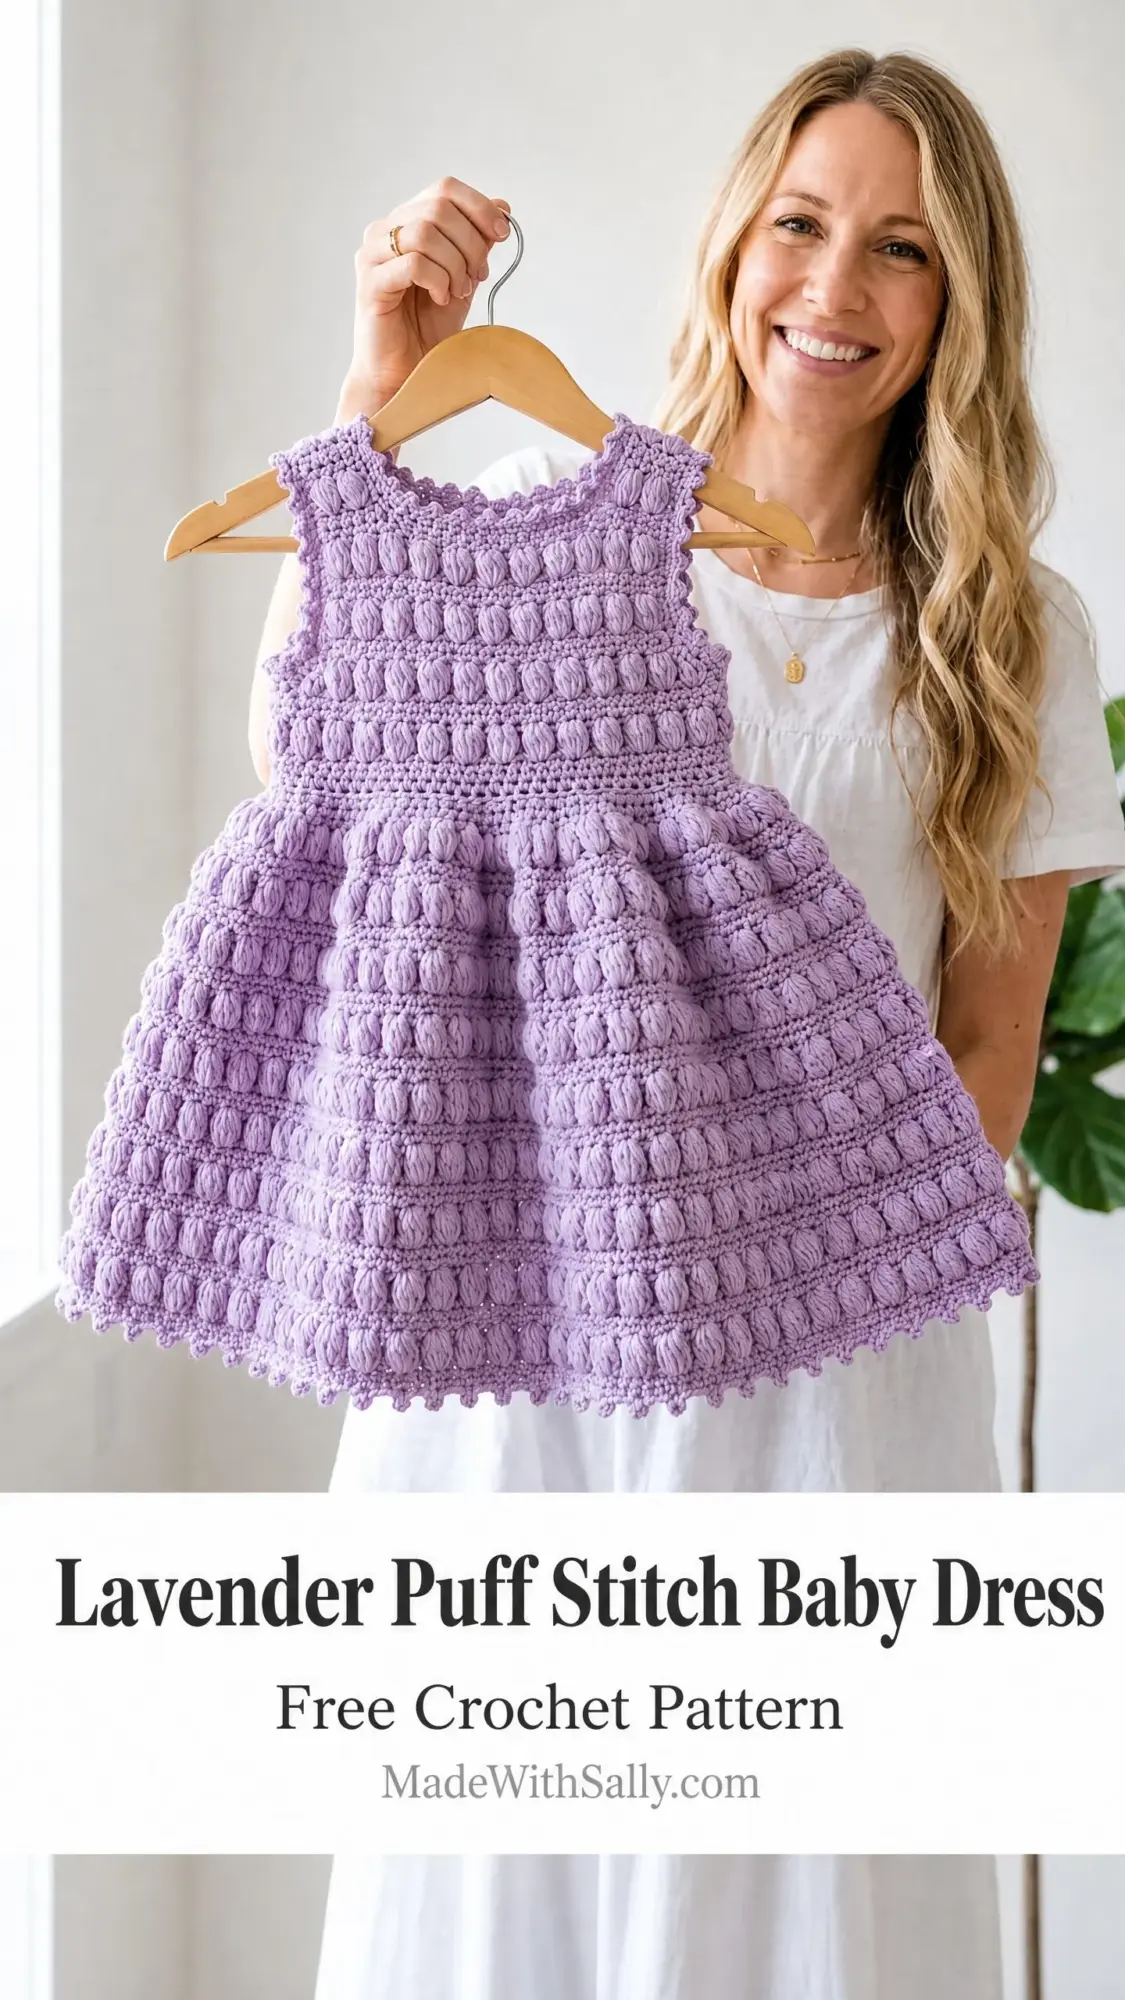
If you need a handmade baby gift that actually gets worn, this is the one. This sweet little dress keeps tiny ones comfortable while looking absolutely adorable for photos, family gatherings, or just a regular Tuesday. The puff stitch texture adds visual interest without being fussy, and the empire waist design means it fits comfortably over a diaper.
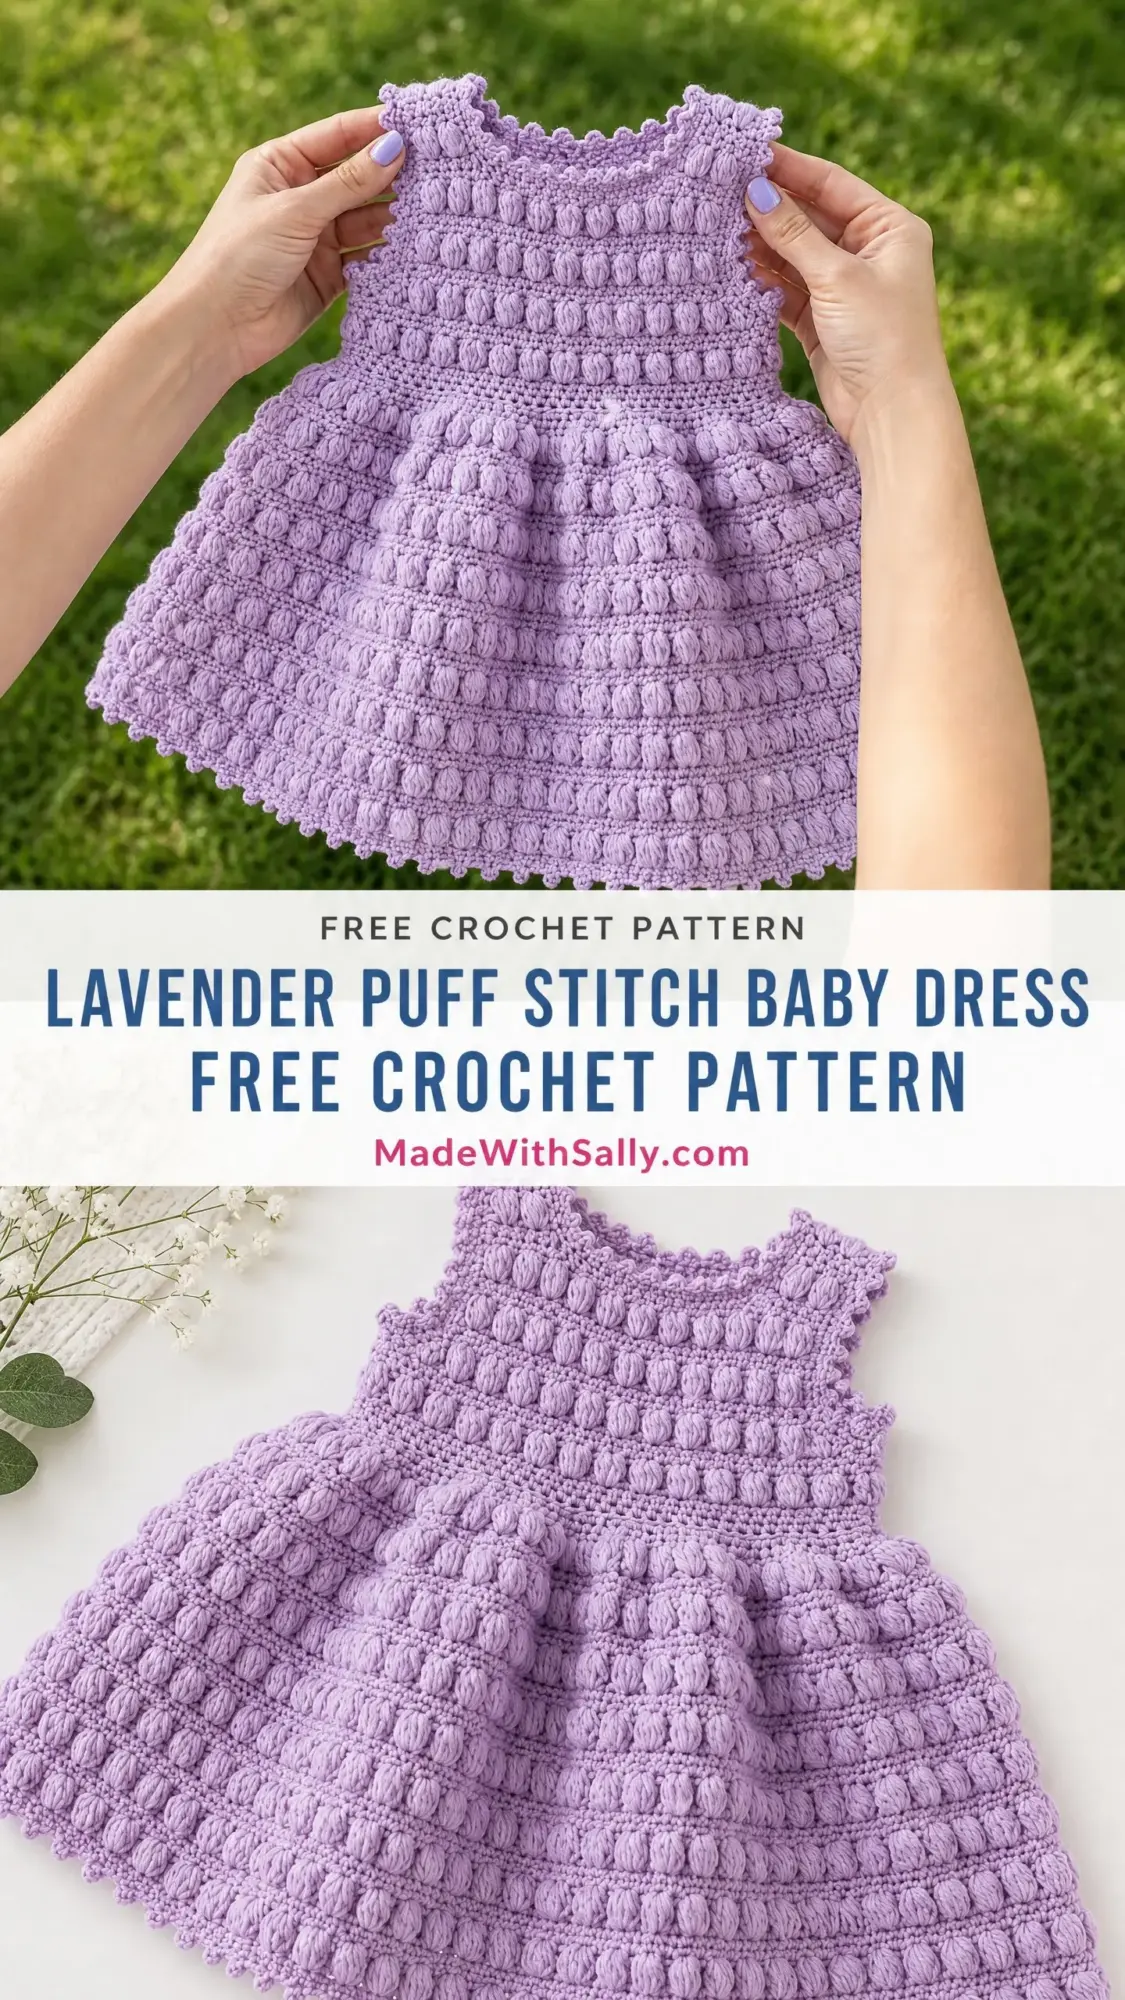
The construction is straightforward once you understand the rhythm. You will work the bodice flat in rows, seam the shoulders, then pick up stitches around the waist and work the skirt in the round. The whole thing uses just a few basic techniques repeated in a satisfying pattern.
This crochet pattern is sized for 6 to 12 months with customization tips for smaller and larger sizes. It works up in about 10 to 14 hours and makes a memorable baby shower gift or a special addition to your own little one’s wardrobe.
Why This Baby Dress Pattern Works So Well
The puff stitch creates that beautiful bubbly texture you see covering the entire dress. Each puff is made by pulling up multiple loops in the same stitch, then drawing through all of them at once. It sounds complicated, but once you get the motion down, it becomes almost meditative.
The empire waist placement is genius for baby clothes. It sits just under the arms, so the skirt flows freely and does not bunch up around chubby baby bellies. The dress slips right over the head with no buttons or zippers needed. The natural stretch of the stitch pattern makes dressing and undressing easy.
I love that this dress has real substance to it. The puff stitches create a thick, cozy fabric that photographs beautifully and feels special in your hands. This is the kind of handmade gift that gets saved in the memory box.
Materials You Will Need
Gather everything before you start so you can crochet uninterrupted.
Yarn: Approximately 350 to 400 yards of DK weight yarn (also called CYCA weight 3). Look for smooth, plied cotton or cotton blend yarn. This weight gives the best stitch definition for the puff texture and feels soft against baby skin.
Some excellent yarn choices include:
Avoid fuzzy or bouclé yarns. They will hide your beautiful puff stitches.
Hook: US Size E-4 / 3.5 mm crochet hook
Notions:
Gauge Matters for This Project
With your E-4 / 3.5 mm hook:
Make a gauge swatch. I know, I know. But puff stitch tension varies wildly between crocheters. Chain 22 and work alternating puff stitch rows and single crochet rows for at least 16 rows. Block lightly and measure. Adjust your hook size if needed.
Finished Measurements
This pattern is written for size 6 to 12 months.
Skill Level
This is an intermediate level crochet pattern. You should be comfortable working in both rows and rounds, and ready to learn the puff stitch if you have not tried it before.
If you have mastered the basics and want to level up, this is a wonderful challenge. The puff stitch is not difficult, just unfamiliar at first. Practice on your gauge swatch before starting the bodice.
Abbreviations and Stitch Definitions
Let me walk you through every abbreviation used in this pattern.
ch = chain. Wrap yarn over hook and pull through the loop on your hook.
sl st = slip stitch. Insert hook, yarn over, pull through both the stitch and the loop on your hook in one motion.
sc = single crochet. Insert hook, yarn over, pull up a loop (2 loops on hook), yarn over, pull through both loops.
sc2tog = single crochet two together. A decrease that turns 2 stitches into 1. Insert hook in first stitch, pull up a loop. Insert hook in next stitch, pull up a loop. Yarn over, pull through all 3 loops.
st(s) = stitch(es)
RS = right side. The front of your work, the side that faces out when worn.
WS = wrong side. The back of your work.
PS = puff stitch. See the detailed instructions below.
rnd = round
rep = repeat
pm = place marker
sk = skip
yo = yarn over
How to Make the Puff Stitch (PS)
This is the star of the show. Take your time learning this technique.
Step 1: Yarn over and insert your hook into the indicated stitch.
Step 2: Yarn over and pull up a loop to approximately 0.5 inch in height. You now have 3 loops on your hook.
Step 3: Yarn over and insert your hook into the same stitch again.
Step 4: Yarn over and pull up another loop to the same height. You now have 5 loops on your hook.
Step 5: Yarn over and insert your hook into the same stitch a third time.
Step 6: Yarn over and pull up a loop to the same height. You now have 7 loops on your hook.
Step 7: Yarn over and draw through all 7 loops at once. One loop remains on your hook.
Step 8: Chain 1 to close and secure the puff stitch.
Important: That closing chain 1 is part of the puff stitch. It does not count as a separate stitch. Keep all your pull-up loops the same height throughout the project for even texture.
How to Make the Picot Edging
This delicate trim finishes the neckline, armholes, and hem.
Step 1: Single crochet into the indicated stitch.
Step 2: Chain 3.
Step 3: Slip stitch into the first chain you made (the one closest to your hook, which is 3 chains back).
Step 4: Single crochet into the next stitch.
Repeat Steps 2 through 4 as directed.
Pattern Notes Before You Begin
Read these before starting. They will save you confusion later.
1. The bodice is worked flat in rows. Front and back are made separately, then seamed at the shoulders.
2. The skirt is worked in the round from the waist downward.
3. Puff stitch rows are always worked on the right side. You will turn and work a plain single crochet row on the wrong side between each puff row.
4. The chain 1 at the beginning of single crochet rows does NOT count as a stitch. Always work your first sc into the first stitch at the base of the turning chain.
5. Each puff stitch counts as one stitch for construction purposes.
6. Block the finished dress for best results.
Crochet Pattern Instructions
Front Bodice
The front bodice is worked flat from the bottom edge upward.
Foundation chain: Chain 38.
Row 1 (WS): Sc in second ch from hook and in each ch across. Turn. (37 sc)
Row 2 (RS, Puff Stitch Row): Ch 1, sc in first st, (PS in next st, sc in next st) across, ending sc in last st. Turn. (37 sts)
Row 3 (WS, Plain Row): Ch 1, sc in each st across. Turn. (37 sc)
Row 4 (RS, Puff Stitch Row): Ch 1, sc in first st, (PS in next st, sc in next st) across. Turn. (37 sts)
Row 5 (WS): Ch 1, sc in each st across. Turn. (37 sc)
Row 6 (RS): Ch 1, sc in first st, (PS in next st, sc in next st) across. Turn. (37 sts)
Row 7 (WS): Ch 1, sc in each st across. Turn. (37 sc)
Row 8 (RS): Ch 1, sc in first st, (PS in next st, sc in next st) across. Turn. (37 sts)
Row 9 (WS): Ch 1, sc in each st across. Turn. (37 sc)
Your piece should measure approximately 2.25 inches tall.
Front Bodice Armhole Shaping
Row 10 (RS): Sl st across first 3 sts, ch 1, sc in same st as last sl st, (PS in next st, sc in next st) across until 3 sts remain unworked. Turn, leaving last 3 sts unworked. (31 sts)
Row 11 (WS): Ch 1, sc2tog, sc in each st across to last 2 sts, sc2tog. Turn. (29 sc)
Row 12 (RS): Ch 1, sc in first st, (PS in next st, sc in next st) across to last st, sc in last st. Turn. (29 sts)
Row 13 (WS): Ch 1, sc in each st across. Turn. (29 sc)
Row 14 (RS): Ch 1, sc in first st, (PS in next st, sc in next st) across to last st, sc in last st. Turn. (29 sts)
Row 15 (WS): Ch 1, sc in each st across. Turn. (29 sc)
Row 16 (RS): Ch 1, sc in first st, (PS in next st, sc in next st) across to last st, sc in last st. Turn. (29 sts)
Row 17 (WS): Ch 1, sc in each st across. Turn. (29 sc)
Row 18 (RS): Ch 1, sc in first st, (PS in next st, sc in next st) across to last st, sc in last st. Turn. (29 sts)
Row 19 (WS): Ch 1, sc in each st across. Turn. (29 sc)
Your front bodice should measure approximately 5.5 inches tall.
Front Neckline Shaping
Left Shoulder:
Row 20 (RS): Ch 1, sc in first st, (PS in next st, sc in next st) 4 times, sc in next st. Turn, leaving remaining sts unworked. (10 sts)
Row 21 (WS): Ch 1, sc in each st across. Turn. (10 sc)
Row 22 (RS): Ch 1, sc in first st, (PS in next st, sc in next st) 4 times, sc in last st. Turn. (10 sts)
Fasten off.
Right Shoulder:
With RS facing, skip 9 center sts for the neckline opening. Join yarn in the 10th st from the end.
Row 20 (RS): Ch 1, sc in joining st, (PS in next st, sc in next st) 4 times, sc in last st. Turn. (10 sts)
Row 21 (WS): Ch 1, sc in each st across. Turn. (10 sc)
Row 22 (RS): Ch 1, sc in first st, (PS in next st, sc in next st) 4 times, sc in last st. Turn. (10 sts)
Fasten off.
Back Bodice
Work the back bodice identically to the front bodice through Row 22, including both shoulder straps.
Seaming the Bodice
Use whipstitch or mattress stitch to join:
Do not seam the side seams yet.
Skirt
The skirt is worked in the round from the waist downward.
Skirt Join Round (Rnd 1): With RS facing, join yarn with sl st to the bottom right side edge of the front bodice foundation. Ch 1. Work 37 sc across the front bodice foundation edge. Work 1 sc at the side seam join point. Work 37 sc across the back bodice foundation edge. Work 1 sc at the remaining side seam join point. Sl st to first sc to join. (76 sc)
Rnd 2 (Increase Rnd): Ch 1, sc in first st, 2 sc in next st, (sc in next 2 sts, 2 sc in next st) 24 times, sc in last st. Sl st to join. (101 sc)
Rnd 3 (Puff Stitch Rnd): Ch 1, sc in first st, (PS in next st, sc in next st) around. Sl st to join. (101 sts)
Rnd 4 (Plain Rnd): Ch 1, sc in each st around. Sl st to join. (101 sc)
Rnd 5 (Puff Stitch Rnd): Ch 1, sc in first st, (PS in next st, sc in next st) around. Sl st to join. (101 sts)
Rnd 6 (Plain Rnd): Ch 1, sc in each st around. Sl st to join. (101 sc)
Rnd 7 (Increase Rnd): Ch 1, sc in next 3 sts, 2 sc in next st, repeat from to 25 times, sc in last 1 st. Sl st to join. (126 sc)
Rnd 8 (Puff Stitch Rnd): Ch 1, (PS in next st, sc in next st) around. Sl st to join. (126 sts)
Rnd 9 (Plain Rnd): Ch 1, sc in each st around. Sl st to join. (126 sc)
Rnd 10 (Puff Stitch Rnd): Ch 1, (PS in next st, sc in next st) around. Sl st to join. (126 sts)
Rnd 11 (Plain Rnd): Ch 1, sc in each st around. Sl st to join. (126 sc)
Rnd 12 (Increase Rnd): Ch 1, sc in next 4 sts, 2 sc in next st, repeat from to 25 times, sc in last 1 st. Sl st to join. (151 sc)
Rnd 13 (Puff Stitch Rnd): Ch 1, sc in first st, (PS in next st, sc in next st) around. Sl st to join. (151 sts)
Rnd 14 (Plain Rnd): Ch 1, sc in each st around. Sl st to join. (151 sc)
Rnd 15 (Puff Stitch Rnd): Ch 1, sc in first st, (PS in next st, sc in next st) around. Sl st to join. (151 sts)
Rnd 16 (Plain Rnd): Ch 1, sc in each st around. Sl st to join. (151 sc)
Rnd 17 (Increase Rnd): Ch 1, sc in next 5 sts, 2 sc in next st, repeat from to 25 times, sc in last 1 st. Sl st to join. (176 sc)
Rnd 18 (Puff Stitch Rnd): Ch 1, (PS in next st, sc in next st) around. Sl st to join. (176 sts)
Rnd 19 (Plain Rnd): Ch 1, sc in each st around. Sl st to join. (176 sc)
Rnd 20 (Puff Stitch Rnd): Ch 1, (PS in next st, sc in next st) around. Sl st to join. (176 sts)
Rnd 21 (Plain Rnd): Ch 1, sc in each st around. Sl st to join. (176 sc)
Rnd 22 (Increase Rnd): Ch 1, sc in next 6 sts, 2 sc in next st, repeat from to 25 times, sc in last 1 st. Sl st to join. (201 sc)
Rnd 23 (Puff Stitch Rnd): Ch 1, sc in first st, (PS in next st, sc in next st) around. Sl st to join. (201 sts)
Rnd 24 (Plain Rnd): Ch 1, sc in each st around. Sl st to join. (201 sc)
Rnd 25 (Puff Stitch Rnd): Ch 1, sc in first st, (PS in next st, sc in next st) around. Sl st to join. (201 sts)
Rnd 26 (Plain Rnd): Ch 1, sc in each st around. Sl st to join. (201 sc)
Rnds 27 and 28: Repeat Rnds 23 and 24. (201 sts after Rnd 27, 201 sc after Rnd 28)
Hemline Picot Edging
Rnd 29 (Picot Hem): Ch 1. Sc in next st, ch 3, sl st in first ch of ch-3 just made (picot made), sc in next st, repeat from to around. Sl st to join. Fasten off.
Neckline Edging
With RS facing, join yarn to the right back shoulder seam at the neckline.
Rnd 1: Ch 1. Work sc evenly around the entire neckline opening, placing 1 sc per row end along the shoulder straps and 1 sc per chain along the neckline edges. Work sc2tog at each inner corner. Sl st to join. (approximately 48 sc)
Rnd 2 (Picot Neckline): Ch 1. Sc in next st, ch 3, sl st in first ch (picot made), sc in next st, repeat from to around. Sl st to join. Fasten off.
Armhole Edging
Work each armhole separately.
With RS facing, join yarn to the base of the armhole at the side seam.
Rnd 1: Ch 1. Work sc evenly around the armhole opening, placing 1 sc per row end. (approximately 28 sc) Sl st to join.
Rnd 2 (Picot Armhole): Ch 1. Sc in next st, ch 3, sl st in first ch (picot made), sc in next st, repeat from to around. Sl st to join. Fasten off.
Repeat for the second armhole.
Finishing Your Baby Dress
Weave in all ends securely using your yarn needle. For cotton yarn, weave in at least 1 inch in two different directions, then trim close.
Blocking: Lay the dress flat on a blocking surface. Mist generously with cool water or use a steam iron held 1 inch above the surface. Do not press directly onto the puff stitches or you will flatten them. Pin the bodice to measurements and spread the skirt into an even A-line shape. Allow to dry completely, at least 4 to 6 hours.
The puff stitches will bloom beautifully after blocking.
Care Instructions
For cotton yarns: Machine wash on gentle cycle in cool water. Lay flat to dry. Do not tumble dry.
For acrylic yarns: Machine wash gentle, tumble dry on low.
Always check your specific yarn label for care recommendations.
Size Customization Tips
Newborn / 0-3 months: Start with a foundation chain of 32 sts. Reduce armhole bind-off to 2 sts each side. Make shoulder straps 8 sts wide with 7 center sts skipped. Work fewer skirt rounds.
12-18 months: Start with a foundation chain of 44 sts. Increase armhole bind-off to 4 sts each side. Keep shoulder straps at 10 sts with 11 center sts skipped. Add one more increase round to the skirt.
2T: Start with a foundation chain of 50 sts. Add 2 additional increase rounds to the skirt.
You Did It!
Thank you so much for choosing this lavender puff stitch baby dress crochet pattern for your next project. I hope the step by step instructions made the process enjoyable and the results make you proud. There is nothing quite like seeing a little one wearing something you made with your own hands.
If you make this dress, I would absolutely love to see it! Tag me on Instagram or share a photo in my Facebook group. Seeing your versions honestly makes my whole week.
Save this pattern to your Pinterest boards so you can find it when you are ready to start, and drop a comment below if you make one. I love hearing which colors you choose and who the lucky baby is. Happy crocheting!
