
Last summer, my niece announced she was expecting her first baby. A girl. I immediately started scrolling through my saved patterns, but nothing felt quite right. I wanted something special. Something that looked like it came from a boutique but felt like it came from the heart.
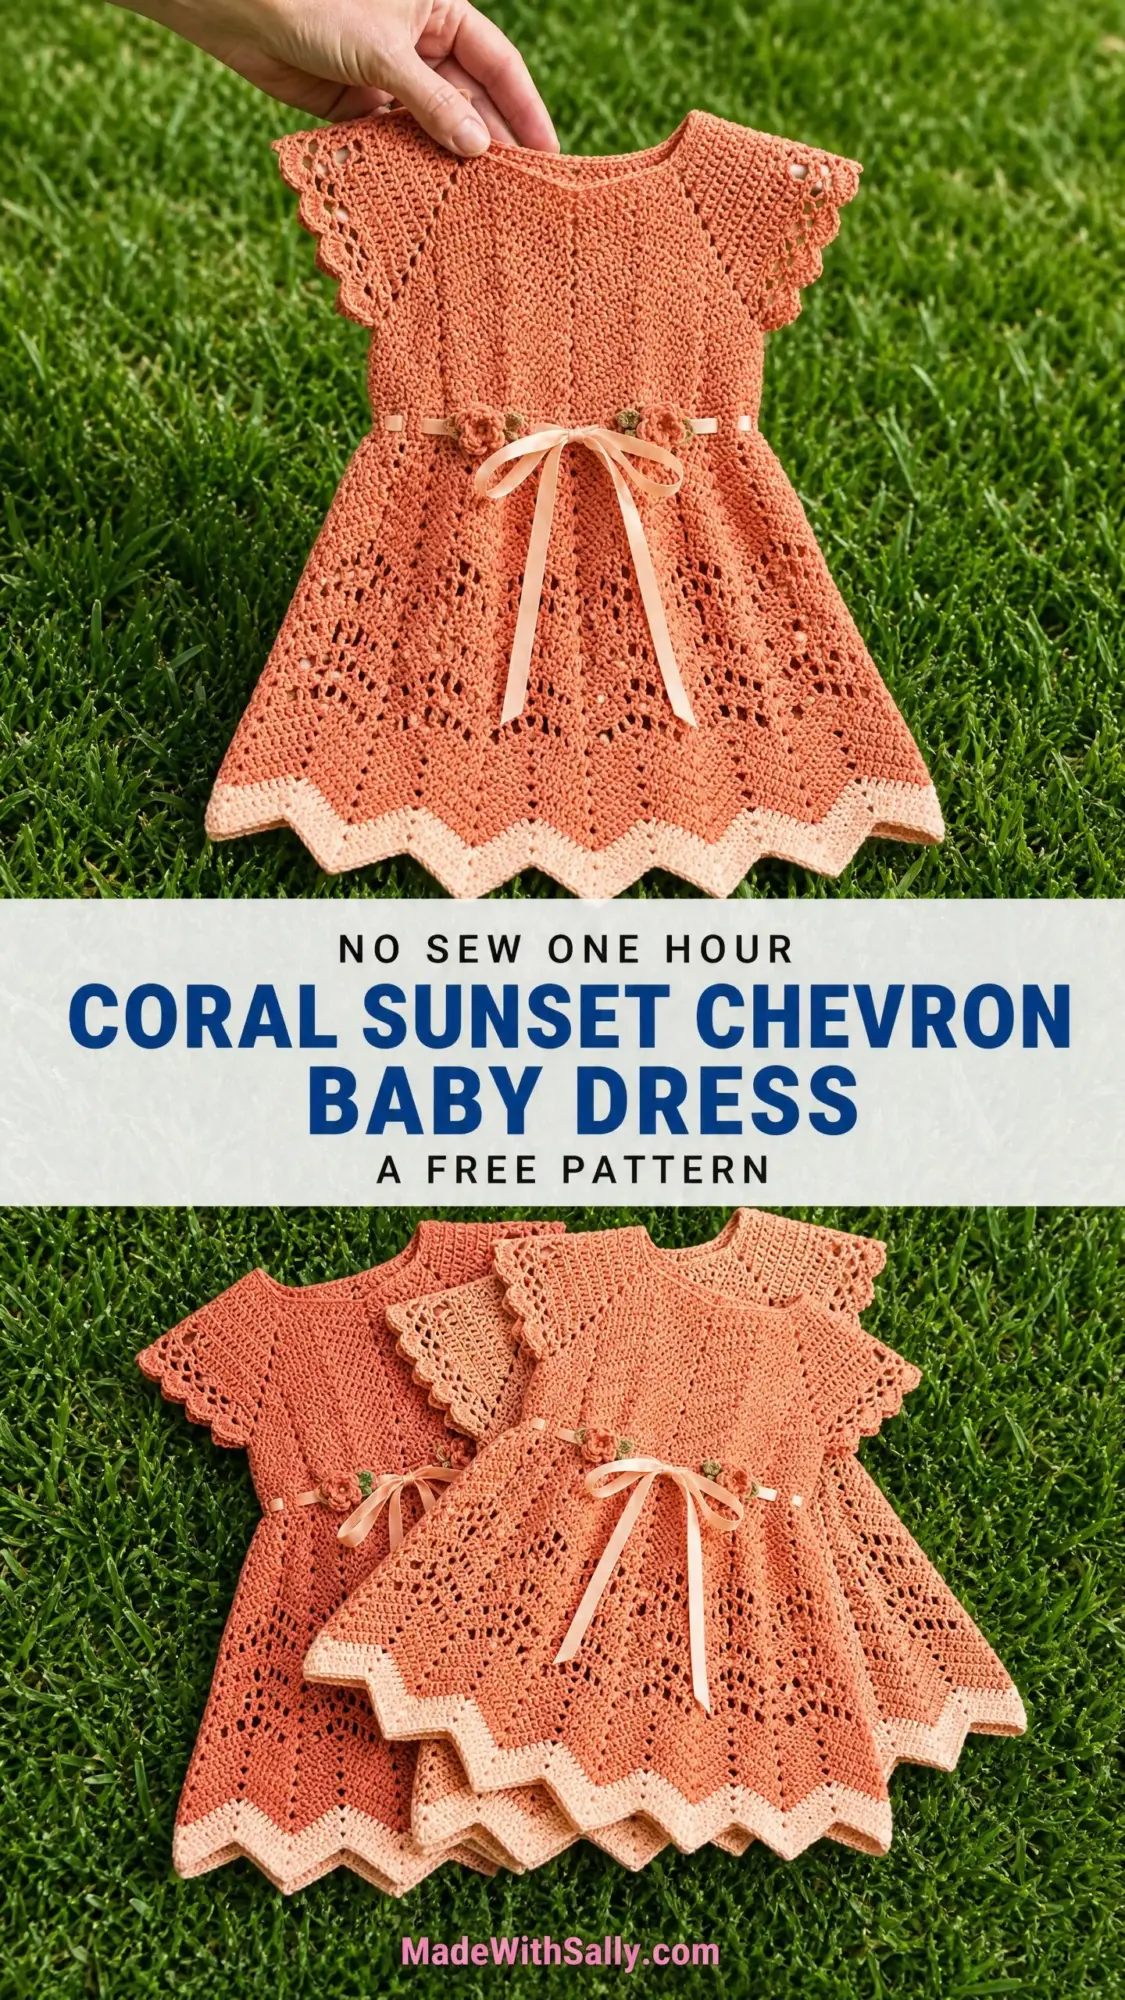
That’s when I started sketching this little dress. I pictured warm coral tones, delicate lace texture, and that classic chevron zigzag hem that makes everyone stop and say "you made that?" The satin ribbon at the waist sealed the deal. It’s the kind of dress that photographs beautifully for milestone pictures but washes easily after applesauce disasters.
If you’ve been wanting to try garment construction but felt intimidated, this is your sign. The dress works top-down in joined rounds, which means minimal seaming and a clear, logical flow from neckline to hem. Let me walk you through every single step.
Why This Crochet Baby Dress Pattern Works So Well
This coral sunset chevron baby dress combines several techniques that create a stunning finished piece without requiring advanced skills. The bodice uses a simple double crochet mesh that looks intricate from a distance but is actually just basic stitches worked in rounds. The skirt transitions into a chevron lace pattern that flares naturally as you work, giving the dress that sweet A-line silhouette.
The cap sleeves are worked separately around the armhole openings after the body is complete. This means you’re never juggling complicated shaping while trying to maintain your stitch count. The waistband features a row of chain spaces that create eyelets for threading the satin ribbon. Two tiny crocheted flowers with leaf accents add the finishing touch.
Skill level: Advanced beginner to intermediate. You’ll need to be comfortable with basic stitches and reading stitch counts carefully. No complex shaping techniques like short rows or set-in sleeves are used.
Time estimate: Approximately 12 to 18 hours for an experienced crocheter working at a steady pace.
Finished Measurements
Size: 12 to 18 months
Materials Needed for This Crochet Tutorial
Yarn A (Main Color): Worsted weight, Category 4 smooth yarn in coral-orange. You’ll need approximately 300 to 350 yards (275 to 320 meters).
Yarn B (Contrast Color): Worsted weight, Category 4 smooth yarn in light peach. You’ll need approximately 50 yards (46 meters).
Hook: US Size G-6 / 4.0 mm crochet hook (or size needed to achieve gauge)
Notions:
Yarn Suggestions That Work Beautifully
Option 1: Lion Brand Pound of Love (Worsted, 100% acrylic) in Pumpkin for Yarn A and Peaches N Cream for Yarn B. Machine washable, soft against baby skin, and widely available.
Option 2: Paintbox Yarns Simply DK (used at a tighter gauge on a G hook for a firm drape). Choose Coral for Yarn A and Pale Rose for Yarn B. Note that DK weight produces a slightly drapier fabric, so swatch carefully.
Option 3: Cascade 220 Superwash (Worsted, 100% superwash wool) in Grapefruit for Yarn A and Buff for Yarn B. Wool provides excellent stitch definition and blocks beautifully.
Substitution tip: Choose a smooth, plied yarn for best stitch definition in the lace mesh and chevron sections. Avoid bouclé, fuzzy, or highly textured yarns. These will obscure the beautiful openwork pattern. Always confirm your yarn is colorfast and skin-safe for infant garments.
Gauge (Please Don’t Skip This)
With Yarn A and US G-6 / 4.0 mm hook, in double crochet mesh pattern:
How to make your gauge swatch: Chain (ch) 22. Row 1: Double crochet (dc) in 4th chain from hook, dc in each ch across. (20 dc) Rows 2 through 8: Ch 3, turn, dc in each stitch across. (20 dc) Block swatch lightly. Measure center 4 inches. Adjust hook size as needed.
I know swatching feels tedious for small projects, but fit is critical for a garment. A dress that’s too tight won’t go over baby’s head. A dress that’s too loose will look sloppy. Take the ten minutes to swatch.
Abbreviations and Stitch Definitions
Let me define every abbreviation before we begin. If you’re newer to crochet patterns, bookmark this section.
Special Stitches Explained Step by Step
Shell Stitch (used in scallop edging)
Work 5 dc all into the same stitch or space. This creates a fan-shaped shell that looks like a little scallop.
V-Stitch (V-st) (used in bodice mesh)
Work (dc, ch 2, dc) all into the same stitch or space. The two double crochets with a chain between them form a V shape.
Chevron Pattern (used in skirt)
This is the signature zigzag pattern. Each repeat unit works as follows:
1. Work 3 dc into the designated peak stitch (this is your increase point, creating the mountain)
2. Work 1 dc into each of the next 4 stitches
3. Skip 2 stitches (this creates the valley, the dip between mountains)
4. Work 1 dc into each of the next 4 stitches
5. Repeat from step 1 for each chevron unit
The skip-2 valley method keeps your stitch count stable while creating the beautiful wave effect.
dc2tog (Double Crochet Decrease)
Yarn over, insert hook into next stitch, yarn over, pull up loop, yarn over, pull through 2 loops. You now have 2 loops on your hook. Yarn over, insert hook into the following stitch, yarn over, pull up loop, yarn over, pull through 2 loops. You now have 3 loops on your hook. Yarn over, pull through all 3 loops. One decrease made. Two stitches become one.
Pattern Notes Before You Begin
Read through these notes carefully. They’ll save you confusion later.
1. The dress is worked top-down in joined rounds after the initial flat neckline setup.
2. After the underarms are set, the garment is worked as a tube. No seaming required for the body.
3. Cap sleeves are worked separately around the armhole openings after the body is complete.
4. The waistband is a single round of chain spaces worked at Round 18 to create eyelets for threading the satin ribbon.
5. Place stitch markers at the center front, center back, and both side points to track shaping.
6. Turn your work at the end of each row during the initial flat neckline section (Rows 1 through 3). After joining into the round, do not turn unless specified.
7. The back neck has a small opening of approximately 1.5 inches (4 cm) which can be closed with a snap or button.
8. Yarn B (light peach) is introduced only at the final two rounds of the skirt hem border.
9. All stitch counts in parentheses at the end of a row or round reflect the total working stitches at that point.
Coral Sunset Chevron Baby Dress Instructions
Section 1: Neckline Setup (Worked Flat in Rows)
The neckline creates a wide, rounded opening. It’s worked flat for 3 rows before joining into the round.
Foundation Chain: With Yarn A and G-6 hook, ch 62.
Row 1 (RS): Sc in 2nd ch from hook, sc in each ch across. Ch 1, turn. (61 sc)
Row 2: Sc in first sc, ch 1, sk 1 sc, sc in next sc; rep from across to last st, sc in last st. Ch 3, turn. (31 sc, 29 ch-1 sps; 61 working sts total)
Row 3: Dc in first ch-1 sp, ch 1, dc in next ch-1 sp; rep from across, ending dc in last sc. Do not turn. (32 dc, 29 ch-1 sps = 61 working sts)
Joining Round: Sl st into first dc of Row 3 to form a ring. Check that the foundation chain is not twisted. This is so important. Place a stitch marker at the join point (this is center back). (61 sts in ring)
Section 2: Upper Bodice (Worked in Rounds, RS Always Facing)
After the joining round, increase 1 sc at the join point to reach 62 sts.
Round 0 (adjustment): Work 1 sc into the sl st join point. (62 sts)
Round 1: Ch 3 (counts as dc throughout), dc in each st around, sl st to top of ch-3. (62 dc)
Round 2: Ch 3, dc in next 3 sts, inc in next st (2 dc in 1 st), dc in next 5 sts, inc in next st; rep from around to last 2 sts, dc in last 2 sts, sl st to top of ch-3. (72 dc)
Round 3: Ch 3, dc in each st around, sl st to top of ch-3. (72 dc)
Round 4: Ch 3, dc in each st around, sl st to top of ch-3. (72 dc)
Round 5: Ch 3, dc in each st around, sl st to top of ch-3. (72 dc)
Round 6: Ch 3, dc in next 11 sts, inc in next st; rep from around, sl st to top of ch-3. (78 dc)
Round 7: Ch 3, dc in each st around, sl st to top of ch-3. (78 dc)
Round 8: Ch 3, dc in each st around, sl st to top of ch-3. (78 dc)
Armhole Division Round (Round 9)
In this round, you’ll divide stitches for front and back. Underarm chains bridge the armhole gaps.
Round 9: Ch 3, dc in next 17 sts (left front = 18 sts including ch-3). Ch 6 (underarm bridge). Sk next 21 sts (left sleeve/armhole). Dc in next 18 sts (back = 18 dc). Ch 6 (underarm bridge). Sk next 21 sts (right sleeve/armhole). Sl st to top of ch-3 to join. (36 dc + 12 ch = 48 working sts)
Round 10 (rejoin underarms): Ch 3, dc in next 17 dc, dc in each of 6 ch across left underarm bridge, dc in next 18 dc across back, dc in each of 6 ch across right underarm bridge, sl st to top of ch-3. (48 dc)
Checkpoint: After Round 10, your bodice tube should measure approximately 3 to 3.5 inches (7.5 to 9 cm) from the neckline. The piece should lay flat as a tube approximately 9.5 to 10 inches (24 to 25 cm) in circumference when folded.
Section 3: Lower Bodice Shaping (Rounds 11 through 17)
Round 11: Ch 3, dc in next 2 sts, ch 1, sk 1 st; rep from around, ending dc in last 0 to 1 sts as needed to close rnd evenly, sl st to ch-3. (48 sts: 32 dc + 16 ch-1 sps)
Round 12: Ch 3, dc in ch-1 sp, dc in next 2 dc; rep from around, sl st to ch-3. (48 dc)
Round 13: Ch 3, dc in each st around. Inc 4 sts evenly spaced (every 12 sts). Sl st to ch-3. (52 dc)
Round 14: Ch 3, dc in next 2 sts, ch 1, sk 1 st; rep from around, sl st to ch-3. (52 working sts: 35 dc + 17 ch-1 sps)
Round 15: Ch 3, dc in ch-1 sp, dc in next 2 dc; rep from around, ending dc in last st, sl st to ch-3. (52 dc)
Round 16: Ch 3, dc in each st around. Inc 4 sts evenly (every 13 sts). Sl st to ch-3. (56 dc)
Round 17: Ch 3, dc in each st around. Sl st to ch-3. (56 dc)
Section 4: Waistband Eyelet Round (Round 18)
This is where the ribbon will thread through.
Round 18: Ch 1, sc in same st, ch 2, sk 2 sts, sc in next 2 sts; rep from around, ending ch 2, sk 2 sts, sc in last 2 sts, sl st to first sc. (14 ch-2 sps + 28 sc = 56 working sts)
Checkpoint: The bodice from neckline to waist should measure approximately 5.5 to 6 inches (14 to 15 cm).
Section 5: Skirt (Rounds 19 through 42)
Skirt Increase Round (Round 19): Ch 1, (sc in next 2 sts, 2 sc in next st) 14 times, (sc in next st, 2 sc in next st) 7 times, sl st to first sc. (77 sc)
Now you have 77 stitches, which divides evenly into 7 chevron units of 11 stitches each.
Chevron Base Round (Rounds 20, 22, 24): Ch 3, 2 dc in same st (= 3 dc at peak), dc in next 4 sts, sk 2 sts, dc in next 4 sts, 3 dc in next st, dc in next 4 sts, sk 2 sts, dc in next 4 sts; rep from around, sl st to top of ch-3. (77 dc)
Open Chevron Round (Rounds 21, 23): Ch 3, 2 dc in same st, ch 1, sk 1, dc in next 3 sts, sk 2 (valley), dc in next 3 sts, ch 1, sk 1, 3 dc in peak st; rep from around, sl st to ch-3. (77 working sts)
Continue alternating these rounds through Round 24.
Skirt Increase Round (Round 25): Ch 3, 2 dc in same st, dc in next 2 sts, inc in next st, dc in next 1 st, sk 2, dc in next 1 st, inc in next st, dc in next 2 sts, 3 dc in peak, dc in next 2 sts, inc, dc in next 1, sk 2, dc in next 1, inc, dc in next 2; rep from around, sl st to ch-3. (91 dc)
Continue chevron pattern with 91 stitches through Round 42, adding increase rounds every 5 to 6 rounds to maintain flare.
Hem Border (Rounds 43 and 44)
Switch to Yarn B.
Round 43: Ch 1, sc in each st around, sl st to first sc. (91 sc)
Round 44 (Shell Border): Ch 1, sc in first st, sk 2 sts, 5 dc in next st (shell made), sk 2 sts, sc in next st; rep from around, sl st to first sc. Fasten off.
Cap Sleeves (Make 2)
Join Yarn A at center of underarm chain.
Round 1: Ch 1, sc evenly around armhole opening, working approximately 28 to 30 sc. Sl st to first sc.
Rounds 2 and 3: Ch 3, dc in each st around, sl st to ch-3.
Round 4 (Scallop Edge): Ch 1, sc in first st, sk 1 st, 3 dc in next st, sk 1 st, sc in next st; rep from around, sl st to first sc. Fasten off.
Crochet Flowers (Make 2)
Step 1: With Yarn A, make a magic ring or ch 4 and join with sl st to form a ring.
Step 2: Ch 1, work 8 sc into the ring. Join with sl st to first sc. (8 sc)
Step 3: (Ch 3, dc, ch 3, sl st) into same st as join. Sl st into next st, (ch 3, dc, ch 3, sl st) into same st. Rep from around until 4 petals are formed (using every other sc). (4 petals)
Step 4: Fasten off, leaving a 6-inch tail for sewing.
Leaves (Make 4)
Step 1: With green yarn (or Yarn A), ch 6.
Step 2: Sl st into 2nd ch from hook, sc in next ch, hdc in next ch, sc in next ch, sl st in last ch.
Step 3: Fasten off, leaving a 6-inch tail.
Finishing Your Baby Dress
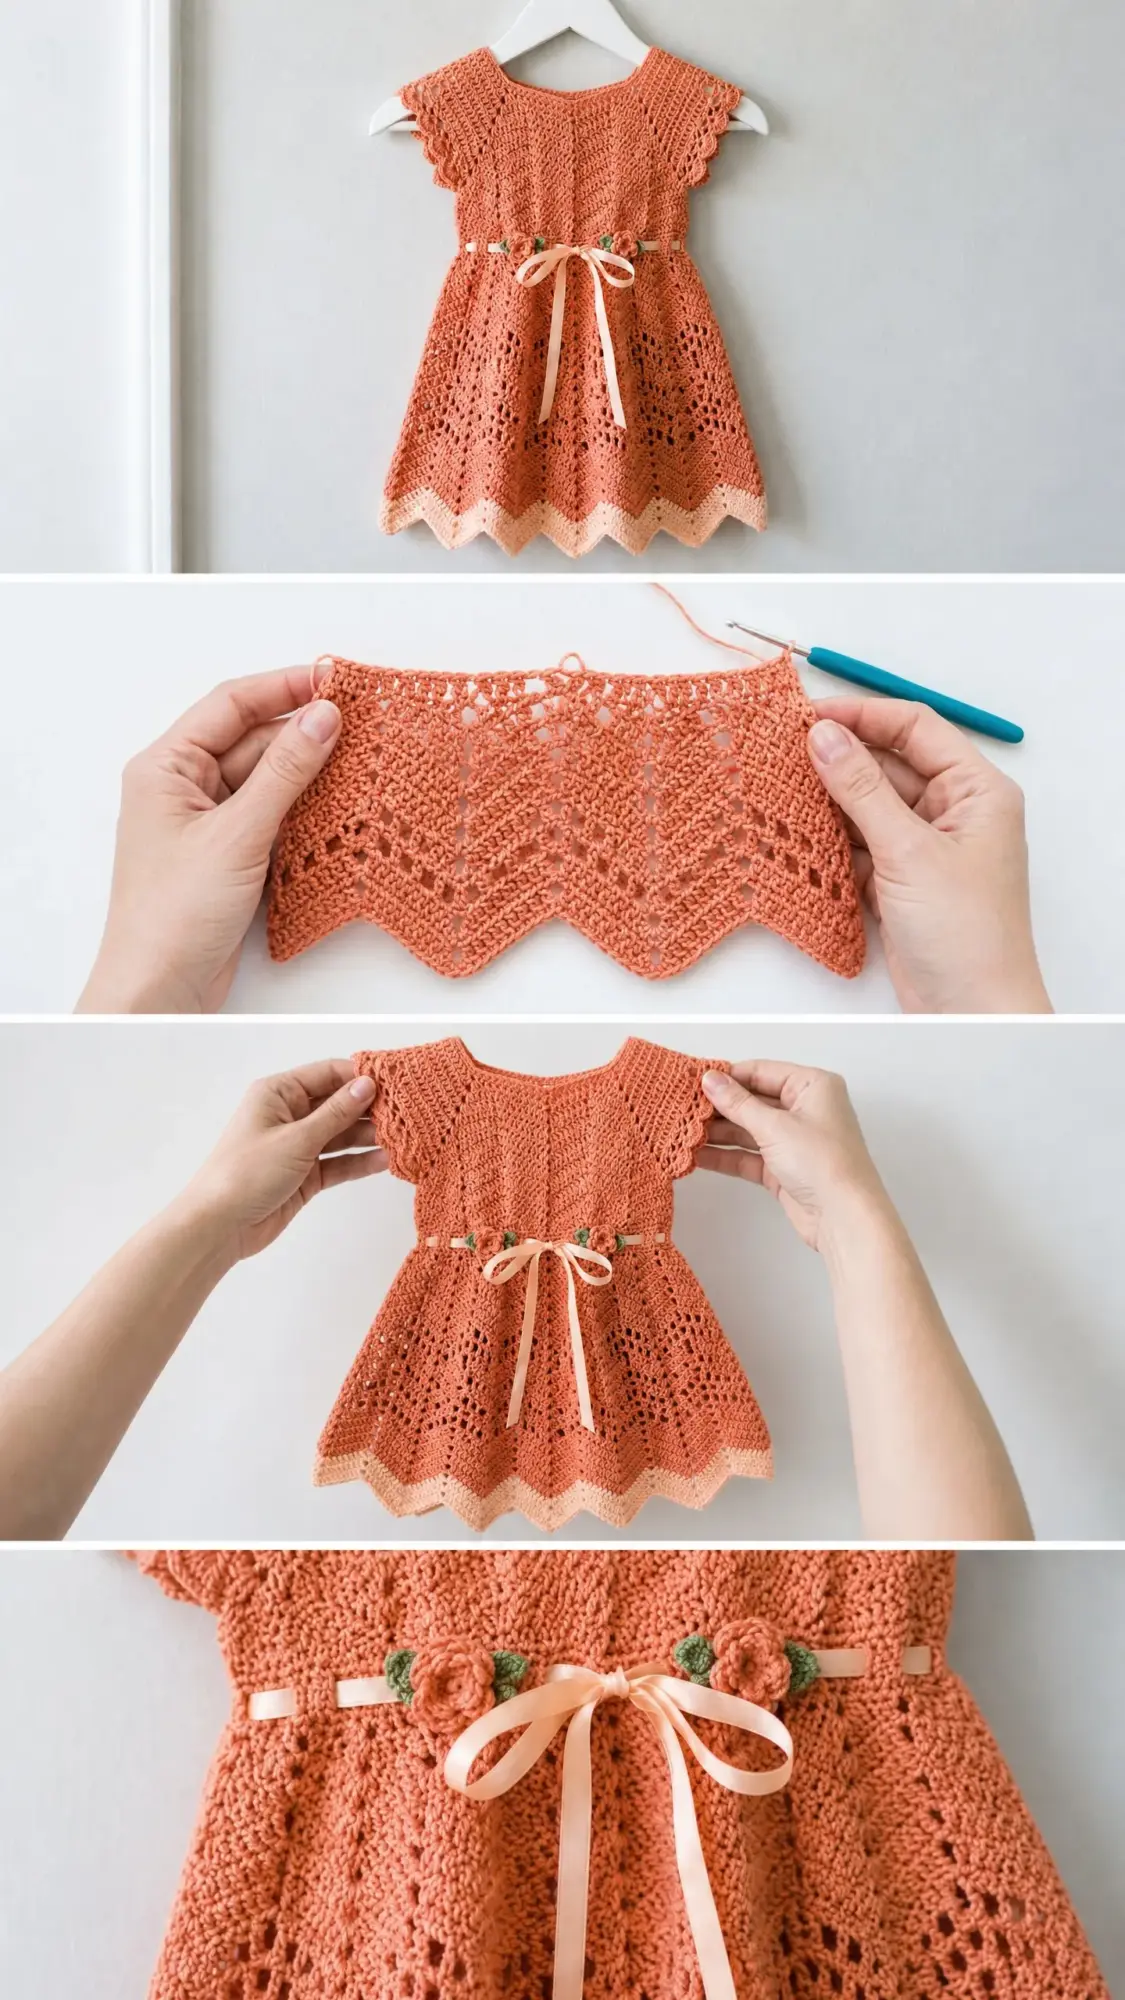
Weave in all ends with your yarn needle. Block the dress gently by pinning it to your blocking mat in the correct dimensions. Allow to dry completely.
Thread the satin ribbon through the waistband eyelets, starting and ending at center front. Tie in a bow. Trim ribbon ends at an angle to prevent fraying.
Attach two flowers and four leaves at the waist, positioning one flower on each side of the ribbon bow. Sew securely with yarn tails.
If desired, add a small button or snap at the back neck opening for easy dressing.
Tips for Success with This Beginner Friendly Pattern
Keep your tension consistent. Uneven tension will show in the chevron pattern especially. If your valleys look wonky, try relaxing your grip.
Count after every round. I cannot stress this enough. Chevron patterns are unforgiving if you lose track. Place a stitch marker at each peak to help you stay oriented.
Block before adding the ribbon. The blocking process evens out your stitches and opens up the lace beautifully. The dress will look twice as professional after blocking.
Choose ribbon that washes well. If you’re using satin, test wash a small piece first. Some ribbons bleed or shrink. Grosgrain ribbon is a more durable alternative.
I hope this crochet pattern brings you as much joy to make as it did for me. Watching that chevron hem take shape is honestly one of my favorite parts of any project. If you make this little dress, I’d absolutely love to see it. Save this pattern to your Pinterest boards so you can find it when you’re ready to start, and please leave a comment below to share your finished piece or ask any questions. Happy crocheting, friend.
