
I don’t know about you, but I have been waiting for the perfect excuse to work with those gorgeous gradient yarns that catch my eye every single time I walk into a craft store. Something about watching colors melt into each other as you stitch just hits different.
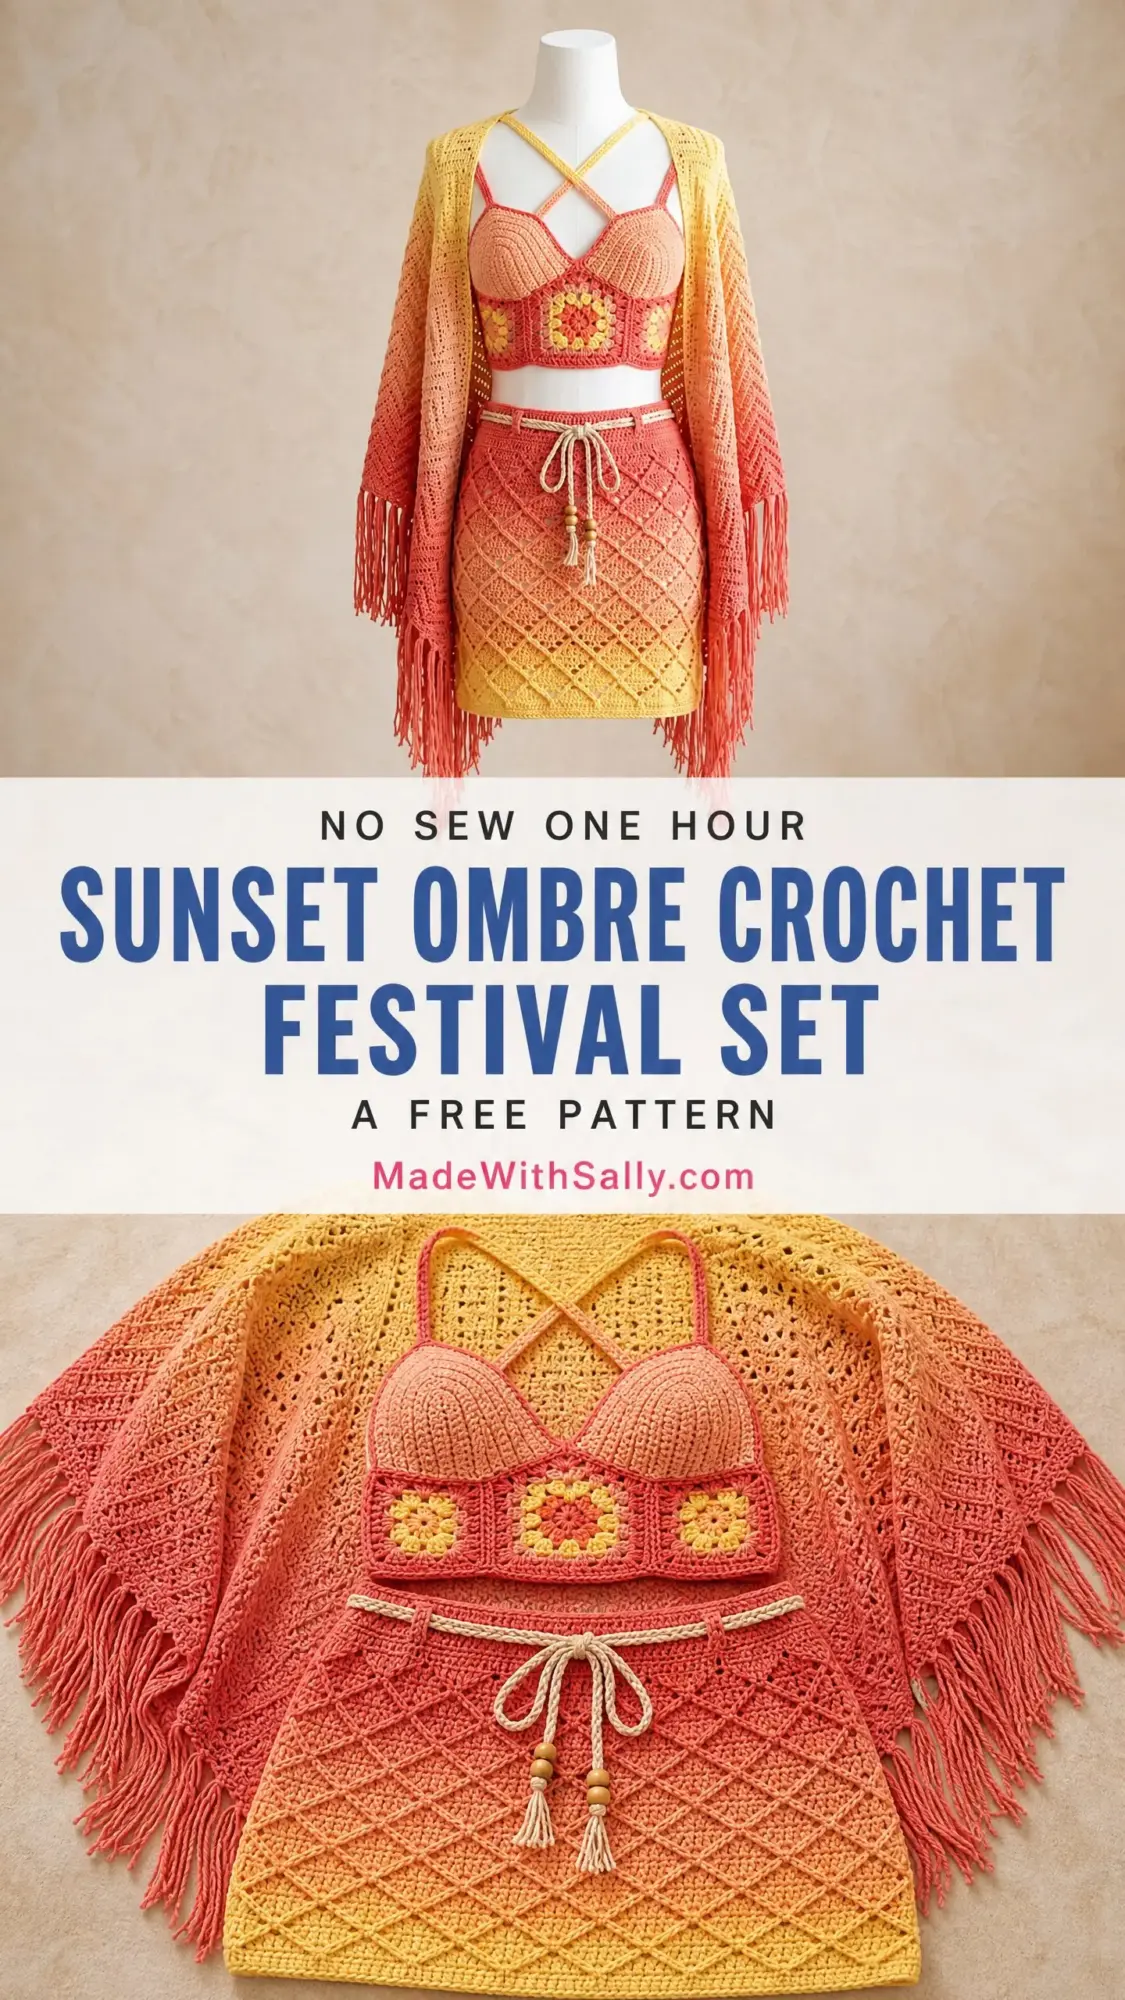
Well, this three piece festival set is exactly that excuse. A coordinating crop top, mini skirt, and fringed kimono wrap, all flowing from deep coral into warm golden yellow like an actual sunset wrapped around your body.
The construction is clever without being fussy. You will work granny squares, a beautiful diamond lattice stitch, and a classic chevron pattern across the three pieces. Advanced intermediate territory here, but if you have made a granny square and can follow a repeat, you are ready to tackle this stunner.
What Makes This Crochet Festival Set Special
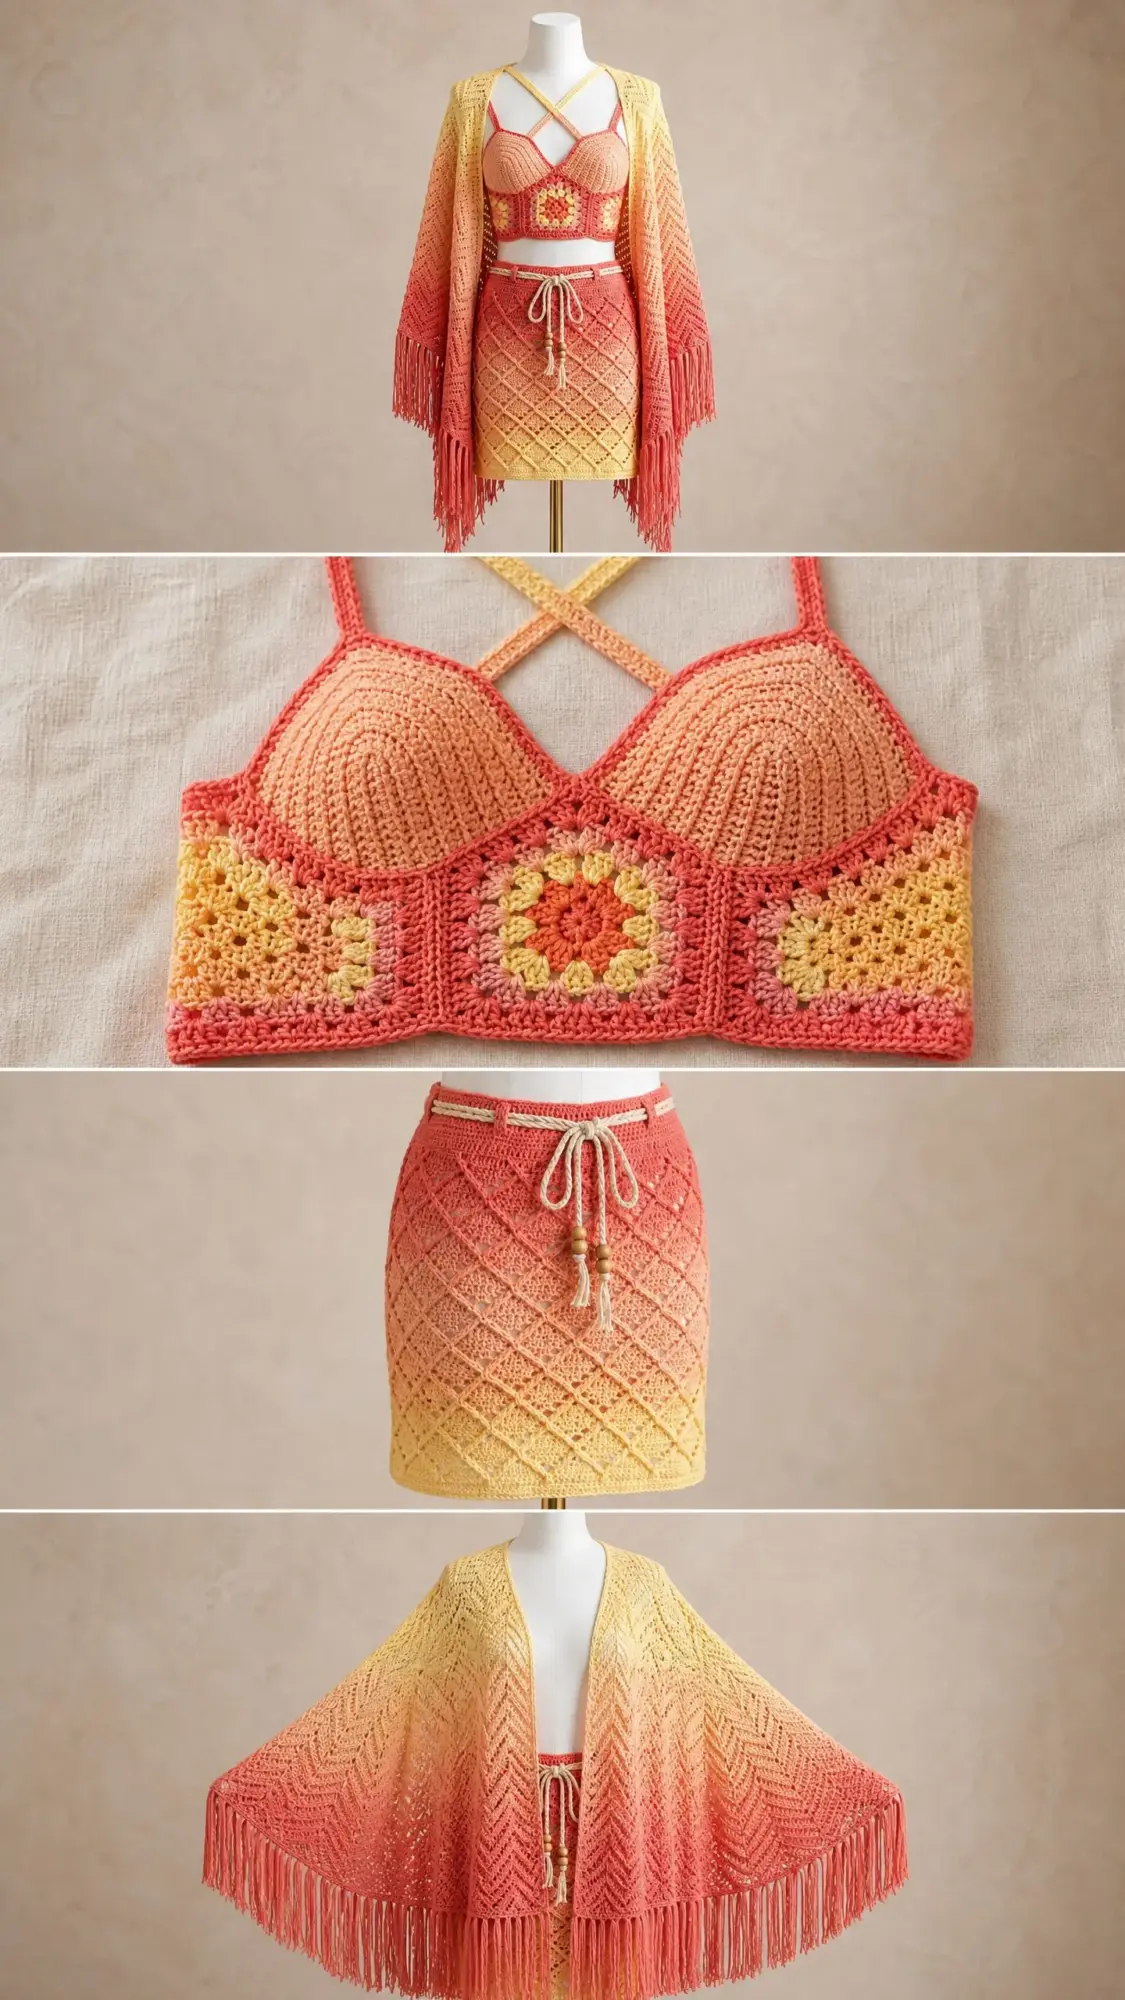
This sunset ombre crochet festival set is designed as a coordinated trio where the gradient flows intentionally across all three garments. When you wear them together, the color story is seamless. The coral starts at the top of each piece and transitions down to yellow at the hems, creating that dreamy ombre effect throughout.
The crop top features a granny square center panel with a sunburst accent, shaped bralette cups, and crossed halter straps that create a gorgeous X pattern at the back. The mini skirt uses a diamond lattice stitch that looks intricate but follows a simple repeat once you get the hang of it. And the kimono wrap? It is worked in chevron stitch with long fringe at all the hems for maximum festival vibes.
Each piece can absolutely be worn on its own or mixed with other wardrobe items. But wearing all three together? That is a statement.
Skill Level and Time Estimate
This crochet pattern falls into the advanced intermediate category. You should be comfortable with granny squares, working in the round, shaping with increases and decreases, and reading stitch repeats. Nothing here is technically difficult on its own, but coordinating three garments to align in color flow takes planning and attention.
Estimated total time: 40 to 55 hours across all three pieces.
Here is the breakdown:
These times assume an experienced crocheter working at a moderate pace. If you are newer to some of these techniques, give yourself extra time and grace.
Finished Measurements
The pattern is written for size Small/Medium (US size 2 to 10, bust 32 to 38 inches, hip 34 to 40 inches). Size customization tips are included after each garment section so you can adjust up or down.
Crop Top:
Skirt:
Kimono:
Materials Needed
Yarn
You will need approximately 1,200 yards total of DK weight yarn (CYCA 3) in a coral to yellow ombre colorway. The gradient should transition smoothly from deep coral at one end to warm golden yellow at the other.
Yardage breakdown by piece:
Yarn Suggestions
Option 1: Lion Brand Mandala (590 yards per skein). This self striping yarn produces its own gradient within a single cake. Look for colorways with coral, orange, and yellow tones like Chimera or Phoenix. One skein covers the top and skirt. A second covers the kimono with yardage to spare.
Option 2: Paintbox Yarns Simply DK (137 yards per skein). Work with two strands simultaneously, one coral and one yellow. Fade between them gradually by adjusting how much of each strand you use. Purchase 5 skeins coral and 5 skeins yellow.
Option 3: WeCrochet Swish DK (123 yards per skein, superwash merino). This yarn takes dye beautifully and comes in coordinating coral and yellow solids. Use the same two strand fade technique. Swatch carefully as this yarn has more drape than cotton blends.
Substitution note: Any smooth DK weight yarn works for this set. Avoid fuzzy or textured yarns like mohair or boucle because they will obscure the stitch definition. Cotton or cotton blend yarns produce a crisp structured look. Wool blends give more drape and stretch.
Hooks
Notions
Gauge
Gauge is mandatory for this fitted set. The top and skirt must fit your body, so please do not skip swatching.
Main gauge (all three pieces, G-6 hook):
18 stitches and 20 rows = 4 inches in single crochet
Diamond lattice stitch (skirt):
Granny square gauge (E-4 hook):
One completed 3 round granny square = approximately 3 inches square
Kimono chevron gauge (G-6 hook):
One full chevron repeat (12 stitches) = approximately 2.6 inches
Abbreviations and Stitch Definitions
Let me walk you through every abbreviation you will encounter. I have included plain English definitions so nothing feels mysterious.
Special Stitches
3-Double Crochet Cluster (3dc-cl)
This stitch combines three incomplete double crochets into one stitch.
Yarn over, insert hook into indicated stitch or space, yarn over, pull up a loop, yarn over, draw through 2 loops (1 loop remains on hook). Yarn over, insert hook into same stitch or space, yarn over, pull up a loop, yarn over, draw through 2 loops. Yarn over, insert hook into same stitch or space, yarn over, pull up a loop, yarn over, draw through 2 loops. Yarn over and draw through all 4 loops on hook. One 3dc-cl complete.
Granny Cluster Shell
Work (3dc-cl, ch 2, 3dc-cl) all into the same chain 2 corner space. This creates one full corner unit of a granny square.
Foundation Single Crochet (FSC)
This creates a stretchy foundation row, which is important for the skirt waistband.
Make a slip knot. Chain 2. Insert hook into second chain from hook. Yarn over, pull up a loop (2 loops on hook). Yarn over, draw through 1 loop (this creates the chain base). Yarn over, draw through remaining 2 loops (this creates the single crochet). For each subsequent FSC, insert hook under both loops of the chain just created in the previous step, yarn over, pull up a loop, yarn over through 1 loop (chain formed), yarn over through 2 loops. Repeat to desired length.
Diamond Lattice Stitch
This stitch creates a diagonal grid of open diamond shapes. It is worked over a multiple of 6 stitches plus 3.
Row 1 (RS): Ch 4 (counts as dc plus ch 1). Skip 1 st. Dc in next st. (Ch 1, sk 1 st, dc in next st) across. Turn.
Row 2 (WS): Ch 1. Sc in first dc. (Sc in ch-1 sp, sc in dc) across, sc in top of t-ch. Turn.
Row 3 (RS): Repeat Row 1.
Row 4 (WS): Ch 3 (counts as dc). Skip first sc. Dc in next sc. (Ch 1, sk 1 sc, dc in next sc) across. Turn.
The offset between rows creates the diagonal diamond illusion.
Chevron Stitch
This creates the wave pattern for the kimono. It is worked over a multiple of 12 stitches plus 1.
Row 1 (RS): Ch 3 (counts as dc). Work 2 dc in first st. (Dc in each of next 4 sts. Sk 2 sts. Dc in each of next 4 sts. 3 dc in next st.) Rep across, ending with 3 dc in last st. Turn.
Row 2: Ch 3 (counts as dc). Work 2 dc in first st. (Dc in each of next 4 sts. Sk 2 sts. Dc in each of next 4 sts. 3 dc in next st.) Rep across, ending with 3 dc in last st. Turn.
All rows are identical. The peaks and valleys form from the 3 dc increase at peaks and the sk 2 at valleys.
Fringe Application
Cut yarn into lengths twice your desired fringe length plus 1 inch. For the kimono, cut 14 inch lengths (finished fringe will be approximately 6 inches). Fold one or two strands in half. Insert the folded loop through an edge stitch. Draw the cut ends through the folded loop and pull firmly to knot. Repeat across all edge stitches.
Important Pattern Notes
Before you begin, read through these notes. They will save you headaches later.
1. The ombre gradient is continuous across all three pieces. Work the set in this order: crop top, skirt, kimono. Begin each piece at the coral end of your gradient yarn so the darkest coral appears at the top of each piece and transitions to yellow at the hem.
2. If using a self striping ombre cake, start at the outside of the cake for each new piece to always begin in the coral zone. Cut and rejoin at the correct color if needed.
3. The crop top is worked in three sections: underbust band (in the round), granny square panel (flat, then seamed), and bralette cups (worked individually and attached). Halter straps are added last as chains.
4. The skirt is worked in the round from waist down. The waistband is worked separately and seamed on.
5. The kimono is worked flat in rectangular panels, seamed at the shoulders. Fringe is attached to all lower and sleeve edges.
6. Always count your stitches at the end of every row and round. Mark the beginning of each round with a stitch marker.
7. When joining yarn for a new section, join with a standing stitch rather than a slip knot join for cleaner results.
Piece 1: Granny Square Crop Top with Halter Straps
Section A: Underbust Band
The band is worked in the round from a foundation chain.
Setup: Using G-6 hook and beginning at the coral end of your yarn, ch 126. Taking care not to twist, sl st in the first ch to join. Place a stitch marker in the join.
Round 1: Ch 1 (does not count as a stitch here or throughout the band). Sc in each ch around. Sl st to first sc to join. (126 sc)
Round 2: Ch 1. Working in BLO, sc in each st around. Sl st to join. (126 sc)
Rounds 3 through 6: Ch 1. Sc in each st around. Sl st to join. (126 sc each round)
Round 7: Ch 1. Working in FLO, sc in each st around. Sl st to join. (126 sc)
This creates a visual ridge that serves as the upper fold line of the band.
Rounds 8 through 12: Ch 1. Sc in each st around. Sl st to join. (126 sc each round)
Fasten off and leave a 12 inch tail for seaming. The band is now approximately 2.5 inches tall.
Checkpoint: The completed band should measure 14 inches in circumference and approximately 2.5 inches tall. The FLO ridge in Round 7 should be visible as a clean horizontal line.
Section B: Granny Square Panel
Make 3 identical granny squares for the front center panel using the E-4 hook.
Square 1 (and 2 and 3):
Round 1: Make a magic ring. Ch 3 (counts as first dc). Work 2 dc into ring. Ch 2. (3 dc into ring, ch 2) 3 times. Sl st to top of beginning ch-3 to join. (4 clusters of 3 dc, 4 ch-2 corner spaces)
Round 2: Sl st into first ch-2 corner sp. Ch 3 (counts as dc). (2 dc, ch 2, 3 dc) into same corner sp. Ch 1. [(3 dc, ch 2, 3 dc) into next corner sp. Ch 1.] 3 times. Sl st to top of beginning ch-3. (8 clusters, 4 corner ch-2 spaces, 4 side ch-1 spaces)
Round 3: Sl st into first ch-2 corner sp. Ch 3 (counts as dc). (2 dc, ch 2, 3 dc) into same corner sp. Ch 1. 3 dc into next ch-1 sp. Ch 1. [(3 dc, ch 2, 3 dc) into next corner sp. Ch 1. 3 dc into next ch-1 sp. Ch 1.] 3 times. Sl st to top of beginning ch-3. (12 clusters total, 4 corner ch-2 spaces, 8 side ch-1 spaces)
Fasten off. One square measures approximately 3 inches square.
Color note for sunburst effect: Work Round 1 in yellow and Rounds 2 and 3 in coral. This creates the sunburst detail visible in the finished piece.
Joining the squares: Lay all 3 squares side by side. Using yarn needle and coral yarn, whipstitch the squares together along one side each. The joined panel should be approximately 9 inches wide and 3 inches tall.
Section C: Cup Construction
Each cup is worked flat, then attached to the band. The cups use increases to create a soft rounded shape.
Right Cup:
Switch to G-6 hook.
Row 1 (RS): Ch 19. Sc in 2nd ch from hook and in each ch across. Turn. (18 sc)
Row 2: Ch 1. 2 sc in first st. Sc across to last st. 2 sc in last st. Turn. (20 sc)
Row 3: Ch 1. Sc across. Turn. (20 sc)
Row 4: Ch 1. 2 sc in first st. Sc across to last st. 2 sc in last st. Turn. (22 sc)
Row 5: Ch 1. Sc across. Turn. (22 sc)
Row 6: Ch 1. 2 sc in first st. Sc across to last st. 2 sc in last st. Turn. (24 sc)
Row 7: Ch 1. Sc across. Turn. (24 sc)
Row 8: Ch 1. 2 sc in first st. Sc across to last st. 2 sc in last st. Turn. (26 sc)
Row 9: Ch 1. Sc across. Turn. (26 sc)
Row 10: Ch 1. 2 sc in first st. Sc across to last st. 2 sc in last st. Turn. (28 sc)
Row 11: Ch 1. Sc across. Turn. (28 sc)
Now work upper cup shaping:
Row 12: Ch 1. Sc in first 10 sts. Turn. (10 sc) You have left 18 sts unworked.
Row 13: Ch 1. Sc across. Turn. (10 sc)
Row 14: Ch 1. Sc2tog. Sc across to last 2 sts. Sc2tog. Turn. (8 sc)
Row 15: Ch 1. Sc across. Turn. (8 sc)
Row 16: Ch 1. Sc2tog. Sc across to last 2 sts. Sc2tog. Turn. (6 sc)
Row 17: Ch 1. Sc across. Turn. (6 sc)
Row 18: Ch 1. Sc2tog. Sc across to last 2 sts. Sc2tog. Turn. (4 sc)
Row 19: Ch 1. Sc across. Turn. (4 sc)
Row 20: Ch 1. Sc2tog. Sc2tog. Turn. (2 sc)
Row 21: Ch 1. Sc2tog. (1 sc)
Fasten off. The halter strap attaches at this point.
Left Cup: Work Rows 1 through 11 identically to Right Cup. (28 sc after Row 11)
Row 12: Ch 1. Skip first 18 sts. Reattach yarn in stitch 19. Sc in sts 19 through 28. Turn. (10 sc)
Continue Rows 13 through 21 as for Right Cup. Fasten off.
Section D: Assembly
Step 1: Pin the granny square panel to the outside of the underbust band, centered at front. Whipstitch the bottom of the panel to the top round of the band.
Step 2: Position the Right Cup so its lower edge aligns with the top of the band and the right edge of the granny panel. Whipstitch along the lower edge.
Step 3: Position the Left Cup symmetrically on the left side. Whipstitch in place.
Step 4: Whipstitch the inner edges of both cups to the outer edges of the granny panel.
Step 5: Work edging around cups. With G-6 hook and RS facing, join coral yarn and work 1 sc in each row end stitch around the outer and inner edges of each cup.
Section E: Halter Straps
Left Inner Strap: Join yarn at the 1 sc peak of the left cup. Ch 80 (adjust for your height). Sl st or sc back across the chain for a firmer strap. Fasten off.
Right Inner Strap: Join yarn at the 1 sc peak of the right cup. Ch 80. Work back. Fasten off.
Left Outer Strap: Join yarn at the outer top corner of the left cup, approximately at the 5th row end stitch. Ch 80. Fasten off.
Right Outer Strap: Join yarn at the outer top corner of the right cup. Ch 80. Fasten off.
To wear: The inner straps cross at the back and tie. The outer straps also cross at the back and tie. This produces the X back shown in the finished piece.
Size Customization for Crop Top
To size up: Add 12 stitches to the foundation chain of the band for each size (about 2.5 inches). Add 2 rows to the cup before upper shaping. Add granny rounds to each square or add a 4th square.
To size down: Remove 12 stitches from the foundation chain. Remove 2 rows from the cup. Use fewer or smaller squares.
Piece 2: Diamond Lattice Mini Skirt
Section A: Waistband
The waistband is worked flat using a stretchy FSC foundation, then seamed into a tube.
Using G-6 hook and beginning at coral:
Row 1: Work 12 FSC. Turn. (12 FSC stitches)
Row 2: Ch 1. Sc across. Turn. (12 sc)
Row 3: Ch 1. Working in BLO, sc across. Turn. (12 sc)
Row 4: Ch 1. Sc across. Turn. (12 sc)
Repeat Rows 3 and 4 alternately until the waistband measures 28 inches long (approximately 70 total rows).
Seam the short ends together. The BLO texture creates horizontal ridges for elasticity. Fasten off.
Section B: Skirt Body
The skirt body is worked in the round from top down.
Round 1 (Setup): With RS of waistband facing, join coral yarn at the seam. Ch 1. Work 126 sc evenly around the lower edge of the waistband. Sl st to first sc to join. (126 sc)
Round 2: Ch 4 (counts as dc plus ch 1). Sk 1 st. Dc in next st. (Ch 1. Sk 1 st. Dc in next st.) around. Sl st to 3rd ch of beginning ch-4 to join. (63 dc, 63 ch-1 spaces)
Round 3: Ch 1. Sc in same st. Sc in each ch-1 sp and each dc around. Sl st to first sc. (126 sc)
Round 4 (Offset Mesh): Ch 3 (counts as dc). Sk 1 st. Ch 1. (Dc in next st. Ch 1. Sk 1 st.) around. Sl st to top of beginning ch-3. (63 dc, 63 ch-1 spaces)
Round 5: Ch 1. Sc in same st. Sc in each ch-1 sp and each dc around. Sl st to first sc. (126 sc)
Round 6: Repeat Round 2.
Round 7: Repeat Round 3.
Round 8: Repeat Round 4.
Round 9: Repeat Round 5.
Repeat Rounds 2 through 9 for pattern. Work a total of 32 rounds of skirt body (4 full sets of the 8 round pattern).
Hip Expansion (optional for medium): After Round 16, work an increase round: Ch 1. (Sc in 20 sts. 2 sc in next st.) 6 times. Sl st to join. (132 sc)
Continue lattice pattern on 132 stitches for remaining rounds.
Hem Round: Ch 1. Sc in each st around. Sl st to join. (132 sc)
Fasten off.
Section C: Waistband Tie
Cut ivory macrame rope to approximately 36 inches. Thread one wooden bead onto each end. Knot to secure. Weave the rope through the top ridge of the waistband, centering at front. The two rope ends hang as the decorative tie.
Checkpoint: The skirt body should measure approximately 13.5 inches from waistband to hem. The waistband is approximately 1.5 inches tall.
Size Customization for Skirt
For larger sizes: Add 12 stitches (2 lattice repeats) for each size up. 138 stitches = Large. 150 stitches = Extra Large.
For length: Add or remove complete 8 round pattern sets. Each set adds approximately 1.6 inches.
Piece 3: Fringed Open Front Kimono Wrap
Important gradient note: For the kimono only, begin at the yellow end of your gradient yarn. The color flows from yellow at the shoulders to coral at the hem.
Section A: Body Panel
The body is worked as one wide rectangle covering back and both fronts. The center front opening is the natural open edge.
Working width: 169 stitches (14 chevron repeats of 12 stitches plus 1).
Using G-6 hook and beginning at yellow:
Ch 170.
Row 1 (RS): Dc in 4th ch from hook (counts as 2 dc at first peak). Dc in each of next 4 ch. Sk 2 ch. Dc in each of next 4 ch. 3 dc in next ch (peak). (Dc in each of next 4 ch. Sk 2 ch. Dc in each of next 4 ch. 3 dc in next ch.) 13 times. Dc in last ch. Turn. (169 dc)
Row 2 and all following rows: Ch 3 (counts as dc). Work 2 dc in first st. (Dc in each of next 4 sts. Sk 2 sts. Dc in each of next 4 sts. 3 dc in next st.) Rep across, ending with 3 dc in last st. Turn.
Continue until body measures 28 inches from foundation to working row.
Fold panel in half to find center back. The two open edges are the front opening.
Sleeves
Work two sleeve panels in chevron pattern, each approximately 20 inches long. Seam to body at shoulders and along underarm.
Fringe
Cut 14 inch lengths of yarn. Apply fringe to all lower body edges and sleeve edges using the fringe application technique. Space fringe approximately every other stitch for full coverage.
Blocking and Finishing
Block all three pieces before final assembly and wearing. Pin to blocking mats, mist with water, and allow to dry completely. This evens out stitches and sets the drape.
Weave in all ends securely. For the crop top, pay special attention to the granny square joins and cup seams.
Final Thoughts on This Crochet Tutorial
This sunset ombre crochet festival set is a labor of love, but the result is absolutely worth it. Each piece teaches you something different, and wearing the completed trio feels like wearing wearable art.
Take your time with the gradient planning. Swatch generously. And do not be afraid to rip back if your color placement is not quite right.
Once you finish, you will have three versatile pieces that work together or separately. The crop top pairs beautifully with high waisted jeans. The skirt works over a swimsuit. And that fringed kimono? Throw it over literally anything.
I hope this step by step crochet pattern brings you hours of happy stitching and a set you are genuinely proud to wear. If you give it a try, I would absolutely love to see your finished pieces. Tag me on Instagram or share in my Facebook group so we can celebrate together.
And hey, if you want to come back to this later, go ahead and save this pattern to your Pinterest boards. That way it will be waiting for you when you are ready to start. Drop a comment below if you make this set or have any questions along the way. I am always happy to help.
