
I don’t know about you, but I’m completely obsessed with bags that actually look like something you’d buy at a boutique. You know the ones. The kind that make people stop you on the street to ask where you got it.
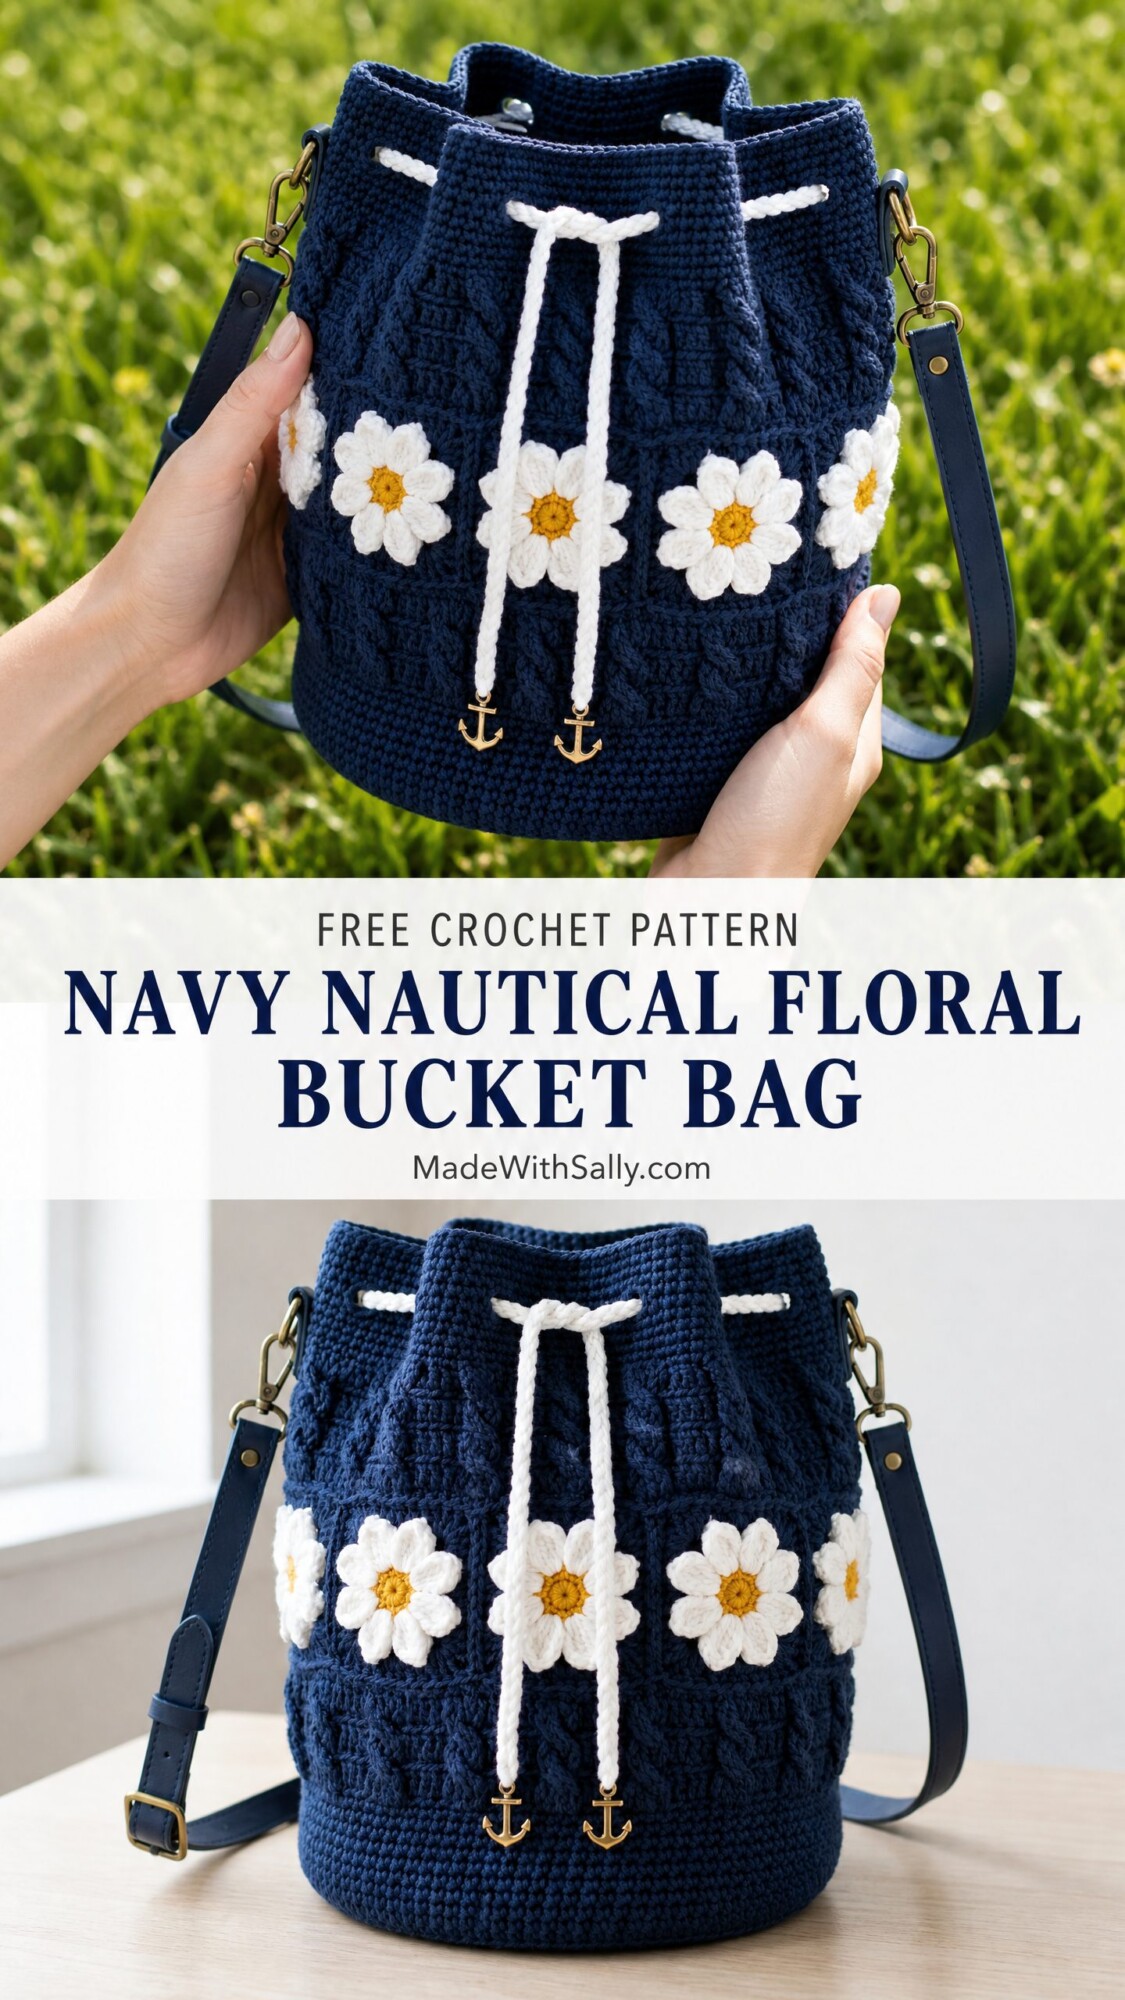
This Navy Nautical Floral Bucket Bag is exactly that kind of project. It combines a gorgeous cable texture with cheerful daisy appliques, brass anchor charms, and a proper leather strap. The whole thing screams summer adventures and coastal vibes without being too literal about it.
The best part? You made it yourself. With your own two hands and a hook. Let me walk you through every single step.
What Makes This Bucket Bag Pattern Special
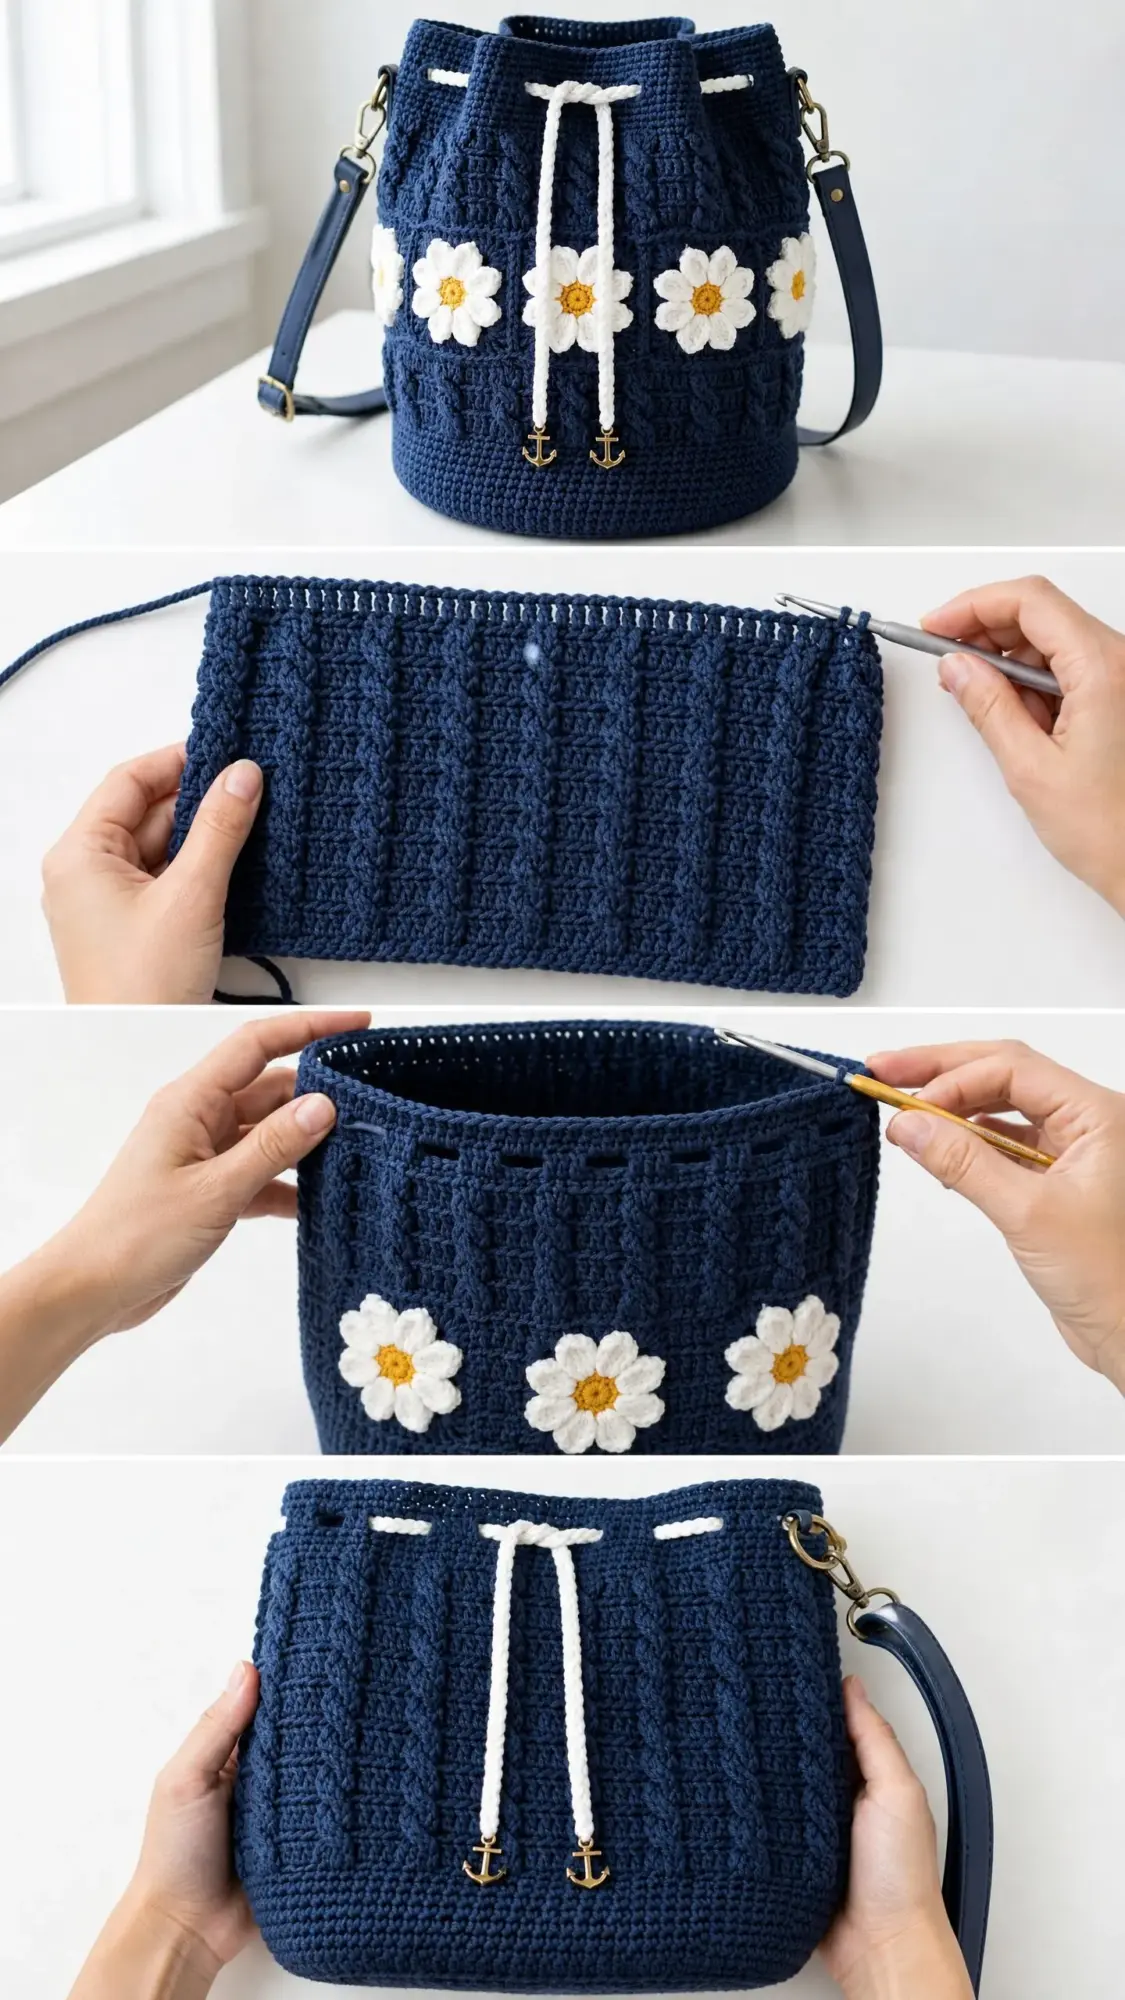
This isn’t your average crochet bag. The construction method creates a structured, professional-looking piece that holds its shape beautifully. You’ll work from the bottom up in the round, starting with a flat circular base and building up through a dense single crochet section before transitioning into the stunning cable texture that gives this bag its visual interest.
The mock cable pattern uses front post and back post stitches to create that woven, twisted look without any cable needle required. It’s easier than it appears, I promise. The daisy appliques get sewn on afterward, so you can position them exactly where you want them.
And those little brass anchor charms dangling from the drawstring? Chef’s kiss. They’re the perfect finishing touch for a nautical-themed accessory.
Skill Level and Time Investment
This pattern is rated intermediate to advanced. You should be comfortable working in continuous rounds, executing post stitches, and managing multiple components. If you’ve made a few amigurumi projects and practiced front post double crochet before, you can absolutely handle this.
Expect to spend 14 to 20 hours on this project if you’re an experienced intermediate crocheter. The cable section goes faster than you’d think once you get into the rhythm. Allow extra time for blocking, assembling the daisy appliques, and attaching all the hardware.
Finished Dimensions
Your completed bucket bag will measure approximately:
This gives you that classic bucket silhouette, wider at the bottom and slightly narrowing toward the top before flaring open at the rim.
Materials You’ll Need
Yarn
Yarn A (Navy): Approximately 550 yards (503 m) of medium weight cotton yarn, 4-ply worsted weight, in navy blue
Yarn B (White): Approximately 80 yards (73 m) of medium weight cotton yarn in white, used for the drawstring channel, daisy petals, and drawstring cord
Yarn C (Gold/Mustard): Approximately 20 yards (18 m) of medium weight cotton yarn in golden yellow, used for daisy centers
Recommended Yarn Brands
Lion Brand 24/7 Cotton in Navy (Color 110), White (Color 100), and Goldenrod (Color 158) works beautifully. It’s 100% mercerized cotton with excellent stitch definition and it’s machine washable. Each skein contains 186 yards per 3.5 oz.
Paintbox Yarns Simply DK Cotton in Sailor Blue, Paper White, and Daffodil Yellow is another great option. It has a smooth, tightly spun texture with clear stitch definition and a subtle sheen.
Drops Paris in Navy Blue (Color 15), Off White (Color 17), and Yellow (Color 21) gives you an affordable 100% cotton worsted with a slightly matte finish that photographs beautifully.
Important substitution note: Use any smooth, 4-ply worsted weight or heavy DK weight cotton yarn. Avoid fuzzy or textured yarns because they’ll obscure the cable texture and daisy details. Cotton is strongly recommended over acrylic because it provides the stiffness and drape needed to hold the bucket shape.
Hooks
Notions
Gauge
Using the G-6 (4.0 mm) hook with Yarn A in single crochet:
18 stitches x 20 rows = 4 inches x 4 inches (10 cm x 10 cm)
To make a gauge swatch, chain 22. Single crochet in the second chain from the hook and in each chain across for 21 single crochet stitches. Turn. Work single crochet rows for 22 rows total. Block gently with water spray. Measure the center 4 inches of the swatch.
Gauge is critical for achieving the stated finished dimensions. Even a half stitch per inch difference will significantly alter the circumference and height of the finished bag. Please take the time to check your gauge.
Abbreviations
Let me define every abbreviation you’ll encounter in this pattern:
Special Stitches Explained
Front Post Double Crochet (FPdc)
Yarn over. Insert your hook from front to back to front around the post of the designated stitch below. You’re going around the vertical part of the stitch, not into the top loops. Yarn over and pull up a loop so you have three loops on your hook. Yarn over and pull through two loops. Yarn over and pull through the remaining two loops. One FPdc complete.
Back Post Double Crochet (BPdc)
Yarn over. Insert your hook from back to front to back around the post of the designated stitch below. Yarn over and pull up a loop so you have three loops on your hook. Yarn over and pull through two loops. Yarn over and pull through the remaining two loops. One BPdc complete.
Cable Panel (worked over 4 stitches)
Skip the next 2 stitches. FPdc around each of the following 2 stitches. Working behind the stitches you just made, FPdc around each of the 2 skipped stitches. One 4-stitch cable cross complete. This cross always leans to the right as viewed from the right side.
Don’t worry if this sounds complicated. Once you do it a few times, it becomes second nature. The trick is reaching behind those first two post stitches to grab the skipped ones.
Pattern Notes Before You Begin
1. The bag body is worked in continuous rounds from the bottom up. Do not join rounds unless specifically instructed. Use a stitch marker in the first stitch of each round and move it up as you go.
2. The base is worked flat in joined rounds with a standing-stitch join to keep it circular. From Round 7 onward, the sides are worked in continuous spiral rounds.
3. The cable texture is a mock cable created with post stitches, not a true cable requiring a cable needle.
4. Daisy motifs are made separately and sewn on after the body is complete.
5. The right side of the bag is always facing outward. All post stitches are worked with the right side facing.
6. For a cleaner color join when switching to Yarn B for the drawstring channel round, complete the last yarn pull of the final stitch in the prior round with Yarn B.
Section 1: The Base
The base is worked as a flat circle using joined rounds, increasing on every round to create a flat disc.
Round 1: With Yarn A and G-6 hook, make a magic ring. Ch 1 (does not count as a stitch throughout). Work 6 sc into the magic ring. Pull tail to close ring. Join with sl st to first sc. (6 sc)
Round 2: Ch 1. 2 sc in each st around. Join with sl st to first sc. (12 sc)
Round 3: Ch 1. (Sc 1, 2 sc in next st) around. Join. (18 sc)
Round 4: Ch 1. (Sc 2, 2 sc in next st) around. Join. (24 sc)
Round 5: Ch 1. (Sc 3, 2 sc in next st) around. Join. (30 sc)
Round 6: Ch 1. (Sc 4, 2 sc in next st) around. Join. (36 sc)
Round 7: Ch 1. (Sc 5, 2 sc in next st) around. Join. (42 sc)
Round 8: Ch 1. (Sc 6, 2 sc in next st) around. Join. (48 sc)
Round 9: Ch 1. (Sc 7, 2 sc in next st) around. Join. (54 sc)
Round 10: Ch 1. (Sc 8, 2 sc in next st) around. Join. (60 sc)
Round 11: Ch 1. (Sc 9, 2 sc in next st) around. Join. (66 sc)
Round 12: Ch 1. (Sc 10, 2 sc in next st) around. Join. (72 sc)
Round 13: Ch 1. (Sc 11, 2 sc in next st) around. Join. (78 sc)
Round 14: Ch 1. (Sc 12, 2 sc in next st) around. Join. (84 sc)
Checkpoint: After Round 14, the base should measure approximately 9 to 9.5 inches (23 to 24 cm) in diameter. If it’s larger, move down one hook size. If it’s smaller, move up one hook size and restart the base for the most accurate finished dimensions.
Do not fasten off. Continue without joining into the side section.
Section 2: Lower Side Body (Rounds 15 to 28)
At the start of Round 15, stop joining and begin working in a continuous spiral. Place a stitch marker in the first stitch of Round 15 and move it up each round.
Round 15: Sc in each st around. (84 sc)
Round 16: (Sc 13, 2 sc in next st) around. (90 sc)
Round 17: Sc in each st around. (90 sc)
Round 18: (Sc 14, 2 sc in next st) around. (96 sc)
Round 19: Sc in each st around. (96 sc)
Round 20: (Sc 15, 2 sc in next st) around. (102 sc)
Round 21: Sc in each st around. (102 sc)
Round 22: (Sc 16, 2 sc in next st) around. (108 sc)
Round 23: Sc in each st around. (108 sc)
Round 24: (Sc 17, 2 sc in next st) around. (114 sc)
Round 25: Sc in each st around. (114 sc)
Round 26: (Sc 18, 2 sc in next st) around. (120 sc)
Round 27: Sc in each st around. (120 sc)
Round 28: Sc in each st around. (120 sc)
Checkpoint: After Round 28, the side walls should be approximately 3 inches (7.5 cm) tall measured from the base join line. The fabric should be standing upright with no significant flare.
Section 3: Transition to Double Crochet Cable Texture (Round 29)
Round 29 establishes the post-stitch foundation. Because post stitches wrap around the posts of the stitches below, this round is worked in regular double crochet to create posts to work around on Round 30.
Round 29: Dc in each st around. (120 dc)
This round is slightly taller than the single crochet rows below, which is correct and expected.
Section 4: Cable Texture Body (Rounds 30 to 50)
The cable texture alternates between a Rib Round using FPdc and BPdc with a Cable Cross Round using the Cable Panel stitch. Here’s where the magic happens.
Round 30 (Rib Round): (FPdc around next dc, BPdc around next dc) around. (120 sts)
Round 31 (Cable Cross Round): Work Cable Panel over every 4 stitches around. That is: (skip 2, FPdc around each of next 2 sts, FPdc around each of the 2 skipped sts) around. (120 sts)
Round 32 (Rib Round): (FPdc around next st, BPdc around next st) around. (120 sts)
Round 33 (Cable Cross Round): (Skip 2, FPdc in each of next 2, FPdc in each of 2 skipped sts) around. (120 sts)
Continue alternating Rib Rounds and Cable Cross Rounds through Round 50, following this pattern:
Checkpoint: After Round 50, the total bag body from base to top should measure approximately 9 to 9.5 inches (23 to 24 cm). The cable texture section alone should measure approximately 5.5 to 6 inches (14 to 15 cm).
Section 5: Drawstring Channel (Rounds 51 to 53)
Switch to Yarn B (White) on the last pull-through of the final stitch of Round 50.
Round 51: With Yarn B, sc in each st around, working into the tops of the post stitches. (120 sc)
Round 52 (Eyelet Round): (Sc 3, ch 2, sk 2) around. (24 ch-2 spaces created)
Round 53: Sc in each sc around and 2 sc in each ch-2 space around. (120 sc)
Do not cut Yarn B. Continue to the rim.
Section 6: Rim (Rounds 54 to 56)
Round 54: Sc in each st around. (120 sc)
Round 55: Sc in each st around. (120 sc)
Round 56: Sl st in each st around. Join with sl st to first sl st. Fasten off Yarn B and weave in ends.
The slip stitch final round creates that slightly rolled, tidy edge visible along the top of the bag.
Section 7: Daisy Appliques (Make 8 Total)
You’ll need 4 daisies for the front and 4 for the back of your bag.
Daisy Center
With Yarn C (Gold) and G-6 hook, make a magic ring.
Round 1: Ch 1. 6 sc into magic ring. Pull tail to close. Join with sl st to first sc. Do not fasten off. (6 sc)
Round 2: Ch 1. 2 sc in each st around. Join with sl st. Fasten off Yarn C, leaving a 6-inch tail. (12 sc)
Daisy Petals
Join Yarn B (White) with a standing sc in any stitch of Round 2 of the daisy center.
Petal Round: In each stitch of Round 2 work the following petal: (sc 1 in current st, ch 4, sl st in second ch from hook, sc in next ch, hdc in next ch, sl st in same st at base of ch).
This creates one elongated petal per stitch of Round 2. You’ll have 12 petals total. After completing all 12 petals, join with sl st to the first sc. Fasten off Yarn B, leaving a 10-inch tail for sewing.
The finished daisy is approximately 2.5 inches (6.5 cm) in diameter.
Placement
Position the daisy band approximately 4 inches (10 cm) from the top rim of the bag, centered vertically in the cable texture section. Space 4 daisies evenly around the front half and 4 daisies evenly around the back half. With 120 stitches total and 8 daisies, each daisy is placed approximately 15 stitches apart.
Using your yarn needle, sew each daisy firmly to the bag through the center disc. Then use the petal yarn tail to tack down any petals that curl away from the bag surface.
Section 8: Drawstring Cord
Crocheted Twisted Cord Method (Recommended)
With Yarn B held double and H-8 hook, chain 120. Sl st in second ch from hook and in each ch across. Fasten off.
This creates a firm, rounded cord approximately 24 inches (61 cm) long. The slip stitching back through the chain causes the cord to naturally twist on itself slightly, mimicking a rope. Make 2 cords.
Attaching Anchor Charms
Open the jump ring on each anchor charm. Thread the jump ring through the knotted end of one cord. Close the jump ring with pliers. Attach one charm to each drawstring cord at their lower ends.
Threading the Drawstring
Thread one cord through the eyelet round (Round 52), beginning at the left side of the bag. Thread it through every other eyelet (12 of the 24 total) going around the full circumference and exiting at the left side again.
Thread the second cord beginning at the right side through the remaining 12 eyelets. When both cords are pulled simultaneously, the bag closes from both sides. Both anchor charms will hang at the front center when the bag is closed.
Section 9: Strap Attachment
D-Ring Tabs
Cut 2 strips of navy leather or faux leather, each 1 inch wide by 3 inches long. Fold each strip through a D-ring and align the cut ends together. Using a leather punch, make 2 holes through both layers of each folded strip. Insert brass rivets through the holes and set with a hammer or rivet setter.
Attaching Tabs to Bag
At each side point of the bag, use the awl to pierce 2 holes through the bag fabric, approximately 0.75 inch apart vertically, positioned just below the drawstring channel. Thread the flat end of the D-ring tab through from outside to inside and back out through the second hole. On the inside, use 2 additional rivets or heavy thread to secure the tab flat against the bag interior.
Clip the swivel clasps of your crossbody strap to the two D-rings. Adjust the strap length as needed.
Section 10: Base Stiffener (Optional)
Cut a circle of stiff interfacing or craft foam to match the base diameter, approximately 9.5 inches (24 cm). If desired, cover it with a scrap of lining fabric and whipstitch the edges closed. Drop the stiffener into the base of the bag. It should sit snugly without any stitching required.
Tips for Success with This Crochet Tutorial
Tension matters. Keep your stitches consistent throughout the cable section. If you tend to crochet loosely, go down a hook size. Too tight? Go up.
Block your daisies. Before sewing them on, give each daisy a quick steam or wet block so the petals lay flat and even.
Test your placement. Before sewing permanently, use pins to position all 8 daisies. Step back and look at the bag from different angles to make sure the spacing looks right.
Take breaks during the cable section. Those post stitches can be hard on your hands. Set a timer and stretch every 30 minutes.
You Did It!
I hope you absolutely love making this Navy Nautical Floral Bucket Bag. It’s one of those projects that looks impressive on the hook and even better when it’s finished. The combination of textures, the pop of the daisy appliques against that deep navy, and those adorable anchor charms all come together into something truly special.
Thank you so much for choosing this pattern. I genuinely appreciate you trusting me to guide you through a project this detailed. If you make this bag, I would love to see it! Tag me on Instagram or share a photo in my Facebook group. Nothing makes my day like seeing your finished projects.
If you loved this crochet pattern as much as I loved designing it, go ahead and save it to your Pinterest boards so you can find it whenever you’re ready to start. And please drop a comment below when you finish yours. I read every single one, and I can’t wait to hear how it turns out for you!
