
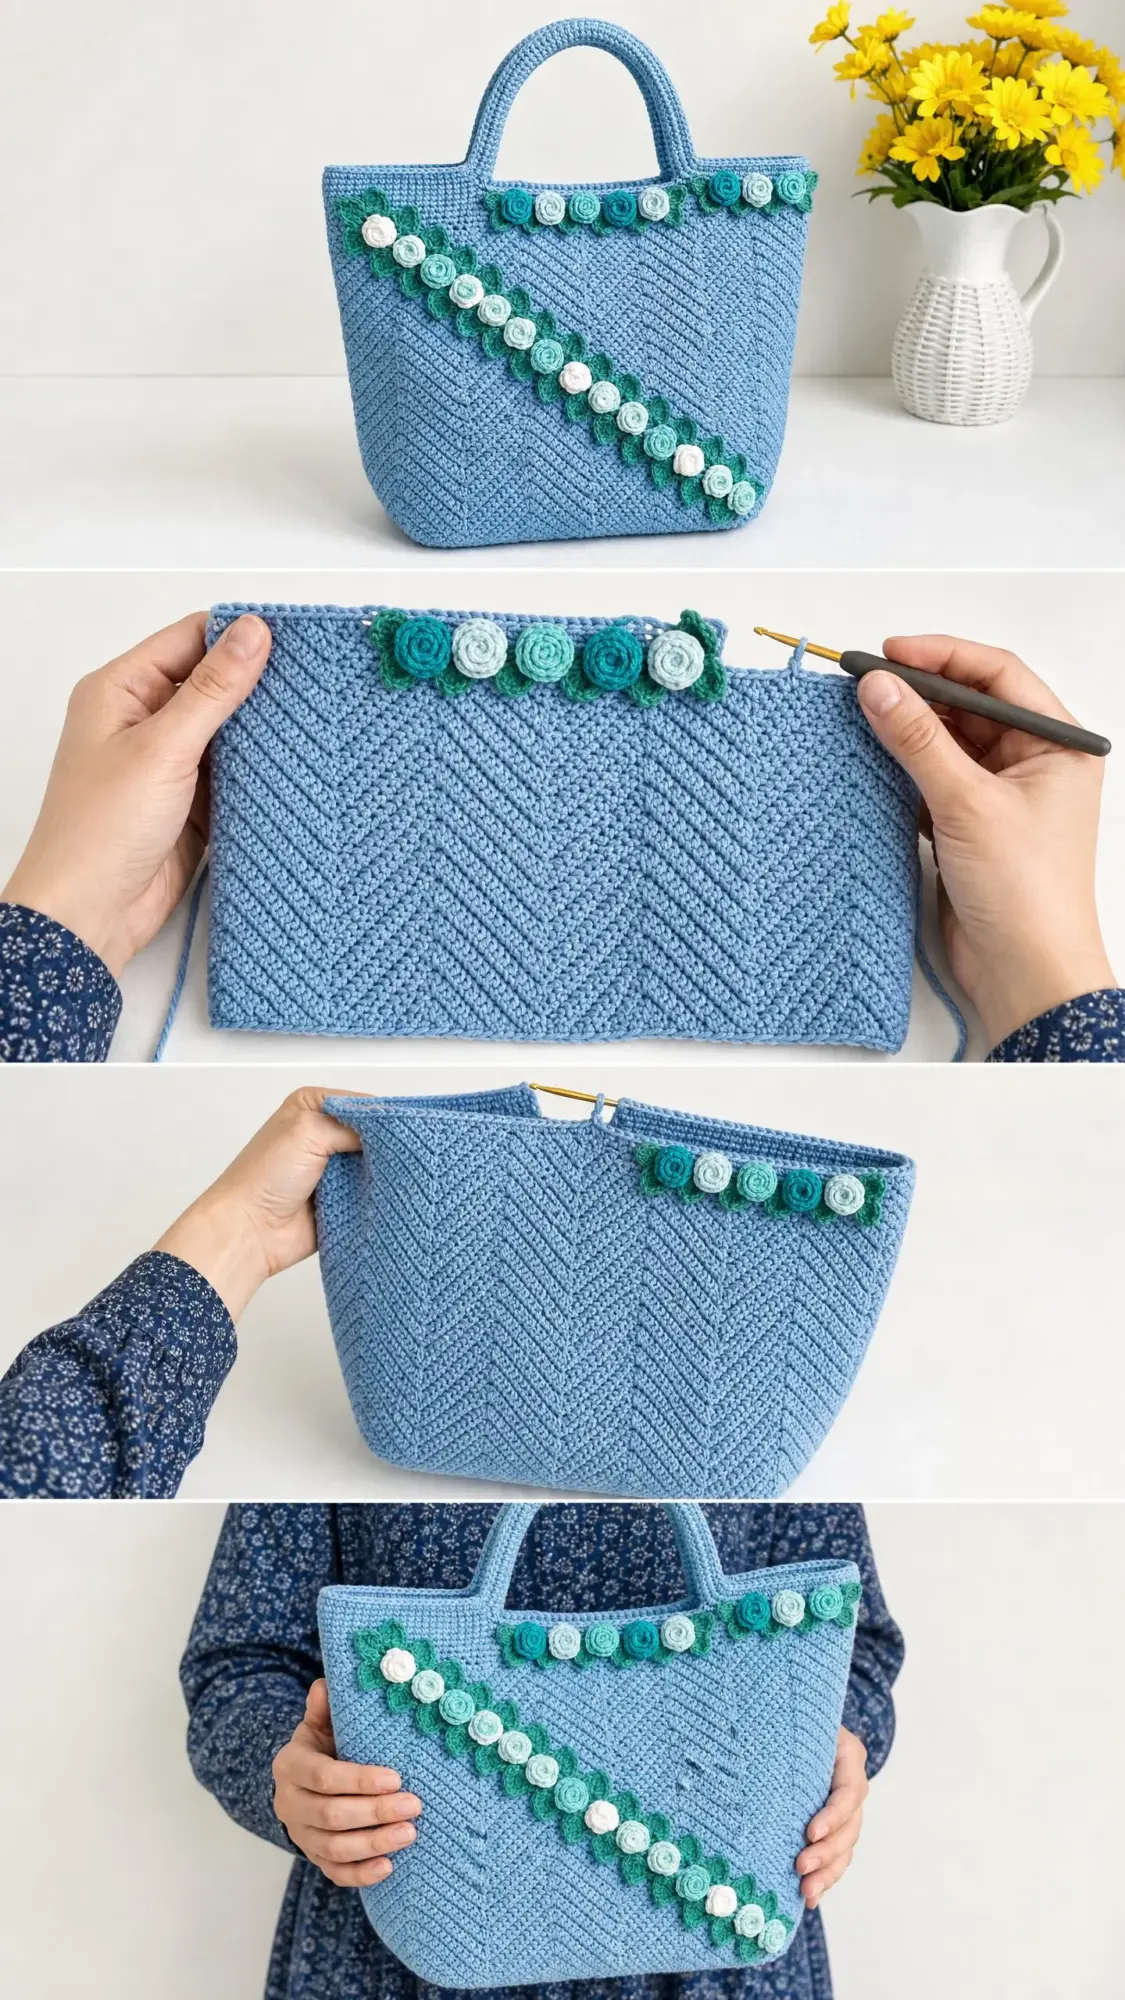
This is a structured crochet tote bag with a herringbone texture, sturdy handles, and dimensional spiral roses arranged in a diagonal stripe. The body uses the herringbone half double crochet stitch throughout. The finished bag stands upright on its own and holds its shape beautifully.
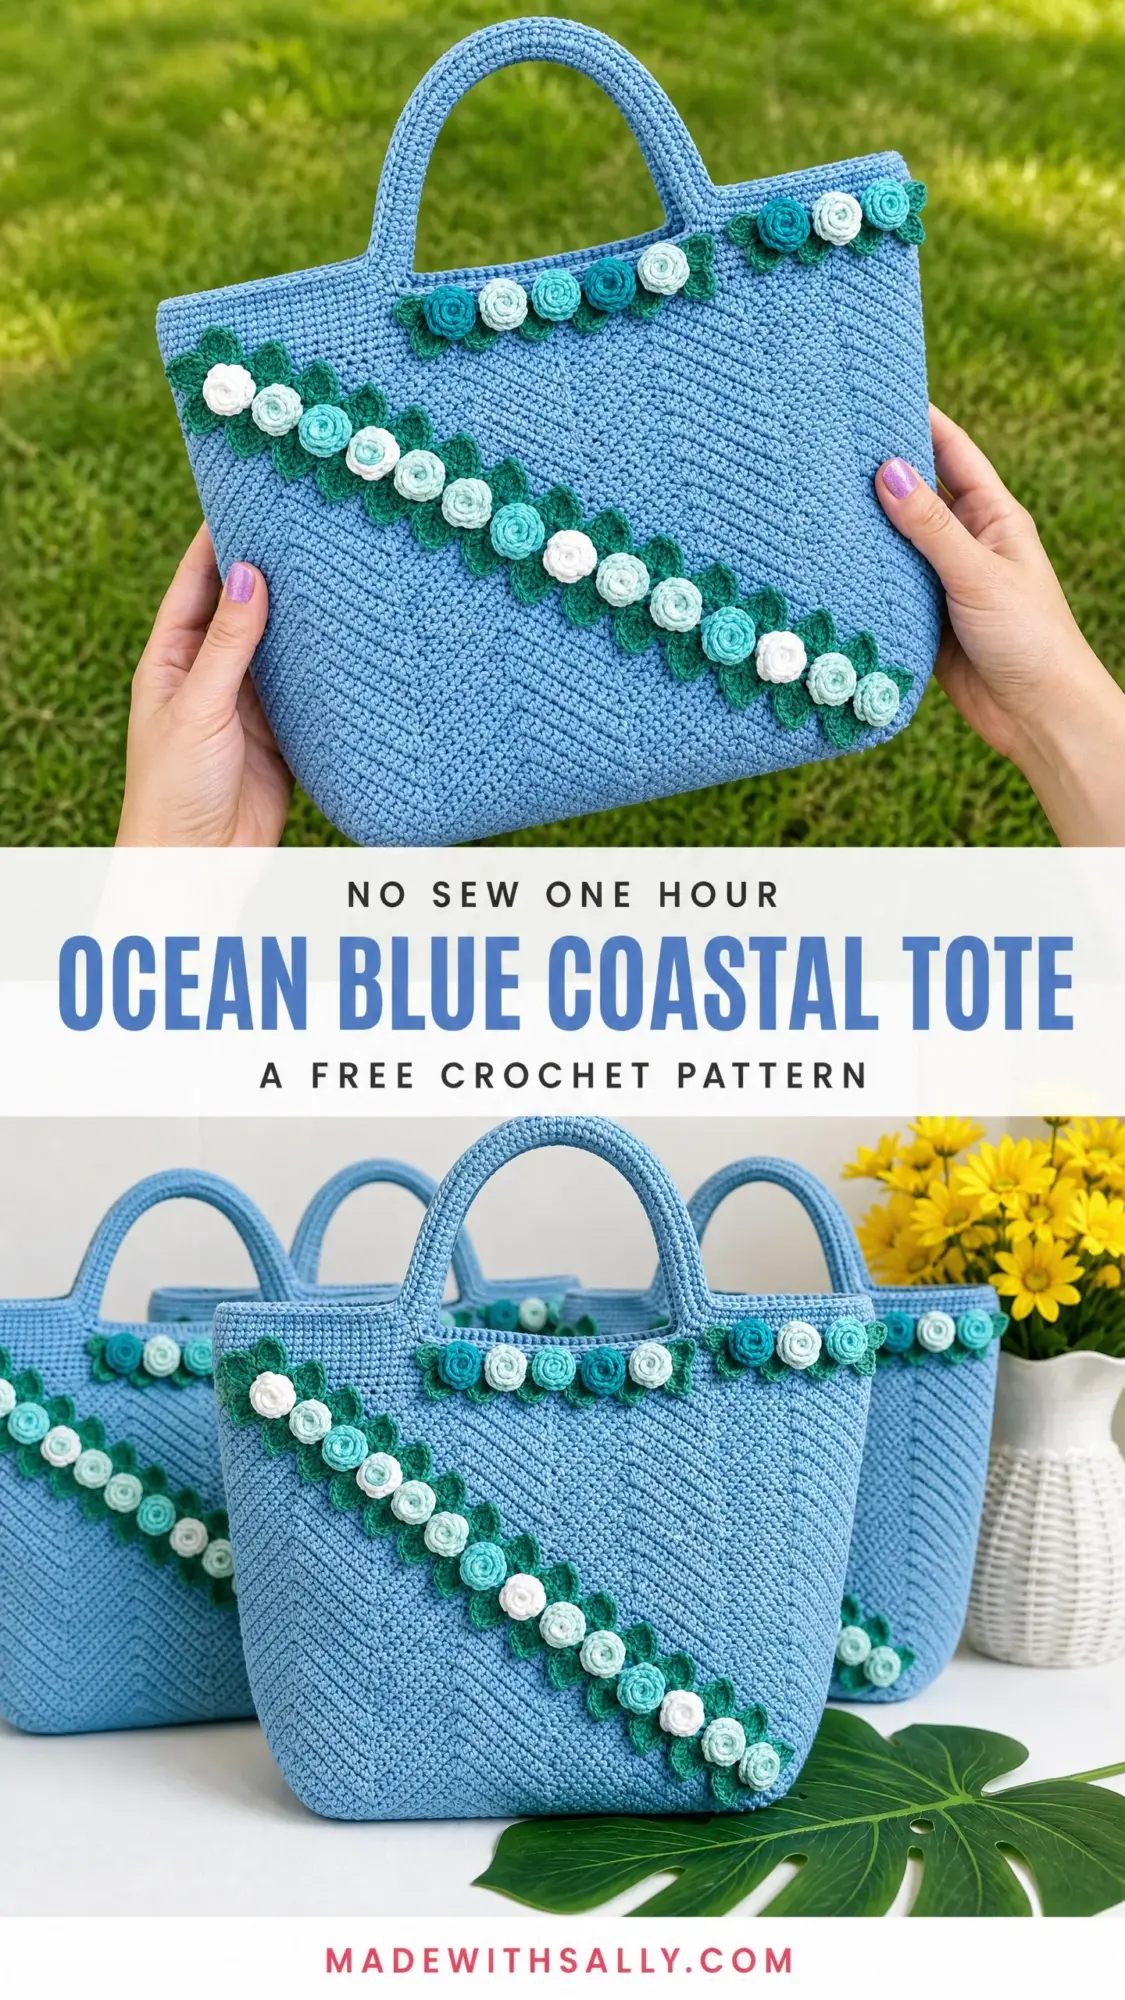
If you love projects that look far more complicated than they actually are, this one delivers. The main stitch creates that gorgeous diagonal chevron texture you see in the photos, but it follows a simple repeat once you get the hang of it.
I designed this tote to be practical enough for everyday use and pretty enough to turn heads. The gradient roses fade from dark teal at the top to crisp white at the bottom, creating that coastal ombre effect. Let me walk you through every single step.
Why You’ll Love This Ocean Blue Coastal Tote Pattern
This crochet tote bag pattern combines structure with style in a way that cotton bags rarely achieve. The herringbone half double crochet creates a dense, firm fabric that holds its shape without any interfacing or lining. You can absolutely add a lining if you want, but the bag works perfectly without one.
The dimensional roses add that special handmade touch without requiring advanced skills. Each rose is simply a strip of stitches rolled into a coil and sewn down. If you can make a chain and work basic stitches, you can make these roses.
The gradient color arrangement gives this tote a polished, designed look. Dark teal roses sit at the top of the diagonal stripe, fading through medium teal and light mint down to white at the bottom corner. This creates visual movement that draws the eye across the front panel.
Skill Level and Time Estimate
This pattern sits comfortably in the advanced beginner to intermediate range. The main challenge is maintaining even tension with the herringbone stitch, which tends to pull tighter than regular half double crochet. Practice on a small swatch first and you will be fine.
Expect to spend approximately 12 to 18 hours on the main bag, depending on your experience with the herringbone stitch. The roses and leaves add another 3 to 5 hours. This is not a weekend project, but it is absolutely achievable over a week or two of evening crafting sessions.
Finished Measurements
Your completed Ocean Blue Coastal Tote will measure:
Materials Needed for This Crochet Tote Pattern
Yarn
Main Color (MC): Approximately 650 yards / 595 meters of worsted weight cotton yarn in steel blue
Accent Color A: Approximately 60 yards / 55 meters of worsted weight cotton yarn in dark teal
Accent Color B: Approximately 60 yards / 55 meters of worsted weight cotton yarn in medium teal
Accent Color C: Approximately 40 yards / 37 meters of worsted weight cotton yarn in light mint
Accent Color D: Approximately 30 yards / 27 meters of worsted weight cotton yarn in white
Recommended Yarn Options
Option 1: Lion Brand 24/7 Cotton in Cornflower (MC), Jade (A), Spearmint (B), Mint (C), White (D). This mercerized cotton holds structure beautifully.
Option 2: Paintbox Yarns Cotton DK used doubled throughout. Slightly softer hand but excellent stitch definition.
Option 3: WeCrochet Dishie in Clarity (MC) with accent colors in Haze (A), Mint (B and C), and Bare (D). Lovely matte finish and widely available.
Important note: Stick with 100 percent cotton or cotton blend yarn. Avoid acrylic or superwash wool as the bag will lose its structure. Do not substitute with bulkier yarn as it will significantly alter the finished dimensions.
Hooks
Notions
Gauge
18 hbhdc x 13 rows = 4 inches / 10 cm, worked in rounds with MC and a US G-6 / 4.0 mm hook, after blocking.
To make a gauge swatch: Chain 22. Work herringbone half double crochet flat for 15 rows. Block flat. Measure the center 4 inches.
Gauge matters for this project. An incorrect gauge will change the finished dimensions and throw off the ratio between the bag body and handles.
Abbreviations
Let me define every stitch abbreviation before we begin:
Special Stitches
Herringbone Half Double Crochet (hbhdc)
This is the star of the show. It creates that beautiful diagonal texture across the fabric. Here is how to work it:
Step 1: Yarn over.
Step 2: Insert hook into the next stitch.
Step 3: Yarn over and pull up a loop. Here is where it differs from regular hdc. Instead of leaving three loops on your hook, immediately draw this new loop through the first loop on your hook only. You now have two loops on your hook.
Step 4: Yarn over and draw through both loops on hook. One hbhdc complete.
The twist happens because you pull the first yarn over through immediately. This creates that distinctive diagonal herringbone line. Keep your tension consistent throughout as this stitch naturally pulls tighter than standard half double crochet.
Spiral Rose
Each rose is worked in rows and then rolled into a coil:
Row 1: Ch 36. Sc in second ch from hook, (sc, hdc, dc, dc) in next ch, (sc, hdc, dc, dc) in next ch. Repeat from parentheses across until 1 ch remains. Sc in last ch. Fasten off leaving a 12-inch tail.
To assemble: Starting from one end of the strip, roll the strip tightly on itself, coiling in a spiral. Use the yarn tail to sew through the base several times to secure the coil. The finished rose measures approximately 0.75 inch / 2 cm in diameter.
For gradient roses, hold two strands of different accent colors together while working the strip.
Leaf
Ch 9. Sl st in second ch from hook, sc in next ch, hdc in next ch, dc in next 2 ch, hdc in next ch, sc in next ch, sl st in last ch. Working along opposite side of foundation chain: sl st in next st, sc in next st, hdc in next st, dc in next 2 sts, hdc in next st, sc in next st, sl st in last st. Fasten off. (18 sts total, flat leaf shape)
Pattern Notes Before You Begin
1. The bag body is worked in joined rounds throughout. Join each round with a slip stitch to the first stitch of that round. Chain 2 at the beginning of each round counts as the first hbhdc.
2. Place a stitch marker in the first stitch of each round to track the beginning. Move the marker up each round.
3. The base is a flat oval. Stitches are worked along both sides of the foundation chain, with increases at each short end to curve the oval.
4. When working in the round, all rounds are worked from the right side. Do not turn between rounds.
5. Count carefully at the end of each base round. The increases set up your entire body stitch count.
Step by Step Crochet Pattern Instructions
Base
The base is a flat oval worked in joined rounds.
Foundation: Ch 23 with MC and G-6 hook.
Round 1: Starting in the second ch from hook, work 1 hbhdc in each of the next 21 ch. Work 4 hbhdc in the last ch (corner). Rotate work to work along the opposite side of the foundation chain. Work 1 hbhdc in each of the next 20 ch. Work 3 hbhdc in the first ch (corner). Join with sl st to the top of ch-2 from beg. (48 hbhdc)
Round 2: Ch 2 (counts as first hbhdc throughout). Work 1 hbhdc in next 20 sts. Work 2 hbhdc in each of next 4 sts (corner increase). Work 1 hbhdc in next 20 sts. Work 2 hbhdc in each of next 3 sts (corner increase). Join. (56 hbhdc)
Round 3: Ch 2. Work 1 hbhdc in next 20 sts. (Work 2 hbhdc in next st, work 1 hbhdc in next st) 4 times (corner increase). Work 1 hbhdc in next 20 sts. (Work 2 hbhdc in next st, work 1 hbhdc in next st) 3 times. Join. (63 hbhdc)
Round 4: Ch 2. Work 1 hbhdc in next 20 sts. (Work 2 hbhdc in next st, work 1 hbhdc in next 2 sts) 4 times. Work 1 hbhdc in next 20 sts. (Work 2 hbhdc in next st, work 1 hbhdc in next 2 sts) 3 times. Join. (70 hbhdc)
Round 5: Ch 2. Work 1 hbhdc in next 20 sts. (Work 2 hbhdc in next st, work 1 hbhdc in next 3 sts) 4 times. Work 1 hbhdc in next 20 sts. (Work 2 hbhdc in next st, work 1 hbhdc in next 3 sts) 3 times. Join. (77 hbhdc)
Round 6: Ch 2. Work 1 hbhdc in next 20 sts. (Work 2 hbhdc in next st, work 1 hbhdc in next 4 sts) 4 times. Work 1 hbhdc in next 20 sts. (Work 2 hbhdc in next st, work 1 hbhdc in next 4 sts) 3 times. Join. (84 hbhdc)
Checkpoint: After Round 6, your oval base should measure approximately 11 inches / 28 cm long and 4 inches / 10 cm wide. If your base is smaller, your tension is too tight. If larger, your tension is too loose. Adjust hook size before proceeding.
Body
Continue working in joined rounds. Do not increase during the body section. Work all stitches in hbhdc throughout.
Rounds 7 through 30: Ch 2. Work 1 hbhdc in each st around. Join. (84 hbhdc)
Repeat this round 24 times total, working Rounds 7 through 30.
Checkpoint: After Round 30, the body should measure approximately 10 inches / 25.5 cm from the base. The opening circumference should measure approximately 28 inches / 71 cm. The fabric should feel firm and hold its shape when set upright.
Fasten off and weave in end.
Top Edge Finishing
With RS facing and MC, join yarn to any stitch at top opening.
Round 31: Ch 1. Work 1 sc in each st around. Join with sl st to first sc. Fasten off. (84 sc)
This round stabilizes the top edge for handle attachment and rose placement.
Handles
Make 2 handles.
Handle Strip: With MC and G-6 hook, ch 7.
Row 1: Hbhdc in second ch from hook and in each ch across. Ch 2, turn. (6 hbhdc)
Row 2: Hbhdc in each st across. Ch 2, turn. (6 hbhdc)
Repeat Row 2 until handle strip measures 14 inches / 35.5 cm total length from start.
Fasten off, leaving a 24-inch sewing tail.
Fold the strip in half lengthwise so the long edges meet. Using the yarn tail and yarn needle, whipstitch the long edges together firmly to create a rounded tube. The seam runs along the bottom of the handle.
Handle Attachment: Position each handle with the outer edges spaced approximately 3.5 inches / 9 cm apart, centered on the front panel. The opposite handle is placed identically on the back panel.
Pin handle ends to the inside top edge of the bag, tucking the raw ends approximately 1 inch / 2.5 cm down into the top edge. Sew securely through all layers using whipstitch, stitching around all four sides of each handle base. Reinforce with a second pass of stitching.
Spiral Roses
Make the following quantities:
Total roses: 24
Leaves
Make approximately 30 leaves total in Colors A and B. Approximately 18 leaves in Color A and 12 leaves in Color B.
Applique Placement
Top Border Row of Roses: Arrange 12 roses evenly along the top opening, spanning both front and back panels, positioned just below the sc finishing round. Begin with 3 Color A roses at the center back, alternating with Color B roses, ending with Color A at the sides. Place one leaf behind each rose, fanning outward. Pin in place before sewing.
Sew each rose and leaf using the yarn tail. Pass the needle through the base of the rose and into the bag fabric several times to secure. Leaves should peek out behind the roses.
Diagonal Stripe of Roses (Front Panel Only): The diagonal stripe begins at the upper left corner of the front panel, just below the top rose border, running diagonally to the lower right corner.
Arrange the remaining 12 roses from upper left to lower right:
Space roses approximately 1.25 inches / 3 cm apart center to center. Place 2 leaves behind each rose, alternating leaf colors. Pin the entire arrangement before sewing anything down. Step back and view from a distance to confirm the diagonal line looks straight.
Finishing and Blocking Your Crochet Tote
Weave in all remaining ends securely.
To block: Wet the finished bag thoroughly in cool water. Gently squeeze out excess water without wringing. Stuff the interior firmly with plastic bags or towels to achieve the final shape. Pin the base flat. Allow to dry completely, 24 to 48 hours.
Once dry, the herringbone stitch fabric will set into a firm structure that holds the bag shape beautifully when filled.
Care Instructions
Hand wash in cool water with mild detergent. Do not machine wash. Do not wring. Lay flat or stuff and reshape while damp. Do not put in dryer. Do not iron directly on roses. Store stuffed with tissue paper to maintain shape.
Size Customization Tips
To make the bag taller: Continue working even rounds in the body section. Each additional round adds approximately 0.33 inches / 0.8 cm to the height.
To make the bag wider: Increase the foundation chain by multiples of 2 stitches, adding corresponding increases at each short end of the base oval.
To make a shallower bag: Begin with a shorter foundation chain. Reducing the chain by 4 stitches reduces the depth by approximately 0.75 inches / 2 cm.
To add a zippered top: Work Rounds 31 through 33 in sc before adding the zipper. Sew a zipper by hand to the inside of the sc top border before adding roses.
Thank you so much for choosing this Ocean Blue Coastal Tote crochet pattern for your next project. I hope you love making it as much as I loved designing it. If you found this tutorial helpful, save it to your Pinterest boards so you can find it again when you are ready to start. And please drop a comment below if you make one. I would absolutely love to see your finished tote!
