
If you have a baby shower coming up, a little one to spoil, or just want to create something truly special for a handmade gift, this dress is exactly what you need. The bobble stitch creates that adorable textured look that makes everyone gasp, and the flutter sleeves add the sweetest finishing touch. This pattern uses intermediate techniques, works up in about 12 to 18 hours, and fits babies 12 to 18 months.
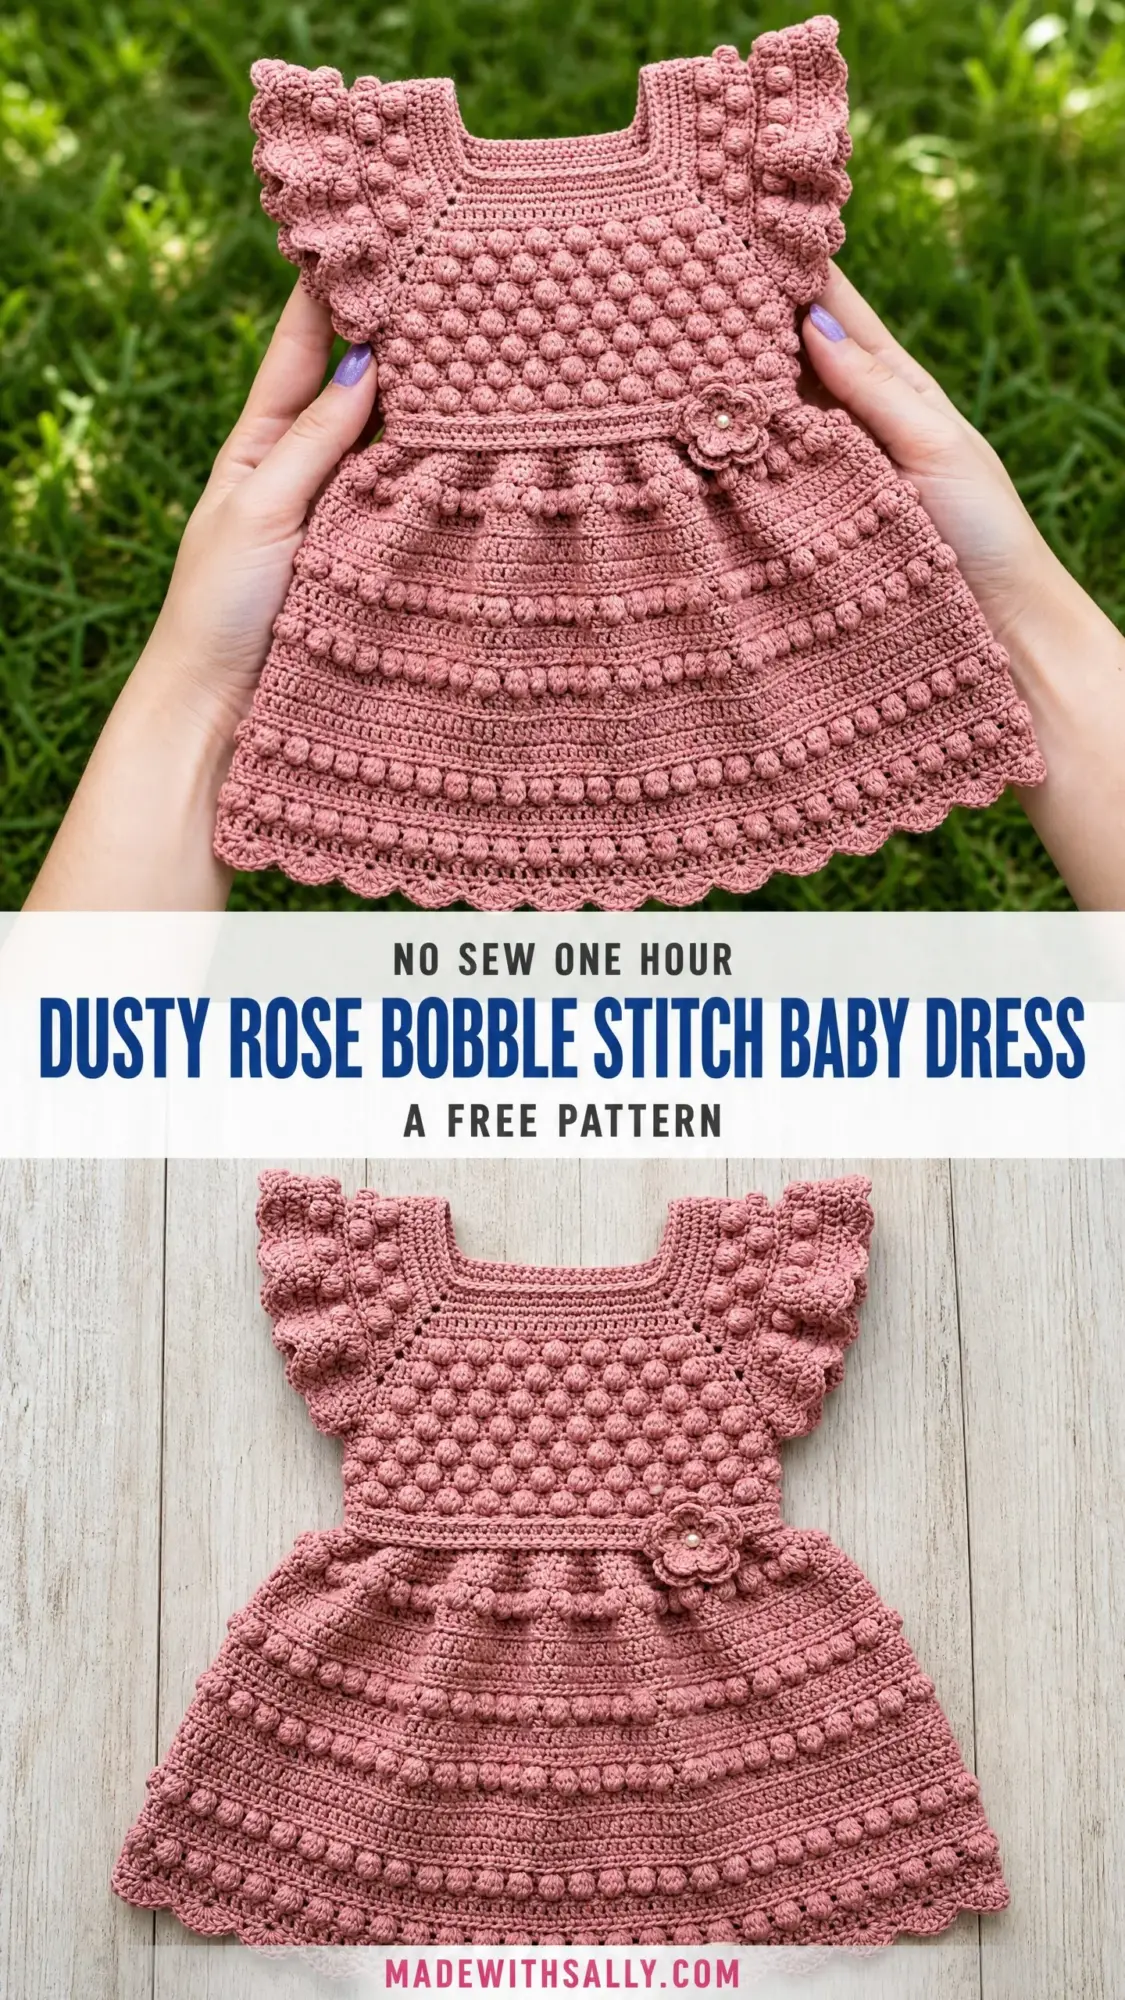
I love how practical this dress is for gift-giving. The construction moves from top down, so you can try it on as you go if you have access to the little one wearing it. The scalloped hem, ruffled sleeves, and tiny flower embellishment make it look far more complicated than it actually is.
Whether you are building your skills with textured stitches or looking for a showstopper project to add to your portfolio, this crochet tutorial walks you through every single step. Grab your hook and let’s make something beautiful together.
Why This Baby Dress Pattern Works So Well
This dusty rose bobble stitch baby dress combines structure with sweetness. The bodice features a dense bobble pattern that holds its shape beautifully, while the A-line skirt flares out with alternating bobble and solid rows. The result is a dress that photographs like a dream and feels comfortable for baby to wear.
The square neckline keeps things classic. The flutter sleeves add movement without bulk. And that little crocheted flower at the waist? It ties the whole design together with a tiny pearl button center.
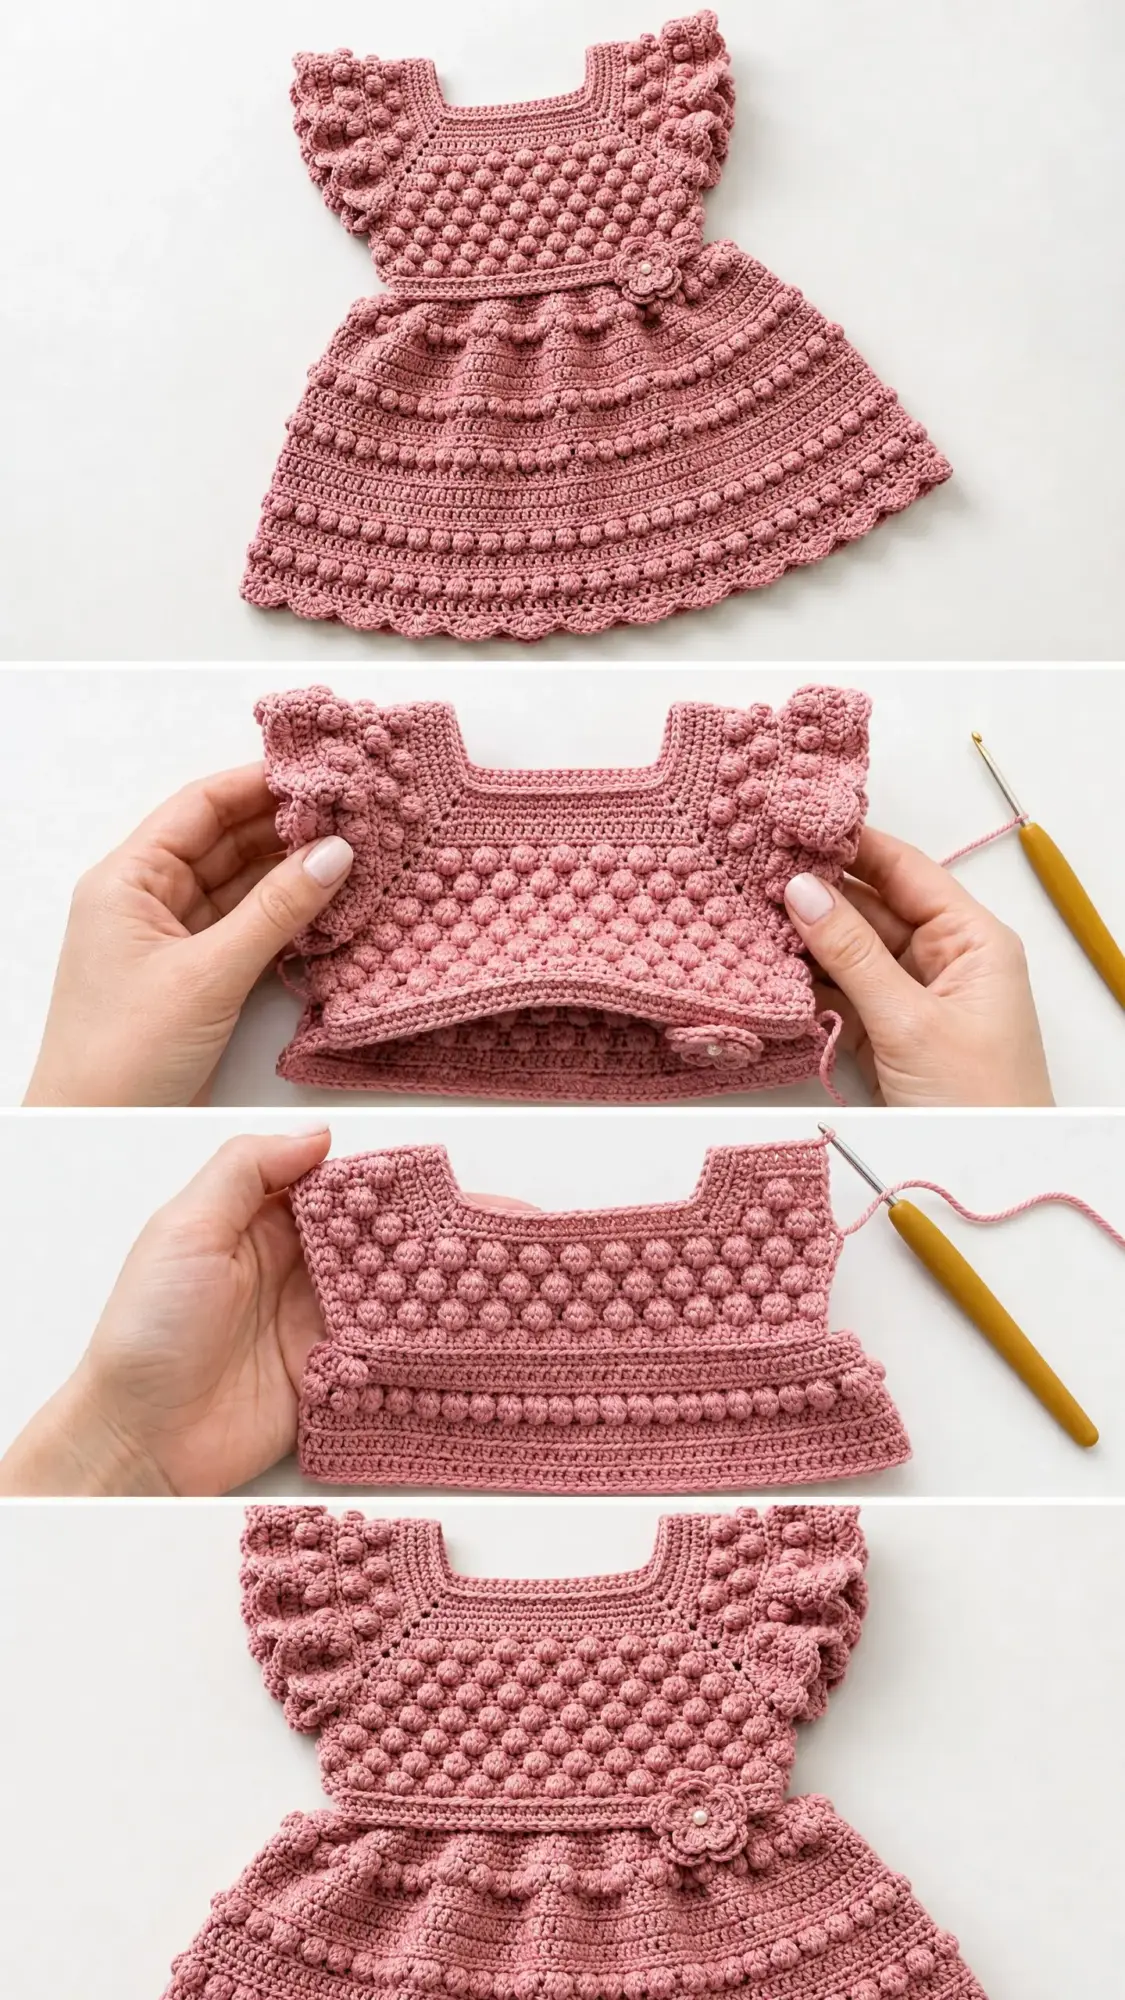
What I appreciate most about this construction is how logical it flows. You work the yoke flat, join it into a tube, add the skirt in rounds, then finish with the sleeves and embellishments. Each section builds on the last, so you always know where you are in the project.
Materials You Will Need
Before you start, gather everything so you can work without interruption.
Yarn: Worsted weight, Size 4 yarn in dusty rose or mauve. You will need approximately 350 to 450 yards (320 to 410 meters).
Hook: US Size G-6, which is 4.0 mm
Notions:
Yarn Suggestions That Work Beautifully
Paintbox Yarns Simply DK in Dusty Rose or Blush Pink works well. Note that this is DK weight, so go up to a US H-8 (5.0 mm) hook and check your gauge carefully. You will need 3 to 4 balls.
Lion Brand Pound of Love in Pastel Pink gives excellent stitch definition for bobbles and is widely available. This is worsted weight, so it matches the pattern perfectly. You will need approximately half a skein.
Drops Safran in Old Rose is 100% cotton and yields beautiful stitch definition. It is ideal for warmer climates. You will need 3 balls.
Choose a yarn with good stitch memory that holds a bobble shape well. Avoid very fuzzy or hairy yarns because they obscure the bobble texture.
Gauge Information
18 single crochet stitches by 20 rows equals 4 inches (10 cm) in single crochet, blocked.
One bobble stitch repeat (1 bobble plus 1 single crochet) times 8 repeats equals 4 inches (10 cm).
Gauge is mandatory for a fitted garment. Slight variation will significantly affect the chest measurement and overall fit. Please make a swatch before starting.
Finished Measurements
This pattern is written for size 12 to 18 months.
Abbreviations and Stitch Definitions
Let me walk you through every abbreviation you will encounter. Understanding these before you begin makes the whole process smoother.
ch = chain. Wrap yarn over hook and pull through the loop on your hook.
sl st = slip stitch. Insert hook, yarn over, pull through both the stitch and the loop on your hook in one motion.
sc = single crochet. Insert hook into stitch, yarn over and pull up a loop (2 loops on hook), yarn over and pull through both loops.
hdc = half double crochet. Yarn over, insert hook, yarn over and pull up a loop (3 loops on hook), yarn over and pull through all 3 loops.
dc = double crochet. Yarn over, insert hook, yarn over and pull up a loop (3 loops on hook), yarn over and pull through 2 loops (2 loops remain), yarn over and pull through remaining 2 loops.
tr = treble crochet. Yarn over twice, insert hook, yarn over and pull up a loop, (yarn over, pull through 2 loops) three times.
sk = skip
st(s) = stitch(es)
sp = space
rep = repeat
pm = place marker
RS = right side
WS = wrong side
beg = beginning
rem = remaining
bo = bobble stitch (defined in special stitches below)
inc = increase, which means work 2 single crochet stitches in the same stitch
dec = sc2tog, which means single crochet two stitches together
BLO = back loop only
FLO = front loop only
rnd = round
YO = yarn over
Special Stitches You Will Learn
The Bobble Stitch (bo)
This is the star of the show. Here is exactly how to make one:
Step 1: Yarn over, insert hook into the indicated stitch or space.
Step 2: Yarn over and pull up a loop. Yarn over and draw through 2 loops only. You now have one incomplete double crochet on your hook.
Step 3: Yarn over, insert hook into the SAME stitch or space.
Step 4: Yarn over and pull up a loop. Yarn over and draw through 2 loops only. You now have two incomplete double crochets on your hook.
Step 5: Yarn over, insert hook into the SAME stitch or space.
Step 6: Yarn over and pull up a loop. Yarn over and draw through 2 loops only. You now have three incomplete double crochets on your hook.
Step 7: Yarn over, insert hook into the SAME stitch or space.
Step 8: Yarn over and pull up a loop. Yarn over and draw through 2 loops only. You now have four incomplete double crochets on your hook.
Step 9: Yarn over and draw through all 5 loops on your hook. Chain 1 to close and secure the bobble.
Important note: The chain 1 closing chain counts as a stitch in subsequent rows. Always skip the stitch directly behind a bobble when working back across.
Scallop Edging
Working along a finished edge: slip stitch into the first stitch, chain 1, then work (sc, hdc, 3 dc, hdc, sc) all into the same stitch. Skip 2 stitches, slip stitch into the next stitch. Repeat the (sc, hdc, 3 dc, hdc, sc) into the same slip stitch, skip 2 stitches, slip stitch into next stitch across the entire edge. Each scallop consumes 3 stitches.
Pattern Notes Before You Begin
Read through these carefully. They will save you confusion later.
1. The yoke is worked flat (back and forth in rows) then joined into a round at the underarm.
2. The bodice front and back are identical, worked as one rectangular flat panel before joining.
3. Place stitch markers at the underarm join points and refresh them every 4 rounds through the skirt.
4. Bobbles always face the right side. When working in rounds, make bobbles on every bobble round. When working flat rows, make bobbles on RS rows only. WS rows are single crochet across.
5. Chain 1 at the beginning of single crochet rows does NOT count as a stitch.
6. Chain 3 at the beginning of double crochet rows DOES count as the first double crochet.
7. The waist gather is created by a single round of single crochet worked into the back loop only just below the skirt join.
8. Block the finished dress before adding embellishments.
Step by Step Instructions
The Yoke
The yoke is worked flat from the top down across both front and back, creating one rectangular fabric panel. The flutter sleeves are added afterward.
Foundation Chain: Chain 82.
Row 1 (RS): Single crochet in 2nd chain from hook and in each chain across. Turn. (81 sc)
Row 2 (WS): Chain 1, single crochet in each stitch across. Turn. (81 sc)
Row 3 (RS, Bobble Row): Chain 1, single crochet in first stitch, (bobble in next stitch, single crochet in next stitch) across to last stitch, single crochet in last stitch. Turn. (40 bobbles, 41 sc = 81 sts total)
Row 4 (WS): Chain 1, single crochet in each stitch across, working single crochet into the top of each bobble (the closing chain 1) and into each regular single crochet. Turn. (81 sc)
Row 5 (RS, Bobble Row): Chain 1, single crochet in first 2 stitches, (bobble in next stitch, single crochet in next stitch) across to last stitch, single crochet in last stitch. Turn. (39 bobbles, 42 sc = 81 sts)
Alternating the bobble offset between Row 3 and Row 5 creates the staggered, honeycomb-like bobble pattern visible in the finished dress.
Row 6 (WS): Chain 1, single crochet in each stitch across. Turn. (81 sc)
Row 7 (RS, Bobble Row): Repeat Row 3. (81 sts)
Row 8 (WS): Chain 1, single crochet in each stitch across. Turn. (81 sc)
Row 9 (RS, Bobble Row): Repeat Row 5. (81 sts)
Row 10 (WS): Chain 1, single crochet in each stitch across. Turn. (81 sc)
Row 11 (RS, Bobble Row): Repeat Row 3. (81 sts)
Row 12 (WS): Chain 1, single crochet in each stitch across. Turn. (81 sc)
Row 13 (RS, Bobble Row): Repeat Row 5. (81 sts)
Row 14 (WS): Chain 1, single crochet in each stitch across. Turn. (81 sc)
Checkpoint: After Row 14, your flat yoke panel should measure approximately 3 inches (7.5 cm) tall and 18 inches (45.5 cm) wide. This fabric will wrap around the body, so do not worry that it looks very wide at this stage.
Yoke Join and Underarm Setup
Fold the yoke panel so Row 1 (the foundation chain edge) meets Row 14 (the working edge). This creates the front and back of the yoke.
With RS facing, lay the panel flat. Place markers at the following stitch positions on Row 14:
The section from stitch 1 to stitch 20 (20 sts) will be the back left shoulder. The section from stitch 21 to stitch 61 (41 sts) will be the front bodice. The section from stitch 62 to stitch 81 (20 sts) will be the back right shoulder.
Fold the panel in half so the foundation chain aligns with Row 14. Working through both layers at each shoulder, slip stitch the foundation chain to Row 14 at the left shoulder (stitches 1 to 20) and at the right shoulder (stitches 62 to 81). This joins the shoulder seams.
The opening between markers B and C forms the left armhole. The opening between markers D and E forms the right armhole.
Bodice Lower Section and Waist
Join yarn at the left side seam at the bottom edge of the yoke. Chain 1. Work 1 single crochet into each available stitch around the entire lower opening of the yoke. The lower opening consists of front panel stitches (41) plus back panel stitches (41) = 82 single crochet around. Join with slip stitch to first single crochet. (82 sc)
Rnd 1: Chain 1, single crochet in each stitch around. Join. (82 sc)
Rnd 2 (Bobble Rnd): Chain 1, single crochet in first stitch, (bobble in next stitch, single crochet in next stitch) around. Join. (41 bobbles + 41 sc = 82 sts)
Rnd 3: Chain 1, single crochet in each stitch around. Join. (82 sc)
Rnd 4 (Bobble Rnd): Chain 1, (bobble in first stitch, single crochet in next stitch) around. Join. (41 bobbles + 41 sc = 82 sts)
Rnd 5: Chain 1, single crochet in each stitch around. Join. (82 sc)
Rnd 6 (Bobble Rnd): Repeat Rnd 2. (82 sts)
Rnd 7: Chain 1, single crochet in each stitch around. Join. (82 sc)
Checkpoint: After Rnd 7, the tubular bodice section should measure approximately 6 inches (15 cm) total from shoulder to this point.
Waist Gather Round
This round draws in the waist slightly and creates the visual break between bodice and skirt.
Rnd 8 (Gather Round): Chain 1, working in BLO only, (single crochet in next 9 stitches, decrease) 4 times, then (single crochet in next 7 stitches, decrease) 4 times. Join. (74 sc)
The Skirt
The skirt is worked in rounds from the waist down, expanding with regular increase rounds interspersed with bobble and solid texture rounds.
Rnd 9: Chain 1, single crochet in each stitch around. Join. (74 sc)
Rnd 10 (Increase Rnd): Chain 1, (single crochet in next 2 stitches, increase) 24 times, then single crochet in remaining 2 stitches. Join. (98 sc)
Rnd 11 (Bobble Rnd): Chain 1, single crochet in first stitch, (bobble in next stitch, single crochet in next stitch) around to last stitch, single crochet in last stitch. Join. (98 sts)
Rnd 12: Chain 1, single crochet in each stitch around. Join. (98 sc)
Rnd 13: Chain 1, single crochet in each stitch around. Join. (98 sc)
Rnd 14 (Increase Rnd): Chain 1, (single crochet in next 3 stitches, increase) 24 times, single crochet in remaining 2 stitches. Join. (122 sc)
Rnd 15 (Bobble Rnd): Chain 1, (bobble in next stitch, single crochet in next stitch) around. Join. (61 bobbles + 61 sc = 122 sts)
Rnd 16: Chain 1, single crochet in each stitch around. Join. (122 sc)
Rnd 17: Chain 1, single crochet in each stitch around. Join. (122 sc)
Rnd 18 (Increase Rnd): Chain 1, (single crochet in next 4 stitches, increase) 24 times, single crochet in remaining 2 stitches. Join. (146 sc)
Rnd 19 (Bobble Rnd): Chain 1, single crochet in first stitch, (bobble in next stitch, single crochet in next stitch) around to last stitch, single crochet in last stitch. Join. (146 sts)
Rnd 20: Chain 1, single crochet in each stitch around. Join. (146 sc)
Rnd 21: Chain 1, single crochet in each stitch around. Join. (146 sc)
Rnd 22 (Increase Rnd): Chain 1, (single crochet in next 5 stitches, increase) 24 times, single crochet in remaining 2 stitches. Join. (170 sc)
Rnd 23 (Bobble Rnd): Chain 1, (bobble in next stitch, single crochet in next stitch) around. Join. (85 bobbles + 85 sc = 170 sts)
Rnd 24: Chain 1, single crochet in each stitch around. Join. (170 sc)
Rnd 25: Chain 1, single crochet in each stitch around. Join. (170 sc)
Checkpoint: After Rnd 25, the skirt should measure approximately 6 inches (15 cm) from the waist gather. The hem circumference should measure approximately 37 to 38 inches (94 to 96 cm).
Skirt Pre-Hem Bobble Rounds
Rnd 26 (Bobble Rnd): Chain 1, single crochet in first stitch, (bobble in next stitch, single crochet in next stitch) around to last stitch, single crochet in last stitch. Join. (170 sts)
Rnd 27: Chain 1, single crochet in each stitch around. Join. (170 sc)
Rnd 28 (Bobble Rnd): Chain 1, (bobble in next stitch, single crochet in next stitch) around. Join. (170 sts)
Rnd 29: Chain 1, single crochet in each stitch around. Join. (170 sc)
Scallop Hem
The scallop hem requires a stitch count divisible by 3. Current count is 170.
Adjustment Round: Chain 1, single crochet across 170 stitches, decreasing twice evenly (once at approximately stitch 57 and once at approximately stitch 114). Join. (168 sc)
Rnd 30 (Scallop Round): Slip stitch into first stitch, chain 1. (Single crochet, half double crochet, 3 double crochet, half double crochet, single crochet) all into same stitch, skip 2 stitches, slip stitch into next stitch. Repeat (single crochet, half double crochet, 3 double crochet, half double crochet, single crochet) into same slip stitch, skip 2 stitches, slip stitch into next stitch around entire hem. 56 scallops total. Join. Fasten off.
Flutter Sleeve (Make 2)
Each armhole has an opening of approximately 44 stitches total around.
Join yarn at the underarm base of one armhole opening, RS facing.
Rnd 1: Chain 1, single crochet evenly around entire armhole opening. Work 1 single crochet into each row-end edge stitch and 1 single crochet into each chain or stitch across the top of the shoulder join. Target count: 44 single crochet. Join with slip stitch. (44 sc)
Row 2 (Flutter Expansion, now worked flat): Do not join. Turn. Chain 3 (counts as double crochet), 2 double crochet in each remaining stitch across. Turn. (87 dc)
Row 3: Chain 3, double crochet in each stitch across. Turn. (87 dc)
Row 4: Chain 1, single crochet in each stitch across. Do not turn. (87 sc)
Row 5 (Scallop Edge on Flutter): Slip stitch into first stitch, (single crochet, half double crochet, 3 double crochet, half double crochet, single crochet) all into same stitch, skip 2 stitches, slip stitch into next stitch. Repeat across. 29 scallops. Fasten off.
Sew or slip stitch the short edges of the flutter ruffle to the bodice sides neatly. Repeat for second armhole.
Neckline Finish
Join yarn at back right shoulder, RS facing.
Rnd 1: Chain 1, single crochet evenly around entire neckline opening. Work 1 single crochet for every 2 row-end edges across the back and 1 single crochet into each stitch across the front. Target count: approximately 60 single crochet. Adjust to nearest even number. Join. (60 sc)
Rnd 2: Chain 1, single crochet in each stitch around. Join. (60 sc)
Rnd 3 (Scallop): Apply Scallop Edging around entire neckline. 20 scallops. Fasten off.
Waist Accent Row
Join yarn at the waist gather round (Rnd 8, the BLO gather round). The unused front loops of Rnd 8 remain exposed and create a natural ridge. Working into these front loops:
Row 1: Join yarn at front center, chain 1, single crochet in each exposed front loop across the front panel only (approximately 37 stitches). Fasten off.
Crochet Flower Embellishment
Rnd 1: Magic ring, chain 1, 6 single crochet into ring. Join. (6 sc)
Rnd 2: Chain 1, (single crochet, half double crochet, 3 double crochet, half double crochet, single crochet) in each single crochet around. Join. (6 petals)
Fasten off, leaving a 12 inch (30 cm) tail for sewing.
Sew flower to the waist join at center front, slightly to the right side as shown in the photo. Sew pearl button through center of flower to bodice. The button is decorative and should not be accessible to young children. Knot securely from the wrong side and clip all ends.
Size Customization Tips
To size down to Newborn or 0 to 3 months: Reduce foundation chain by 10 stitches (chain 72, work 71 single crochet in Row 1). Work only 4 bobble rows in the yoke instead of 6. Reduce skirt increase rounds by 2 rounds. Target finished chest: 16 inches (40 cm).
To size up to 2T or 24 months: Increase foundation chain by 10 stitches (chain 92, work 91 single crochet in Row 1). Add 2 additional bobble rows to the yoke. Add one extra increase round in the skirt. Target finished chest: 22 inches (56 cm).
General rule: Each 10-stitch change in the foundation chain adds or removes approximately 2.2 inches (5.5 cm) in chest circumference at the gauge stated.
Finishing and Blocking
Weave in all ends securely using a yarn needle, burying tails through at least 1 inch of fabric in multiple directions.
Wet block the dress by soaking in cool water for 15 minutes, gently pressing out excess water in a towel (do not wring), and laying flat on a blocking mat. Pin the hem scallops open gently. Allow to dry completely before wearing or storing.
After blocking, attach the flower embellishment and button.
Care Instructions
Hand wash in cool water with mild soap. Do not wring or twist. Lay flat to dry. Do not tumble dry or machine wash. Store folded, not hung, to prevent stretching. If using acrylic yarn, cool iron is safe on the reverse side. If using cotton, warm iron is acceptable.
You Did It!
I hope you absolutely love making this bobble stitch baby dress crochet pattern. The finished piece is the kind of handmade gift that makes people tear up a little, and you deserve all the credit for every single bobble. The texture, the flutter sleeves, that tiny flower at the waist. It all comes together into something truly precious.
Thank you so much for choosing this pattern. I cannot wait to see your finished dresses! If you make one, please tag me on Instagram or share it in our Facebook group. Seeing your creations genuinely makes my day.
If you loved this pattern, save it to your Pinterest boards so you can find it again later. And please leave a comment below if you give it a try. I would love to hear how it turned out and see photos of your finished dress!
