
I’ve been looking for the perfect winter layering piece for ages. Something delicate but cozy. Something that feels special without being fussy.
Get the Ad-Free PDF Pattern
You can find the free pattern below, or you can purchase the ad-free printable PDF from my shop.
Get the Printable PDF →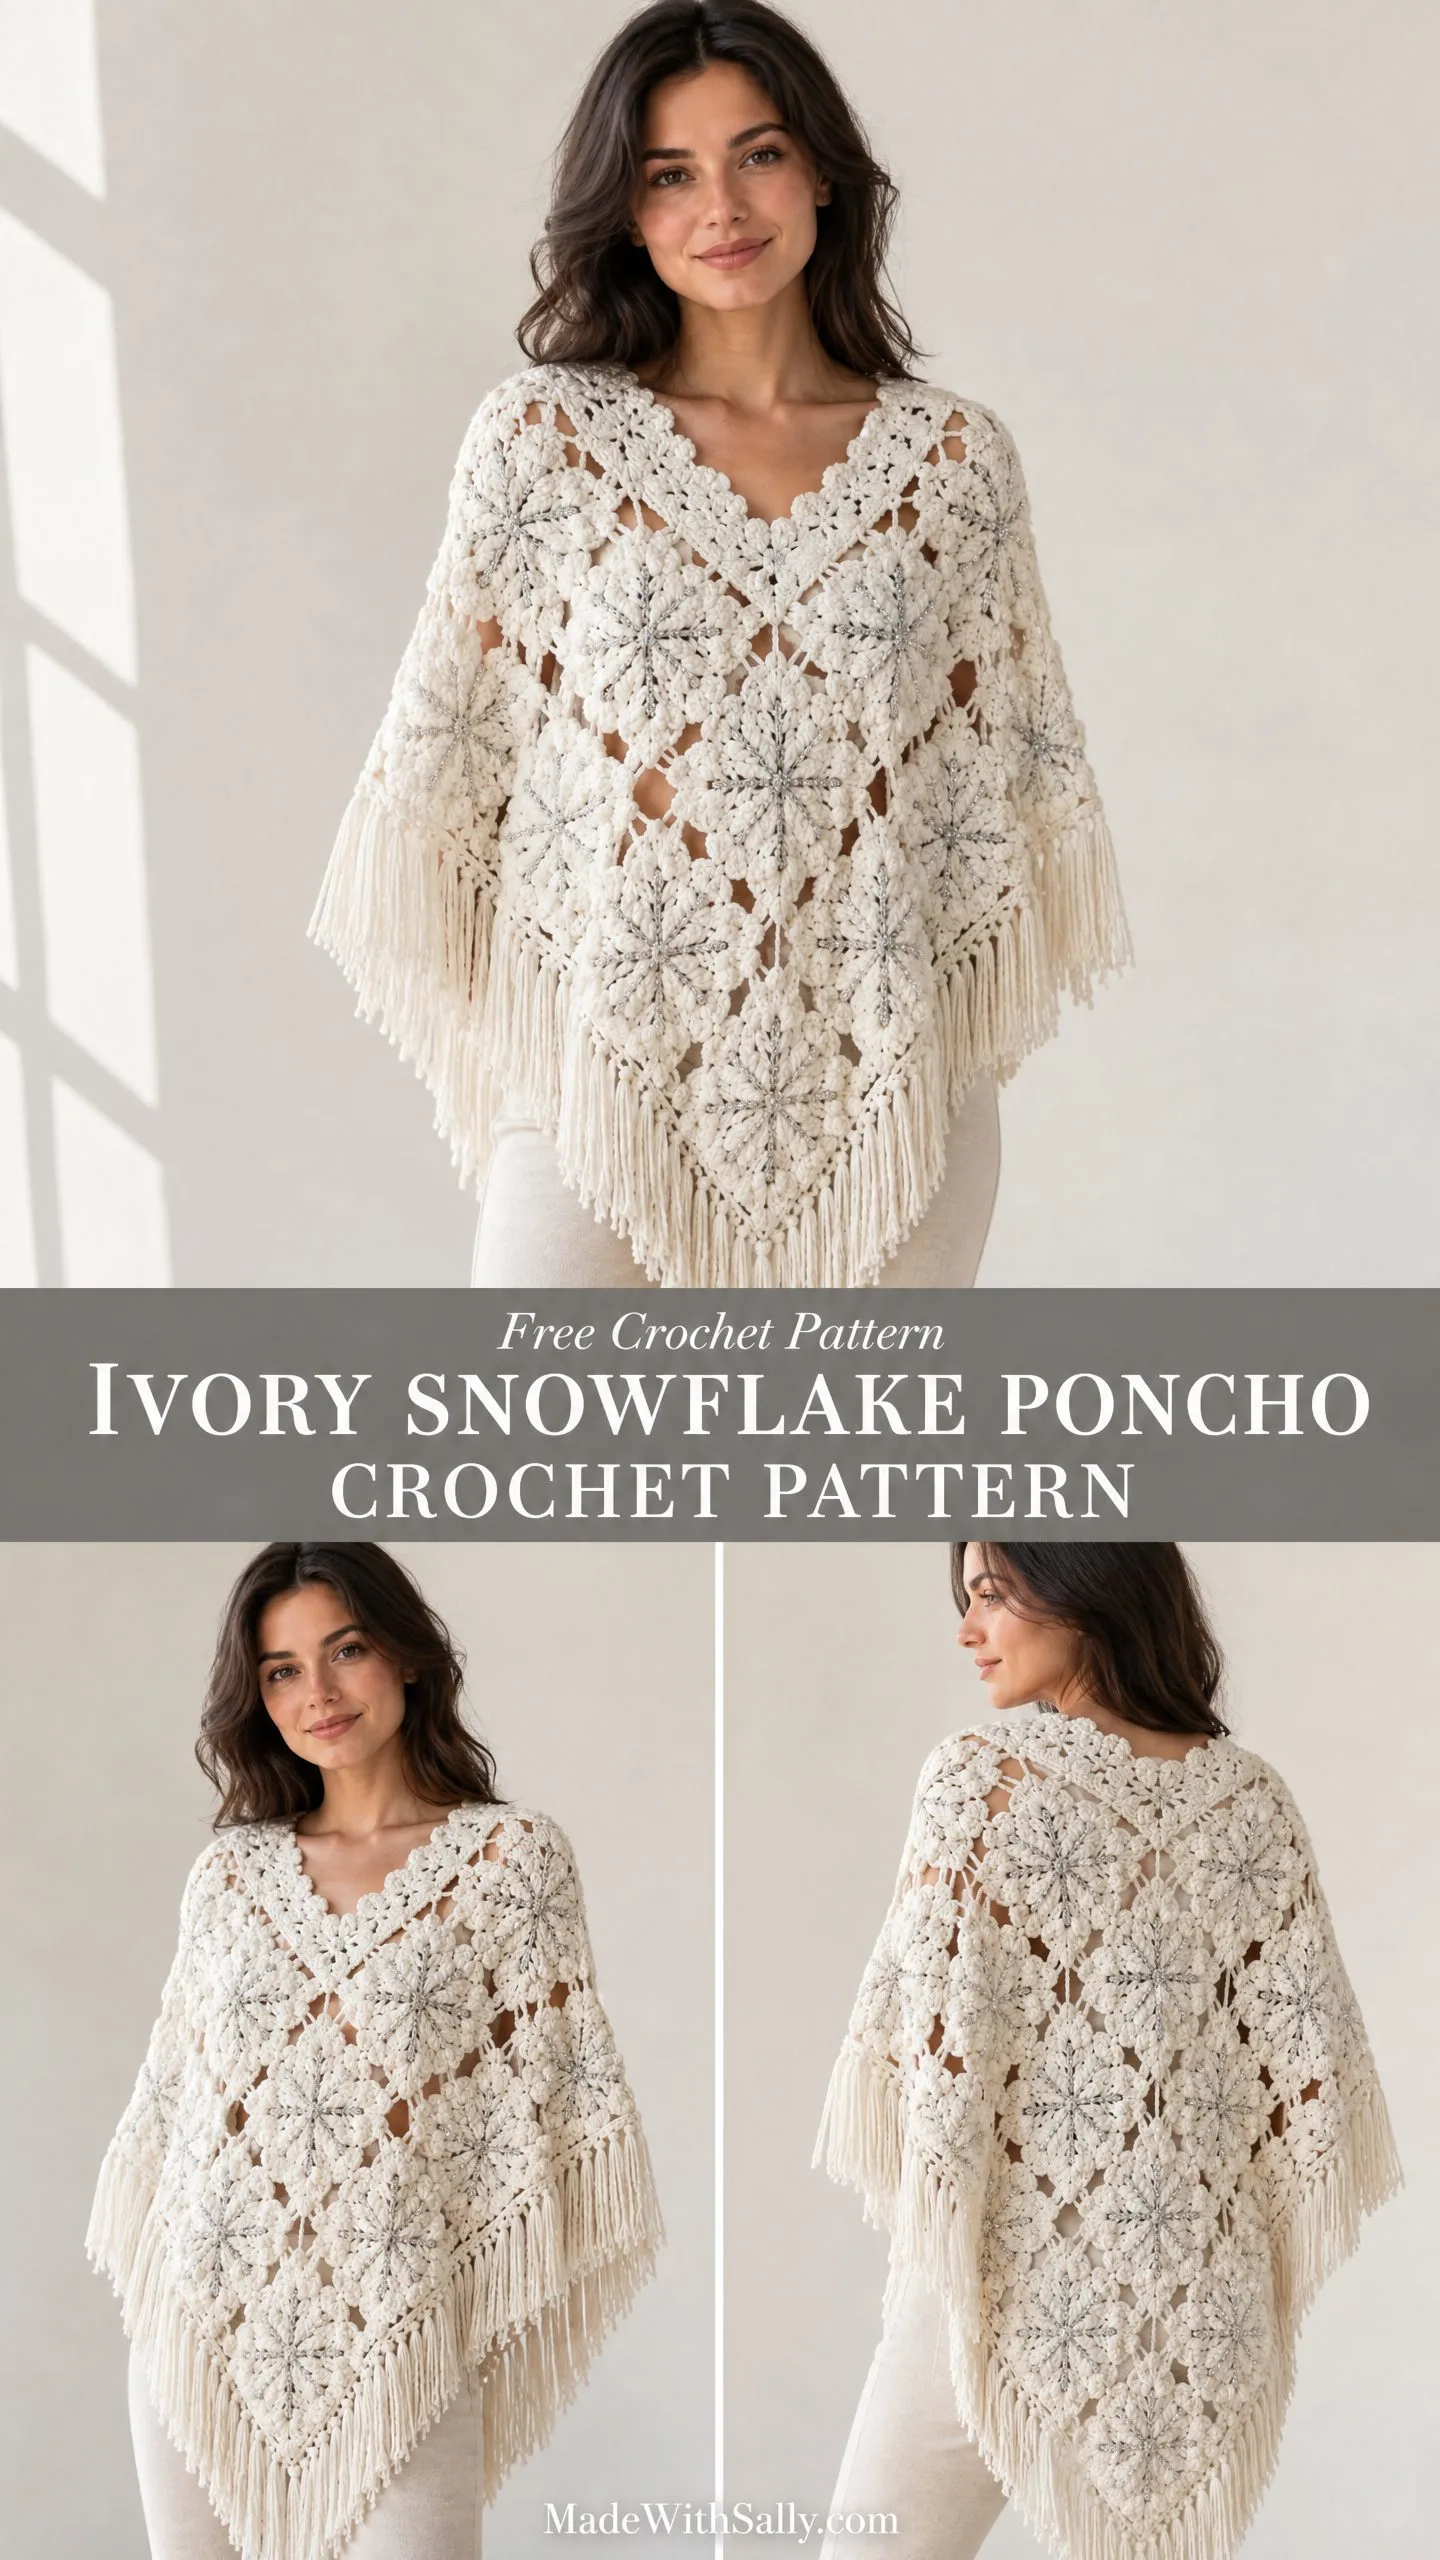
This Ivory Snowflake Poncho is exactly what I had in mind. It’s become my favourite recommendation for crocheters ready to try motif work, and I think you’re going to love it too.
The design features beautiful snowflake star motifs joined into a flowing triangular shape. It drapes beautifully over dresses, blouses, or even a simple tee. Let me walk you through everything you need to make your own.
Why This Snowflake Poncho Pattern Works So Well
The construction method here is clever. Instead of crocheting one massive piece and hoping for the best, you create 18 individual snowflake motifs. Each one is small and manageable. You can make them while watching TV, waiting at appointments, or during your lunch break.
Once your motifs are done, you block them and join them together. This approach gives you complete control over the fit. If you need more coverage, add more motifs. If you want a smaller version, use fewer. It’s genuinely adjustable in a way that most poncho patterns aren’t.
The lace texture opens up beautifully after blocking. Those snowflake points become crisp and defined. The whole piece transforms from "nice crochet project" to "stunning handmade garment."
Skill Level
This pattern is rated intermediate.
Here’s why: you’ll be working with motif construction, joining techniques, lace stitches, shaping, and decorative edging. That sounds like a lot, but each individual skill is straightforward.
If you’re comfortable with chains, single crochet (sc), double crochet (dc), and slip stitches (sl st), you have the foundation you need. The pattern introduces everything else step by step.
Advanced beginners can absolutely complete this project. I’d suggest practicing the motif joining technique on a few test squares first. Once that clicks, you’re golden.
Finished Size
Adult Medium (adjustable)
Need a larger size? Add extra snowflake motifs around the shoulder line and lower edges. The modular construction makes sizing adjustments simple.
Materials You’ll Need
Gather these supplies before you start:
Yarn Suggestions
The yarn you choose affects the final drape and texture:
I recommend choosing a yarn with good stitch definition so those snowflake points really pop after blocking.
Gauge
20 double crochet stitches x 10 rows = 10 x 10 cm / 4 x 4 inches after blocking
Check your gauge before diving in. Make a test swatch, block it, then measure. If your swatch is too big, try a smaller hook. Too small? Go up a hook size.
Gauge matters here because it affects both the size of your individual motifs and the overall fit of the finished poncho.
Abbreviations
Let me define every stitch term you’ll encounter:
Special Stitch: Snowflake Cluster
This is the signature stitch that creates those gorgeous snowflake points:
Snowflake Cluster: Work (dc, ch 2, dc, ch 2, dc) all into the same stitch or space.
It’s basically three double crochets separated by chain-2 spaces, all anchored in one spot. This fans out to create the pointed tips of each snowflake arm.
Step-by-Step Pattern Instructions
Snowflake Motif (Make 18)
You’ll create 18 identical motifs. I recommend making one complete motif first to check your gauge and get comfortable with the pattern before batch-producing.
Round 1:
Make a magic ring. Chain 3 (this counts as your first dc), then work 11 dc into the ring. Join with sl st to the top of the beginning ch-3. (12 dc)
Round 2:
Ch 3, dc in same stitch, ch 1, skip 1 stitch, 2 dc in next stitch. Repeat this pattern around the entire round. Join with sl st.
Round 3:
Sl st into the chain space. Ch 3, work (dc, ch 2, 2 dc) in same space. Repeat in each chain space around. Join with sl st.
Round 4:
Sl st to center of next space. Ch 1, sc. In each corner space work: (sc, ch 3, sc). Continue around and join with sl st.
Round 5:
In each ch-3 space work: (dc, ch 2, dc, ch 2, dc). Continue around to create snowflake points. Fasten off.
Repeat these instructions 17 more times until you have 18 completed motifs.
Assembly
This is where your poncho takes shape.
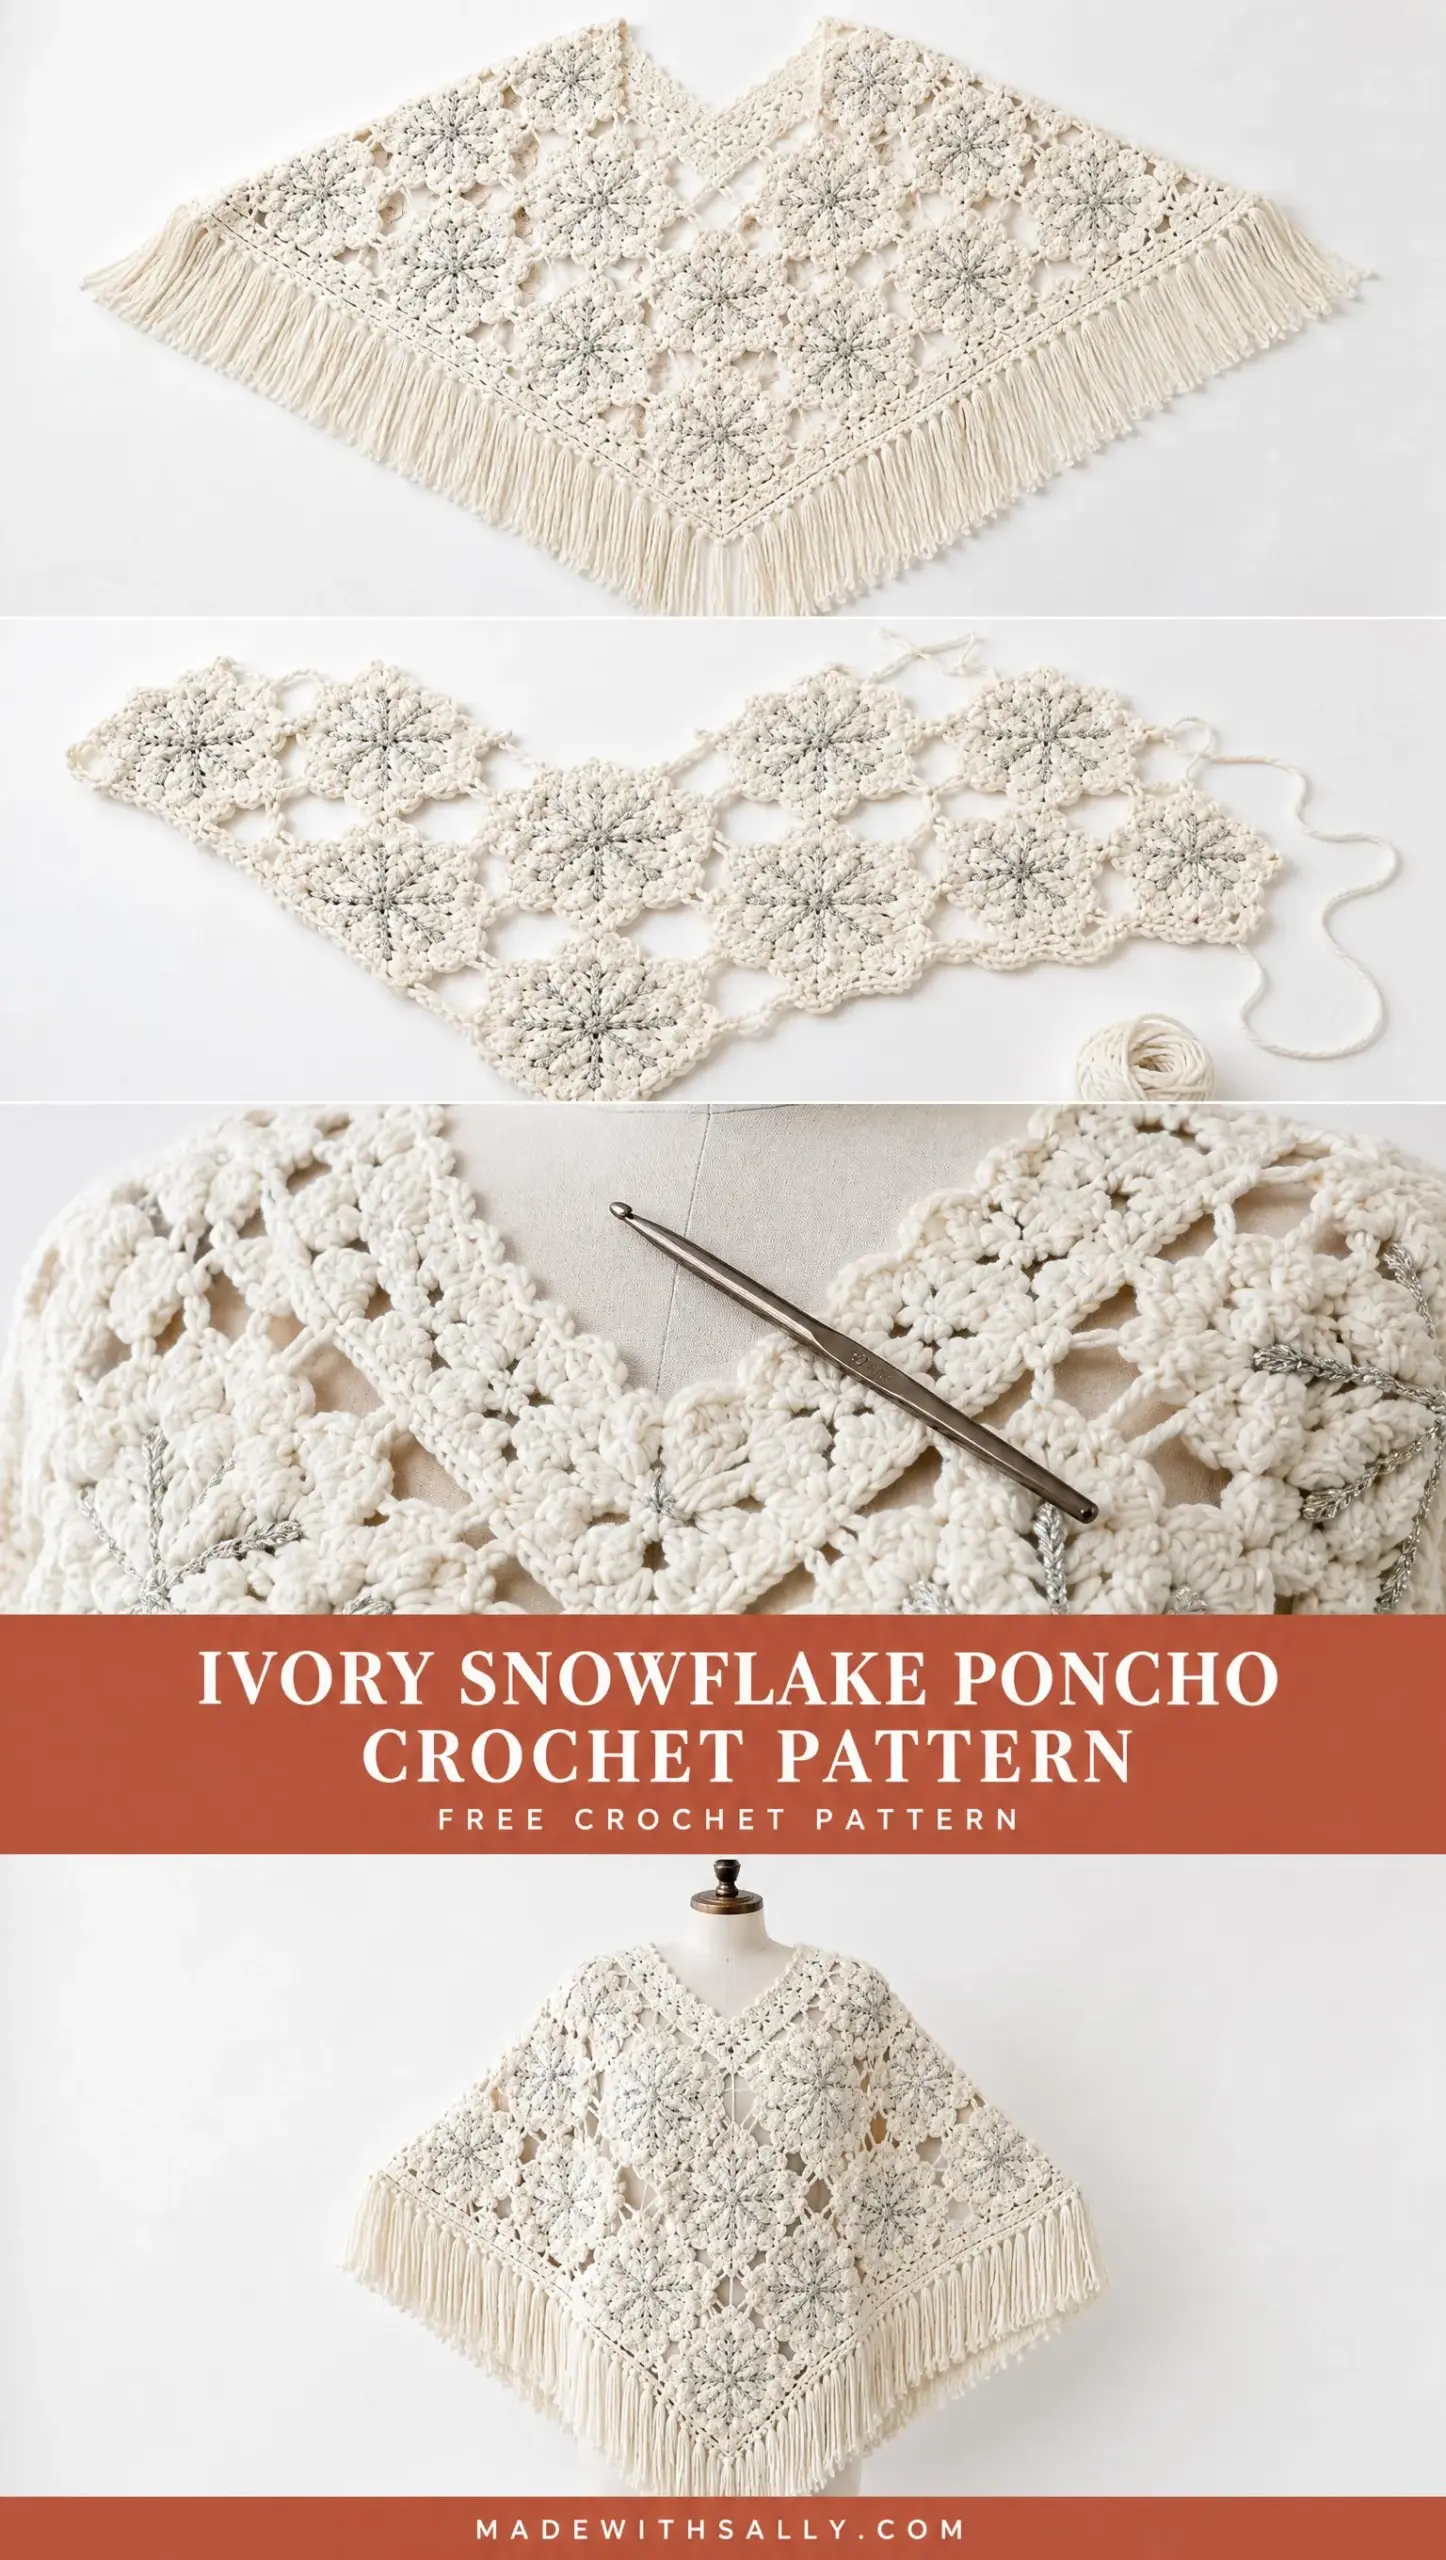
Step 1: Block all motifs to open the snowflake lace pattern. Pin each one out on your blocking mats, stretching the points gently. Mist with water and let dry completely.
Step 2: Arrange motifs in a poncho shape:
Lay everything out on a flat surface before joining. Make sure the arrangement looks balanced and the motifs line up at their connection points.
Step 3: Join motifs using slip stitch joins through matching chain spaces. Work through both layers, connecting the corresponding spaces on adjacent motifs.
Take your time with the joining. Neat, consistent joins make the finished piece look polished and professional.
Neckline Edging
The neckline gets a simple ribbed edging that adds structure and a touch of elegance.
Round 1:
Attach yarn around the neckline opening. Work sc evenly around the entire opening. Join with sl st.
Round 2:
Ch 2, hdc around. Join with sl st.
Round 3:
Work alternating front-post and back-post hdc stitches for a soft raised collar effect.
Front-post hdc: Yarn over, insert hook from front to back around the post of the stitch below (not through the top loops), complete the hdc as normal.
Back-post hdc: Yarn over, insert hook from back to front around the post, complete the hdc.
Alternate these stitches across the round to create subtle ribbing.
Bottom Lace Border
The decorative border along the bottom edge adds a beautiful finishing touch.
Round 1:
Attach yarn at the bottom point. Work sc evenly around all edges. Join with sl st.
Round 2:
Repeat: (sc, ch 3, skip 2 stitches) around the entire edge. Join.
Round 3:
In every chain space work: (sc, hdc, dc, hdc, sc). This creates a pretty shell-like scallop along the bottom. Join and fasten off.
Finishing Your Ivory Snowflake Poncho
Almost there! These final steps make a real difference in the finished look.
1. Weave in all ends securely. Use your tapestry needle to work ends back through several stitches so they won’t come loose with wear.
2. Wet block the finished poncho. Soak it gently in cool water, squeeze out excess moisture (don’t wring), and lay flat on blocking mats.
3. Shape the snowflake points carefully with pins. Take your time here. Well-blocked points transform the entire piece.
4. Allow to dry completely before wearing. Patience pays off. Rushing this step means your blocking won’t hold.
Care Instructions
Treat your handmade poncho gently and it will last for years.
Hand wash in cool water with a mild detergent. Lay flat to dry on a clean towel. Avoid high heat, which can damage the fibers and distort your careful blocking work.
Troubleshooting Common Issues
If the poncho feels too small: Add extra motif rows before assembly. The modular construction makes this easy.
If the fabric curls: Increase blocking time and gently reshape the points. Sometimes lace needs aggressive blocking to behave.
If the neckline stretches: Add an extra round of single crochet reinforcement around the opening.
Frequently Asked Questions
Can I change colors?
Absolutely. Use gradient yarns for an ombre effect, or try silver and white combinations for a frosty winter look. The motif construction also works beautifully with each motif in a different shade.
Can I make a larger size?
Yes. Add additional snowflake motifs around the shoulder and lower edges. You’ll need more yarn, so purchase extra.
Can beginners make this?
Advanced beginners can complete it with practice. I’d suggest learning motif joining on simpler projects first, then tackling this pattern with confidence.
Construction Notes
Understanding the big picture helps everything make sense. This poncho is created from individual snowflake motifs that are crocheted separately, blocked, and then joined to create the shoulder area and triangular lower drape.
The neckline is finished with a simple ribbed edging. The bottom edge receives the decorative lace border with those pretty scallop shells.
Working in pieces like this might seem slower at first, but it’s actually quite relaxing. No wrestling with a giant project on your lap. Each motif is a small win.
Final Thoughts on the Ivory Snowflake Poncho Crochet Pattern
This poncho is the kind of project that impresses everyone who sees it. The intricate-looking snowflake motifs, the delicate lace texture, the elegant drape. It looks like something from a boutique, but you made it with your own hands.
The modular construction keeps things manageable, and the step-by-step instructions guide you through every round. Whether you’re making this for yourself or as a gift for someone special, the finished piece is genuinely stunning.
Thank you so much for choosing this pattern. I really hope you enjoy making it as much as I enjoyed designing it. If you give it a try, I’d love to see your finished poncho! Share your photos on Instagram or Facebook and tag me so I can celebrate with you.
If this pattern caught your eye, go ahead and save it to your Pinterest boards so you can find it when you’re ready to cast on. And if you make your own Ivory Snowflake Poncho, please drop a comment below. I love hearing how projects turn out and seeing what color combinations you choose!
Want a Quick & Easy Printable Version?
Get a clean, beautifully formatted PDF of this pattern — easy to follow step by step, ready to print or save on any device. No scrolling, no distractions, just the pattern.
Get the Printable PDF →