
I originally sketched this design in a little spiral notebook about three summers ago. I called her "Lavender Dreams" right from the start because the soft purple tones reminded me of the lavender fields I saw in photos from Provence. The butterfly just made sense. Something about those delicate wings paired with the flowing mesh panels felt romantic and whimsical.
The pattern sat in that notebook for way too long. Life got busy, and I kept pushing it aside for quicker projects. But this year, I finally pulled it out, worked through all my scribbled notes, and brought her to life. I am so glad I did.
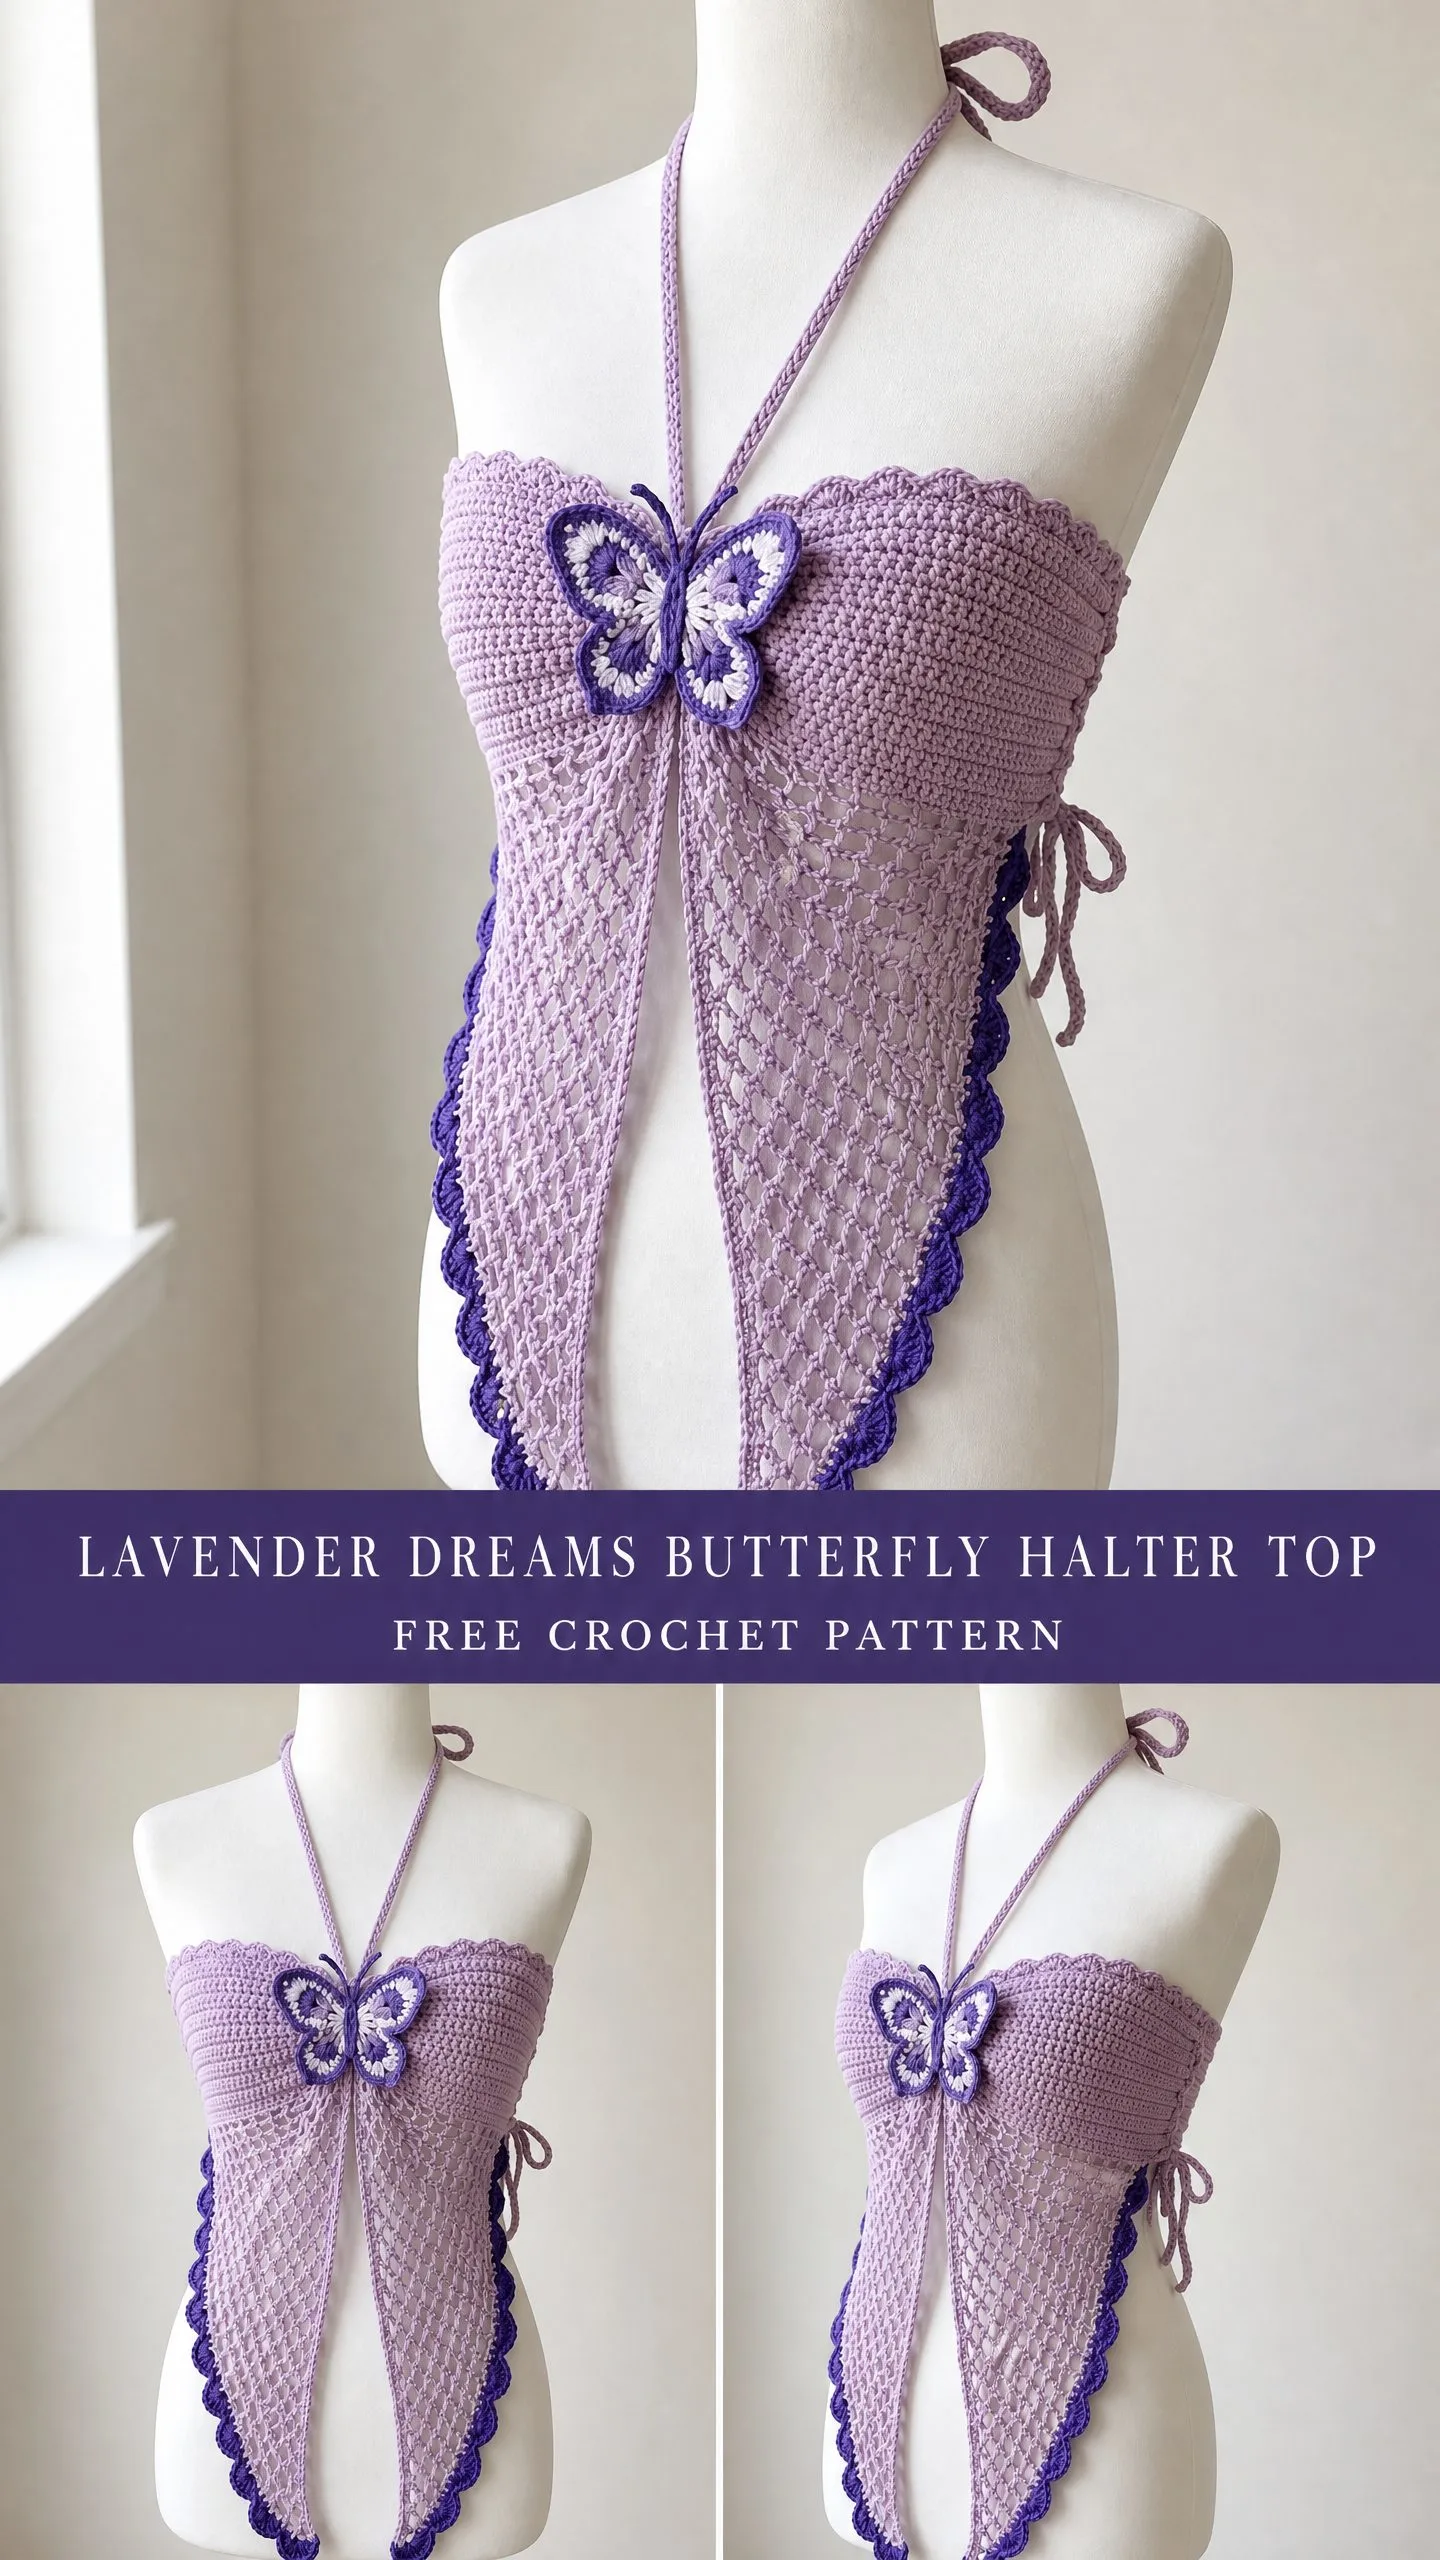
If you have been looking for a summer crochet project that feels special and looks absolutely stunning, this butterfly halter top is the one. The construction is clever but not complicated, and the finished piece looks like something from a boutique window.
About This Butterfly Halter Top Crochet Pattern
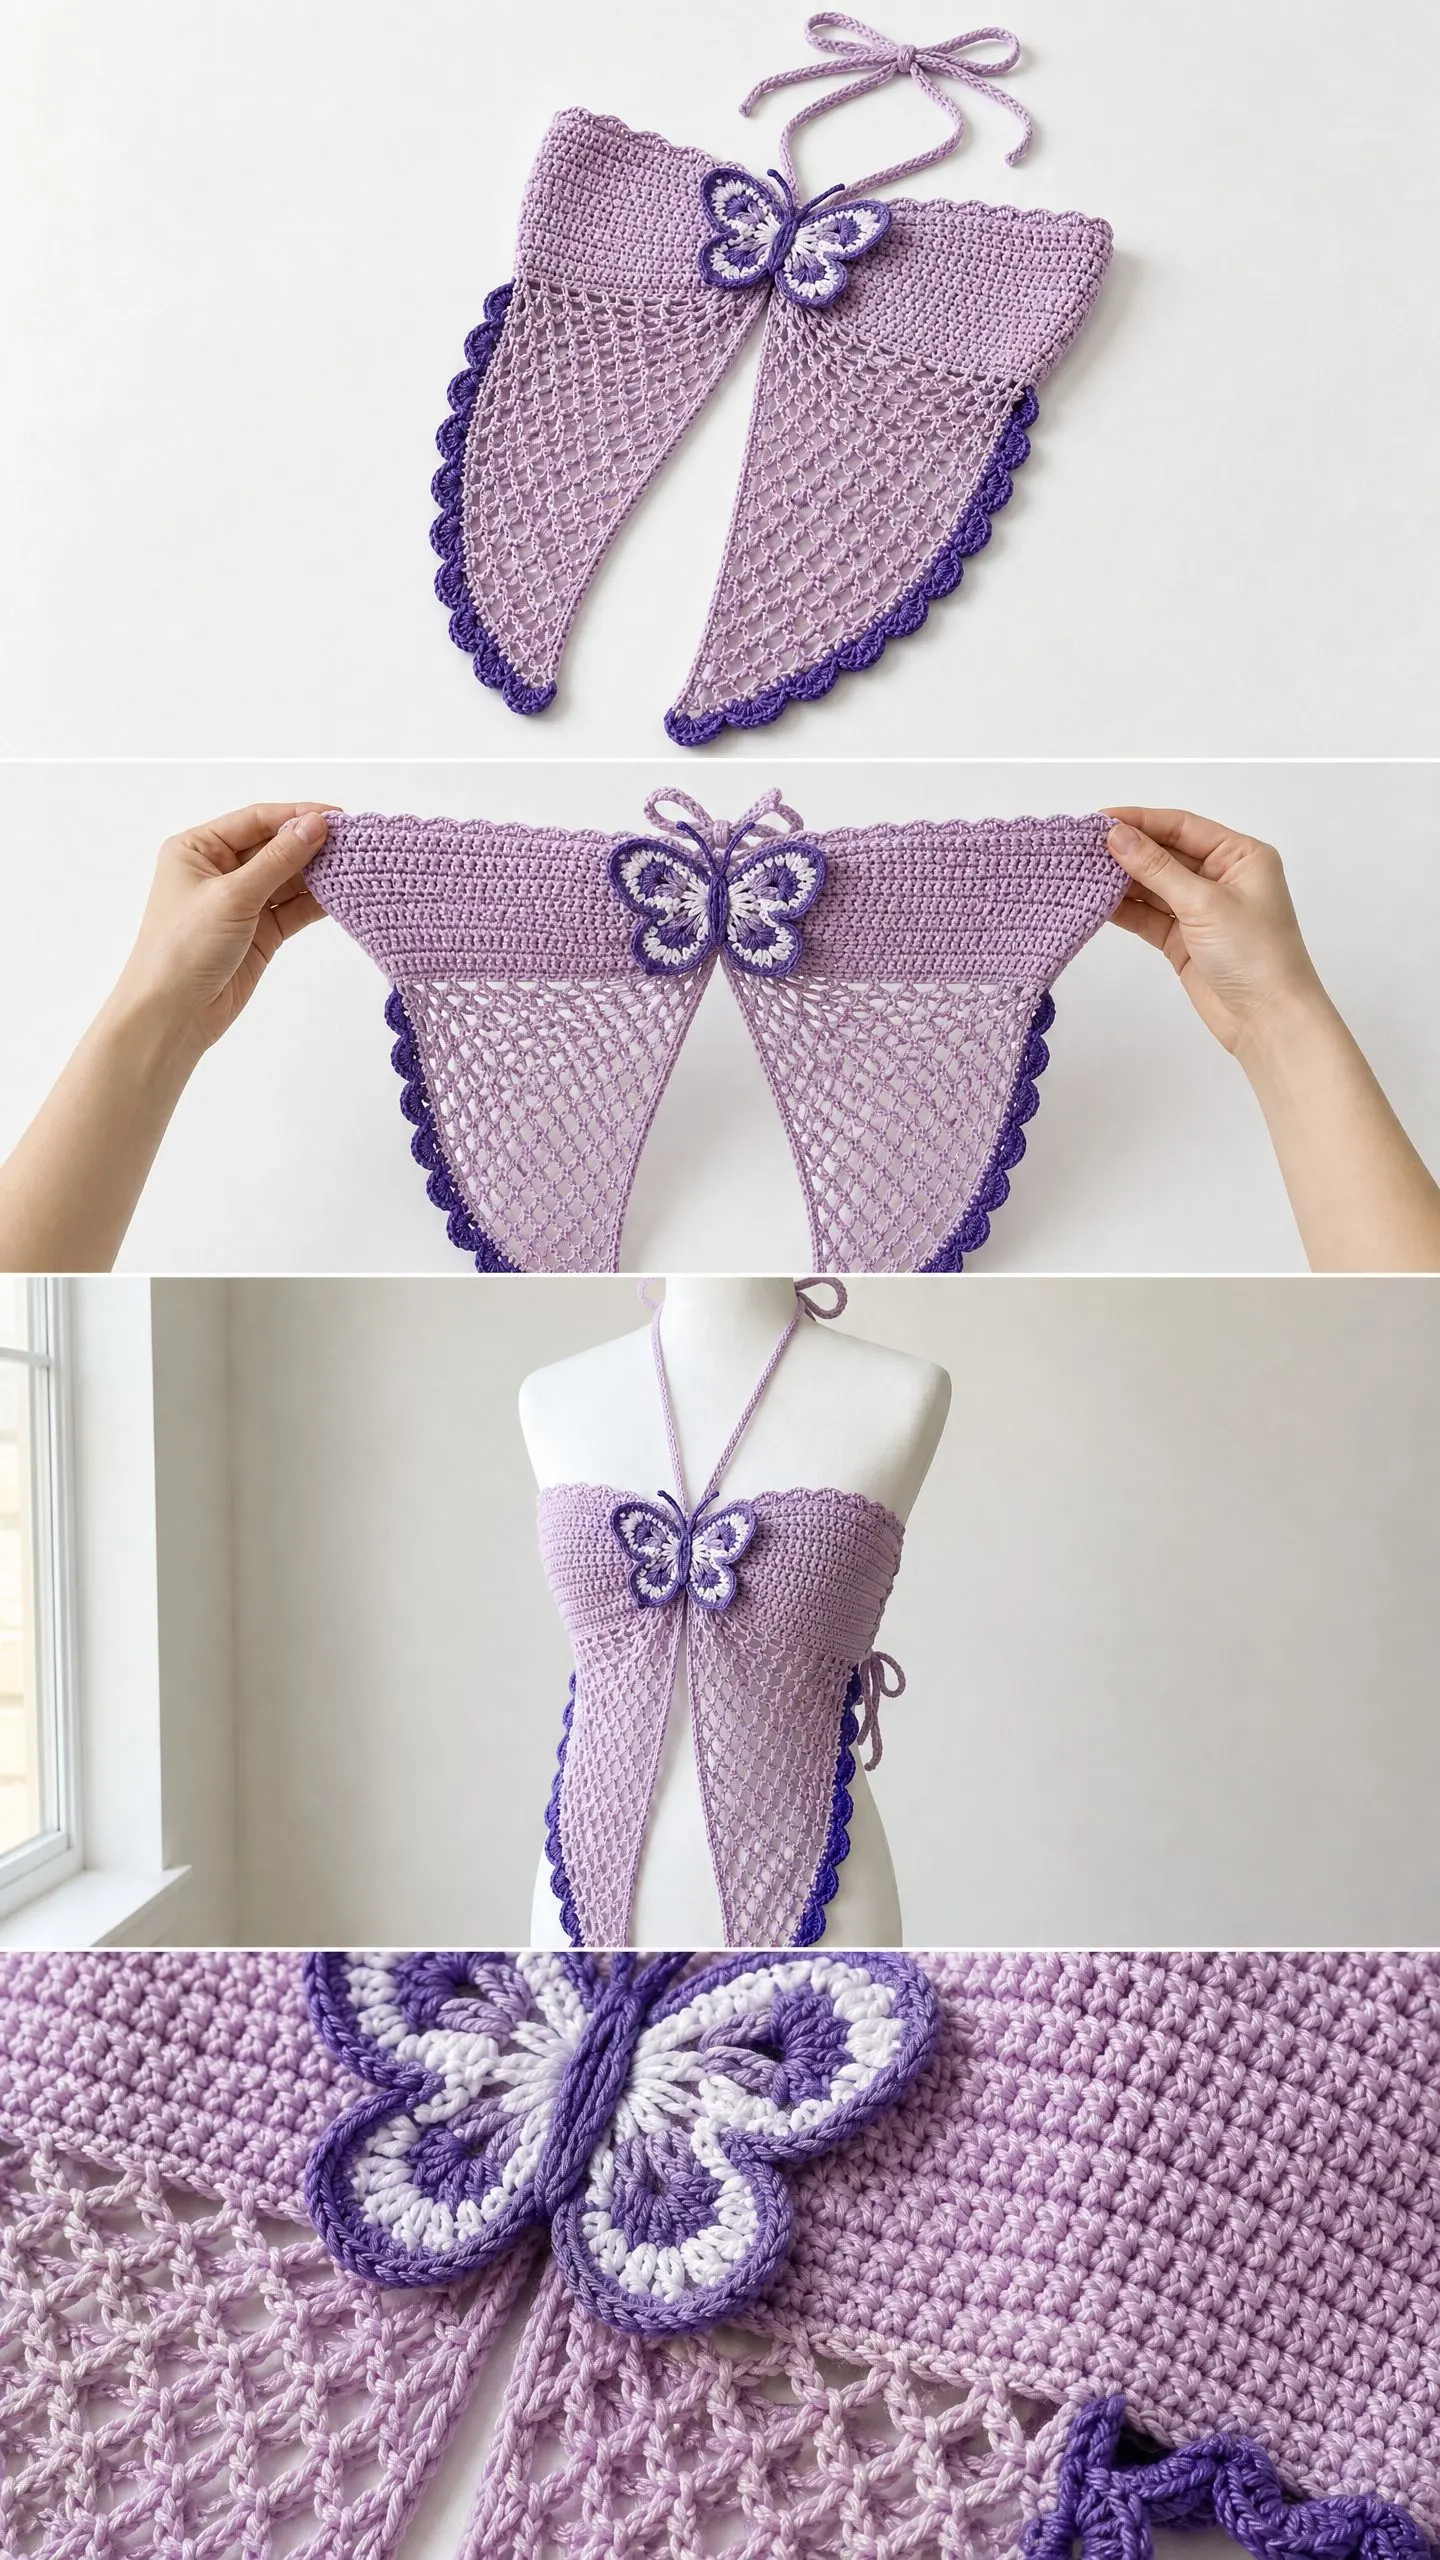
This halter top features a structured bandeau-style bodice worked in rows of single crochet (sc), which creates that firm, supportive chest band you see in the photos. From the base of the bodice, two open-work diamond mesh panels drape down in pointed tails at the front and back. A crocheted butterfly applique sits right at the center chest, adding that perfect finishing touch.
The color palette uses a soft lilac as the main color and a deeper violet for the butterfly wings and scallop border trim. The contrast creates beautiful visual interest without being overwhelming.
The construction flows logically from top to bottom. You will work the bodice band first, then create the mesh panels working downward from the base of the band. After that, you will add the scallop border, attach the straps and ties, and finish by making and sewing on the butterfly. Each section builds on the last in a way that makes sense.
Skill Level
This pattern is rated intermediate. You should be comfortable with single crochet worked in rows, reading a diagonal shaping sequence, working a mesh stitch pattern, creating a scallop border, and constructing a small applique motif with color changes.
If you are a beginner who has completed a few small projects already, you can absolutely attempt this with patience. Take it one section at a time, and do not rush through the mesh panel decreases.
Time Estimate
Plan for 14 to 20 hours of crochet time if you work at an average intermediate pace. This does not include blocking time. The butterfly applique adds approximately 1 to 2 hours on its own.
Finished Measurements
This pattern fits a 32 to 34 inch bust (81 to 86 cm) with moderate stretch due to the mesh panels.
Here are the key measurements:
The side ties allow 2 to 3 inches of additional fit adjustment at the waist, which is helpful for getting that perfect fit.
Materials Needed
Yarn
Main Color (MC): approximately 500 yards (457 m) of DK weight yarn in soft lilac
Contrast Color (CC): approximately 80 yards (73 m) of DK weight yarn in deep violet
Accent Color (AC): approximately 20 yards (18 m) of DK weight yarn in white or pale lavender for butterfly wing highlights
Recommended Yarn Brands
1. Lion Brand Pound of Love (DK weight): 100 percent acrylic, machine washable, widely available in purple tones. The drape suits the mesh panels well.
2. Paintbox Yarns Simply DK: 100 percent acrylic, affordable, consistent tension, available in coordinating lavender and violet shades.
3. Scheepjes Catona (4-ply / light DK): 100 percent mercerized cotton. Cotton gives a crisper mesh and excellent stitch definition for the butterfly. Slightly more yardage needed due to weight. Purchase 600 yards (549 m) MC and 100 yards (91 m) CC.
Any DK weight yarn that achieves gauge will work. Avoid fuzzy or heavily textured yarns because they obscure the beautiful mesh pattern. Mercerized cotton or cotton-blend yarns give the crispest results and feel most comfortable for a summer garment.
Hooks
Notions
Gauge
With MC and E-4 (3.50 mm) hook:
18 sc x 22 rows = 4 inches x 4 inches (10 cm x 10 cm) in single crochet, blocked.
Mesh panel gauge:
Gauge is critical for fit. Please adjust your hook size as needed to match gauge before beginning. A quick swatch now saves major frustration later.
Abbreviations (US Terms)
Special Stitches
Diamond Mesh Stitch (worked flat in rows)
This stitch creates the open lattice diamond pattern visible on the front and back panels.
Row A (RS): Ch 2 (does not count as st), sc in first st, (ch 1, sk 1 st, sc in next st) across to end, turn.
Row B (WS): Ch 2 (does not count as st), sc in first st, (ch 1, sk ch-1 sp, sc in next sc) across to end, turn.
Repeat Rows A and B for pattern. The ch-2 turning chain does not count as a stitch in this pattern. Always sc into the actual first stitch, not the turning chain.
Scallop Border Stitch
Worked along a foundation row or edge with CC.
1. Join CC with sl st in first st.
2. Ch 1, sc in same st.
3. Skip 1 st or sp, work 5 dc in next st or sp (shell made).
4. Skip 1 st or sp, sc in next st or sp.
5. Repeat Steps 3 and 4 across the entire edge.
6. Fasten off.
The repeat unit is: skip 1, 5-dc shell, skip 1, sc. The stitch count going into the border must be a multiple of 4, plus 1 edge sc at each end, for an even sequence.
Pattern Notes Before You Begin
1. The bodice band is worked first as a flat rectangle, then joined into a tube.
2. The mesh panels are worked separately as flat triangular pieces, one for front and one for back. Each panel attaches to the base edge of the bodice band and works downward, decreasing at both side edges to create the pointed tail shape.
3. The side ties attach at the side seams of the bodice.
4. The neck halter strap attaches at the center front top edge of the bodice, passes behind the neck, and ties at the back.
5. The butterfly is made separately and sewn to the center front of the bodice.
6. All stitch counts appear in parentheses at the end of each row or round.
7. Right side (RS) is the public-facing side. When working the bodice in rounds, all rounds are RS. When working mesh panels flat, RS and WS rows alternate.
8. The ch-2 turning chain in mesh panel rows does NOT count as a stitch. Always work the first sc into the actual first stitch.
Step-by-Step Crochet Pattern Instructions
Section 1: Bodice Band
The bodice band creates that firm, structured chest section. You will work it flat in single crochet, then seam the side edges to form a tube.
Foundation Chain:
With MC and E-4 hook, ch 137.
Row 1 (RS): Sc in 2nd ch from hook and in each ch across, turn. (136 sc)
Row 2 (WS): Ch 1, sc in each st across, turn. (136 sc)
Row 3 (RS): Ch 1, sc in each st across, turn. (136 sc)
Row 4 (WS): Ch 1, sc in each st across, turn. (136 sc)
Row 5 (RS): Ch 1, sc in each st across, turn. (136 sc)
Row 6 (WS): Ch 1, sc in each st across, turn. (136 sc)
Row 7 (RS): Ch 1, sc in each st across, turn. (136 sc)
Row 8 (WS): Ch 1, sc in each st across, turn. (136 sc)
Row 9 (RS): Ch 1, sc in each st across, turn. (136 sc)
Row 10 (WS): Ch 1, sc in each st across, turn. (136 sc)
Row 11 (RS): Ch 1, sc in each st across, turn. (136 sc)
Row 12 (WS): Ch 1, sc in each st across, turn. (136 sc)
Row 13 (RS): Ch 1, sc in each st across, turn. (136 sc)
Row 14 (WS): Ch 1, sc in each st across, turn. (136 sc)
Row 15 (RS): Ch 1, sc in each st across. Do not turn. Fasten off, leaving a 24-inch sewing tail.
Checkpoint: After Row 15, the bodice band measures approximately 6 inches (15 cm) tall and 30 inches (76 cm) wide. If your measurement differs, check your gauge.
Seaming the Bodice Band:
Fold the band so that the two short side edges (each 15 rows tall) meet, RS facing outward. Using the sewing tail and yarn needle, whip stitch or mattress stitch the two short edges together to form a tube. This seam becomes the left side seam. The tube circumference is approximately 30 inches (76 cm).
Weave in the seam ends. The top edge is where the halter strap will attach. The bottom edge is where the mesh panels will be worked.
Section 2: Front Mesh Panel
The front mesh panel is a flat, triangular piece worked downward from the front half of the bodice band base edge.
Identifying the front edge: With the side seam at the left, the front spans from the side seam across 68 stitches to the right side edge. Mark these 68 stitches with stitch markers at each end.
Setup Row: With RS facing, attach MC to the right-hand end of the 68 front base-edge stitches. Working along the bottom edge of the bodice band into the foundation chain loops, ch 2 (does not count as st), sc in first st, (ch 1, sk 1, sc in next st) across to the left end of the front 68 sts, turn. (34 sc, 33 ch-1 sps)
About the decreases: Each decrease row removes 1 sc from each end (2 sc total per decrease row). Decrease rows occur every RS row. The panel tapers from 34 sc at the top to 2 sc at the point.
Panel Row 1 (WS): Ch 2, sc in first st, (ch 1, sk sp, sc in next sc) across, turn. (34 sc, 33 ch-sps)
Panel Row 2 (RS, decrease row): Ch 2, sc2tog over first sc and ch-1 sp, sc in next sc, (ch 1, sk sp, sc in next sc) across until 2 sc and 1 sp rem, ch 1, sk sp, sc2tog over last sc and next sp. Turn. (32 sc, 31 ch-sps)
Continue in this pattern, working a plain WS row followed by a decrease RS row. The stitch counts progress as follows:
Fasten off, leaving a 6-inch tail. Weave in end.
Checkpoint: The front mesh panel should measure approximately 14 inches (35.5 cm) from top to lowest point.
Section 3: Back Mesh Panel
The back mesh panel is constructed identically to the front mesh panel, worked on the remaining 68 stitches of the bodice band base edge.
Attach MC and work the Setup Row and all Panel Rows 1 through 33 exactly as written for the Front Mesh Panel.
Section 4: Scallop Border
The scallop border is worked in CC (deep violet) along the slanted side edges and bottom pointed edges of both mesh panels.
For each panel, with RS facing, attach CC with sl st to the top right corner of the panel’s right slanted edge.
Work sc evenly along the edge, working 1 sc into the end of each sc row and 1 sc into each ch-2 turning ch-sp. Work approximately 33 sc along the right slanted edge, then 1 sc at the bottom point sc, then 33 sc along the left slanted edge. Adjust to 65 sc total for proper scallop alignment.
Scallop Border Row: Sl st to first sc, ch 1, sc in first sc, (skip 1 sc, 5 dc in next sc, skip 1 sc, sc in next sc) across. (16 scallop shells)
Fasten off CC. Weave in ends. Repeat this border on the second panel.
Section 5: Side Ties
Make 4 ties total (2 for front sides, 2 for back sides).
For each tie: Ch 50 (approximately 9 inches). Sl st in 2nd ch from hook and in each ch across. Fasten off, leaving a 10-inch sewing tail.
Attach the ties in pairs at each side of the bodice band, approximately midway up the bodice at row 7 or 8. Sew securely through several stitches to prevent pulling.
Section 6: Halter Neck Strap
With MC and E-4 hook, ch 160 (approximately 28 inches). Sl st in 2nd ch from hook and in each ch across. Fasten off, leaving a 10-inch sewing tail on each end.
Attach one end to the top-right front corner of the bodice band by sewing securely through 4 to 5 sts. Repeat for the top-left front corner. The strap passes up from each corner, behind the neck, and ties in a bow.
Section 7: Butterfly Applique
Use MC (lilac), CC (deep violet), and AC (white/pale lavender). Use D-3 (3.25 mm) hook for better definition.
Upper Wings (make 2):
With CC, ch 4, join with sl st to form a ring.
Round 1: Ch 3 (counts as dc), 2 dc in ring, ch 2, 3 dc in ring, ch 2, 3 dc in ring, ch 2, 3 dc in ring, ch 2, sl st to top of ch-3. (4 groups of 3 dc, 4 ch-2 sps)
Round 2: Sl st across to first ch-2 sp, ch 3, (2 dc, ch 2, 3 dc) in same ch-2 sp, ch 1, (3 dc, ch 2, 3 dc) in next ch-2 sp, ch 1, (3 dc, ch 2, 3 dc) in next ch-2 sp, ch 1, (3 dc, ch 2, 3 dc) in last ch-2 sp, ch 1, sl st to top of ch-3. Fasten off CC.
Round 3: Join AC with sl st in any ch-2 corner sp, ch 1, (sc, hdc, dc, hdc, sc) in each ch-2 sp around, sc in each dc and ch-1 sp around. Sl st to first sc. Fasten off AC.
Lower Wings (make 2):
With CC, ch 4, join with sl st to form a ring.
Round 1: Ch 3 (counts as dc), 2 dc in ring, ch 2, 3 dc in ring, ch 2, 3 dc in ring, ch 2, sl st to top of ch-3. (3 groups of 3 dc, 3 ch-2 sps)
Round 2: Sl st to first ch-2 sp, ch 3, (2 dc, ch 2, 3 dc) in same sp, ch 1, (3 dc, ch 2, 3 dc) in next sp, ch 1, (3 dc, ch 2, 3 dc) in last sp, ch 1, sl st to top of ch-3. Fasten off CC.
Round 3: Join AC, work as for upper wing Round 3. Fasten off AC.
Butterfly Body:
With CC, ch 10. Sc in 2nd ch from hook and in each ch across. (9 sc) Fasten off, leaving a sewing tail.
With MC, join at top of body and ch 6, fold and sl st to base of ch to form the left antenna loop. Ch 6, fold and sl st to same base for right antenna loop. Fasten off.
Assembling the Butterfly:
Arrange the two upper wings symmetrically with their straight edges meeting at the center. Sew together. Place the two lower wings below, slightly overlapping at center, and sew together. Lay the body piece vertically over the joined center point and sew securely through all layers. Attach the antenna at the top of the body.
Attach the completed butterfly to the center front top edge of the bodice band, approximately at row 2 down from the top edge and centered on the front width.
Size Customization Tips
To size up (36 to 38 inch bust): Add 16 stitches to the foundation chain (ch 153 instead of ch 137). Each mesh panel starts at 76 stitches and requires 36 decrease rows plus the point row.
To size down (28 to 30 inch bust): Reduce the foundation chain (ch 121) for a 120 stitch bodice band. Each mesh panel starts at 60 stitches and requires 28 decrease rows.
To adjust bodice height: Add or remove rows of plain sc. Each 2 rows adds or removes approximately 0.36 inches of height.
To adjust panel length: Add or remove decrease rows, remembering to work a WS plain row between each RS decrease row.
Finishing and Blocking
1. Weave in all remaining ends securely on the WS, weaving at least 1 inch in multiple directions.
2. Hand wash in cool water with gentle detergent. Do not wring.
3. Press out excess water gently by rolling in a clean towel.
4. Pin flat to blocking mats, stretching the mesh panels gently to open up the diamond lattice. Use rust-proof pins along the scallop border edge to define each scallop point.
5. Allow to dry fully (12 to 24 hours) before unpinning.
Care Instructions
For acrylic yarn versions: Machine wash cold, gentle cycle, in a mesh laundry bag. Lay flat to dry. Do not tumble dry, iron, or dry clean.
For cotton or cotton-blend versions: Hand wash in cool water. Lay flat to dry. Light ironing on the cotton setting with a damp cloth is acceptable.
Store flat or loosely folded. Avoid hanging on a hanger as the mesh panels may stretch over time.
You Made It!
I really hope you love making this Lavender Dreams Butterfly Halter Top crochet pattern as much as I loved designing it. Every time I wear mine, I get the nicest compliments. The butterfly detail really does catch people’s attention in the best way.
Thank you so much for choosing this pattern and trusting me with your crochet time. If you make this top, I would absolutely love to see it! Tag me on Instagram or share your photos in my Facebook group. Seeing your creations honestly makes my whole week.
If this pattern is calling your name, go ahead and pin it to your Pinterest boards so you can find it when you are ready to start. And please drop a comment below if you make one. I love hearing about your color choices and any tweaks you try. Happy hooking, friend!
