
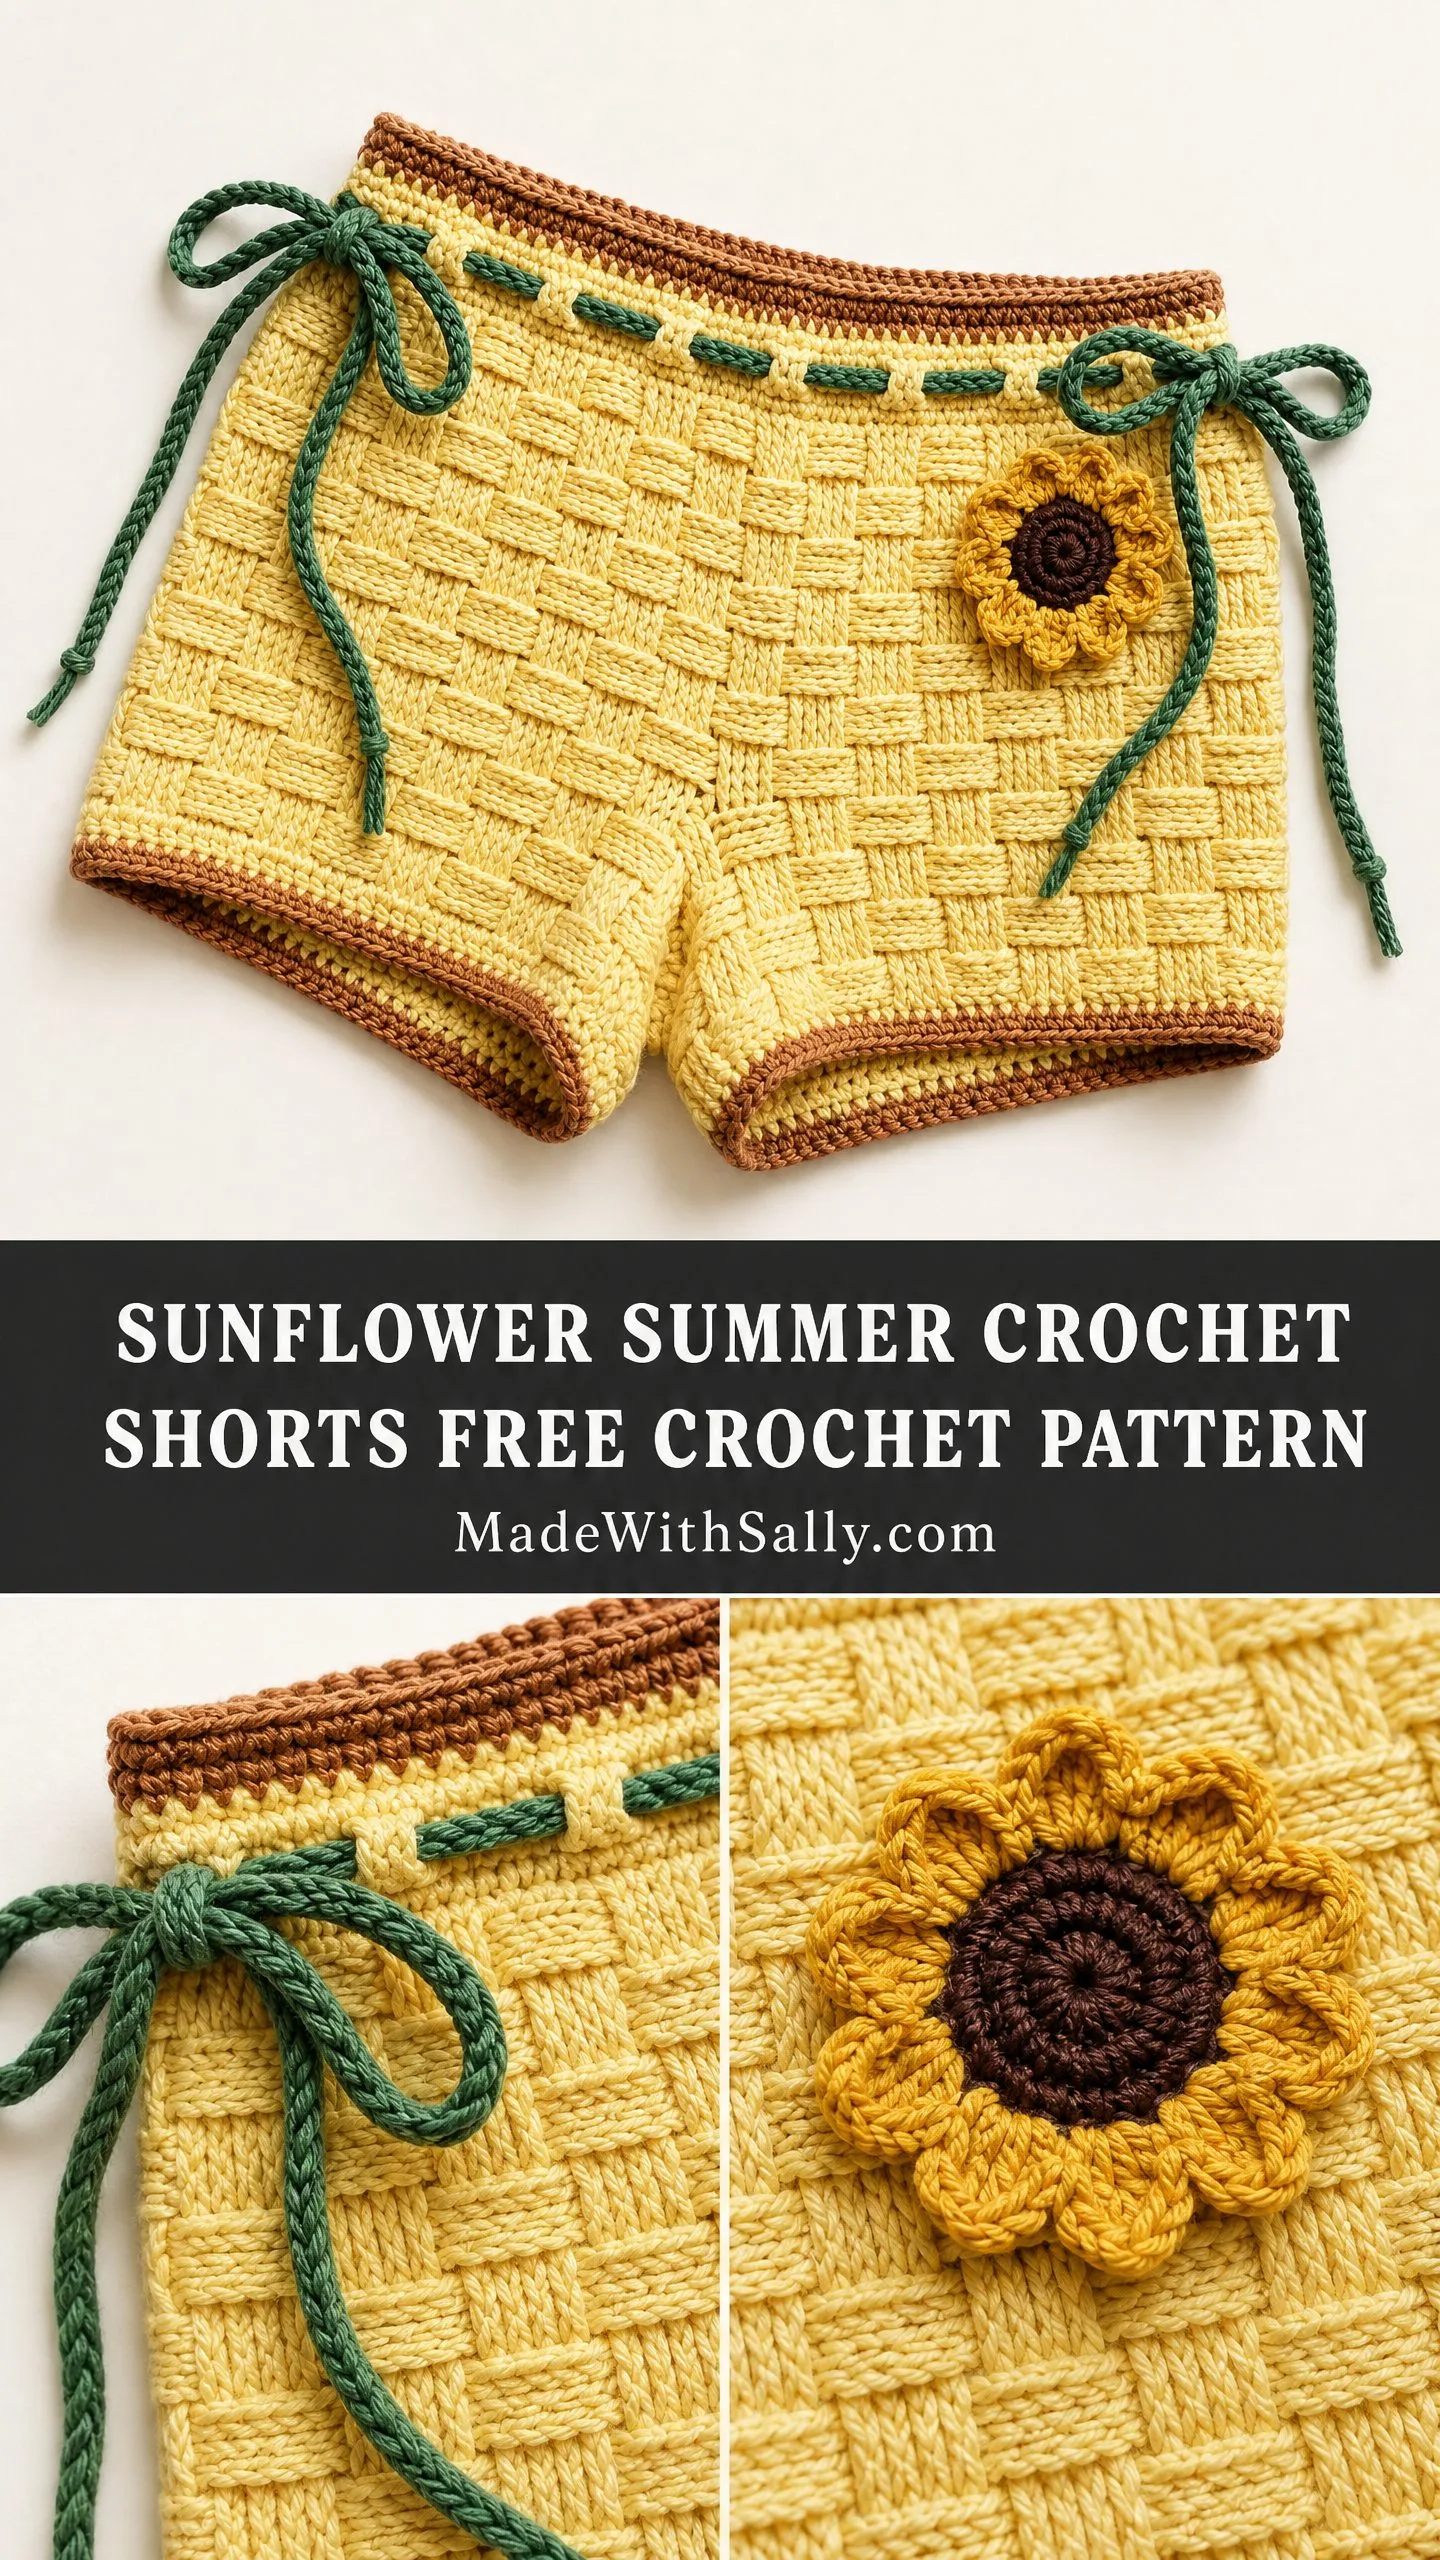
I’ve been looking for the perfect summer crochet project for months, and this is my absolute favourite find. These sunflower summer crochet shorts combine everything I love about handmade clothing: a gorgeous basket-weave texture, cheerful retro vibes, and that satisfying feeling of wearing something you created yourself.
If you’ve never crocheted a garment before, this might seem ambitious. But trust me. The construction is simpler than it looks, and I’m going to walk you through every single step.
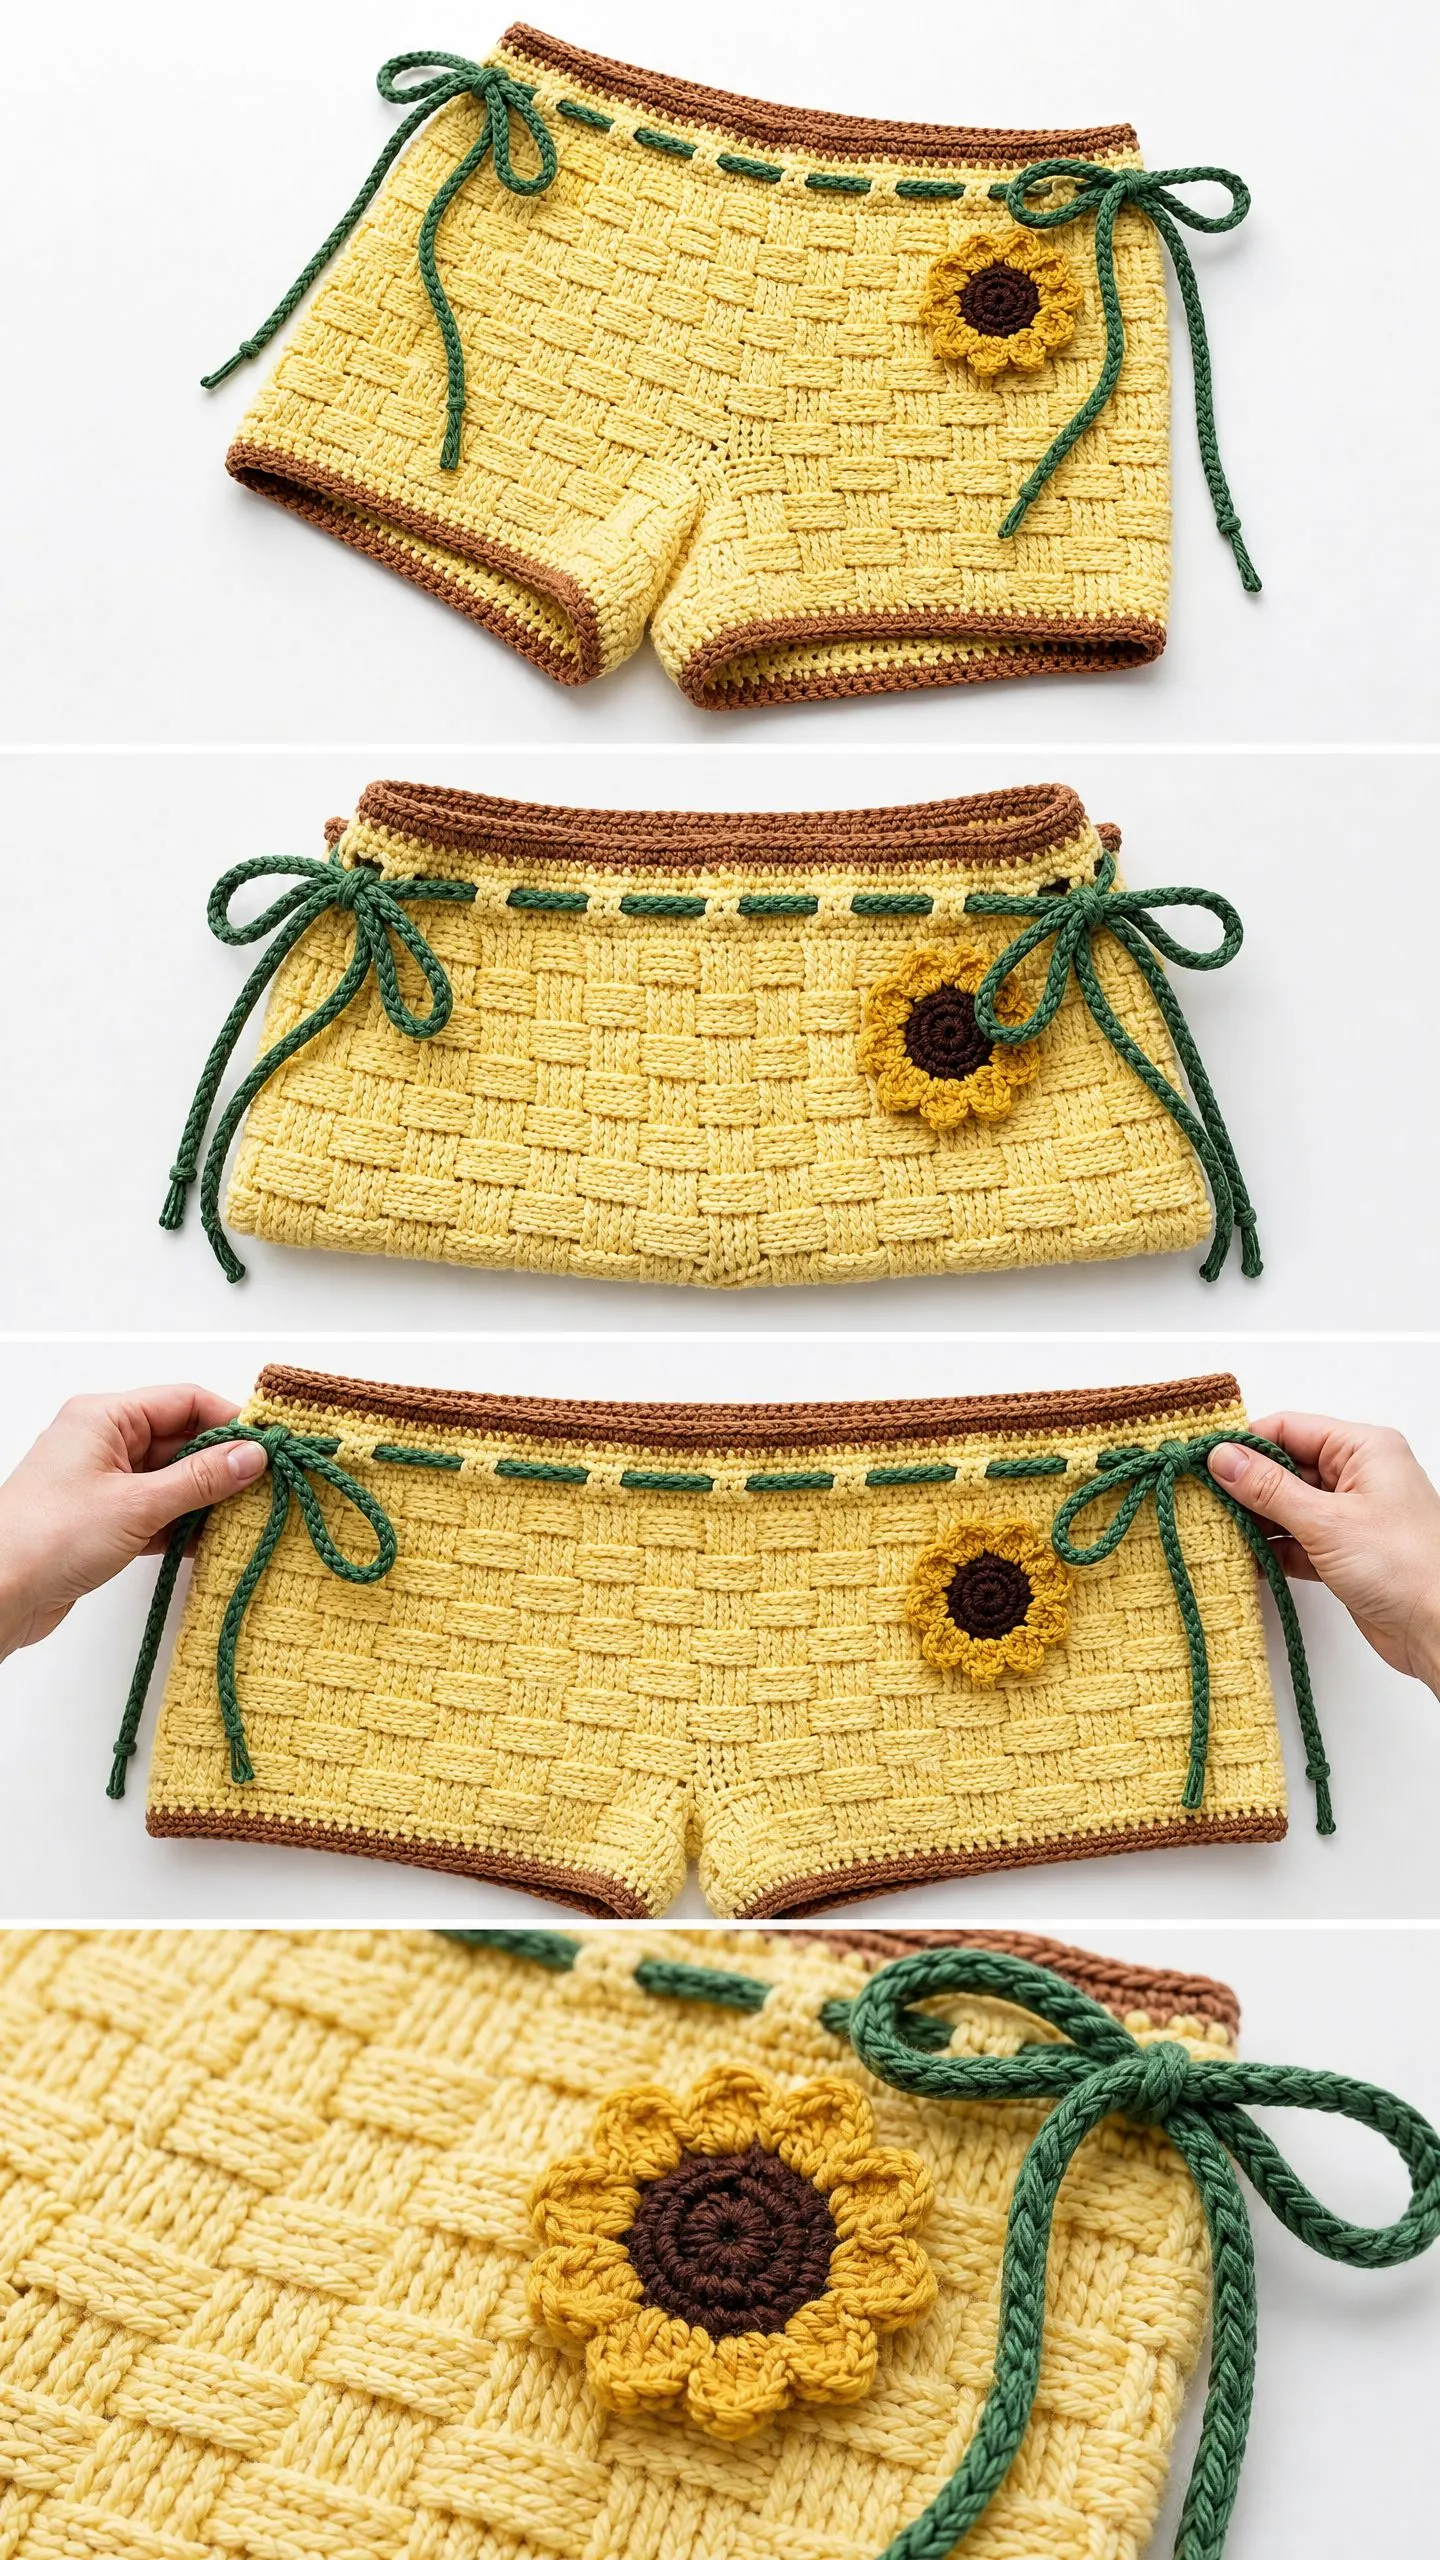
The butter yellow colour paired with rust trim and a sweet little sunflower applique gives these shorts such a vintage summer aesthetic. They’re the kind of project that makes people ask, "Wait, you MADE those?"
Why You’ll Love This Crochet Shorts Pattern
These shorts are worked as two flat panels, then seamed together. That means no complicated shaping while you’re working in the round. No trying to increase and decrease while keeping track of a complex stitch pattern. You just crochet two rectangles with a bit of shaping at the crotch, sew them together, and add the finishing touches.
The basket-weave stitch creates that beautiful woven texture you see in the photos. It looks intricate, but it’s actually just two stitches repeated in a specific arrangement. If you can do a double crochet, you can learn the post stitches that make this magic happen.
The adjustable drawstring waistband means you have some flexibility with fit, and the removable sunflower applique can be pinned on or taken off for washing. Smart details like these make a big difference in a wearable project.
Skill Level
This crochet pattern is rated intermediate. You should be comfortable with:
If you’ve made a hat or a simple bag before, you’re ready for this. The individual techniques aren’t difficult. There are just several of them combined in one project.
Finished Measurements
The pattern is written for size Small, with Medium and Large in parentheses formatted as S (M, L).
Waist circumference (relaxed): 26 (30, 34) inches or 66 (76, 86.5) cm
Hip circumference (at widest): 32 (36, 40) inches or 81.5 (91.5, 101.5) cm
Total rise (waistband top to crotch): 10 (10.5, 11) inches or 25.5 (26.5, 28) cm
Inseam length: 2.5 (2.5, 3) inches or 6.5 (6.5, 7.5) cm
Leg opening circumference: 18 (20, 22) inches or 45.5 (51, 56) cm
The drawstring gives you approximately 4 inches of adjustment range on either side, so don’t stress too much about getting the waist measurement exactly perfect.
Materials Needed
Yarn A (main colour, butter yellow): Worsted weight, approximately 450 (520, 600) yards or 410 (475, 550) meters
Yarn B (trim colour, rust/caramel): Worsted weight, approximately 80 (95, 110) yards or 73 (87, 101) meters
Yarn C (drawstring and accent, forest green): Worsted weight, approximately 120 (130, 140) yards or 110 (119, 128) meters
Yarn D (sunflower center, dark brown): Worsted weight, approximately 15 yards or 14 meters
Hook: US size J / 6.0 mm for main fabric, bands, and sunflower
Hook: US size I / 5.5 mm for waistband only (optional, for a firmer edge)
Other supplies: Tapestry needle, 6 stitch markers, 2 locking stitch markers or safety pins, brooch pin or sewing needle and thread, scissors
Yarn Suggestions
Lion Brand Wool-Ease works beautifully for this project. The blend of 80% acrylic and 20% wool gives excellent stitch definition for the post stitches. Look for Butterscotch, Caramel, and Avocado colourways.
Paintbox Yarns Simply DK held double throughout gives you a worsted weight equivalent with a huge colour range. Banana Cream, Vintage Pink, and Grass Green would be perfect.
Cascade 220 in 100% Peruvian Highland Wool creates a slightly firmer fabric with excellent blocking properties. Try Lemon, Ginger, and Basil.
Avoid fuzzy, textured, or bouclé yarns. They’ll obscure that beautiful basket-weave texture you’re working so hard to create.
Gauge
In basket-weave pattern with J hook:
16 stitches = 4 inches / 10 cm
12 rows = 4 inches / 10 cm
In single crochet:
16 sc = 4 inches / 10 cm
18 rows = 4 inches / 10 cm
Gauge swatch instructions: Chain 22 with Yarn A and your J hook. Work the basket-weave pattern for 16 rows. Block lightly. Measure the center 4 inches. If your swatch is too small, go up a hook size. If it’s too big, go down a hook size.
Please, please check your gauge. This is a garment that needs to fit your body. Skipping the swatch will lead to disappointment, and nobody wants that.
Abbreviations
ch: chain
dc: double crochet (yarn over, insert hook, pull up loop, yarn over and pull through 2 loops twice)
sc: single crochet (insert hook, pull up loop, yarn over and pull through both loops)
sc2tog: single crochet two together, a decrease (insert hook in first stitch, pull up loop, insert hook in second stitch, pull up loop, yarn over and pull through all 3 loops)
sl st: slip stitch (insert hook, pull up loop and through loop on hook in one motion)
FPdc: front post double crochet (explained in detail below)
BPdc: back post double crochet (explained in detail below)
st(s): stitch(es)
RS: right side
WS: wrong side
t-ch: turning chain
rep: repeat
sk: skip
pm: place marker
Special Stitches Explained
Front Post Double Crochet (FPdc)
This stitch wraps around the vertical "post" of a stitch from the previous row, creating a raised texture on the front of your work.
Yarn over. Insert your hook from front to back to front around the post (the stem) of the stitch in the row below. You’re going around the outside of the stitch rather than into the top loops. Yarn over and pull up a loop. You now have 3 loops on your hook. Yarn over and draw through 2 loops. Yarn over and draw through the remaining 2 loops. One FPdc complete.
Back Post Double Crochet (BPdc)
This is the opposite of FPdc. It wraps around the post from behind, making that stitch recede.
Yarn over. Insert your hook from back to front to back around the post of the stitch in the row below. Yarn over and pull up a loop. Yarn over and draw through 2 loops. Yarn over and draw through the remaining 2 loops. One BPdc complete.
The Basket-Weave Concept
You’ll work blocks of 4 FPdc alternating with blocks of 4 BPdc across each row. Every 4 rows, the blocks switch positions. This creates the woven appearance. The front post stitches push forward while the back post stitches recede, and when you alternate their positions, you get that gorgeous basket texture.
Twisted Chain Cord
For the drawstrings, you’ll make a chain to the desired length, then without turning, work a slip stitch into the back bump of every chain back to the beginning. This creates a firm, rounded cord that looks much more polished than a plain chain.
Pattern Notes Before You Begin
The shorts are made from two identical flat panels, one for the front and one for the back. After crocheting both panels, you’ll seam the sides and inseam, then pick up stitches around the waist and leg openings to add the bands.
The chain 3 at the beginning of every basket-weave row counts as the first double crochet. This is important for your stitch counts.
When working post stitches, always skip the stitch at the base of the post stitch in the current row. The post stitch itself replaces that skipped stitch.
The stitch count for each panel should be a multiple of 8 plus 2. Size S uses 66 stitches, Size M uses 74 stitches, and Size L uses 82 stitches.
Step by Step Crochet Pattern Instructions
Front Panel
Foundation chain: Using Yarn A and J hook, ch 68 (76, 84).
Row 1 (RS): Dc in the 4th ch from hook (beginning ch-3 counts as first dc), dc in each ch across. Turn. 66 (74, 82) dc
Row 2 (WS, establish basket-weave, Block A positions):
Ch 3 (counts as first dc), turn.
Work BPdc around each of next 3 sts.
Work FPdc around each of next 4 sts, work BPdc around each of next 4 sts repeat across to last 4 sts before t-ch.
Work FPdc around each of next 3 sts.
Dc in top of t-ch. Turn. 66 (74, 82) sts
Row 3 (RS):
Ch 3, turn.
Work FPdc around each of next 3 sts.
Work BPdc around each of next 4 sts, work FPdc around each of next 4 sts repeat across to last 4 sts before t-ch.
Work BPdc around each of next 3 sts.
Dc in top of t-ch. Turn. 66 (74, 82) sts
Row 4 (WS): Repeat Row 2. 66 (74, 82) sts
Row 5 (RS): Repeat Row 3. 66 (74, 82) sts
This completes the first basket-weave block set. Now you’ll switch the block positions.
Row 6 (WS, Block B positions):
Ch 3, turn.
Work FPdc around each of next 3 sts.
Work BPdc around each of next 4 sts, work FPdc around each of next 4 sts repeat across to last 4 sts before t-ch.
Work BPdc around each of next 3 sts.
Dc in top of t-ch. Turn. 66 (74, 82) sts
Row 7 (RS):
Ch 3, turn.
Work BPdc around each of next 3 sts.
Work FPdc around each of next 4 sts, work BPdc around each of next 4 sts repeat across to last 4 sts before t-ch.
Work FPdc around each of next 3 sts.
Dc in top of t-ch. Turn. 66 (74, 82) sts
Row 8 (WS): Repeat Row 6. 66 (74, 82) sts
Row 9 (RS): Repeat Row 7. 66 (74, 82) sts
One full basket-weave repeat is complete. Continue repeating Rows 2 through 9 until the panel measures 7.5 (8, 8.5) inches or 19 (20.5, 21.5) cm from the foundation chain. End after a Row 5 or Row 9.
Crotch Curve Shaping
Transition row (WS): With Yarn A, work 1 sc in each st across. Turn. 66 (74, 82) sc
Decrease Row 1 (RS): Ch 1, sc2tog over first 2 sts, sc in each st to last 2 sts, sc2tog. Turn. 64 (72, 80) sc
Decrease Row 2 (WS): Ch 1, sc2tog, sc in each st to last 2 sts, sc2tog. Turn. 62 (70, 78) sc
Decrease Row 3 (RS): Ch 1, sc2tog, sc in each st to last 2 sts, sc2tog. Turn. 60 (68, 76) sc
Decrease Row 4 (WS): Ch 1, sc2tog, sc in each st to last 2 sts, sc2tog. Turn. 58 (66, 74) sc
Work 2 (2, 3) rows even in sc with no shaping. 58 (66, 74) sc
Fasten off Yarn A. Front Panel complete.
Back Panel
Work exactly the same as the Front Panel. You now have two identical panels.
Assembly
Place front and back panels together with wrong sides facing each other. Using Yarn A and a tapestry needle, seam the two side edges together from the waist edge down to the bottom of the basket-weave section. Do not seam the sc crotch rows yet. Complete both side seams.
With right sides of one leg facing together, fold the shorts so the front inseam meets the back inseam. Seam the inseam from the crotch center point downward to the bottom leg edge. Repeat for the other leg.
Close the curved crotch seam where the two panels meet at the center. Weave in all ends.
Waistband
Join Yarn B to the top edge at one side seam with a sl st, RS facing.
Round 1 (RS): Ch 1, work sc evenly around the entire waist edge, placing 1 sc per dc. Sl st to first sc to join. Do not turn. 132 (148, 164) sc
Round 2 (RS): Ch 1, sc in each sc around. Sl st to join. 132 (148, 164) sc
Round 3 (RS, Yarn C eyelet row): Join Yarn C.
Ch 1, sc in first sc.
Ch 1, sk 1 sc, sc in next sc repeat around, ending with sl st to first sc. 66 (74, 82) sc and 66 (74, 82) ch-1 spaces
Place markers at the side seam eyelets.
Round 4 (RS): With Yarn B, join to first sc.
Ch 1, sc in sc, sc in ch-1 sp around. Sl st to join. 132 (148, 164) sc
Round 5 (RS): Ch 1, sc in each sc around. Sl st to join. 132 (148, 164) sc
Round 6 (RS): Working in back loops only, sl st in each sc around. Sl st to join. Fasten off Yarn B.
Leg Bands (make 2)
Join Yarn B to the leg opening at the inseam, RS facing.
Round 1 (RS): Ch 1, sc evenly around the leg opening. Target stitch count is 72 (80, 88) sc. Sl st to join. 72 (80, 88) sc
Round 2 (RS): Ch 1, sc in each sc around. Sl st to join. 72 (80, 88) sc
Round 3 (RS): Ch 1, sc in each sc around. Sl st to join. 72 (80, 88) sc
Fasten off. Repeat for second leg.
Drawstring Cords (make 2)
Using Yarn C and J hook, ch 85 (90, 95). Without turning, sl st in the back bump of every ch from the hook back to the starting point. Fasten off, leaving a 6 inch tail at each end.
Thread one cord through the eyelet round from the right side seam, all the way around and back out the same opening. Both ends emerge at the right side. Tie in a bow.
Repeat with the second cord through the left side seam.
Sunflower Applique
Center disk: Using Yarn D and J hook, make a magic ring.
Round 1: Ch 1, work 8 sc into the ring. Sl st to first sc to join. 8 sc
Round 2: Ch 1, work 2 sc in each sc around. Sl st to join. 16 sc
Round 3: Ch 1, sc in each sc around. Sl st to join. 16 sc
Fasten off Yarn D. Join Yarn A.
Petal round (Round 4): Working into each sc of Round 3, work one petal in each stitch:
Sl st into sc, ch 3, work 3 dc into same sc, ch 3, sl st into same sc in each of the 16 sc around.
Fasten off Yarn A. 16 petals
Attach a brooch pin to the wrong side of the sunflower, or sew directly to the front right hip of the shorts about 2 inches below the waistband.
Blocking and Finishing
Weave in all remaining ends on the wrong side, working through at least 2 inches of stitches in different directions.
For cotton or cotton-blend yarns, wet block by soaking in cool water for 20 minutes. Gently squeeze out excess water. Lay flat on a blocking mat, pin to measurements, and let dry completely.
For acrylic or wool yarns, steam block by holding a steam iron 1 inch above the fabric surface. Pin to shape and let cool completely before removing pins.
Care Instructions
Hand wash in cool water with gentle detergent. Do not wring. Lay flat to dry away from direct sunlight. Do not tumble dry or iron directly. Store flat or loosely rolled to prevent stretching.
Time to Make These Shorts Your Own
This crochet shorts pattern takes about 12 to 18 hours for an experienced intermediate crocheter. Add a few more hours if you’re newer to post stitches or want to take your time with the finishing details. The result is a one of a kind summer garment that nobody else will have.
The sunflower applique is optional, of course. You could swap it for a different flower, add multiple smaller blooms, or leave the shorts plain. You could also play with the colour palette entirely. Imagine these in cream with burgundy trim, or pale blue with white accents.
If you want to pin this project to your Pinterest boards for later, please do. I love seeing these patterns get saved and shared. And if you make these sunflower summer crochet shorts, I would absolutely love to see your finished project. Drop a comment below or tag me on Instagram or Facebook with your photos. There’s nothing better than seeing a pattern come to life in someone else’s hands.
