
When I sat down to design this dress, I had one goal in mind. I wanted to create something that would make people gasp when they saw it. A statement piece that looks like it belongs in a boutique window but is actually achievable for a dedicated home crocheter.
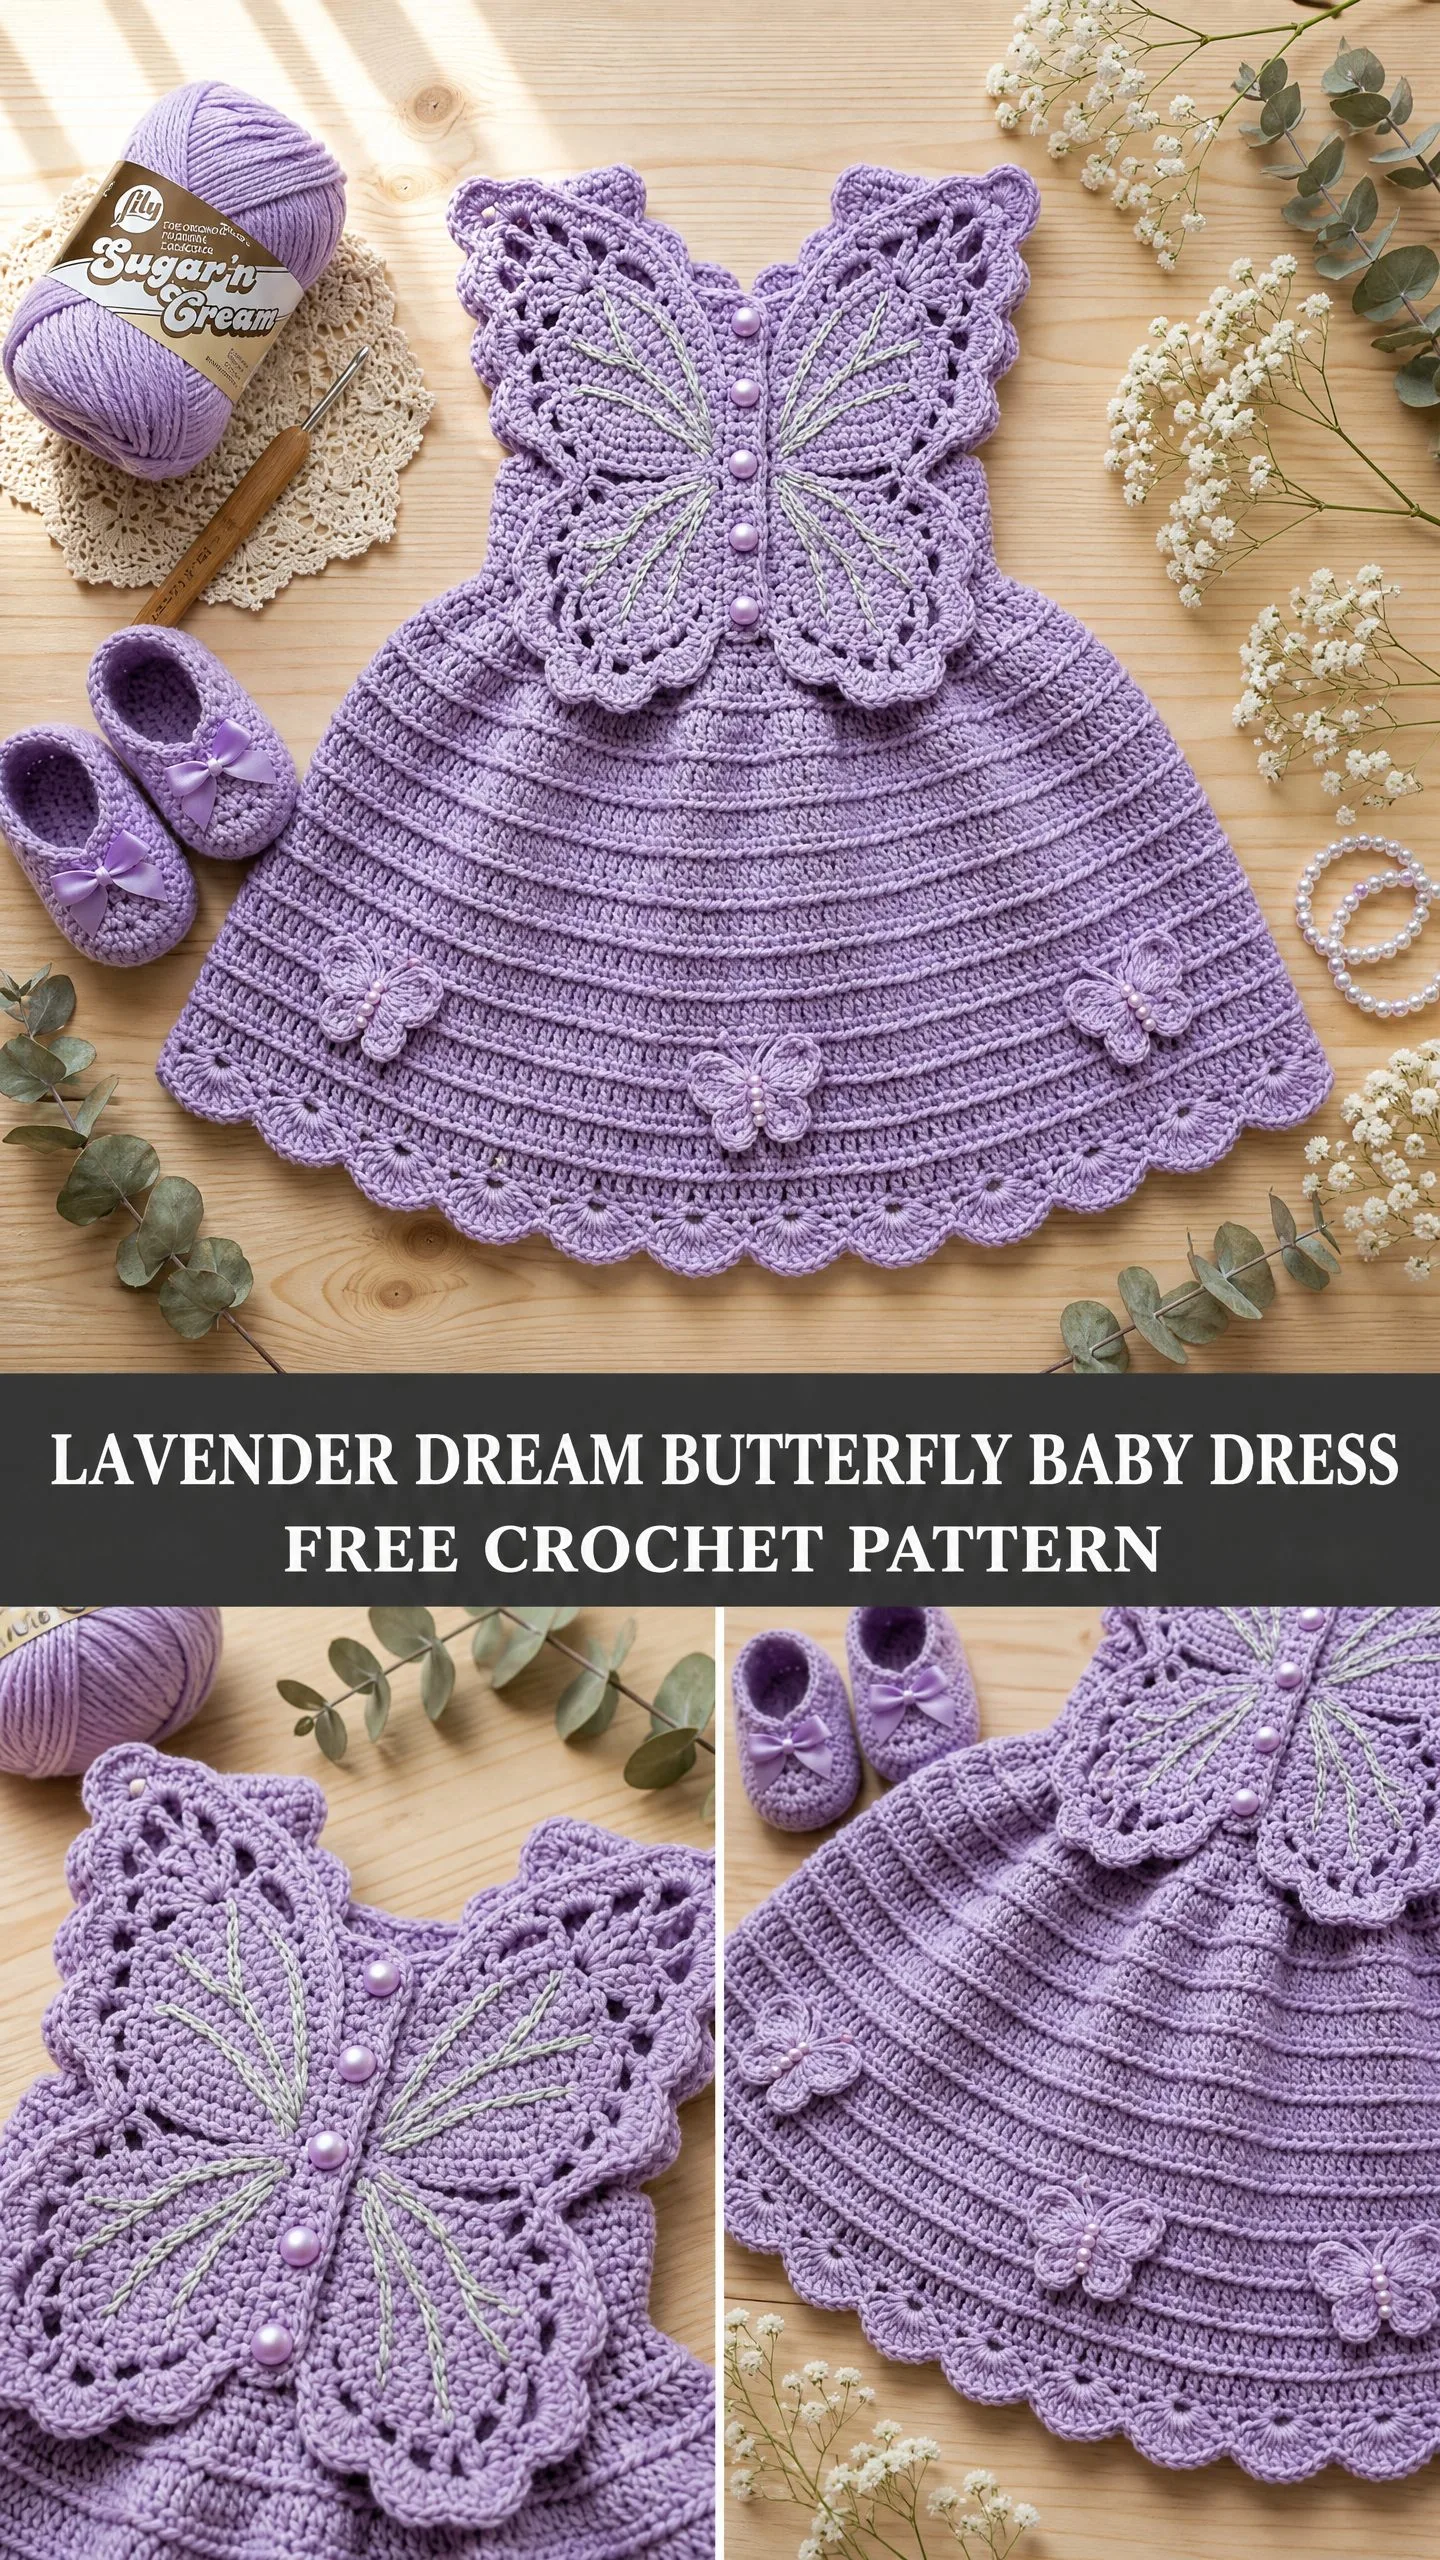
I made deliberate choices throughout the design process. The dramatic butterfly bodice needed to be worked separately so you could really focus on those lace wing details without juggling the whole garment. The A-line skirt had to flare just right, using simple half double crochet with evenly spaced increases. And those tiny butterfly appliques scattered along the hem? They needed to be quick to work up so you would actually want to make all five of them.
I am SO pleased with how this turned out. The way the upper wings extend to form the shoulder straps, the pearl bead accents down the butterfly body, that gorgeous scallop edging at the hem. This is the kind of heirloom piece that gets passed down through generations.
About This Baby Dress Crochet Pattern
This lavender butterfly baby dress is a show-stopping project for anyone who loves detailed needlework. The construction method is modular, meaning you work each piece separately and then assemble everything at the end. This approach makes the project much less overwhelming than it might look at first glance.
The dress features a wide A-line skirt worked flat from the waist down, a large butterfly motif that serves as the entire front bodice, and delicate scallop lace edging. Small butterfly appliques add extra charm to the finished piece. Pearl button closures run up the center back for easy dressing.
Skill level: Advanced beginner to intermediate. If you can work basic stitches and follow a pattern carefully, you can absolutely make this dress.
Time estimate: Plan for 14 to 20 hours if you are experienced. First-time makers should budget 25 to 30 hours.
Finished Measurements
This pattern fits size 6 to 12 months:
Materials You Will Need
Yarn: Worsted weight (weight category 4), 100% cotton or cotton-acrylic blend. You will need approximately 400 yards / 366 meters total in a single lavender color.
The yarn shown in the photos is Lily Sugar n Cream, which is a 100% cotton worsted weight yarn with 95 yards per 2.5 oz ball. You will need approximately 5 balls.
Other great options include Lion Brand 24/7 Cotton (approximately 3 balls needed) or any smooth worsted weight yarn that achieves gauge. Avoid fuzzy or textured yarns because the butterfly lace details will lose their definition.
Hook: US size G-6 / 4.0 mm for all main sections. You may use a US size F-5 / 3.75 mm for the small butterfly appliques if you want them slightly firmer.
Notions:
Gauge
With US G-6 / 4.0 mm hook and worsted weight cotton:
16 hdc x 12 rows = 4 inches / 10 cm worked flat in half double crochet (hdc), turning chain counts as first hdc.
Please check your gauge before beginning. The skirt circumference and length depend on accurate gauge. If your swatch is larger than stated, go down one hook size. If smaller, go up one hook size.
For the lace bodice sections, one shell (5 dc into same stitch) measures approximately 1 inch / 2.5 cm across and 0.5 inch / 1.25 cm tall.
Abbreviations and Stitch Definitions
Let me walk you through every abbreviation you will encounter. I will explain each one in plain English so there is no confusion.
Special Stitches for This Crochet Tutorial
These special stitches create the beautiful lace effects throughout the dress.
Shell Stitch: Work 5 double crochet (dc) all into the same stitch or space. This creates a lovely fan shape. When the pattern says "shell in next sp," insert your hook into the chain space indicated and complete all 5 dc there.
V-Stitch: Work (dc, ch 2, dc) all into the same stitch or space. This creates a V shape with a chain-2 space at its center.
Picot: Ch 3, slip stitch into the first of those 3 chains. This creates a small decorative loop that adds elegance to edgings.
Puff Stitch: (Yo, insert hook in stitch, pull up a loop to height of a dc) 4 times in the same stitch, yo, pull through all 9 loops on hook, ch 1 to lock. This creates a raised oval bubble perfect for the butterfly body.
Scallop Edging: Working along a foundation edge, sc in first st, sk 2 sts, (shell in next st, sk 2 sts, sc in next st) repeat across.
Pattern Notes Before You Begin
Read through these notes before starting. They will save you confusion later.
1. The skirt is worked flat (back and forth in rows) beginning from the waist and expanding outward to the hem.
2. The dress has a center back opening for ease of dressing. Buttons and button loops close the back.
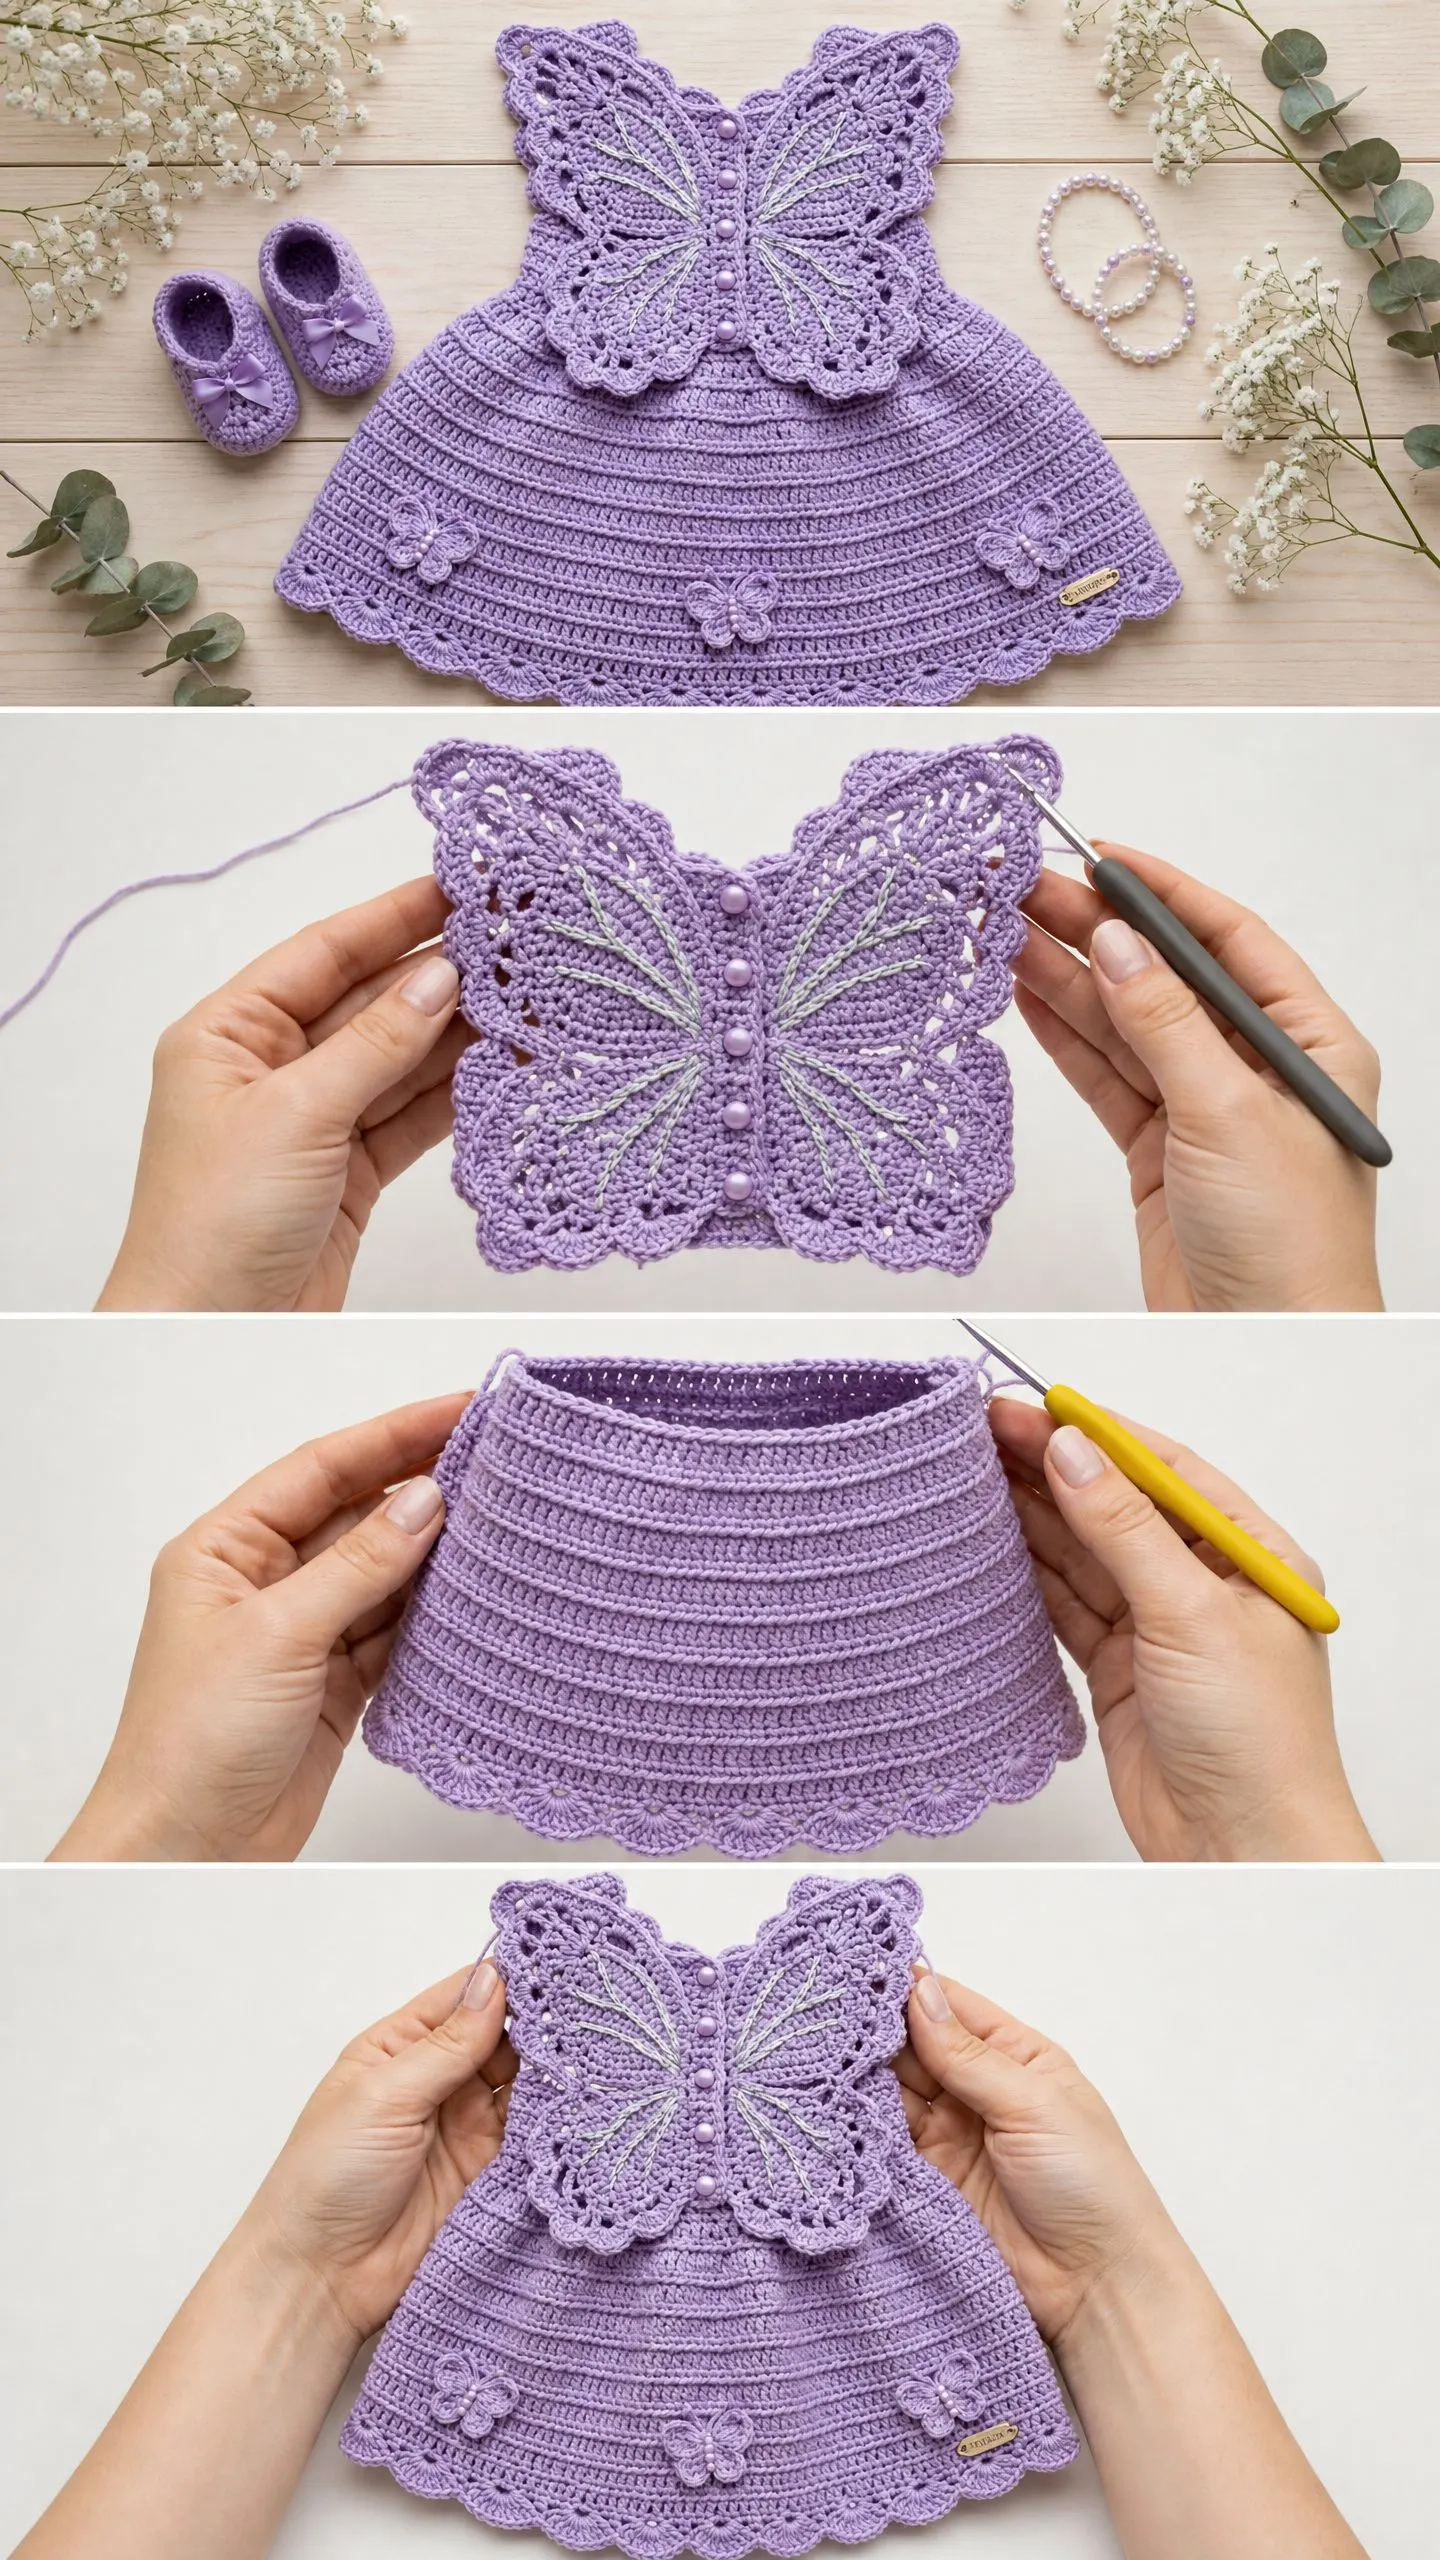
3. The bodice butterfly is worked as a separate flat piece, then overlaid onto the upper skirt and seamed at the sides and waist.
4. The upper butterfly wings extend above the bodice panel to form the shoulder straps. They do not connect at the shoulders but frame the neckline on each side.
5. All turning chains are noted. The t-ch at the beginning of an hdc row counts as 1 hdc unless explicitly stated otherwise.
6. Stitch counts in parentheses at the end of each row reflect total working stitches.
7. Right side is the public/outside face of the garment.
8. Block all pieces before assembly. The lace bodice butterfly opens up dramatically when blocked wet.
9. The small butterfly appliques are pinned in place before sewing so you can adjust their placement visually.
Step by Step Instructions
Section 1: The Skirt
The skirt is worked from the waist down. You are beginning with a chain that forms the waist edge.
Foundation: ch 74.
Row 1 (RS): hdc in 3rd ch from hook and in each ch across. (72 hdc) The turning chain counts as 1 hdc here and throughout unless noted.
Row 2 (WS): ch 2, turn. hdc in each st across. (72 hdc)
Row 3 (RS): ch 2, turn. hdc in first 8 sts, inc in next st, (hdc in next 8 sts, inc in next st) 7 times. Check: 8 increases added. (80 hdc)
Row 4 (WS): ch 2, turn. hdc in each st across. (80 hdc)
Row 5 (RS): ch 2, turn. hdc in first 9 sts, inc in next st, (hdc in next 9 sts, inc in next st) 7 times. 8 increases. (88 hdc)
Row 6 (WS): ch 2, turn. hdc in each st across. (88 hdc)
Row 7 (RS): ch 2, turn. hdc in first 10 sts, inc in next st, (hdc in next 10 sts, inc in next st) 7 times. 8 increases. (96 hdc)
Row 8 (WS): ch 2, turn. hdc in each st across. (96 hdc)
Row 9 (RS): ch 2, turn. hdc in first 11 sts, inc in next st, (hdc in next 11 sts, inc in next st) 7 times. 8 increases. (104 hdc)
Row 10 (WS): ch 2, turn. hdc in each st across. (104 hdc)
Row 11 (RS): ch 2, turn. hdc in first 12 sts, inc in next st, (hdc in next 12 sts, inc in next st) 7 times. 8 increases. (112 hdc)
Row 12 (WS): ch 2, turn. hdc in each st across. (112 hdc)
Row 13 (RS): ch 2, turn. hdc in first 13 sts, inc in next st, (hdc in next 13 sts, inc in next st) 7 times. 8 increases. (120 hdc)
Row 14 (WS): ch 2, turn. hdc in each st across. (120 hdc)
Row 15 (RS): ch 2, turn. hdc in first 14 sts, inc in next st, (hdc in next 14 sts, inc in next st) 7 times. 8 increases. (128 hdc)
Row 16 (WS): ch 2, turn. hdc in each st across. (128 hdc)
Row 17 (RS): ch 2, turn. hdc in first 15 sts, inc in next st, (hdc in next 15 sts, inc in next st) 7 times. 8 increases. (136 hdc)
Row 18 (WS): ch 2, turn. hdc in each st across. (136 hdc)
Row 19 (RS): ch 2, turn. hdc in first 16 sts, inc in next st, (hdc in next 16 sts, inc in next st) 7 times. 8 increases. (144 hdc)
Row 20 (WS): ch 2, turn. hdc in each st across. (144 hdc)
Row 21 (RS): ch 2, turn. hdc in first 17 sts, inc in next st, (hdc in next 17 sts, inc in next st) 7 times. 8 increases. (152 hdc)
Row 22 (WS): ch 2, turn. hdc in each st across. (152 hdc)
Row 23 (RS): ch 2, turn. hdc in first 18 sts, inc in next st, (hdc in next 18 sts, inc in next st) 7 times. 8 increases. (160 hdc)
Row 24 (WS): ch 2, turn. hdc in each st across. (160 hdc)
Do not fasten off. You will return to work the hem edging after assembly.
CHECKPOINT: After Row 24, your skirt should measure approximately 8 inches / 20 cm from foundation chain to current row edge. Width at Row 24 should be approximately 16 to 17 inches / 40.5 to 43 cm laid flat.
Set the skirt aside. Fasten off if you prefer, leaving a 12-inch tail for joining later.
Section 2: The Bodice Butterfly
The bodice butterfly is the centerpiece of the dress. It consists of four wing sections worked flat, joined at a center body column, then edged. The butterfly sits on the front bodice with the upper wings extending up to form straps.
Bodice Center Body Column
Ch 7.
Row 1: sc in 2nd ch from hook and in each ch across. (6 sc)
Rows 2 through 16: ch 1, turn. sc in each st across. (6 sc)
After Row 16, you have a narrow rectangle approximately 5.5 inches / 14 cm tall. This is the butterfly body. Fasten off and set aside.
Upper Right Wing
Foundation: Ch 37.
Row 1 (RS): dc in 4th ch from hook, dc in next 2 ch, (sk 2 ch, shell in next ch, sk 2 ch, dc in next 3 ch) 4 times. (4 shells, 5 groups of 3 dc) Total working sts: (35 dc)
Row 2 (WS): ch 3, turn. dc in each dc and shell st across, working 3 dc across each shell top (compress to 3 dc on the return row to maintain shape). (35 dc)
Row 3 (RS): ch 3, turn. dc in first 2 dc, (sk 2 dc, shell in next dc, sk 2 dc, dc in next 3 dc) across, end dc in last 2 dc. (4 shells) (35 dc)
Row 4 (WS): rep Row 2. (35 dc)
Row 5 (RS): ch 3, turn. dc2tog over first 2 sts (decrease at wing tip edge), dc in next dc, (sk 2, shell in next dc, sk 2, dc in next 3 dc) 3 times, sk 2, shell in next dc, sk 2, dc in next 2 dc, dc2tog over last 2 sts. (33 dc, 4 shells inside)
Row 6 (WS): ch 3, turn. dc2tog, dc across compressing shells to 3 dc, dc2tog at end. (31 dc)
Row 7 (RS): ch 3, turn. dc2tog, dc in next dc, (sk 2, shell in next dc, sk 2, dc in next 3 dc) across adjusting to fit 31 sts with 3 shells, dc2tog at end. (29 dc)
Row 8 (WS): ch 3, turn. dc2tog, dc across (compress shells), dc2tog. (27 dc)
Row 9 (RS): ch 3, turn. dc2tog, dc in next dc, (sk 2, shell in next dc, sk 2, dc in next 2 dc) across for 2 shells, end dc2tog. (25 dc)
Row 10 (WS): ch 3, turn. dc2tog, dc across, dc2tog. (23 dc)
Row 11 (RS): ch 3, turn. dc2tog, (sk 2, shell in next dc, sk 2, dc in next 3 dc) once, (sk 1, shell in next dc, sk 1, dc in next 2 dc) once, dc2tog. (21 dc, 2 shells)
Row 12 (WS): ch 3, turn. dc2tog, dc across, dc2tog. (19 dc)
Do not fasten off. Proceed to wing edging.
Upper Left Wing
Work exactly as Upper Right Wing. The mirroring is achieved during assembly by placing the left wing on the opposite side of the body column.
Lower Right Wing
Foundation: Ch 25.
Row 1 (RS): dc in 4th ch from hook, dc in next dc, (sk 2 ch, shell in next ch, sk 2 ch, dc in next 3 ch) twice, sk 2 ch, shell in next ch, sk 2 ch, dc in last 2 ch. (3 shells, 4 anchor groups) (24 dc total)
Row 2 (WS): ch 3, turn. dc2tog, dc across compressing shells to 3 dc, dc2tog. (22 dc)
Row 3 (RS): ch 3, turn. dc2tog, dc in next dc, (sk 2, shell in next dc, sk 2, dc in next 3 dc) twice, dc2tog. (20 dc, 2 shells)
Row 4 (WS): ch 3, turn. dc2tog, dc across, dc2tog. (18 dc)
Row 5 (RS): ch 3, turn. dc2tog, dc in next dc, (sk 2, shell in next dc, sk 2, dc in next 3 dc) once, sk 2, shell in next dc, dc2tog. (16 dc, 2 shells)
Row 6 (WS): ch 3, turn. dc2tog, dc across, dc2tog. (14 dc)
Row 7 (RS): ch 3, turn. dc2tog, sk 2, shell in next dc, sk 2, dc in next dc, shell in next dc, dc2tog. (12 dc, 2 shells)
Row 8 (WS): ch 3, turn. dc2tog, dc across, dc2tog. (10 dc)
Row 9 (RS): ch 3, turn. dc2tog, dc in next 6 dc, dc2tog. (8 dc)
Do not fasten off. Proceed to lower wing edging.
Lower Left Wing
Work as Lower Right Wing.
Wing Edging
All four wing pieces receive the same scallop/shell edging before assembly.
With RS facing, join yarn at the corner of any wing at the lowest point of the piece.
Round 1 (edging): ch 1, sc evenly around all edges of the wing. Work 1 sc per dc post, 2 sc across each shell top, and 3 sc in each corner point. When you reach the flat base edge, work 1 sc per foundation chain stitch. Join with sl st to first sc. Adjust your count so it is divisible by 6. For the upper wing, aim for approximately 96 sc. For the lower wing, aim for approximately 60 sc.
Round 2 (scallop shell edging): ch 1, (sc in first sc, sk 2 sc, shell in next sc, sk 2 sc) around. Join with sl st to first sc.
Round 3 (picot finish, upper wings only): ch 1, sc in first st, (sc in each dc of shell, picot after 3rd dc of shell, sc in remaining shell dc, sc in sc between shells) around. Join and fasten off.
On lower wings, fasten off after Round 2 without the picot round.
Assembling the Butterfly Bodice
Lay all four wing pieces and the center body column on a flat surface.
Step 1: Position the body column vertically. The top 6 rows will be above the wing attachment point. The bottom 4 rows extend below the lower wings.
Step 2: With yarn needle, whipstitch the inner straight edge of the Upper Right Wing to the right side of the body column, beginning at Row 4 of the column and ending at Row 14. (10 rows of attachment)
Step 3: Attach Upper Left Wing to left side of the column, mirroring Step 2.
Step 4: Attach Lower Right Wing to right side of the column, beginning at Row 10 of the column and ending at Row 16.
Step 5: Attach Lower Left Wing to left side of the column, mirroring Step 4.
Butterfly Body Detail
Using the puff stitch, work 3 to 5 puff stitches in a vertical line down the center of the body column, spacing them approximately 1 inch apart. If attaching pearl beads, use a beading needle and thread to sew one 6 mm pearl bead between each puff stitch.
Section 3: Assembling Skirt and Bodice
Step 1: Lay the skirt flat on your blocking surface, RS facing up. The foundation chain is the waist edge (top). The Row 24 edge is the hem (bottom).
Step 2: Center the butterfly bodice on the front of the skirt, aligning the bottom of the body column with the waist edge. The lower wings should rest on the upper skirt front, approximately Row 2 to Row 6.
Step 3: Pin the butterfly bodice in place. The center body column should align with the center front of the skirt.
Step 4: With yarn needle and matching yarn, whipstitch the bottom edge of the butterfly to the waist edge of the skirt. Work carefully so the seam is not visible from the RS.
Step 5: The upper wings extend upward above the waist edge to form the shoulder straps. No additional seaming is needed at the upper wings.
Section 4: Waistband Finish
With RS facing, join yarn at the right back edge of the skirt at the waist.
Row 1: ch 1, sc evenly across the entire top (waist) edge, working 1 sc per foundation chain stitch, but skipping behind the butterfly bodice section. Work sc across the back. Total working sts across the back and two side sections: approximately (42 sc)
Row 2: ch 1, turn. sc in each sc across. (42 sc)
Do not fasten off.
Section 5: Back Opening and Button Loops
The dress has a center back opening from waist to shoulder.
Right Back Band
Row 1: With RS facing, join yarn at the top right back corner. ch 1, sc evenly down the right back edge, working approximately 2 sc per row. (40 sc)
Row 2: ch 1, turn. sc in each sc across. (40 sc)
Row 3 (button loops): ch 1, turn. sc in first 4 sc, (ch 3, sk 2 sc, sc in next 6 sc) 4 times, sc to end. 4 button loops created.
Row 4: ch 1, turn. sc in each sc and 3 sc in each ch-3 loop across.
Fasten off.
Left Back Band
Work Rows 1 and 2 as Right Back Band. On Row 3, work all sc with no button loops. Fasten off.
Sew buttons to left back band aligned with the button loops.
Section 6: Hem Scallop Edging
With RS facing, join yarn at the right back lower corner of the skirt.
Round 1: ch 1, sc in each hdc across the hem edge. (160 sc)
Note: 160 is not evenly divisible by 6. Work inc in 2 evenly spaced stitches to get (162 sc), which gives you 27 repeats.
Round 2 (scallop): (sc in first sc, sk 2 sc, shell in next sc, sk 2 sc) 27 times. Join. (27 shells, 27 sc)
Round 3 (picot shell caps): ch 1, (sc in first sc, sc in each of first 2 dc of shell, picot, sc in next dc of shell, picot, sc in last 2 dc of shell) around. Join. Fasten off.
Section 7: Small Butterfly Appliques
Make 5 small butterflies using these instructions:
Magic ring or ch 4 joined to ring.
Round 1: ch 1, 8 sc in ring, join. (8 sc)
Round 2 (upper wings): ch 5, dc in same st, (dc, ch 2, dc, ch 5, dc) in next st, (dc, ch 2, dc) in next st, ch 5, sl st in same st. Fasten off leaving tail for seaming.
Round 2 (lower wings): Rejoin yarn at opposite side of ring. Ch 3, (dc, ch 2, dc) in same st, ch 3, sl st in next st. Ch 3, sl st in next st. (dc, ch 2, dc) in next st, ch 3, sl st in base ring. Fasten off.
Body: With yarn threaded on needle, wrap yarn 4 times around center ring and cinch. Attach pearl bead if desired.
Placement: Position 3 butterflies along the hem, evenly spaced, approximately 2 inches above the scallop edging. Position 1 small butterfly at the center of each lower wing of the bodice butterfly.
Using yarn needle and matching yarn, sew each applique flat against the skirt surface with small invisible stitches at each wing tip and body center.
Blocking Your Finished Dress
Blocking is essential for this project. The lace bodice butterfly and wing lobes open up dramatically when blocked wet.
1. Soak all pieces in lukewarm water for 15 to 20 minutes.
2. Gently squeeze out excess water (do not wring).
3. Lay flat on your blocking mat and pin to measurements.
4. Pay special attention to the wing lobes, pinning each scallop point to open up the lace.
5. Allow to dry completely before removing pins.
Tips for Success with This Crochet Pattern
Take your time with the butterfly wings. They look complicated, but if you work row by row and count your stitches, the shaping becomes clear.
Block before assembly. It is much easier to sew pieces together when they are blocked flat and relaxed.
Use locking stitch markers. Mark your increase positions on the skirt rows so you do not lose track.
Do not skip the gauge swatch. This dress needs accurate sizing, and cotton yarn can behave differently from acrylic.
Pin the appliques before sewing. Move them around until the placement looks balanced, then sew them down.
Final Thoughts on the Lavender Dream Butterfly Baby Dress
This baby dress crochet pattern creates a truly special garment. The combination of simple skirt construction with intricate lace details gives you the best of both worlds. You get the satisfaction of meditative rows on the skirt, then the excitement of creating those beautiful butterfly wings.
Every baby shower needs a gift that makes everyone stop and ask, "You MADE that?" This dress is that gift.
The modular construction means you can work on pieces during small pockets of time, then bring everything together at the end for a dramatic reveal. And when you finally sew that last butterfly applique in place and step back to look at your finished work? That feeling is absolutely worth every stitch.
I would love to see your finished dresses! Save this pattern to your Pinterest boards so you can find it when you are ready to start, and please leave a comment below if you make one. There is nothing better than seeing these designs come to life in your hands.
