Crochet sandals look intimidating. I know. You see those perfectly connected motifs, the delicate straps, the professional finish, and you think this is way beyond your skill level. Let me stop you right there. If you can crochet a granny square, you can absolutely make these sandals. The construction breaks down into simple flower motifs joined together, and I promise the technique is far more approachable than it appears. Whether you are a confident beginner ready to level up or an experienced crocheter looking for a fresh summer project, this pattern meets you where you are.
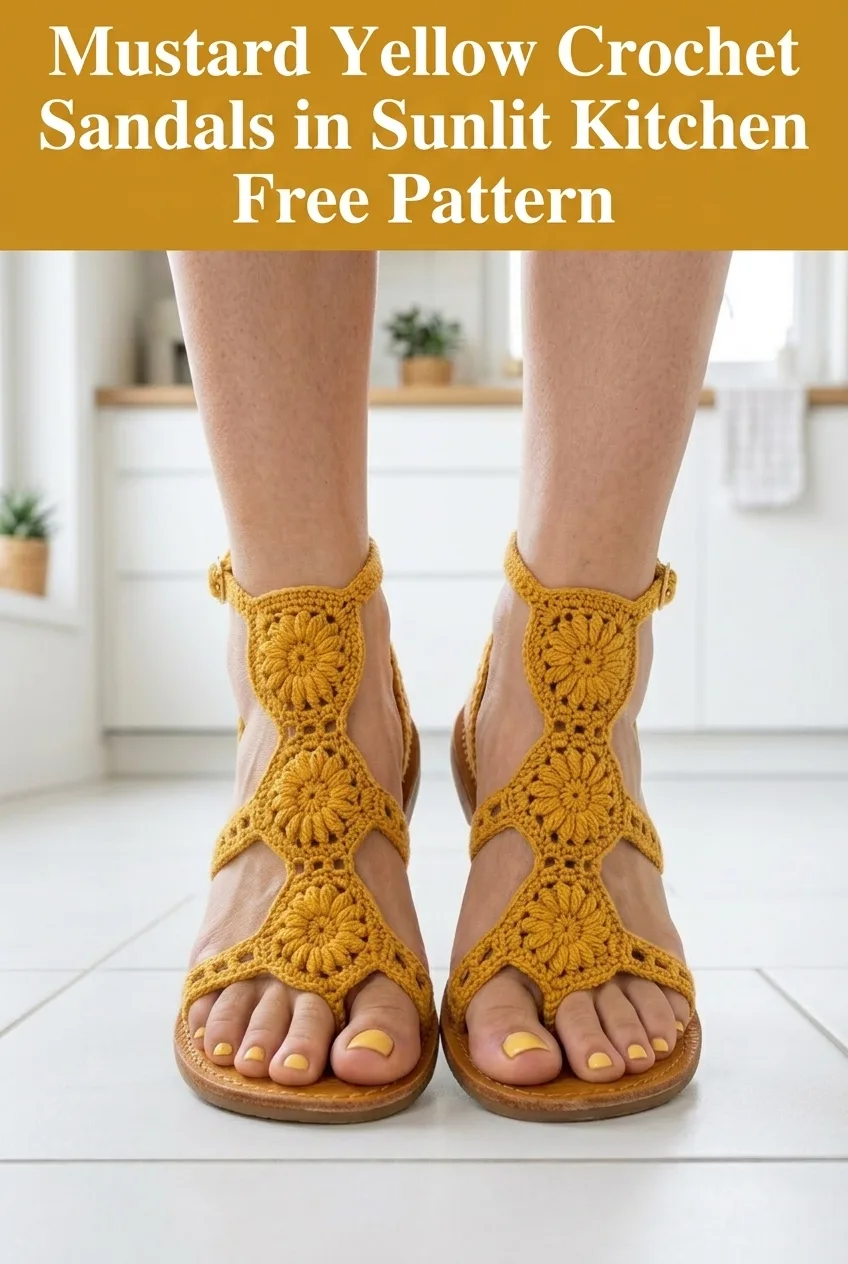
These mustard yellow crochet sandals combine vintage charm with modern wearability. The warm golden color practically glows, and the openwork flower design keeps your feet cool while looking absolutely stunning. I designed this pattern to work with flip flop soles or leather sandal bases, giving you flexibility in how you want to finish your project.
Why This Crochet Sandal Pattern Works
The secret to these sandals is the modular construction. Instead of crocheting one complicated piece, you create individual flower motifs and join them as you go. Each motif uses the same stitch pattern, so once you master one, you have mastered them all. The repetition builds muscle memory quickly.
The sunburst flower motif at the center of each square creates that gorgeous dimensional texture you see in the photos. It looks intricate, but it is really just puff stitches worked in a circle. The surrounding border transforms the circle into a square that connects seamlessly with its neighbors.
This crochet tutorial walks you through every step, from creating your first motif to attaching the finished upper to your sandal sole.
Materials You Will Need
Yarn:
Hook:
Additional Supplies:
Gauge and Sizing
Gauge: One completed motif measures approximately 2 inches by 2 inches (5cm x 5cm)
Check your gauge before beginning the full project. If your motif is larger, try a smaller hook. If smaller, go up a hook size.
Sizing Notes:
This pattern creates sandal uppers that fit sizes 7 to 9 (US women’s). For smaller feet (sizes 5 to 6), make 3 motifs for the front panel instead of 4. For larger feet (sizes 10 to 11), add one additional motif to the front panel and extend the ankle strap by 6 chain stitches.
Stitch Abbreviations and Definitions
Before we begin, let me explain every stitch you will use:
ch = chain: Wrap yarn over hook, pull through loop on hook. Creates foundation or spacing.
sl st = slip stitch: Insert hook, yarn over, pull through stitch AND loop on hook in one motion. Used for joining and moving across work.
sc = single crochet: Insert hook, yarn over, pull up loop (2 loops on hook), yarn over, pull through both loops.
dc = double crochet: Yarn over, insert hook, yarn over, pull up loop (3 loops), yarn over, pull through 2 loops, yarn over, pull through remaining 2 loops. Creates a taller stitch.
puff st = puff stitch: (Yarn over, insert hook in stitch, yarn over, pull up loop) 3 times in same stitch (7 loops on hook), yarn over, pull through all 7 loops. Creates a puffy, dimensional cluster. This is the star of your flower centers.
ch-sp = chain space: The gap created by chain stitches. You work into this gap, not into the chain itself.
Step by Step Crochet Pattern for Sunburst Flower Motifs
Each sandal requires 4 motifs for the front panel, 2 motifs for the ankle section, plus strap construction. Make 12 motifs total for one pair of sandals.
Sunburst Flower Motif
Round 1 (Center Ring):
Ch 4, sl st to first ch to form a ring.
Ch 3 (counts as first dc), work 11 dc into ring, sl st to top of beginning ch-3 to join. (12 dc)
Round 2 (Puff Stitch Petals):
Ch 1, sc in same st, ch 2, skip next dc, *puff st in next dc, ch 2, skip next dc, sc in next dc, ch 2, skip next dc* repeat around, ending with puff st in last dc before first sc, ch 2, sl st to first sc to join. (6 puff stitches, 6 sc)
This round creates the dimensional flower center. Your puff stitches should poof outward nicely. If they look flat, try pulling up taller loops when creating the puff.
Round 3 (First Expansion):
Ch 1, sc in same st, *3 dc in ch-2 sp, sc in top of puff st, 3 dc in ch-2 sp, sc in next sc* repeat around, sl st to first sc to join. (36 dc, 12 sc total: 48 sts)
Round 4 (Square Formation):
Ch 3 (counts as dc), dc in same st, dc in next 5 sts, *3 dc in next st (corner made), dc in next 5 sts, 2 dc in next st, dc in next 5 sts* repeat around, working 3 dc corners at the 4 corner points, sl st to top of ch-3 to join. (56 dc)
You should now have a square with 14 dc per side, including corner stitches.
Round 5 (Border and Join Points):
Ch 1, sc in each st around, working 3 sc in each corner stitch, sl st to first sc to join. Fasten off, weave in ends. (60 sc total: 15 sc per side)
Joining Motifs for the Front Panel
The front panel consists of 4 motifs arranged in a vertical strip that runs from your toes toward your ankle.
Join as you go method:
Complete the first motif fully. For subsequent motifs, work Round 5 until you reach the joining edge. At the midpoint of the joining side (the 8th sc), ch 1, sl st to corresponding sc on adjacent motif, ch 1, continue sc on working motif. Repeat for the second joining point (the 12th sc). This creates a secure but flexible connection.
Alternatively, you can sew motifs together using a whip stitch after all pieces are complete. Place motifs wrong sides together and stitch through back loops only for a flat seam.
Front Panel Assembly:
Ankle Section and Strap Construction
The ankle section uses 2 motifs joined horizontally, creating a band that wraps around the side and back of your ankle.
Ankle Band:
Join 2 motifs side by side using the same joining method as the front panel.
Ankle Strap with Buckle:
From the outer corner of the ankle band, join yarn with sl st.
Row 1: Ch 1, work 8 sc evenly across the side edge. Turn. (8 sc)
Rows 2 to 15: Ch 1, sc in each sc across. Turn. (8 sc)
This creates a strap approximately 3 inches long.
Buckle Attachment Row:
Ch 1, sc in first 3 sc, ch 3 (creates buckle opening), skip next 2 sc, sc in last 3 sc. Turn.
Final Row: Ch 1, sc in each st and ch across. Fasten off. (8 sc)
Thread the strap through your buckle before attaching to the sandal sole.
Buckle Keeper Strap (small loop that holds excess strap):
Ch 12, sl st to first ch to form loop. Sc around loop until covered. Fasten off. Sew to strap base near buckle.
Toe Strap
From the bottom corner of Motif 1 (toe motif), join yarn with sl st.
Row 1: Ch 1, work 6 sc along bottom edge. Turn. (6 sc)
Rows 2 to 4: Ch 1, sc in each sc across. Turn. (6 sc)
Fasten off, leaving a long tail for sewing.
Attaching the Crochet Upper to Sandal Soles
This is where your sandals come together. You have several options depending on your sole type.
For Flip Flop Soles:
Remove the existing straps. Position your crocheted upper on the sole, marking where the toe strap, front panel base, and ankle band need to attach. Use a leather punch or sharp scissors to create small holes in the sole. Thread a tapestry needle with strong thread (or use the same cotton yarn doubled) and whip stitch the crochet pieces to the sole through these holes.
For Leather Sandal Bases:
Leather bases often have existing holes or slots for strap attachment. Weave your crochet straps through these slots and secure with tight stitches on the underside.
Pro Tips for Secure Attachment:
Finishing Touches
Blocking:
Lightly wet block your motifs before assembly by misting with water and pinning to shape. This evens out your stitches and makes joining easier. Cotton yarn responds beautifully to wet blocking.
Stiffening (Optional):
For extra structure, apply a light coat of fabric stiffener to the completed upper before attaching to soles. This helps maintain shape with wear.
Care Instructions:
Spot clean with mild soap and water. Do not machine wash. Store flat to maintain shape. The cotton yarn will soften slightly with wear, conforming to your foot.
Customization Ideas for Your Crochet Sandals
Color Variations:
This pattern looks stunning in natural cream, coral pink, sage green, or classic black. For a boho vibe, try variegated cotton yarn in sunset tones.
Embellishments:
Add small wooden beads to the center of each flower motif. String beads onto your yarn before beginning Round 2 and slide one bead into position at the top of each puff stitch.
Extended Ankle Coverage:
For more coverage, add a third row of motifs to the ankle section, creating a gladiator sandal style that extends higher up the leg.
Skill Level and Time Estimate
This beginner friendly crochet pattern suits crafters who feel comfortable with basic stitches and want to try something new. The puff stitch may be new to you, but I have explained it thoroughly above.
Time to Complete:
Work on motifs during short crochet sessions. They are perfectly portable and make great take along projects.
Troubleshooting Common Issues
Motifs are different sizes:
Check your tension. Many crocheters tighten up as they work. Take breaks and consciously relax your hands.
Puff stitches look limp:
Pull up taller loops when creating the puff. The yarn should be loose and fluffy, not pulled tight.
Squares are curling:
This usually resolves with blocking. If curling persists, your tension may be too tight. Try going up half a hook size.
Motifs do not join evenly:
Count your stitches on each side before joining. All sides should have 15 sc after Round 5.
I hope you love making these mustard yellow crochet sandals as much as I enjoyed designing them. They make a gorgeous handmade gift, and honestly, you deserve a pair for yourself too. Tag me on Instagram or share in our Facebook group when you finish yours. I absolutely love seeing your color choices and styling ideas.
If this crochet sandal pattern caught your eye, go ahead and pin it to your summer crochet board so you can find it when you are ready to start. And please drop a comment below if you make a pair. I would love to hear which color you chose and how they turned out!
