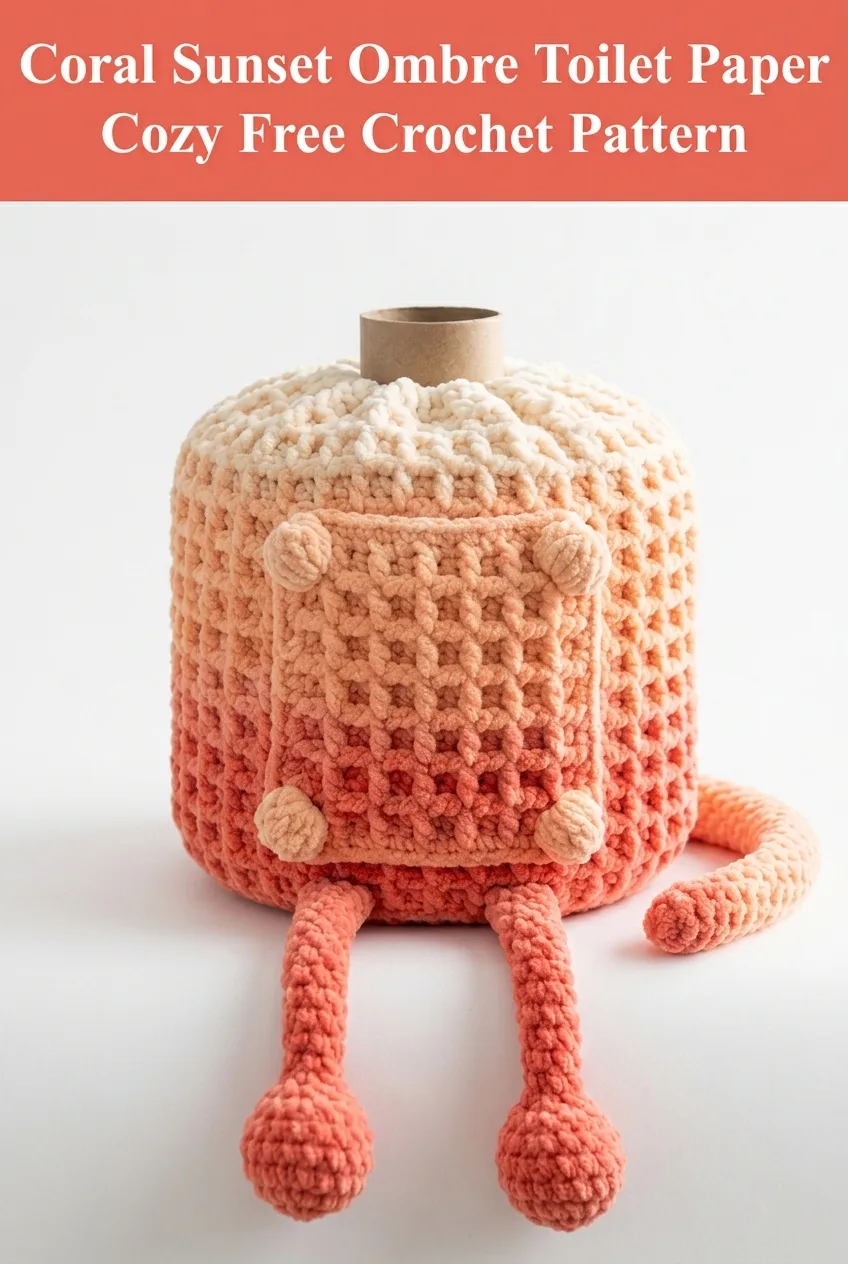
I call this one the "Coral Sunset" because that gorgeous gradient reminds me of watching the sky change colors from my grandmother’s back porch. I actually sketched out this quirky little design in a notebook years ago after visiting a friend who had the most boring bathroom I’d ever seen. She needed something fun. Something unexpected. Something that would make guests do a double take and smile. I tucked that sketch away and forgot about it until last month when I was reorganizing my craft room and found that old notebook. The moment I saw those scribbles, I knew it was time to bring this whimsical toilet paper cozy to life.
Why You’ll Love This Crochet Toilet Paper Cozy Pattern
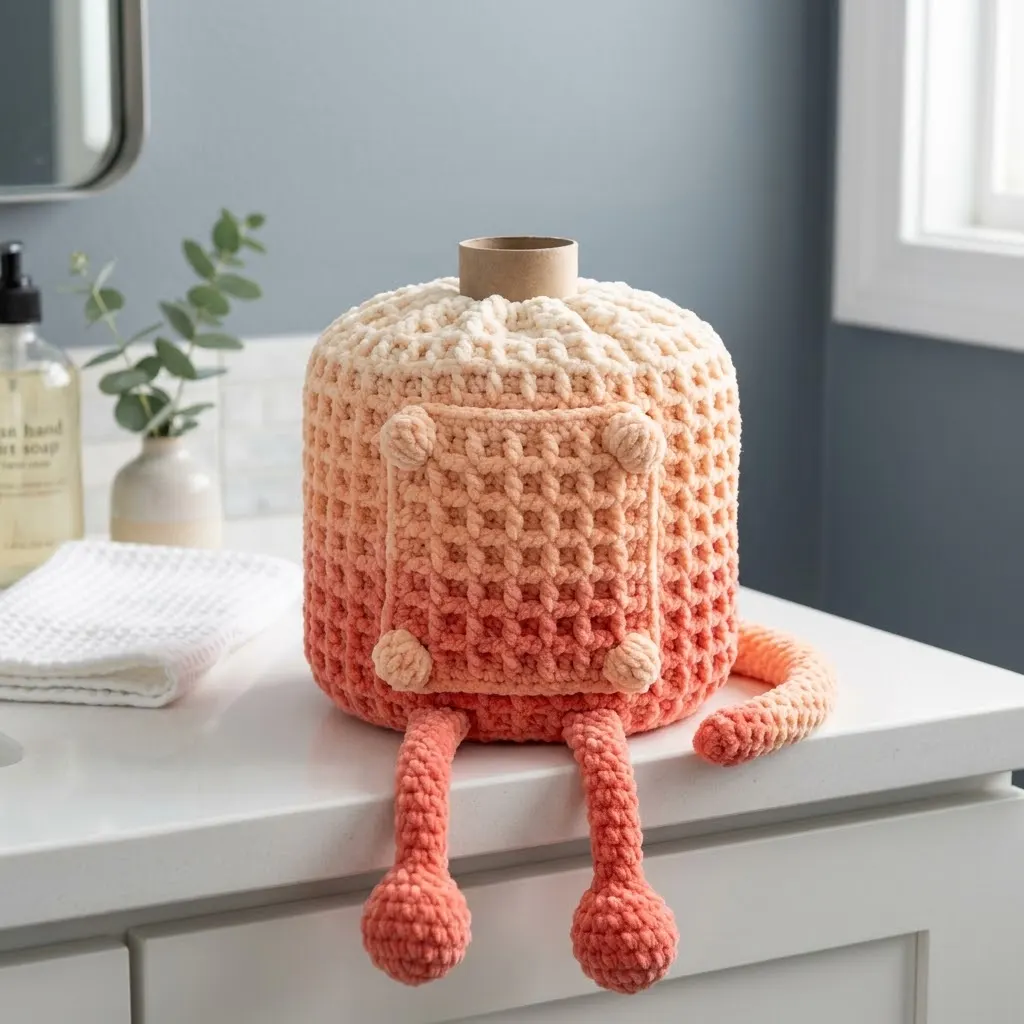
Let me be honest with you. Toilet paper cozies sound like something your great aunt made in 1972. But this one? This coral sunset ombre toilet paper cozy is different. It has personality. It has dangling legs with little bobble feet. It has a sweet face with button details. It transforms a boring bathroom essential into a conversation piece.
This crochet pattern works up quickly using bulky yarn and simple stitches. You’ll use basic single crochet (sc) throughout most of the body, which means even confident beginners can tackle this project. The bobble details add texture without overwhelming complexity.
Plus, this makes an incredible housewarming gift. Trust me, nobody is expecting a handmade toilet paper cozy with legs. That element of surprise is priceless.
Materials Needed
Gather these supplies before you start crocheting:
Yarn:
Hook:
Notions:
Finished Dimensions:
Gauge
Gauge: 12 sc and 14 rows = 4 inches in single crochet
Check your gauge before starting. Your cozy needs to fit snugly around a standard toilet paper roll without being too tight or too loose.
Skill Level
Intermediate Beginner
If you can crochet in the round and make basic bobble stitches, you can absolutely make this pattern. I’ll walk you through everything step by step.
Abbreviations and Stitch Definitions
Let me break down every stitch you’ll need:
ch = chain: Wrap yarn over hook, pull through loop on hook. This creates your foundation.
sl st = slip stitch: Insert hook, yarn over, pull through stitch AND loop on hook in one motion. Used for joining rounds.
sc = single crochet: Insert hook into stitch, yarn over, pull up a loop (2 loops on hook), yarn over, pull through both loops. This is your main stitch throughout.
inc = increase: Work 2 single crochets into the same stitch. This makes your circle grow larger.
dec = decrease: Insert hook into next stitch, pull up loop, insert hook into following stitch, pull up loop (3 loops on hook), yarn over, pull through all 3 loops. This makes your work smaller.
bob = bobble stitch: Yarn over, insert hook, pull up loop, yarn over, pull through 2 loops. Repeat this 4 more times in the same stitch (6 loops on hook). Yarn over, pull through all 6 loops. Push the bobble to the right side of your work.
FLO = front loop only: Work into just the front loop of the stitch, leaving the back loop unworked.
Crochet Tutorial: Step by Step Instructions
Body of the Cozy
The body is worked from the top down in continuous rounds. Use a stitch marker to track your round beginnings.
Round 1: Create a magic ring. Work 6 sc into the ring. Pull tight to close. (6 sts)
Round 2: Inc in each st around. (12 sts)
Round 3: *Sc 1, inc* repeat around. (18 sts)
Round 4: *Sc 2, inc* repeat around. (24 sts)
Round 5: *Sc 3, inc* repeat around. (30 sts)
Round 6: *Sc 4, inc* repeat around. (36 sts)
Round 7: *Sc 5, inc* repeat around. (42 sts)
Round 8: *Sc 6, inc* repeat around. (48 sts)
At this point, your circle should measure approximately 4 inches across. This creates the top opening where the toilet paper tube peeks through.
Round 9: Working in FLO only, sc in each st around. (48 sts)
This front loop only round creates a nice ridge that helps the top sit flat.
Rounds 10-28: Sc in each st around. (48 sts per round)
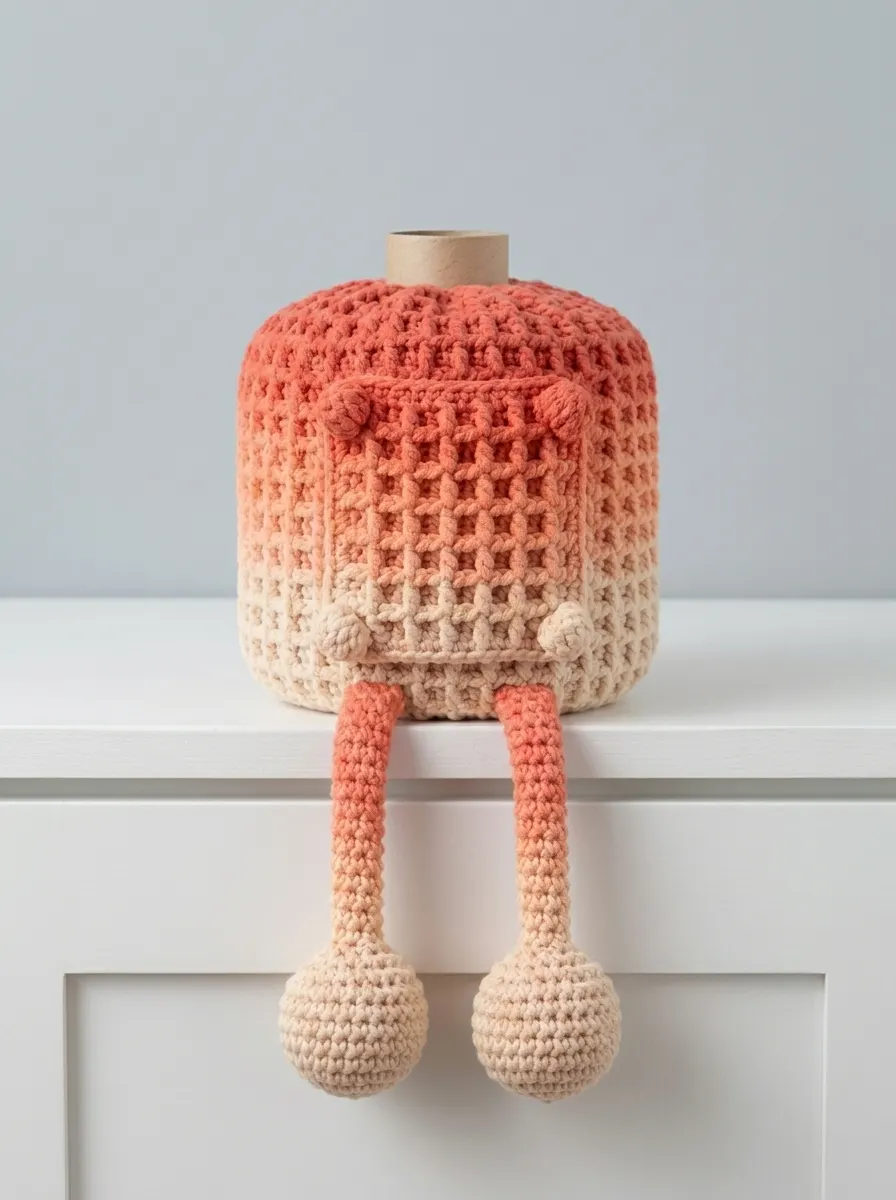
Continue working even for 19 rounds. Your cozy should now measure approximately 5 inches from the top. The gradient in your yarn will create that beautiful sunset effect as you work down.
Round 29: Working in FLO only, sc in each st around. (48 sts)
This creates another decorative ridge near the bottom.
Rounds 30-32: Sc in each st around. (48 sts)
Round 33: Sl st in next st. Fasten off, leaving a 6 inch tail for weaving.
Face Panel
This small rectangular panel gets sewn onto the front of your cozy.
Row 1: Ch 13, sc in 2nd ch from hook and in each ch across. Turn. (12 sts)
Rows 2-10: Ch 1, sc in each st across. Turn. (12 sts)
After Row 10, fasten off leaving a long tail for sewing.
Bobble Details for Face
You’ll create 4 small bobbles to embellish the face panel. These represent the quirky "buttons" or facial features.
For each bobble:
Round 1: Create a magic ring. Work 6 sc into ring. (6 sts)
Round 2: Inc in each st around. (12 sts)
Round 3: Sc in each st around. (12 sts)
Stuff lightly with a tiny bit of fiberfill.
Round 4: Dec 6 times around. (6 sts)
Fasten off, leaving tail for sewing. Thread tail through remaining stitches, pull tight to close.
Make 4 bobbles total.
Legs (Make 2)
Each leg is worked in continuous rounds. These create the adorable dangling appendages.
Round 1: Create a magic ring. Work 6 sc into ring. (6 sts)
Round 2: Inc in each st around. (12 sts)
Round 3: *Sc 1, inc* repeat around. (18 sts)
Rounds 4-6: Sc in each st around. (18 sts)
This creates the bobble foot at the end.
Round 7: *Sc 1, dec* repeat around. (12 sts)
Round 8: Dec 6 times around. (6 sts)
Stuff the foot portion firmly with fiberfill.
Rounds 9-22: Sc in each st around. (6 sts)
Continue stuffing lightly as you work. The leg should be about 4 inches long.
Sl st in next st. Fasten off, leaving long tail for sewing.
Make 2 legs total.
Assembly Instructions
Now comes the fun part. Bringing your coral sunset cozy to life.
Step 1: Attach the Face Panel
Position the rectangular face panel on the front of your cozy, centered about 1 inch from the top ridge. Pin in place. Using the long tail and your tapestry needle, whipstitch around all four edges to secure.
Step 2: Add Bobble Details
Arrange your 4 bobbles on the face panel in a square pattern, near the corners. Sew each one securely in place using the tails. Weave in ends.
Step 3: Attach Legs
Position both legs at the bottom front of your cozy, spacing them about 2 inches apart. The legs should dangle over the edge of your counter or shelf. Sew securely using the long tails, stitching through several rounds of the leg base for stability.
Step 4: Weave All Ends
Turn your cozy inside out. Weave all remaining yarn tails through several stitches, then trim close to the work.
Customization Ideas
Want to make this crochet pattern your own? Here are some ideas:
Color variations: Try a blue to white gradient for a beachy vibe. A purple to pink gradient looks gorgeous too. Solid colors with contrasting legs add fun contrast.
Add eyes: Attach small safety eyes or embroider French knot eyes above the face panel for extra personality.
Skip the legs: Not feeling the dangling appendages? Simply omit them for a more traditional look.
Longer legs: Add more rounds to the leg tube section for dramatic floor length dangles.
Different textures: Substitute bobble rounds into the main body for an all over textured look.
Tips for Crochet Beginners
If this is one of your first amigurumi style projects, here are some tips to help you succeed:
Work in good lighting. Dark yarn and dim rooms make counting stitches frustrating.
Use a stitch marker religiously. Move it up every round. Losing your place in continuous rounds is so easy to do.
Don’t stress about perfection. The bulky yarn and tight stitches hide minor inconsistencies beautifully.
Test the fit early. After Round 8, place your work on top of a toilet paper roll to check sizing. Adjust your hook size if needed.
Stuff legs as you go. Trying to push fiberfill down a narrow tube after the fact is much harder.
How to Care for Your Finished Cozy
Your crocheted toilet paper cozy will last for years with proper care. Spot clean as needed with a damp cloth. For deeper cleaning, hand wash gently in cool water with mild soap. Reshape while damp and lay flat to dry. Avoid wringing or twisting, which can distort the stitches.
If you used acrylic yarn, you can machine wash on gentle cycle in a mesh laundry bag. Tumble dry on low heat.
Final Thoughts on This Toilet Paper Cozy Crochet Pattern
This coral sunset ombre toilet paper cozy brings genuine joy to an unexpected place. Every time I walk into my bathroom, those little dangling legs make me smile. And honestly, that’s exactly what handmade items should do. They should spark happiness in ordinary moments.
I hope this step by step crochet tutorial gives you everything you need to create your own whimsical bathroom buddy. The combination of gradient yarn and simple single crochet stitches means the project practically designs itself as you work. Just sit back, stitch, and watch that sunset emerge.
This beginner friendly pattern also makes a fantastic stash buster. Got partial skeins of bulky yarn lying around? Combine them into your own unique color combination. The possibilities are endless.
I would absolutely love to see your finished coral sunset cozies. If you make one, please share your photos on Instagram or tag me on Facebook. Seeing your creations brings me so much joy.
If this pattern made you smile, go ahead and save it to your Pinterest boards so you can find it later. And please drop a comment below if you make one. I’d love to hear which colors you chose and where your new bathroom buddy lives. Happy crocheting, friend.
