You know that gorgeous skein you’ve been saving for "the right project"? This is it. Grab your softest white and a pretty sage green because this crochet tulip bouquet with matching vase is absolutely worth raiding your stash for. The construction is more clever than complicated. You’re working each tulip in the round using basic increases and decreases, then building simple stems and leaves that slide right over wire for that realistic upright shape. I’d call this an intermediate project, mostly because there are multiple pieces to assemble. But if you can single crochet in a spiral, you can absolutely make these.
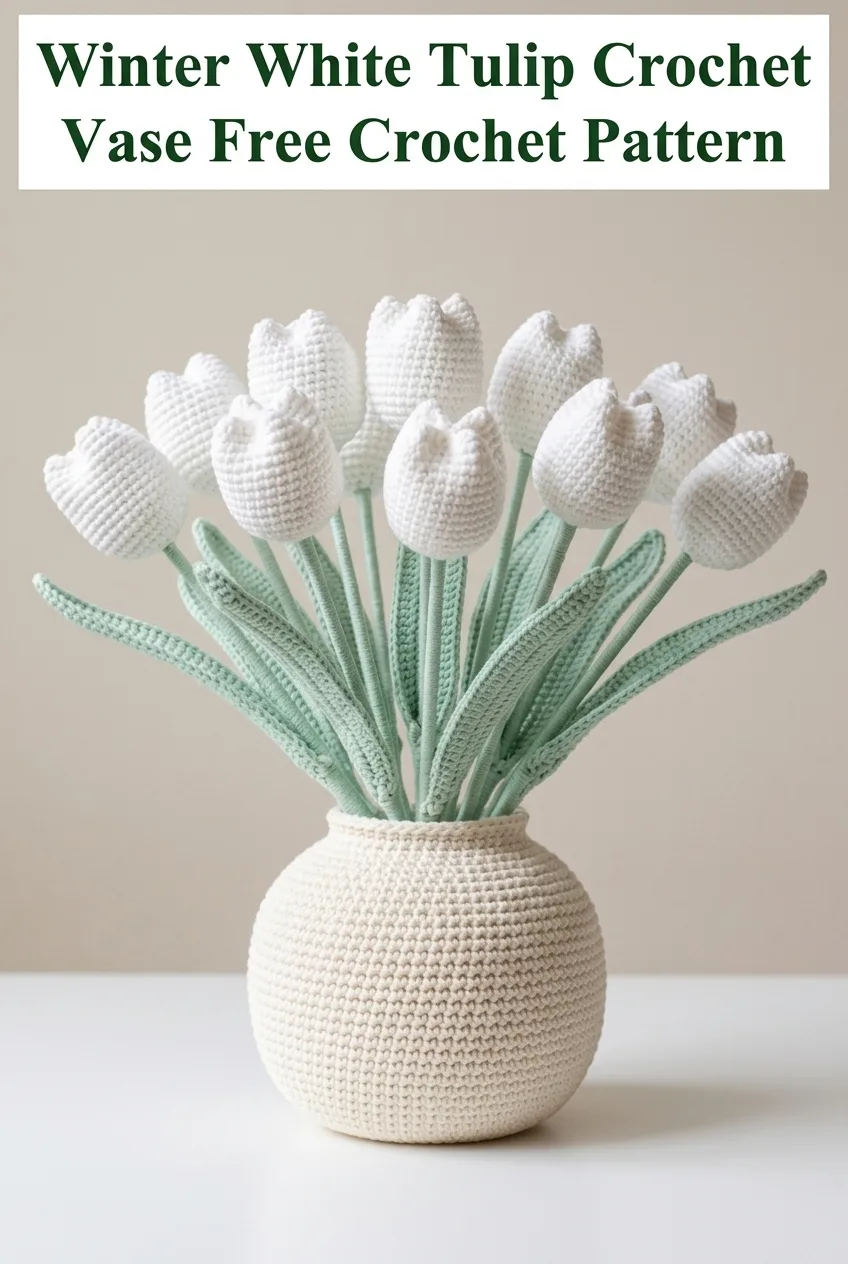
This winter white tulip crochet vase creates a stunning display piece that never wilts, never needs water, and brings a touch of handmade elegance to any room. Whether you’re decorating your own home or making a thoughtful gift, this crochet pattern delivers impressive results without requiring advanced skills.
Why You’ll Love This Crochet Tulip Pattern
These crocheted tulips look far more intricate than they actually are. The magic is really in the tight, consistent stitches and the simple shaping that mimics real tulip petals. Once you get the rhythm down on your first flower, the rest fly off your hook.
The matching crochet vase is worked in a neutral cream or beige tone, creating that beautiful contrast against the white blooms and sage stems. It’s sturdy enough to hold all your tulips without flopping over, and it looks genuinely like a piece of home décor rather than a craft project.
What makes this pattern special:
Materials You’ll Need
Before you start, gather everything so you can work uninterrupted. Nothing worse than getting into a flow and realizing you’re missing something essential.
Yarn:
Cotton or cotton blend yarns work beautifully here because they hold their shape and create that clean, tight stitch definition you see in the photos. Acrylic works too, just be sure to go down a hook size if your stitches look loose.
Hook:
Additional Supplies:
Skill Level and Stitches Used
This crochet pattern is intermediate level, but a confident beginner who has completed a few amigurumi projects could definitely tackle it. You’ll be working in continuous rounds, which means you don’t join at the end of each round. Instead, you spiral upward. A stitch marker helps you track where each round begins.
Stitches and Abbreviations:
Gauge
Gauge matters here because you want a tight fabric that doesn’t show stuffing. Work a small test swatch in single crochet. You should have approximately 5 to 6 stitches per inch. If your stitches are too loose and you can see gaps, go down a hook size. If your fabric is stiff and hard to work, go up a hook size.
Crochet Tulip Pattern Instructions

Tulip Head (Make 12 or desired number)
Using white yarn and 3.5mm hook:
Round 1: Make a magic ring, work 6 sc into the ring. Pull tight to close. (6 sts)
Round 2: Inc in each st around. (12 sts)
Round 3: *Sc 1, inc* repeat around. (18 sts)
Round 4: *Sc 2, inc* repeat around. (24 sts)
Round 5: *Sc 3, inc* repeat around. (30 sts)
Rounds 6 to 10: Sc in each st around. (30 sts) This creates the rounded body of the tulip.
Round 11: *Sc 3, invdec* repeat around. (24 sts)
Round 12: *Sc 2, invdec* repeat around. (18 sts)
Begin stuffing lightly with fiberfill. You want the tulip plump but not rock hard.
Round 13: *Sc 1, invdec* repeat around. (12 sts)
Round 14: Invdec around. (6 sts)
Finish stuffing. Fasten off, leaving a long tail. Thread tail through remaining stitches and pull tight to close. Weave in end.
Creating the Petal Definition
This step is optional but adds beautiful realism. Using a yarn needle and matching white yarn, make three vertical lines from the top center of the tulip down to about the midpoint. Pull gently to create the indented petal shapes you see on real tulips. Secure inside the tulip head.
Stem (Make 12 or one per tulip)
Using sage green yarn and 3.5mm hook:
Round 1: Make a magic ring, work 6 sc into the ring. Pull tight. (6 sts)
Rounds 2 to 35: Sc in each st around. (6 sts)
This creates a tube approximately 5 to 6 inches long. Adjust rounds for longer or shorter stems if desired.
Sl st to next st and fasten off, leaving a long tail for attaching to tulip head.
Insert a piece of floral wire into the stem tube. Leave about half an inch extending from the top to poke into the tulip head for stability.
Attaching Stem to Tulip
Thread the long tail from the stem onto your yarn needle. Position the top of the stem at the base of the tulip head, with the wire poking slightly into the stuffing. Sew around the base using whip stitch, securing the stem firmly. The wire will hold the tulip upright.
Leaf (Make 10 to 14 for a full arrangement)
Using sage green yarn and 3.5mm hook:
Ch 30.
Row 1: Starting in second ch from hook, sc in each ch across. (29 sts)
Row 2: Ch 1, turn. Sc in each st across. (29 sts)
Rows 3 to 4: Repeat Row 2.
Row 5: Ch 1, turn. Invdec, sc to last 2 sts, invdec. (27 sts)
Row 6: Ch 1, turn. Sc in each st across. (27 sts)
Rows 7 to 12: Repeat Rows 5 and 6 three more times. (21 sts after Row 12)
Row 13: Ch 1, turn. Invdec, sc to last 2 sts, invdec. (19 sts)
Row 14: Ch 1, turn. Invdec, sc to last 2 sts, invdec. (17 sts)
Continue decreasing every row until you have 5 stitches remaining.
Final Row: Invdec, sc 1, invdec. (3 sts)
Fasten off and weave in ends.
The leaf will naturally curl slightly, which looks lovely and realistic. Insert a piece of floral wire along the center back if you want the leaves to be poseable.
Crochet Vase Pattern Instructions
Using cream or beige yarn and 3.5mm hook:
Round 1: Make a magic ring, work 6 sc into the ring. Pull tight. (6 sts)
Round 2: Inc in each st around. (12 sts)
Round 3: *Sc 1, inc* repeat around. (18 sts)
Round 4: *Sc 2, inc* repeat around. (24 sts)
Round 5: *Sc 3, inc* repeat around. (30 sts)
Round 6: *Sc 4, inc* repeat around. (36 sts)
Round 7: *Sc 5, inc* repeat around. (42 sts)
Round 8: *Sc 6, inc* repeat around. (48 sts)
Rounds 9 to 12: Sc in each st around. (48 sts) This creates the flat base.
Round 13: Working in back loops only this round, sc in each st around. (48 sts) This creates a crisp edge where the base meets the body.
Rounds 14 to 22: Sc in each st around, working in both loops as normal. (48 sts)
Round 23: *Sc 6, invdec* repeat around. (42 sts)
Rounds 24 to 26: Sc in each st around. (42 sts)
Round 27: *Sc 5, invdec* repeat around. (36 sts)
Rounds 28 to 29: Sc in each st around. (36 sts)
Round 30: *Sc 4, invdec* repeat around. (30 sts)
Round 31: Sc in each st around. (30 sts)
Sl st to next st. Fasten off and weave in ends.
The vase should measure approximately 4 inches tall and 3.5 inches wide at the widest point. If you want a sturdier vase, you can place a small jar or cup inside before arranging your tulips.
Assembly and Finishing
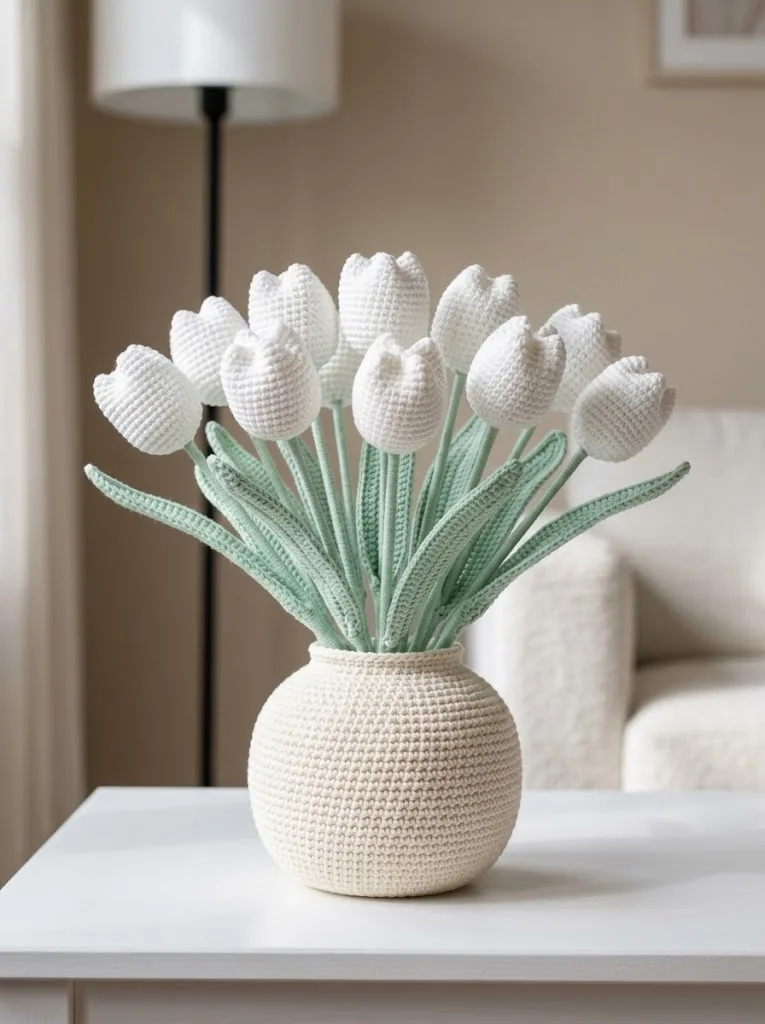
Arrange your tulips and leaves inside the vase. The wire in the stems makes them poseable, so you can fan them out naturally. Tuck leaves around the edges, letting them drape over the vase rim for that organic, just-picked look.
Tips for a professional finish:
Customization Ideas
Once you’ve mastered this basic crochet pattern, the possibilities are endless. Try pink, yellow, or red tulips for a pop of color. Make a smaller bouquet with just five or six stems for a minimalist look. Experiment with variegated yarn for watercolor-style petals.
You can also scale up the vase pattern by continuing the increases for a larger container, or make multiple small vases with single stems as party favors or gifts.
I really hope you enjoy making this winter white tulip crochet vase as much as I enjoyed designing it. If you try this crochet pattern, I would absolutely love to see your finished bouquet. Tag me on Instagram or share a photo in our Facebook group. Seeing your creations genuinely makes my day.
If you loved this pattern, go ahead and save it to your Pinterest boards so you can find it whenever inspiration strikes. And please drop a comment below if you make these tulips. I’d love to hear which colors you chose and where they ended up living in your home.
