
My niece announced her pregnancy last spring, and I immediately started mentally scrolling through every baby pattern I’d ever bookmarked. But nothing felt quite right. I wanted something that looked like an heirloom piece, the kind of dress that gets carefully folded in tissue paper and passed down. Something with ruffles and texture and that perfect soft purple that works whether you know the baby’s gender or not.
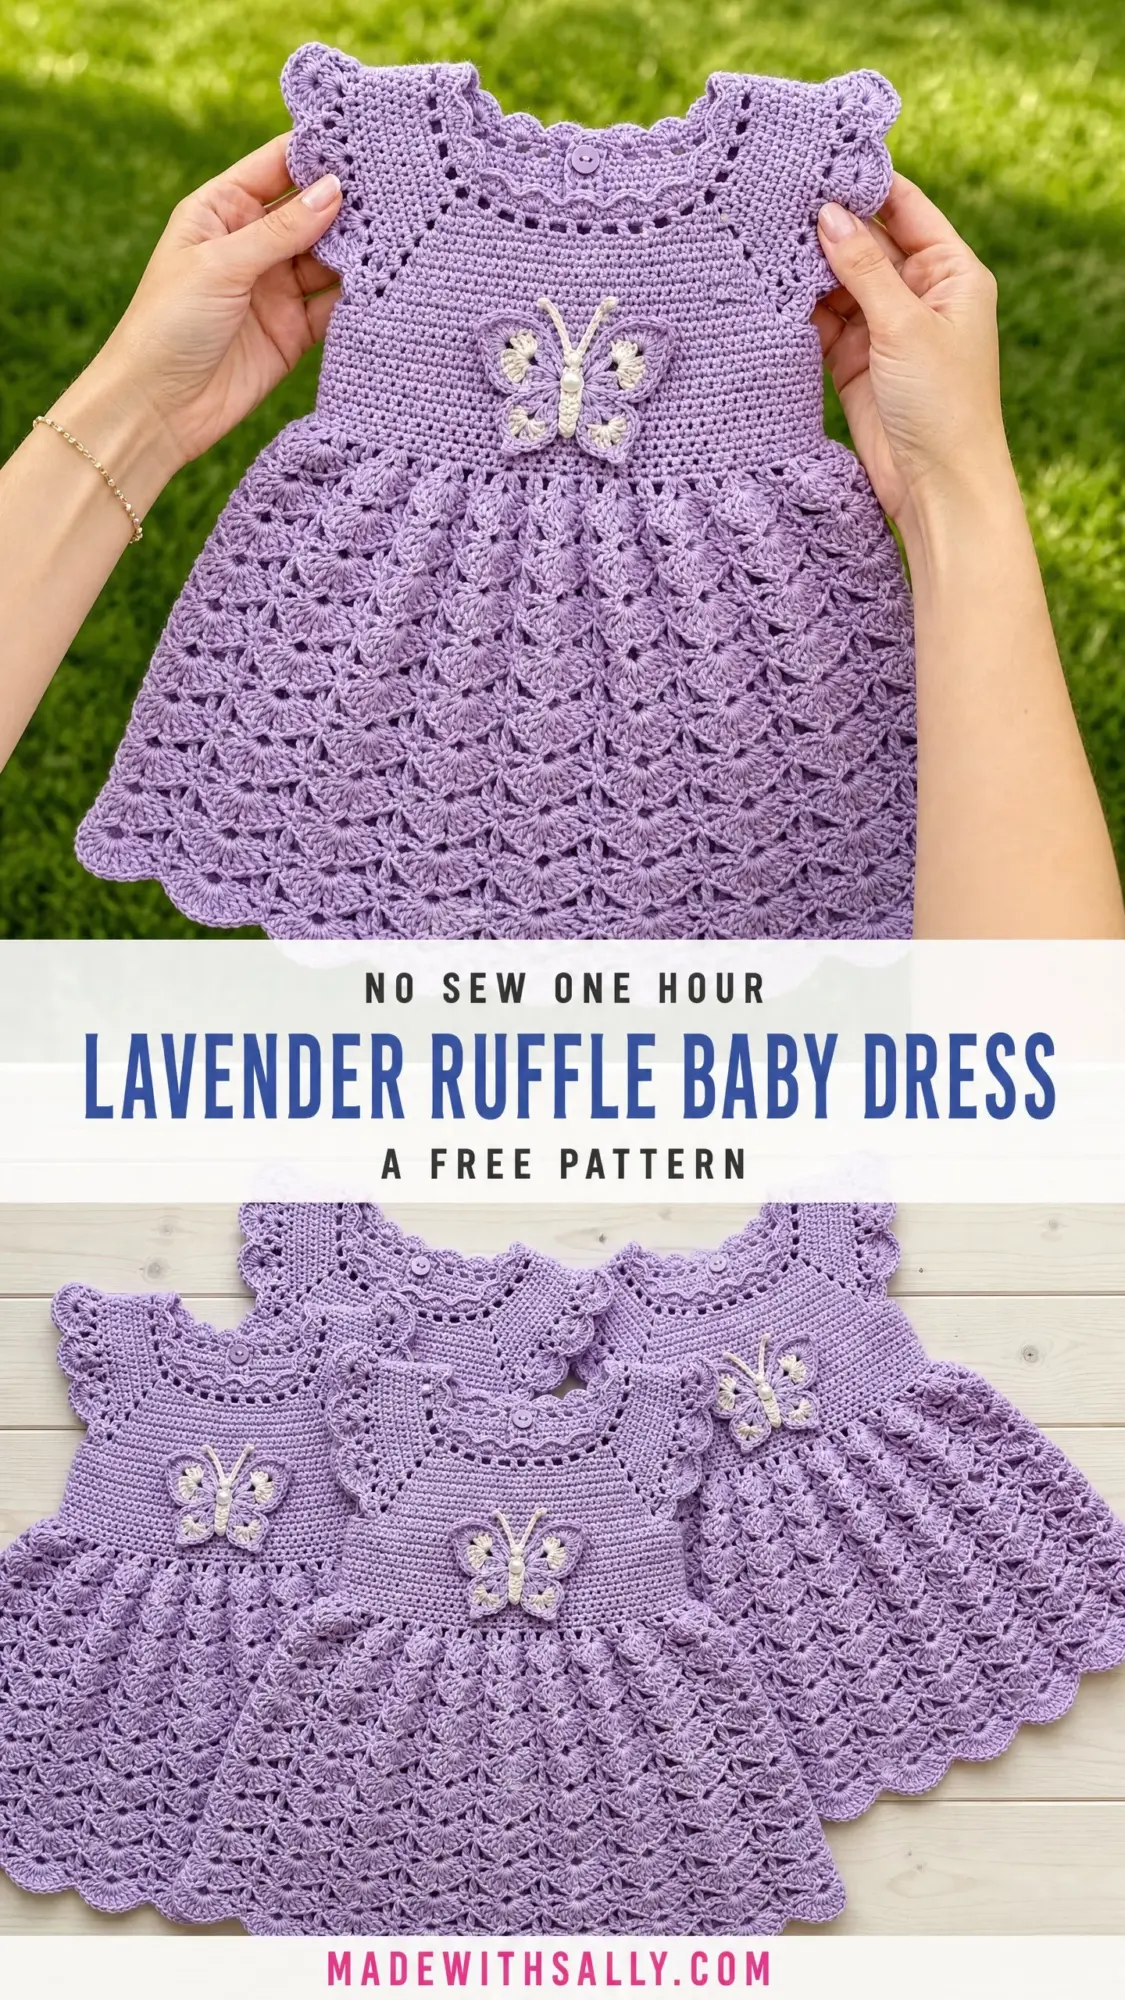
So I designed this one myself. The moment I finished the last scallop on the hem and held it up, I actually gasped a little. It looked like something from a boutique window, not my living room couch.
If you’ve been searching for a baby dress crochet pattern that feels special without requiring a PhD in fiber arts, this is the one. The construction is clever but totally doable, and the shell stitch skirt creates all that gorgeous texture without any complicated colorwork or shaping. Let me walk you through every single step.
About This Lavender Ruffle Baby Dress Crochet Pattern
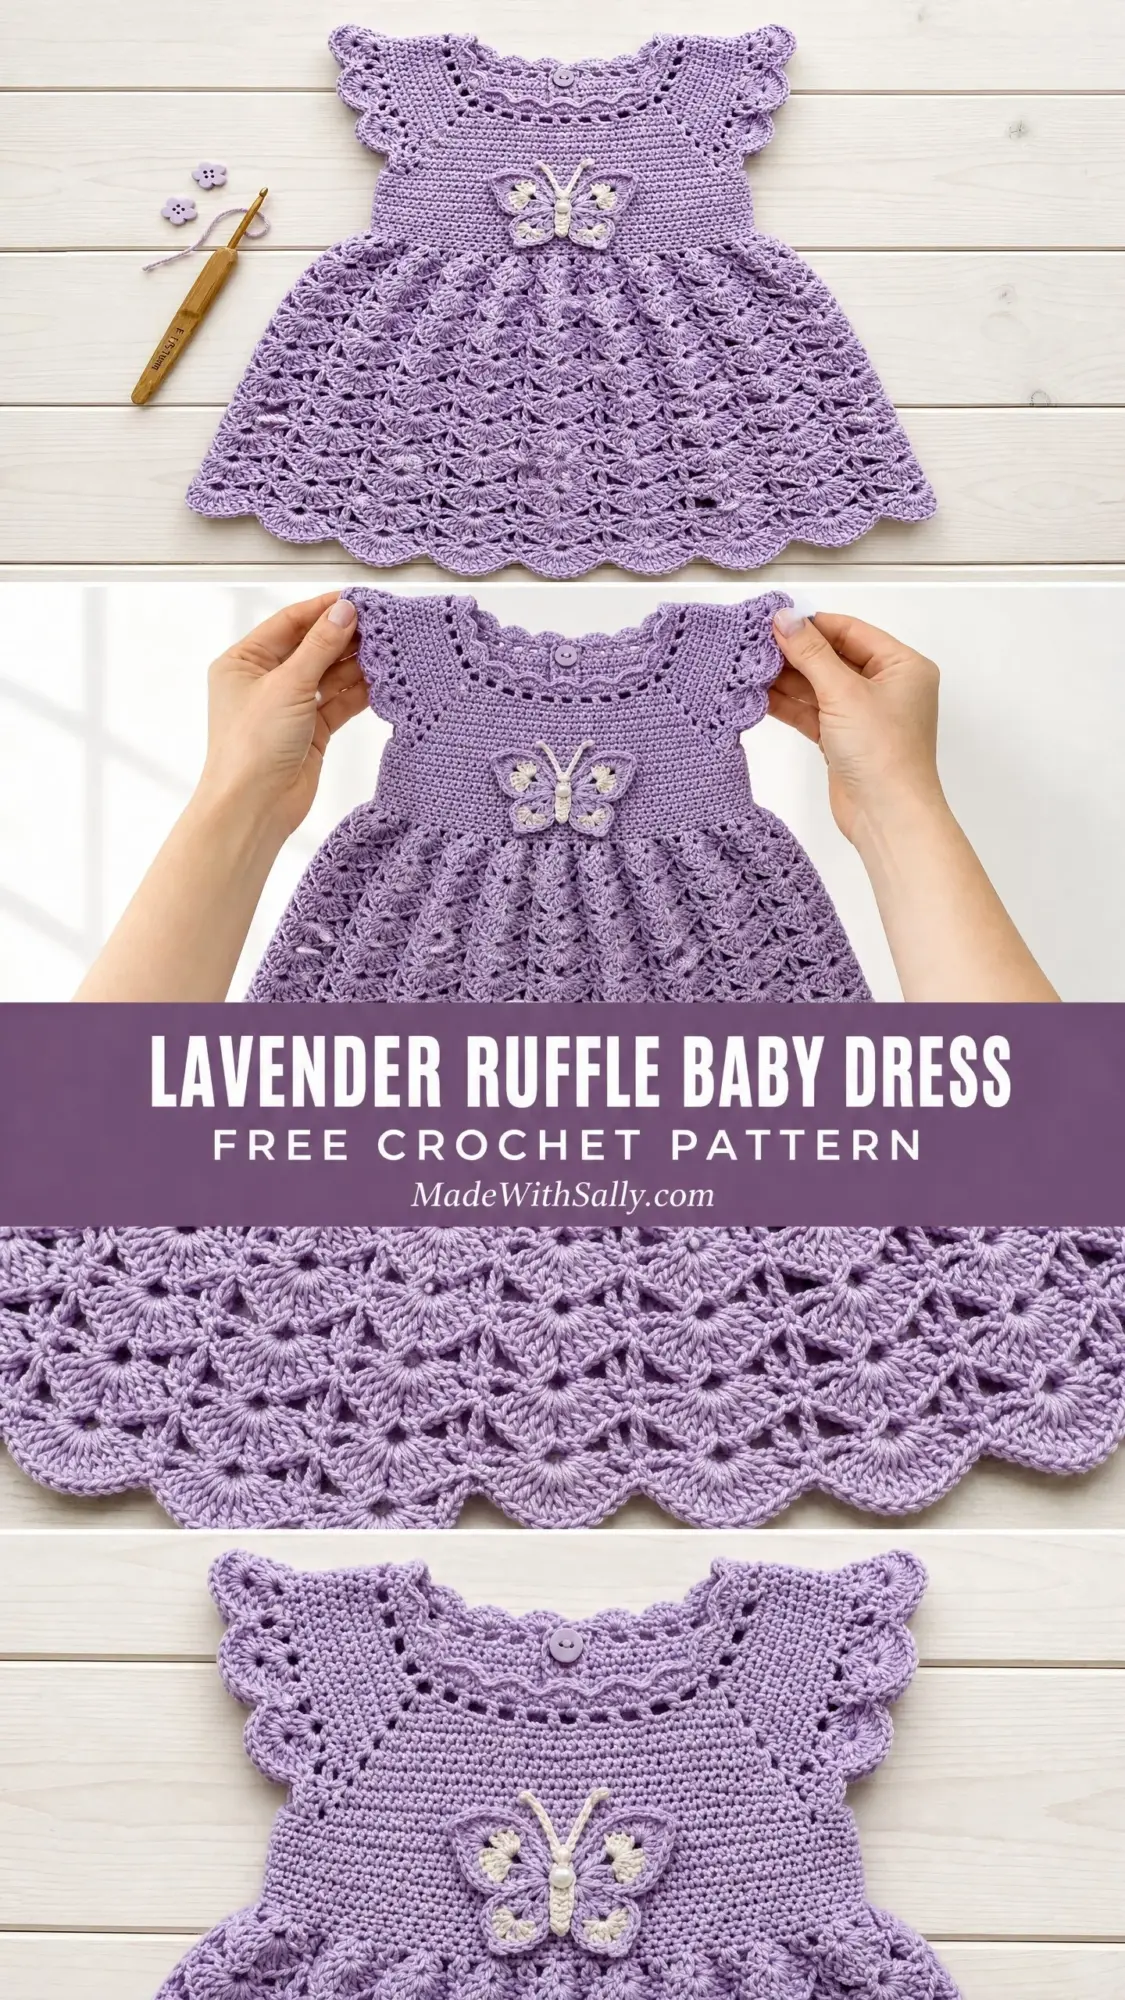
This sweet baby dress features a fitted yoke worked from the top down, a simple bodice, flutter sleeves with ruffled edges, and a full skirt made entirely in an expanding fan shell stitch. The scalloped hem and delicate butterfly appliqué at the waist give it that heirloom quality that makes people ask "where did you buy that?"
The dress is worked primarily in the round after a short flat section at the neckline. You’ll start at the neck, work the raglan yoke shaping, separate for the armholes, continue down the bodice, then transition into the shell stitch skirt. The sleeves get their flutter edging at the very end.
Skill Level: Intermediate. You should be comfortable working in the round, following stitch repeats, and doing basic raglan increases. The shell stitch pattern looks intricate but follows a consistent two round repeat once you get the hang of it.
Finished Size: Fits approximately 12 to 18 months. Chest circumference measures 20 inches (51 cm). Total dress length from shoulder to hem is 14.5 inches (37 cm). The bodice measures 6 inches (15 cm) and the skirt adds another 8.5 inches (21.5 cm).
Time Estimate: Plan for 12 to 18 hours of work if you’re an experienced intermediate crocheter. The butterfly appliqué and blocking will add a bit more time.
Materials You’ll Need
Yarn:
Recommended Yarns:
1. Lion Brand Comfy Cotton Blend in Lilac offers a slight sheen and beautiful drape
2. Paintbox Yarns Simply DK in Violet Purple gives excellent stitch definition at an affordable price
3. Drops BabyMerino works beautifully for an heirloom finish
Look for smooth DK weight yarn with good stitch definition. Avoid fuzzy or textured yarns that will hide the lovely shell pattern. Baby safe fibers like cotton, acrylic, cotton blends, or superwash wool work best.
Hooks:
Notions:
Gauge
Using US size F / 3.75 mm hook:
For the shell skirt pattern:
Important: Work a 5 inch square in single crochet, block it lightly, and measure the center 4 inches. Gauge is critical for garment fit, so take time to check this before starting.
Abbreviations and Stitch Definitions
Before we dive in, let me define every stitch and abbreviation you’ll encounter:
Numbers in parentheses at the end of a round indicate your total stitch count.
Special Stitches
Fan Shell Stitch: Work 5 double crochet stitches into the same stitch or space. This creates one shell or fan unit.
Scallop Edging: Slip stitch into first stitch, then work [ch 2, 4 dc in same st, sk 2 sts, sl st in next st] across the edge.
Flutter Sleeve Shell: Work [sc in next st, ch 3, 5 dc in same st as sc, sc in next st] across the armhole edge for that beautiful ruffle effect.
Step by Step Instructions
Section 1: Neckline and Yoke
The yoke starts at the neckline and works downward. You’ll begin flat for 2 rows to create the button opening at the back, then join to work in the round.
Foundation: Using the larger hook, ch 62.
Row 1 (RS): Sc in 2nd ch from hook and in each ch across. Turn. (61 sc)
Row 2 (WS): Ch 1, sc in first 3 sts (left back), pm after st 3, sc in next 10 sts (left sleeve), pm after st 13, sc in next 31 sts (front), pm after st 44, sc in next 10 sts (right sleeve), pm after st 54, sc in last 7 sts (right back). Turn. (61 sc)
Those 4 markers sit at your raglan dividing points. These marked stitches will receive increases on each increase round.
Join to work in the round: At the end of Row 2, do not turn. Slip stitch the last stitch to the first stitch of Row 2 to join, being careful not to twist. From this point, the right side always faces you.
Yoke Increase Rounds
Each increase round adds 2 stitches at each of the 4 raglan points, giving you 8 new stitches per round.
Rnd 1 (Increase Rnd): [Sc to 1 st before marker, 2 sc in next st, sc in marked st (sm), 2 sc in next st] 4 times, sc to end of rnd. (69 sc)
Rnd 2 (Increase Rnd): [Sc to 1 st before marker, 2 sc in next st, sc in marked st (sm), 2 sc in next st] 4 times, sc to end of rnd. (77 sc)
Rnd 3 (Increase Rnd): [Sc to 1 st before marker, 2 sc in next st, sc in marked st (sm), 2 sc in next st] 4 times, sc to end of rnd. (85 sc)
Rnd 4 (Increase Rnd): [Sc to 1 st before marker, 2 sc in next st, sc in marked st (sm), 2 sc in next st] 4 times, sc to end of rnd. (93 sc)
Rnd 5 (Increase Rnd): [Sc to 1 st before marker, 2 sc in next st, sc in marked st (sm), 2 sc in next st] 4 times, sc to end of rnd. (101 sc)
Rnd 6 (Increase Rnd): [Sc to 1 st before marker, 2 sc in next st, sc in marked st (sm), 2 sc in next st] 4 times, sc to end of rnd. (109 sc)
Rnd 7 (Increase Rnd): [Sc to 1 st before marker, 2 sc in next st, sc in marked st (sm), 2 sc in next st] 4 times, sc to end of rnd. (117 sc)
Rnd 8 (Increase Rnd): [Sc to 1 st before marker, 2 sc in next st, sc in marked st (sm), 2 sc in next st] 4 times, sc to end of rnd. (125 sc)
Checkpoint: Your piece from neckline to current working row should measure approximately 3 inches (7.5 cm). You should see diagonal lines of increases at the raglan points.
Section 2: Divide for Body and Sleeves
This round separates the sleeve stitches from the body. You’ll put the sleeve stitches on waste yarn to work later.
Rnd 9 (Dividing Round): Sc across right back sts (11 sc), ch 4 (underarm bridge), skip the 26 right sleeve sts and place them on a stitch holder or waste yarn, sc across front sts (47 sc), ch 4 (underarm bridge), skip the 26 left sleeve sts and place them on a stitch holder or waste yarn, sc across left back sts (15 sc), sl st to first sc of rnd to join. (81 sts)
Section 3: Bodice
Work the bodice in single crochet, treating the underarm chain stitches as regular stitches.
Rnds 10 through 18: Sc in each st around. (81 sc)
Rnd 19 (Waist Increase Round): [Sc in next 8 sts, 2 sc in next st] 9 times. (90 sc)
Rnd 20: Sc in each st around. (90 sc)
Checkpoint: The bodice from the armhole should measure approximately 3 inches (7.5 cm). Full piece from neckline should measure approximately 6 inches (15 cm).
Section 4: Waist Transition Round
This sets up the shell repeat for the skirt. We need a multiple of 12 stitches, so we’ll make a small adjustment.
Rnd 21 (Adjustment Round): Sc in first 3 sts, sc2tog, [sc in 10 sts, sc2tog] 5 times, sc in remaining 7 sts. (84 sc)
Rnd 22 (Shell Setup Round): Ch 3 (counts as dc), [dc in same st, sk 2 sts, sc in next st, sk 2 sts, 5 dc in next st] to last 6 sts, sk 2 sts, sc in next st, sk 2 sts, 3 dc in same st as beg ch-3 (completing the first shell), sl st to top of beg ch-3. (7 shell repeats)
Section 5: Skirt Shell Pattern
The skirt uses a two round repeat that expands the fabric outward, creating that beautiful full silhouette.
Skirt Round 1 (Shell Round A): Sl st into the sp at the top of the previous round’s shell (between sts 2 and 3 of each 5-dc shell), ch 3 (counts as dc), work 4 more dc in same sp, ch 1, sc in the sc between shells, ch 1, [5 dc in sp at top of next shell, ch 1, sc in next sc between shells, ch 1] around, sl st to top of beg ch-3. (7 shells)
Skirt Round 2 (Shell Round B): Ch 1, sc in sp between 2nd and 3rd dc of previous shell, [ch 3, sc in top of next sc, ch 3, sc in top center of next shell] around, ending ch 3, sl st to first sc. (14 sc, 14 ch-3 sps)
Skirt Round 3 (Shell Round A, Increase): Work as Shell Round A but work 7 dc (instead of 5 dc) in every shell sp. (7 expanded shells)
Skirt Round 4 (Shell Round B): Ch 1, sc in center of first expanded shell (between dc 4 and dc 5), [ch 3, sc in next sc between shells, ch 3, sc in center of next shell] 6 times, ch 3, sc in last sc, ch 3, sl st to first sc. (14 sc, 14 ch-3 sps)
Skirt Round 5 (Shell Round A): Work 5 dc in each ch-3 sp from previous round. Work sc into each sc between. (14 shells)
Skirt Round 6 (Shell Round B): Sc in center of each shell, ch 3 between each sc, sc in each sc between shells, ch 3 between. (28 sc, 28 ch-3 sps)
Skirt Round 7 (Shell Round A): Work 5 dc in each of the 28 ch-3 sps. Work sc in each of the 28 connecting sc. (28 shells)
Skirt Round 8 (Shell Round B): Sc in center of each of the 28 shells, ch 3 between, sc in each of the 28 connecting sc, ch 3 between. (56 sc, 56 ch-3 sps)
Skirt Round 9 (Shell Round A): Work 5 dc in each of the 56 ch-3 sps. Work sc in each of the 56 connecting sc. (56 shells)
Skirt Round 10 (Shell Round B): Sc in center of each of 56 shells, ch 2, sc in each connecting sc, ch 2. (112 sc, 112 ch-2 sps)
Checkpoint: Skirt from waist should measure approximately 7.5 inches (19 cm).
Section 6: Hem Scallop Edging
Hem Rnd 1: Sl st in first st of last shell round, ch 1, sc in same st. [Sk 2 sts, 5 dc in next st, sk 2 sts, sc in next st] around. Sl st to first sc.
Hem Rnd 2 (Final Scallop): [Sl st in first dc of shell, ch 1, sc in same dc, hdc in next dc, dc in next (center) dc, hdc in next dc, sc in last dc of shell, sl st to sc between shells] around. Fasten off. Weave in end.
Section 7: Flutter Sleeve Edging
Place the 26 held sleeve sts back on the larger hook. Attach yarn at the underarm center point.
Sleeve Setup Rnd: Pick up and sc 2 sts from the underarm chain, sc in each of the 26 held sleeve sts, sc in the remaining 2 underarm chain sts. (30 sc)
Sleeve Rnd 1: Sc in each st around. (30 sc)
Sleeve Ruffle Rnd: [Sc in next st, 5 dc in same st, sk 2 sts] 10 times, sl st to first sc. (10 shells)
Sleeve Scallop Rnd: [Sl st in first dc of shell, sc in 2nd dc, hdc in 3rd dc (center), sc in 4th dc, sl st in 5th dc, sl st in sc between shells] around. Fasten off.
Repeat for the second sleeve.
Section 8: Neckline Edging
Switch to the smaller hook. Attach yarn at the top right corner of the center back opening.
Neckline Rnd 1: Ch 1, work sc evenly around the neckline edge, working approximately 1 sc per st along the foundation chain and 1 sc per row end along the back opening edges. Join with sl st.
Neckline Rnd 2: Ch 1, sc in each st around. At the top left corner of the center back, work a button loop: ch 4, sk 2 sts, sc in next st. Continue sc to end of round. Sl st to join.
Neckline Rnd 3 (Scallop): [Sl st in st, ch 2, 3 dc in same st, sk 2 sts, sl st in next st] around the neckline. Fasten off.
Sew the button to the opposite center back edge, aligned with the button loop.
Section 9: Butterfly Appliqué
Upper Wings: Ch 5, sl st to form a ring. Ch 3 (counts as dc), 11 dc in ring, sl st to top of ch-3. (12 dc) Fold piece flat.
Lower Wings: Ch 4, sl st to form a ring. Ch 3 (counts as dc), 7 dc in ring, sl st to top of ch-3. (8 dc)
Body: Using cream yarn, ch 8. Sc in 2nd ch from hook and each ch across. (7 sc) Fasten off, leaving a 10 inch tail.
Assembly: Layer upper wings behind lower wings, slightly overlapping at center. Place body strip vertically down the center of all four wings. Use the long tail to sew through all layers several times at the center point, cinching them together to create a waist on the butterfly. Add antennae with two 2 inch lengths of yarn knotted at the tips if desired.
Sew butterfly to the front center waist seam of the dress.
Finishing and Blocking
Weave in all yarn ends securely. Darn any small holes at the underarm join points.
For cotton or cotton blend yarn: Wet block by submerging the dress in cool water, gently squeezing out excess water (do not wring), and pinning to a foam blocking board. Pin the scalloped hem points outward. Allow to dry completely.
For acrylic yarn: Pin to shape, cover with a damp cloth, and steam gently. Acrylic will soften and hold the blocked shape.
Blocking makes an enormous difference with the shell stitch skirt. Don’t skip this step!
Size Customization
For 0 to 6 months: Begin with ch 50. Reduce yoke increase rounds to 6. Reduce bodice plain rounds to 6. Stop skirt at Round 7. Finished length approximately 12 inches.
For 2T: Begin with ch 70. Work 9 yoke increase rounds. Add 2 extra plain sc rounds in the bodice. Work 2 additional shell repeat rounds before hem edging. Finished length approximately 16 inches.
To lengthen any size: Add additional 2 round shell repeats before the hem scallop edging. Each pair adds approximately 0.75 inch.
Care Instructions
Hand wash in cool water with gentle detergent. Lay flat to dry. Do not tumble dry, iron directly, or dry clean. Store folded to prevent the skirt from stretching.
I really hope you love making this lavender ruffle baby dress crochet pattern as much as I loved designing it. There’s something so satisfying about watching that shell stitch skirt grow round by round, knowing you’re creating a keepsake someone will treasure. If you make one, I’d absolutely love to see it! Tag me on Instagram or share a photo in the comments below.
Save this baby dress crochet tutorial to your Pinterest boards so you can find it when you’re ready to start stitching. And please drop a comment if you make one. I genuinely read every single one, and seeing your finished dresses makes my whole day!
