
Go dig through your thread stash right now. That gorgeous forest green crochet cotton you have been saving? The burnt orange and golden mustard skeins you bought because the colors reminded you of October leaves? This is their moment.
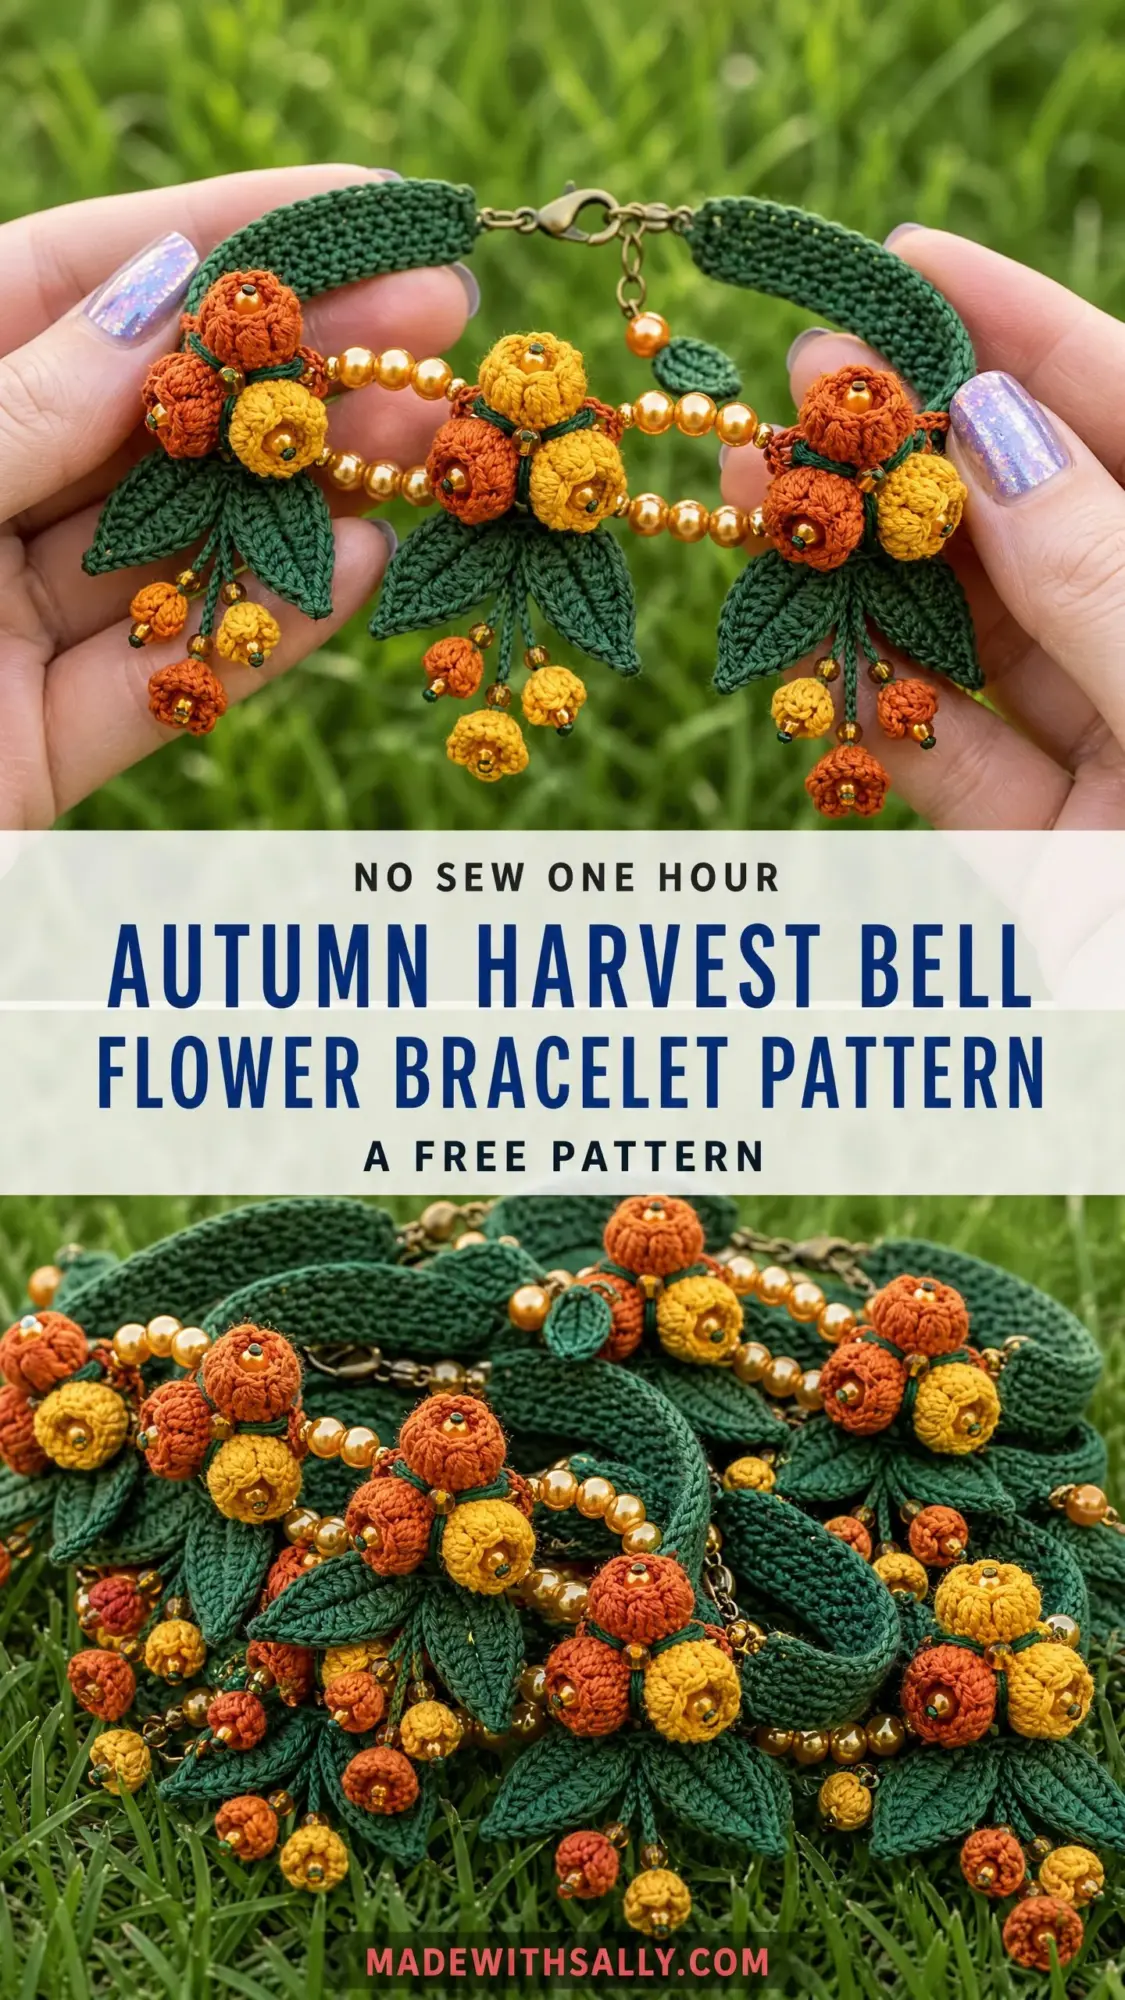
This bracelet is not a quick project. I want to be upfront about that. You are building dimensional pom-buds, tiny bell flowers, crocheted leaves, and assembling them all onto a beaded band with real jewelry hardware. It is advanced work. But if you have been craving a challenge that produces something truly wearable and stunning, this autumn harvest design delivers.
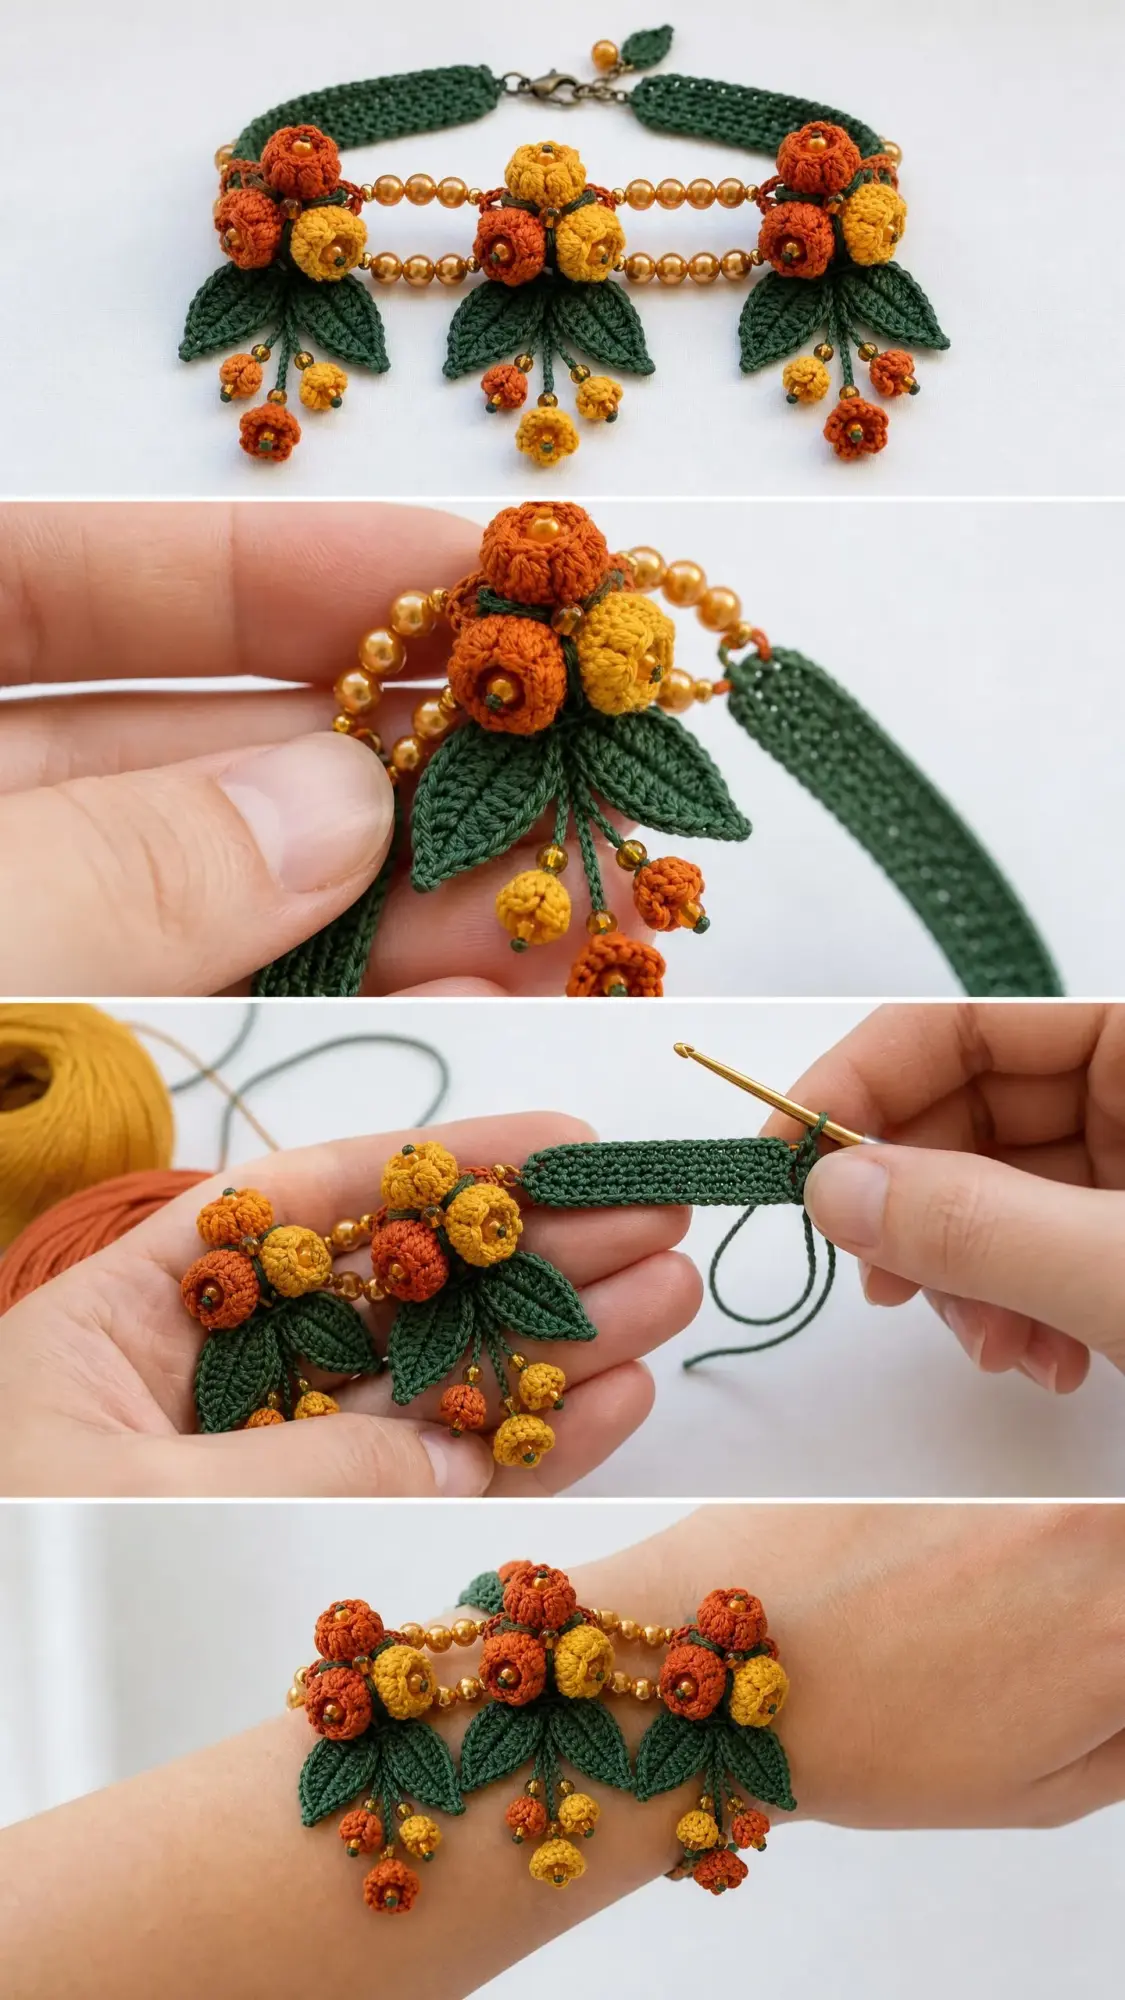
The construction combines several techniques that make thread jewelry so satisfying. You will work tiny spherical buds that hold their shape beautifully, cup-shaped bell flowers that dangle and catch the light, and flat leaves with defined center spines. Everything comes together on a firm half double crochet band accented with rose-gold pearl beads. The result looks like it belongs in a boutique jewelry case.
Why This Crochet Bracelet Pattern Stands Out
Most crochet jewelry patterns stick to simple chains or basic flat motifs. This design goes further. Each of the three floral cluster stations features tightly worked pom-buds in warm autumn tones, nestled against fanning green leaves. A double strand of glass pearl beads runs horizontally through the centerpiece, and small bell flowers hang below each cluster with seed bead accents.
The finished piece measures approximately 7.5 inches long, adjustable to 8.5 inches with the extension chain. The band width sits at about 0.75 inch, and the overall drop from the band to the longest dangle reaches roughly 2.25 inches. This gives you a substantial statement piece without being overwhelming on the wrist.
Materials You Will Need
Crochet Thread:
Hook:
Beads and Hardware:
Thread Suggestions:
Aunt Lydia’s Classic Crochet Thread Size 10 works beautifully for this project. It is widely available, smooth, and takes color well. DMC Petra Crochet Cotton Size 10 offers excellent stitch definition with a lovely sheen. Lizbeth Crochet Thread Size 10 by Handy Hands has a slightly softer hand that helps with shaping those dimensional motifs.
Do not substitute with thicker yarn. The dimensional scale and bead integration depend entirely on thread-weight construction.
Gauge
Working in half double crochet (hdc) with Size 10 thread and your steel hook:
Gauge for individual motifs is less critical, but maintaining consistent tension across all buds and leaves ensures visual uniformity when you assemble everything.
Abbreviations
Let me walk you through every abbreviation you will encounter:
Special Stitches
Pom-Bud
This creates a round three-dimensional ball approximately 0.5 to 0.6 inch in diameter.
Round 1: Start with MR, work 6 sc into ring, pull ring closed. (6 sc)
Round 2: 2 sc in each st around. (12 sc)
Round 3: (Sc in next st, 2 sc in next st) 6 times. (18 sc)
Round 4: Sc in each st around. (18 sc)
Round 5: (Sc in next st, sc in next st, 2 sc in next st) 6 times. (24 sc)
Round 6: Sc in each st around. (24 sc)
At this point, insert a 4 mm bead into the ball and hold in place.
Round 7: (Inv dec over next 2 sts, sc in next 2 sts) 6 times. (18 sts)
Round 8: (Inv dec over next 2 sts, sc in next st) 6 times. (12 sts)
Round 9: Inv dec 6 times. (6 sts)
Fasten off leaving a long tail. Thread tail through front loops of remaining 6 sts, pull to close. Weave in end through center of ball to secure.
Small Bell Flower
This creates a cup-shaped flower approximately 0.5 inch tall.
Round 1: MR, work 4 sc into ring, pull ring closed. (4 sc)
Round 2: 2 sc in each st around. (8 sc)
Round 3: (Sc in next st, 2 sc in next st) 4 times. (12 sc)
Round 4: Working in back loops only, sc in each st around. (12 sc)
Round 5: (Sc in next 2 sts, 2 sc in next st) 4 times. (16 sc)
Round 6: (Sc in next 3 sts, 2 sc in next st) 4 times. (20 sc)
Fasten off leaving a 6-inch tail for attachment. The opening faces downward forming the bell mouth.
Flat Leaf
This creates an elongated leaf shape approximately 1 inch long.
Starting chain: Ch 8.
Row 1 (RS): Starting in 2nd ch from hook, sc in next 5 ch, 3 sc in last ch (tip of leaf), working along opposite side of foundation ch, sc in next 5 ch, sl st in last ch to close base. Do not turn. (13 sc plus sl st at base)
Row 2: Working back up the same piece, sl st into first sc, sc in next 4 sts, hdc in next st, 3 hdc in center tip st, hdc in next st, sc in next 4 sts, sl st into base sl st.
Fasten off leaving a tail for sewing.
Small Leaf
Same as Flat Leaf but beginning with Ch 6.
Row 1: Starting in 2nd ch from hook, sc in next 3 ch, 3 sc in last ch, sc in next 3 ch along opposite side, sl st at base. (9 sc plus sl st)
Row 2: Sl st into first sc, sc in next 2 sts, hdc in next st, 3 hdc in center tip st, hdc in next st, sc in next 2 sts, sl st at base.
Fasten off with tail.
Calyx Cap
MR, work 5 sc into ring, pull closed. (5 sc)
Round 2: 2 sc in each st around. (10 sc)
Round 3: In back loops only, (sc in next st, ch 3, sl st back into same st) 10 times.
Fasten off with tail. This creates a small star-shaped calyx to sew to each pom-bud base.
Tiny Pom Ball (Optional)
MR, 6 sc into ring. (6 sc)
Round 2: 2 sc in each st. (12 sc)
Round 3: (Inv dec) 6 times. (6 sts)
Fasten off, pull tail through remaining sts to close. These are approximately 0.25 inch wide.
Step by Step Crochet Instructions
Section 1: The Band
The band is the green flat strap that wraps around the wrist. It is worked in rows of hdc creating a firm, slightly textured strip.
With Color A (Forest Green) and Steel Hook Size 7, ch 65.
Row 1: Hdc in 3rd ch from hook, hdc in each ch across. Turn. (63 hdc)
Row 2: Ch 2, hdc in each st across. Turn. (63 hdc)
Row 3: Ch 2, hdc in each st across. Turn. (63 hdc)
Row 4: Ch 2, hdc in each st across. Turn. (63 hdc)
Row 5: Ch 2, hdc in each st across. Do not turn. (63 hdc)
At end of Row 5, do not fasten off. Work a border around the entire band:
Border Round: Rotate work. Along the short end, work 5 sc evenly across the end edge. Rotate. Along the long bottom edge, sc in each foundation ch, working 1 sc per ch. Along the other short end, work 5 sc evenly. Rotate. Along the long top edge, sc in each row end, working 1 sc per row end. Join with sl st to first sc of border. Fasten off with tail.
Your band should measure approximately 6.5 inches in length and 0.75 inch in width. Set aside.
Section 2: Pom-Buds (Make 9 Total)
Make 5 pom-buds in Color B (Burnt Orange) and 4 pom-buds in Color C (Golden Mustard) following the Pom-Bud instructions above. Insert a 4 mm pearl bead into each before closing.
Section 3: Calyx Caps (Make 9 Total)
Make 9 calyx caps in Color A (Forest Green). Sew one to the base of each pom-bud, pulling the tail through securely.
Section 4: Large Leaves (Make 9 Total)
Make 9 large flat leaves using Color A. These will be arranged 3 per cluster station, fanning downward.
Section 5: Small Leaves (Make 6 Total)
Make 6 small leaves using Color A. These accent the upper edge of each cluster and the extension chain tip area.
Section 6: Small Bell Flowers (Make 18 Total)
Make 10 small bell flowers in Color B (Burnt Orange) and 8 in Color C (Golden Mustard).
For each bell flower, after fastening off, thread a beading needle onto the tail and string 1 gold seed bead. Push needle back up through the flower center and secure.
Section 7: Tiny Pom Balls (Optional, Make 12)
Make 6 in Burnt Orange and 6 in Golden Mustard. Attach one seed bead to the bottom of each using a beading needle and thread.
Section 8: Bead Strand
Cut beading thread approximately 20 inches long. Using a beading needle, string 60 to 65 rose-gold 6 mm pearl beads. Tie a knot at each end, leaving a 2-inch tail on each side.
Fold the bead strand in half so that 30 to 32 beads fall in each loop. This creates the two parallel rows of pearls visible between the floral clusters.
Section 9: Assembly
Step 1: Lay the band right side up. Mark the exact center. Then mark 1.5 inches to the left of center and 1.5 inches to the right of center. These are your three cluster station points.
Step 2: For each station, arrange 3 pom-buds in a triangular cluster. Alternate colors for visual rhythm. Sew pom-buds together with their tails.
Step 3: For each station, sew 3 large flat leaves to the lower side of the pom-bud cluster, fanning outward: one pointing straight down, one angled left, one angled right.
Step 4: Center each assembled cluster at its station mark. Sew through the cluster base and through the band fabric multiple times with Color A thread.
Step 5: Position the folded bead strand horizontally across the band, running from the left outer cluster station to the right outer cluster station. Tack each end and the midpoint fold securely.
Step 6: Below each station, attach 5 to 6 dangle units (small bell flowers and tiny pom balls) using Color A thread. Space dangles across the width of the leaf fan, with longer dangles in the center.
Step 7: On the right short end of the band, attach the lobster clasp using Color A thread. Stitch through the clasp ring and band at least 6 times.
Step 8: On the left short end, use the jump ring to attach the extension chain.
Step 9: Work a small leaf for the extension chain tip. Attach it to the free end ring of the extension chain. Add 1 rose-gold 4 mm pearl bead just below the leaf.
Finishing Your Crochet Bracelet
Weave in all remaining thread tails using your tapestry needle. Pull each tail in two different directions through the fabric before trimming.
To block, lightly mist the assembled bracelet with cool water. Lay flat on a blocking mat. Use rust-proof pins to straighten the band and fan the leaves into position. Allow to dry completely, at least 4 to 6 hours.
Do not heavily mist the pom-buds if using cotton stuffing. If you used bead inserts, light misting is fine.
Care Instructions
Hand wash in cool water with mild liquid soap. Do not wring or twist. Gently press out excess water in a clean towel. Reshape and lay flat to dry. Store in a small jewelry pouch to protect the dimensional motifs.
Wrapping Up
This autumn harvest bracelet represents the kind of crochet work that makes people stop and ask where you bought it. The combination of dimensional pom-buds, delicate bell flowers, and pearl beads creates something that looks far more complex than the techniques involved. Yes, it takes time. Yes, you need patience. But every single component uses stitches you already know, just worked at a smaller scale with thread instead of yarn.
Take your time with this one. Work on it across several sessions. The assembly stage is actually the most satisfying part, watching all those individual motifs come together into a cohesive piece of wearable art.
If this pattern is calling to you, go ahead and pin it to your Pinterest boards so you can find it when you are ready to start. And when you finish your bracelet, please come back and leave a comment below. I genuinely love seeing how these designs turn out in different color combinations.
