
Last summer, my friend invited me on a weekend sailing trip, and I realized I had absolutely nothing nautical to wear. Not a single thing. I dug through my closet looking for something that screamed "seaside chic" and came up empty. So naturally, I did what any crocheter would do: I made something instead.
Get the Ad-Free PDF Pattern
You can find the free pattern below, or you can purchase the ad-free printable PDF from my shop.
Get the Printable PDF →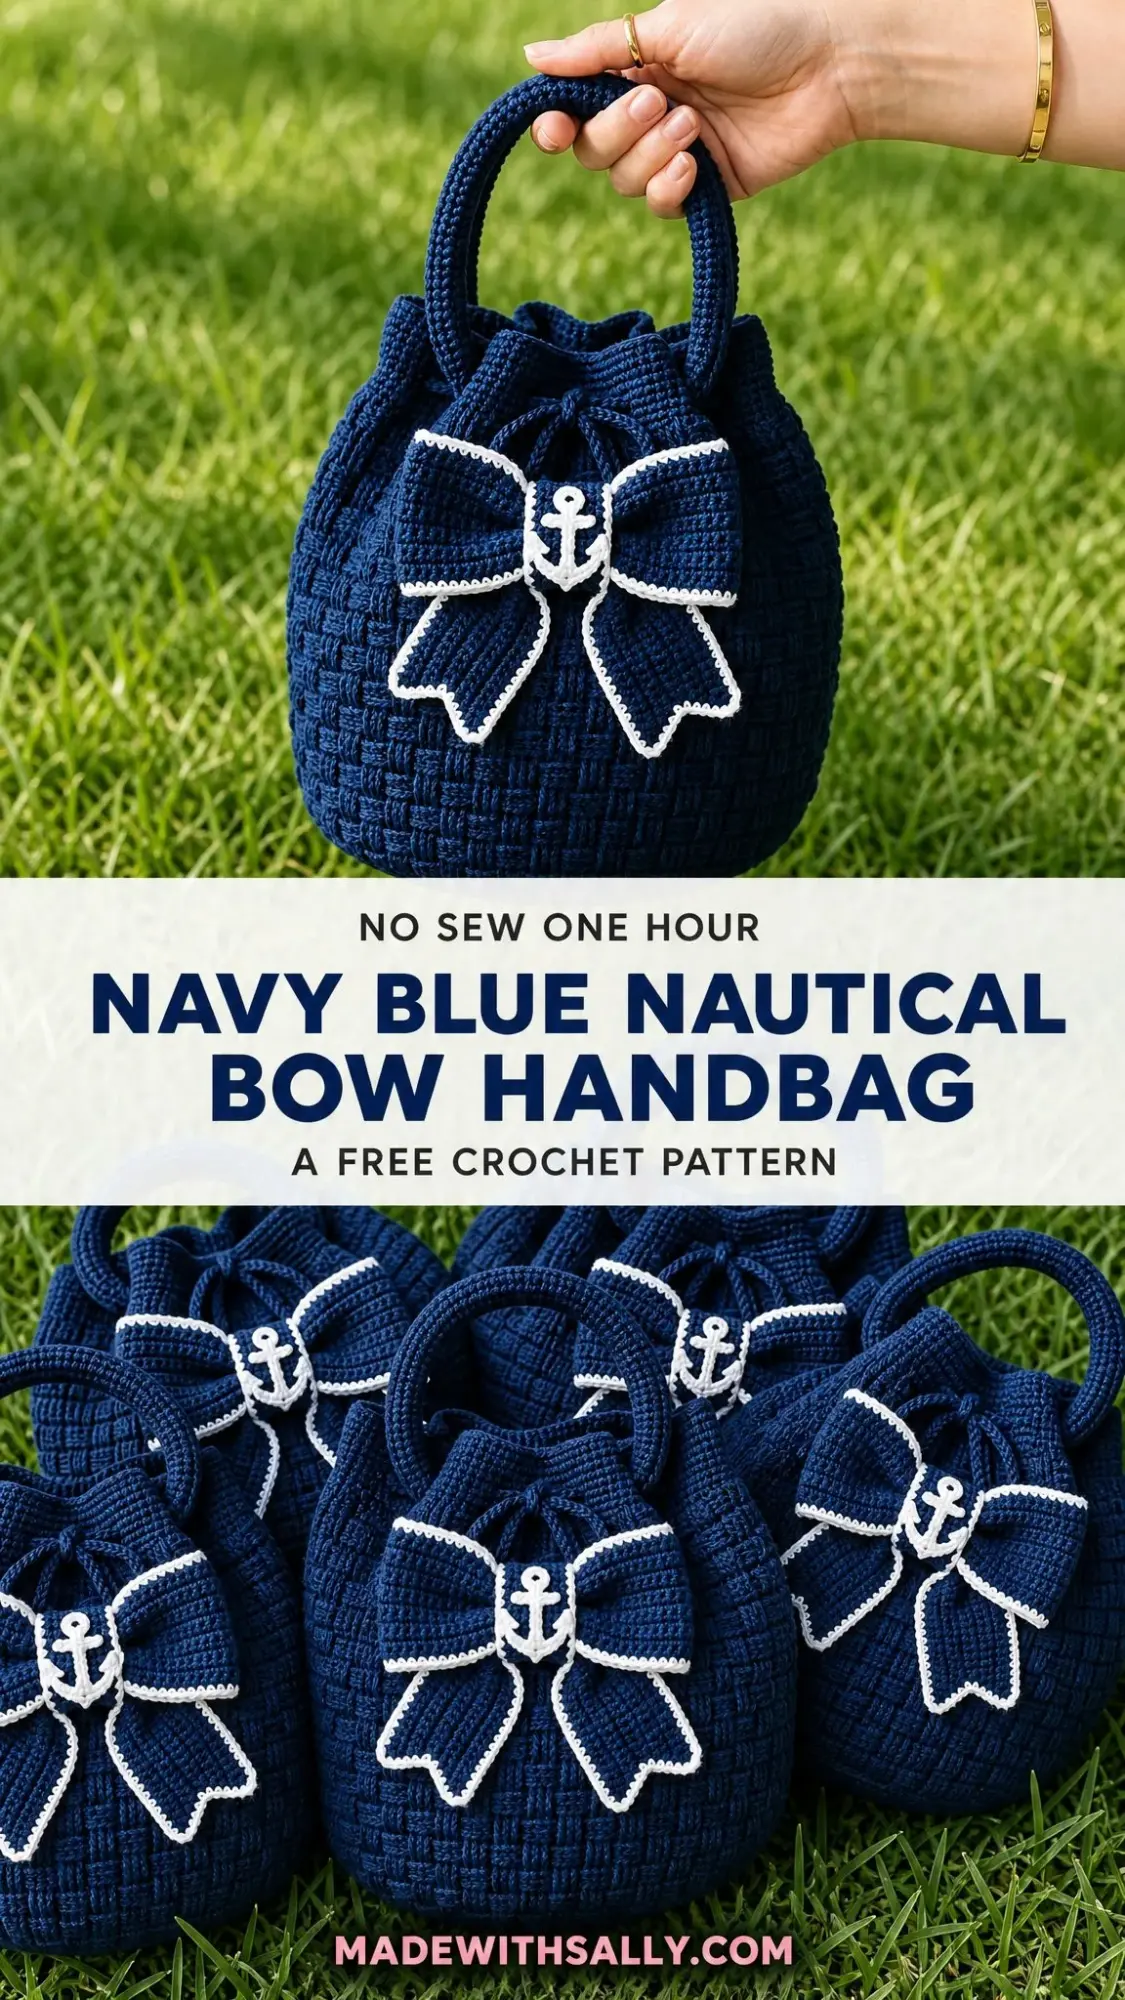
This Navy Blue Nautical Bow Handbag became my passion project for the next two weeks. I wanted a structured bucket bag with serious visual impact, something that would look polished enough for brunch but playful enough for a beach boardwalk. The basketweave texture, the crisp bow with its little anchor accent, the cinched drawstring top… every detail came together better than I could have hoped.
Now I carry this bag constantly, and strangers stop me to ask about it. If you love projects that look impressive but follow logical construction, you are going to adore making this handbag.
About This Navy Nautical Bow Handbag Crochet Pattern
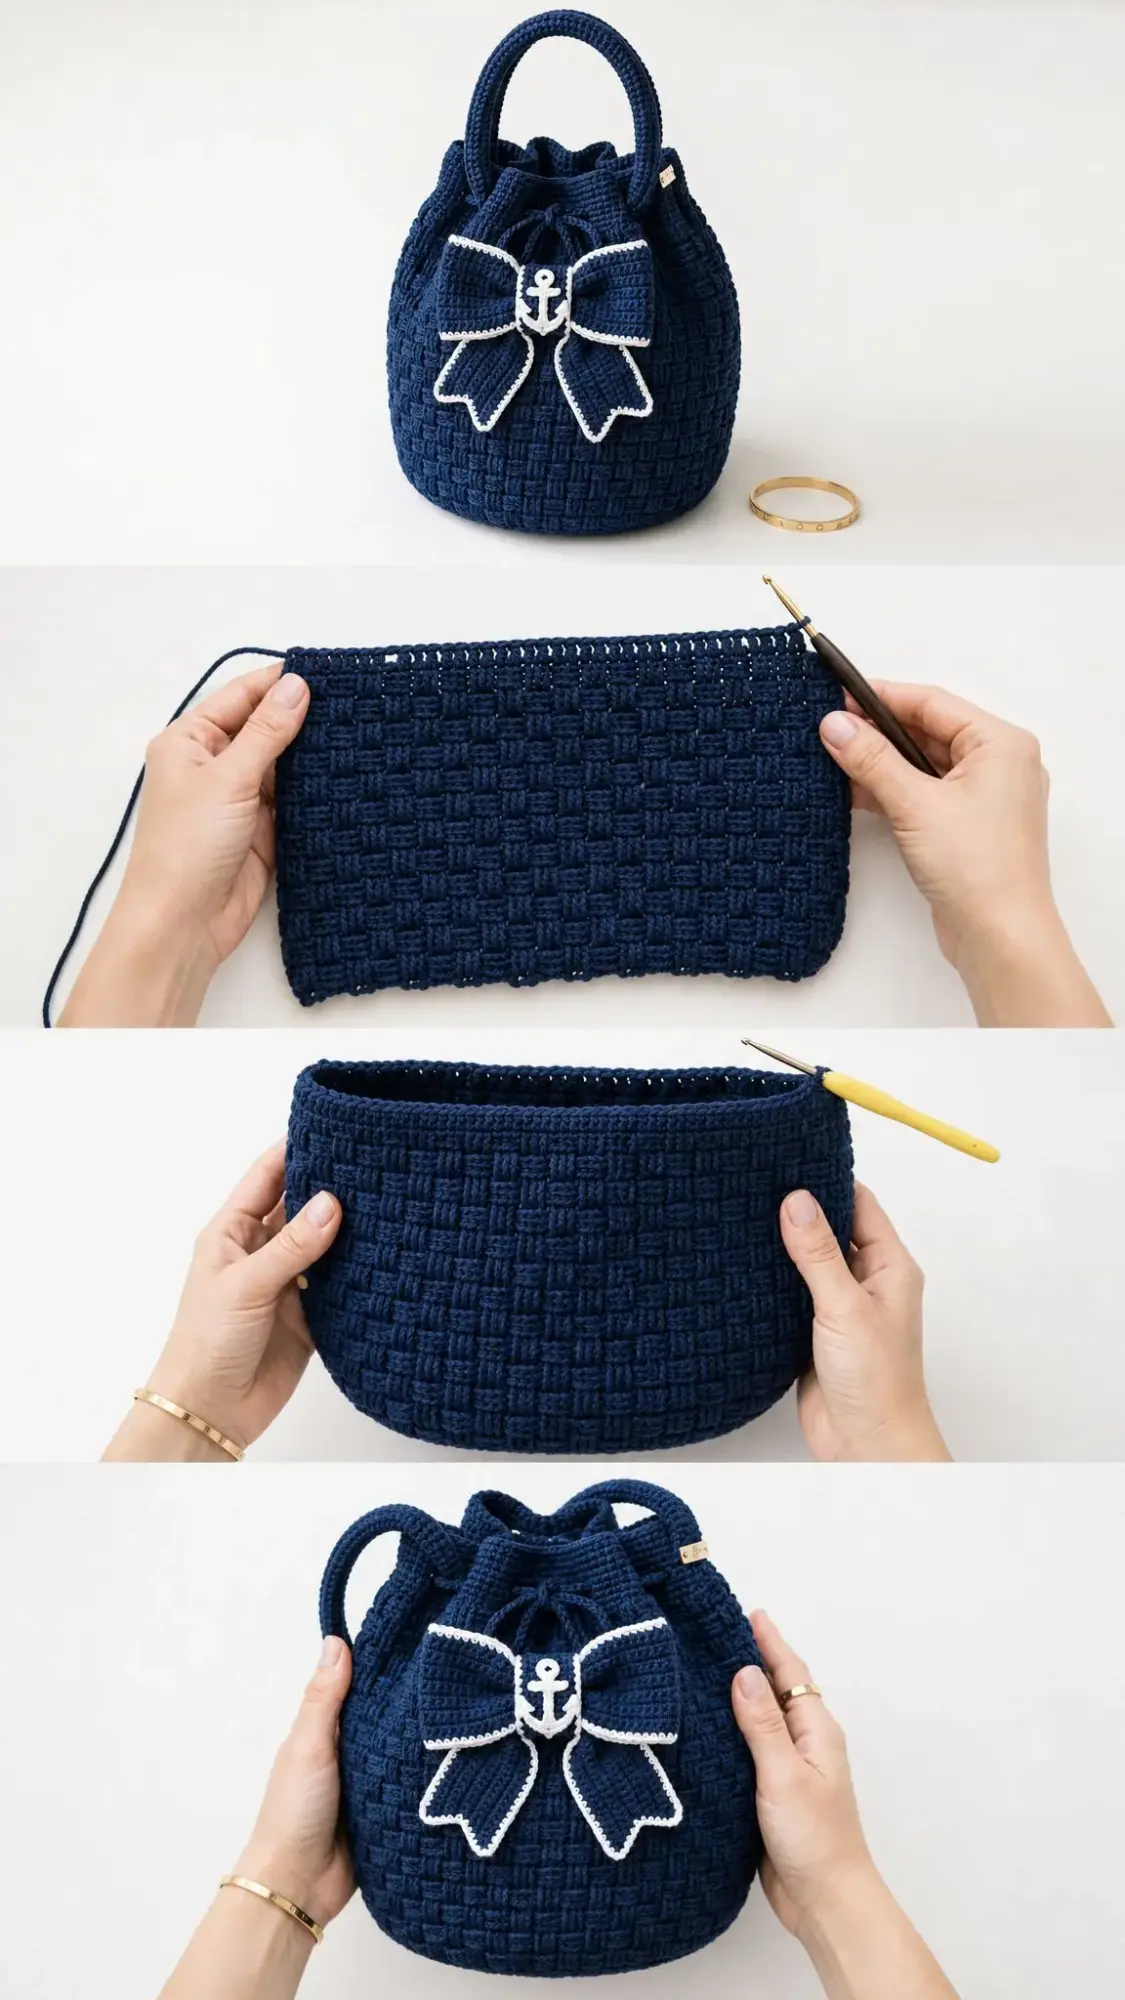
This intermediate crochet pattern creates a structured oval-base bucket handbag with gorgeous basketweave texture on the body. The bag features double handles, a cinched drawstring closure, and a show-stopping layered bow with an adorable crocheted anchor at the center.
The finished handbag measures approximately 9 inches wide by 8.5 inches tall by 4 inches deep, with a handle rise of about 5 inches. It is the perfect size for carrying your phone, wallet, keys, sunglasses, and a few essentials without feeling bulky.
Construction Overview: You will work the oval base in joined rounds, then build the basketweave body upward. The drawstring eyelet round creates the cinched top. Handles, bow, and anchor are made separately and sewn on during finishing.
Expect this project to take 8 to 12 relaxed hours of crocheting, plus blocking and drying time. It is absolutely worth every minute.
Materials You Will Need
Gathering the right supplies before you start makes the whole process smoother. Here is everything you need:
Yarn:
Hooks:
Notions:
Optional Structure:
Optional Lining:
Yarn Suggestions
For best results, choose a smooth, low-stretch yarn that creates a dense fabric. Your swatch should feel firm rather than drapey.
Great options include:
If your fabric feels loose, go down a hook size. If it is stiff and hard to work, go up a hook size.
Gauge
Getting gauge right matters a lot for this project because you want the bag to hold its shape beautifully.
Basketweave gauge: 16 stitches and 14 joined rounds = 4 inches (10 cm) after firm blocking
Single crochet gauge: 18 sc and 20 rows = 4 inches (10 cm)
Make a basketweave swatch at least 5 inches square. Match both stitch and round gauge before beginning. A dense swatch gives the handbag its structured shape.
Abbreviations and Stitch Guide
This pattern uses US crochet terminology. If you typically work from UK patterns, remember that US single crochet (sc) equals UK double crochet (dc), and US double crochet (dc) equals UK treble (tr).
Abbreviations:
Special Stitches
Front Post Double Crochet (FPdc): Yarn over, insert your hook from front to back to front around the post of the next stitch, yarn over and pull up a loop, then complete a double crochet as normal. The post sits raised on the right side of your work.
Back Post Double Crochet (BPdc): Yarn over, insert your hook from back to front to back around the post of the next stitch, yarn over and pull up a loop, then complete a double crochet. The post recedes behind the fabric.
Basketweave Block: Work 4 FPdc, 4 BPdc across the round for three rounds. On the next three rounds, reverse the order to 4 BPdc, 4 FPdc. This creates raised woven squares that look like a basket.
Invisible Join: Fasten off, thread your tail on a yarn needle, insert under both loops of the second stitch of the round, then back into the center of the final stitch. Pull until the top edge looks like a normal stitch.
Reverse Single Crochet (Crab Stitch): Work single crochet from left to right if you are right-handed, or right to left if left-handed. Insert your hook in the previous stitch, pull up a loop, yarn over and pull through both loops.
Note for Left-Handed Makers: Work the same stitch counts and shaping. Your visual spiral direction and crab stitch direction will be mirrored. Place the bow on the front center after the bag is complete.
Bag Base Instructions
Using navy yarn and your 5 mm hook, work in joined rounds.
Round 1: Chain 17. Work 2 sc in the 2nd chain from hook, sc in the next 14 chains, 4 sc in the last chain. Working along the opposite side of the foundation chain, sc 14, 2 sc in the first chain. Join. (36 sc)
Round 2: Inc in each of the next 2 stitches, sc 14, inc in each of the next 4 stitches, sc 14, inc in each of the last 2 stitches. Join. (44 sc)
Round 3: (Sc 1, inc) twice, sc 14, (sc 1, inc) 4 times, sc 14, (sc 1, inc) twice. Join. (52 sc)
Round 4: (Sc 2, inc) twice, sc 14, (sc 2, inc) 4 times, sc 14, (sc 2, inc) twice. Join. (60 sc)
Round 5: (Sc 3, inc) twice, sc 14, (sc 3, inc) 4 times, sc 14, (sc 3, inc) twice. Join. (68 sc)
Round 6: (Sc 4, inc) twice, sc 14, (sc 4, inc) 4 times, sc 14, (sc 4, inc) twice. Join. (76 sc)
Round 7: (Sc 5, inc) twice, sc 14, (sc 5, inc) 4 times, sc 14, (sc 5, inc) twice. Join. (84 sc)
Round 8: (Sc 6, inc) twice, sc 14, (sc 6, inc) 4 times, sc 14, (sc 6, inc) twice. Join. (92 sc)
Round 9: Sc 22, inc, sc 23, inc, sc 22, inc, sc 22, inc. Join. (96 sc)
Base Checkpoint
Your base should measure about 8.25 x 4.25 inches after light steam blocking. If your base is significantly smaller or larger, check your gauge and adjust your hook size if needed.
Bag Body Instructions
Now comes the fun part where you build up that beautiful basketweave texture.
Round 10: Ch 1, sc BLO in each stitch around. Join. (96 sc)
This back loop only round creates a crisp edge where the base meets the body.
Round 11: Ch 1, sc in each stitch around. Join. (96 sc)
Rounds 12 to 14: Ch 2, FPdc 4, BPdc 4; repeat from around. Join. (96 sts)
Rounds 15 to 17: Ch 2, BPdc 4, FPdc 4; repeat from around. Join. (96 sts)
Rounds 18 to 20: Repeat Rounds 12 to 14. (96 sts)
Rounds 21 to 23: Repeat Rounds 15 to 17. (96 sts)
Rounds 24 to 26: Repeat Rounds 12 to 14. (96 sts)
Rounds 27 to 29: Repeat Rounds 15 to 17. (96 sts)
Round 30: Ch 1, sc in each stitch around. Join. (96 sc)
Round 31 (Eyelet Round): Ch 2, (dc in next 2 sts, ch 1, sk 1, dc in next st); repeat from around. Join. (72 dc + 24 ch-sps = 96)
This creates the holes for your drawstring to weave through.
Round 32: Ch 1, sc in each dc and ch-1 space around. Join. (96 sc)
Round 33: Reverse sc in each stitch around. Invisible join. (96 sts)
Body Checkpoint
Before the eyelet round, your bag should measure about 7.5 inches tall from the base edge and 24 inches around the top when laid open.
Handles (Make 2)
Chain 9.
Row 1: Sc in 2nd chain from hook and across. (8 sc)
Rows 2 to 48: Ch 1, turn, sc across. (8 sc)
Wrap the strip around rope if using, or fold lengthwise without rope. Whipstitch the long edges closed. Curve into a handle shape and sew each end securely over Rounds 28 to 32, about 3 inches apart. Repeat for the second handle on the back of the bag.
Drawstring
Chain 125. Slip stitch in the back bump of each chain for a rounded cord.
Weave through Round 31, entering and exiting at front center. Knot the ends or add small tassels for a decorative finish.
Bow Loops
Using navy yarn, chain 35.
Row 1: Sc in 2nd chain from hook and across. (34 sc)
Rows 2 to 18: Ch 1, turn, sc across. (34 sc)
Edge with cream: Join cream yarn in any corner, ch 1, sc evenly around placing 3 sc in each corner. Invisible join.
Cinch the rectangle at the center with navy yarn to create the bow shape.
Bow Tails (Make 2)
Using navy yarn, chain 17.
Row 1: Sc in 2nd chain from hook and across. (16 sc)
Rows 2 to 10: Ch 1, turn, sc across. (16 sc)
Row 11: Ch 1, turn, sc 5, sc2tog, sk 2, sc2tog, sc 5. (12 sts plus center notch)
Fasten off.
Edge with cream: Work sc around the entire piece, working 2 sc in the outside lower corners and 1 sc around the notch edges.
Sew the tails under the bow loops.
Anchor Accent
Using cream yarn and your smaller 4 mm hook, create a small anchor measuring approximately 1.75 inches tall.
Chain 8 for the shank. Slip stitch back 7.
Chain 4, slip stitch in the 2nd chain and next 2 chains for one fluke. Slip stitch to base. Repeat for the opposite fluke.
Chain 6 for the crossbar. Slip stitch back 5.
Add a small chain 6 ring at the top and fasten off.
Sew the anchor to the cinched center of the bow.
Finishing and Assembly
Assembly Order:
1. Block the bag body lightly
2. Sew handle ends through several layers
3. Weave the drawstring through the eyelet round
4. Pin the bow at front center
5. Sew bow tails first
6. Sew bow loops on top
7. Attach anchor accent
8. Weave in all tails inside the bag
Blocking: Shape the base flat and stuff the body with towels. Steam lightly without flattening the basketweave texture. Let dry completely before adding the bow.
Optional Lining: Trace the bag shape, sew a simple bucket lining, and hand-stitch it just below the eyelet round so the drawstring still moves freely.
Size Customization Tips
To change width: Add or remove base increase rounds in multiples of 8, keeping the final body count divisible by 8.
To change height: Add or remove basketweave rounds in sets of 3.
For a longer handle rise: Add rows to each handle strip before seaming.
Care Instructions
Spot clean with cool water and mild soap. Press out moisture in a towel, reshape, and air dry flat. Avoid hanging while wet, as this can stretch the bag out of shape.
Troubleshooting Common Issues
Body flares outward: Your basketweave rounds are too loose. Go down a hook size for the body or work the top sc rounds more firmly.
Base cups too soon: Your increase rounds may be tight. Block the base flat before starting the body and check that Rounds 1 to 9 match the stated counts.
Texture does not line up: The body count must be 96 and divisible by 8. If a round is short, find the missed stitch before continuing.
Bow droops: Add a small felt or plastic canvas strip behind the bow center, or sew more anchoring stitches through the top loop edges.
Final Thoughts on This Nautical Handbag Crochet Pattern
I absolutely love how this Navy Blue Nautical Bow Handbag turned out, and I think you will too. The basketweave stitch creates such satisfying texture, and the bow with its tiny anchor is the perfect finishing touch. Whether you are headed to a seaside vacation or just want a unique handmade accessory, this bag delivers.
Thank you so much for choosing this pattern! I genuinely appreciate you being here and trusting me with your crafting time. If you make this handbag, I would love to see it. Share your photos on Instagram or Facebook and tag me so I can admire your work.
If you want to come back to this Navy Nautical Bow Handbag crochet pattern later, save it to one of your Pinterest boards so it is easy to find. And please leave a comment below if you make one. I always love hearing how projects turn out for you!
Want a Quick & Easy Printable Version?
Get a clean, beautifully formatted PDF of this pattern — easy to follow step by step, ready to print or save on any device. No scrolling, no distractions, just the pattern.
Get the Printable PDF →