
Looking for a handmade summer set that feels special enough for a beach vacation but practical enough to actually wear? This butter yellow two-piece combines a fan stitch bralette with a decorative bow centerpiece and matching high-waist shorts with a ribbed waistband. The construction uses familiar stitches like single crochet (sc) and double crochet (dc) arranged in an elegant repeating pattern.
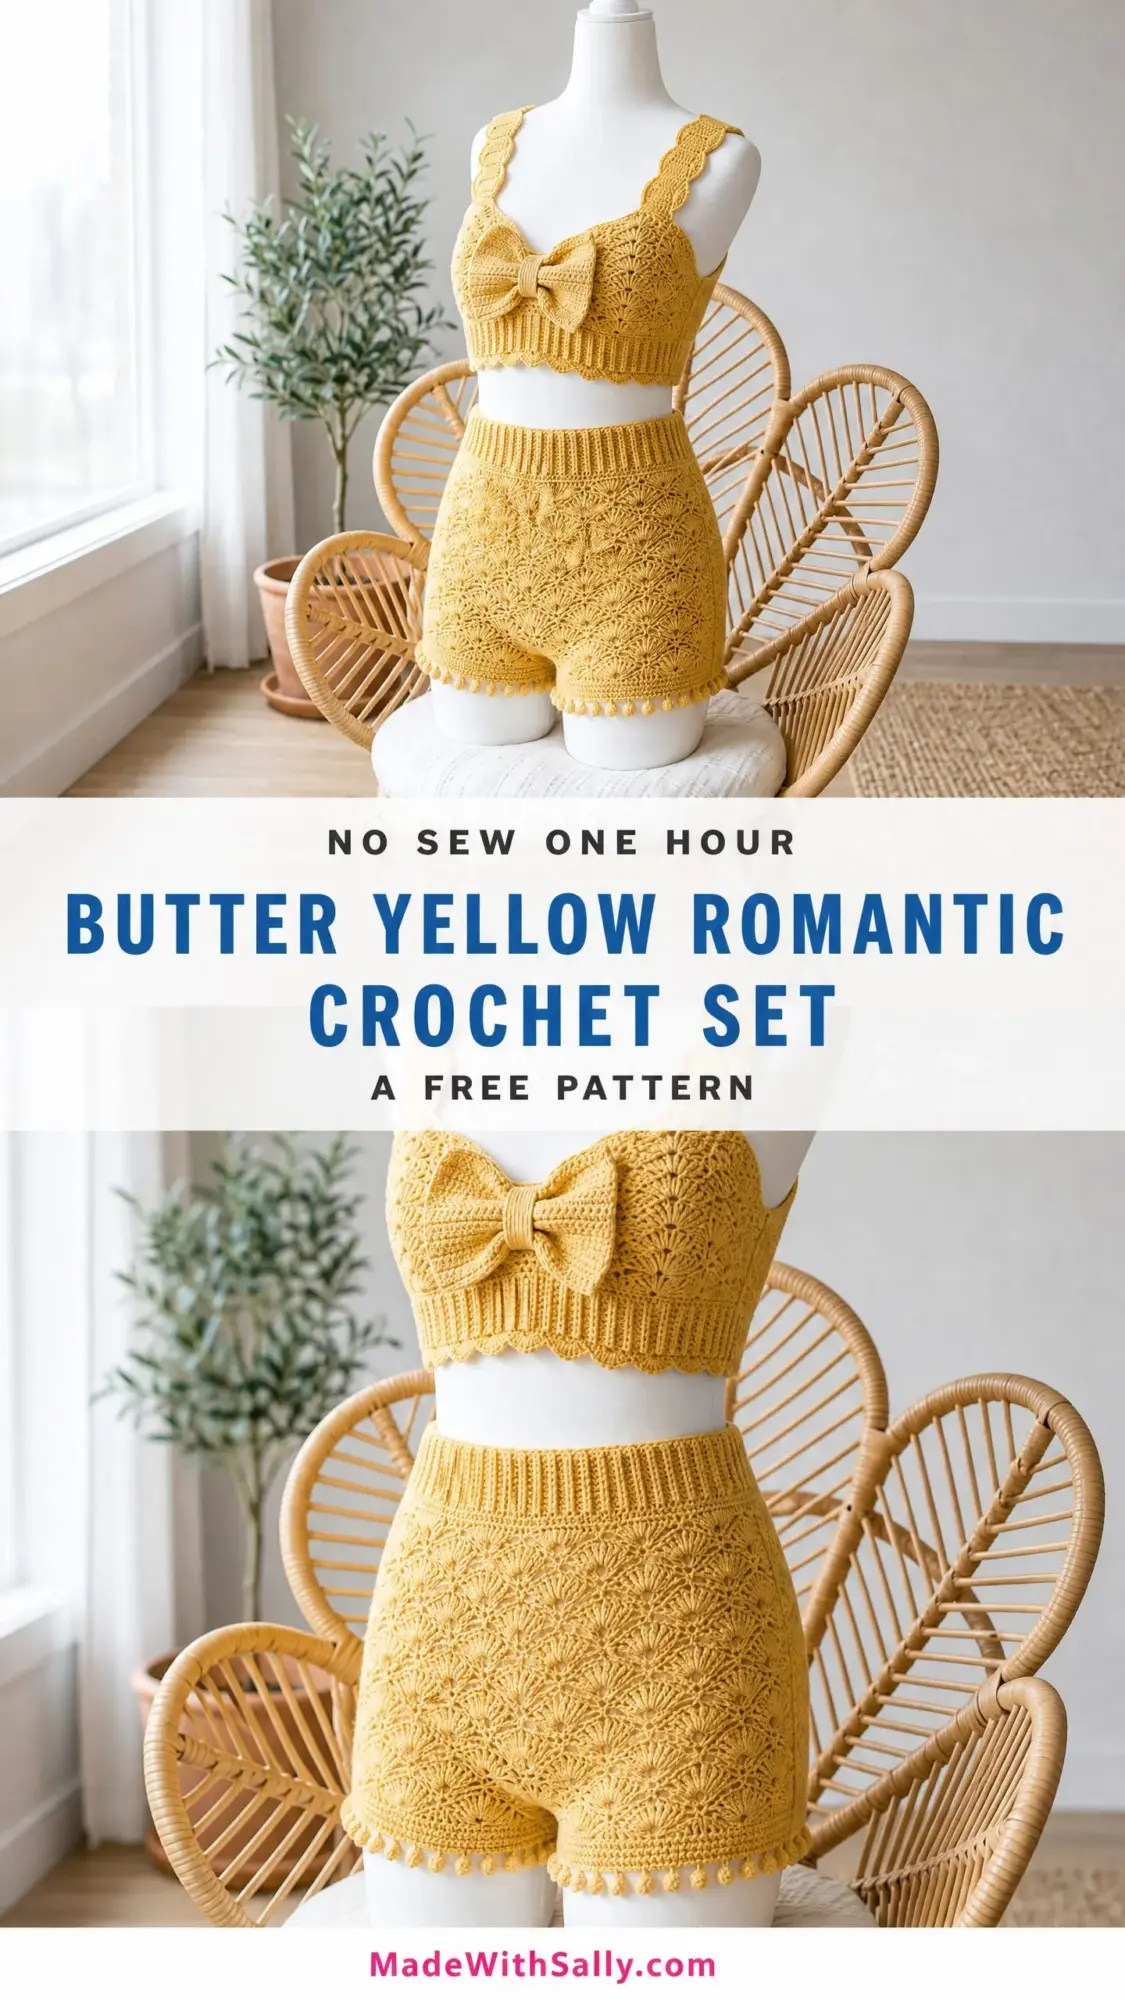
This set works up beautifully as a gift for yourself or someone you love. It is sized for a Small (US 4/6) with detailed notes for adjusting to Medium or Large. The bralette takes roughly 10 to 14 hours, while the shorts need 14 to 18 hours, so plan for a satisfying weekend project or a relaxed week of evening stitching.
If you have intermediate skills and have completed at least one garment before, you will find this achievable with patience. The fan stitch repeat is simple once you get the rhythm, and I will walk you through every step below.
Why You Will Love This Crochet Set Pattern
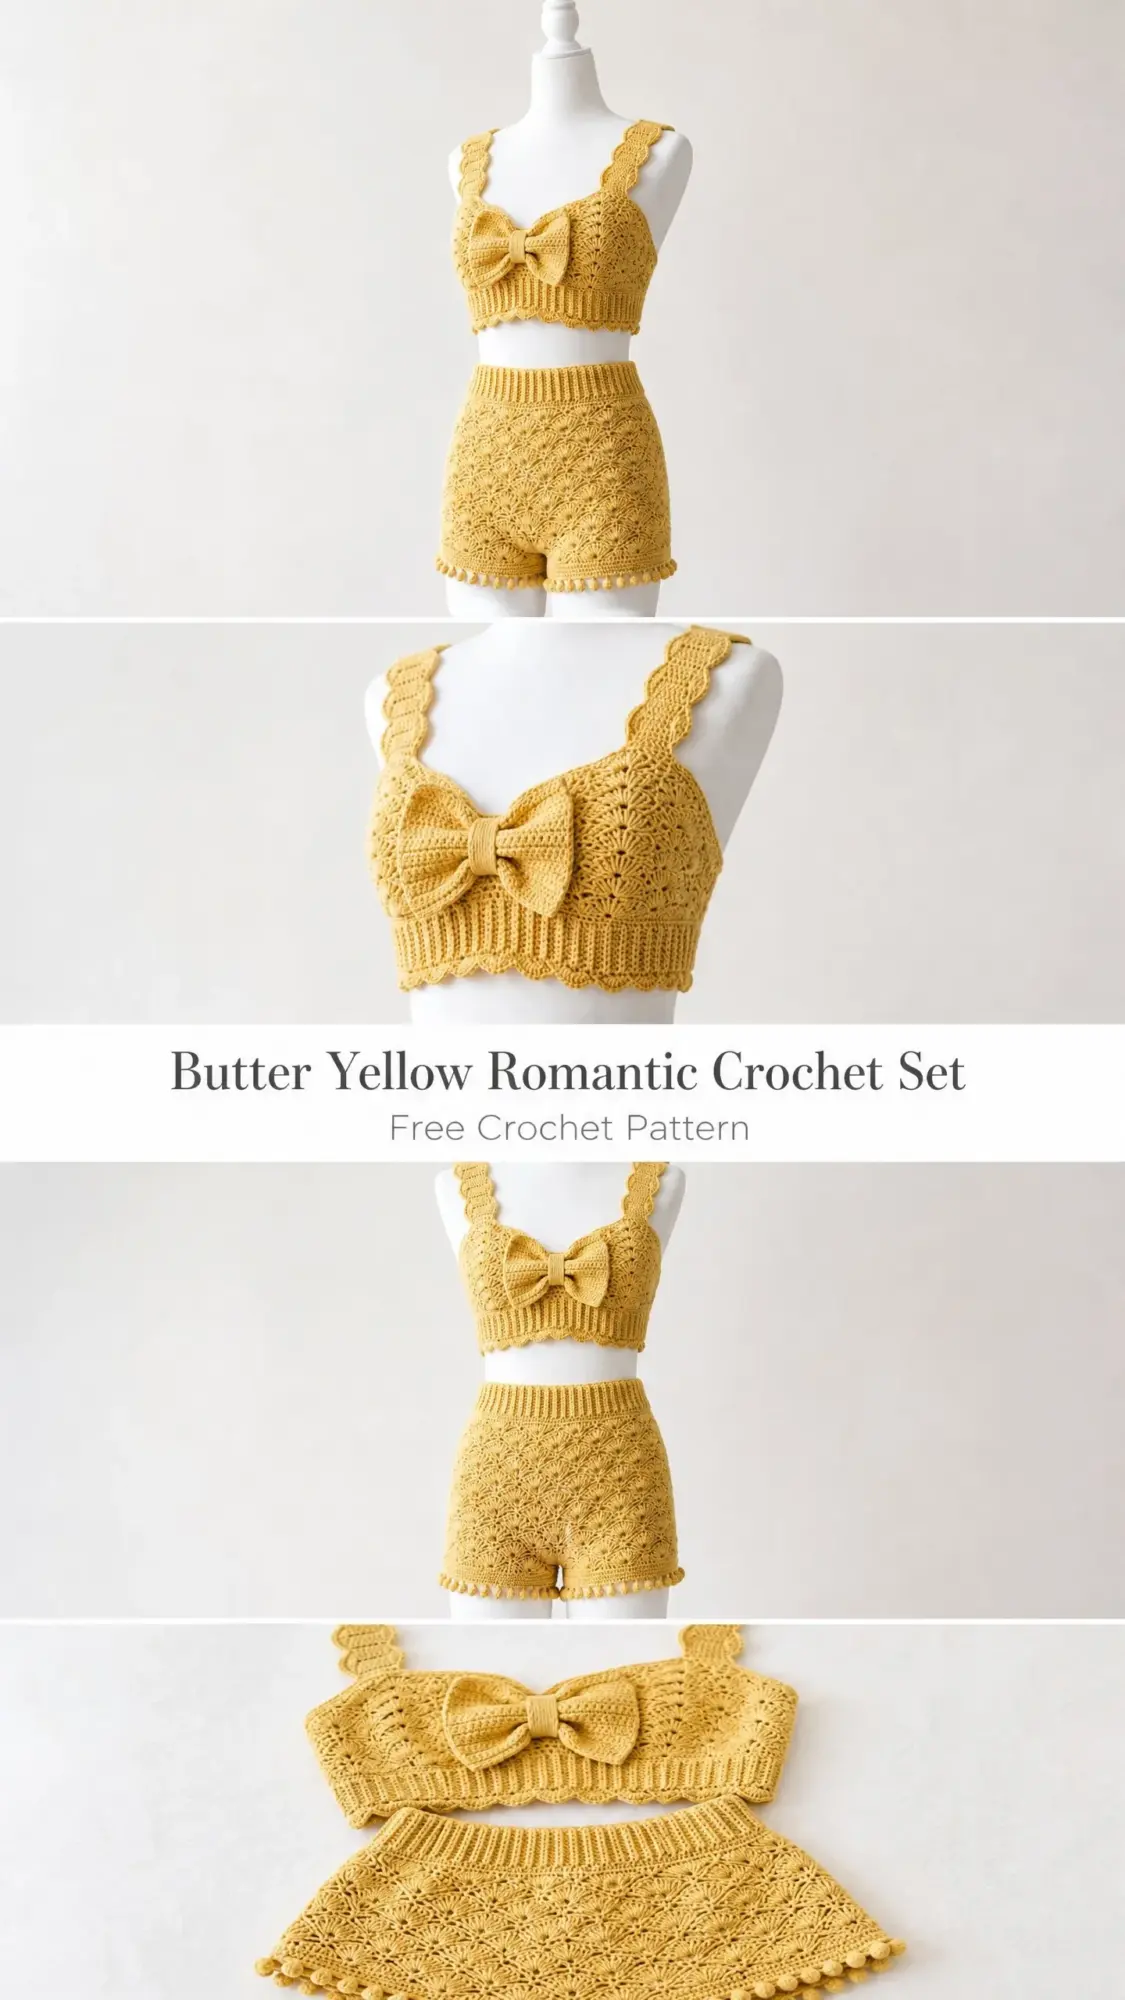
The romantic aesthetic of this two-piece comes from the fan stitch texture that covers both the bralette body and the shorts. Each fan consists of five double crochet stitches worked into a single stitch, creating those pretty shell-like waves you see in the photos. The scalloped straps add feminine detail, while the centered bow brings the whole look together.
What makes this pattern practical is the construction method. The bralette is worked in flat panels that get seamed together, so you can check your sizing as you go. The shorts are worked in the round from the waistband down, which means minimal finishing work at the end.
The wide ribbed waistband on the shorts deserves special mention. It is worked in back loop only single crochet (blo sc), which creates a stretchy, ridged texture that hugs comfortably without digging in. You can add elastic inside the waistband for extra security, but the ribbing alone provides plenty of stretch.
Materials You Will Need
Before you begin, gather everything on this list. Having your materials ready makes the whole process smoother.
Yarn: DK weight (CYCA 3), 100% cotton or cotton-blend. You need approximately 600 yards total. That breaks down to 250 yards for the bralette and 350 yards for the shorts. If you are making a larger size, grab an extra 100 yards to be safe.
Recommended yarn options:
Hooks:
Notions:
Substitution tip: Choose any DK weight yarn with a smooth, tightly plied construction. Avoid fuzzy or textured yarns because they will hide the pretty fan stitch detail.
Gauge Information
Getting gauge right matters for fitted garments like this one. Take the time to swatch before diving in.
With E-4 / 3.5 mm hook in Fan Stitch Pattern:
With D-3 / 3.25 mm hook in ribbing:
Work a swatch of at least 24 stitches by 12 rows. Block it flat before measuring. If your swatch is too big, try a smaller hook. If it is too small, go up a hook size.
Finished Measurements
Bralette:
Shorts:
Stitch Abbreviations and Definitions
Let me define every abbreviation you will encounter. Understanding these terms before you start will save confusion later.
blo = back loop only. Instead of inserting your hook under both loops of the stitch, you insert it under only the back loop. This creates ribbed texture.
ch = chain. Wrap yarn over hook, pull through loop on hook. Example: ch 5 means make 5 chain stitches.
ch-sp = chain space. The gap created by a chain in the previous row.
dc = double crochet. Yarn over, insert hook in stitch, yarn over and pull up a loop (3 loops on hook), yarn over and pull through 2 loops (2 loops remain), yarn over and pull through last 2 loops.
sc = single crochet. Insert hook in stitch, yarn over and pull up a loop (2 loops on hook), yarn over and pull through both loops.
sk = skip. Pass over the indicated number of stitches without working into them.
sl st = slip stitch. Insert hook in stitch, yarn over and pull through both the stitch and the loop on hook in one motion.
st(s) = stitch(es)
RS = right side. The public-facing side of your work.
WS = wrong side. The inside of your finished piece.
t-ch = turning chain
sc2tog = single crochet two together. A decrease that joins two stitches into one.
Special Stitches for This Pattern
Fan Stitch (Multiple of 6 Stitches Plus 1)
This creates the beautiful shell-like texture throughout both pieces.
Setup row (RS): Sc in first st, sk 2 sts, work 5 dc all in next st (this is 1 fan made), sk 2 sts, sc in next st. Repeat across, ending with sc in last st.
Fan row (RS): Ch 3, turn. Work 2 dc in first sc (half fan at edge), sk 2 sts, sc in center dc of next fan, sk 2 sts, work 5 dc in next sc, sk 2 sts, sc in center dc of next fan, sk 2 sts. Continue across, ending with 3 dc in last sc (half fan at edge).
Return row (WS): Ch 1, turn. Sc in first dc, ch 2, sk 2 dc, sc in next sc, ch 2, sk 2 dc, sc in next dc (center of fan). Continue across, ending sc in top of t-ch.
Use stitch markers to mark the center dc of each fan for the first several rows until the pattern feels natural.
Scallop Stitch (For Strap Edging)
Working along a straight edge: sl st in first st, ch 3, work 4 dc in same st, sl st in next st. Repeat (sl st in next st, ch 3, 4 dc in same st, sl st in next st) across.
Picot Ball Trim (For Shorts Hem)
Working into the hem row: sc in first st, ch 3, sl st in first ch of ch-3 to close picot, sc in next st. Repeat around.
Bow Construction
Rectangle: Ch 25. Row 1: Sc in second ch from hook and in each ch across. (24 sc) Rows 2 through 10: Ch 1, turn. Sc in each sc across. (24 sc) Fasten off.
Center Band: Ch 7. Row 1: Sc in second ch from hook and in each ch across. (6 sc) Rows 2 through 6: Ch 1, turn. Sc in each sc across. (6 sc) Fasten off.
Pinch the rectangle at center to gather. Wrap the center band tightly around the gathers and seam the ends together at back.
Bralette Instructions
Lower Band
The lower band forms the foundation. It is worked flat in ribbing for stretch.
With D-3 / 3.25 mm hook, ch 11.
Row 1: Sc in second ch from hook and in each ch across. (10 sc)
Rows 2 through 120: Ch 1, turn. Sc in blo of each sc across. (10 sc)
The band should measure approximately 24 inches. Fold so the short ends align. Sl st the first and last rows together to form a ring. This seam sits at center back.
Back Closure Band
With D-3 / 3.25 mm hook, ch 11.
Row 1: Sc in second ch from hook and in each ch across. (10 sc)
Rows 2 through 24: Ch 1, turn. Sc in blo of each sc across. (10 sc)
Make two identical strips. Pin them overlapping at center back of the main band with a 1.5 inch overlap zone. Sew buttons through both layers at top, middle, and bottom.
Left Cup
With E-4 / 3.5 mm hook, attach yarn at the left front side of the band on the top edge. Work across 19 stitches for the left cup.
Foundation pickup: Sc evenly across 19 sts of the top edge. (19 sc)
Row 1 (WS): Ch 1, turn. Sc in each sc across. (19 sc)
Row 2 (RS, fan row): Ch 3 (counts as dc), turn. Work 2 dc in first sc (half fan), sk 2 sc, sc in next sc, sk 2 sc, 5 dc in next sc (fan 1), sk 2 sc, sc in next sc, sk 2 sc, 5 dc in next sc (fan 2), sk 2 sc, sc in last sc, 2 dc in last sc (half fan). (19 sts)
Row 3 (WS, return row): Ch 1, turn. Sc in first dc, ch 2, sc in sc, ch 2, sc in center dc of fan 1, ch 2, sc in sc, ch 2, sc in center dc of fan 2, ch 2, sc in sc, ch 2, sc in top of t-ch. (7 sc with 6 ch-2 sps)
Row 4 (RS, begin decrease): Ch 3, turn. Work 2 dc in first sc, sk ch-2 sp, sc in next sc, sk ch-2 sp, 5 dc in next sc, sk ch-2 sp, sc in next sc, sk ch-2 sp, 5 dc in next sc, sk ch-2 sp, sc in last sc. Leave last 2 dc unworked. (17 sts)
Continue decreasing at the armhole edge through Row 10, following the pattern to taper the cup from 19 stitches down to 10 stitches.
Row 10 (RS, top edge): Ch 1, turn. Sc across all sts and into all ch-sps for a total of 10 sc. (10 sc)
Fasten off. Each cup should measure approximately 3.75 inches wide at the base and 5.5 inches tall.
Right Cup
Attach yarn at center front and work across the right 19 stitches. Mirror the left cup instructions, decreasing at the opposite armhole edge.
Straps (Make 2)
With D-3 / 3.25 mm hook, ch 5.
Row 1: Sc in second ch from hook and in each ch across. (4 sc)
Rows 2 through 50: Ch 1, turn. Sc in blo of each sc across. (4 sc)
The strap should measure 10 inches. Adjust length as needed (5 rows equals approximately 1 inch).
Work scallop edging along both long edges of each strap. Seam the top ends to the cup corners and the bottom ends to the back band, spacing them 3 inches apart.
Attach the bow to the center front V between the cups.
Shorts Instructions
Waistband
With D-3 / 3.25 mm hook, ch 21.
Row 1: Sc in second ch from hook and in each ch across. (20 sc)
Rows 2 through 130: Ch 1, turn. Sc in blo of each sc across. (20 sc)
The waistband should measure 26 inches long and 4 inches tall. Sl st the short ends together to form a ring.
If using elastic, thread it through the center of the waistband before joining. Overlap elastic ends by 1 inch and sew securely.
Shorts Body
With E-4 / 3.5 mm hook, join yarn to any stitch along the top edge of the waistband.
Foundation round: Sc evenly around, placing 1 sc per row end. With 130 rows, work sc2tog 4 times evenly spaced to reduce to 126 sc. (126 sc)
Round 1 (fan round): Sl st in first sc, ch 3, work 2 more dc in same sc, sk 2 sc, sc in next sc, sk 2 sc, (5 dc in next sc, sk 2 sc, sc in next sc, sk 2 sc) rep around, end with 2 dc in same st as beginning ch-3, sl st to top of ch-3. (21 fans, 126 sts)
Round 2 (return round): Ch 1, sc in same sl st, (ch 2, sc in center dc of next fan, ch 2, sc in next sc) rep around, sl st to first sc. (126 sts)
Rounds 3 through 17: Repeat Rounds 1 and 2 alternately. (126 sts each round)
Leg Separation and Finishing
Place stitch markers at two points exactly half the circumference apart. Work the crotch joining round by chaining 6 to bridge each side.
For each leg, work around 72 stitches (reduced from 76 with sc2tog). Continue the fan stitch pattern for 6 rounds, creating a 2.5 inch inseam.
Finish each leg with picot ball trim: (sc in next sc, ch 3, sl st in first ch of ch-3 to close picot) around.
Finishing Your Crochet Set
Weave in all ends with your tapestry needle, working ends back and forth through at least 1 inch of fabric in two directions.
Wet block both pieces by submerging in cool water for 10 minutes. Press out water gently without wringing. Lay flat on a blocking mat and pin to measurements. Allow 12 to 24 hours to dry completely. Blocking evens the fan stitches and gives that polished look.
Care instructions: Machine wash gentle cycle in cold water or hand wash. Lay flat to dry. Do not tumble dry or iron directly on the fabric. Store flat or folded.
Size Customization Tips
For Medium (US 8/10): Add 12 stitches to the band pickup (2 additional fans). Work the waistband strip to 30 inches (150 rows). Use 138 sc for the shorts body (23 fans).
For Large (US 12/14): Add 24 stitches to the band pickup (4 additional fans). Work the waistband strip to 34 inches (170 rows). Use 144 sc for the shorts body (24 fans).
To lengthen the shorts, add fan stitch rounds in pairs before leg separation. Each pair adds approximately 0.66 inches.
I hope you love making this butter yellow romantic crochet set as much as I loved designing it. If you give this pattern a try, I would absolutely love to see your finished piece! Share your photos on Instagram or tag me on Facebook.
Save this crochet pattern to your Pinterest boards so you can find it when you are ready to start stitching. And if you make it, please come back and leave a comment below. I love hearing how your projects turn out and seeing which color combinations you choose!
