
You know that beautiful navy yarn sitting in your stash? The one you’ve been saving for something truly special? This is the project it’s been waiting for.
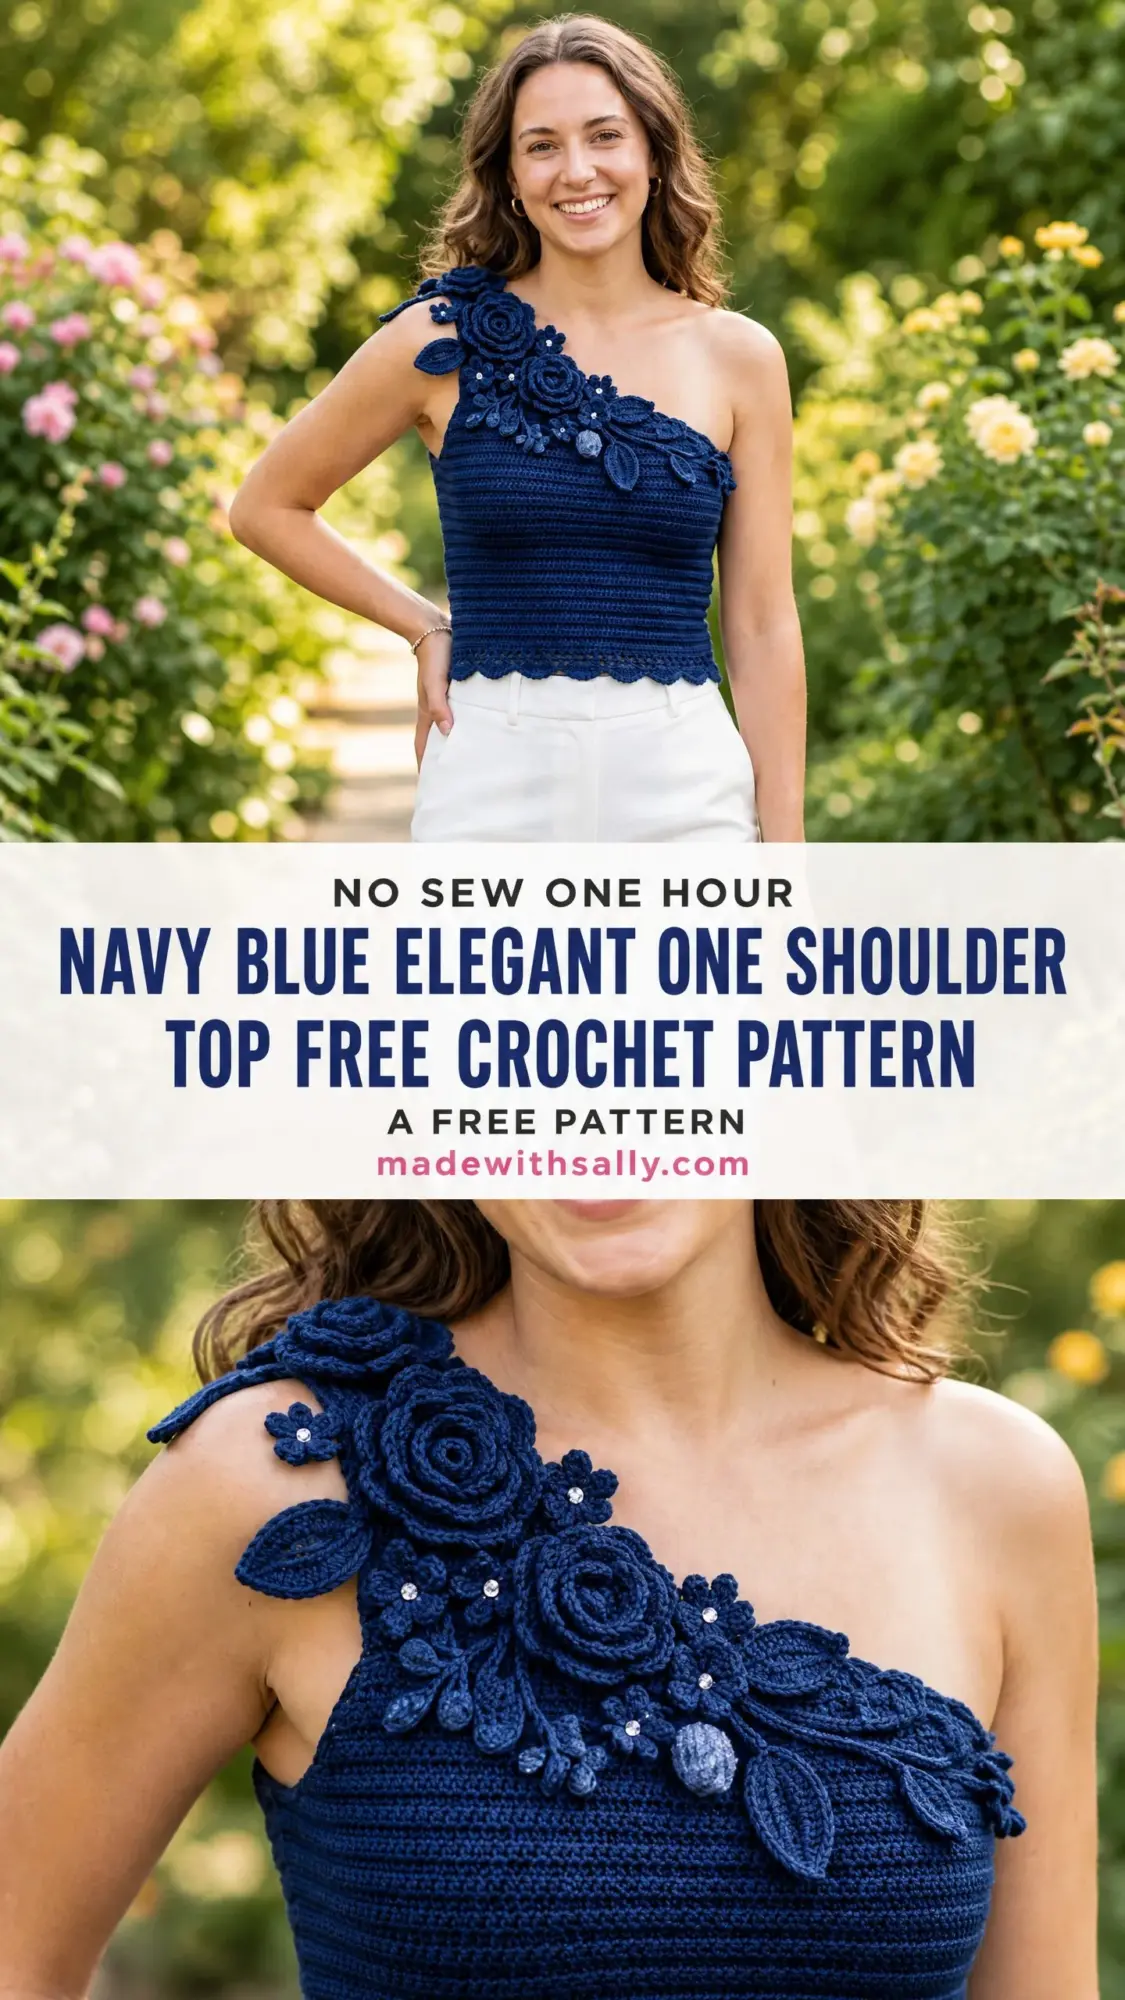
This elegant one shoulder top combines a fitted ribbed bodice with stunning three-dimensional floral appliques that cascade over the shoulder strap. The construction is actually quite clever. You’ll work the scalloped hem first, build the bodice upward in the round, then create each rose, leaf, and flower separately before assembling them into that gorgeous botanical arrangement. I won’t sugarcoat it. This pattern sits firmly in the advanced intermediate to advanced range. But if you’ve made a few garments and dabbled in crochet flowers before, you absolutely have the skills to pull this off.
The secret to that beautiful horizontal ribbed texture? Working single crochet through the back loop only. It creates subtle ridges that give the bodice structure and visual interest without complicated stitch patterns. Let’s dive in.
About This Navy Blue Crochet Top Pattern
This fitted crop top features an asymmetrical one-shoulder design that’s equal parts sophisticated and eye-catching. The bodice hugs the body with a gentle stretch, thanks to that back loop only technique. A decorative scallop shell border finishes the hem with feminine flair.
But the real showstopper is the floral applique. Three rolled roses in graduated sizes anchor the design. Smaller daisy-style accent flowers, elongated leaves, trailing vine chains, and scattered bead embellishments fill in the arrangement. Everything gets crocheted separately, then sewn onto the strap and upper bodice.
Skill Level: Advanced Intermediate to Advanced
Time Estimate: Approximately 20 to 30 hours total for a size Small/Medium. The bodice takes roughly 10 to 14 hours. Each large rose takes 45 to 60 minutes. Assembly and finishing take 2 to 4 hours.
Finished Measurements (Size Small):
Materials Needed for Your Crochet Top
Yarn: DK weight (CYCA #3 Light) cotton or cotton-blend yarn in navy blue. You’ll need approximately 600 to 700 yards / 550 to 640 meters total.
Cotton is strongly recommended here. It provides the drape, structure, and stitch definition this design needs to really shine.
Yarn Suggestions:
Hooks:
Additional Materials:
Gauge
Bodice gauge (E-4 / 3.5 mm hook, single crochet through back loop only):
18 stitches = 4 inches / 10 cm
20 rows = 4 inches / 10 cm
Please check your gauge. For a fitted garment like this, even one stitch per 4 inches will significantly alter the fit. Swatch in the round, not flat, and measure after washing and drying your swatch.
Gauge is less critical for the applique elements, but work tightly enough that yarn doesn’t gap between stitches.
Abbreviations and Special Stitches
Before we begin, let’s go over the abbreviations you’ll encounter. I’ll define each one in plain English so there’s no confusion.
blo = back loop only. When you look at your stitch, you’ll see two loops at the top. The back loop is the one farthest from you. Insert your hook under just that loop.
ch = chain. Yarn over and pull through the loop on your hook.
dc = double crochet. Yarn over, insert hook into stitch, pull up a loop (3 loops on hook), yarn over and pull through 2 loops (2 loops remain), yarn over and pull through remaining 2 loops.
MC = magic circle. Also called a magic ring. Create an adjustable loop, work stitches into the center, then pull the tail to close the hole.
sc = single crochet. Insert hook into stitch, pull up a loop (2 loops on hook), yarn over and pull through both loops.
sc2tog = single crochet two together (a decrease). Insert hook in next stitch, pull up a loop, insert hook in following stitch, pull up a loop (3 loops on hook), yarn over and draw through all 3 loops.
sk = skip
sl st = slip stitch. Insert hook into stitch, yarn over, pull through both the stitch and the loop on your hook in one motion.
st(s) = stitch(es)
Special Stitches Explained
Scallop Shell Stitch: Work 5 double crochets all into the same stitch. This creates a rounded fan shape for the decorative hem border.
Back Loop Only Single Crochet (BLO sc): This is what creates that beautiful horizontal ribbed texture on the bodice. By working through only the back loop, you leave the front loop exposed, forming visible ridges.
Surface Slip Stitch: Used for vine details. Hold yarn on the wrong side, insert hook from front to back through the fabric, catch the yarn from behind, and draw it through to the front.
Pattern Notes
A few things to keep in mind as you work:
1. The bodice is worked in the round, joining each round with a slip stitch. Chain 1 at the beginning of each round does NOT count as a stitch.
2. The scallop border is worked first, then the bodice builds upward from it. This ensures the lower edge lies flat and curls outward attractively.
3. When working through the back loop only, don’t accidentally catch the front loop. This will disrupt your texture.
4. All floral pieces are made separately and pinned in place before sewing. Refer to the photographs during assembly for placement guidance.
5. Bead embellishments are added last, sewn individually by hand.
Section 1: Scallop Hem Border
The border forms the decorative lower edge of your bodice. You’ll work it as a flat strip first, then join it into a ring.
With E-4 / 3.5 mm hook, chain 128.
Border Row 1: Sc in 2nd ch from hook and in each ch across. Turn. (127 sc)
Border Row 2 (scallop row, RS): Ch 1, sc in first st, (skip next 2 sts, 5 dc in next st, skip next 2 sts, sc in next st) 21 times. Do not turn. (21 shells; 127 stitches consumed)
With right sides facing, fold the strip into a ring. Align the last stitch of Border Row 2 with the first stitch. Slip stitch through both stitches to join into a round.
Checkpoint: Your border should form a scalloped ruffle ring approximately 28 to 29 inches in circumference. Each scallop shell should fan out cleanly.
Section 2: Bodice
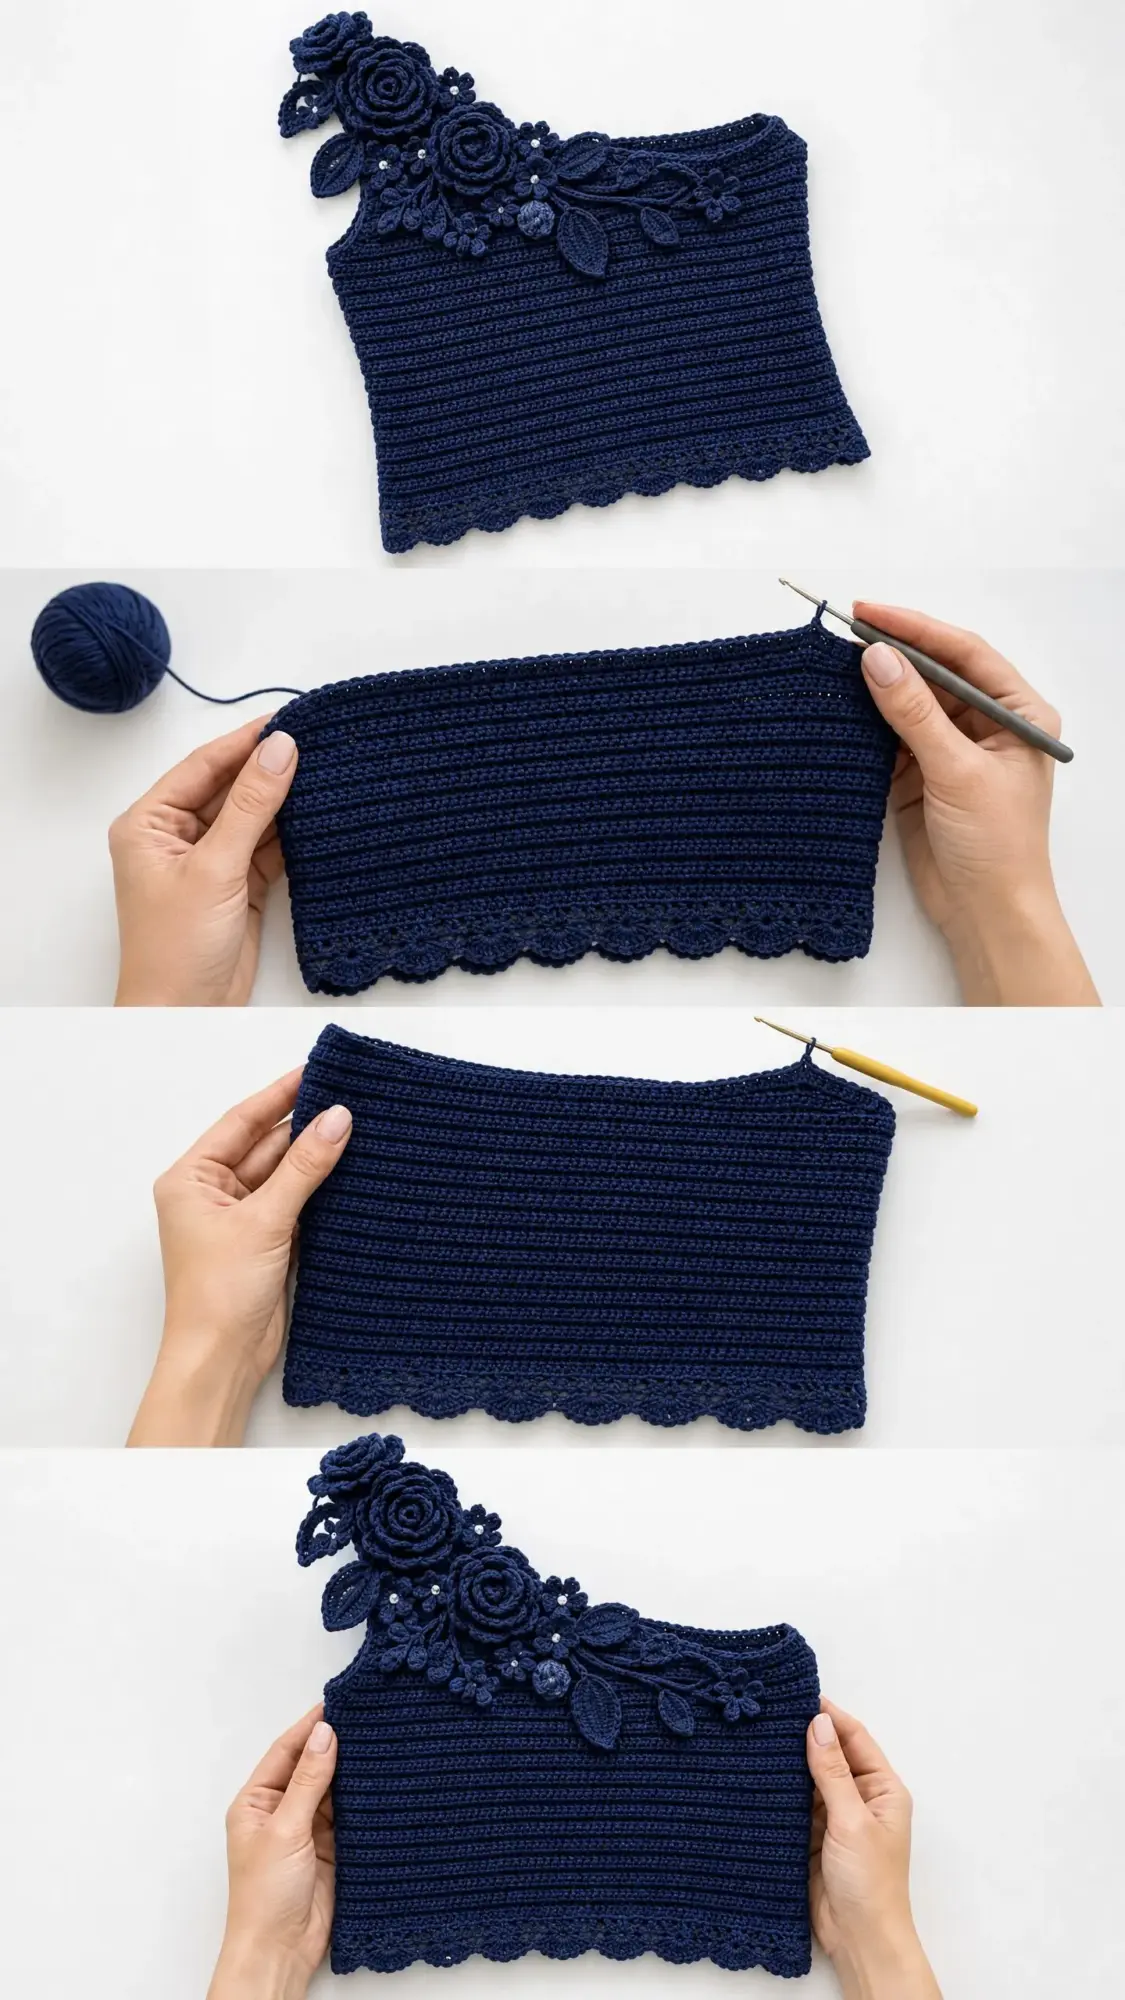
Now you’ll work upward from the top edge of your scallop border in continuous rounds of single crochet through the back loop only (sc blo). This creates that subtle horizontal ribbed texture.
Setup Round: Turn the border so the foundation chain edge faces upward. Join yarn with a sl st into the first remaining loop of the foundation chain at the join point. Ch 1. Work 1 sc into each remaining foundation chain loop around the top edge. Sl st to first sc to join. (127 sc)
Place a stitch marker in the first stitch and move it up each round.
Rnds 1-10: Ch 1, sc blo in each st around, sl st to first st to join. (127 sc)
Checkpoint: Your work should measure approximately 2 inches above the scallop border. The texture should show clean horizontal ridges.
Rnds 11-35: Continue working each round exactly as Rounds 1-10. Ch 1, sc blo in each st around, sl st to first st to join. (127 sc each round)
Checkpoint: Your bodice should measure approximately 7 inches above the scallop border.
Rnds 36-37: Ch 1, sc blo in each st around, sl st to first st to join. (127 sc)
Round 37 is your final round of the bodice tube. Fasten off and weave in the end.
Section 3: Upper Edge Finishing
Finish the upper edge with one round of regular single crochet (through both loops) to create a stable, neat edge.
Join yarn with sl st to any stitch at the top edge.
Upper Edge Round: Ch 1, sc in each st around through both loops, sl st to first sc to join. (127 sc)
Fasten off and weave in end.
Checkpoint: Your total bodice should measure approximately 8 to 9 inches from the top of the scallop to the upper edge.
Section 4: Shoulder Strap
The strap is worked flat in rows of regular single crochet. It begins at the upper left edge of your bodice.
With the bodice laying flat and right side out, identify the left upper front edge. Count 10 stitches in from the left side seam. The strap begins here.
Strap Row 1 (RS): Join yarn with sl st to the first of these 10 stitches. Ch 1, sc in each of the next 10 sts. Turn. (10 sc)
Strap Rows 2-54 (or until desired length): Ch 1, sc in each st across. Turn. (10 sc)
Continue until the strap measures 12 inches from where it separates from the bodice, or until it reaches comfortably over your shoulder to the upper back edge. Try on the bodice to check length before fastening off.
Strap Attachment: Pin the strap end to the upper back edge, approximately 10 stitches in from the left side seam at the back. Sew securely using whip stitch or mattress stitch. Weave in all ends.
Section 5: Floral Applique Elements
The applique includes three large rolled roses, two small accent flowers, multiple leaves, and vine details. Each element is crocheted separately using your smaller D-3 / 3.25 mm hook.
Large Rolled Rose (Make 3)
The roses are worked as flat strips with increasing-height stitches, then rolled and sewn at the base.
With D-3 hook, chain 48.
Row 1: Sc in 2nd ch from hook, sc in next ch, (hdc in next 2 ch, dc in next 2 ch, 2 dc in next ch) repeat across, ending with sc in last 2 ch. Fasten off, leaving a long tail.
Starting from the end with smaller stitches, roll the strip tightly. The taller stitches will naturally spiral outward, creating petal layers. Use the tail to sew through the base several times, securing the roll. Hide the tail inside the rose.
Make three roses in graduated sizes by adjusting your tension. Pull tighter for smaller roses, work more loosely for larger ones.
Small Accent Flower (Make 2)
With D-3 hook, make a magic circle.
Rnd 1: Ch 1, 5 sc into the ring, sl st to first sc to join. (5 sc)
Rnd 2: (Ch 3, 2 dc in same st, ch 3, sl st in same st, sl st in next st) 5 times. Fasten off.
This creates a small five-petal flower perfect for filling gaps in your arrangement.
Elongated Leaf (Make 8 to 10)
With E-4 hook, chain 12.
Row 1: Sc in 2nd ch from hook, hdc in next ch, dc in next 2 ch, tr in next 3 ch, dc in next 2 ch, hdc in next ch, 3 sc in last ch. Working down the opposite side of the chain, hdc in next ch, dc in next 2 ch, tr in next 3 ch, dc in next 2 ch, hdc in next ch, sc in last ch. Sl st to first sc to join. Fasten off.
Vine Chains
Chain 20 to 30 stitches, fasten off. Make several in varying lengths for trailing accents.
Section 6: Assembly and Finishing
Pin all your floral elements to the shoulder strap and upper bodice before sewing anything permanently. Arrange the three roses as the focal point, with the largest rose at the center of the shoulder. Tuck leaves behind and around the roses. Add small flowers to fill gaps. Let vine chains trail down the upper bodice diagonally.
Once you’re happy with the arrangement, sew each piece securely using matching yarn and a yarn needle. Take your time here. The placement makes all the difference.
Bead Embellishments: Using a beading needle and thread, sew rhinestones or seed beads scattered among the flowers and along vine trails. This adds sparkle and a polished finish.
Blocking: Wet block the finished bodice by pinning it flat on blocking mats and misting with water. Let it dry completely. This evens out your stitches and helps the garment hold its shape.
Tips for Success
Tension matters. Keep your bodice stitches consistent but not too tight. You want gentle stretch. For the applique flowers, work tightly so they hold their sculptural shape.
Try it on as you go. Fitting is everything with garments. Check the bodice fit before finishing and adjust the strap length before attaching.
Don’t rush the applique arrangement. Lay everything out, step back, adjust. The photos are your guide. The cascading diagonal flow makes this design special.
Final Thoughts on This Elegant Crochet Top Pattern
This navy blue one shoulder top is absolutely a labor of love. The hours you invest will pay off in a truly stunning handmade garment that looks like it belongs in a boutique. That ribbed texture, those sculptural roses, the graceful asymmetry. It all comes together into something you’ll be proud to wear again and again.
I hope this crochet tutorial gives you everything you need to bring this beautiful top to life. Whether you’re making it for a special event or simply because you deserve something gorgeous, enjoy every stitch.
If you’re excited to make this later, go ahead and save it to your Pinterest boards so you can find it when you’re ready. And please, if you make this top, I would absolutely love to see it. Drop a comment below or tag me on Instagram with your finished piece. Happy crocheting!
