
Cables look intimidating. I get it. All those crossing stitches and fancy textures can make even experienced crocheters nervous. But here’s the truth: if you can work a front post double crochet, you can absolutely make this sweater.
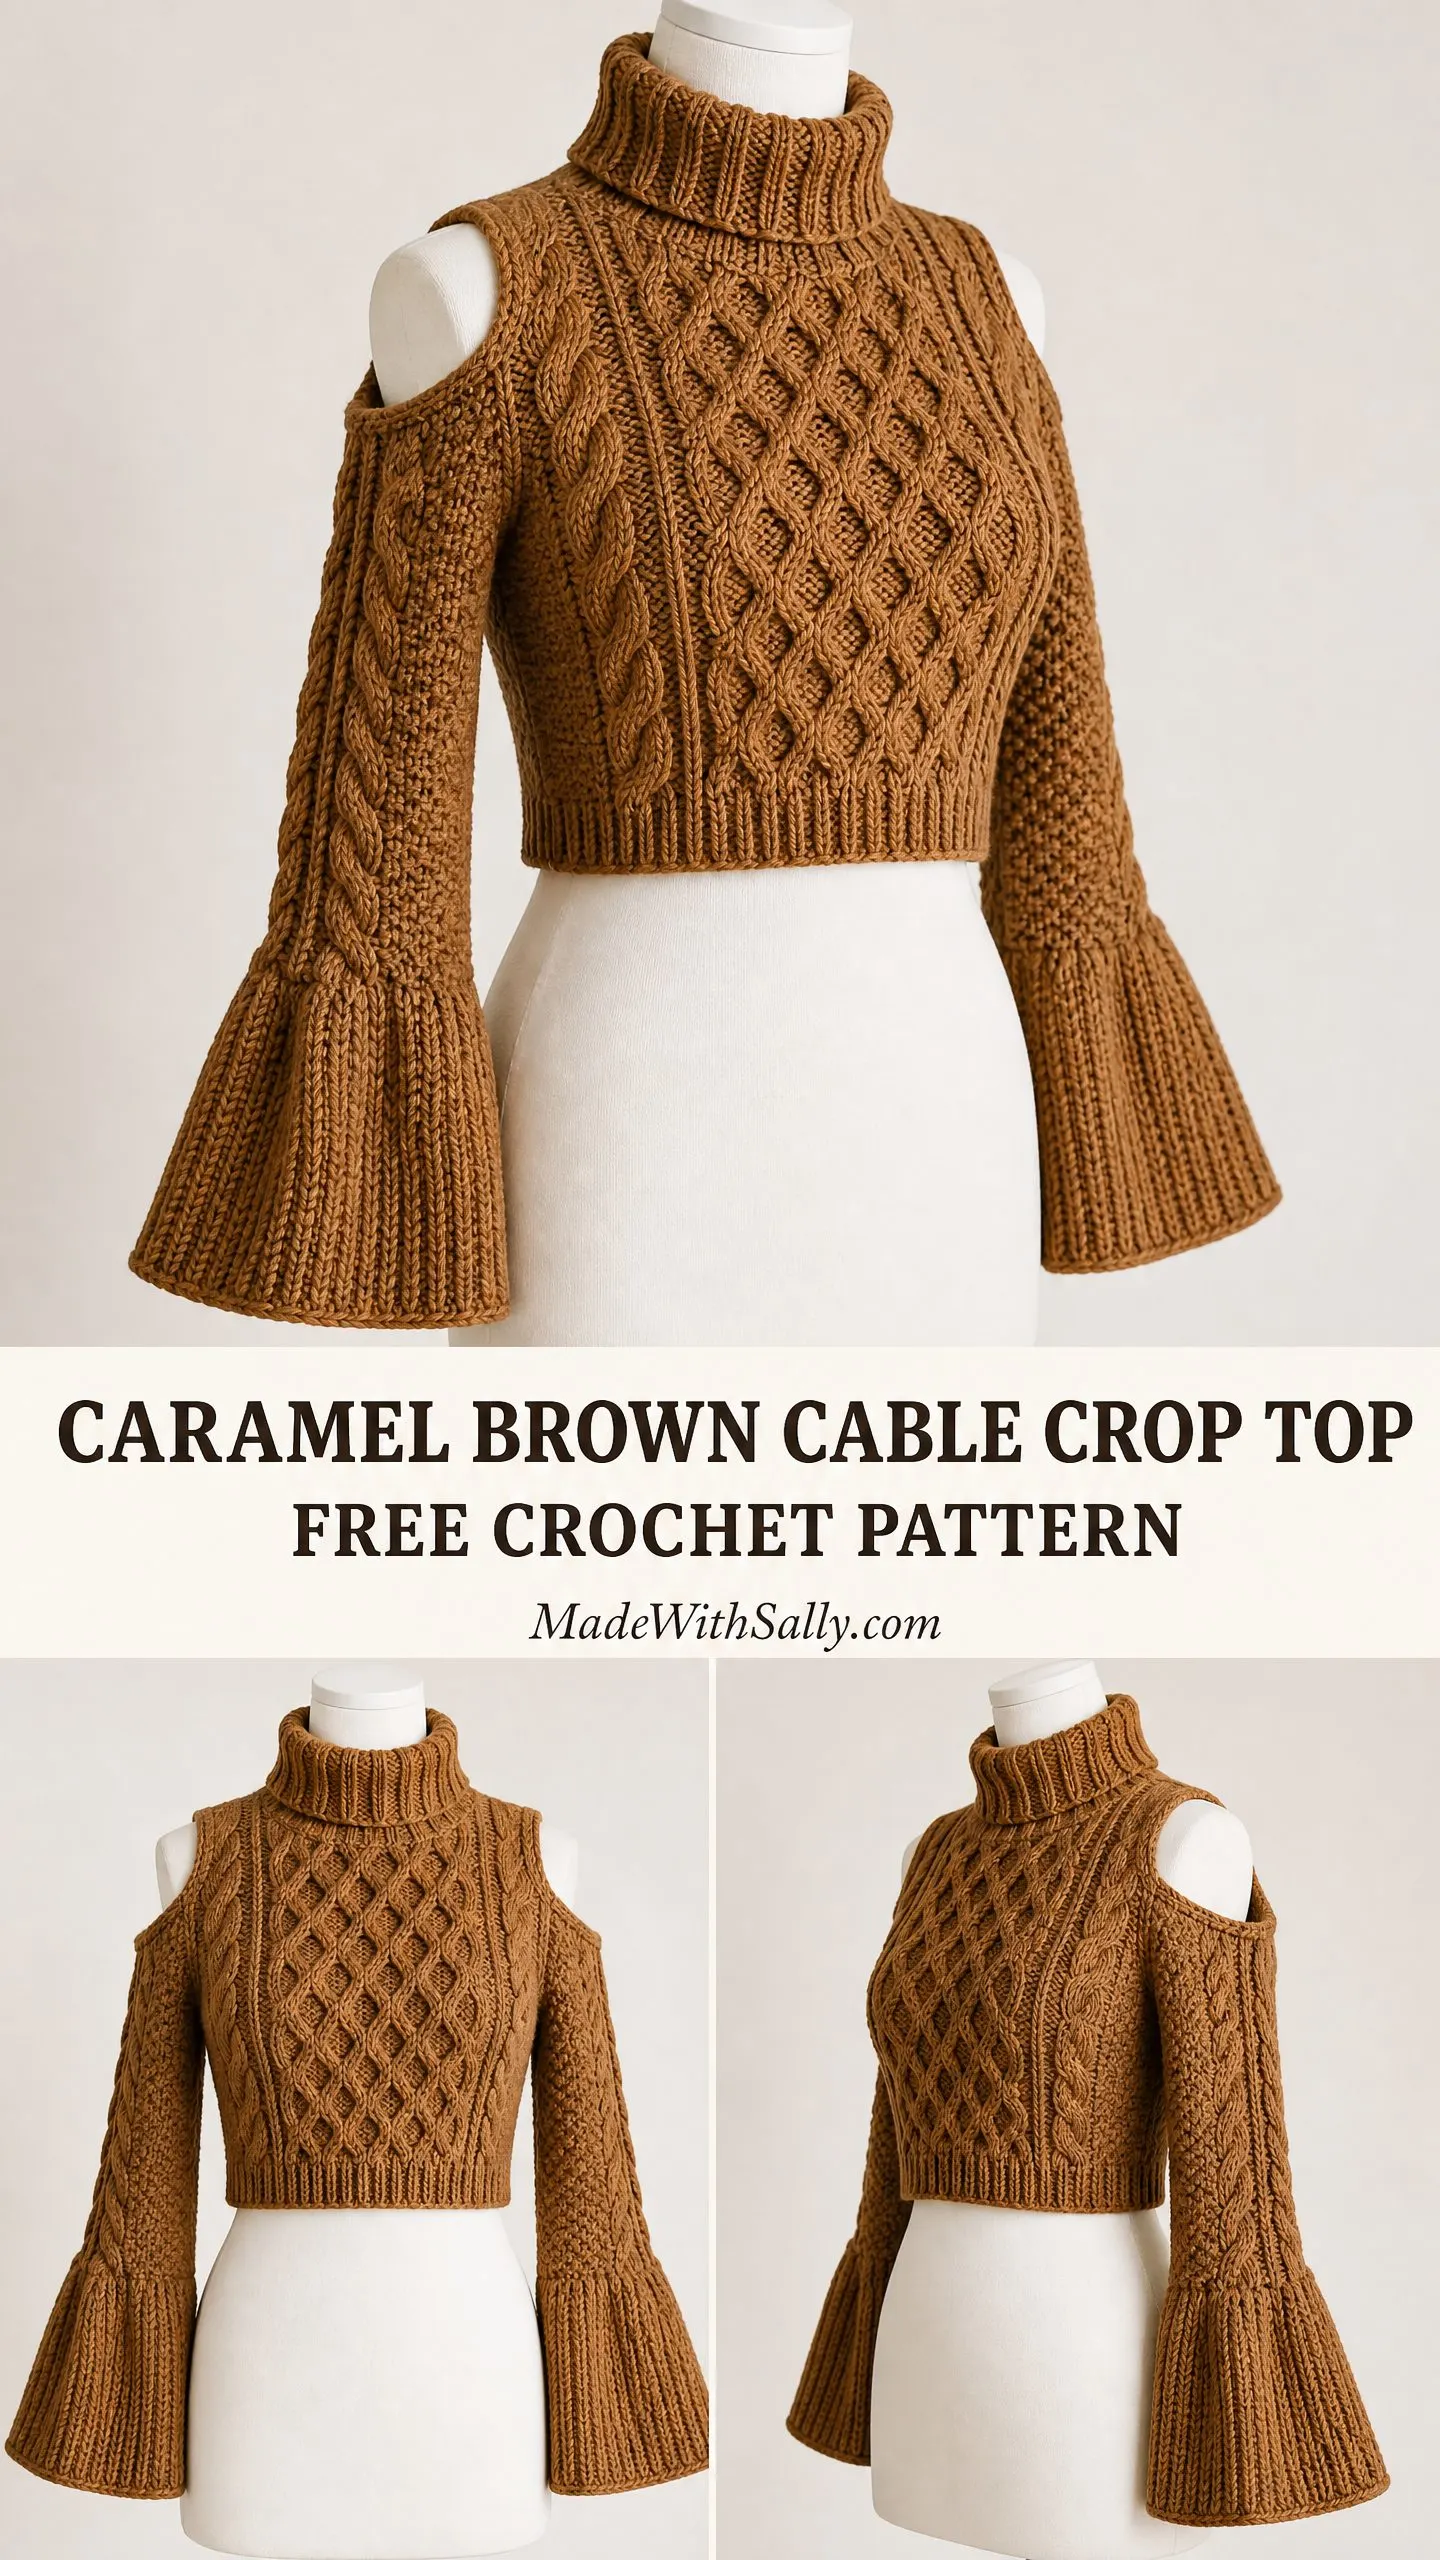
This cropped turtleneck features a gorgeous honeycomb cable pattern that creates those raised diamond shapes you see in high-end knitwear. The technique is simpler than it appears. You’re just wrapping your hook around the post of stitches instead of working into the top loops. That’s the whole secret.
Whether you’ve never tried post stitches before or you’re looking to level up your garment-making skills, I’ve broken this pattern down into manageable pieces. Literally. You’ll work the back, front, and sleeves separately, then seam them together. No complicated shaping while juggling cable crosses. Let’s do this.
Why You’ll Love This Crochet Cable Sweater Pattern
This cozy cropped turtleneck has everything going for it. The boxy, slightly oversized fit is incredibly flattering and comfortable. The warm caramel brown color works with practically anything in your closet. And that honeycomb texture? It’s the kind of detail that makes people ask, "Wait, you MADE that?"
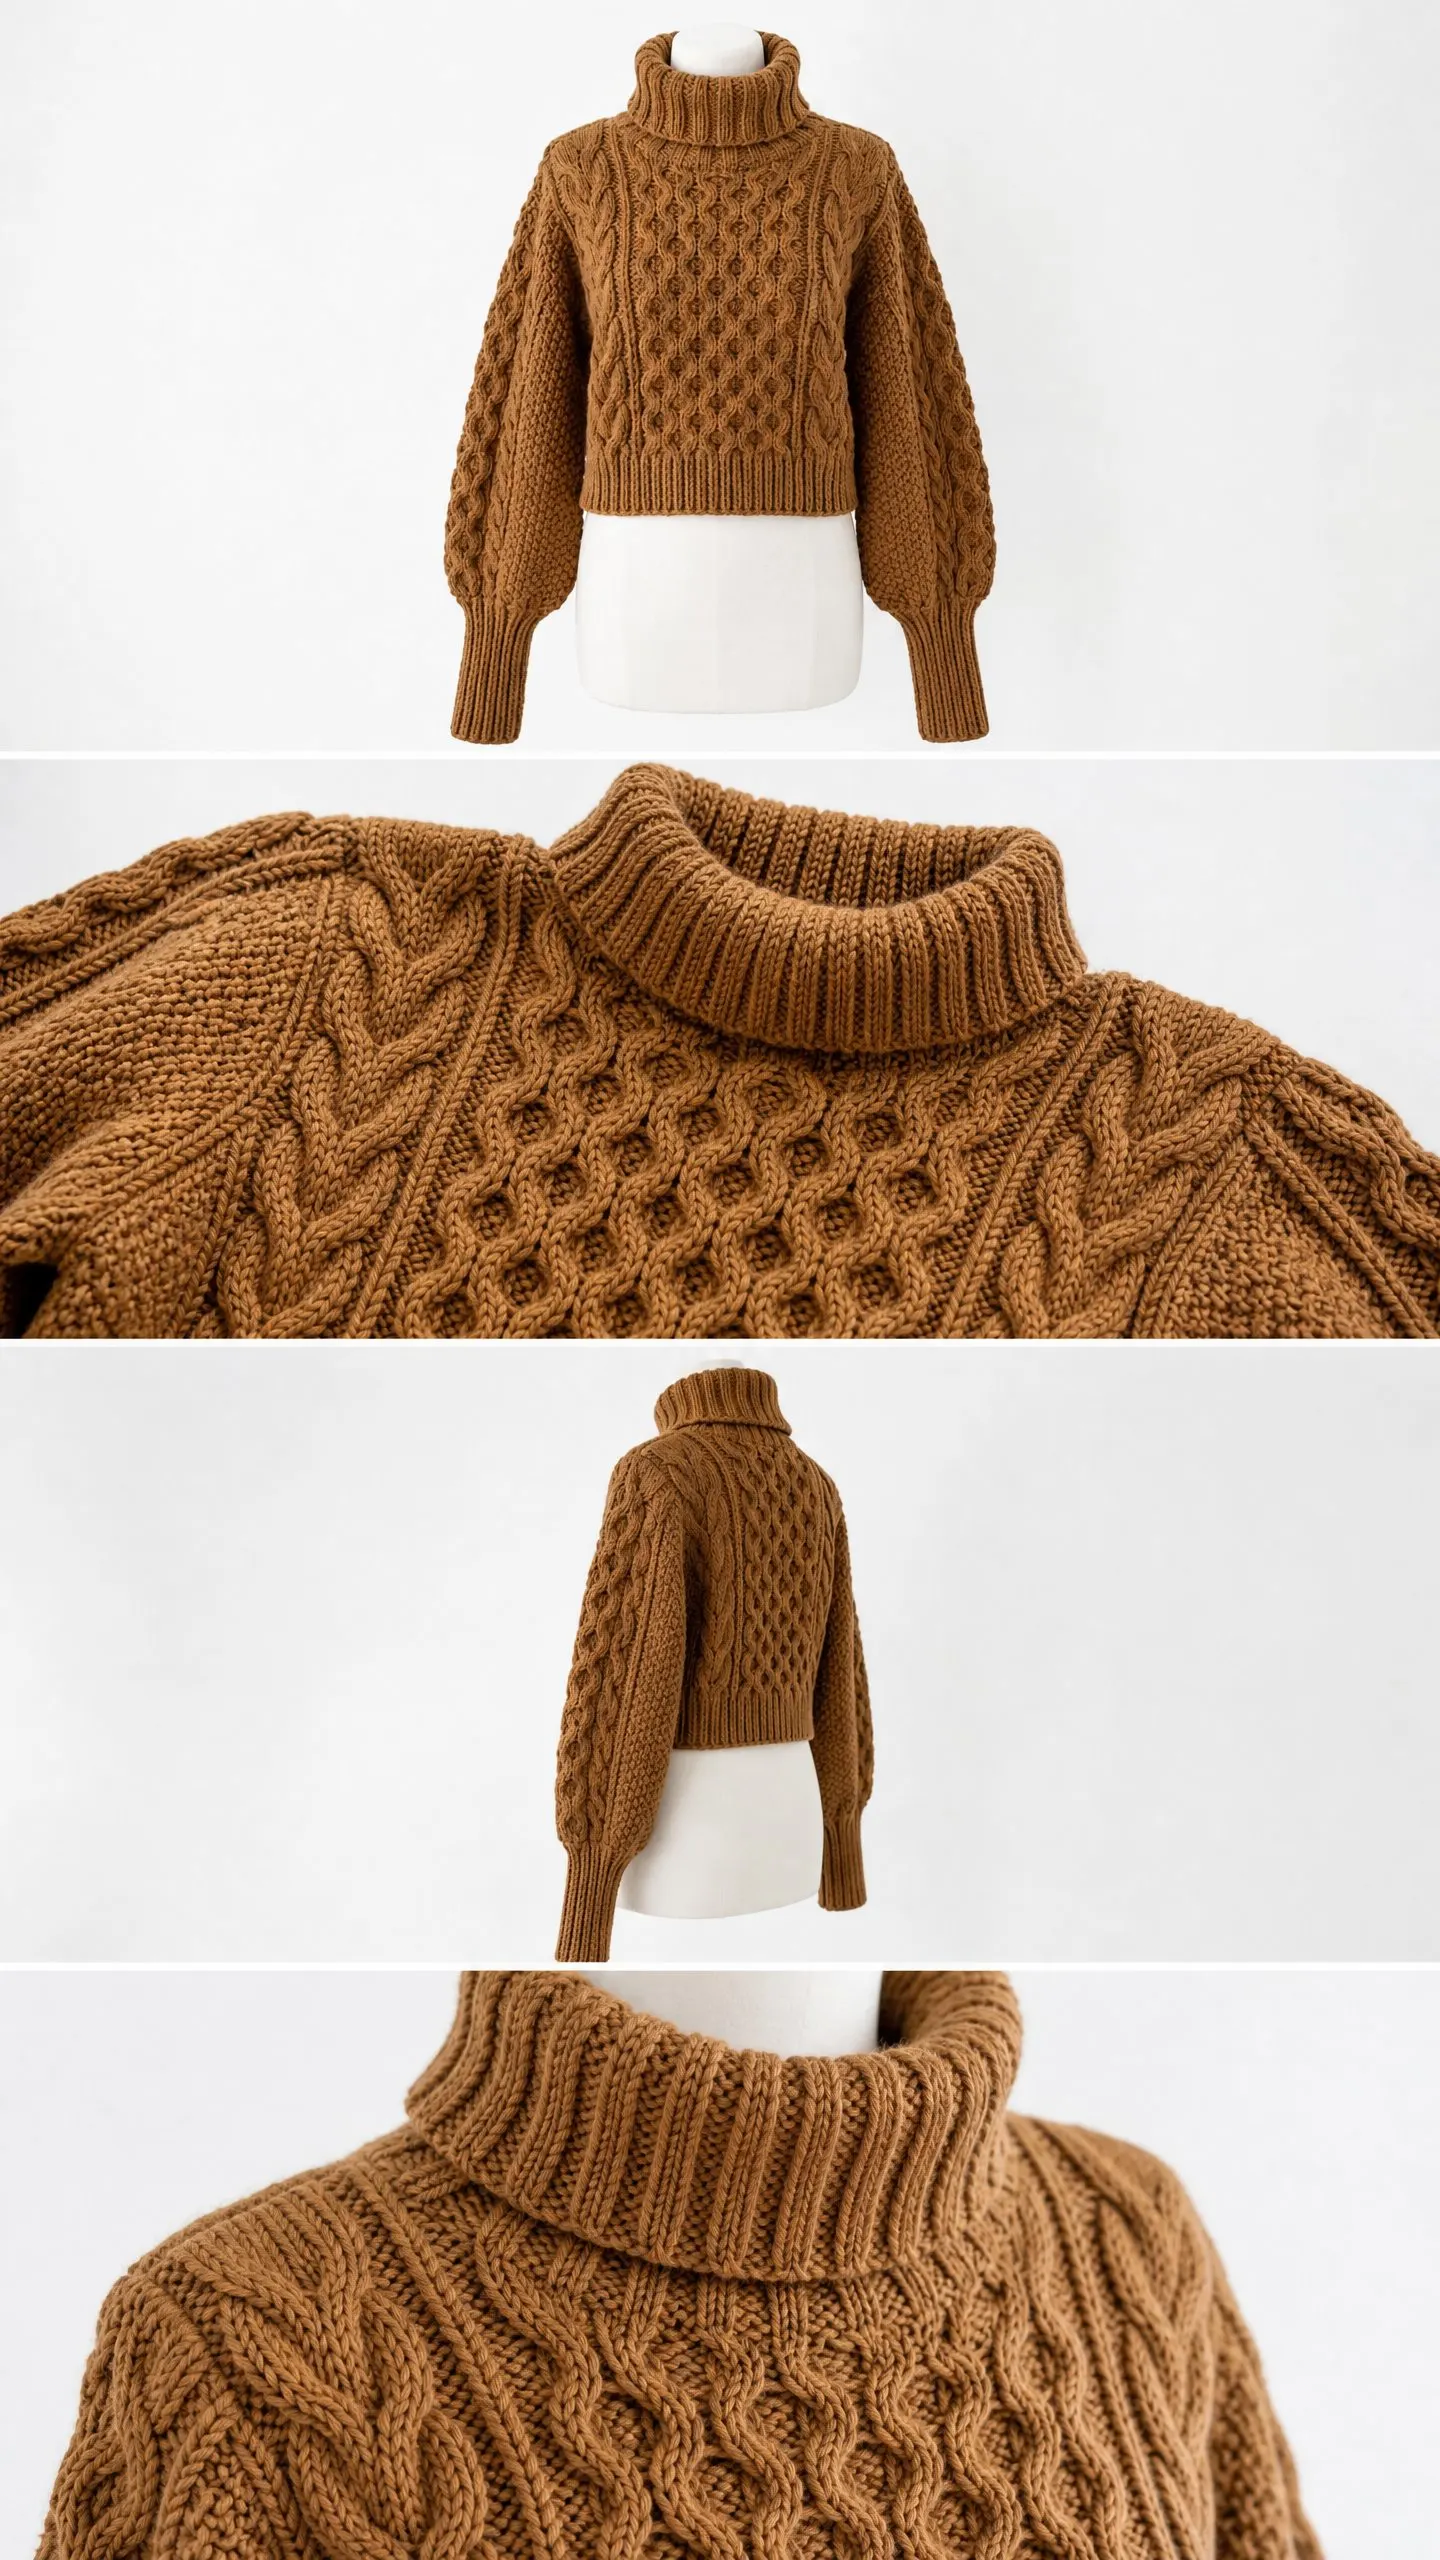
The sweater hits right at the waist with a deep ribbed hem band that keeps everything in place. The sleeves are wide and dramatic through the upper arm, then taper down to fitted ribbed cuffs. And that tall turtleneck folds over beautifully, adding extra warmth without bulk.
Best of all, there are no color changes and no closures. You work each piece flat, seam them together, then pick up stitches for the collar. Straightforward construction that produces stunning results.
Skill Level
This pattern is rated intermediate to advanced. You should feel comfortable with:
If you’ve made a few scarves or blankets and want to try your first garment, this is a challenging but achievable next step. Take your time with the cable technique, and you’ll be fine.
Time Estimate
Plan for approximately 40 to 60 hours of work, depending on your speed and familiarity with post stitch textures. This is definitely a project to spread across several weeks, not a weekend make.
Finished Measurements
The written pattern produces a size Medium with the following dimensions:
The garment is designed with approximately 4 to 6 inches of positive ease for that relaxed, boxy silhouette.
Size Customization Tips
The honeycomb cable stitch pattern repeat is 6 stitches wide. To adjust width, add or subtract multiples of 6 stitches to your foundation chain. Each 6-stitch repeat adds approximately 1.5 inches of width at gauge.
To lengthen the body, add rows before beginning shoulder shaping. Every 2 rows adds about 1 inch. To lengthen sleeves, add rows to the straight sleeve section before the underarm. If you change the neckline width, adjust your turtleneck pickup count proportionally.
Materials Needed for This Cable Crochet Pattern
Yarn
Bulky weight yarn (CYCA weight 5), approximately 1,200 yards / 1,097 meters total in caramel brown.
Recommended yarn options:
Option 1: Lion Brand Wool-Ease Thick and Quick in Caramel (100% acrylic, 106 yards per 6 oz skein). This yarn gives excellent stitch definition in post stitch textures. You will need approximately 12 skeins.
Option 2: Cascade Yarns Cascade 128 Superwash in Toffee (100% superwash merino wool, 128 yards per 3.5 oz skein). Machine washable with beautiful drape. You will need approximately 10 skeins.
Option 3: Paintbox Yarns Simply Chunky in Caramel Brown (100% acrylic, 109 yards per 3.5 oz skein). An affordable option with a smooth texture. You will need approximately 11 skeins.
Substitution note: Choose any bulky weight yarn with good stitch definition. Avoid yarns with heavy halo or extreme softness, as these will obscure the honeycomb cable texture.
Hook
US Size K / 6.5 mm crochet hook (adjust as needed to meet gauge)
Notions
Gauge (Please Don’t Skip This)
In Honeycomb Cable Pattern:
In 2×2 Ribbing (for hem and cuffs):
Make a swatch of at least 24 stitches and 12 rows in the Honeycomb Cable Pattern. Block your swatch before measuring. If your gauge is looser (fewer stitches per inch), go down one hook size. If tighter (more stitches per inch), go up one hook size.
I know gauge swatches feel tedious, but for a fitted garment like this, they’re essential. A sweater that doesn’t fit is a sweater that lives in the back of your closet.
Abbreviations
Special Stitches Explained
These are the building blocks of your cable texture. Read through them carefully before starting.
Front Post Double Crochet (FPdc)
This stitch creates a raised ridge on the front of your fabric.
Yarn over. Insert hook from front to back to front around the post of the indicated stitch in the row below (not into the top of the stitch). Yarn over and pull up a loop. Yarn over and draw through 2 loops. Yarn over and draw through 2 loops.
Back Post Double Crochet (BPdc)
This stitch creates a recessed channel, making the front post stitches pop forward even more.
Yarn over. Insert hook from back to front to back around the post of the indicated stitch in the row below. Yarn over and pull up a loop. Yarn over and draw through 2 loops. Yarn over and draw through 2 loops.
Front Post Double Crochet 2 Together (FPdc2tog)
This is a decrease worked around two posts.
Yarn over. Insert hook around the post of the first stitch. Pull up a loop. Yarn over, draw through 2 loops. You have 2 loops on hook. Yarn over. Insert hook around the post of the second stitch. Pull up a loop. Yarn over, draw through 2 loops. You have 3 loops on hook. Yarn over and draw through all 3 loops.
Cable Cross Right (CCR) Over 4 Stitches
This creates a rightward-traveling cable twist.
Skip the next 2 FPdc stitches (do not work them yet). Work FPdc around each of the next 2 FPdc stitches. Then go back and work FPdc around each of the 2 skipped stitches, inserting your hook in front of the stitches you just made. All 4 FPdc stitches are completed and have crossed to the right.
Cable Cross Left (CCL) Over 4 Stitches
This creates a leftward-traveling cable twist.
Work FPdc around the 3rd and 4th FPdc stitches of the group (skipping the first two temporarily). Then go back and work FPdc around the 1st and 2nd stitches, inserting your hook behind the stitches just made. All 4 FPdc stitches are completed and have crossed to the left.
Honeycomb Cable Pattern (Multiple of 6 Stitches Plus 2)
This pattern creates the diamond lattice texture across your fabric.
Row 1 (RS): Ch 2 (counts as first dc throughout), dc in each st across. Turn.
Row 2 (WS): Ch 2, BPdc around each st across to last st, dc in top of tch. Turn.
Row 3 (RS): Ch 2, (CCR over next 4 FPdc, BPdc over next 2 BPdc) across to last st, dc in top of tch. Turn.
Row 4 (WS): Ch 2, (FPdc over next 2 FPdc, BPdc over next 4 BPdc) across to last st, dc in top of tch. Turn.
Row 5 (RS): Ch 2, (BPdc over next 2 BPdc, CCL over next 4 FPdc) across to last st, dc in top of tch. Turn.
Row 6 (WS): Ch 2, BPdc around each st across to last st, dc in top of tch. Turn.
Rows 3 through 6 form the pattern repeat.
2×2 Ribbing (Multiple of 4 Stitches Plus 2)
Row 1: Ch 2 (counts as dc), (FPdc over next 2 sts, BPdc over next 2 sts) across to last st, dc in top of tch. Turn.
All subsequent rows: Ch 2, (FPdc over next 2 FPdc, BPdc over next 2 BPdc) across to last st, dc in top of tch. Turn.
Pattern Notes Before You Begin
1. The sweater is worked flat in pieces: Back, Front, Left Sleeve, Right Sleeve. Pieces are seamed and the turtleneck is worked in rounds afterward.
2. The turning chain 2 counts as a double crochet throughout. The last stitch of any row is always a dc into the top of the turning chain from the previous row.
3. Right side (RS) rows are read from right to left. Wrong side (WS) rows are read from left to right.
4. Use stitch markers to mark the beginning of honeycomb repeats and shoulder shaping positions.
5. All stitch counts include the turning chain as one stitch.
6. When seaming, use mattress stitch or whip stitch with the same yarn. Don’t pull seams too tight or the sweater will pucker.
Step by Step Crochet Pattern Instructions
BACK PANEL
Foundation
Ch 60.
Row 1 (RS): Dc in 3rd ch from hook and in each ch across. Turn. (59 sts including tch)
Hem Ribbing Section (Rows 2 through 10)
Row 2: Ch 2, (FPdc over next 2 sts, BPdc over next 2 sts) 14 times, FPdc over next st, dc in top of tch. Turn. (59 sts)
Rows 3 through 10: Continue established 2×2 Ribbing pattern. Turn after each row. (59 sts each row)
After Row 10, the hem ribbing should measure approximately 3 inches tall.
CHECKPOINT: Your piece should measure approximately 3 inches from foundation chain edge to current row.
Body Section (Rows 11 through 46)
Now work in Honeycomb Cable Pattern.
Row 11 (RS, setup row): Ch 2, dc in each st across. Turn. (59 sts)
Row 12 (WS): Ch 2, BPdc around each st across to last st, dc in top of tch. Turn. (59 sts)
Row 13 (RS, Cable Cross Row A): Ch 2, (CCR over next 4 sts, BPdc over next 2 sts) 9 times, CCR over next 4 sts, dc in top of tch. Turn. (59 sts)
Row 14 (WS): Ch 2, (FPdc over next 2 sts, BPdc over next 4 sts) 9 times, FPdc over next 2 sts, dc in top of tch. Turn. (59 sts)
Row 15 (RS, Cable Cross Row B): Ch 2, (BPdc over next 2 sts, CCL over next 4 sts) 9 times, BPdc over next 2 sts, dc in top of tch. Turn. (59 sts)
Row 16 (WS): Ch 2, BPdc around each st across to last st, dc in top of tch. Turn. (59 sts)
Rows 17 through 46: Continue repeating Rows 13 through 16 of the Honeycomb Cable Pattern. Work a total of 36 rows in the body section. (59 sts each row)
CHECKPOINT: Your Back Panel should measure approximately 16 inches total from cast-on edge, and approximately 19.5 inches wide.
Shoulder Shaping (Rows 47 through 50)
Mark stitch 1, stitch 20, stitch 40, and stitch 59 with stitch markers.
LEFT SHOULDER:
Row 47 (RS): Ch 2, work in established Honeycomb Cable Pattern across next 19 sts (stitches 2 through 20). Turn, leaving remaining stitches unworked. (20 sts)
Rows 48 through 50: Continue in pattern across Left Shoulder stitches. (20 sts each row)
Fasten off.
CENTER NECK:
Skip center 19 stitches (stitches 21 through 39). These form the back neck opening.
RIGHT SHOULDER:
With RS facing, join yarn at stitch 40.
Row 47 (RS): Ch 2, work in established Honeycomb Cable Pattern across next 19 sts to end of row, dc in top of tch. Turn. (20 sts)
Rows 48 through 50: Continue in pattern across Right Shoulder stitches. (20 sts each row)
Fasten off.
FRONT PANEL
Work Front Panel exactly as Back Panel through Row 46. (59 sts after Row 46)
Front Shoulder Shaping (Rows 47 through 50)
Work Left and Right Shoulders exactly as for Back Panel. Fasten off both shoulders.
CHECKPOINT: Front and Back Panels should be identical. Each should measure approximately 16 inches tall and 19.5 inches wide.
LEFT SLEEVE
Cuff Foundation
Ch 26.
Row 1 (RS): Dc in 3rd ch from hook and in each ch across. Turn. (25 sts)
Cuff Ribbing Section (Rows 2 through 10)
Row 2: Ch 2, (FPdc over next 2 sts, BPdc over next 2 sts) 6 times, dc in top of tch. Turn. (25 sts)
Rows 3 through 10: Continue in established 2×2 Ribbing. (25 sts each row)
CHECKPOINT: Cuff should measure approximately 8 inches wide and 3 inches tall.
Sleeve Body with Shaping (Rows 11 through 48)
You’ll increase 1 stitch at each end of every 4th row to expand from 25 stitches to 49 stitches.
Increase Row Instructions: Work ch 3 (counts as dc plus 1 increase stitch) at the beginning, continue in Honeycomb Cable Pattern to the last stitch, work 2 dc in the last stitch. Each increase row adds 2 stitches.
Row 11 (RS, Increase Row): Ch 3, work in Honeycomb Cable Pattern to last st, 2 dc in last st. Turn. (27 sts)
Rows 12 through 14: Work in Honeycomb Cable Pattern across. Turn. (27 sts)
Row 15 (RS, Increase Row): Ch 3, work in pattern to last st, 2 dc in last st. Turn. (29 sts)
Rows 16 through 18: Work in pattern. Turn. (29 sts)
Row 19 (RS, Increase Row): Ch 3, work in pattern to last st, 2 dc in last st. Turn. (31 sts)
Rows 20 through 22: Work in pattern. Turn. (31 sts)
Row 23 (RS, Increase Row): Ch 3, work in pattern to last st, 2 dc in last st. Turn. (33 sts)
Rows 24 through 26: Work in pattern. Turn. (33 sts)
Row 27 (RS, Increase Row): Ch 3, work in pattern to last st, 2 dc in last st. Turn. (35 sts)
Rows 28 through 30: Work in pattern. Turn. (35 sts)
Row 31 (RS, Increase Row): Ch 3, work in pattern to last st, 2 dc in last st. Turn. (37 sts)
Rows 32 through 34: Work in pattern. Turn. (37 sts)
Row 35 (RS, Increase Row): Ch 3, work in pattern to last st, 2 dc in last st. Turn. (39 sts)
Rows 36 through 38: Work in pattern. Turn. (39 sts)
Row 39 (RS, Increase Row): Ch 3, work in pattern to last st, 2 dc in last st. Turn. (41 sts)
Rows 40 through 42: Work in pattern. Turn. (41 sts)
Row 43 (RS, Increase Row): Ch 3, work in pattern to last st, 2 dc in last st. Turn. (43 sts)
Row 44: Work in pattern. Turn. (43 sts)
Row 45 (RS, Increase Row): Ch 3, work in pattern to last st, 2 dc in last st. Turn. (45 sts)
Row 46 (WS, Increase Row): Ch 3, work in pattern to last st, 2 dc in last st. Turn. (47 sts)
Row 47 (RS, Increase Row): Ch 3, work in pattern to last st, 2 dc in last st. Turn. (49 sts)
Row 48 (WS): Work in pattern. Turn. (49 sts)
Fasten off.
CHECKPOINT: Completed sleeve should measure approximately 16 inches wide at upper edge and 18 inches total length.
RIGHT SLEEVE
Work Right Sleeve exactly as Left Sleeve.
Assembly Instructions
Step 1: Shoulder Seams
With RS facing each other, align Back and Front Panels at the shoulders. Using yarn needle and matching yarn, seam the Left Shoulder of Back to the Left Shoulder of Front. Seam the Right Shoulder of Back to the Right Shoulder of Front. Each shoulder seam spans 20 stitches (approximately 6.5 inches).
Step 2: Set in Sleeves
Fold each sleeve in half lengthwise to find the center top edge. Place the center of the sleeve top edge at the shoulder seam. The sleeve should span approximately 16 inches centered on the shoulder seam, with 8 inches falling to each side. Pin in place. Sew the sleeve to the body using mattress stitch along the armhole opening. Repeat for the other sleeve.
Step 3: Side and Underarm Seams
With RS facing each other, align Back and Front Panels at the side edges. Starting at the hem edge, sew upward along the side seam to the armhole. Then sew the sleeve underarm seam from the cuff upward to the armhole junction. Repeat on the other side.
Step 4: Check All Seams
Turn garment right side out. Check that all seams are secure, even, and not puckered. Weave in all yarn ends at this stage.
Turtleneck Collar
With RS facing, join yarn at one shoulder seam at the neckline opening.
Round 1: Ch 2 (counts as dc), work dc evenly around the entire neckline opening. Target 40 stitches total. Join with sl st to top of beg ch 2. (40 sts)
Round 2: Ch 2 (counts as dc), (FPdc over next 2 sts, BPdc over next 2 sts) 9 times, FPdc over next 2 sts, join with sl st to top of beg ch 2. Turn. (40 sts)
Round 3: Ch 2, (FPdc over next 2 FPdc, BPdc over next 2 BPdc) 9 times, FPdc over next 2 sts, join with sl st to top of beg ch 2. Turn. (40 sts)
Rounds 4 through 14: Continue in established 2×2 Ribbing in rounds, turning after each round. (40 sts each round)
Fasten off. Weave in end.
CHECKPOINT: Finished turtleneck collar should measure approximately 6 inches tall and fold over naturally.
Finishing and Blocking
Weave in all remaining yarn ends on the wrong side, working back and forth through post stitches to secure them.
For Wool or Wool-Blend Yarns (Wet Blocking)
Submerge the finished sweater in cool water and gently press out excess water. Do not wring or twist. Lay flat on a blocking board or clean towels. Smooth to finished measurements, shaping the cables gently to open up the honeycomb texture. Allow to dry completely (24 to 48 hours).
For Acrylic Yarns (Steam Blocking)
Hold a steam iron 1 to 2 inches above the fabric surface. Do not press directly onto acrylic. Steam lightly and allow to cool completely before moving.
Care Instructions
Hand wash in cool water with mild detergent. Press out excess water gently. Lay flat to dry. Do not tumble dry unless your yarn label specifically allows it. Store folded, not on a hanger.
You Did It!
I hope you absolutely love your new cable crochet sweater. This project takes real dedication, and you should feel incredibly proud when you slip it on for the first time. That honeycomb texture is going to turn heads everywhere you go.
Thank you so much for choosing this pattern. If you make this cozy cable crop top, I would love to see it! Tag me on Instagram or share a photo in our Facebook group. Seeing your finished projects is honestly the best part of my day.
If you want to find this crochet tutorial later, go ahead and save it to your Pinterest boards so it’s there when you’re ready to cast on. And if you have any questions or want to share how yours turned out, drop a comment below. I always love hearing from you!
