
I call this one the "Little Aran" cardigan, and it has quite the history in my pattern notebook. The original sketch dates back to when my best friend announced her first pregnancy, and I became slightly obsessed with the idea of creating a crochet piece that looked like those gorgeous Irish fisherman sweaters my grandmother used to knit.
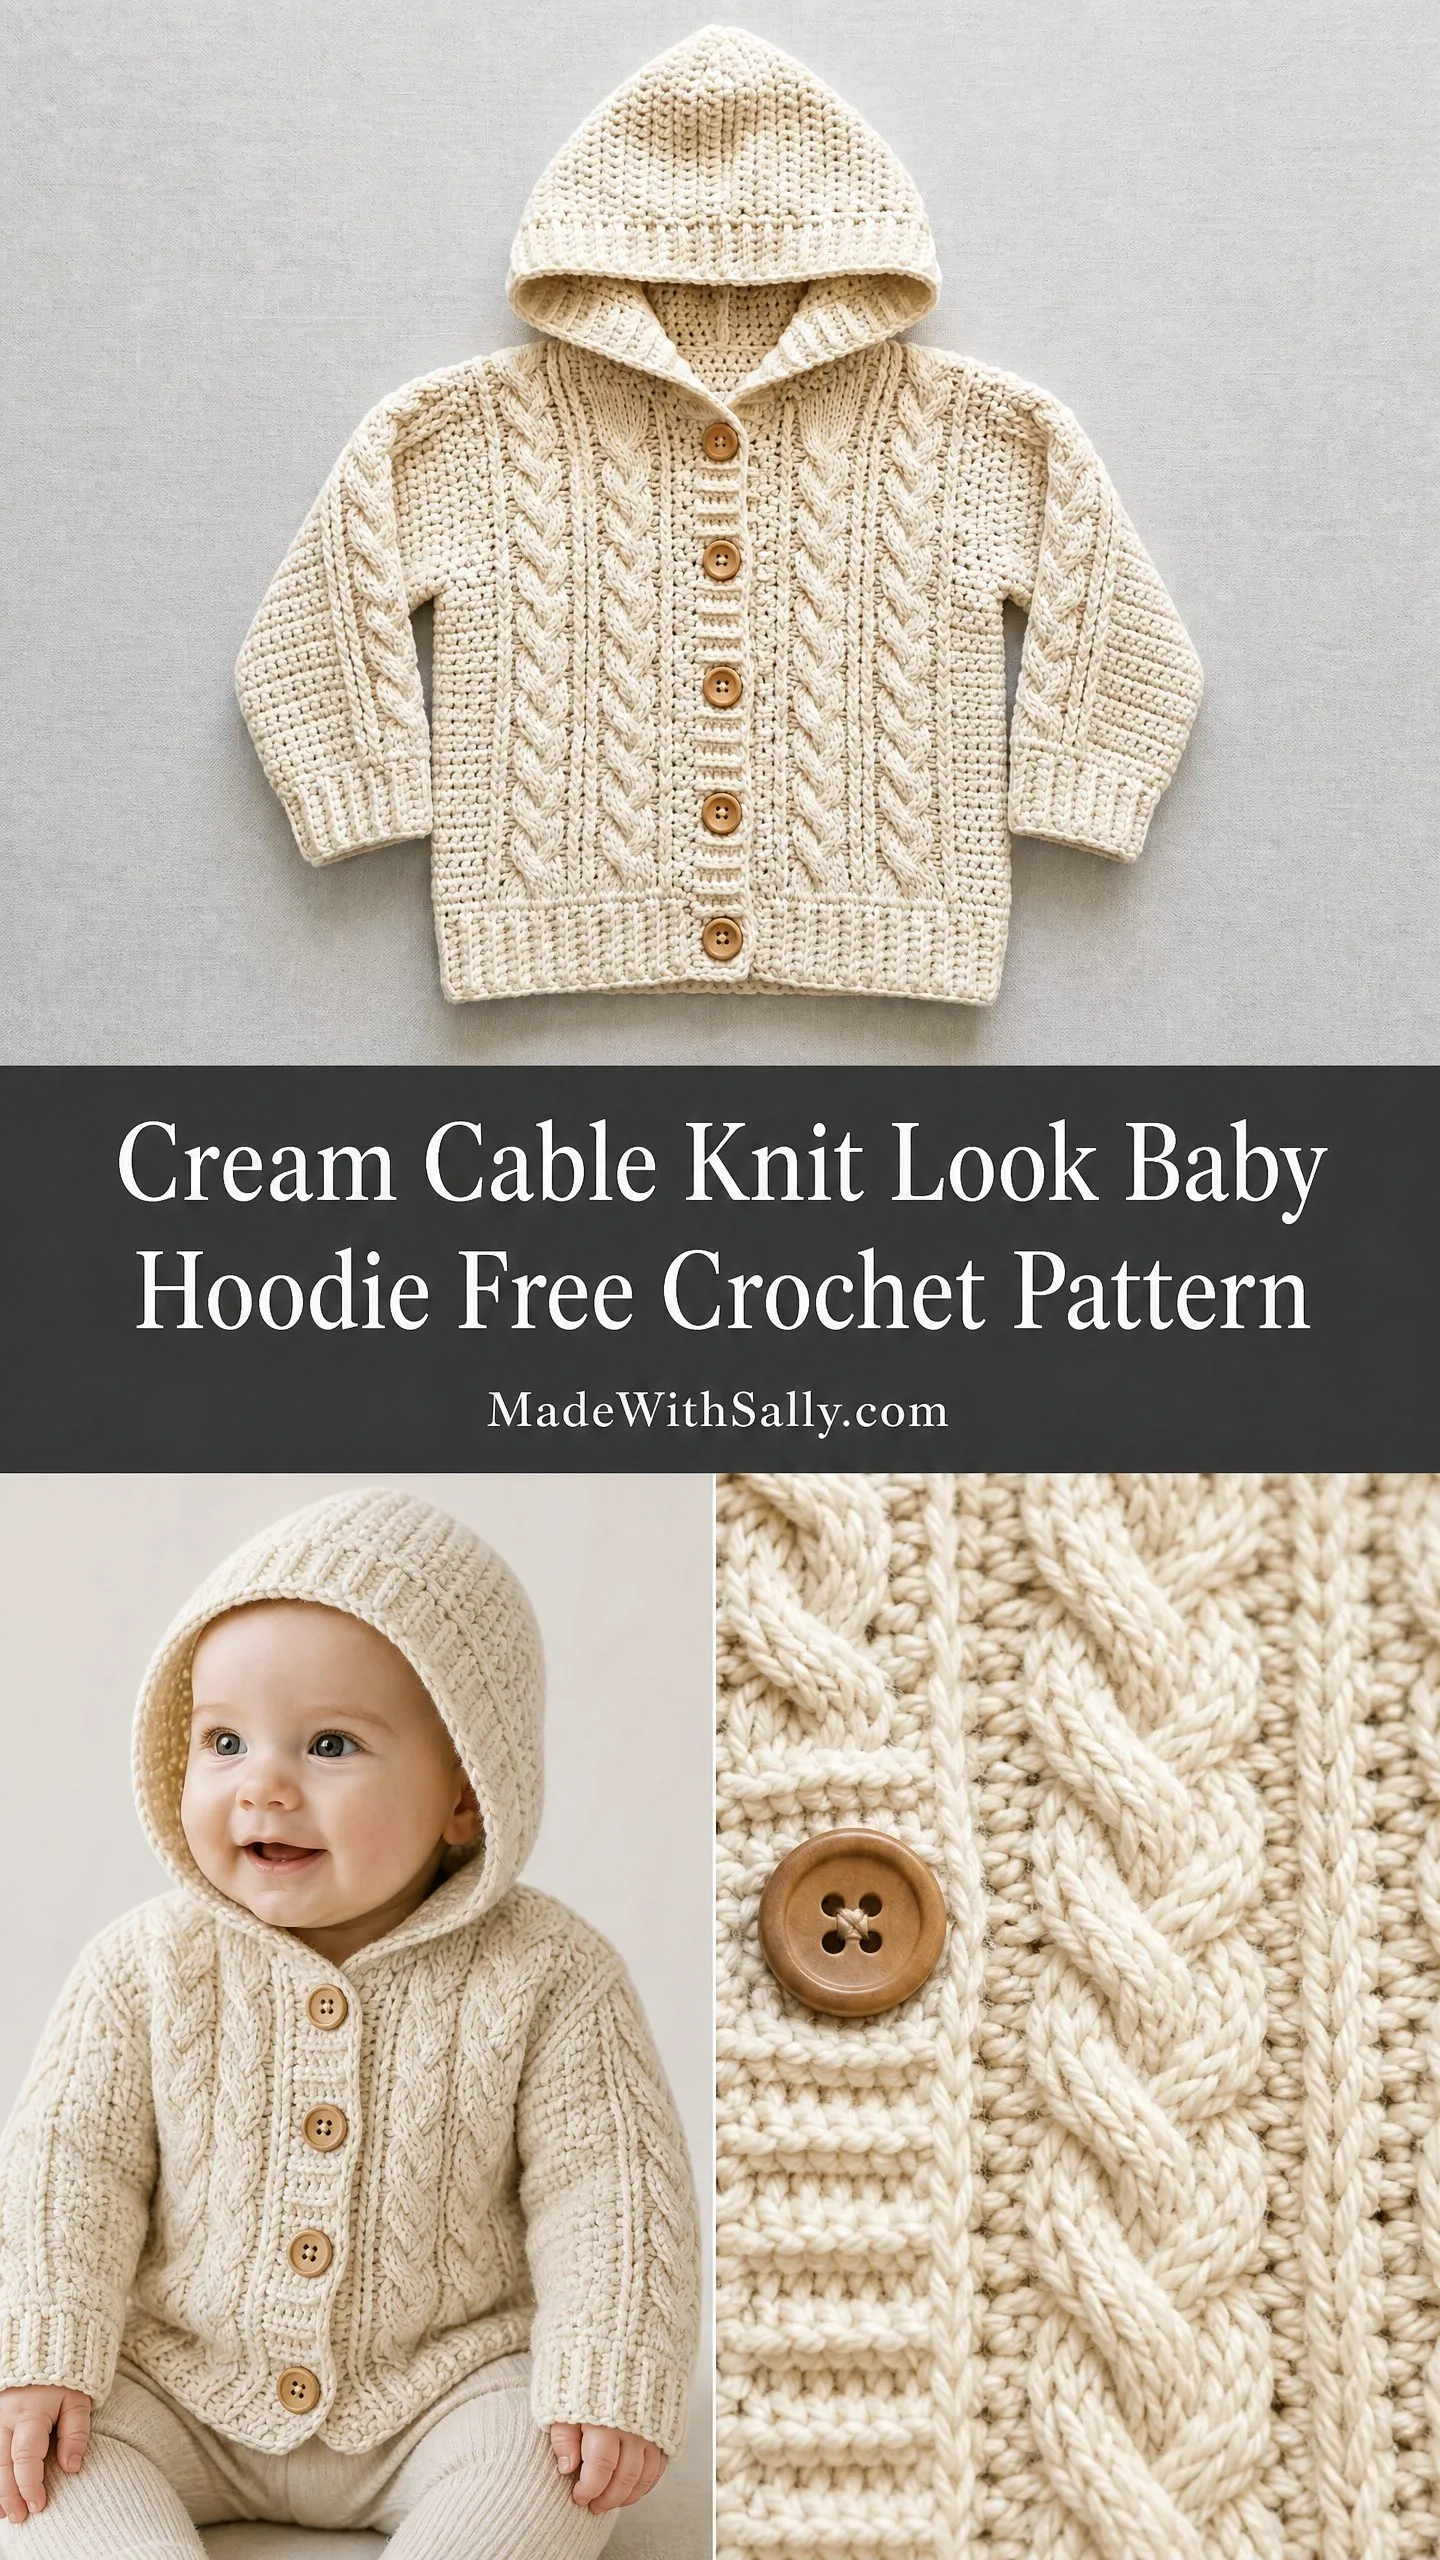
After many swatches, frogged attempts, and late nights figuring out how to make cables work with a hook instead of needles, I finally cracked the code. The secret is all in the post stitches, and I promise it is far less intimidating than it looks.
This cream cable knit look baby hoodie has become one of my most requested patterns, and I am thrilled to finally share the complete instructions with you today. If you have ever wanted to create an heirloom-quality baby garment that looks hand-knit but is actually crocheted, this is your project.
Why This Cable Baby Hoodie Pattern Works So Well
The magic of this crochet tutorial lies in how the front post and back post double crochets create that classic rope cable texture. When you look at the finished piece, most people cannot tell it is crocheted rather than knitted. That Aran aesthetic, with its creamy yarn and deeply textured cables, gives this baby cardigan an heirloom quality that makes it perfect for gift-giving.
What I love most about this pattern is its versatility. The neutral cream colorway works for any baby, any nursery theme, and any season. The wooden buttons add a rustic, handcrafted touch that complements the traditional cable design beautifully.
This step by step pattern is sized for 6 to 12 months, with a finished chest measurement of 19 inches (48 cm) when closed. The total length from shoulder to hem is 10.5 inches (26.5 cm), and the sleeves measure 6.5 inches (16.5 cm) from underarm to cuff. The hood adds another 6 inches (15 cm) of cozy coverage.
Skill Level and Time Investment
I have labeled this an intermediate crochet pattern, and I want to be honest about what that means. You should feel comfortable with post stitches before starting. If you have never worked a front post double crochet before, I recommend practicing on a simple swatch first. Once you understand how to wrap your hook around the post of a stitch rather than into the top, you will be ready to tackle these cables.
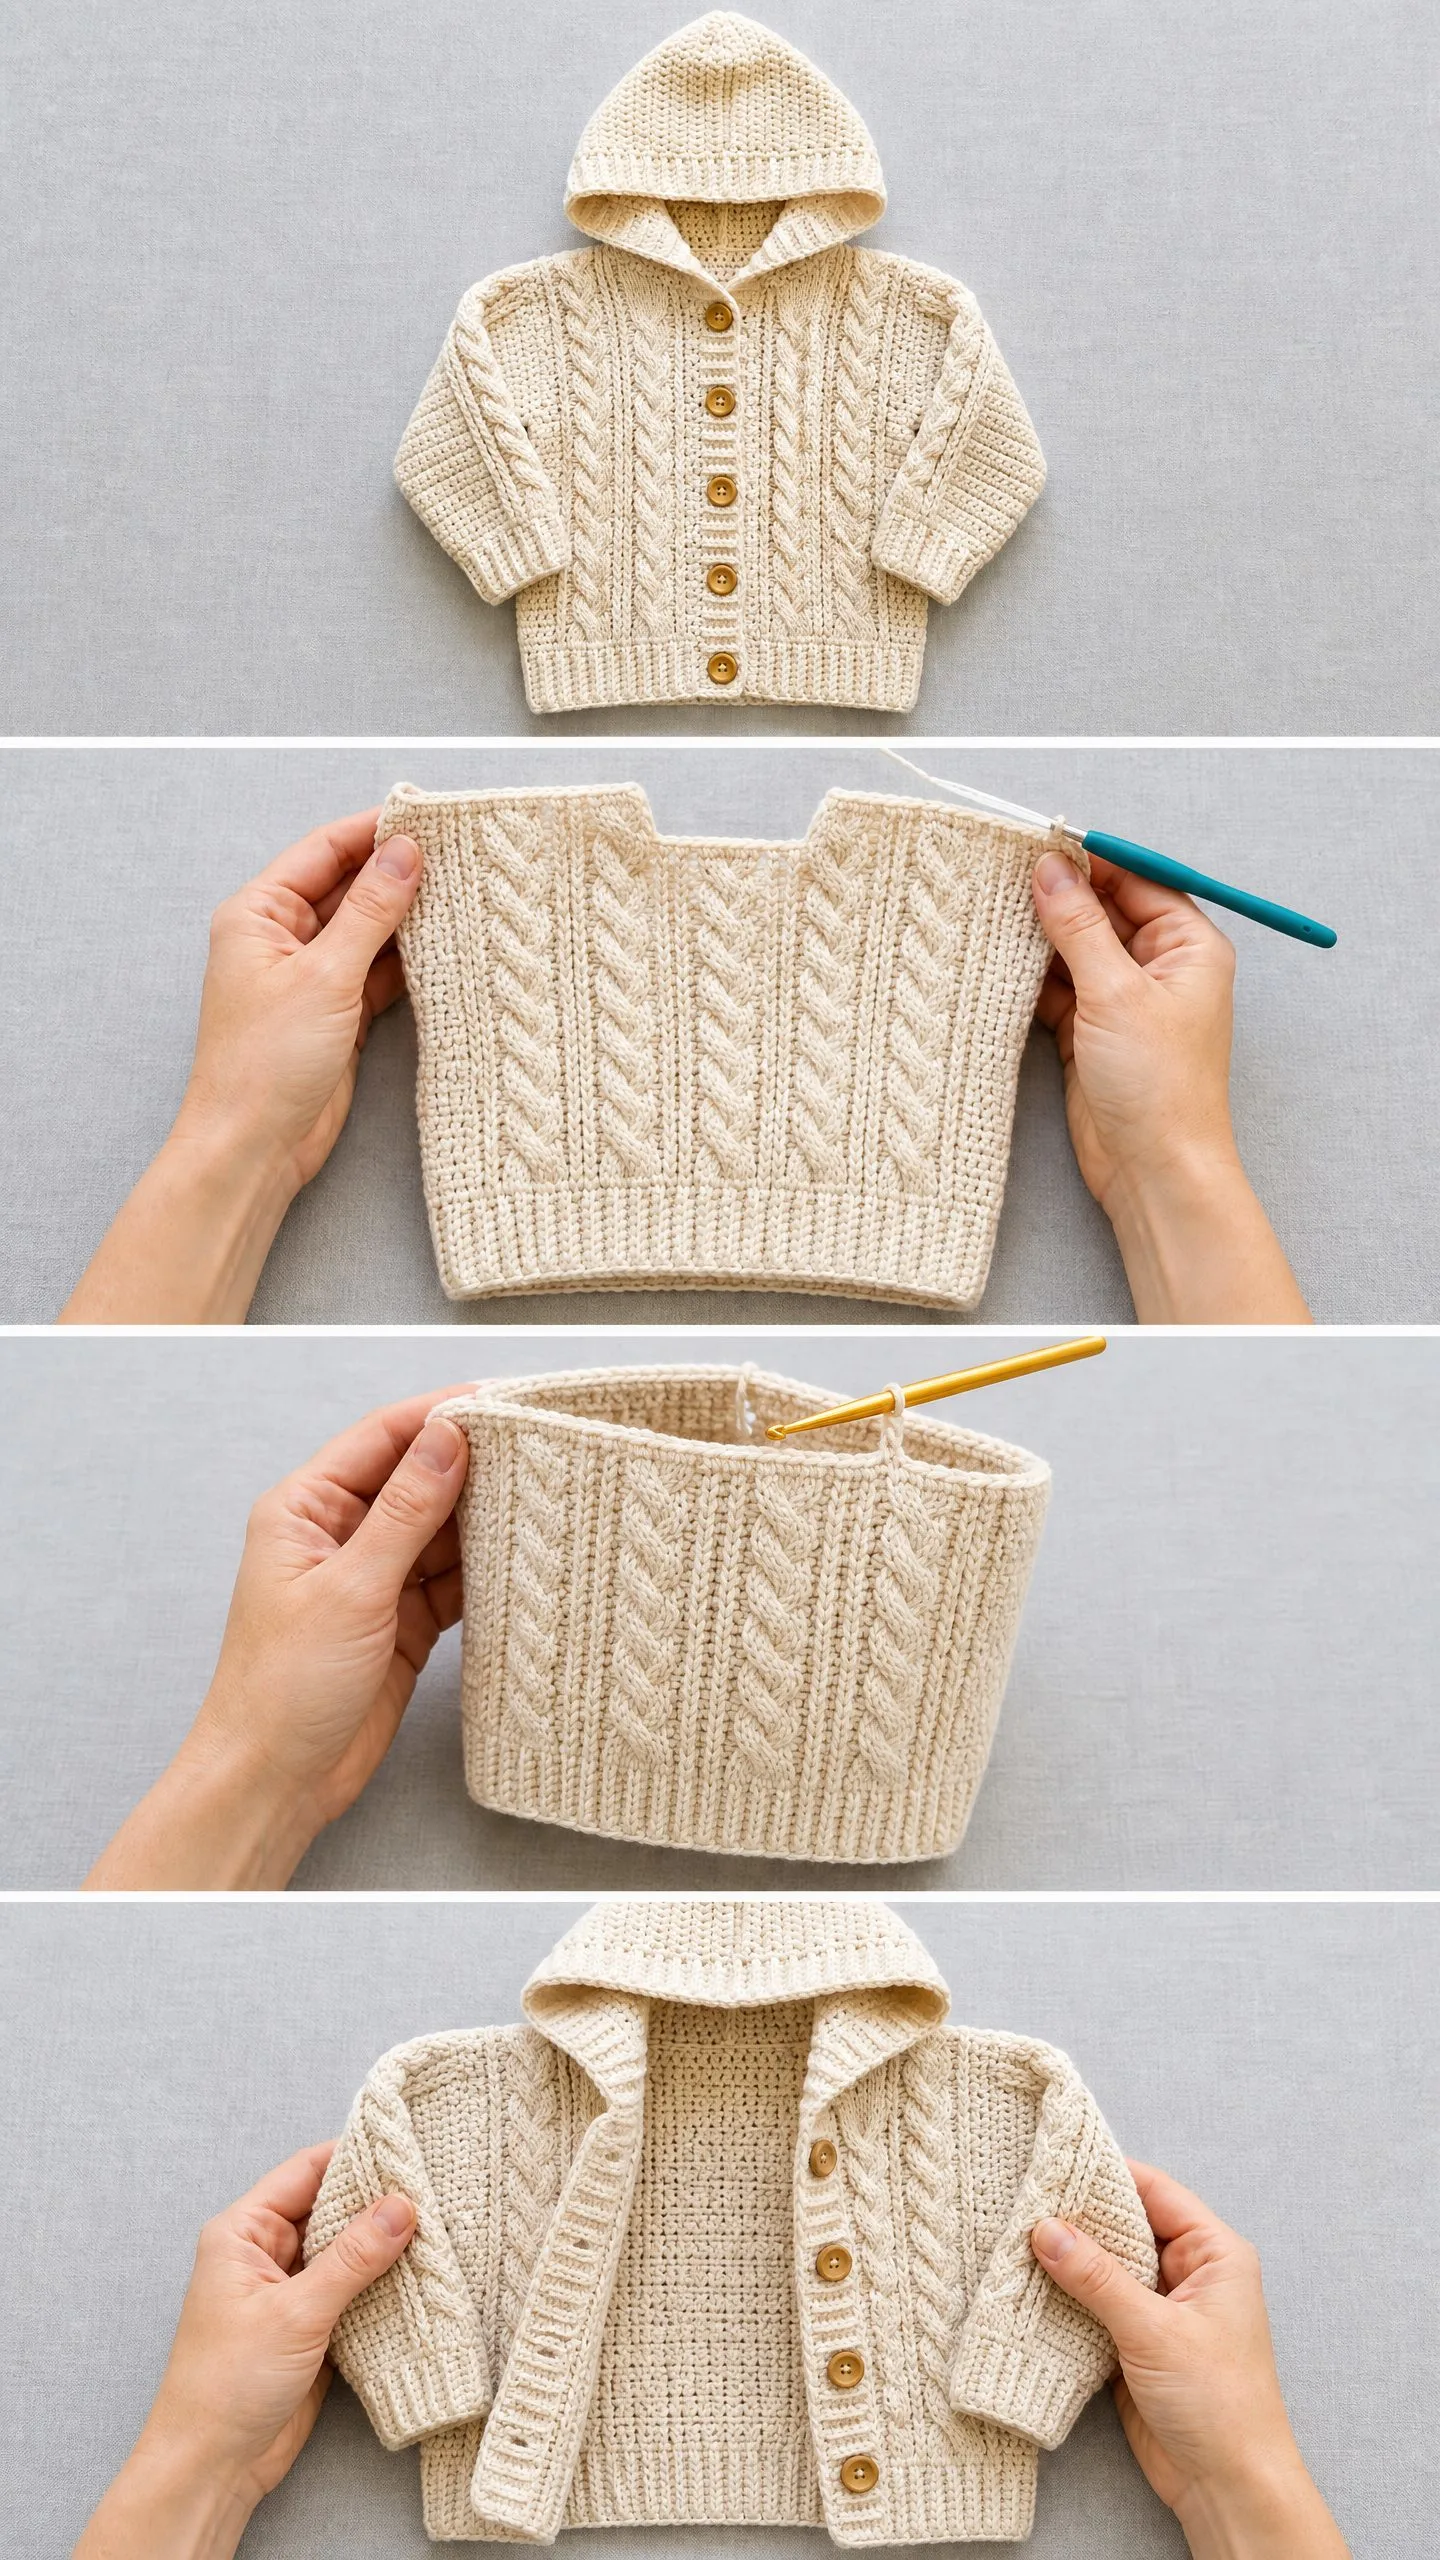
The construction method is straightforward. You will work flat pieces (back, two fronts, two sleeves) and seam them together. The hood gets picked up directly from the neckline, which is a lovely technique that eliminates extra seaming at the neck.
Time estimate: Plan for approximately 12 to 18 hours of work. Here is a rough breakdown:
Materials You Will Need
Yarn: Worsted weight (category 4) in cream or natural off-white. You will need approximately 550 to 650 yards (503 to 595 meters) total.
I have three yarn suggestions that work beautifully for this cable hoodie crochet pattern:
1. Lion Brand Pound of Love in Ivory is my budget-friendly pick. It is 100% acrylic, machine washable, and holds cable definition wonderfully.
2. Paintbox Yarns Simply DK in Paper White, used doubled, creates exceptional stitch clarity. Doubling DK weight yarn gives you that worsted-weight equivalent.
3. Cascade 220 Superwash in Natural is my recommendation for heirloom-quality results. This 100% superwash wool has superior stitch definition. You will need 3 skeins.
Important: Choose a yarn with good stitch definition and minimal fuzz. Fuzzy or bouclé yarns will completely obscure your cable pattern, and that would break my heart after all your hard work.
Hook: US size J-10 / 6.0 mm, or whatever size you need to meet gauge.
Notions:
Gauge (Please Do Not Skip This)
I know gauge swatches are not the most exciting part of crochet, but for a fitted baby garment, they are essential. Trust me on this one.
In main cable pattern: 14 stitches and 10 rows = 4 inches (10 cm), blocked
In single crochet ribbing: 14 stitches and 16 rows = 4 inches (10 cm)
Work a swatch of at least 20 stitches and 14 rows, block it, then measure. Even being off by one stitch per 4 inches will shift the chest measurement by over an inch. On a baby garment, that is significant.
Abbreviations and Stitch Definitions
Let me walk you through every stitch you will use in this how to crochet tutorial. I am defining each one in plain English so there is no confusion.
ch = chain. The foundation stitch that creates your starting row.
sl st = slip stitch. Insert hook, yarn over, pull through both the work and the loop on your hook in one motion.
sc = single crochet. Insert hook, yarn over, pull up a loop (2 loops on hook), yarn over, pull through both loops.
dc = double crochet. Yarn over, insert hook, yarn over, pull up a loop (3 loops on hook), yarn over, pull through 2 loops, yarn over, pull through remaining 2 loops.
hdc = half double crochet. Yarn over, insert hook, yarn over, pull up a loop (3 loops on hook), yarn over, pull through all 3 loops at once.
FPdc = front post double crochet. This is the key stitch for creating cables. Yarn over, insert hook from front to back to front around the post (the vertical bar) of the stitch in the row below, yarn over and pull up a loop (3 loops on hook), yarn over and pull through 2 loops, yarn over and pull through remaining 2 loops. The stitch sits raised on the front of your fabric.
BPdc = back post double crochet. The opposite of FPdc. Yarn over, insert hook from back to front to back around the post of the stitch in the row below, complete as a regular dc. This stitch sits raised on the back of the fabric.
FPtr = front post treble crochet. Yarn over twice, insert hook from front to back to front around the post of the indicated stitch, yarn over and pull up a loop (4 loops on hook), [yarn over and pull through 2 loops] 3 times. This taller stitch creates more pronounced cable crosses.
sk = skip
st(s) = stitch(es)
RS = right side
WS = wrong side
rep = repeat
t-ch = turning chain
pm = place marker
Special Stitch: Cable Cross Right (CR6)
This is where the magic happens. The Cable Cross Right is worked over 6 stitches and creates that beautiful rope-twist cable leaning to the right.
Here is the step by step process:
Step 1: Skip the next 3 post stitches in the current row.
Step 2: Work FPtr around the post of stitch 4 from your current hook position (counting in the row below).
Step 3: Work FPtr around the post of stitch 5 in the row below.
Step 4: Work FPtr around the post of stitch 6 in the row below.
Step 5: Now go back and work FPtr around the post of stitch 1 (the first stitch you skipped).
Step 6: Work FPtr around the post of stitch 2.
Step 7: Work FPtr around the post of stitch 3.
Result: 6 FPtr total. The right-side stitches cross over the left-side stitches, creating that gorgeous right-leaning twist.
On rows between cable crosses, you simply work these 6 stitches as regular FPdc to maintain the raised column.
Understanding the Main Cable Pattern
The cable pattern alternates panels of 6-stitch cables separated by 4-stitch columns of BPdc. Those BPdc columns create the grooves between cables on the right side, which is what gives this baby hoodie its authentic Aran look.
Cable cross rows (worked every 6th row on RS): ch 3 (counts as dc), [4 BPdc, CR6] across to last 5 sts, 4 BPdc, dc in top of t-ch.
Cable maintenance rows (all other RS rows): ch 3, [4 BPdc, 6 FPdc] across to last 5 sts, 4 BPdc, dc in top of t-ch.
WS rows: ch 3, [4 FPdc, 6 BPdc] across to last 5 sts, 4 FPdc, dc in top of t-ch.
The ch-3 at the start of each row counts as 1 dc throughout the entire pattern.
Pattern Notes Before You Begin
A few things to keep in mind as you work through this beginner friendly construction method:
1. The garment is worked in pieces: back, right front, left front, two sleeves. All pieces are seamed together, then the hood is picked up from the neckline.
2. Cable crosses happen on Row 7 and then every 6 rows after that. Keep a row counter handy.
3. All post stitches are worked around stitches in the PREVIOUS row, not the current row.
4. Right front and left front are mirror images. Right front has the button band; left front has the buttonholes.
5. Block all pieces before seaming. Wet blocking really opens up the cable texture.
Step by Step Instructions: Back Panel
Foundation: ch 36.
Row 1 (WS, setup): dc in 4th ch from hook and in each ch across, turn. (34 dc)
Your 34 stitches will be arranged into the cable pattern starting Row 2: 2 dc edge stitches on each side, with 30 sts in the cable pattern (3 full cable repeats).
Row 2 (RS, cable maintenance): ch 3 (counts as dc), dc in next st, [4 FPdc, 6 BPdc] 3 times, dc in next st, dc in top of t-ch, turn. (34 sts)
Row 3 (WS): ch 3, dc in next st, [4 BPdc, 6 FPdc] 3 times, dc in next st, dc in top of t-ch, turn. (34 sts)
Rows 4 through 7: Continue alternating RS and WS rows in the established pattern. (34 sts each row)
Row 8 (RS, CABLE CROSS ROW): ch 3, dc in next st, [4 FPdc, CR6] 3 times, dc in next st, dc in top of t-ch, turn. (34 sts)
Rows 9 through 26: Continue in established cable pattern, working CR6 on Row 14, Row 20, and Row 26. (34 sts each row)
Checkpoint: After Row 26, your back piece should measure approximately 10.5 inches (26.5 cm) from the foundation chain.
Fasten off and leave a long tail for seaming.
Mark your shoulder sections: 9 stitches from each side edge for shoulders, with 16 center stitches remaining for the back neck.
Right Front Panel
The right front contains the button band (no buttonholes).
Foundation: ch 21.
Row 1 (WS, setup): dc in 4th ch from hook and in each ch across, turn. (19 dc)
Row 2 (RS, setup): ch 3, dc in next 2 sts (button band), 4 FPdc, 6 BPdc, 4 FPdc, dc in next st, dc in top of t-ch, turn. (19 sts)
Row 3 (WS): ch 3, dc in next st, 4 BPdc, 6 FPdc, 4 BPdc, dc in next 2 sts, dc in top of t-ch, turn. (19 sts)
Rows 4 through 7: Continue in established pattern. (19 sts each row)
Row 8 (RS, CABLE CROSS ROW): ch 3, dc in next 2 sts, 4 FPdc, CR6, 4 FPdc, dc in next st, dc in top of t-ch, turn. (19 sts)
Rows 9 through 26: Continue in established pattern, working CR6 on Row 14, Row 20, and Row 26. (19 sts each row)
Fasten off and leave a long tail.
Left Front Panel (with Buttonholes)
The left front is the mirror image of the right front and contains 5 buttonholes.
Foundation: ch 21.
Row 1 (WS, setup): dc in 4th ch from hook and in each ch across, turn. (19 dc)
Row 2 (RS, setup): ch 3, dc in next st, 4 FPdc, 6 BPdc, 4 FPdc, dc in next 2 sts, dc in top of t-ch, turn. (19 sts)
Row 3 (WS): ch 3, dc in next 2 sts, 4 BPdc, 6 FPdc, 4 BPdc, dc in next st, dc in top of t-ch, turn. (19 sts)
Row 4 (RS, BUTTONHOLE ROW 1): ch 3, dc in next st, 4 FPdc, 6 BPdc, 4 FPdc, ch 1, sk 1 st, dc in next st, dc in top of t-ch, turn. (19 sts with 1 ch-1 sp forming buttonhole)
Row 5 (WS): ch 3, dc in next 2 sts (working dc into the ch-1 sp from previous row), 4 BPdc, 6 FPdc, 4 BPdc, dc in next st, dc in top of t-ch, turn. (19 sts)
Continue in established pattern, working buttonholes on Rows 9, 14, 19, and 24, and cable crosses on Rows 8, 14, 20, and 26. (19 sts each row)
Note: Row 14 is both a buttonhole row and a cable cross row. Work the CR6 in the cable section, then work the buttonhole in the band.
Fasten off and leave a long tail.
Sleeves (Make 2)
Sleeves are worked from cuff to underarm.
Cuff (worked lengthwise in single crochet ribbing)
Foundation: ch 7.
Row 1: sc in 2nd ch from hook and in each ch across, turn. (6 sc)
Rows 2 through 25: ch 1, sc in back loop only across, turn. (6 sc each row)
After Row 25, seam the short ends together to form a ring.
Sleeve Body
With RS facing, join yarn to the cuff edge.
Foundation round: Work 28 dc evenly around the long edge of the cuff. Do not join; continue working flat in rows.
Row 1 (WS, setup): ch 3, dc in each of next 27 sts, turn. (28 dc)
Row 2 (RS, setup): ch 3, dc in next st, [4 FPdc, 6 BPdc] twice, 4 FPdc, dc in next st, dc in top of t-ch, turn. (28 sts)
Rows 3 through 7: Continue in established pattern. (28 sts each row)
Row 8 (RS, CABLE CROSS ROW): ch 3, dc in next st, [4 FPdc, CR6] twice, 4 FPdc, dc in next st, dc in top of t-ch, turn. (28 sts)
Rows 9 through 16: Continue in established pattern, working CR6 on Row 14. (28 sts each row)
Checkpoint: The sleeve body should measure approximately 6.5 inches (16.5 cm) from the cuff join.
Fasten off and leave a long tail. Make second sleeve identically.
Assembly
Shoulder seams: Hold the back and right front pieces with RS together. Align the 9-stitch shoulder sections and whipstitch or mattress stitch together. Repeat for the left front shoulder.
Set in sleeves: Place a marker 4 inches (10 cm) below each shoulder seam on both the back and fronts to mark armhole depth. Pin the sleeve into the armhole opening and whipstitch in place.
Side and sleeve seams: Starting at the cuff edge, whipstitch the sleeve seam closed, then continue down the side seam from underarm to hem. Repeat for the second side.
Weave in all ends.
Hood
The hood is picked up directly from the neckline edge.
With RS facing, join yarn at the right front neck edge.
Row 1 (RS, setup): ch 3, work 36 dc evenly across the neckline (10 dc across right front neck, 16 dc across back neck, 10 dc across left front neck), turn. (36 dc)
Row 2 (WS, setup): ch 3, dc in each of next 35 sts, turn. (36 dc)
Row 3 (RS, cable setup): ch 3, dc in next st, [4 FPdc, 6 BPdc] 3 times, 4 FPdc, dc in next st, dc in top of t-ch, turn. (36 sts)
Rows 4 through 8: Continue in established pattern. (36 sts each row)
Row 9 (RS, CABLE CROSS ROW): ch 3, dc in next st, [4 FPdc, CR6] 3 times, 4 FPdc, dc in next st, dc in top of t-ch, turn. (36 sts)
Rows 10 through 14: Continue in established pattern. (36 sts each row)
Row 15 (RS, CABLE CROSS ROW): ch 3, dc in next st, [4 FPdc, CR6] 3 times, 4 FPdc, dc in next st, dc in top of t-ch, turn. (36 sts)
Checkpoint: After Row 15, the hood should measure 6 inches (15 cm) from the neckline.
Fold the hood in half with RS together and seam the top closed using whipstitch or mattress stitch.
Finishing
Sew the 5 wooden buttons to the right front button band, spacing them evenly to align with the buttonholes on the left front.
Blocking: Wet block the finished garment by soaking it in lukewarm water, gently squeezing out excess moisture, and laying flat on a blocking mat. Pin to measurements and allow to dry completely. This step dramatically improves the cable definition.
Tips for Success with This Baby Hoodie Crochet Pattern
Keep a row counter nearby. Tracking your cable cross rows (every 6th row) is the most important thing you can do to keep your cables looking uniform.
If your cables seem tight or puckered, try going up a hook size. The post stitches naturally compress the fabric, so a slightly larger hook can help maintain the proper drape.
When working the CR6, take your time. The crossing motion feels awkward at first, but it becomes second nature by your third or fourth cable cross.
Do not skip the blocking step. I know it adds time, but blocking transforms this piece from nice to stunning. The cables really pop after a good wet block.
Thank you so much for choosing this pattern for your next project. I truly hope you love making this little cable hoodie as much as I loved designing it. There is something deeply satisfying about watching those rope cables emerge row after row.
If you make this cream cable knit look baby hoodie, I would absolutely love to see your finished piece. Tag me on Instagram or share a photo in our Facebook group. Seeing your versions brings me so much joy.
Go ahead and pin this pattern to your Pinterest boards so you can find it when you are ready to cast on. And please drop a comment below if you make one. I read every single comment and love hearing about your projects and any modifications you try. Happy crocheting, friends!
