
This is a structured knee-length hooded coat for girls aged 3 to 6 years. It features a basket-weave textured bodice, a flared A-line skirt, bell sleeves with scallop trim, and crocheted butterfly appliques. You will need worsted weight yarn, two hook sizes, and familiarity with post stitches.
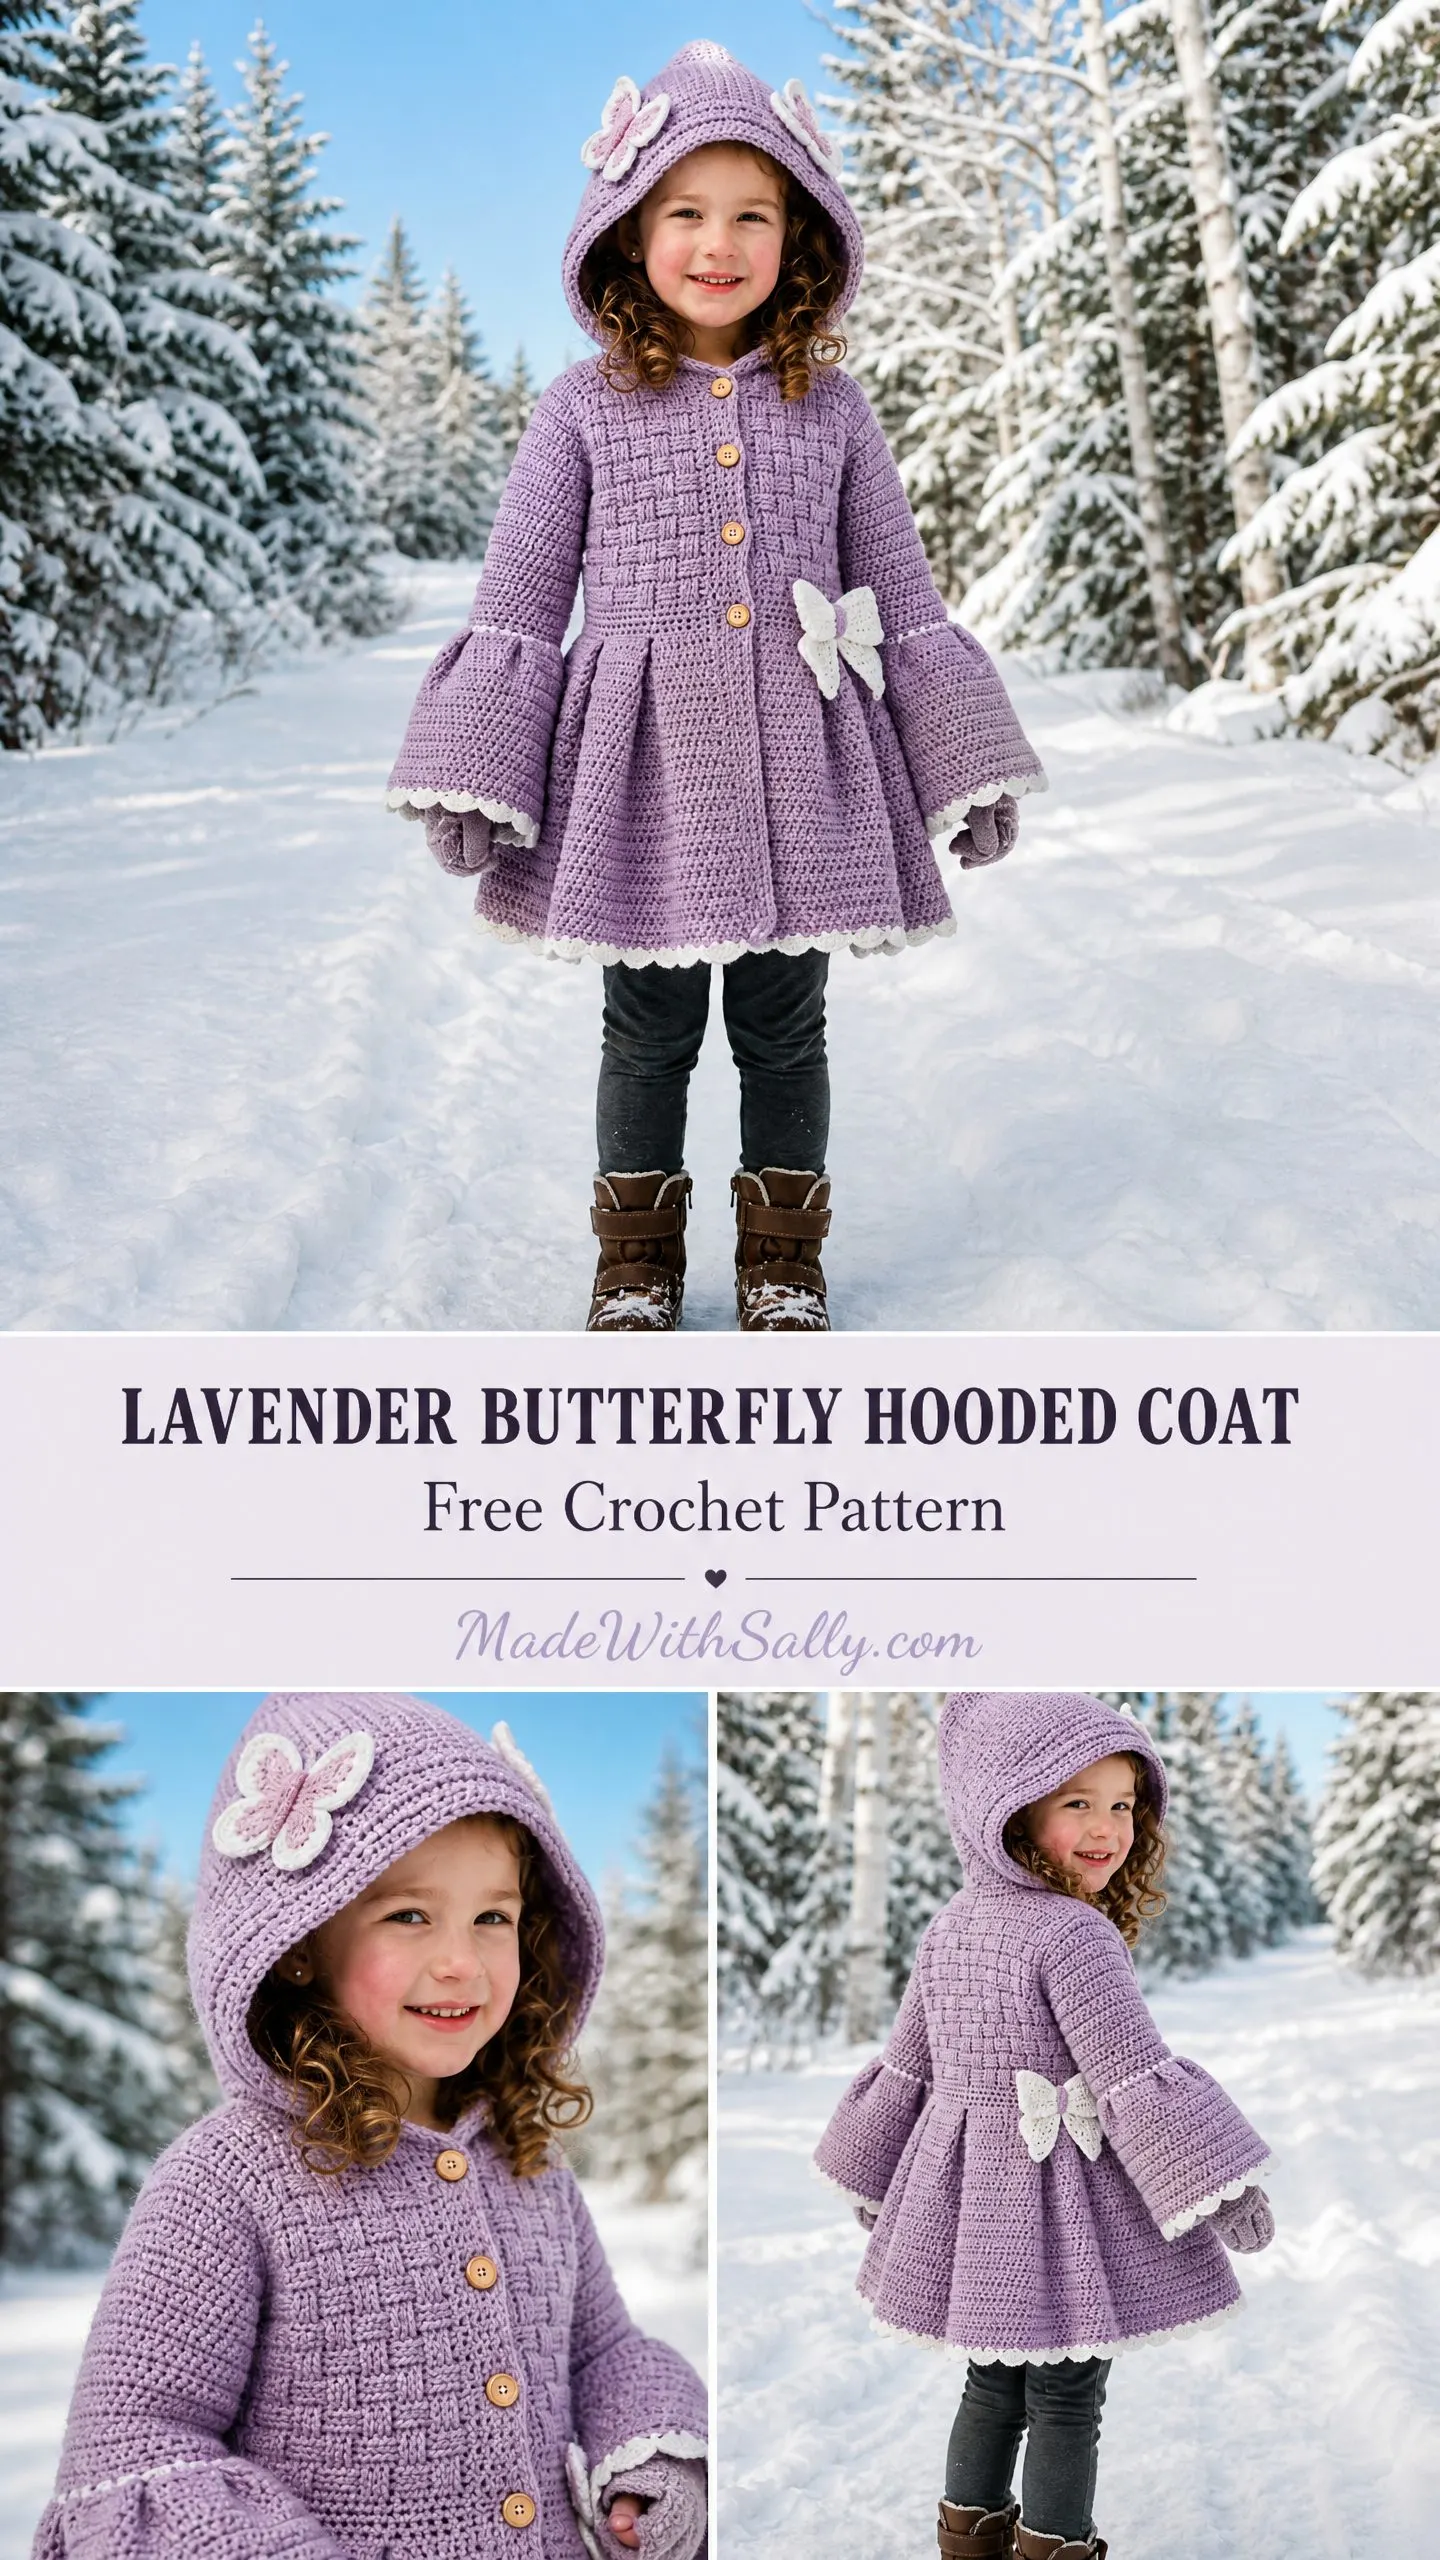
The coat works up in pieces and seams together at the end. If you have completed at least two garments and feel comfortable with front and back post stitches, you are ready for this project.
Expect about 15 to 22 hours of work total. The finished piece makes a stunning gift or a treasured addition to any little one’s wardrobe.
Why You Will Love This Crochet Pattern
This hooded coat combines structure and whimsy in all the right ways. The basket-weave stitch on the bodice creates a woven texture that looks far more complex than it actually is. Meanwhile, the single crochet skirt panels drape beautifully and create that classic A-line silhouette.
The butterfly appliques add a playful touch without overwhelming the design. One sits sweetly on the hood, and another decorates the hip. These small details transform a practical winter coat into something truly special.
I love that this pattern offers four sizes in one. Whether you are making it for a 3-year-old or a 6-year-old, the instructions scale clearly with all changes noted in parentheses.
Skill Level
Advanced Beginner to Intermediate. The basket-weave stitch requires working into front and back post stitches alternately. This demands some familiarity with post stitches, but all shaping is straightforward.
If you have never worked post stitches before, I recommend practicing on a small swatch first. Once you get the rhythm, it becomes almost meditative.
Time Estimate
Plan for 15 to 22 hours total, including seaming and embellishments. If you work in shorter sessions of 1 to 2 hours, most crocheters complete this project in 10 to 14 days.
Finished Sizes for This Crochet Tutorial
Size 3T: chest 22 in / 56 cm, length 20 in / 51 cm, sleeve 10.5 in / 27 cm
Size 4T: chest 23 in / 58.5 cm, length 21 in / 53.5 cm, sleeve 11 in / 28 cm
Size 5T: chest 24 in / 61 cm, length 22 in / 56 cm, sleeve 11.5 in / 29 cm
Size 6: chest 25 in / 63.5 cm, length 23 in / 58.5 cm, sleeve 12 in / 30.5 cm
Instructions are written for size 3T. Changes for sizes 4T, 5T, and 6 appear in parentheses in the format (4T / 5T / 6).
Materials Needed
Yarn A (main color): Worsted weight, category 4, approximately 900 (1000 / 1100 / 1200) yds / 823 (914 / 1006 / 1097) m in lavender
Yarn B (trim and butterfly): Worsted weight, category 4, approximately 80 yds / 73 m in white or cream
Hooks:
Notions:
Yarn Suggestions
Lion Brand Pound of Love (worsted, 100% acrylic, 1020 yds / 932 m per skein) in Pastel Purple offers excellent stitch definition for post-stitch texture. It is machine washable and widely available.
Paintbox Yarns Simply DK (used at double strand for worsted weight, 100% acrylic) feels soft against skin, comes in consistent lavender colorways, and is budget-friendly.
Cascade 220 Superwash (worsted, 100% superwash wool, 220 yds / 201 m per skein) in Lavender gives superior drape and stitch memory. It is machine washable and creates a more polished heirloom finish.
Substitution note: Choose a smooth, plied yarn with good stitch definition so the basket-weave texture reads clearly. Avoid fuzzy or halo yarns. Maintain yardage equivalents and verify gauge before beginning.
Gauge
With G-6 hook and Yarn A, in basket-weave stitch pattern:
18 stitches and 14 rows = 4 in / 10 cm
With H-8 hook and Yarn A, in single crochet:
16 stitches and 18 rows = 4 in / 10 cm
Gauge is mandatory for a wearable garment. Make a 5 in / 13 cm swatch in each stitch, wash and block it before measuring. Adjust hook size as needed.
Abbreviations (US Terms)
Before we dive into the step by step instructions, let me define every abbreviation you will encounter:
Special Stitches Explained
Basket-Weave Panel (BW)
This stitch creates a woven-looking texture by alternating columns of front post and back post double crochets across a multiple of 4 stitches.
Row 1 (setup, RS): Ch 3 (counts as dc). Dc in each st across. Turn.
Row 2 (RS texture row): Ch 2 (does not count as st throughout pattern). Work FPdc around each of next 4 dc. Work BPdc around each of next 4 dc. Rep from FPdc sequence to end, ending with dc in top of t-ch. Turn.
Row 3 (WS texture row): Ch 2. Work BPdc around each FPdc of previous row. Work FPdc around each BPdc of previous row. Repeat to end, dc in t-ch. Turn.
Rows 4 onward: Repeat Rows 2 and 3 alternately to maintain basket-weave columns.
Scallop Trim
Worked along any edge with Yarn B:
Step 1: Join Yarn B with sl st at right edge.
Step 2: Ch 1, sc in same st. Sk 1 st. Work 5 dc in next st (shell made). Sk 1 st. Sc in next st.
Step 3: Repeat from Step 2 to end of edge. Fasten off.
Note: The total stitch count of the trim edge must be a multiple of 4. Adjust foundation edge by 1 or 2 sts at seam if needed.
FPdc (Front Post Double Crochet)
Yo. Insert hook from front to back to front around the post (vertical bar) of the indicated stitch below. Yo and pull up a loop. (Yo, draw through 2 lps) twice.
BPdc (Back Post Double Crochet)
Yo. Insert hook from back to front to back around the post of the indicated stitch below. Yo and pull up a loop. (Yo, draw through 2 lps) twice.
sc2tog (Single Crochet Two Together, Decrease)
Insert hook in next st, yo, pull up lp. Insert hook in following st, yo, pull up lp. Yo, draw through all 3 lps on hook. (1 st decreased)
dc2tog (Double Crochet Two Together)
Yo, insert hook in next st, yo, pull up lp, yo, draw through 2 lps (2 lps rem). Yo, insert hook in next st, yo, pull up lp, yo, draw through 2 lps (3 lps rem). Yo, draw through all 3 lps. (1 st decreased)
Butterfly Applique Instructions
The butterfly is made in two identical wing pairs joined at the body. You will make one for the hood and one for the hip.
Small Wings (make 2 per butterfly)
Rnd 1: Magic ring. Ch 3, work 9 dc in ring. Join with sl st to top of ch-3. (10 dc)
Rnd 2: Ch 3, dc in same st. 2 dc in each st around. Join with sl st. (20 dc)
Rnd 3: Ch 1. Sc in each of first 3 sts. Hdc in each of next 4 sts. Sc in each of next 3 sts. Sl st to close petal. Fasten off leaving 8 in tail for assembly.
Large Wings (make 2 per butterfly)
Rnd 1: Magic ring. Ch 3, 11 dc in ring. Join with sl st. (12 dc)
Rnd 2: Ch 3, dc in same st. 2 dc in each st around. Join. (24 dc)
Rnd 3: Ch 3, dc in same st. Dc in next st. (2 dc in next st, dc in next st) around. Join. (36 dc)
Rnd 4: Ch 1. Sc in first 4 sts. Hdc in next 5 sts. Sc in next 4 sts. Sl st to close. Fasten off.
Body of Butterfly
Ch 8 with Yarn B. Sc in 2nd ch from hook and in each ch. Fasten off. This forms the center bar.
Assembly
Hold one small wing and one large wing together with flat edges aligned. Using yarn needle, whipstitch flat edges together along 5 sts to form one side. Repeat for second side. Wrap body bar around center, sewing through both layers. Secure. Curl top of body into a small loop for antennae effect.
Hood Butterfly: Use small wings only, joined with body bar as above.
Coat Butterfly (for hip): Use large wings, joined as above. Optionally add a second color accent with Yarn B in a contrast pink if desired.
Pattern Notes Before You Begin
The coat is worked flat in pieces: Back Bodice, Right Front Bodice, Left Front Bodice, Back Skirt, Right Front Skirt, Left Front Skirt, two Sleeves, and Hood. All pieces are blocked, then seamed with mattress stitch or whipstitch on WS.
The bodice uses basket-weave stitch on the G-6 hook for structure. The skirt panels are worked in sc on the H-8 hook for drape and flare.
Sleeves are worked flat and seamed. Bell flare is created by increasing at the sleeve cuff over the final several rows.
The button band is worked as a final border row along both front edges after seaming.
Buttons are placed on the right front for girls. Buttonholes are worked on the left front border.
All ch-2 turning chains do NOT count as a stitch in this pattern unless specifically noted. The ch-3 in basket-weave setup rows counts as one dc.
When working post stitches, always work the final dc into the top of the turning chain of the previous row to maintain edge stitch counts.
When changing stitch patterns between bodice and skirt, work one row of sc to create a clean transition ridge. This joining row doubles as the waist and is where the skirt attaches.
Pin and block each piece before seaming. This garment benefits greatly from wet blocking.
How to Crochet the Back Bodice
With G-6 hook and Yarn A, ch 53 (55 / 57 / 61).
Foundation Row (WS): Dc in 4th ch from hook (ch-3 counts as dc here). Dc in each ch across. Turn. (51 / 53 / 55 / 59 dc)
Row 1 (RS): Ch 2 (does not count as st). FPdc around each of next 4 sts. BPdc around each of next 4 sts. Rep to last st. Dc in last st. Turn. (51 / 53 / 55 / 59 sts)
Note: For sizes 4T and 5T which have stitch counts not divisible evenly by 8, end each basket-weave row with partial repeat of 3 FPdc or 3 BPdc and then dc in last st. The texture will still read as basket-weave with a slight edge variation.
Row 2 (WS): Ch 2. BPdc around each FPdc. FPdc around each BPdc. Dc in last st. Turn. (51 / 53 / 55 / 59 sts)
Rows 3 through 20 (3T) / 3 through 22 (4T) / 3 through 24 (5T) / 3 through 26 (6): Rep Rows 1 and 2 alternately. (51 / 53 / 55 / 59 sts throughout)
After the Back Bodice, your piece should measure approximately 6 in / 15 cm tall (6.5 in / 16.5 cm for size 6). Check against gauge swatch before proceeding.
Armhole Shaping
Continue basket-weave pattern while shaping:
Next Row (RS): Sl st across first 4 sts. Ch 2. Work basket-weave across to last 4 sts. Leave last 4 sts unworked. Turn. (43 / 45 / 47 / 51 sts)
Next Row: Ch 2. Sc2tog. Work pattern to last 2 sts. Sc2tog. Turn. (41 / 43 / 45 / 49 sts)
Next Row: Ch 2. Sc2tog. Work pattern to last 2 sts. Sc2tog. Turn. (39 / 41 / 43 / 47 sts)
Continue even in basket-weave for 8 (9 / 10 / 11) more rows, ending after a WS row. (39 / 41 / 43 / 47 sts)
Shoulder and Neck Shaping
Right Shoulder: Work across first 11 (12 / 12 / 14) sts. Turn. Work 2 rows even. Fasten off.
Center Back: Skip center 17 (17 / 19 / 19) sts for back neck.
Left Shoulder: Join yarn at 12th (13th / 13th / 15th) st from left edge. Work across 11 (12 / 12 / 14) sts. Turn. Work 2 rows even. Fasten off.
Shoulder stitch counts: 11 (12 / 12 / 14) sts each shoulder, 17 (17 / 19 / 19) sts back neck.
How to Crochet the Right Front Bodice
With G-6 hook and Yarn A, ch 28 (29 / 30 / 32).
Foundation Row (WS): Dc in 4th ch from hook. Dc in each ch across. Turn. (26 / 27 / 28 / 30 dc)
Note: The front panels are each approximately half the back width plus 1 button-band stitch.
Rows 1 through 20 (3T) / 22 (4T) / 24 (5T) / 26 (6): Work basket-weave same as Back Bodice, maintaining 26 (27 / 28 / 30) sts throughout.
Armhole Shaping
Next Row (RS, at side seam edge): Sl st across first 4 sts. Ch 2. Work pattern to end. Turn. (22 / 23 / 24 / 26 sts)
Next Row: Work pattern to last 2 sts. Sc2tog. Turn. (21 / 22 / 23 / 25 sts)
Next Row: Sc2tog. Work pattern to end. Turn. (20 / 21 / 22 / 24 sts)
Continue even for 4 (5 / 5 / 6) rows. (20 / 21 / 22 / 24 sts)
Neck Shaping
Row A: Work to last 2 sts at neck edge. Sc2tog. Turn. (19 / 20 / 21 / 23 sts)
Row B: Sc2tog at neck. Work to end. Turn. (18 / 19 / 20 / 22 sts)
Row C: Work to last 2. Sc2tog. Turn. (17 / 18 / 19 / 21 sts)
Row D: Sc2tog. Work to end. Turn. (16 / 17 / 18 / 20 sts)
Continue decreasing 1 st at neck edge every row until 11 (12 / 12 / 14) sts remain.
Work 1 even row on shoulder sts. Fasten off.
How to Crochet the Left Front Bodice
Work same as Right Front Bodice reversing all shaping:
Final count: 11 (12 / 12 / 14) sts at shoulder after all shaping.
Checkpoint: Both front bodice panels should measure approximately 6 in / 15 cm tall before armhole shaping, same as the back bodice.
How to Crochet the Back Skirt
The skirt is worked from waist to hem. It begins with fewer stitches at the waist and increases progressively to create a full A-line flare.
With H-8 hook and Yarn A, ch 53 (55 / 57 / 61).
Row 1 (WS): Sc in 2nd ch from hook and each ch across. Turn. (52 / 54 / 56 / 60 sc)
Row 2 (RS): Ch 1. 2 sc in first st. Sc to last st. 2 sc in last st. Turn. (54 / 56 / 58 / 62 sc)
Row 3: Ch 1. Sc across. Turn. (54 / 56 / 58 / 62 sc)
Rows 4 through 5: Rep Rows 2 and 3. (56 / 58 / 60 / 64 sc after Row 4)
Continue in pattern: increase 2 sts (1 each edge) every RS row.
Row 6: 2 sc in first st. Sc to last. 2 sc in last. (58 / 60 / 62 / 66 sc)
Row 7: Sc across. (58 / 60 / 62 / 66 sc)
Row 8: 2 sc in first st. Sc to last. 2 sc in last. (60 / 62 / 64 / 68 sc)
Row 9: Sc across. (60 / 62 / 64 / 68 sc)
Row 10: 2 sc in first. Sc to last. 2 sc in last. (62 / 64 / 66 / 70 sc)
Row 11: Sc across. (62 / 64 / 66 / 70 sc)
Row 12: 2 sc in first. Sc to last. 2 sc in last. (64 / 66 / 68 / 72 sc)
Row 13: Sc across. (64 / 66 / 68 / 72 sc)
Row 14: 2 sc in first. Sc to last. 2 sc in last. (66 / 68 / 70 / 74 sc)
Row 15: Sc across. (66 / 68 / 70 / 74 sc)
For sizes 5T and 6, continue increasing every RS row:
Row 16 (5T/6): 2 sc in first. Sc to last. 2 sc in last. (72 / 76 sc)
Row 17 (5T/6): Sc across. (72 / 76 sc)
Row 18 (6 only): 2 sc in first. Sc to last. 2 sc in last. (78 sc)
Row 19 (6 only): Sc across. (78 sc)
Work even (no increases) until skirt measures:
Adjusting for Scallop Trim
Before applying scallop trim, adjust count to nearest multiple of 4:
Scallop Trim Row (with Yarn B): Join Yarn B. Ch 1. Sc in first st. Sk 1 st. 5 dc in next st. Sk 1 st. Sc in next st. Rep to end. Fasten off. (17 / 17 / 18 / 20 shells)
How to Crochet the Front Skirt Panels
Right Front Skirt
With H-8 hook and Yarn A, ch 28 (29 / 30 / 32).
Row 1: Sc in 2nd ch from hook and each ch. Turn. (27 / 28 / 29 / 31 sc)
Work increases at side edge only every RS row, keeping front center edge straight:
Row 2: Ch 1. Sc to last st. 2 sc in last st. Turn. (28 / 29 / 30 / 32 sc)
Row 3: Sc across. Turn. (28 / 29 / 30 / 32 sc)
Rep Rows 2 and 3 for 3T: 6 more times total (8 increase rows), 4T: 7 times, 5T: 8 times, 6: 9 times.
Adjust final counts for trim:
Work even until skirt length matches Back Skirt.
Scallop Trim: Work same as Back Skirt trim. (9 / 9 / 9 / 10 shells)
Left Front Skirt
Work same as Right Front Skirt, reversing increases to side edge (left edge, beginning of RS rows).
Row 2: Ch 1. 2 sc in first st. Sc to end. Turn.
Same final stitch counts and trim as Right Front Skirt.
How to Crochet the Sleeves (Make 2)
With G-6 hook and Yarn A, ch 29 (31 / 33 / 35).
Foundation Row: Dc in 4th ch from hook and each ch across. Turn. (27 / 29 / 31 / 33 dc)
Rows 1 through 4: Work basket-weave pattern same as bodice. (27 / 29 / 31 / 33 sts throughout)
Cap shaping rows: Work even for 2 more rows. (27 / 29 / 31 / 33 sts)
Begin Bell Flare (Switch to H-8 Hook)
Continue in sc from this point.
Row 5 (Transition): Ch 1. Sc across entire row. Turn. (27 / 29 / 31 / 33 sc)
Row 6: Ch 1. 2 sc in first st. Sc to last. 2 sc in last. Turn. (29 / 31 / 33 / 35 sc)
Row 7: Sc across. Turn. (29 / 31 / 33 / 35 sc)
Row 8: 2 sc in first. Sc to last. 2 sc in last. Turn. (31 / 33 / 35 / 37 sc)
Row 9: Sc across. Turn. (31 / 33 / 35 / 37 sc)
Row 10: 2 sc in first. Sc to last. 2 sc in last. Turn. (33 / 35 / 37 / 39 sc)
Row 11: Sc across. Turn. (33 / 35 / 37 / 39 sc)
Row 12: 2 sc in first. Sc to last. 2 sc in last. Turn. (35 / 37 / 39 / 41 sc)
Row 13: Sc across. Turn. (35 / 37 / 39 / 41 sc)
Row 14: 2 sc in first. Sc to last. 2 sc in last. Turn. (37 / 39 / 41 / 43 sc)
Row 15: Sc across. Turn. (37 / 39 / 41 / 43 sc)
Rows 16 through 18: Rep Rows 14 and 15, then Row 14 once more.
Row 19: Sc across. Turn. (41 / 43 / 45 / 47 sc)
Row 20: 2 sc in first. Sc to last. 2 sc in last. Turn. (43 / 45 / 47 / 49 sc)
Row 21: Sc across. Turn. (43 / 45 / 47 / 49 sc)
Work even until sleeve measures:
Adjust final stitch count to nearest multiple of 4 for trim:
Scallop Trim: Join Yarn B. Work same scallop as before. (11 / 11 / 12 / 12 shells)
Sleeve Cap Shaping
Return to top of sleeve. With G-6 hook, rejoin yarn at foundation chain edge.
Cap Row 1: Sl st across 3 sts. Ch 1. Sc across to last 3 sts. Turn. (21 / 23 / 25 / 27 sc)
Cap Row 2: Sc2tog. Sc to last 2 sts. Sc2tog. Turn. (19 / 21 / 23 / 25 sc)
Cap Row 3: Sc2tog. Sc to last 2. Sc2tog. Turn. (17 / 19 / 21 / 23 sc)
Cap Row 4: Sc2tog. Sc to last 2. Sc2tog. Turn. (15 / 17 / 19 / 21 sc)
Cap Row 5: Sc2tog. Sc to last 2. Sc2tog. Turn. (13 / 15 / 17 / 19 sc)
Cap Row 6: Sc2tog. Sc to last 2. Sc2tog. Turn. (11 / 13 / 15 / 17 sc)
Fasten off.
Assembly and Finishing
1. Block all pieces before seaming. Wet blocking is recommended for this garment.
2. Seam shoulders using mattress stitch or whipstitch on WS.
3. Attach skirt to bodice at waist, matching side seams and center fronts.
4. Seam side seams from underarm to hem in one continuous seam.
5. Set in sleeves by pinning sleeve cap to armhole, matching center of cap to shoulder seam. Whipstitch in place.
6. Seam sleeve underarms from cuff to underarm.
7. Work button band along both front edges.
8. Add buttonholes to left front band.
9. Attach butterflies to hood top and hip using yarn needle.
10. Sew on buttons using sewing thread for security.
11. Weave in all ends and give the finished coat a final light blocking.
Tips for Success with This Beginner Friendly Pattern
Count your stitches at the end of every row, especially during the basket-weave sections. Post stitches can be tricky to count at first.
Use stitch markers liberally. Mark the first and last stitch of each row, and place markers at pattern repeat boundaries.
Practice your post stitches on a small swatch before starting the bodice. Getting comfortable with FPdc and BPdc will make the whole project more enjoyable.
Block generously. This coat transforms with blocking. The basket-weave texture becomes more defined, and the skirt drapes beautifully.
Take breaks. This is a multi-hour project. Working in 1 to 2 hour sessions helps maintain consistent tension.
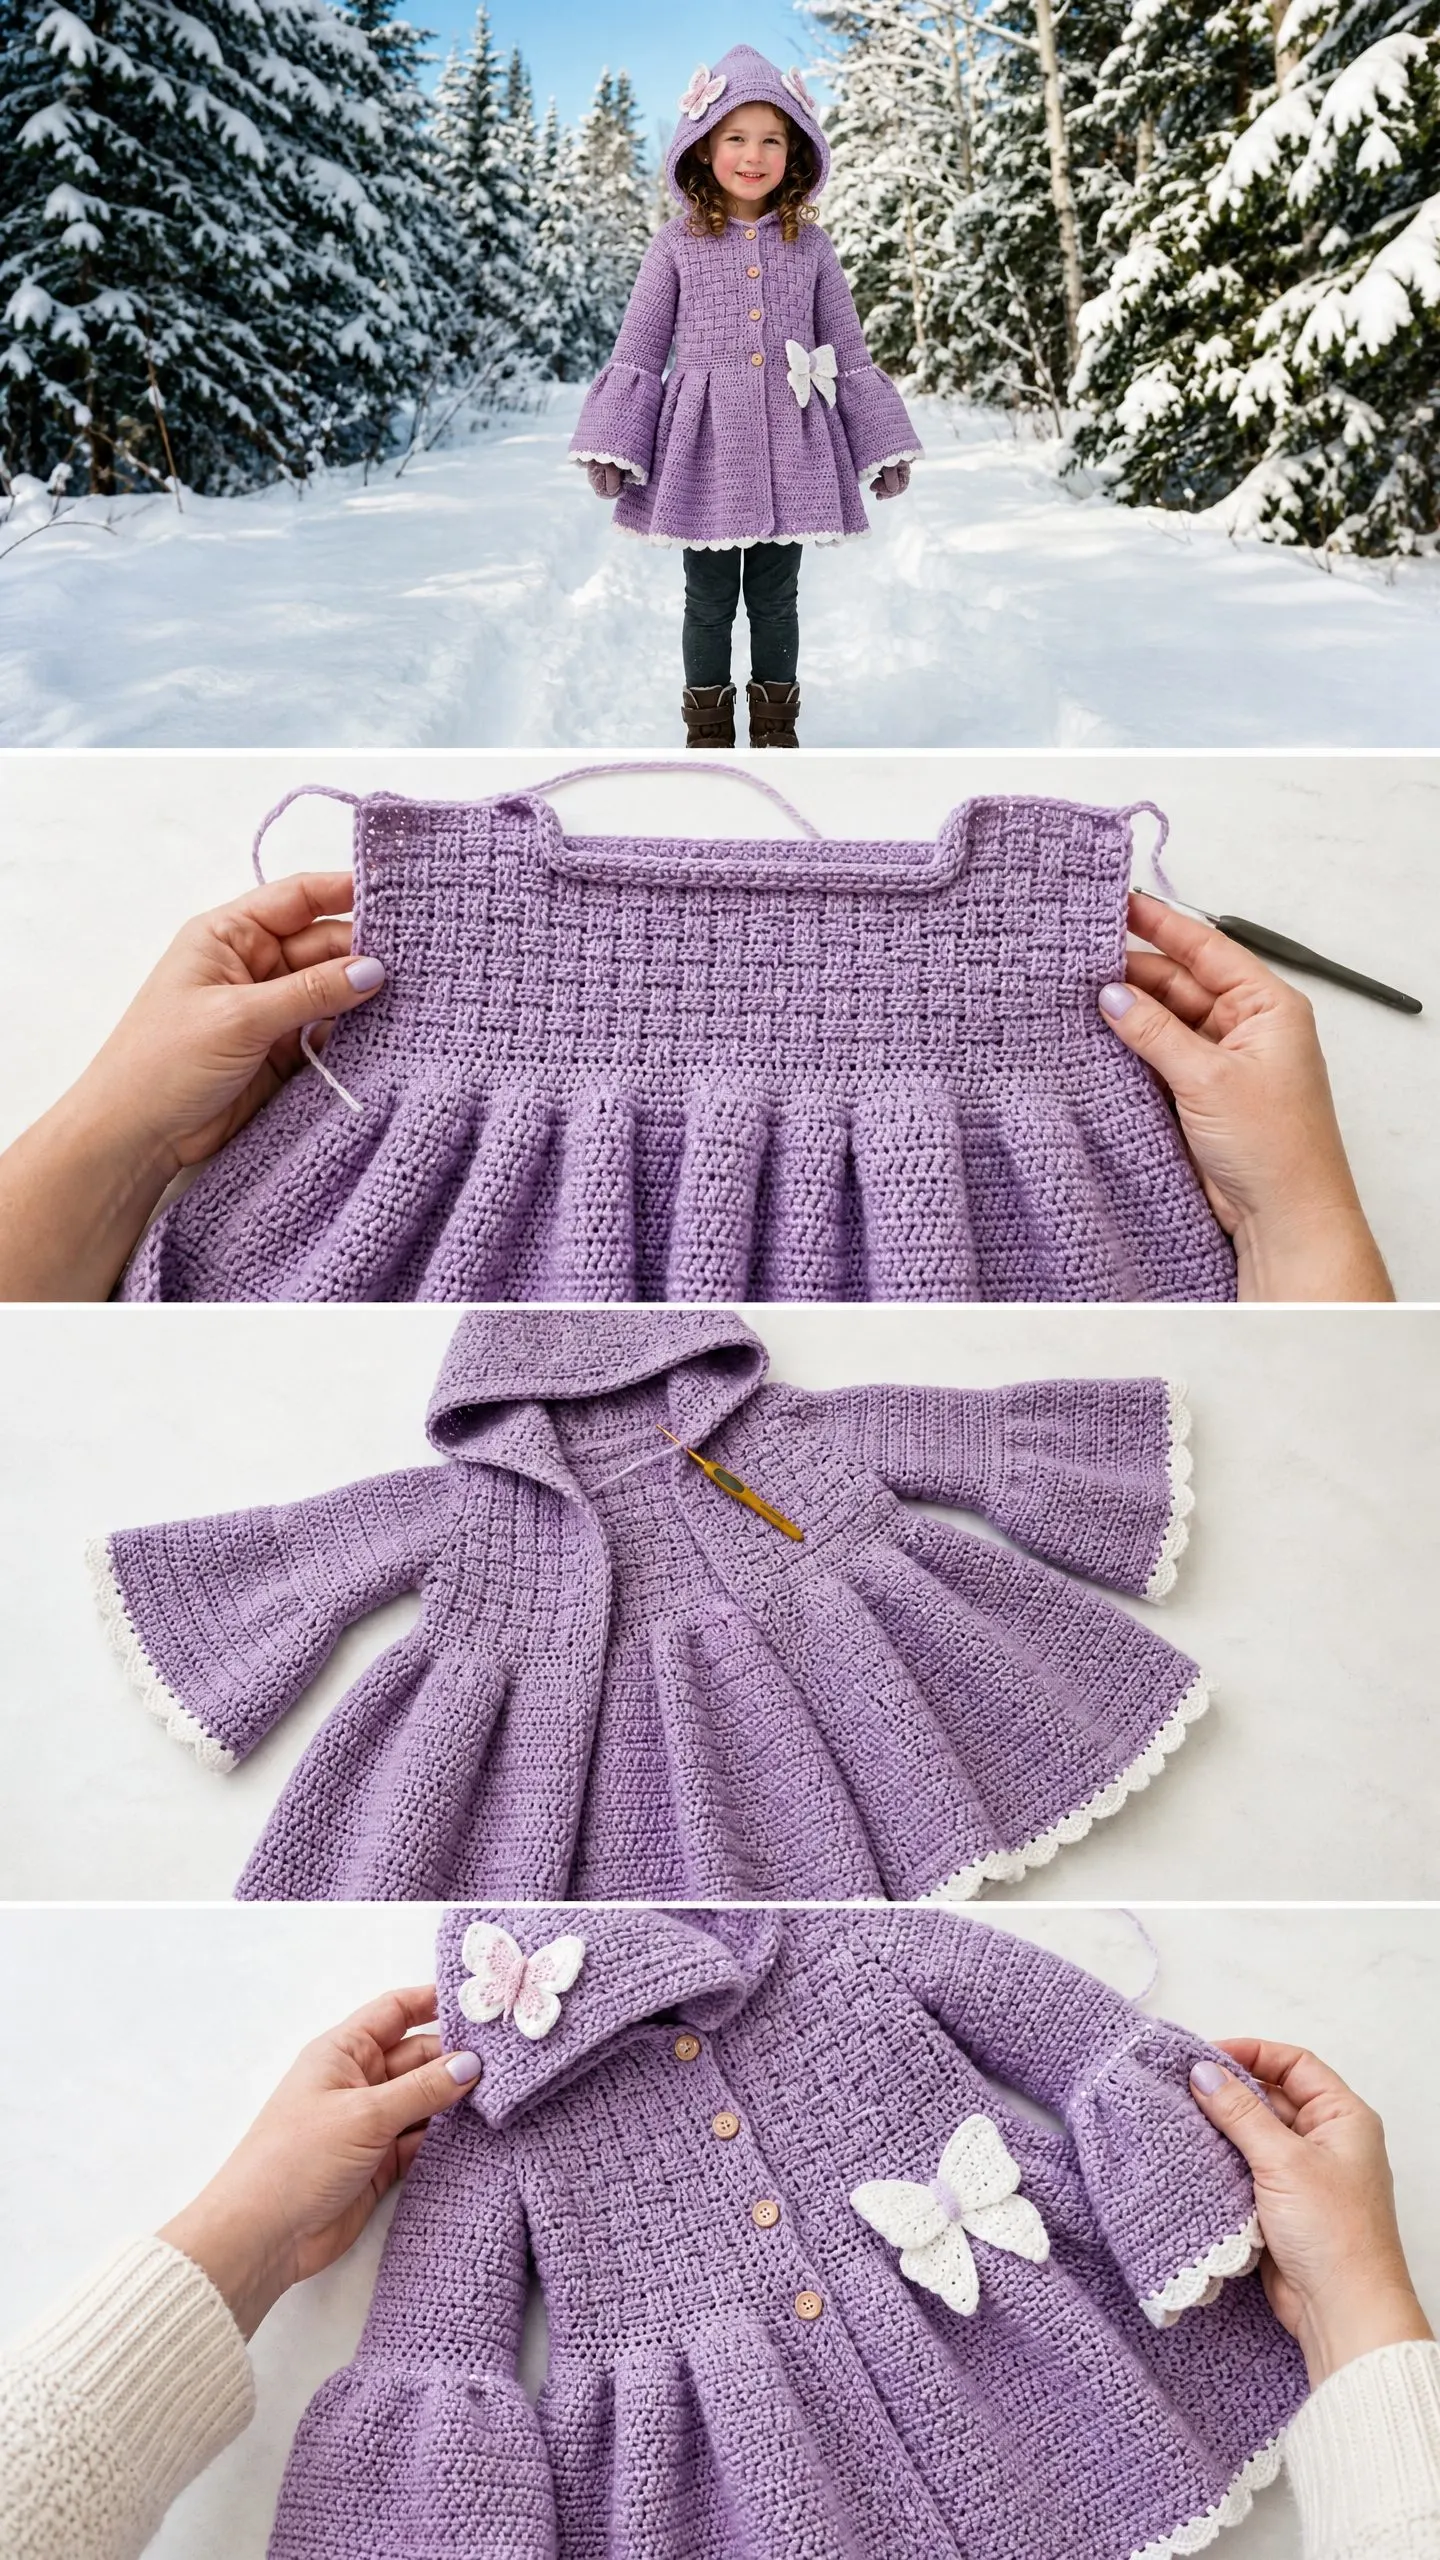
Final Thoughts on This Lavender Butterfly Hooded Coat Crochet Pattern
This coat is a labor of love that results in something truly memorable. The combination of textures, the sweet butterfly details, and the practical warmth make it a piece that will be treasured for years.
Whether you are making it for your own little one, a
