
I’ve been on the hunt for statement jewelry patterns that feel truly unique, and this coral seashell ear cuff stopped me in my tracks. The combination of delicate crochet work, champagne pearls, and that gorgeous gradient of coral to ivory creates something you’d expect to find in a boutique, not on your crafting table.
Get the Ad-Free PDF Pattern
You can find the free pattern below, or you can purchase the ad-free printable PDF from my shop.
Get the Printable PDF →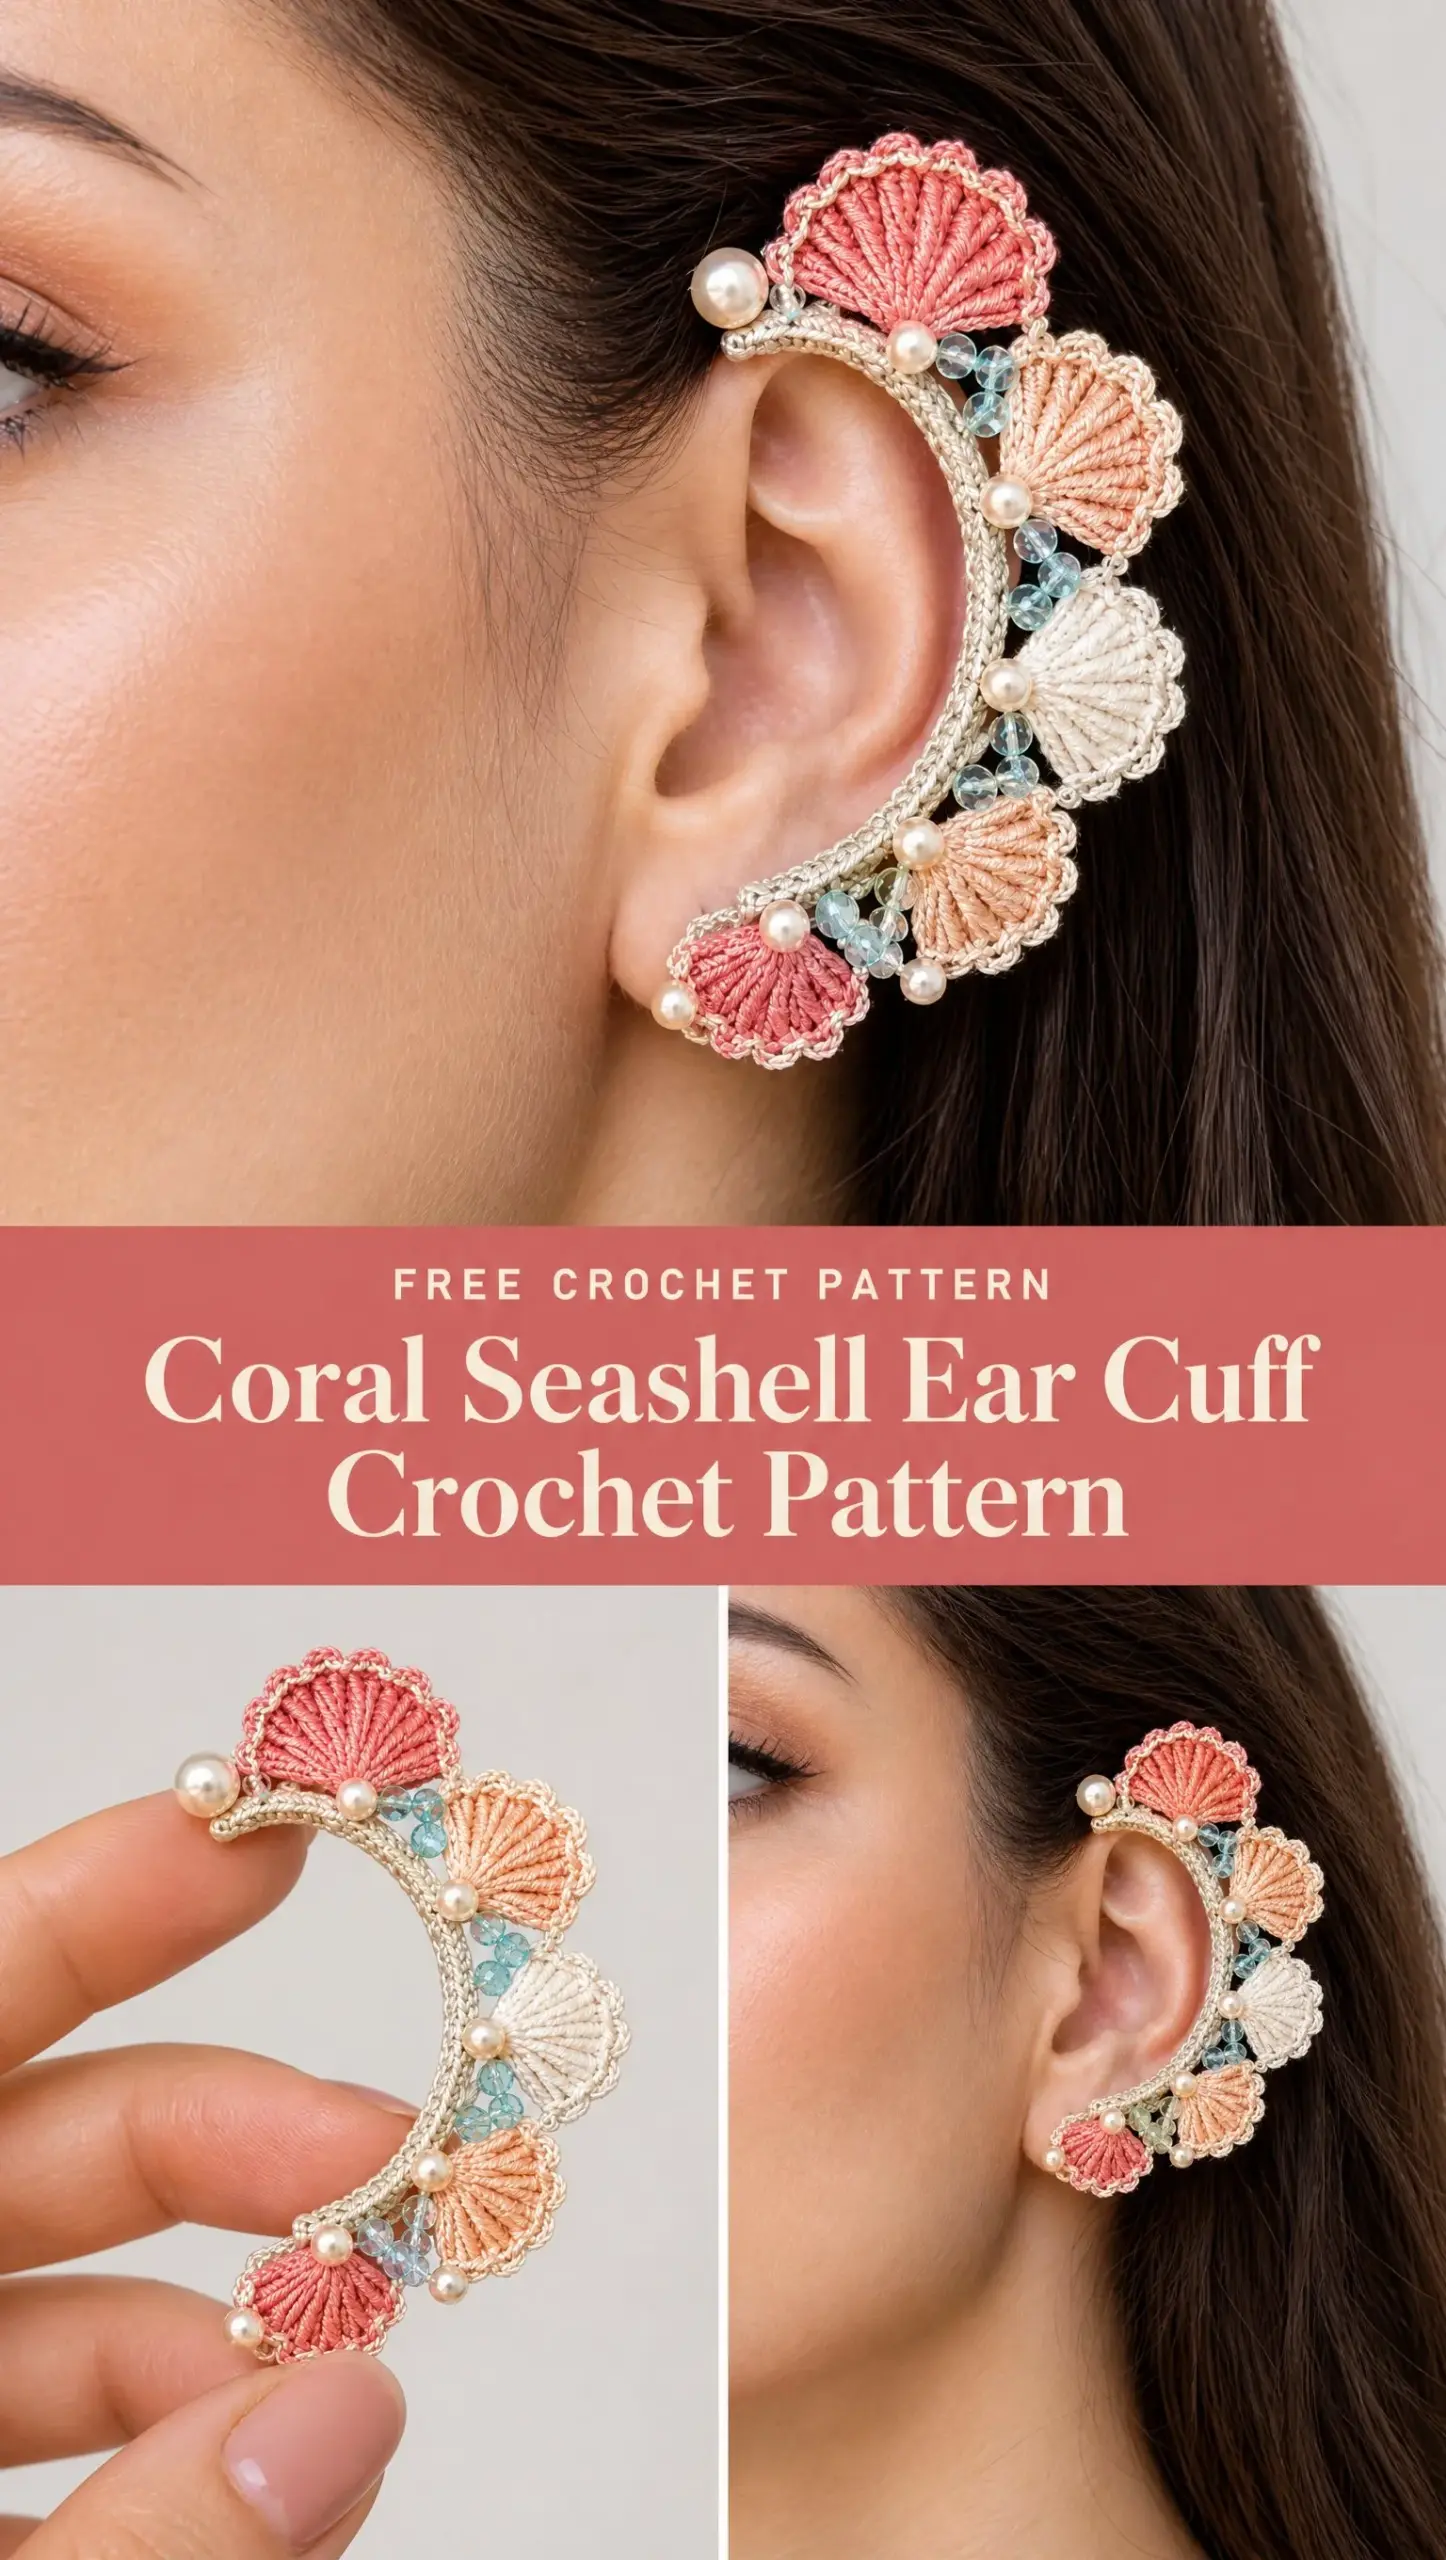
This is my new favourite pattern for anyone who wants to expand beyond traditional crochet projects and try their hand at wearable art. The construction is fascinating. You’re essentially building miniature fan shells and assembling them onto a wrapped wire frame that curves around the outer ear.
If you’ve ever wanted to make a piece of crochet jewelry that genuinely makes people stop and ask "wait, you MADE that?" then this ear cuff is exactly what you need in your project queue.
About This Coral Seashell Ear Cuff Pattern
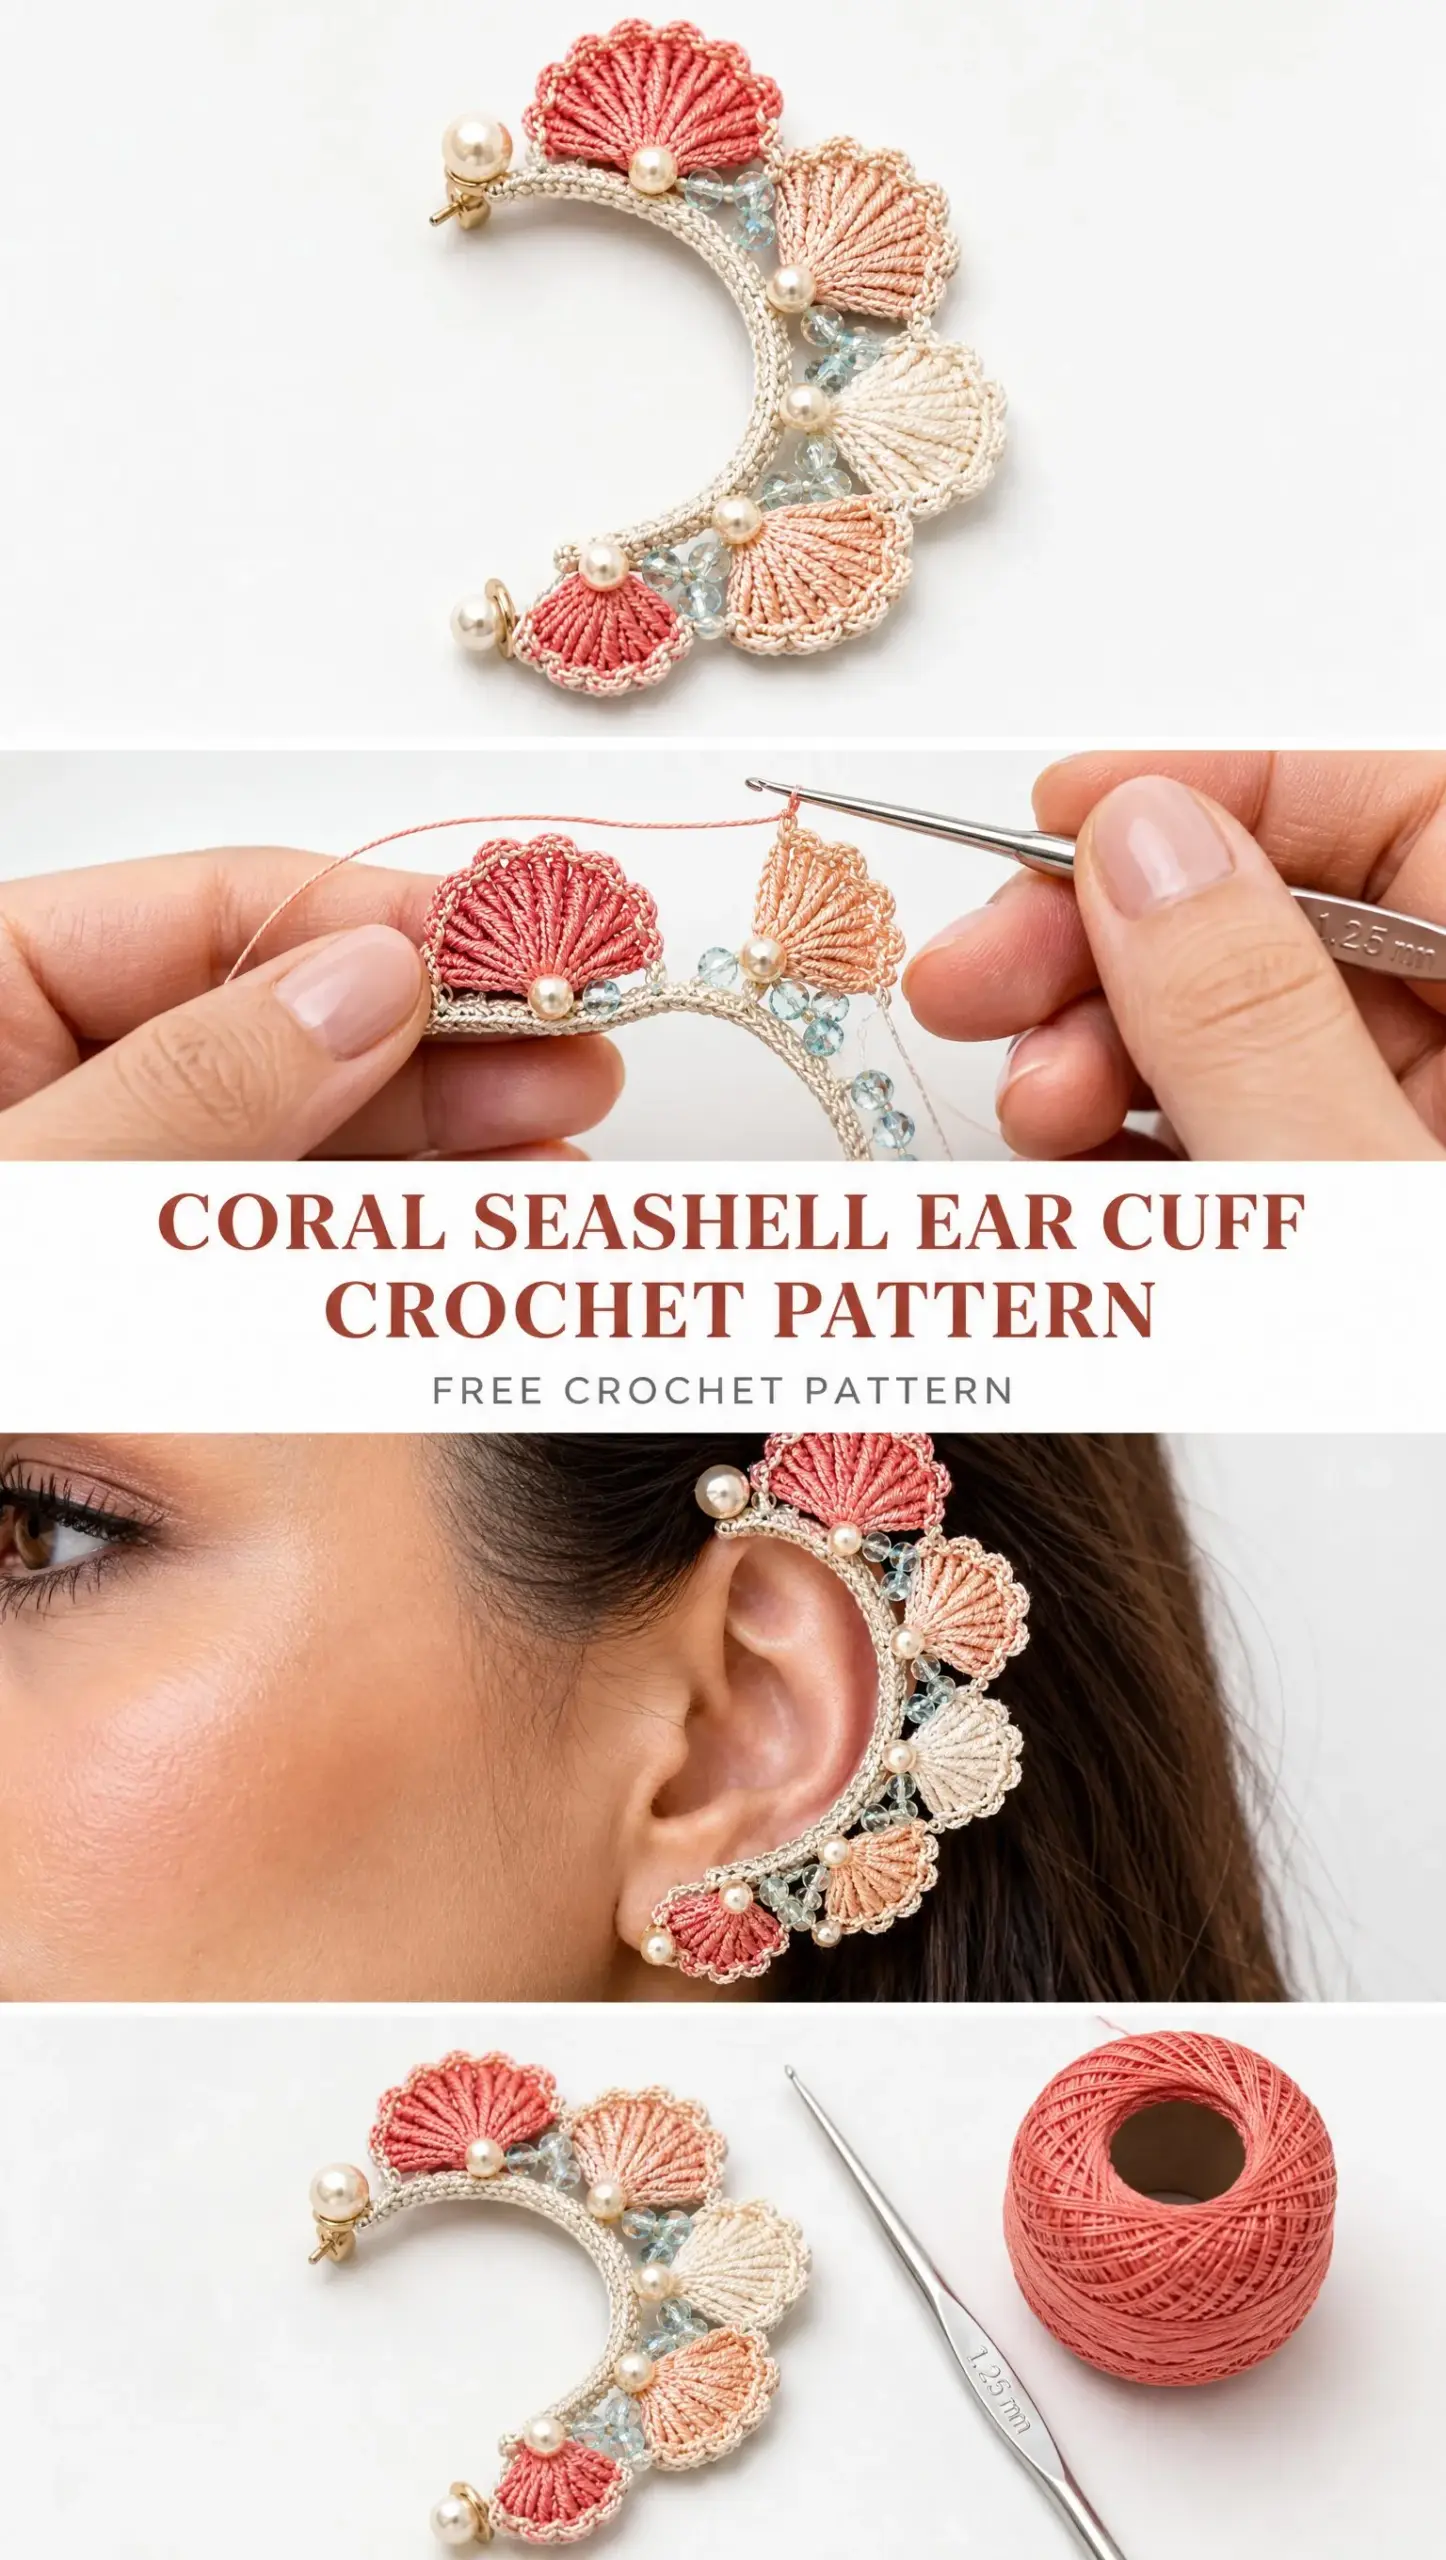
This intermediate level project combines crochet motifs with beadwork and jewelry assembly techniques. Seven ridged fan shell motifs graduate in size from small near the earlobe to larger near the upper helix. The shells come in coral, soft peach, and warm ivory, each edged in a delicate blush border.
The finished ear cuff features a cream C-shaped rim with a narrow sand inner border. Champagne pearls nestle at each shell base, while transparent pale aqua seed beads decorate the open chain bridges between shells. The center of the ear remains completely open, making this surprisingly comfortable to wear.
Skill Level: Intermediate
Construction Method: Crochet motifs assembled onto a wrapped curved support
Style: Statement ear cuff
Materials You’ll Need
Gathering the right supplies is essential for this project. Here’s everything the pattern calls for:
| Item | Recommended Specification |
|---|---|
| Thread | Size 10 crochet cotton or fine mercerized cotton, approximately 55 to 75 meters total |
| Colors | Cream/ivory, sand, coral, soft peach, warm ivory, blush edge color |
| Hook | 1.25 to 1.50 mm steel crochet hook; choose size for firm, crisp stitches |
| Pearls | 7 small champagne pearls, 3 to 4 mm, plus 1 rounded pearl 5 to 6 mm for the forward upper tip |
| Seed Beads | 10 to 16 transparent pale aqua seed beads, approximately 3 mm |
| Support | Thin smooth jewelry wire or a premade lightweight C-shaped ear cuff support, flexible but shape retaining |
| Notions | Fine beading needle, sewing needle, matching sewing thread, small pliers if using wire, sharp scissors |
Target Finished Size: About 6.5 to 8 cm along the outside curve, depending on the wearer. The inner opening should remain comfortably clear of the ear canal. Aim for a rim thickness of 3 to 4 mm after wrapping.
Gauge Information
Here’s the good news: exact gauge is less important than firmness for this project. A medium shell should measure about 17 to 20 mm wide at the scalloped edge. If your ribs feel floppy, switch to a smaller hook or work with tighter tension.
The key is crisp, defined stitches that hold their shape. Thread crochet naturally produces firmer fabric than yarn, which is exactly what we want for jewelry that needs to maintain its structure.
Abbreviations Used in This Pattern
Before diving into the crochet tutorial, let’s define every abbreviation you’ll encounter:
Pattern Overview
This step by step crochet pattern breaks down into four main components:
1. A fully wrapped C-shaped support
2. A narrow sand inner border crocheted over the support
3. Seven separate ridged fan shells
4. Decorative chain bridges carrying aqua beads
The shells are sewn securely to the outer rim and finished with pearls at their bases. Here’s the shell breakdown:
Keep adjacent shells different enough in color to show off each individual fan shape. You can mirror or adjust the color order to your preference.
How to Make the Wrapped C-Shaped Support
Step 1. Cut a piece of smooth jewelry wire about 12 to 14 cm long. If you’re using a premade ear cuff support, skip ahead to Step 3.
Step 2. With round nose pliers, bend the wire into a gentle C shape that follows the outside of the ear from just above the helix down to slightly below the lobe. Turn both cut ends inward into tiny closed loops so no sharp end is exposed. This is important for comfort and safety.
Step 3. Using cream thread, leave a 20 cm sewing tail. Tie the thread at one end of the support and wrap closely, side by side, along the entire wire. Every 6 to 8 wraps, make a small locking half knot around the support so the covering cannot slide.
Step 4. At the opposite end, reverse direction and add a second light wrapping layer only where needed to remove gaps. Keep the support slim and smooth.
Step 5. Finish with two secure knots. Thread the tail through several wraps, trim, and hide the end. Bend the support gently so it hugs the outer ear while leaving the central ear opening unobstructed.
Fit Note: The cuff should rest on the outer ear, not press into the ear canal. Make fit changes gradually by bending the support a few millimeters at a time.
How to Crochet the Sand Inner Border
Join sand colored thread near the lower end of the wrapped support. Work directly around the support:
Ridged Fan Shell Motif Formula
All seven shells use the same basic construction. Their width changes based on the number and height of tall stitches in Row 2. Work tightly so the ribs remain distinct.
Base and Ribs
Row 1: Ch 5. Beginning in 2nd ch from hook, sl st in next ch, sc in next ch, hdc in next ch, 5 dc in last ch. Rotate the piece so you can work back along the opposite side of the starting chain. Hdc in next underside loop, sc in next, sl st in last. This forms a tiny rounded shell base.
Row 2: Ch 3. Work tall stitches into the central base area so all ribs radiate from one point. For each rib, insert the hook into the same lower base area but vary the stitch height as directed for the shell size. Keep a narrow gap between ribs by working a ch 1 between tall stitches.
Row 3 (Scalloped Blush Edge): Join blush at one outer corner. Work (sl st, ch 2, sc) into each ch 1 gap across the fan. Finish with sl st at the opposite outer corner. Fasten off, leaving a 15 to 20 cm sewing tail.
Shell Size Chart
| Shell | Rib Sequence Across Fan | Approximate Width |
|---|---|---|
| 1 (XS) | dc, dc, tr, dc, dc | 12 to 14 mm |
| 2 (S) | dc, tr, tr, tr, dc | 14 to 16 mm |
| 3 (M) | dc, tr, tr, tr, tr, dc | 16 to 18 mm |
| 4 (M+) | dc, tr, tr, tr, tr, tr, dc | 18 to 20 mm |
| 5 (L) | tr, tr, tr, tr, tr, tr, tr | 20 to 22 mm |
| 6 (L) | tr, tr, tr, tr, tr, tr, tr | 20 to 22 mm |
| 7 (XL) | tr, tr, tr, tr, tr, tr, tr, tr | 22 to 25 mm |
Pro Tip for Sharper Ribs: After each tall stitch in Row 2, gently pull the post straight before making the ch 1. If desired, lightly steam block the shells over a rounded surface, keeping the fan slightly cupped rather than flat.
Make All Seven Shells
| Shell | Main Color | Suggested Position |
|---|---|---|
| 1 | Coral | Lower edge near lobe |
| 2 | Soft peach | Lower mid |
| 3 | Warm ivory | Mid lower |
| 4 | Soft peach | Middle |
| 5 | Warm ivory | Upper mid |
| 6 | Soft peach/coral | Upper |
| 7 | Coral | Top/upper helix |
How to Create the Beaded Chain Bridges
The airy bridges sit between shells and visually connect the motifs without filling the center of the cuff. They add that delicate, ocean inspired touch.
1. Pre string 10 to 16 pale aqua seed beads onto cream thread. Keep the beads pushed far back while crocheting.
2. Join cream thread to the rim beside Shell 1. Ch 4 to 6, depending on the gap to the next shell.
3. For a beaded chain: ch 1, slide one bead up to the hook, ch 1 tightly to trap the bead, then continue chaining. Use 1 to 3 beads per bridge.
4. Anchor the bridge with a sl st into the wrapped rim or into a secure stitch at the base edge of the next shell.
5. Repeat between each pair of shells. Vary bridge length slightly so the arches follow the outer ear smoothly instead of forming a rigid ladder.
6. At the end, weave the thread tail through several wrapped rim stitches and trim.
Important: Keep all bead loops outside the ear opening. If any loop naturally swings inward, shorten that bridge by 1 to 2 chains.
Assemble the Seven Shells on the Rim
Step 1. Lay the C-shaped rim on a flat surface in the same orientation it will sit on the ear. Arrange all seven shells along the outer edge before sewing anything permanently. This dry fitting step saves so much frustration later.
Step 2. Place Shell 1 near the lower end and Shell 7 near the top. Graduate the shell sizes smoothly. Slight overlap is acceptable at the base, but keep each scalloped fan edge fully visible.
Step 3. Using each shell tail, sew the shell base to the wrapped rim with 3 to 5 small whip stitches. Pass through the crochet wrapping, not bare wire. Knot on the back and conceal the tail inside the wrapping.
Step 4. Angle each fan slightly outward so the shell surface can be seen in side profile. Keep the back of every shell base flat against the rim.
Step 5. After all seven shells are attached, gently flex the cuff to ensure the sewing remains secure and the motifs do not twist.
Add Champagne Pearls
Final Shaping and Finishing
Fit Customization Guide
Every ear is different! Here’s how to troubleshoot common fitting issues:
| Issue | Adjustment |
|---|---|
| Cuff feels too long | Remove one lower shell or reduce spacing between shell bases by 2 to 3 mm |
| Cuff feels too short | Lengthen the support by 5 to 8 mm or add 1 to 2 chains to several bridges |
| Top slips away from ear | Gently tighten the upper C curve and place the largest shell slightly farther back |
| Lower edge swings | Move Shell 1 a little upward and tighten the lower support curve |
| Shells look crowded | Reduce shell width one size or increase rim spacing by 2 mm |
| Shells collapse | Use a smaller hook, tighter tension, or a tiny amount of stiffener on the back |
| Bead loops fall inward | Shorten each affected bridge by 1 to 2 chains and anchor farther outward |
Construction Checklist
Before calling your ear cuff complete, run through this checklist:
Care Instructions
Store the cuff flat in a small box so the fan motifs are not crushed. Spot clean the crochet only with a barely damp cloth. Avoid soaking because repeated wetting can distort the wrapped support and weaken bead or pearl thread. Reshape gently with fingers after storage.
Final Thoughts on This Coral Seashell Ear Cuff Crochet Pattern
This ear cuff pattern pushes the boundaries of what crochet can become. It’s jewelry, it’s art, and it’s entirely handmade by you. The combination of thread crochet, beadwork, and wire wrapping creates a piece that looks far more complicated than it actually is.
Take your time with each shell. Enjoy the meditative rhythm of thread crochet. And when you put that finished ear cuff on and catch your reflection, I promise you’ll feel like a million bucks.
Thank you so much for choosing this pattern! I would absolutely love to see your finished coral seashell ear cuffs. Tag me on Instagram or share your photos in our Facebook group. Seeing your creations genuinely makes my day.
If this pattern inspires you, go ahead and save it to your Pinterest boards so you can find it when you’re ready to start. And please drop a comment below if you make one. I’d love to hear which color combination you chose!
Want a Quick & Easy Printable Version?
Get a clean, beautifully formatted PDF of this pattern — easy to follow step by step, ready to print or save on any device. No scrolling, no distractions, just the pattern.
Get the Printable PDF →