
I found the original sketch for this shawl tucked inside an old notebook from years ago. It was just a rough triangle covered in scribbled notes about "scales like butterfly wings" and "the blues of a morpho." I had drawn it after spending an afternoon at a butterfly conservatory, completely mesmerized by the way those iridescent wings caught the light.
Get the Ad-Free PDF Pattern
You can find the free pattern below, or you can purchase the ad-free printable PDF from my shop.
Get the Printable PDF →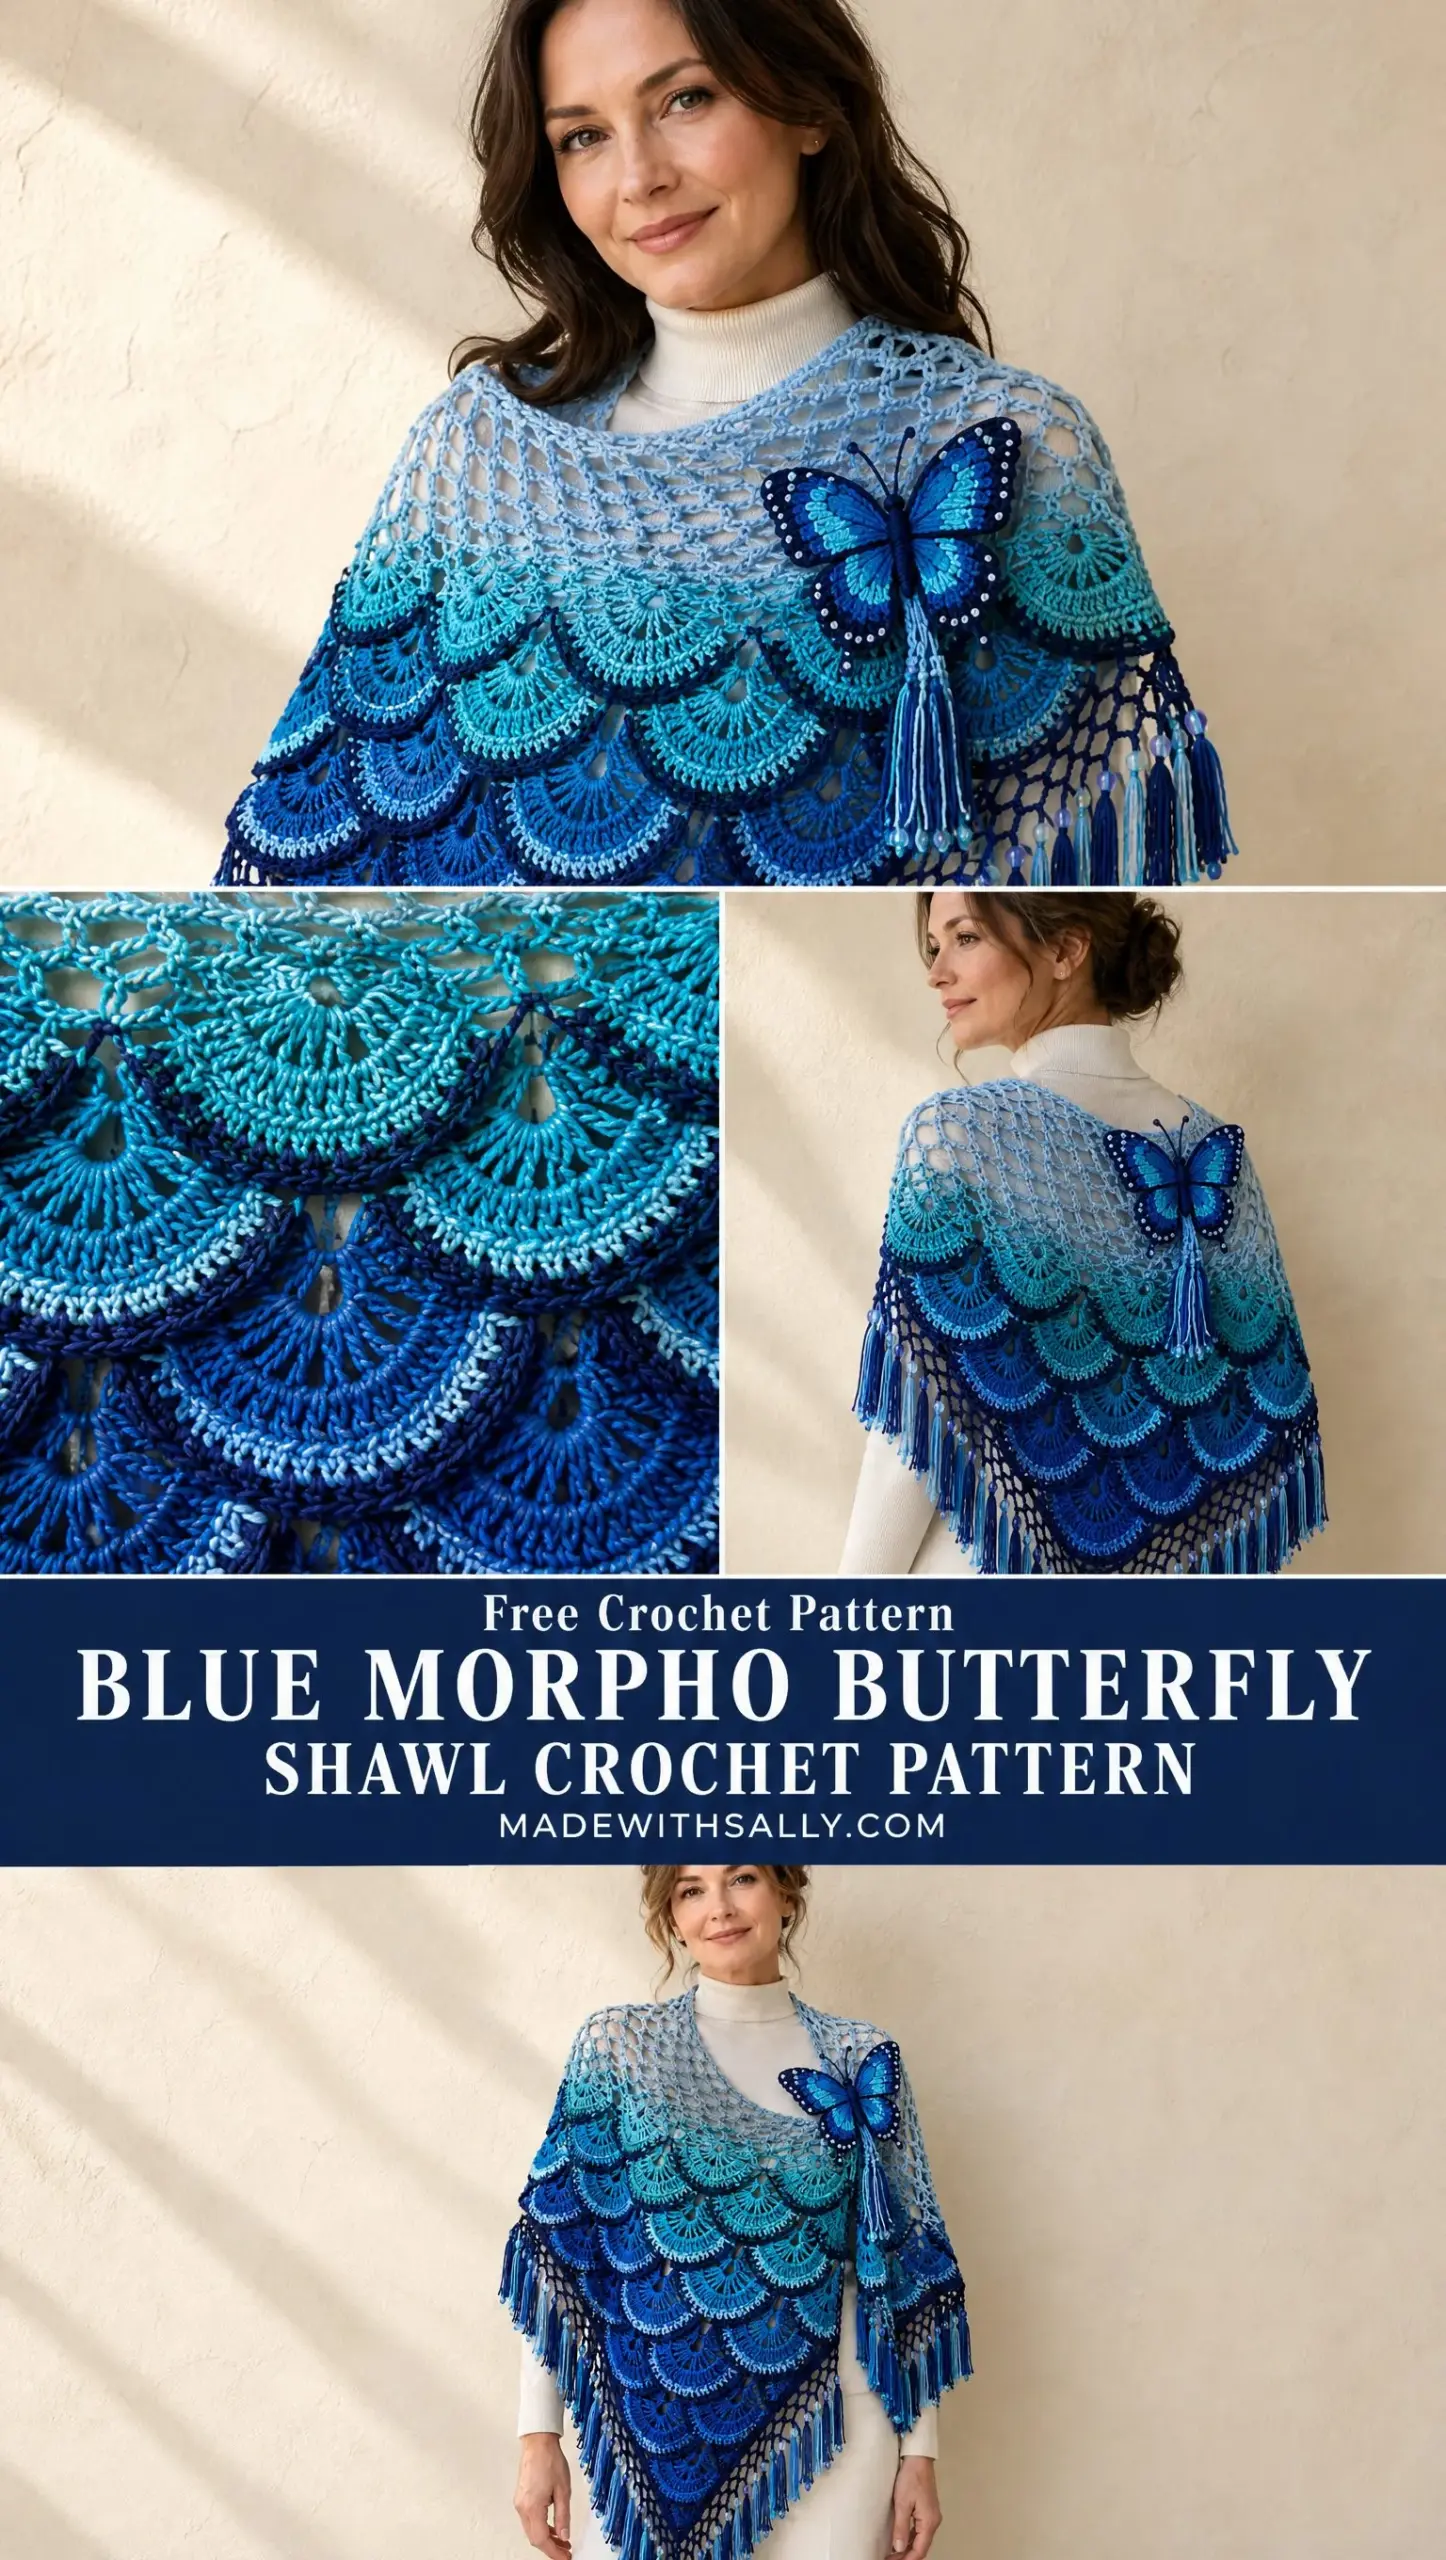
It took me a long time to figure out how to translate that vision into yarn. The layered fan motifs needed to overlap just right. The color gradient had to flow from pale sky blue down through turquoise and into deep cobalt. And of course, there had to be an actual butterfly perched right on the shoulder.
This pattern is finally the finished version of that old dream. The Blue Morpho Butterfly Shawl combines an airy chain lace yoke with dozens of individually crocheted fan scales that layer like real butterfly wing scales. It is ambitious, yes. But if you have ever wanted to wrap yourself in something truly breathtaking, this is the project.
About This Pattern
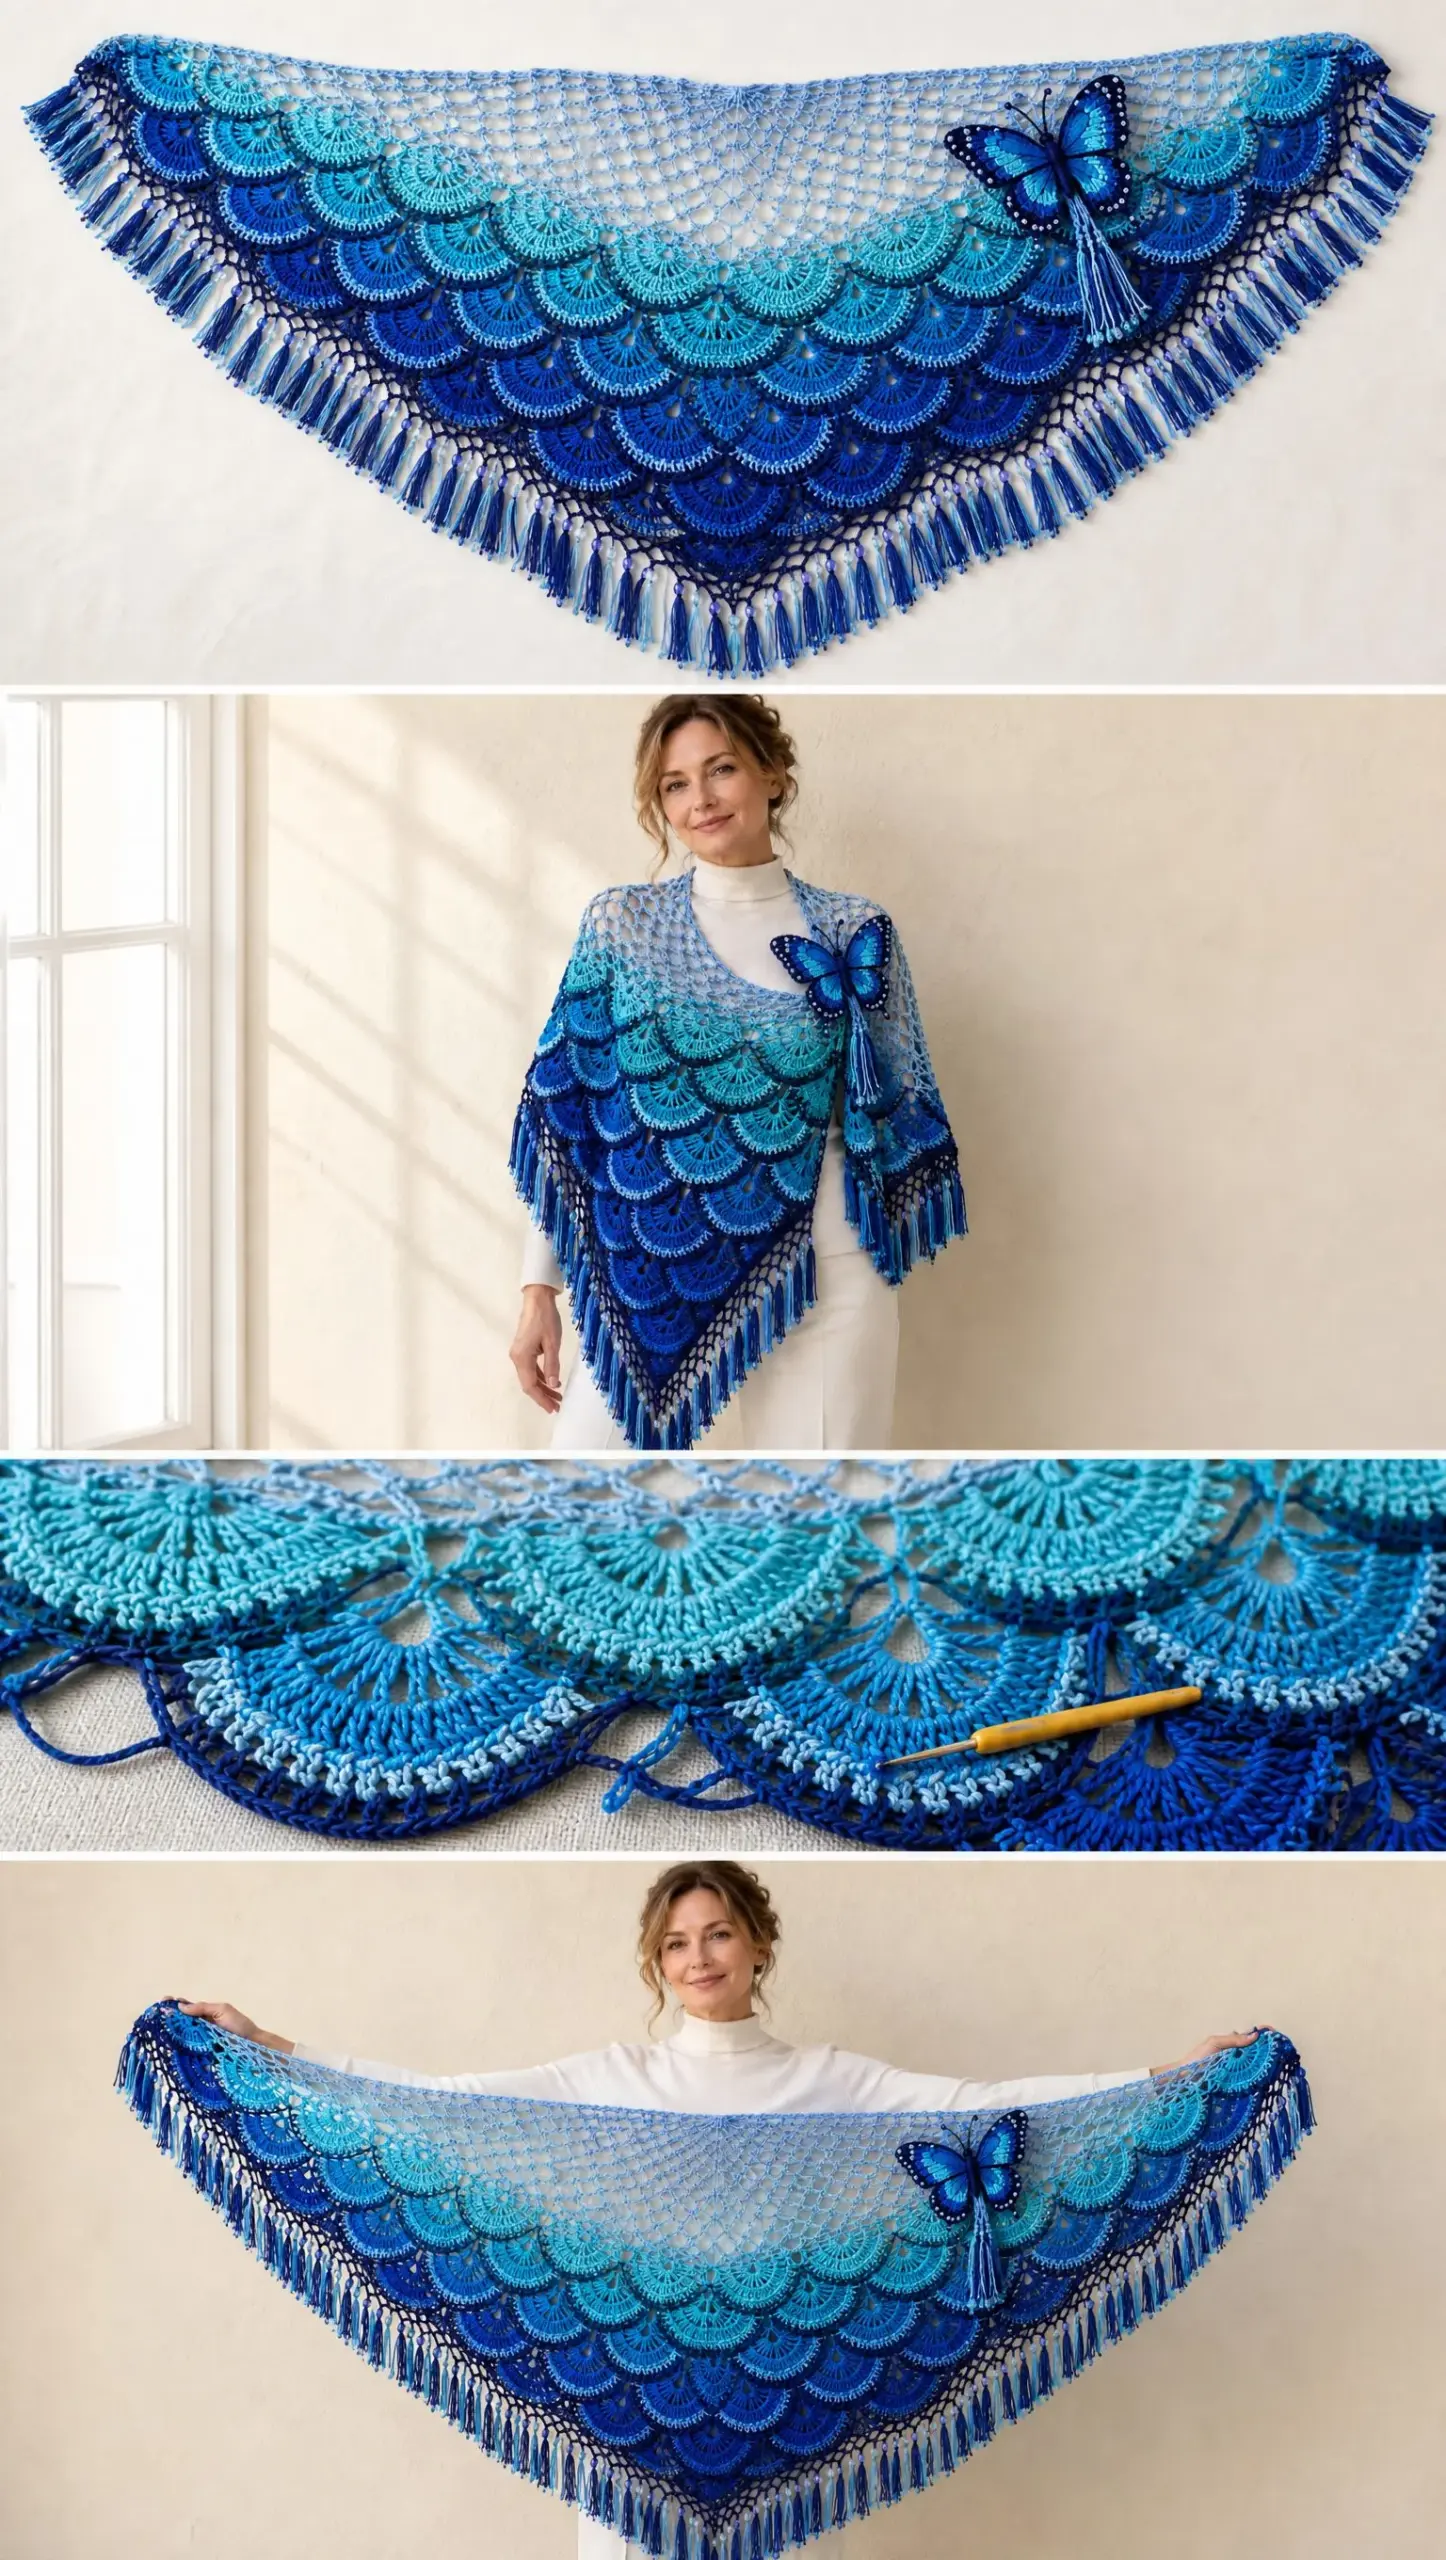
This is an intermediate to advanced level crochet project that creates a full size triangular shawl measuring approximately 175 to 185 centimeters across the wingspan and 82 to 88 centimeters deep, not including the fringe. The construction method is top down triangular mesh with joined on scale motifs and a separate butterfly applique.
The shawl begins at the center back neck and grows outward as an open triangular mesh. The upper section stays airy and pale blue, forming a delicate chain lace yoke across your shoulders. From the lower yoke downward, individual raised fan motifs get crocheted separately and then joined to selected mesh spaces in staggered rows. They overlap like the scales on a butterfly wing, creating that gorgeous dimensional texture you see in the photos.
The final perimeter is stabilized with a navy mesh edging and finished with long mixed blue fringe. A sculptural four wing butterfly is worked separately and sewn at the upper right chest as the closure accent.
Materials You Will Need
Yarn: Fingering to sport weight smooth cotton or cotton bamboo blend yarn. You will need a total of approximately 1,150 to 1,350 meters across five shades of blue.
Here is the breakdown by color:
Hook: 3.25 mm for the main body. You may want a 2.75 to 3.0 mm hook for the butterfly if you prefer crisper details.
Notions: 12 to 24 translucent blue or clear beads, 4 to 6 mm, with holes large enough for the fringe strands. You will also need a yarn needle, locking stitch markers, scissors, blocking mats, and rustproof pins.
Yarn Choice Tip: Use a yarn with clear stitch definition and some drape. Mercerized cotton gives the crispest fan ribs and butterfly veins. Cotton bamboo blends give a softer fall. Avoid very fuzzy yarn because the layered scale structure depends on visible stitch architecture.
Gauge
Getting gauge matters for this project since you are working to specific measurements.
Mesh gauge: Approximately 7 chain 3 spaces by 8 rows equals 10 centimeters after blocking.
Fan gauge: One finished large fan measures approximately 8.5 to 9 centimeters wide by 5.5 centimeters deep.
Fringe: Approximately 20 to 24 centimeters finished length.
Stitch Abbreviations and Definitions
Let me walk you through all the stitches and terms used in this pattern.
Special fan increase: When the pattern says "2 dc in same st," work two double crochets into one stitch. "3 dc in same st" means three double crochets into one stitch. These increases build the radial spread of each fan.
Joining method: When a fan is joined to the shawl, replace the center chain of a joining loop with a slip stitch into the indicated body mesh space. This anchors the motif without flattening the raised outer edge.
Part 1: Triangular Chain Lace Body
The body is a center out triangle. Every row adds one mesh space at each outer edge and two mesh spaces around the center point. Place a marker in the center chain 3 space and move it upward each row.
Foundation
Row 1 (RS): Chain 6. Double crochet in first chain made, chain 3, double crochet in same first chain, chain 3, double crochet again in same first chain. Turn.
You now have two triangular wings separated by a center chain 3 space.
Mesh Repeat
Row 2: Chain 6, double crochet in first double crochet (edge increase), chain 3, double crochet in next double crochet across to center chain 3 space; in center space work (double crochet, chain 3, double crochet); continue chain 3, double crochet in next double crochet across; chain 3, double crochet in same final double crochet (edge increase). Turn.
Rows 3 through 64: Repeat Row 2, always working one double crochet into each double crochet and chain 3 between posts. At the center chain 3 space work (double crochet, chain 3, double crochet). At each edge begin with chain 6 and finish with chain 3, double crochet in the final double crochet. This creates a stable triangular filet mesh.
Upper Shoulder Section
Work Rows 1 through 20 entirely in pale blue. At Row 20, the yoke should be approximately 23 to 27 centimeters deep after light stretching. If it is substantially smaller, continue pale blue until this depth is reached.
Lower Foundation Mesh
Rows 21 through 64 may remain pale blue or transition gradually through pale aqua. Most of this area will be covered by scales, so exact color changes are not critical. Keep the center point and both outer edges perfectly straight. Do not fasten off at the end of Row 64.
Body Size Check
Lay the triangle flat without stretching. Aim for approximately 78 to 82 centimeters from the center back start to the lower point, and 165 to 175 centimeters across the top edge. The border and blocking will add additional width and depth.
Important: The written counts create a generous adult shawl. If your row gauge differs, prioritize the finished depth measurement. Stop the mesh body when it reaches approximately 78 to 82 centimeters before the final border.
Part 2: Raised Fan Scale Motif
Make the scales individually and join them to the mesh. Each motif is semicircular with a raised navy outline. Work over yarn tails wherever possible so finishing remains tidy.
Large Fan (Main Motif)
Row A: With the scale color, chain 4 and join to form a ring. Chain 3 (counts as double crochet), work 8 double crochet into ring. Turn. 9 dc.
Row B: Chain 3, double crochet in same stitch; 2 double crochet in each of next 8 stitches. Turn. 18 dc.
Row C: Chain 4 (counts as treble crochet), treble crochet in same stitch, treble crochet in next stitch, 2 treble crochet in next stitch across. End with treble crochet in final stitch if needed to maintain a smooth semicircle. Do not turn.
Outer navy ridge: Join navy at lower right corner. Chain 1, single crochet evenly around curved edge, placing 2 single crochet in each row end turn and 1 single crochet in each top stitch. At approximately every fourth stitch work a picot. Continue down the opposite side and fasten off.
Optional icy ridge: With icy blue, surface slip stitch along one selected radial column from center ring to outer edge. Use on roughly one third of motifs.
Small Fan (For Narrowing Side Rows)
Work Rows A and B only, then add the navy ridge around the curve. Finished width is approximately 6 to 6.5 centimeters.
Preparing Fan Colors
For a full size shawl, prepare approximately 58 to 72 large fans and 10 to 16 small fans. A useful starting mix is 22 turquoise or aqua, 18 medium cobalt, 24 deep cobalt, and 10 small side fans split among the same shades. Exact quantity depends on gauge and how densely you overlap them.
Texture tip: Steam block the fans very lightly or pin them dry. Do not flatten the outer ridge. The finished surface should retain a shallow cupped profile so adjacent rows cast small shadows.
Part 3: Joining the Overlapping Scale Field
Place the shawl right side up. Count upward from the lower point. The first scale row begins approximately 27 to 30 centimeters below the top shoulder edge, leaving the pale blue mesh yoke exposed.
Row 1 of Scales
Across a body mesh row, position large aqua fans side by side with their straight lower edges approximately level. Join each fan at three points: left upper corner, center top, and right upper corner. Anchor those points to three successive body mesh spaces. Leave 1 mesh space between adjacent fans if your motifs are wide; leave none if your gauge is narrow. The navy ridge faces outward and downward.
Row 2 and All Following Rows
Move the next fan row downward by approximately half a fan depth. Stagger every new fan so its center line falls over the gap between two fans above. Join each fan through the body mesh and, where they overlap, catch the hidden top edge of the lower fan to the back of the upper row with one discreet slip stitch or sewing tack. This creates the layered scale effect without producing a heavy solid sheet.
Shaping the Triangle
At both outer side edges, switch to small fans whenever a full fan would protrude beyond the triangle. At the center point, keep the lowest fan centered exactly on the vertical spine of the shawl. As the triangle narrows toward the bottom, reduce the number of motifs naturally rather than forcing equal counts in every row.
Keep 5 to 8 millimeters of visible navy ridge between overlapping rows. If the overlap hides the ridge completely, move the next row slightly lower. Change from turquoise to cobalt gradually over 5 to 7 scale rows. Reserve the darkest cobalt for the bottom third.
Recommended Color Layout
| Scale Row | Approximate Color | Placement |
|---|---|---|
| 1 to 2 | Turquoise or aqua | Across upper chest below yoke |
| 3 to 4 | Aqua plus bright cobalt | Staggered, broadest section |
| 5 to 7 | Bright cobalt | Middle body |
| 8 to 10 | Cobalt plus deep cobalt | Lower body |
| 11 and beyond | Deep cobalt | Near center point; number of fans decreases naturally |
Check drape frequently. The scale field should remain flexible. If it starts to feel rigid, reduce the number of joining tacks between overlapping motifs.
Part 4: Navy Mesh Border
With right side facing, join navy at one upper corner. The border runs down one sloping side, around the bottom point, and up the opposite sloping side. Do not edge the straight top neck line unless you want extra stability.
Border Row 1: Chain 1, single crochet evenly along the edge, placing 2 single crochet in each row end space where needed to prevent pulling. At the bottom point work 3 single crochet in the same space. Continue up the opposite side.
Border Row 2: Chain 5, skip 2 single crochet, single crochet in next single crochet; repeat chain 4, skip 2 single crochet, single crochet in next single crochet around. At the bottom point work (single crochet, chain 4, single crochet) into the center point stitch so the border turns cleanly.
Border Row 3: Slip stitch into first chain 4 loop, chain 1, single crochet in loop, chain 4 around. At bottom point use chain 5 in the center loop. Fasten off and weave in.
Optional top edge stabilization: If the shoulder line stretches excessively, work one row of navy or pale blue slip stitches along the upper edge. Keep this loose enough that the shawl still wraps naturally.
Part 5: Long Beaded Fringe
Cut strands 46 to 50 centimeters long. Each finished tassel uses 4 strands folded in half, producing 8 fringe ends about 22 to 24 centimeters long before trimming. Mix navy, cobalt, and aqua within each tassel.
Attach one tassel to every second border loop along both sloping edges and the lower point. At the center point, use a slightly fuller tassel of 6 folded strands.
Add translucent beads to only about one tassel in every 4 to 5. Thread the bead onto one or two ends, then knot below it securely.
Trim the completed fringe into a soft V, leaving the center point 2 to 4 centimeters longer than the adjacent fringe.
Part 6: Blue Morpho Butterfly Closure
The butterfly is worked as four separate wing motifs around a narrow navy body. Use a smaller hook if necessary so the applique remains sculptural and crisp.
Upper Wing (Make 2)
With brilliant cyan, chain 7. Starting in 2nd chain from hook: single crochet, half double crochet, double crochet, treble crochet, double treble crochet, 5 double treble crochet in final chain.
Rotate to work along opposite side of foundation chain: double treble crochet, treble crochet, double crochet, half double crochet, single crochet. Join.
Round 2: With indigo, work single crochet around, placing 2 single crochet in each of the three outermost tip stitches to broaden the wing. Add 2 surface slip stitch vein lines from base toward tip.
Round 3: With navy, single crochet around outer edge. Every 4th or 5th stitch work picot. With icy blue, add tiny surface dots by making single loose French knot style yarn stitches or very short surface slip stitches between selected picots.
Lower Wing (Make 2)
With cyan, chain 6. Starting in 2nd chain: single crochet, half double crochet, double crochet, treble crochet, 4 double treble crochet in final chain; rotate and mirror back along the opposite side.
Work indigo and navy rounds as for the upper wings, but keep the shape shorter and rounder.
Body and Antennae
With navy, chain 15. Starting in second chain, slip stitch in 4 chains, single crochet in next 6 chains, half double crochet in next 3 chains, 3 half double crochet in final chain. Fasten off.
For each antenna, attach a 12 to 14 centimeter doubled strand of navy to the head end, twist lightly, knot the tip and trim.
Assembly
Arrange the upper wings above the lower wings with their narrow bases touching the body. Sew securely through several stitches at each wing base, leaving the outer two thirds of every wing free so it can lift slightly. Add a 16 to 20 centimeter mixed blue tassel at the lower body end.
Attaching the Butterfly
Position the butterfly at the upper right chest where the pale blue mesh meets the first scale row. Sew the body and inner wing bases to the shawl at 5 to 7 points. Leave wing tips free.
For a functional closure, sew a small clear snap or flat hook and eye beneath the butterfly, attaching the matching half to the opposite front section. Do not rely on the decorative butterfly alone to bear strong pulling force.
Part 7: Finishing and Blocking
Weave all ends through at least 4 to 5 centimeters of same color stitches. Split yarn plies on the return pass for extra security.
Hand wash or soak according to the yarn label. Support the shawl fully when lifting it wet.
Pin the upper edge straight and spread both wings evenly. Pin the lower point sharply, then smooth the side edges into a symmetrical triangle. Pin mesh sections open, but do not aggressively flatten the raised fan scales or butterfly wings.
Allow to dry completely before attaching the final beads if your beads are delicate or coated. After drying, trim fringe uniformly and recheck every bead knot.
How to Wear Your Shawl
To reproduce the photographed drape, place the center back start slightly left of the spine when wrapping. Bring the left front section farther across the torso and allow its lower point to fall toward the lower center left. Bring the right side across more narrowly and secure beneath the butterfly. This creates the broad asymmetric V while keeping the butterfly unobstructed.
Size Adjustments
| Desired Change | Adjustment |
|---|---|
| Smaller wrap | Stop mesh body 6 to 10 rows sooner and reduce scale rows proportionally |
| Larger wingspan | Continue mesh rows until top edge reaches desired width; add more fans across each scale row |
| Shallower point | Stop body earlier, then add normal border |
| Deeper point | Continue body 4 to 8 rows; use additional deep cobalt scale rows near the point |
| Lighter weight | Use fewer overlap tacks and space fans 1 mesh space apart |
| Denser or warmer | Place fans edge to edge and add one extra scale row before border |
Care Instructions
Hand wash cool with mild detergent. Do not wring. Roll in a towel to remove excess water and dry flat, reshaping the triangle and fringe. Store folded rather than hanging for long periods, because the weight of the scale field and beads can stretch the upper mesh.
Quick Construction Checklist
Final Thoughts on This Blue Morpho Butterfly Shawl Crochet Pattern
This is not a quick weekend project. I will be honest about that. The Blue Morpho Butterfly Shawl asks for patience, attention to color flow, and careful assembly of all those beautiful overlapping scales. But when you drape it around your shoulders and see how those fan motifs catch the light, how the colors flow from sky to sea to midnight, you will understand why this design stayed in my notebook for so long waiting to be made real.
Because this is a sculptural, motif heavy shawl, the most reliable fit method is measurement rather than strict row count. Keep the triangular body dimensions, motif size, and overlap spacing consistent, and the design will scale cleanly across different yarns.
Thank you so much for choosing this pattern. I genuinely cannot wait to see how your version turns out.
If you make this shawl, I would absolutely love to see it! Share your photos on Instagram or Facebook and tag me so I can admire your work. Save this Blue Morpho Butterfly Shawl crochet pattern to your Pinterest boards so you can find it whenever you are ready to start, and please drop a comment below if you have any questions or just want to share your progress. Happy crocheting!
Want a Quick & Easy Printable Version?
Get a clean, beautifully formatted PDF of this pattern — easy to follow step by step, ready to print or save on any device. No scrolling, no distractions, just the pattern.
Get the Printable PDF →