
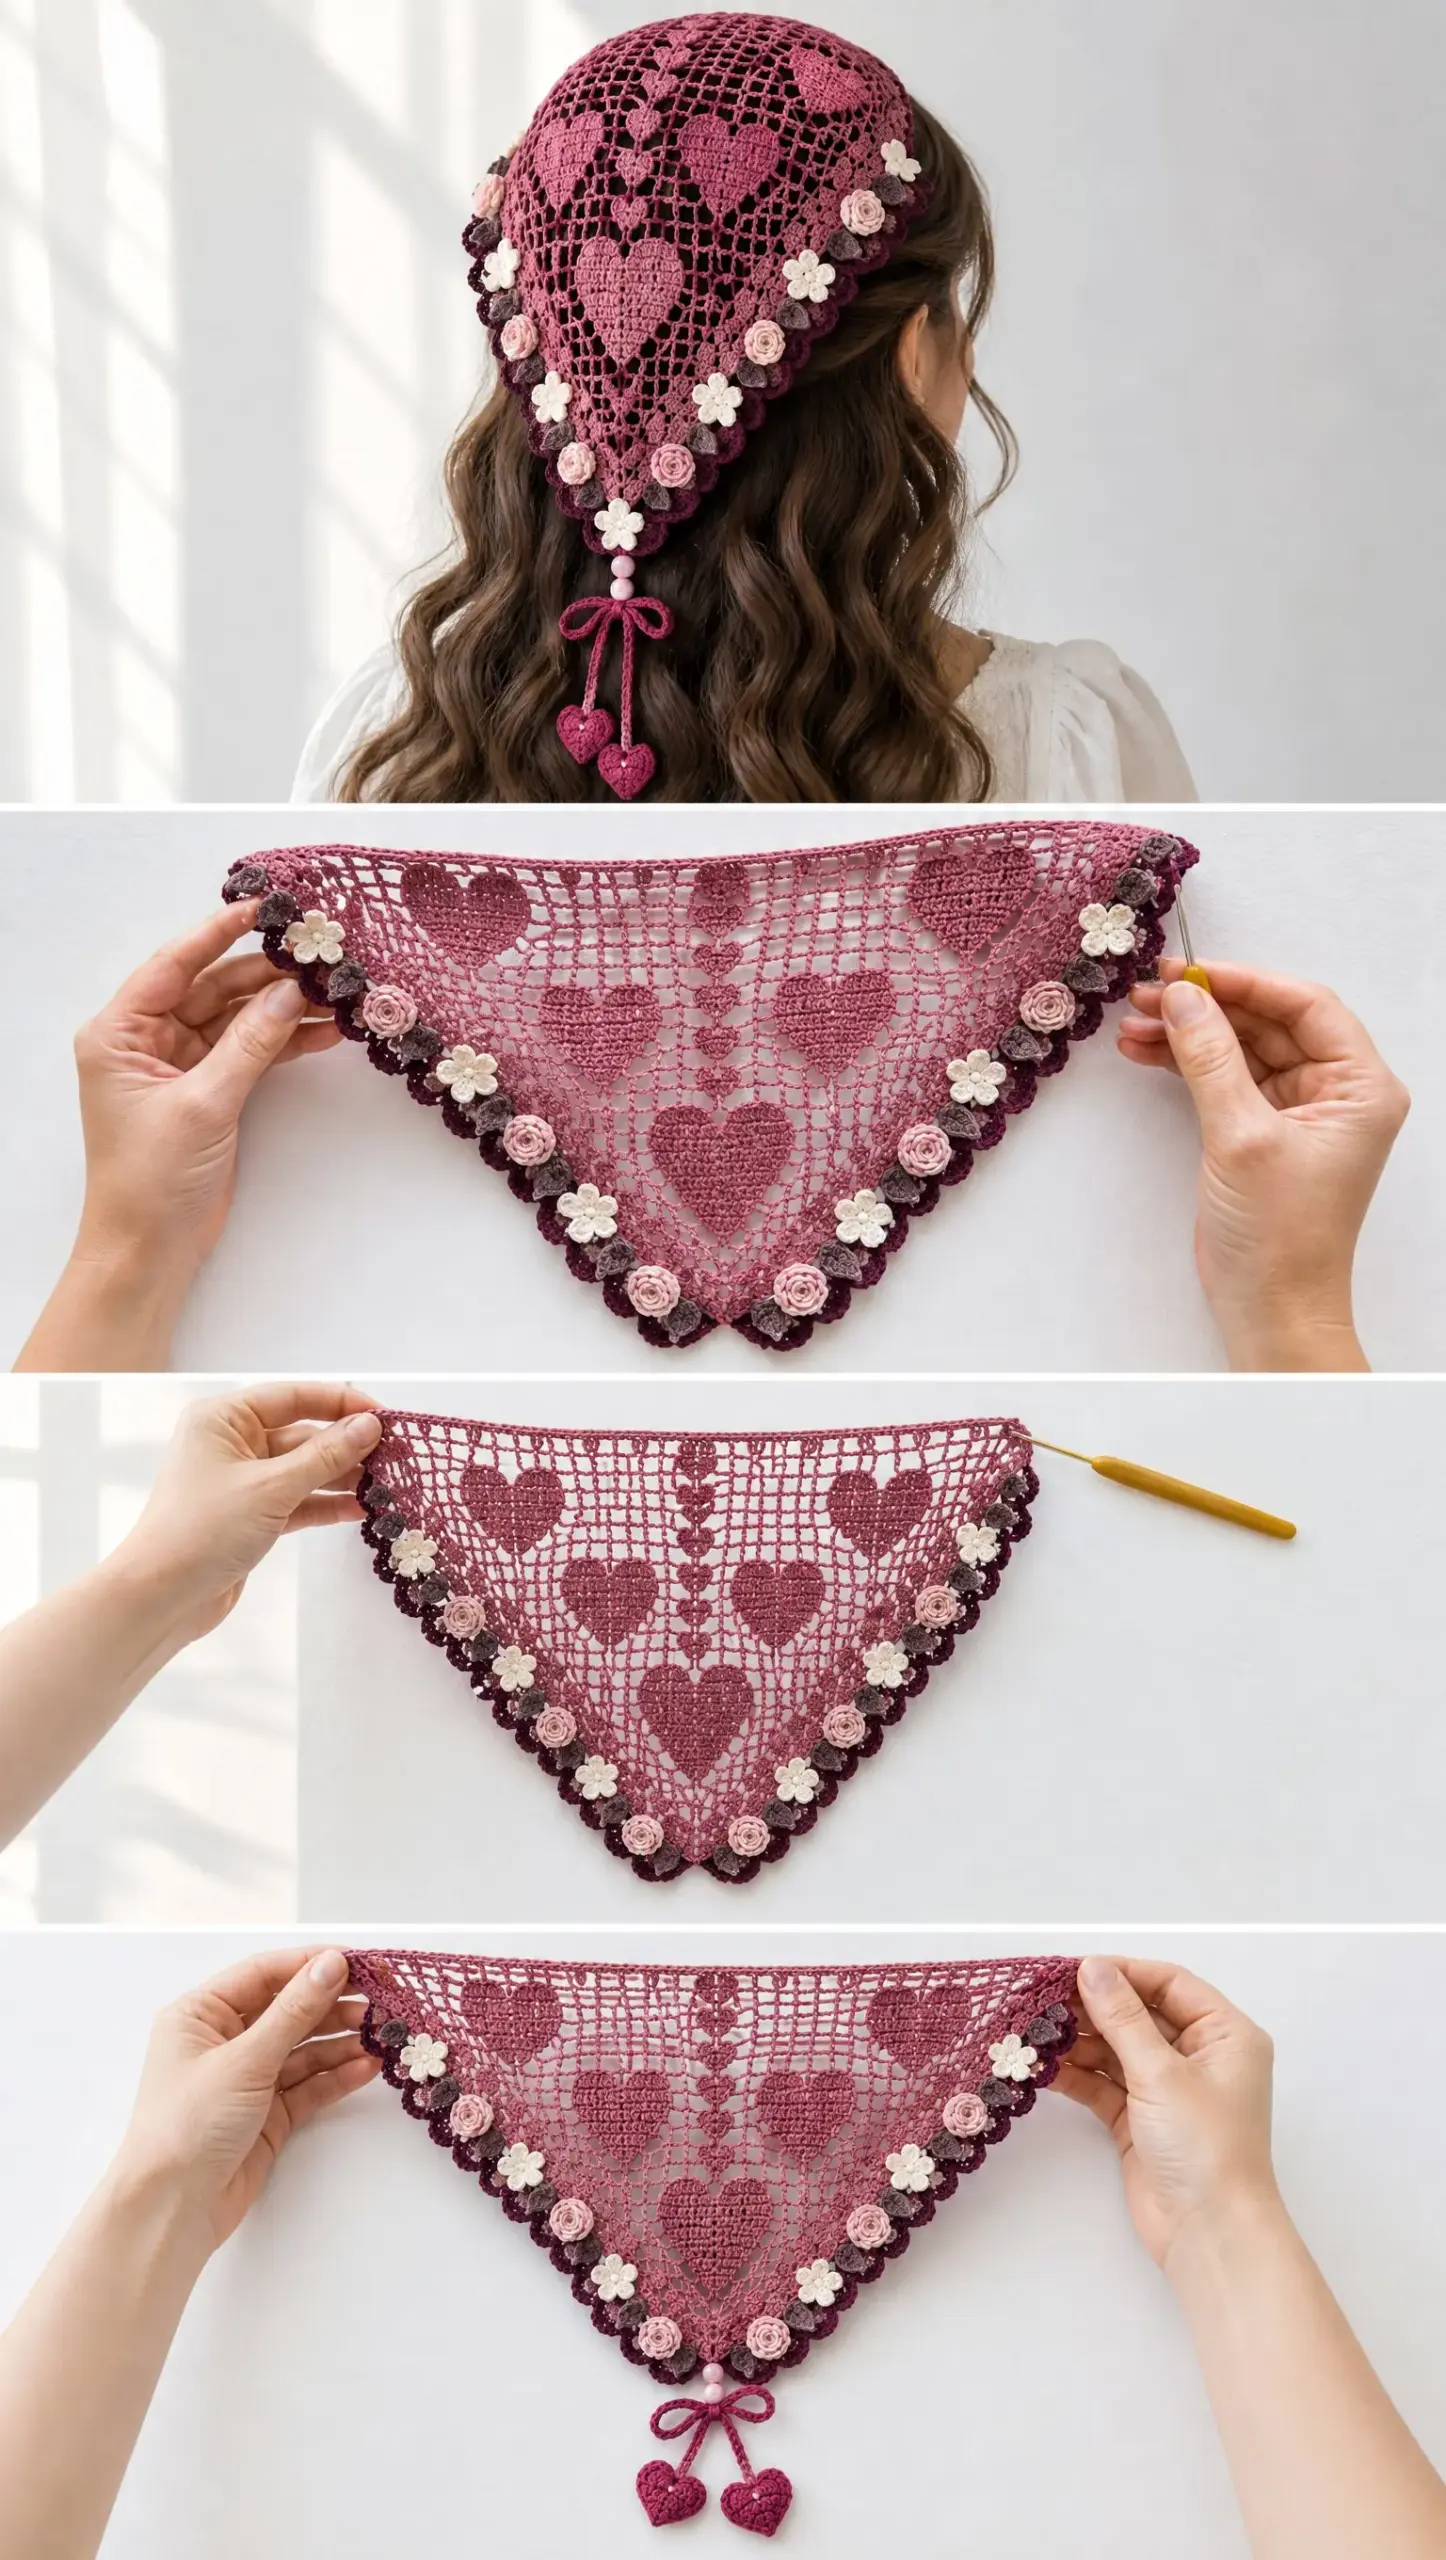
This is a triangular lace kerchief worked in fine cotton thread with filet crochet heart motifs. It uses basic stitches like double crochet and chains. The finished piece features a decorative scalloped border with flowers, leaves, and dangling heart charms.
Get the Ad-Free PDF Pattern
You can find the free pattern below, or you can purchase the ad-free printable PDF from my shop.
Get the Printable PDF →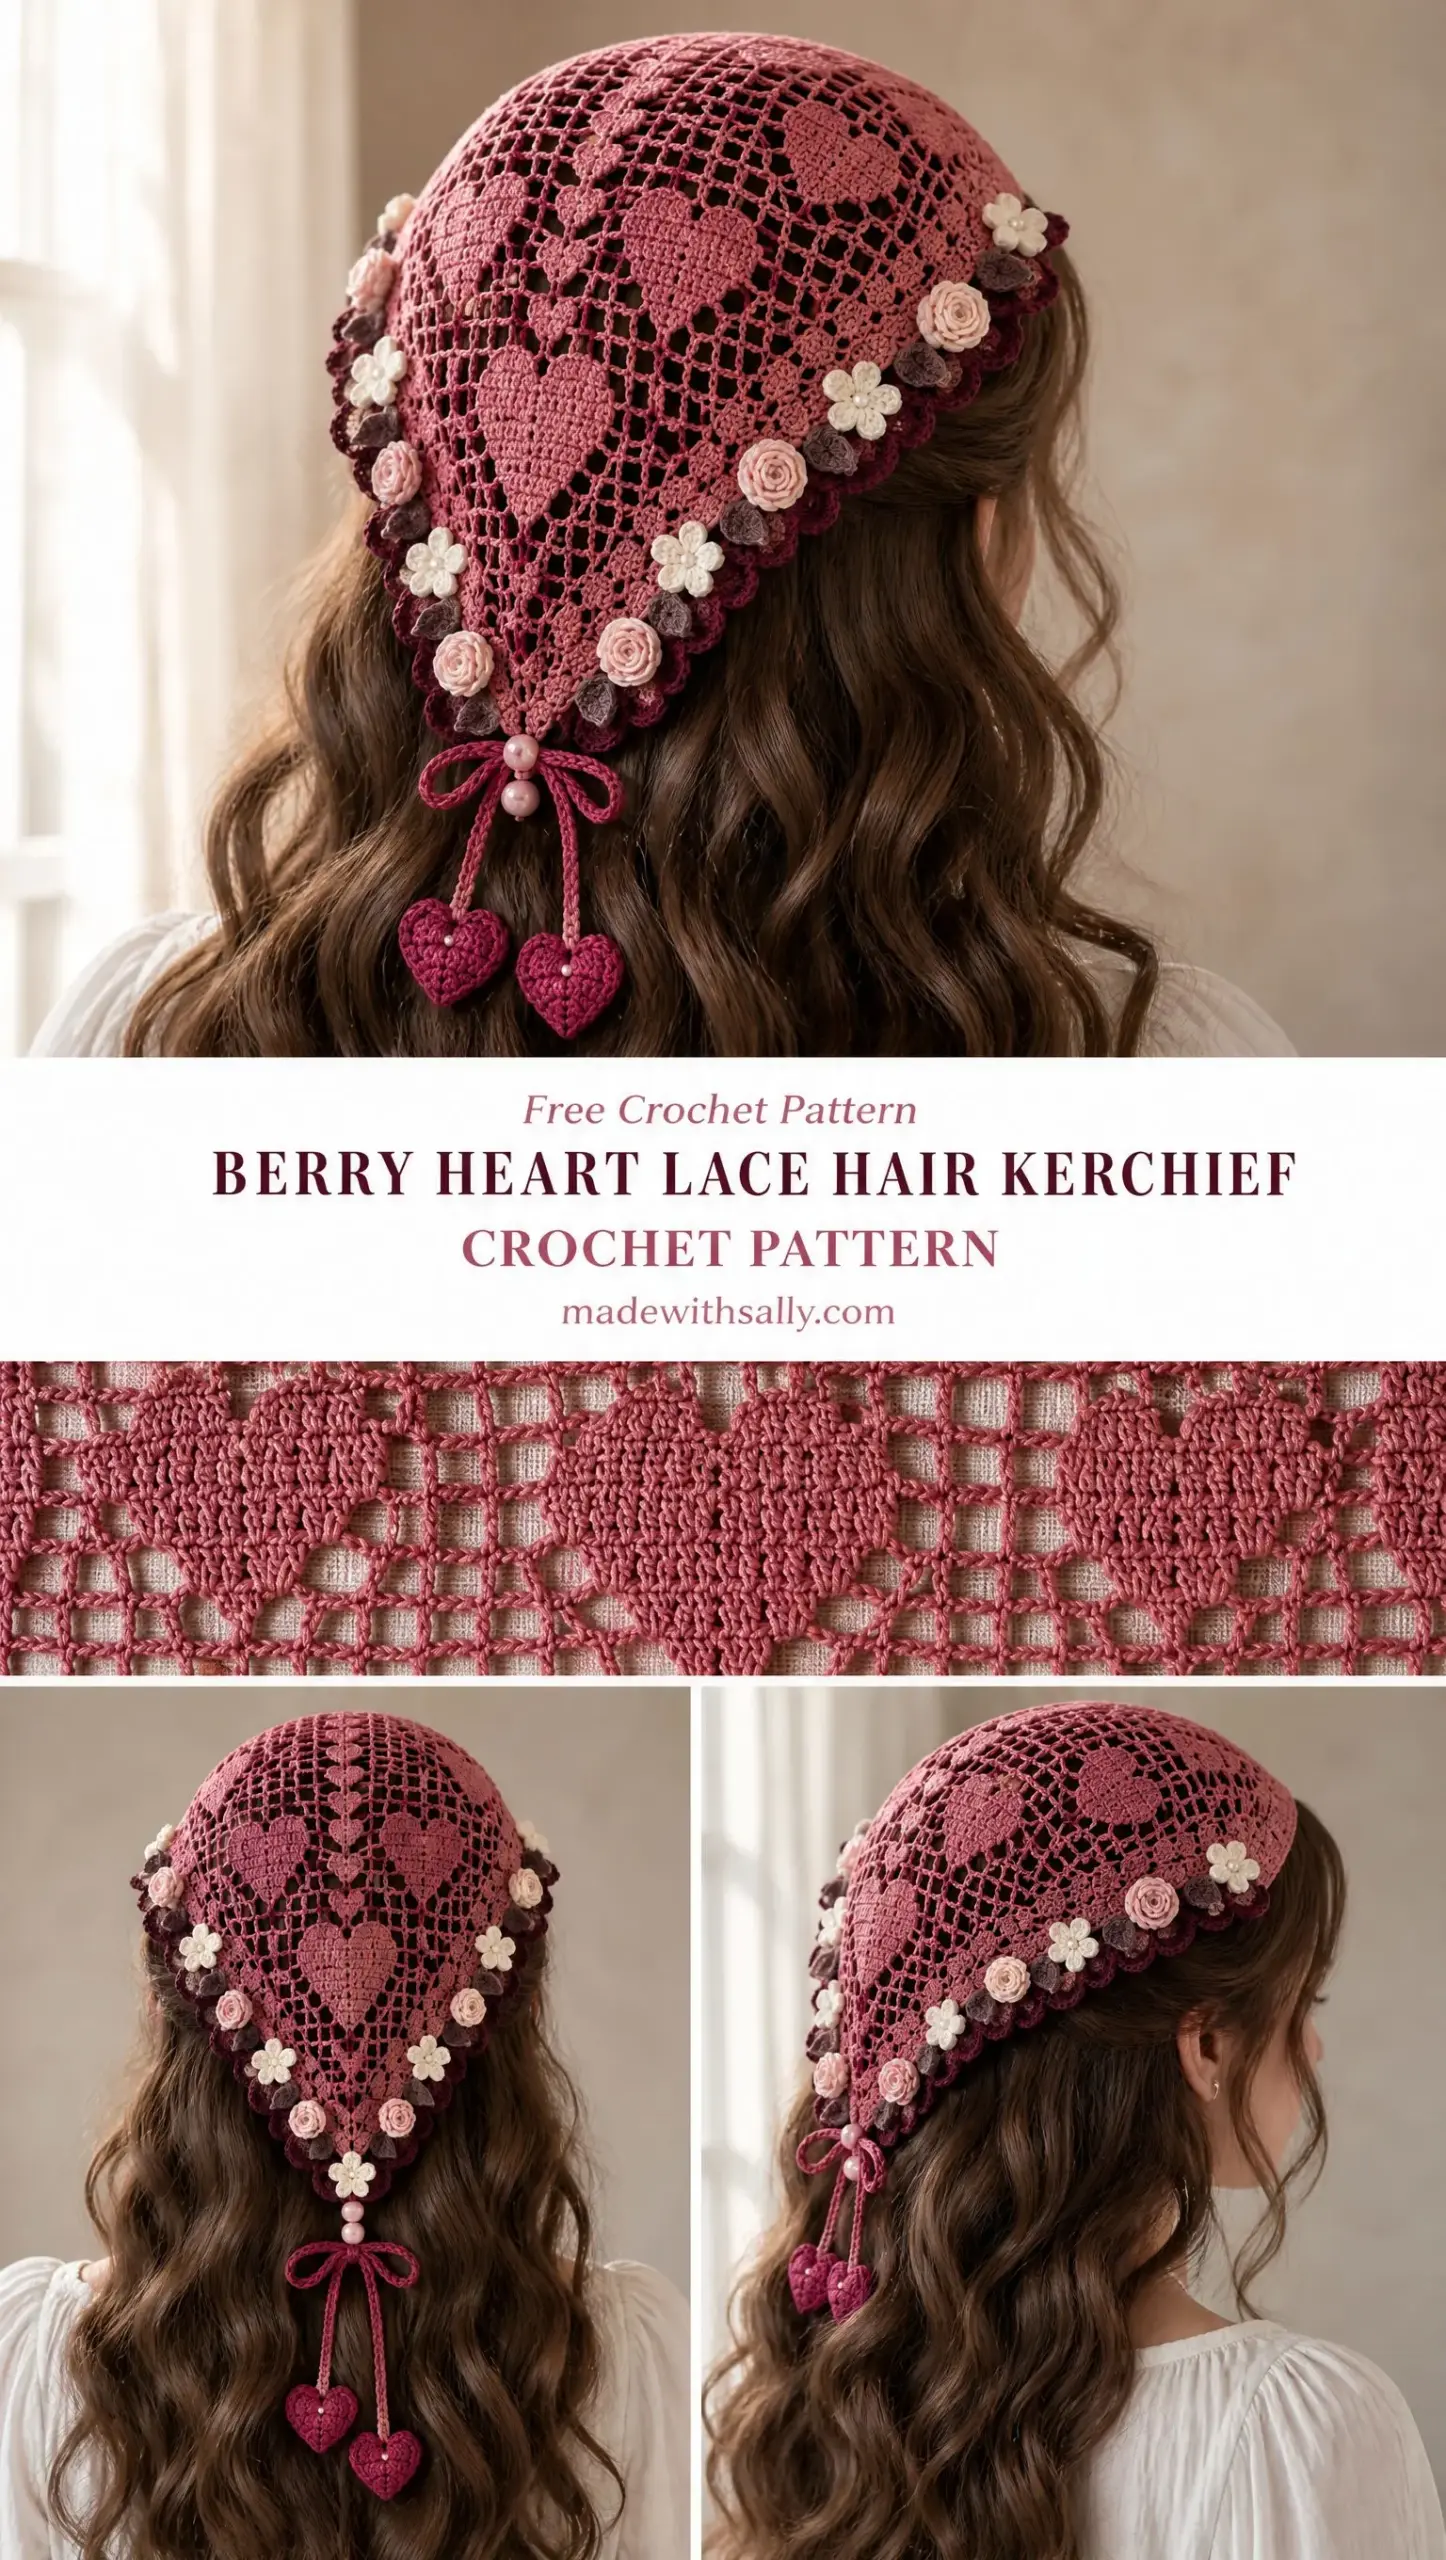
The construction starts from a small ring at the crown and increases outward to form the triangle shape. You’ll work the heart designs using the filet technique, which creates solid blocks against an open mesh background. The border adds a romantic touch with alternating blush rosettes and ivory blossoms.
This pattern is rated intermediate because of the fine thread, small hook, and the need to follow a filet chart for the heart placement. If you’ve worked with lace weight yarn before or tried basic filet crochet, you’re ready for this project.
Project Details and Finished Size
Skill Level: Intermediate
Finished Size: Approximately 34 inches (86 cm) wide across the top edge and 18 inches (46 cm) from crown to point.
This generous size means the kerchief covers the back of your head comfortably and ties easily at the nape of your neck or under your chin.
Materials You’ll Need
Gather these supplies before you begin:
Gauge: Approximately 10 filet mesh blocks x 10 rows = 4 inches (10 cm).
Gauge matters here because it affects the final drape and size. If your kerchief is coming out stiff, try going up a hook size. If it’s too loose and floppy, go down a size.
Abbreviations and Stitch Definitions
Let me walk you through every abbreviation used in this pattern so there’s no confusion:
ch = chain: Wrap yarn over hook and pull through the loop on your hook. This creates one chain stitch.
sl st = slip stitch: Insert hook into stitch, yarn over, pull through both the stitch and the loop on your hook in one motion. This is used for joining and moving across stitches without adding height.
sc = single crochet: Insert hook into stitch, yarn over and pull up a loop (2 loops on hook), yarn over and pull through both loops.
hdc = half double crochet: Yarn over, insert hook into stitch, yarn over and pull up a loop (3 loops on hook), yarn over and pull through all 3 loops.
dc = double crochet: Yarn over, insert hook into stitch, yarn over and pull up a loop (3 loops on hook), yarn over and pull through 2 loops, yarn over and pull through remaining 2 loops.
tr = treble crochet: Yarn over twice, insert hook into stitch, yarn over and pull up a loop (4 loops on hook), [yarn over and pull through 2 loops] three times.
sp = space: The gap created by chain stitches between other stitches.
st = stitch
rep = repeat
Understanding Filet Crochet
Filet crochet is a technique that creates pictures or patterns using a grid of solid and open blocks. Think of it like pixel art, but with yarn.
Each solid filet block is made with 3 double crochet stitches worked consecutively. These create the filled in portions of your design, which in this pattern form the heart shapes.
Each open block is made with dc, ch 2, skip 2 stitches, dc. This creates the airy mesh background that makes the hearts stand out.
When you look at a filet chart, filled squares represent solid blocks and empty squares represent open mesh blocks. You’ll read the chart from bottom to top, working right to left on odd rows and left to right on even rows.
Main Kerchief Body Instructions
Foundation
Chain 8. Join with slip stitch to form a ring.
This small ring becomes the crown of your kerchief, the part that sits at the top of your head.
Row 1
Ch 5 (counts as dc + ch-2). Work 3 dc into ring, ch 2, 3 dc into ring, ch 2, dc into ring. Turn.
You’ve just created the beginning of your triangle with the center point established.
Row 2
Ch 5. Work dc into first stitch. Ch 2, dc in next dc, repeat across to center point. In center space work dc, ch 2, dc. Continue mesh pattern.
The center space is where you’ll always work your increase to maintain the triangular shape. Every row builds outward from this center point.
Continuing the Filet Mesh Pattern
Follow the heart chart arrangement as you work:
The heart motifs are worked by substituting open mesh blocks with solid blocks according to the chart. When you reach a heart section, instead of working dc, ch 2, skip 2, dc for an open block, you’ll work 3 dc for a solid block.
Heart Motif Construction
For each heart block within the design:
Row A: Work three filled blocks across the heart upper lobes. This creates the two bumps at the top of the heart.
Row B: Add two filled blocks separated by one open mesh space. This continues building the heart shape.
Row C: Reduce to one centered filled block. This forms the point at the bottom of the heart.
Continue filet mesh around the motif until the heart silhouette is complete.
Continue body rows until the triangle measures approximately 18 inches from crown to point.
Point Shaping
As you near the bottom of the kerchief, you’ll need to shape the point:
Decrease one mesh block at each side every row for the final 8 rows.
Finish with a small centered point.
Fasten off and weave ends invisibly. Use your sewing needle to tuck in all tails so they don’t show through the delicate lacework.
Plum Scalloped Border
The deep plum border frames the entire kerchief and gives it a finished, polished look.
Attach deep plum yarn along the triangle edge.
Round 1
Sc evenly around the entire edge, placing 3 sc in the point.
The 3 sc in the point creates a nice sharp corner at the bottom of your triangle.
Round 2
Ch 3, skip 2 stitches, 5 dc into next stitch, skip 2 stitches, sl st.
Repeat to create scallops all the way around.
These shell shapes form the romantic scalloped edge that the flowers will sit on.
Flower Border Elements
Blush Rosette
Make a magic ring. (A magic ring is an adjustable loop that lets you close the center of your work tightly. If you’re not comfortable with magic rings, you can chain 4 and join with a slip stitch instead.)
Work 5 petals: (sc, hdc, 3 dc, hdc, sc) into ring.
Pull center closed and secure flat.
These rosettes have a layered, rose like appearance that adds dimension to the border.
Ivory Five Petal Blossom
Magic ring.
Repeat five times: (ch 2, 2 dc, ch 2, sl st into ring).
Sew a small center stitch to flatten the flower.
The ivory blossoms are simpler and flatter than the rosettes, creating nice visual contrast.
Assembling the Flower Border
Sew flowers alternately along the plum scallop edge. Alternate between the blush rosettes and ivory blossoms for variety.
Add short plum leaves between flowers: Ch 6, sc back along chain, attach flat.
These little leaves fill the gaps and add greenery to your floral border.
Lower Point Decoration
The bottom point of the kerchief gets special embellishment.
Attach two pale pink beads at the point with strong sewing thread. Make sure your knots are secure since this area will see movement.
Raspberry Bow
Chain 35 for each tail.
Slip stitch back along chains.
Create two loops and secure at center.
This forms a dainty bow that dangles from the point of your kerchief.
Heart Charm Pattern
These small dimensional hearts hang from the bow tails.
Magic ring.
Row 1
Ch 2, 3 dc, 3 tr, 3 dc, ch 2, sl st into ring.
Row 2
Work around heart with sc increases at the top curves and point.
Add a small picot at bottom. (A picot is typically ch 3, sl st back into the first chain, creating a small decorative bump.)
Make two charms and attach to bow tails.
If you want slightly puffy hearts, add a tiny bit of stuffing before closing them up.
Finishing Instructions
Proper finishing makes all the difference with lace work.
Block the kerchief gently on a towel using lukewarm water. Blocking opens up the lacework and makes the heart motifs crisp and readable.
Shape the triangle and scallops carefully. Pin each scallop individually if needed.
Allow to dry completely. This may take 24 hours or more depending on humidity.
Steam lightly if needed, avoiding direct heat. Hold your iron several inches above the work and let the steam do the work.
Secure all flower centers and concealed joins with a few extra stitches.
Check that the fabric drapes naturally and the heart motifs remain open and readable. If the hearts look blurry or closed up, you may need to block more aggressively.
Care Instructions
To keep your kerchief looking beautiful:
Hand wash in cool water with a gentle detergent.
Lay flat to dry, reshaping while damp.
Store folded away from direct sunlight to prevent fading of the raspberry and plum colors.
Tips for Success
Tension consistency is crucial with fine thread. Try to maintain the same hand position and yarn tension throughout your work sessions. If you crochet tighter when tired, save this project for when you’re relaxed.
Count your stitches at the end of every row, especially when working the heart motifs. One missed stitch can throw off the entire design.
Use stitch markers to mark the center point of your triangle. This helps you keep track of where your increases should go.
Work in good lighting. Fine cotton thread is hard to see, and you’ll strain your eyes working in dim conditions.
Take breaks. This is detailed work that requires concentration. Step away every 30 minutes or so.
Making It Your Own
While this pattern uses raspberry pink as the main color, you could easily substitute other colors. Consider soft sage green, dusty blue, or classic ecru for a different mood. The plum border could become forest green, navy, or burgundy.
The flower colors can also be customized. Think about who you’re making this for and choose colors that suit their style.
I hope you love making this Berry Heart Lace Hair Kerchief as much as I enjoyed putting this pattern together for you. The combination of delicate filet hearts and the romantic flower border creates something truly special. Thank you for choosing this pattern!
If this project caught your eye, save it to your Pinterest boards so you can find it when you’re ready to start. And please drop a comment below if you make one. I’d love to hear which colors you chose and see how your kerchief turned out!
Want a Quick & Easy Printable Version?
Get a clean, beautifully formatted PDF of this pattern — easy to follow step by step, ready to print or save on any device. No scrolling, no distractions, just the pattern.
Get the Printable PDF →