
THIS is the poncho pattern you have been waiting for. Seriously. If you want something that looks absolutely stunning but comes together faster than you would expect, you are in the right place. The granny mesh stitch creates that gorgeous open texture without any complicated techniques, and the ombre color transition from cream to blush pink is pure elegance.
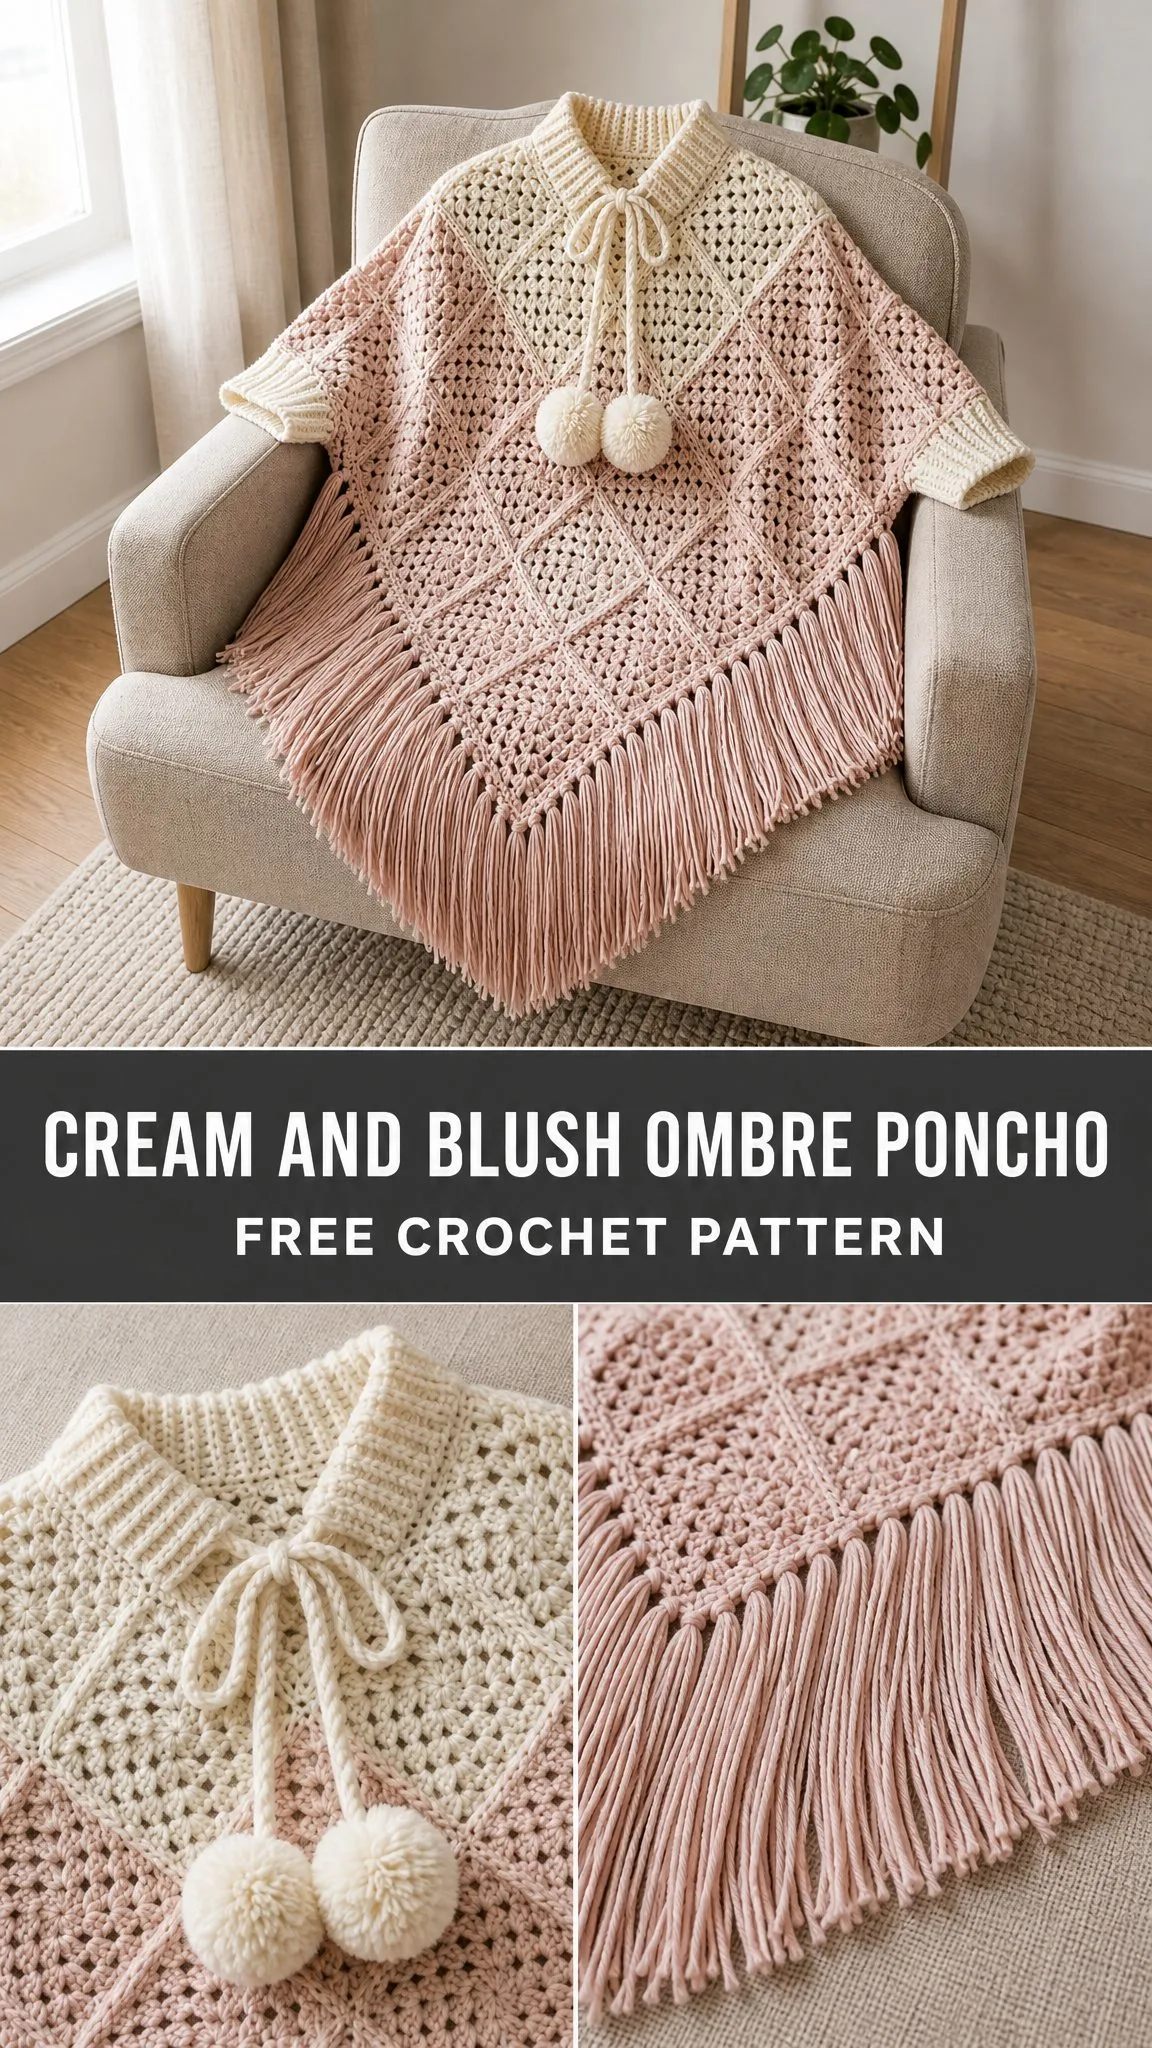
I am SO excited to share this one with you. The construction is surprisingly simple. You make two identical rectangular panels, seam them at the shoulders, and suddenly you have this beautiful draped silhouette with pointed hems and cozy ribbed details. The whole thing works up in about 15 to 20 hours, which means you could realistically finish it in a weekend if you are determined.
Whether you are making this for yourself or as a gift, it is going to impress. The turtleneck collar, the sweet pompom ties, that luxurious fringe along the bottom. It looks like something you would find in a boutique. But you are going to make it with your own two hands. Let me walk you through every single step.
Why You Will Love This Crochet Poncho Pattern
This poncho hits the sweet spot between cozy and stylish. The granny mesh stitch creates an open, lacy texture that drapes beautifully without being too heavy. And because you are working with bulky weight yarn, the fabric builds up quickly while still keeping you warm.
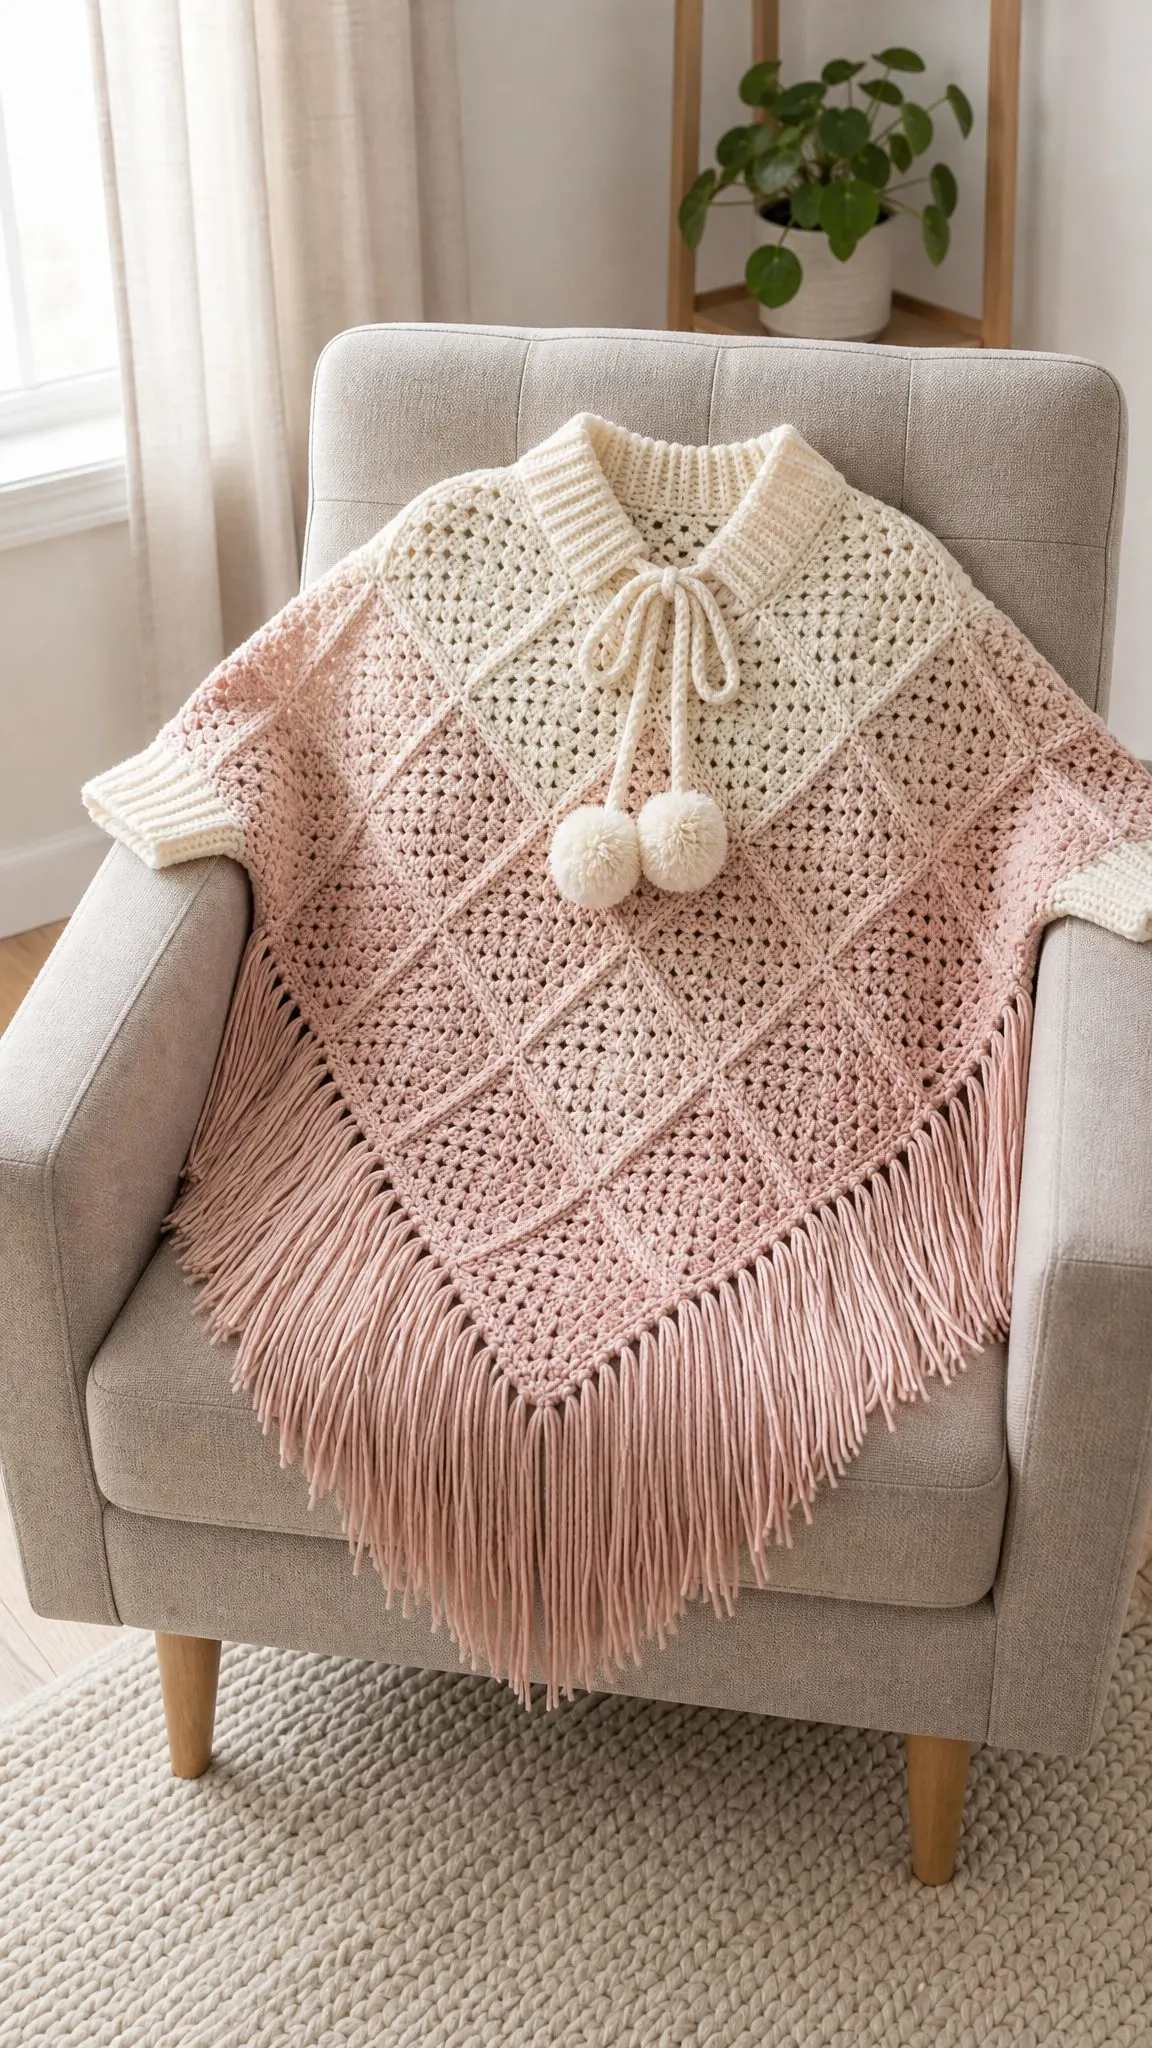
The color transition is one of my favorite details. You start with a soft cream at the top, then gradually blend into a dusty blush pink for the body. It is not a harsh line. Instead, you get this gentle ombre effect that looks way more complicated than it actually is.
The finishing touches really make this piece special. The ribbed turtleneck collar stands about 4 inches tall and keeps your neck cozy. The twisted cord tie with those fluffy cream pompoms adds a playful touch. And the long fringe along the hemline gives it movement and drama.
Skill Level and Time Estimate
This pattern is rated intermediate. You should be comfortable with granny clusters, basic color changes, seaming, and working in the round. There is no tricky shaping involved. The panels are simple rectangles, and the poncho shape comes from how you assemble them.
If any of those techniques are new to you, do not worry. I will explain everything as we go. The key skills you will use are the granny cluster stitch, back loop only single crochet for the ribbing, and basic seaming.
Plan for approximately 15 to 20 hours of crochet time if you work at a steady pace. That breaks down nicely over a week or two of evening crafting sessions.
Finished Measurements
The finished poncho fits most adults comfortably. Here are the key measurements:
Materials You Will Need
Yarn:
Yarn Suggestions:
Any Category 5 bulky yarn that matches gauge will work. Avoid very fluffy or heavily textured yarns because they will hide the pretty stitch definition.
Hook:
Additional Supplies:
Gauge
Getting gauge right matters for this project since it is a garment. Using your US K-10.5 / 6.5 mm hook:
Please make a 6-inch swatch before starting. If your swatch is too small, go up a hook size. If it is too large, go down a hook size.
Abbreviations and Stitch Definitions
Let me define all the abbreviations you will see in this pattern. I will give you the full name, the abbreviation, and explain what it means in plain language.
Special Stitches
Granny Cluster (cl)
This is the star stitch of the pattern. Here is how to work it:
Yarn over, insert hook into the designated stitch or space, yarn over and pull up a loop, yarn over and draw through 2 loops on hook. That completes one double crochet. Repeat this action 2 more times into the same stitch or space so you have 4 loops on hook. Yarn over and draw through all 4 loops on hook.
You have just made a 3-dc cluster worked into one location. It creates a compact, slightly raised stitch that forms the lattice texture.
Granny Mesh Block
This is one full repeat unit of the pattern:
Work 1 cluster into ch-sp, chain 1, work 1 cluster into same ch-sp, chain 1.
This creates one diamond-shaped cell of the granny lattice.
Ribbing Row
For the collar and cuffs, you will work single crochet in back loops only across all stitches. This creates stretchy, textured ribbing.
Pattern Notes Before You Begin
1. The poncho is made from two identical rectangular panels. Panel 1 becomes the front, Panel 2 becomes the back.
2. Panels are worked flat in rows from top to bottom. The diagonal diamond visual effect comes from the stitch pattern and color placement, not from shaping.
3. Color change: Yarn A (Cream) is used for the top 8 rows. Yarn B (Blush) is used for the remaining rows. Rows 9 and 10 are transition rows where you blend the colors.
4. The collar and cuffs use Yarn A only. Fringe uses Yarn B only.
5. All chain 3 turning chains count as the first double crochet of that row. Chain 1 turning chains do not count as a stitch.
6. When joining a new color, do so on the last pull-through of the stitch before the new color is needed.
Step-by-Step Crochet Poncho Pattern Instructions
Panel (Make 2)
Both panels are identical. Work through these instructions twice.
Foundation Row:
Using Yarn A, chain 99.
Row 1 (RS): Single crochet in 2nd chain from hook and in each chain across. Turn. (98 sc)
Row 2 (WS, set-up row): Chain 3 (counts as dc), dc in next 2 sts, [ch 1, sk 1 st, dc in next 3 sts] across, ending dc in last st. Turn. (24 groups of 3 dc with ch-1 spaces)
Here is how Row 2 breaks down: your turning chain counts as the first dc, then you work 2 more dc for your first 3-dc group. Then you repeat [ch 1, skip 1, 3 dc] 23 times. Finally, ch 1, skip 1, dc in last stitch. This creates 24 chain 1 spaces and sets up your granny lattice.
Row 3 (RS, begin granny mesh): Chain 4 (counts as dc + ch 1), turn. Skip first dc group, [cluster in next ch-1 sp, ch 1, cluster in same ch-1 sp, ch 1, skip 3-dc group] repeat across, ending cluster in last ch-1 sp, ch 1, cluster in same sp, ch 1, dc in top of turning chain. Turn. (48 clusters, 49 ch-1 spaces)
Row 4: Chain 4, turn. [Cluster in next ch-1 sp, ch 1, cluster in same ch-1 sp, ch 1] repeat across all ch-1 spaces, ending dc in 3rd chain of turning chain. Turn. (48 clusters, 49 ch-1 spaces)
Rows 5 through 8: Repeat Row 4. Continue in Yarn A only.
Checkpoint: After Row 8, your cream section should measure approximately 5 to 6 inches / 13 to 15 cm tall.
Color Transition Rows
Row 9 (transition row 1): With Yarn A, chain 4, turn. Work first 12 cluster pairs as established in Yarn A. On the 13th cluster of this row, drop Yarn A and pick up Yarn B to complete the pull-through, then continue remaining 12 cluster pairs and final dc in Yarn B. Turn. (48 clusters, 49 ch-1 spaces)
Row 10 (transition row 2): With Yarn B, chain 4, turn. Work all cluster pairs across in Yarn B. Turn. Cut Yarn A and secure. (48 clusters, 49 ch-1 spaces)
Lower Body Section
Rows 11 through 42: Continue working Row 4 pattern in Yarn B only. Repeat the granny mesh row for 32 rows.
Checkpoint: After Row 42, your full panel should measure approximately 22 inches / 56 cm from top to bottom.
Fasten off. Weave in all ends on both panels.
Assembly Instructions
Seaming the Panels
Lay both panels side by side with right sides facing up. You will join them at the shoulders using Yarn A and a yarn needle with mattress stitch or slip stitch seam.
Right Shoulder Seam:
Hold Panel 1 and Panel 2 with top edges aligned and right sides together. Starting from the right edge, seam across 11 inches / 28 cm (approximately 14 cluster-pair widths). Fasten off.
Neckline Opening:
Leave the center 6 inches / 15 cm unseamed. This forms your neck opening.
Left Shoulder Seam:
Seam the remaining 11 inches / 28 cm on the left side. Fasten off.
Your two seamed sections create a neck opening in the center. The bottom edges hang free on front and back. The side edges create your sleeve openings.
Checkpoint: Try the poncho on. The neckline opening should measure approximately 6 inches across. The sleeve openings should measure approximately 11 inches from shoulder seam down.
Sleeve Cuff (Make 2)
Foundation:
With Yarn A, chain 9.
Row 1: Sc in 2nd chain from hook and in each chain across. Turn. (8 sc)
Rows 2 through 30: Chain 1, turn. Sc in blo of each stitch across. Turn. (8 sc)
Your ribbed strip should measure approximately 11 inches / 28 cm after 30 rows. Adjust row count if needed to fit your sleeve opening.
Seam the short ends together to form a loop. Attach the cuff to the sleeve opening using slip stitches, easing in any fullness evenly. Repeat for second cuff.
Turtleneck Collar
With Yarn A, join yarn to the neckline opening with a slip stitch. Work in the round.
Round 1: Chain 1, sc evenly around the neckline opening, placing approximately 60 sc evenly around. Slip stitch to first sc to join. (60 sc)
Adjust your stitch count to an even number for the ribbing pattern.
Round 2: Chain 1, [sc in blo of next st, sc in flo of next st] repeat around. Slip stitch to join. (60 sts)
This back loop/front loop alternation creates a mock ribbing texture.
Rounds 3 through 16: Repeat Round 2. (60 sts each round)
Round 17 (cord channel): Chain 1, sc in each st around. Slip stitch to join. (60 sc)
Fasten off. Weave in end.
Finishing Details
Twisted Cord Tie
Cut 12 strands of Yarn A, each approximately 60 inches / 152 cm long. Hold all strands together and fold the bundle in half.
Secure the folded loop end to a doorknob or other fixed point. Hold the loose ends and twist clockwise with consistent tension until the cord begins to kink when slightly relaxed.
Fold the twisted length in half, letting it twist back on itself naturally. Tie a knot at each end.
Your finished cord should measure approximately 20 inches / 51 cm.
Thread the cord through Round 17 of the collar, weaving in and out through the stitches. Pull ends to front center.
Pompoms (Make 2)
Using a pompom maker or cardboard circle with 2.5 inch diameter, wrap Yarn A around approximately 80 to 100 times until plump.
Cut through all loops along the outer edge. Before removing cardboard, tie a 12-inch strand of Yarn A tightly around the center. Double-knot securely.
Remove cardboard, fluff, and trim into a neat ball approximately 2 to 2.5 inches in diameter.
Attach one pompom to each end of the twisted cord tie.
Fringe
Cut Yarn B into strands measuring 12 inches / 30 cm each. You need approximately 160 to 180 strands total.
Take 4 strands and fold them in half. Insert your crochet hook from back to front through a stitch along the hem edge. Draw the folded loop through, then pass the loose ends through the loop and pull down firmly.
Continue spacing fringe groups approximately every other stitch along both pointed hemline edges (front and back points only, not the side edges).
Trim all fringe to a uniform 5 inches / 13 cm using a ruler and sharp scissors.
Size Customization Tips
For a wider poncho: Add stitches to the foundation chain in multiples of 4. Each additional 4-stitch group adds approximately 1.5 to 2 inches per panel.
For a longer poncho: Add more rows in the lower body section. Each row adds approximately 0.5 inch in length.
For a larger neckline: Leave more center stitches unseamed during assembly.
For a taller collar: Add more rounds beyond Round 16. Every 4 rounds adds approximately 1 inch.
Blocking and Care
To block your finished poncho, fill a basin with cool water and submerge the piece. Press gently to saturate but do not wring. Lift while supporting the full weight, press between towels to remove excess water, and lay flat to dry.
Shape to measurements, ensuring panels lie flat and fringe hangs straight. Pin edges if needed. Allow to air dry completely.
For ongoing care with acrylic yarns, machine wash on gentle in cool water and lay flat to dry. Do not tumble dry on high heat. For wool blend yarns, hand wash only.
I hope you absolutely love making this cozy, gorgeous poncho. It is one of those projects that feels luxurious to wear and even better to gift. If you make one, I would love to see it! Tag me on Instagram or share a photo on Facebook.
Save this pattern to your Pinterest boards so you can find it when you are ready to cast on. And if you have any questions or just want to share your finished poncho, drop a comment below. I always love hearing from you!
