
I don’t know about you, but I have a serious soft spot for dessert-themed amigurumi. There’s just something about turning your favorite treats into huggable, shelf-worthy creations that makes me ridiculously happy.
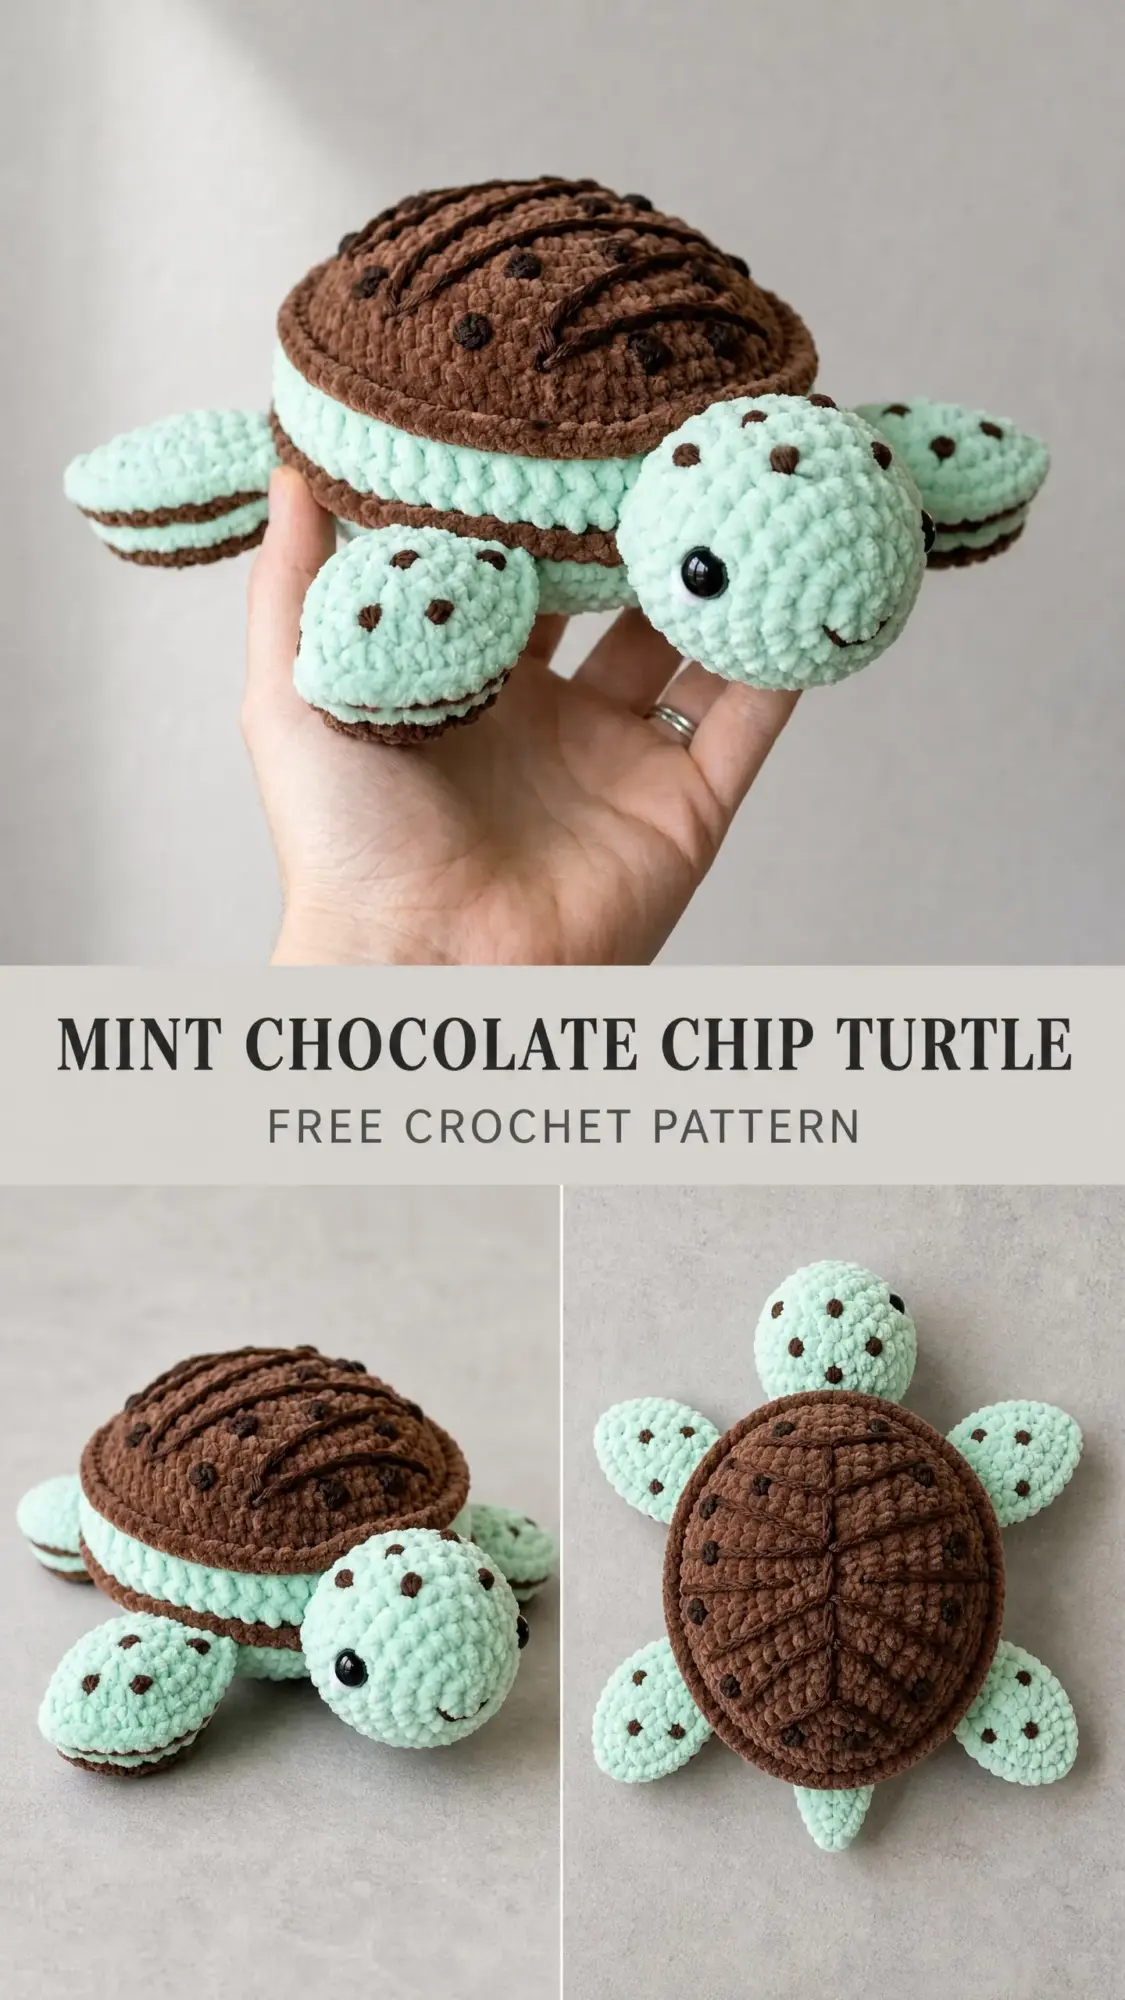
This mint chocolate chip turtle combines two of my greatest loves: adorable stuffed animals and the best ice cream flavor ever invented. The brown shell looks like a chocolate cookie, the mint green body peeks out like creamy filling, and those little French knot freckles? Pure chocolate chip perfection.
If you’ve been looking for a project that’s equal parts cute and clever, you’re in the right place. Let’s make something delicious together.
About This Mint Chocolate Chip Turtle Crochet Pattern
This amigurumi turtle measures approximately 7 inches wide by 5 inches tall when complete. That’s the perfect size for displaying on a shelf, gifting to a friend, or letting a kiddo snuggle during storytime.
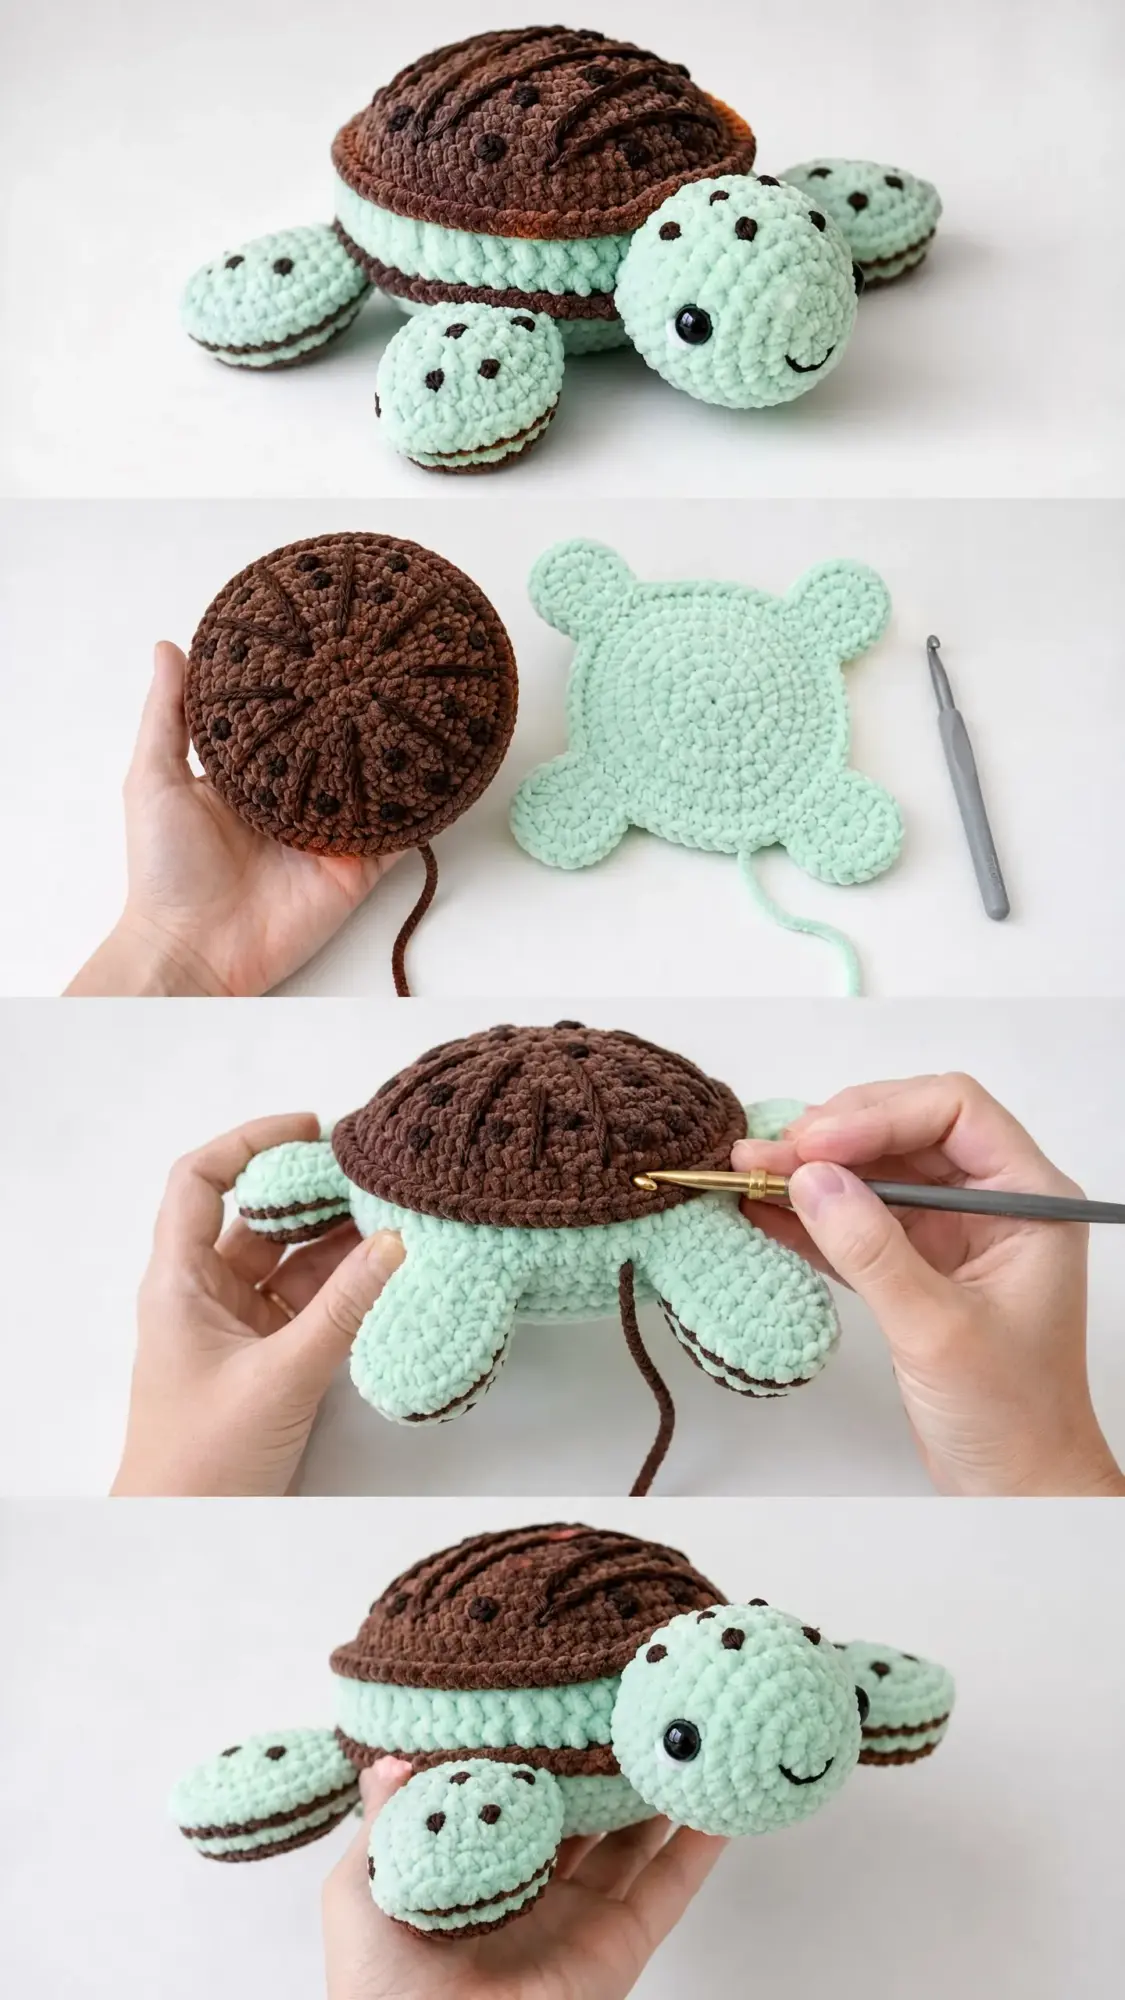
The construction is straightforward if you’ve tackled amigurumi before. You’ll work each piece separately in the round, stuff them firmly, then sew everything together. The body forms a rounded base, the domed shell sits on top, and the flippers and head attach around the edges to create that classic turtle silhouette.
What makes this little guy special is the sandwich cookie banding visible on every piece. Those chocolate brown stripes around the head, flippers, and shell brim create the layered mint chip ice cream sandwich effect. It’s a small detail that makes a huge visual impact.
Skill Level
This pattern is intermediate level. You should feel comfortable working in a continuous spiral, sewing pieces together neatly, and doing basic surface embroidery.
If you’ve completed at least one amigurumi project before, you’ll find this turtle totally manageable. The stitches themselves are simple. Single crochet (sc) is your main player, with basic increases and decreases for shaping.
The trickiest parts? Positioning the safety eyes evenly and keeping your embroidered French knots consistent. Neither is difficult, just takes a bit of patience.
Time estimate: Plan for 6 to 10 hours depending on your speed and how meticulous you are with assembly.
Materials You’ll Need
Gather these supplies before you start:
Yarn:
Hook:
Notions:
Yarn Suggestions
Any worsted weight yarn that achieves gauge will work beautifully. Here are three options I recommend:
1. Lion Brand Pound of Love in Mint and Café au Lait. This acrylic yarn produces smooth, consistent fabric and is easy to find at most craft stores.
2. Paintbox Yarns Simply DK held double in Spearmint Green and Coffee Bean. Holding two strands together gives you a denser fabric with excellent stitch definition.
3. Drops Safran in Mint and Chocolate. This cotton option creates a firmer texture and slightly heavier finished toy.
Important: Avoid fluffy or novelty yarns. They obscure your stitch definition and make counting rounds nearly impossible. For amigurumi, you want a tight, dense fabric that hides your stuffing.
Gauge
5 single crochet stitches x 5 rows = 1 inch (2.5 cm) when worked in the round, unblocked.
To check your gauge, work this quick swatch:
Work a magic ring, sc 6 in ring (6 stitches). Increase in each stitch around (12 stitches). [Sc 1, inc] x 6 (18 stitches). [Sc 2, inc] x 6 (24 stitches). Fasten off.
Measure the diameter. It should be approximately 2 inches across. If your swatch is larger, try a smaller hook. If smaller, go up a hook size.
Gauge matters here because all your pieces need to fit together during assembly. If they’re different sizes, your turtle will look lopsided.
Abbreviations and Stitch Definitions
Let me walk you through every stitch and abbreviation used in this pattern:
Special Stitches Explained
Magic Ring (MR):
Make a loop with your yarn so the tail end sits behind the working yarn. Insert your hook into the loop from front to back, yarn over and pull up a loop, chain 1 to secure. This chain does not count as a stitch. Work your single crochets into the center of the ring. Pull the tail end to close the ring tightly before continuing.
If magic rings intimidate you, you can substitute by chaining 2 and working all your stitches into the second chain from the hook. The center won’t close as tightly, but it works.
Invisible Decrease (dec):
This technique creates cleaner decreases without visible gaps. Insert your hook through the front loop only of the next stitch, then through the front loop only of the following stitch. You now have two front loops on your hook. Yarn over, pull through both front loops. Yarn over again, pull through both loops on hook. One decrease complete.
French Knot Embroidery:
Thread your yarn needle with Color B. Bring the needle up at the desired spot on the surface. Wrap the yarn around the needle twice, close to the fabric. Insert the needle back into the fabric just beside the entry point, not into the same hole. Hold the wrapped yarn against the fabric with your thumb as you pull the needle through. This forms a small raised knot. Secure on the wrong side.
Straight Stitch Embroidery:
Bring your needle up at the start point, carry the yarn across the surface the desired distance, and insert the needle back through the fabric. Pull snug but not so tight that you pucker the fabric.
Pattern Notes Before You Begin
Read through these tips before starting. They’ll save you frustration later:
1. Work in a continuous spiral unless instructed otherwise. Do not join rounds with a slip stitch. Use a stitch marker in the first stitch of each round and move it up as you go.
2. Leave long tails when fastening off pieces you’ll sew together. About 18 inches gives you plenty to work with.
3. Stuff firmly. Well-stuffed pieces hold their shape and make assembly much easier.
4. Insert safety eyes before closing the head. Once you sew that opening shut, you can’t add them.
5. Color changes: When switching colors, complete the last yarn over of your final stitch using the new color. Cut the old color and weave in the tail, or carry it loosely inside if you’ll use it again soon.
6. The banded effect comes from working accent rounds in chocolate brown between sections of mint green. These contrast rounds create the sandwich cookie striping.
Crochet Pattern Instructions
Body (Make 1, Color A Mint Green)
The body forms the flat-bottomed, rounded base of your turtle. You’ll work from the bottom upward.
Rnd 1: MR, sc 6 in ring. (6)
Rnd 2: Inc in each st around. (12)
Rnd 3: [Sc 1, inc] x 6. (18)
Rnd 4: [Sc 2, inc] x 6. (24)
Rnd 5: [Sc 3, inc] x 6. (30)
Rnd 6: [Sc 4, inc] x 6. (36)
Rnd 7: [Sc 5, inc] x 6. (42)
Rnd 8: [Sc 6, inc] x 6. (48)
Rnd 9: [Sc 7, inc] x 6. (54)
Rnd 10: [Sc 8, inc] x 6. (60)
Rnd 11: Sc in each st around. (60)
Rnd 12: Sc in each st around. (60)
Rnd 13: Sc in each st around. (60)
Rnd 14: Sc in each st around. (60)
Switch to Color B for round 15.
Rnd 15 (Color B): Sc in each st around. (60)
Rnd 16 (Color B): Sc in each st around. (60)
Switch to Color A for round 17.
Rnd 17 (Color A): Sc in each st around. (60)
Rnd 18: [Sc 8, dec] x 6. (54)
Rnd 19: [Sc 7, dec] x 6. (48)
Rnd 20: [Sc 6, dec] x 6. (42)
Checkpoint: After round 20, your body should measure approximately 4.5 inches in diameter and about 2.5 inches tall.
Begin stuffing firmly and continue stuffing as you close.
Rnd 21: [Sc 5, dec] x 6. (36)
Rnd 22: [Sc 4, dec] x 6. (30)
Rnd 23: [Sc 3, dec] x 6. (24)
Rnd 24: [Sc 2, dec] x 6. (18)
Rnd 25: [Sc 1, dec] x 6. (12)
Rnd 26: Dec x 6. (6)
Fasten off, leaving a 6 inch tail. Thread tail through remaining 6 stitches, pull tight, and secure. Weave in end.
Shell Top (Make 1, Color B Chocolate Brown)
The shell top is a strongly domed circle that sits on top of the body. Work from the center outward.
Rnd 1: MR, sc 6 in ring. (6)
Rnd 2: Inc in each st around. (12)
Rnd 3: [Sc 1, inc] x 6. (18)
Rnd 4: [Sc 2, inc] x 6. (24)
Rnd 5: [Sc 3, inc] x 6. (30)
Rnd 6: [Sc 4, inc] x 6. (36)
Rnd 7: [Sc 5, inc] x 6. (42)
Rnd 8: [Sc 6, inc] x 6. (48)
Rnd 9: [Sc 7, inc] x 6. (54)
Rnd 10: Sc in each st around. (54)
Rnd 11: Sc in each st around. (54)
Rnd 12: Sc in each st around. (54)
Rnd 13: Sc in each st around. (54)
Rnd 14: Sc in each st around. (54)
Checkpoint: The shell top should measure approximately 4.75 inches in diameter with a noticeable dome when stuffed moderately. Do not overstuff.
Stuff the shell moderately, shaping it into a dome. Do not close the bottom. Leave the opening wide for sewing onto the body.
Fasten off, leaving a 20 inch tail for seaming. Set aside.
Shell Brim / Band (Make 1, Alternating Color B and Color A)
The brim creates the wide flat rim visible around the base of the shell. This is worked separately as a flat ring and seamed between the shell and body.
Note: This piece is worked in joined rounds, not a continuous spiral.
Foundation: With Color B, ch 54, join with sl st to first ch to form a ring. Be careful not to twist.
Rnd 1 (Color B): Ch 1, sc in each ch around, join with sl st to first sc. (54)
Rnd 2 (Color B): Ch 1, sc in each st around, join with sl st to first sc. (54)
Switch to Color A.
Rnd 3 (Color A): Ch 1, sc in each st around, join with sl st to first sc. (54)
Rnd 4 (Color A): Ch 1, sc in each st around, join with sl st to first sc. (54)
Switch to Color B.
Rnd 5 (Color B): Ch 1, sc in each st around, join with sl st to first sc. (54)
Rnd 6 (Color B): Ch 1, sc in each st around, join with sl st to first sc. (54)
Fasten off, leaving a 20 inch tail.
Head (Make 1)
The head is a large round sphere. Remember to insert safety eyes before closing.
With Color A (mint green):
Rnd 1: MR, sc 6 in ring. (6)
Rnd 2: Inc in each st around. (12)
Rnd 3: [Sc 1, inc] x 6. (18)
Rnd 4: [Sc 2, inc] x 6. (24)
Rnd 5: [Sc 3, inc] x 6. (30)
Rnd 6: [Sc 4, inc] x 6. (36)
Rnd 7: Sc in each st around. (36)
Rnd 8: Sc in each st around. (36)
Rnd 9: Sc in each st around. (36)
Insert safety eyes now between rounds 8 and 9, approximately 5 to 6 stitches apart from center front. Attach safety eye backs firmly.
Switch to Color B.
Rnd 10 (Color B): Sc in each st around. (36)
Rnd 11 (Color B): Sc in each st around. (36)
Switch to Color A.
Rnd 12 (Color A): [Sc 4, dec] x 6. (30)
Rnd 13: [Sc 3, dec] x 6. (24)
Begin stuffing firmly.
Rnd 14: [Sc 2, dec] x 6. (18)
Rnd 15: [Sc 1, dec] x 6. (12)
Rnd 16: Dec x 6. (6)
Fasten off, leaving a 16 inch tail. Thread tail through remaining 6 stitches, pull tight, secure, and leave tail for seaming.
Checkpoint: The head should measure approximately 2.75 inches in diameter.
Flipper (Make 4)
Each flipper is a small oval disk edged with a chocolate brown band. All four are identical.
With Color A (mint green):
Rnd 1: MR, sc 6 in ring. (6)
Rnd 2: Inc in each st around. (12)
Rnd 3: [Sc 1, inc] x 6. (18)
Rnd 4: [Sc 2, inc] x 6. (24)
Rnd 5: Sc in each st around. (24)
Rnd 6: Sc in each st around. (24)
Switch to Color B.
Rnd 7 (Color B): Sc in each st around. (24)
Rnd 8 (Color B): Sc in each st around. (24)
Switch to Color A.
Rnd 9 (Color A): [Sc 2, dec] x 6. (18)
Rnd 10: [Sc 1, dec] x 6. (12)
Stuff lightly. Flippers should be slightly flattened, not fully round like a ball.
Rnd 11: Dec x 6. (6)
Fasten off, leaving a 14 inch tail. Thread tail through remaining 6 stitches, pull tight, secure, and leave tail for seaming.
Checkpoint: Each flipper should measure approximately 1.75 inches in diameter and be noticeably flat like a small disk.
Assembly Instructions
Now comes the satisfying part. Putting your turtle together.
Step 1: Lay the body flat with the top side up. Find the Color B band at rounds 15 and 16. This is where the shell brim will attach.
Step 2: Pin the shell brim ring around the body at the Color B band level. Using your yarn needle and Color B yarn, whip stitch the bottom edge of the brim to the body, working through corresponding stitches all the way around.
Step 3: Place the shell top, open side down, onto the center top of the body. The shell should sit centered with the brim extending around the lower edge. Pin in place. Using the long tail from the shell, sew through the outer edge of the shell bottom and the top edge of the brim band, working around the entire circumference.
Step 4: Attach the head to the front of the body, centering it at approximately the front center. It should slightly overlap the lower edge of the shell brim. The brown band on the head should align visually with the brim. Sew using the tail, working through 10 to 12 stitches.
Step 5: Attach the two front flippers on either side of the head at the front left and front right positions. The flat face of each flipper should face upward. The brown band should align with the brim band. Sew securely through 8 to 10 stitches.
Step 6: Attach the two rear flippers symmetrically at the back left and back right, slightly behind the midpoint of the body. Angle them slightly outward and backward. Sew securely through 8 to 10 stitches each.
Embroidery Details
These finishing touches bring your turtle’s personality to life.
Shell lines: Using Color B and your yarn needle, work 3 to 4 long straight stitches radiating from the center top of the shell outward toward the brim edge. These represent the scutes of a real turtle shell. Space them evenly.
Shell French knots: Scatter 10 to 14 French knots across the surface of the shell in Color B. Cluster a few near the shell lines and spread the rest irregularly. These are your chocolate chips.
Head freckles: Work 3 small French knots across the top of the head, between the eyes and the crown. Space them slightly irregularly.
Flipper freckles: Work 2 to 3 small French knots on the face of each flipper.
Smile: Work a small curved straight stitch below and between the safety eyes. Two or three stitches in a shallow arc create a gentle, sweet expression.
Size Customization Tips
Want a different size? Here’s how to adjust:
Smaller turtle (approximately 5 inches wide): Use fingering or sport weight yarn with a US B-1 / 2.25 mm or C-2 / 2.75 mm hook. Keep the same stitch counts. Use 9 mm safety eyes instead of 12 mm.
Larger turtle (approximately 9 to 10 inches wide): Use bulky weight yarn with a US J-10 / 6.0 mm hook. Use 15 mm safety eyes. You may need to add 2 to 3 additional plain rounds to the body for proper proportions.
Puffier flippers: Add one additional plain round between rounds 6 and 7 of the flipper. Stuff more firmly before closing.
Care Instructions
Hand wash your finished turtle in cool water with mild soap. Gently squeeze out excess water without wringing. Reshape while damp and lay flat on a clean towel to dry.
Do not place in a dryer. Heat may distort the shape or melt the safety eye backs.
Safety note: This toy is not recommended for children under 3 years due to safety eye hardware. For a child-safe version, substitute embroidered eyes worked in black yarn using satin stitch.
Finishing Touches
Once assembly is complete, weave in all remaining ends securely. Knot once inside the stuffed cavity before trimming. Pull your yarn needle and tail through the stuffing and out a different exit point, trim close to the surface, and the tail will retract invisibly inside.
If any seams look puckered, use a blunt needle to gently manipulate the stitches from the outside.
For a crisper shell edge, you can work one additional round of slip stitch around the bottom opening of the shell in Color B before assembly.
Thank you so much for making this mint chocolate chip turtle crochet pattern with me. I absolutely love how the color combination comes together, and I hope yours brings you just as much joy.
If you make this little guy, please save this page to your Pinterest boards so you can find it again later. And I’d love to see your finished turtles, so drop a comment below or tag me on Instagram or Facebook. Happy crocheting!
