
When I started designing this jellyfish trio, I had a clear vision in my head. I wanted something whimsical enough for a nursery mobile but sophisticated enough that adults would want them dangling in their craft rooms too. The challenge was creating three coordinating pieces that felt like a family while each having its own personality.
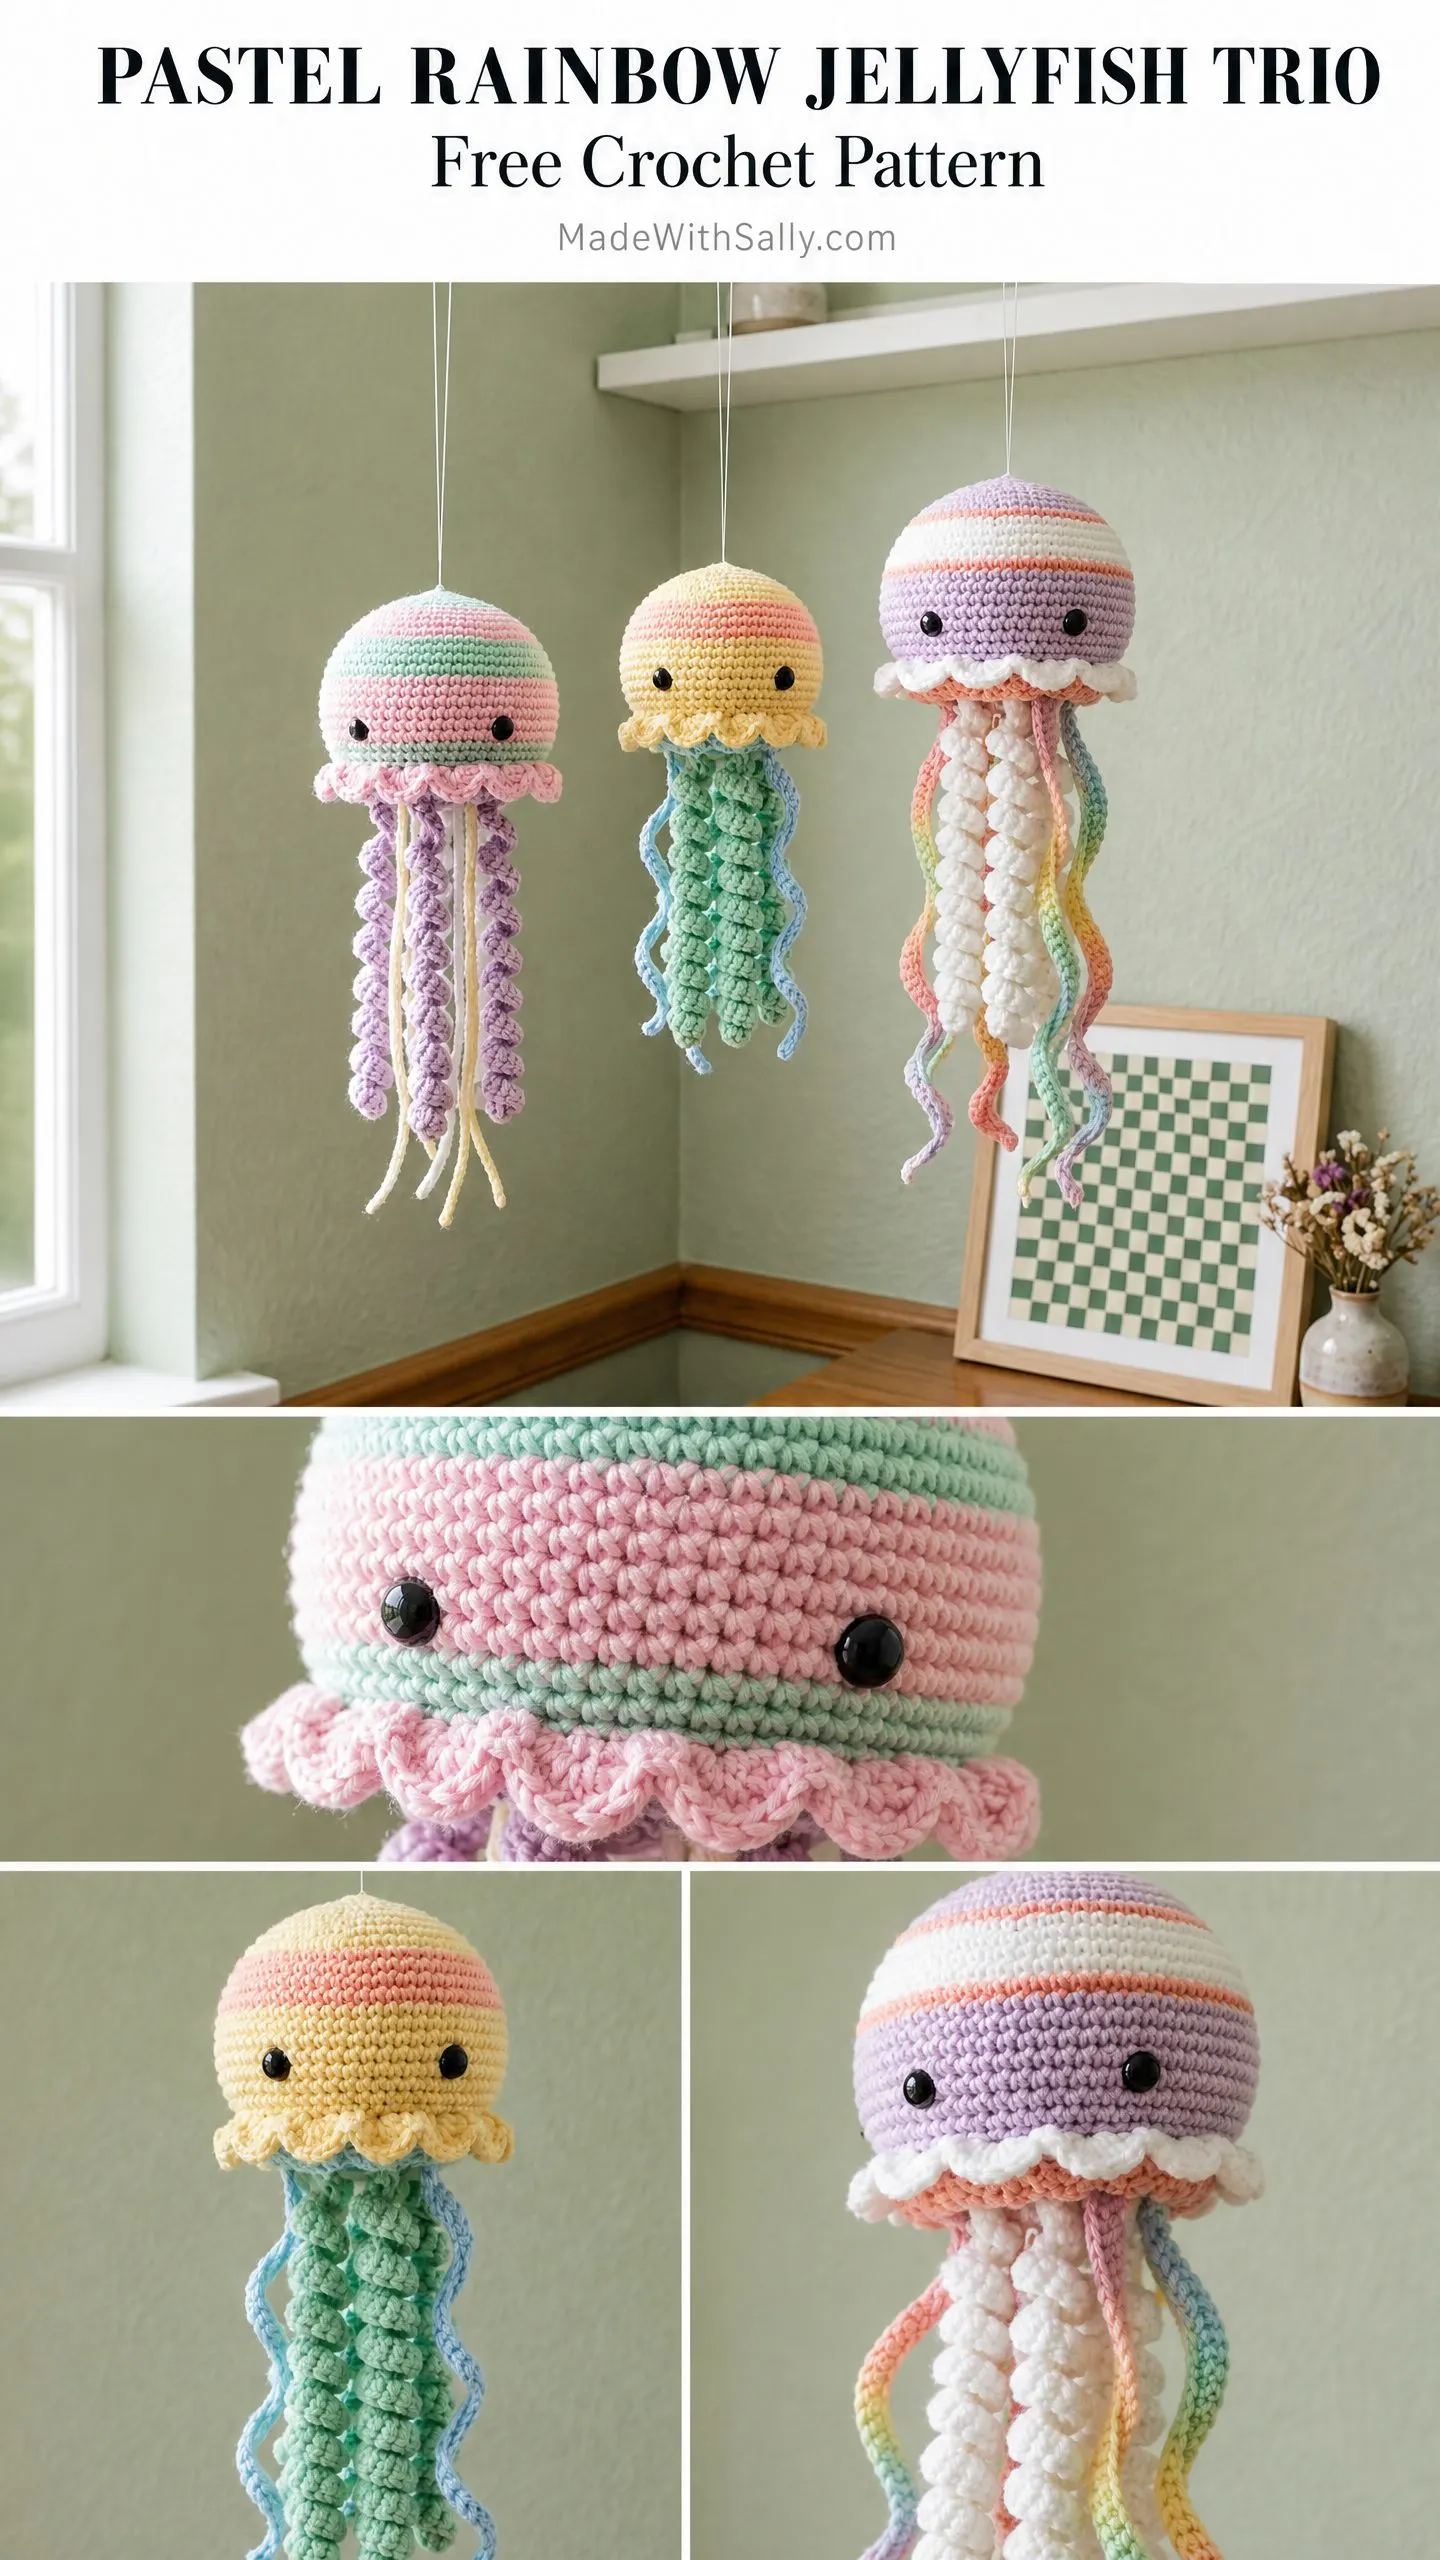
I spent weeks perfecting the tentacle textures. Those bobble chains? They needed to drape just right. The wavy spirals had to curl without looking messy. And the rainbow colorway on the largest jellyfish needed to feel magical without being overwhelming.
I am SO pleased with how these turned out. The kawaii faces, the pastel stripes, the way they gently spin when you hang them near a window. This pattern gives you everything you need to create all three jellyfish, and I cannot wait to see your versions.
About This Crochet Pattern
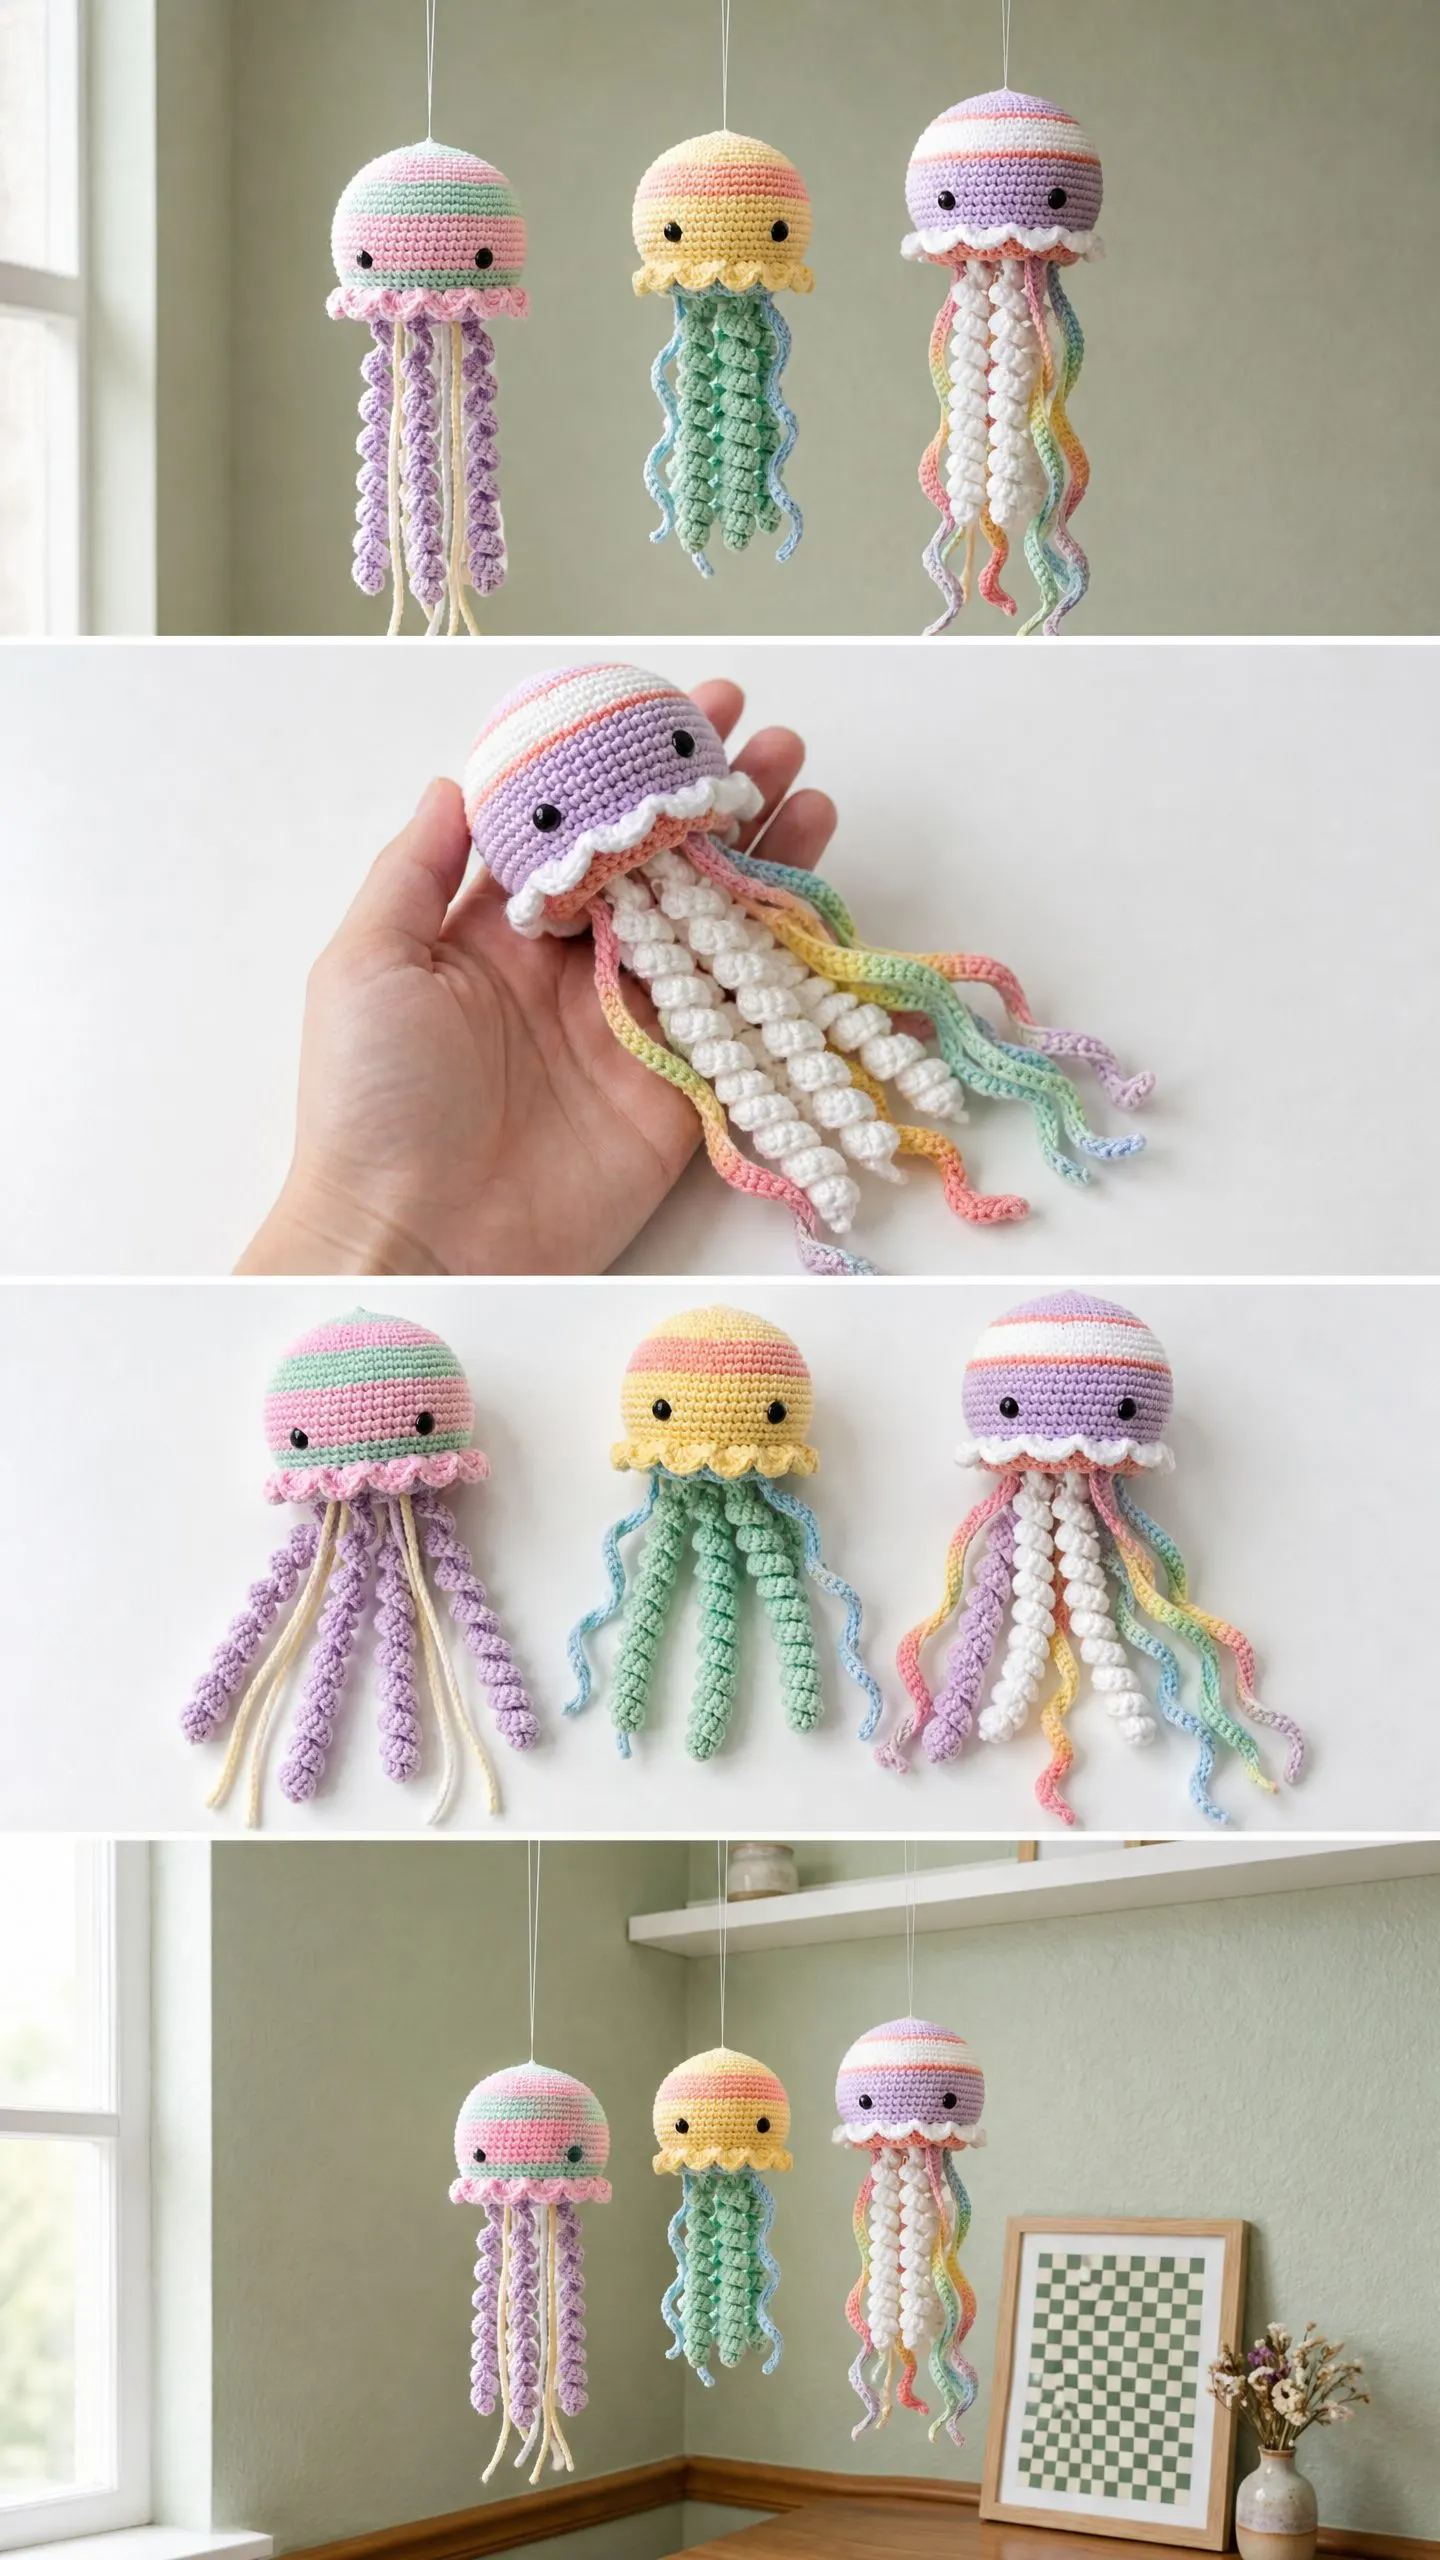
This amigurumi jellyfish pattern creates three hanging sea creatures in beautiful pastel colorways. You will make a pink and lavender jellyfish, a yellow and mint jellyfish, and a larger rainbow jellyfish with dramatic trailing tentacles.
Each jellyfish follows the same basic construction. You will work a domed bell from the top down in continuous rounds, add a frilly ruffle skirt at the base, then attach an assortment of textured tentacles. Safety eyes give them that adorable kawaii expression that makes these pieces so charming.
The finished small jellyfish measure approximately 3.5 inches (9 cm) across the bell and 9 inches (23 cm) from top to tentacle tips. The large rainbow jellyfish is more impressive at 4.5 inches (11.5 cm) across and 14 inches (35.5 cm) total length. Perfect sizes for a mobile, window display, or nursery decoration.
Skill Level
This crochet tutorial is written for intermediate crocheters. You should be comfortable working in continuous rounds, making invisible decreases, changing colors mid-round, and creating bobble stitches.
That said, if you are a confident beginner with a few amigurumi projects under your belt, you can absolutely tackle this. I have included detailed explanations of every special stitch. Take your time with the tentacle techniques, and you will be fine.
Time estimate: Each small jellyfish takes 3 to 5 hours. The large rainbow jellyfish takes 6 to 9 hours due to all those gorgeous tentacles.
Materials Needed
Yarn
You will need sport weight yarn (CYCA 2) in multiple pastel colors. Here is what each jellyfish requires:
Pink-Lavender Jellyfish:
Yellow-Mint Jellyfish:
Large Rainbow Jellyfish:
Yarn recommendations: Lion Brand Baby Soft Sport, Paintbox Yarns Simply DK (worked at tighter gauge), or WeCrochet Brava Sport all work beautifully. Avoid fuzzy yarns since they obscure the stitch definition in your bobbles and ruffles.
Hook
The smaller hook creates a tight fabric that holds stuffing securely without showing through.
Additional Supplies
Gauge
Small jellyfish: 6 single crochet (sc) = 1 inch (2.5 cm); 6 rounds = 1 inch (2.5 cm)
Large jellyfish: 5.5 sc = 1 inch (2.5 cm); 5.5 rounds = 1 inch (2.5 cm)
To check your gauge, work rounds 1 through 6 of the bell. At 36 stitches, your flat circle should measure approximately 2.5 inches (6.5 cm) for small jellyfish or 2.75 inches (7 cm) for the large version.
Gauge matters here. Too loose, and your stuffing will peek through. Too tight, and your jellyfish will be smaller than intended.
Abbreviations
Let me walk you through every stitch abbreviation you will encounter:
Special Stitches
Bobble Stitch (bob)
This creates those adorable bumpy tentacles. Here is exactly how to work it:
Yarn over, insert hook in stitch, yarn over, pull up a loop, yarn over, pull through 2 loops. You have made one incomplete double crochet (dc). Repeat this process 3 more times in the same stitch. You now have 5 loops on your hook. Yarn over and pull through all 5 loops at once. The bobble pops to the right side of your work.
Bobble Chain Tentacle
Chain 3. Work 1 bobble in the 3rd chain from hook. Chain 3, work 1 bobble in the 3rd chain from hook. Continue this sequence to create a beaded, bumpy tentacle. Each repeat adds approximately 0.35 inches (9 mm) of length.
Wavy Chain Tentacle
Chain to the length specified in the instructions. Working back along the chain, work 3 sc in each chain stitch. The excess stitches cause the tentacle to spiral and wave naturally. This is one of my favorite techniques because it looks so impressive but is genuinely simple.
Invisible Decrease
This makes your decreases nearly invisible on the outside of your work. Insert your hook through the front loop only of the next stitch. Without completing anything, also insert your hook through the front loop only of the following stitch. Now yarn over, pull through both front loops, yarn over, pull through both loops on hook. That counts as one stitch.
Step by Step Crochet Pattern
Section 1: Bell (All Three Jellyfish)
Use the C-2 hook for small jellyfish or D-3 hook for the large rainbow jellyfish. Start with Main Color A.
Round 1: MR, 6 sc in ring, pull ring closed. (6 sts)
Round 2: Inc in each st around. (12 sts)
Round 3: (Sc in next st, inc in next st) rep around. (18 sts)
Round 4: (Sc in next 2 sts, inc in next st) rep around. (24 sts)
Round 5: (Sc in next 3 sts, inc in next st) rep around. (30 sts)
Round 6: (Sc in next 4 sts, inc in next st) rep around. (36 sts)
Checkpoint: Your flat circle should measure approximately 2.5 inches (6.5 cm) for small jellyfish or 2.75 inches (7 cm) for the large version.
Round 7: (Sc in next 5 sts, inc in next st) rep around. (42 sts)
Round 8: (Sc in next 6 sts, inc in next st) rep around. (48 sts)
For large rainbow jellyfish only, add this round:
Round 9 (large only): (Sc in next 7 sts, inc in next st) rep around. (54 sts)
Stripe Section
Now comes the fun part. You will alternate colors every 2 rounds. Small jellyfish starts at Round 9 with 48 sts. Large jellyfish starts at Round 10 with 54 sts.
Round 9 (small) / Round 10 (large): SC-B. Sc in each st around. (48 sts) / (54 sts)
Round 10 (small) / Round 11 (large): SC-B. Sc in each st around. (48 sts) / (54 sts)
Round 11 (small) / Round 12 (large): MC-A. Sc in each st around. (48 sts) / (54 sts)
Round 12 (small) / Round 13 (large): MC-A. Sc in each st around. (48 sts) / (54 sts)
Round 13 (small) / Round 14 (large): SC-C. Sc in each st around. (48 sts) / (54 sts)
Round 14 (small) / Round 15 (large): SC-C. Sc in each st around. (48 sts) / (54 sts)
Round 15 (small) / Round 16 (large): MC-A. Sc in each st around. (48 sts) / (54 sts)
Round 16 (small) / Round 17 (large): MC-A. Sc in each st around. (48 sts) / (54 sts)
Bell Base Section
Switch to BC-D (lavender for pink-lavender and rainbow jellyfish; soft yellow for yellow-mint jellyfish).
Rounds 17-20 (small) / Rounds 18-21 (large): BC-D. Sc in each st around. (48 sts) / (54 sts)
Work 4 rounds total in BC-D.
Round 21 (small) / Round 22 (large): BC-D. Working in BLO, sc in each st around. (48 sts) / (54 sts)
Mark this round. You will return here to attach the ruffle.
Insert Safety Eyes
Place your safety eyes between rounds 17 and 18 (small) or rounds 18 and 19 (large). Space them approximately 8 to 10 stitches apart, centered on what will be the front of your jellyfish.
Base Closing Rounds
Continue with BC-D.
Round 22 (small) / Round 23 (large): (Sc in next 6 sts, dec) rep around. (42 sts) / For large: (Sc in next 7 sts, dec) rep around. (48 sts)
Round 23 (small) / Round 24 (large): (Sc in next 5 sts, dec) rep around. (36 sts) / (42 sts)
Stuff your bell firmly now. The dome should hold its shape but not stretch the fabric.
Round 24 (small) / Round 25 (large): (Sc in next 4 sts, dec) rep around. (30 sts) / (36 sts)
Round 25 (small) / Round 26 (large): (Sc in next 3 sts, dec) rep around. (24 sts) / (30 sts)
Round 26 (small) / Round 27 (large): (Sc in next 2 sts, dec) rep around. (18 sts) / (24 sts)
Add any final stuffing needed now.
Round 27 (small) / Round 28 (large): (Sc in next st, dec) rep around. (12 sts) / (18 sts)
Round 28 (small) / Round 29 (large): Dec around. (6 sts) / (12 sts)
For large jellyfish only:
Round 30 (large): Dec around. (6 sts)
Fasten off, leaving a 10 inch (25 cm) tail. Thread tail through remaining stitches, pull tight to close, and weave in securely.
Section 2: Ruffle Skirt
Return to the marked BLO round. Join RF-E with a sl st in any front loop.
Ruffle Round 1: Ch 2 (does not count as st). Work 3 dc in each front loop around. Join with sl st to first dc. (144 dc for small / 162 dc for large)
Fasten off. The ruffle will naturally fan out around the bell base.
Section 3: Tentacles
Here is where each jellyfish gets its personality.
Pink-Lavender Jellyfish Tentacles:
Make 6 bobble chain tentacles in lavender: Ch 3, bob in 3rd ch from hook, (ch 3, bob in 3rd ch from hook) 14 times total. Fasten off with 6 inch tail.
Make 3 straight strand tentacles in cream: Ch 50. Fasten off with 6 inch tail.
Yellow-Mint Jellyfish Tentacles:
Make 6 wavy chain tentacles in mint: Ch 30, work 3 sc in each ch back across (90 sc). Fasten off with 6 inch tail.
Make 2 wavy chain tentacles in sky blue: Ch 30, work 3 sc in each ch back across (90 sc). Fasten off with 6 inch tail.
Large Rainbow Jellyfish Tentacles:
Make 4 long bobble chain tentacles in white/cream: Ch 3, bob in 3rd ch from hook, (ch 3, bob in 3rd ch from hook) 22 times total.
Make 4 rainbow wavy tentacles (long): Ch 40, work 3 sc in each ch back across (120 sc).
Make 4 rainbow strand tentacles: Ch 60. Fasten off.
Make 4 rainbow wavy tentacles (short): Ch 25, work 3 sc in each ch back across (75 sc).
Attaching Tentacles
Use your yarn needle to thread tentacle tails through the closed base of your bell. Tie secure knots on the inside and trim tails to 0.25 inch (0.6 cm).
Spread tentacles across the lower portion of the base rather than bunching them all at the center. For the rainbow jellyfish, layer them with white bobbles at center, then shorter wavy tentacles, then longer wavy ones, then straight strands at the outer edge.
Section 4: Hanging Loop
Cut a 12 inch (30 cm) length of thin string. Thread both ends through a yarn needle, push through the top of the bell near the magic ring closure, then back out nearby. Tie at your desired hanging length.
Finishing Tips
Steam your ruffles. Hold a garment steamer about 2 inches away and gently shape the ruffle while warm. This helps it fan evenly.
Encourage tentacle curls. Lightly mist the wavy tentacles with water and let them dry while hanging.
Weave in ends carefully. Always weave ends to the inside of the bell through several stitches in different directions before trimming.
Care Instructions
Hand wash gently in cool water with mild soap. Do not wring. Reshape while wet and hang to dry so tentacles maintain their drape. Keep out of direct sunlight to prevent color fading.
Safety note: These jellyfish contain small parts and are decorative pieces, not toys for young children. If making for babies, embroider the eyes instead of using safety eyes.
I hope you love making these jellyfish as much as I loved designing them. If this pattern brings a little pastel magic to your crafting time, please save it to your Pinterest boards so you can find it again later. And if you make one (or all three!), I would absolutely love to see your finished jellies in the comments below.
