
I don’t know about you, but I’ve been dreaming about a handmade summer set that actually looks like something you’d find in a boutique. All the charm of crochet with none of the "homemade swimwear" awkwardness.
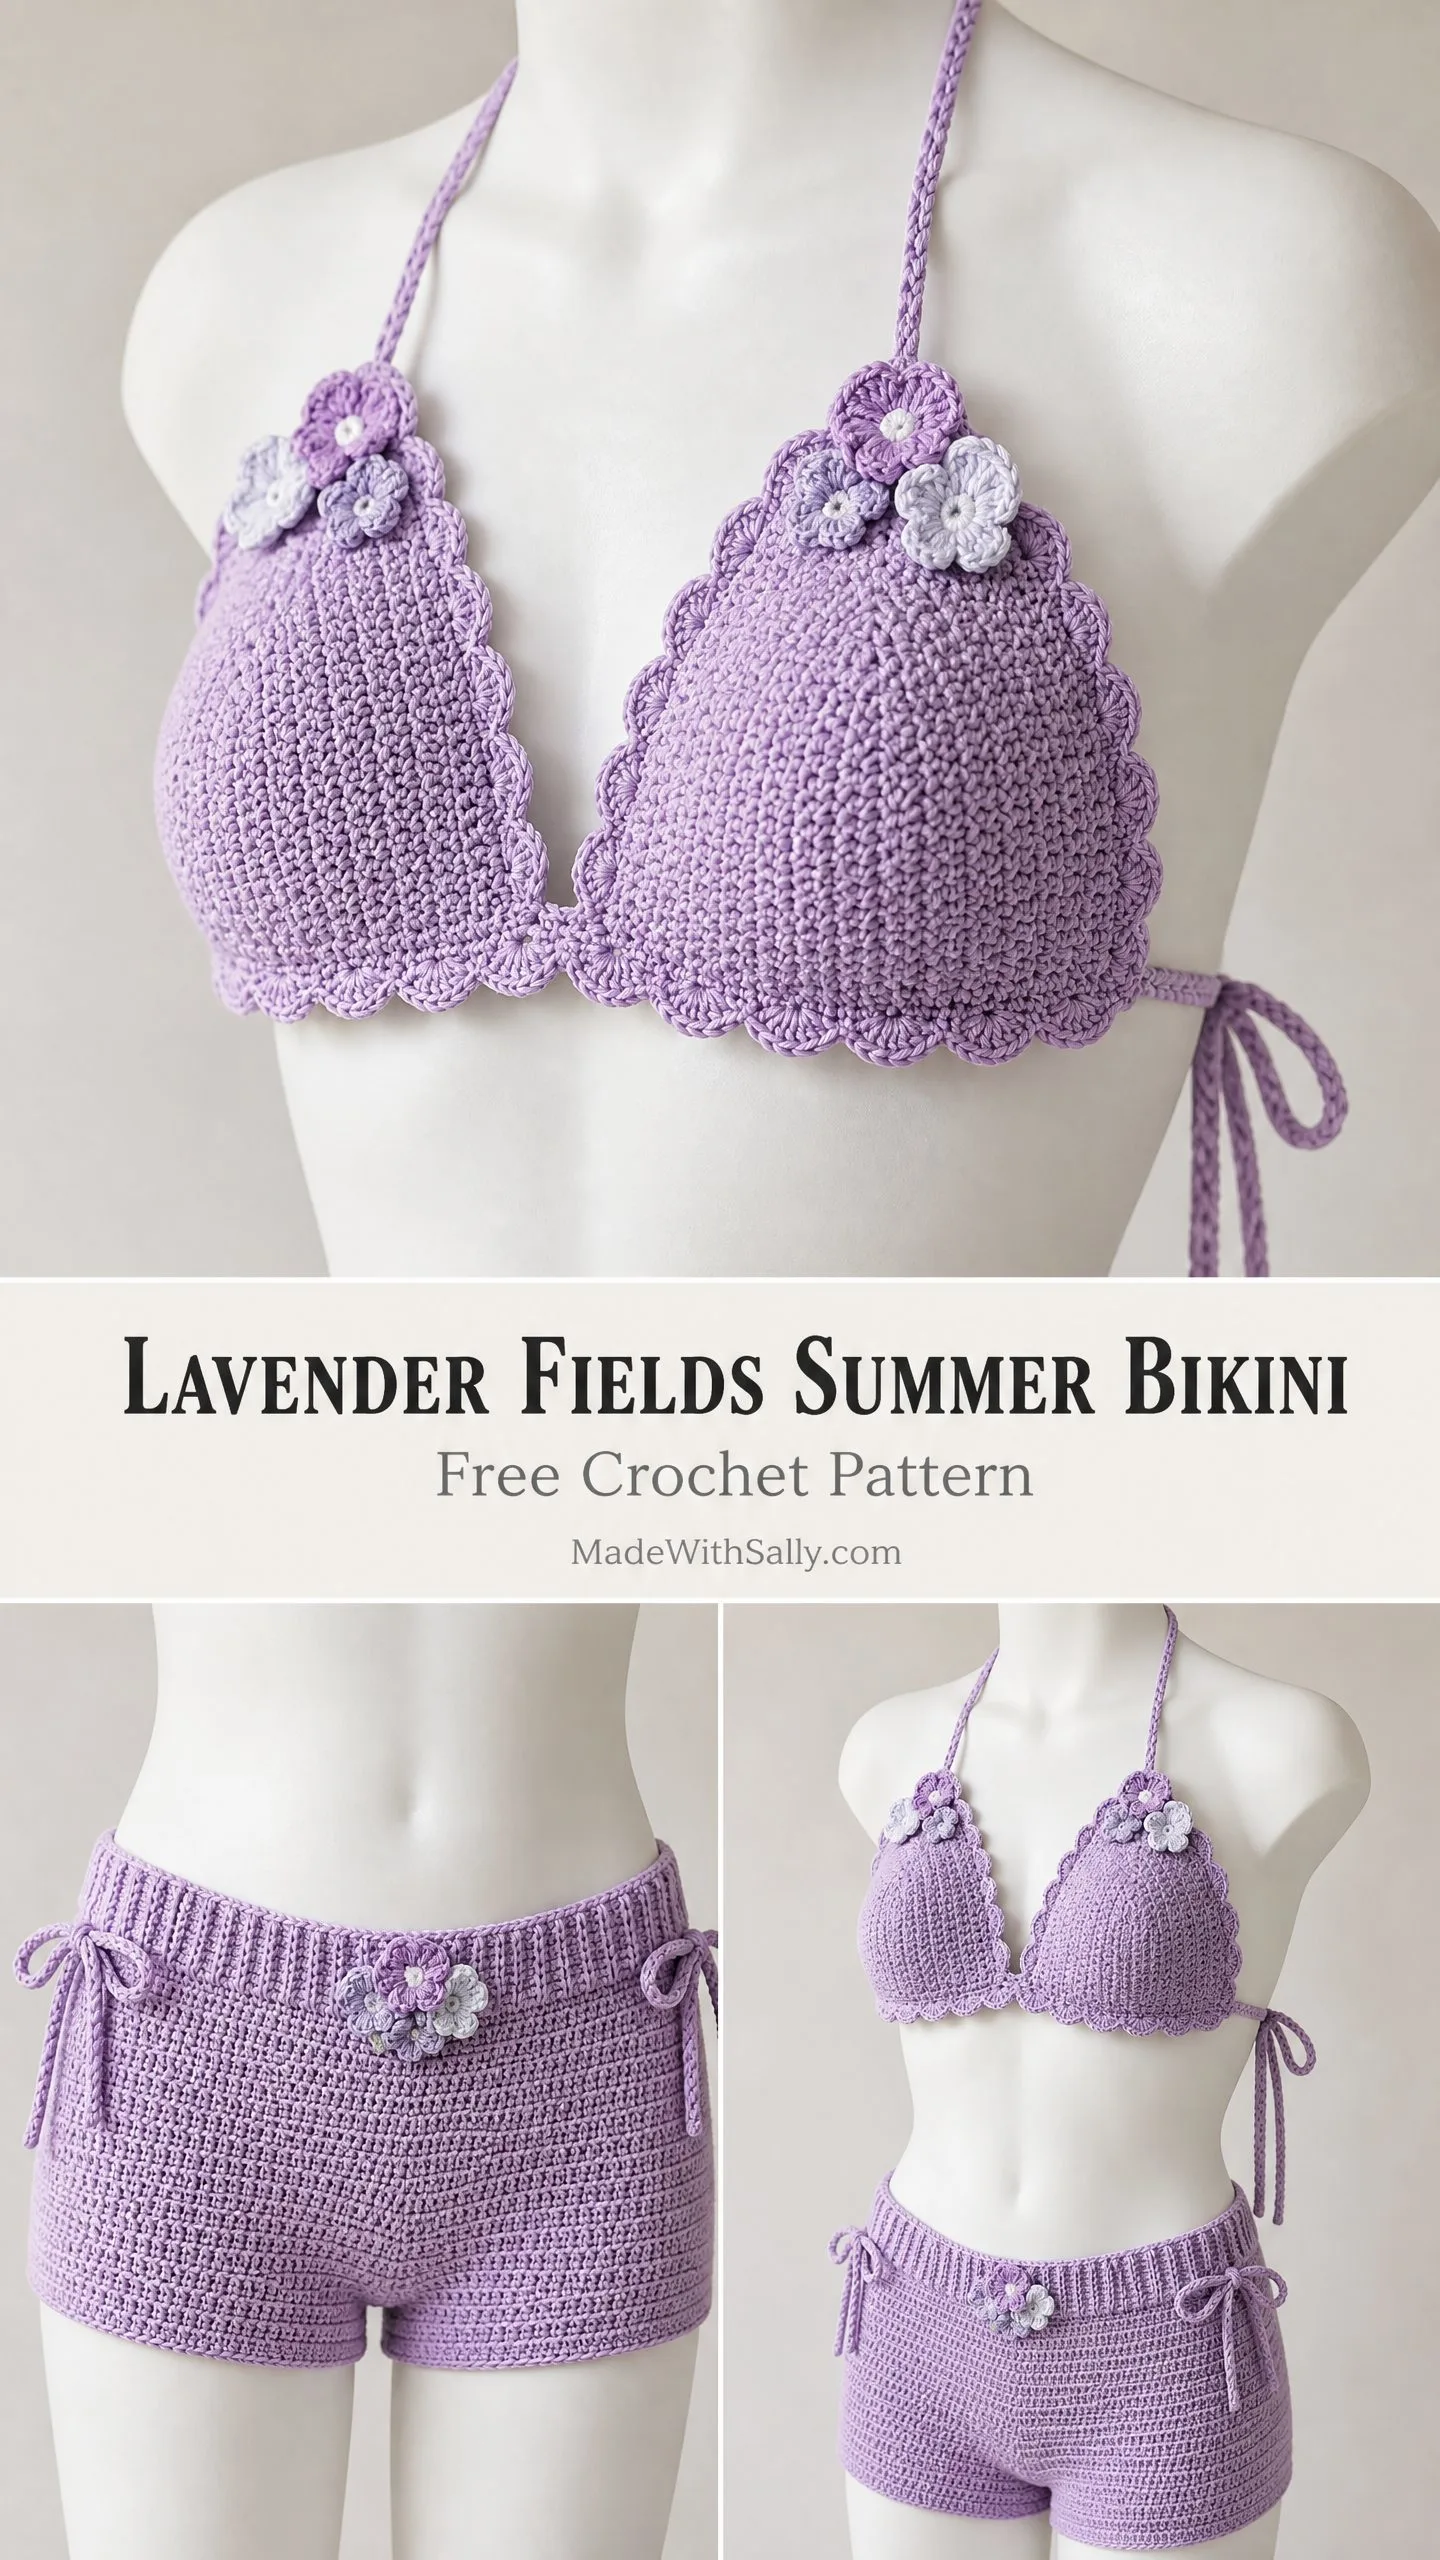
This Lavender Fields Summer Bikini is that dream brought to life. We’re talking triangle cups with the prettiest scalloped edges, tiny layered flower appliques, and boy-short style bottoms with a ribbed waistband that actually stays put. The whole thing ties together with crocheted cords that look polished and intentional.
Whether you’re wearing this poolside, at the beach, or just for those perfect summer photos, this set delivers. Let me walk you through everything you need to make your own.
What You’re Making
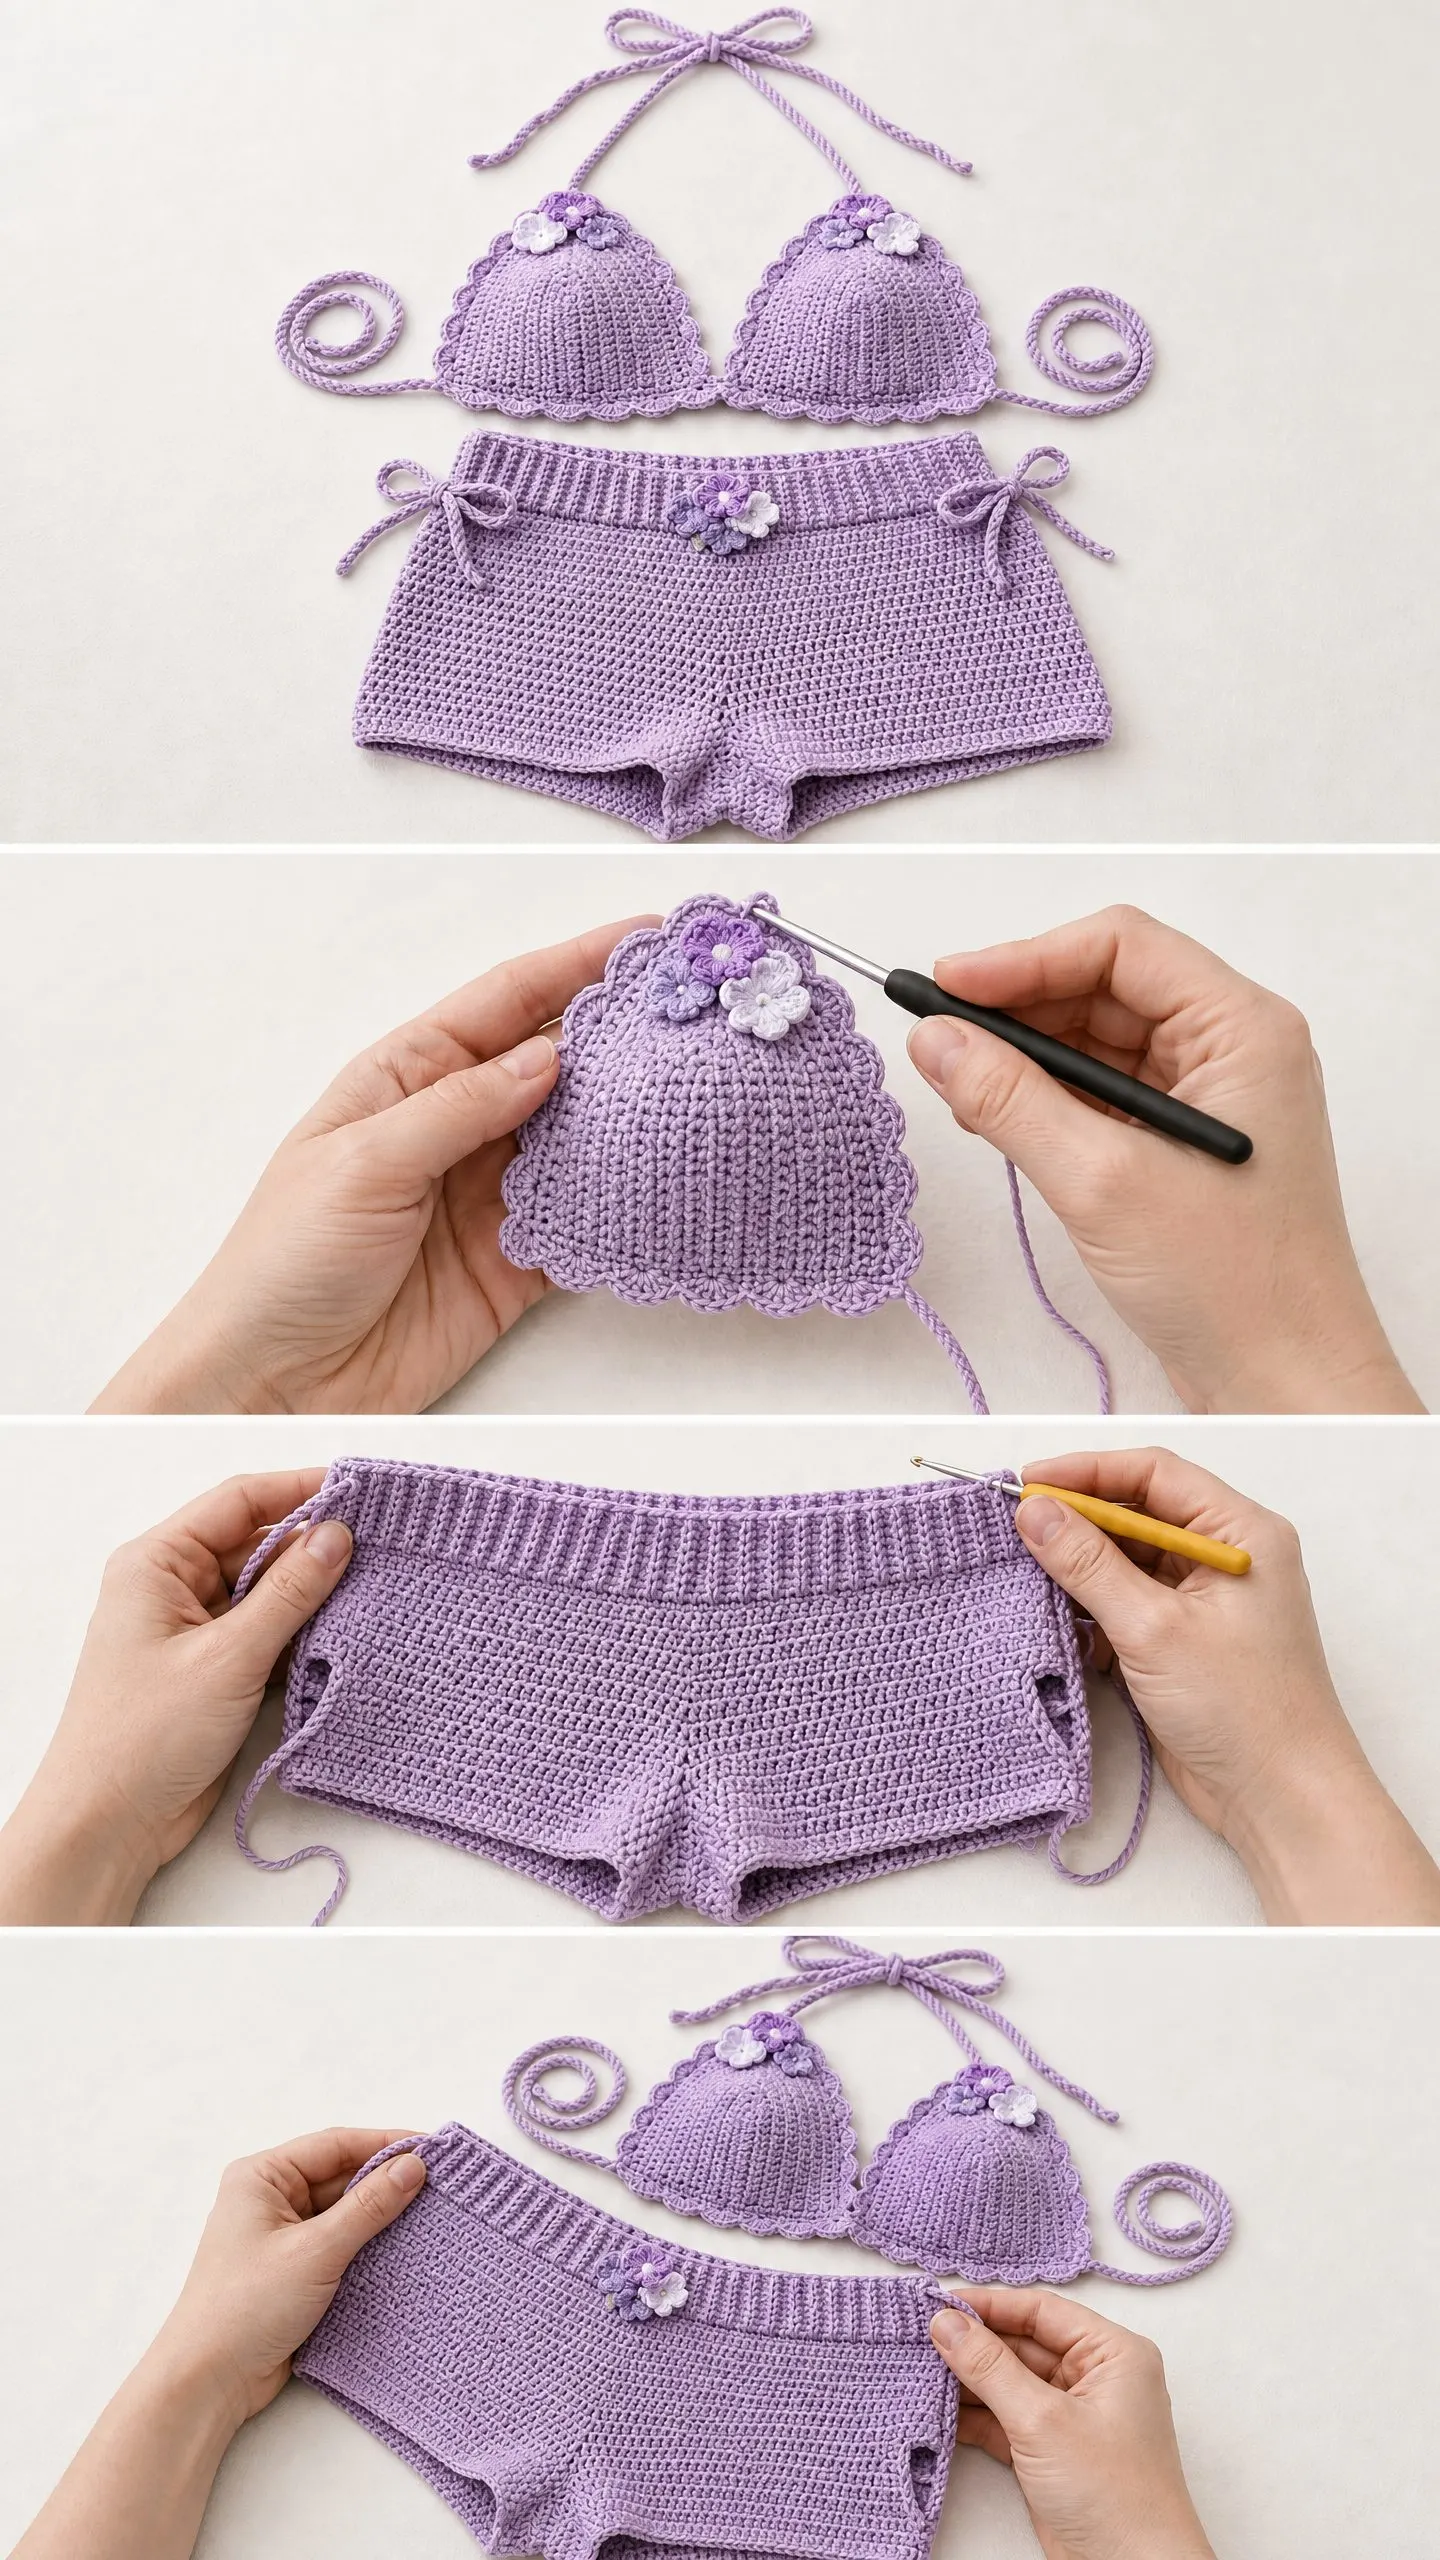
This two-piece summer set includes a halter-style triangle bikini top and matching boy-short bottoms. The top features two triangle cups worked with increases to create that classic bikini shape. Each cup gets finished with a shell stitch scallop edging along the outer edges. The whole look comes together with crocheted cord ties at the neck and band.
The bottoms start with a stretchy front loop only ribbed waistband, then the body works downward in joined rounds. You’ll shape the crotch area by dividing into front and back panels, decreasing at the edges, then rejoining for the leg openings. Side ties at the waistband add adjustability and that signature cute factor.
The finishing touch? Five small layered flower appliques in contrasting purples and whites scattered across both pieces.
Skill Level
This pattern sits at an intermediate level. You should feel comfortable working in rows and rounds, increasing and decreasing for shaping, working into the front loop only for that ribbing texture, making a magic ring, joining rounds, and working a shell stitch edging.
Don’t let the skill level scare you though. Every section builds on basic single crochet (sc), and I’ll explain each special technique as we go. The flower appliques are probably the fiddliest part since they’re tiny, but they’re also optional if you want to keep things simple.
Time Estimate
Here’s roughly what to expect:
Break this into sections across several evenings and it becomes a totally manageable project.
Finished Measurements
Top (one size, adjustable via tie length):
Bottoms (sized as written for US size Small to Medium):
I’ve included size customization tips later in the pattern if you need to go up or down.
Materials
Yarn:
Yarn Suggestions:
Choose a smooth, plied yarn with good stitch definition so your scallop edging and flowers show up clearly. Avoid fuzzy or heavily textured yarns. If you plan to actually swim in this, consider cotton or a cotton blend and go up one hook size since cotton tends to be heavier and denser.
Hooks:
Notions:
Gauge
With G-6 (4.0 mm) hook and worsted weight yarn in single crochet:
Gauge swatch: Chain 20. Work single crochet back and forth for 22 rows. Block lightly. Measure the center 16 stitches across and center 18 rows vertically. Adjust hook size as needed.
Gauge matters a lot for the bottoms to fit correctly at the waist and hip. Please don’t skip this step.
Abbreviations
Let me break down every abbreviation you’ll see. I’ll give you the full name, the short version, and what it actually means.
Special Stitches and Techniques
Shell Stitch
Work 5 dc all into the same stitch or space. This creates one shell. When working the edging, shells are separated by skip 1, sc 1 to create the scalloped effect.
Scallop Edging
This is what gives the cups that beautiful wavy edge.
1. Join yarn at the starting corner of the edge to be worked.
2. Ch 1. Work 1 sc into the first stitch.
3. Skip 1 stitch.
4. Work 5 dc (one shell) into the next stitch.
5. Skip 1 stitch.
6. Work 1 sc into the next stitch.
7. Repeat steps 3 through 6 across until all stitches are worked, ending with 1 sc.
8. Fasten off.
The stitch count of the edge being scalloped must be a multiple of 4 plus 1 (like 17, 21, 25, 29) for this edging to begin and end with a sc. The shaping rows are planned to meet this requirement.
Crocheted Cord / Chain Tie
1. Make a slip knot and place on hook.
2. Chain to desired length (keep each chain snug and even).
3. Slip stitch back through each chain from the end back toward the hook. This creates a firm round cord.
4. Alternatively, work a very tight chain-only cord by chaining to length without slip stitching back. The slip-stitched version is sturdier and recommended.
Small Flower Applique (Make 5 Total)
These layered flowers add the finishing charm. Each flower has two layers in contrasting colors.
Layer 1 (back petals, worked in medium purple):
1. Make a MR.
2. Ch 1. Work 6 sc into the ring. Pull ring closed. (6 sc)
3. Do not join. Working in a continuous spiral, work (ch 3, sl st into same st, sl st into next st) 6 times. (6 petals formed)
4. Fasten off leaving a tail for sewing.
Layer 2 (front petals, worked in pale white or very pale lavender):
1. Make a MR.
2. Ch 1. Work 5 sc into the ring. Pull ring closed. (5 sc)
3. Work (ch 2, sl st into same st, sl st into next st) 5 times. (5 smaller petals formed)
4. Fasten off leaving a tail for sewing.
Assembly: Layer the small white flower on top of the large purple flower, offset slightly so petals interleave. Use yarn needle to sew the layers together through the center. Sew the assembled flower to the garment.
Pattern Notes Before You Begin
1. The top cups are each worked separately in rows. The two cups are then joined at the center front.
2. The neck ties and band ties are made separately as crocheted cords and attached.
3. The bottoms are worked in joined rounds. The waistband is worked first in ribbing, seamed, then attached to the body which works downward.
4. Ch 1 at the beginning of sc rows does NOT count as a stitch in this pattern.
5. When joining new yarn, always join with a sl st into the first stitch and ch 1 before beginning.
6. Stitch markers are essential for the bottoms. Mark the first stitch of each round.
Bikini Top Instructions
Triangle Cups (Make 2)
The cup is worked in rows from the base upward. Increases at each edge create the triangular shape.
With G-6 hook and main color, begin.
Foundation: Ch 4.
Row 1 (RS): Sc in 2nd ch from hook, sc in next 2 ch. Turn. (3 sc)
Row 2 (WS): Ch 1, inc in first st, sc to last st, inc in last st. Turn. (5 sc)
Row 3 (RS): Ch 1, inc in first st, sc to last st, inc in last st. Turn. (7 sc)
Row 4 (WS): Ch 1, inc in first st, sc to last st, inc in last st. Turn. (9 sc)
Row 5 (RS): Ch 1, inc in first st, sc to last st, inc in last st. Turn. (11 sc)
Row 6 (WS): Ch 1, inc in first st, sc to last st, inc in last st. Turn. (13 sc)
Row 7 (RS): Ch 1, inc in first st, sc to last st, inc in last st. Turn. (15 sc)
Row 8 (WS): Ch 1, inc in first st, sc to last st, inc in last st. Turn. (17 sc)
Row 9 (RS): Ch 1, inc in first st, sc to last st, inc in last st. Turn. (19 sc)
Row 10 (WS): Ch 1, inc in first st, sc to last st, inc in last st. Turn. (21 sc)
Row 11 (RS): Ch 1, inc in first st, sc to last st, inc in last st. Turn. (23 sc)
Row 12 (WS): Ch 1, inc in first st, sc to last st, inc in last st. Turn. (25 sc)
Row 13 (RS): Ch 1, inc in first st, sc to last st, inc in last st. Turn. (27 sc)
Row 14 (WS): Ch 1, inc in first st, sc to last st, inc in last st. Turn. (29 sc)
Row 15 (RS): Ch 1, inc in first st, sc to last st, inc in last st. Turn. (31 sc)
Row 16 (WS): Ch 1, sc across all sts evenly. Turn. (31 sc)
After Row 16, each cup should measure approximately 4.5 inches tall and 7.75 inches wide at the base. Set aside and make the second cup the same way.
Joining the Cups
Hold both cups with RS facing you. The two cups are joined along their inner vertical edges.
1. Identify the inner edge of each cup. This is the straight vertical edge running from the tip to the band edge.
2. With main color and G-6 hook, join yarn at the bottom inner corner of the left cup.
3. Working through both layers at once (right sides facing each other), sl st through the edge rows of both cups together, working 1 sl st per row end. Work up from the band edge for approximately 8 row ends (halfway up) to create the center front join. (8 sl sts)
4. Fasten off and weave in end.
Alternatively, join with a whip stitch seam on the WS for a cleaner look.
Scallop Edging on Cups
The scallop edging goes along the two diagonal outer edges of each cup (the top slanted sides of each triangle). The base edges stay plain.
Each outer diagonal edge has 15 row ends. For the scallop edging, you need a multiple of 4 plus 1 stitches. Work 1 sc into each of the 15 row ends, but work 2 sc into row ends 4 and 12 to bring the count to 17.
Work the scallop edging across 17 sts. This produces 4 shells and 5 sc per outer edge.
For the top point of each cup: work 1 sc, then 5 dc into the very tip stitch, then 1 sc to round the apex.
Neck Ties (Make 2)
With G-6 hook and main color, ch 56 (approximately 14 inches).
Sl st back through each chain from the far end back toward the hook, working tightly and evenly. (56 sl sts)
Fasten off leaving an 8-inch tail for attaching.
Attach one cord to the top point (apex) of each cup using the yarn needle, threading the tail through the tip stitches twice and knotting securely on the WS.
Band Ties (Make 4)
With G-6 hook and main color, ch 72 (approximately 18 inches).
Sl st back tightly through each chain. (72 sl sts)
Fasten off leaving an 8-inch tail.
Attach one tie to each lower outer corner of each cup (4 corners total). When worn, the two ties from each side tie together at the sides or back.
Boy-Short Bottoms Instructions
Ribbed Waistband
With G-6 hook and main color, ch 13.
Row 1: Sc in 2nd ch from hook, sc in each ch across. Turn. (12 sc)
Row 2: Ch 1, sc in FLO of each st across. Turn. (12 sc)
Repeat Row 2 until the waistband strip measures 26 inches (66 cm) long, approximately 117 rows total.
Seam the waistband into a tube: fold the strip so the two short ends meet. Sl st or whip stitch the ends together. This seam sits at center back.
Waistband Top Edging
With RS of waistband tube facing, join main color at the back seam at the top long edge.
Rnd 1: Ch 1, sc evenly around the top edge, working 1 sc per row end. Work 116 sc evenly by skipping 1 row end at the back seam area. Sl st to first sc to join. (116 sc)
Fasten off.
Body Worked from Waistband Bottom
Turn the waistband tube so the unworked long edge faces up.
Join main color at the back seam at the bottom edge of the waistband.
Rnd 1: Ch 1, sc evenly around the bottom edge, 1 sc per row end. Work 116 sc evenly. Sl st to first sc to join. (116 sc)
Rnds 2 through 16: Ch 1, sc in each st around. Sl st to first sc to join. (116 sc per round)
Crotch Shaping
Mark stitch 1 (center back) and stitch 59 (center front). This divides the round into two halves of 58 stitches each.
FRONT PANEL (58 sts):
Row 1 (RS): Join yarn at stitch 59. Ch 1, sc in each of the 58 front sts. Turn. (58 sc)
Row 2 (WS): Ch 1, dec, sc to last 2 sts, dec. Turn. (56 sc)
Row 3 (RS): Ch 1, dec, sc to last 2 sts, dec. Turn. (54 sc)
Row 4 (WS): Ch 1, dec, sc to last 2 sts, dec. Turn. (52 sc)
Row 5 (RS): Ch 1, dec, sc to last 2 sts, dec. Turn. (50 sc)
Row 6 (WS): Ch 1, dec, sc to last 2 sts, dec. Turn. (48 sc)
Row 7 (RS): Ch 1, dec, sc to last 2 sts, dec. Turn. (46 sc)
Row 8 (WS): Ch 1, dec, sc to last 2 sts, dec. Turn. (44 sc)
Row 9 (RS): Ch 1, dec, sc to last 2 sts, dec. Turn. (42 sc)
Fasten off and leave a tail.
BACK PANEL (58 sts):
Join yarn at stitch 1.
Row 1 (RS): Ch 1, sc in each of the 58 back sts. Turn. (58 sc)
Rows 2 through 9: Work exactly as for the front panel, decreasing 2 sts each row until you have 42 sc.
Do not fasten off.
Rejoining for Leg Openings
1. With yarn still attached after the last back panel row, fold the piece so front and back crotch edges align.
2. Sl st through the first st of front panel and first st of back panel together. (Right side seam)
3. Continue sc across the remaining front panel sts. (41 sc across front)
4. At the left edge, sl st through the last front panel st and last back panel st together. (Left side seam)
5. Continue sc across the remaining back panel sts. (41 sc across back)
6. Sl st to the first sl st join to close the round. (84 sc)
Rnd 1 post-join: Ch 1, sc in each st around, working sc into each join sl st. Sl st to first sc to join. (84 sc)
Rnd 2: Ch 1, sc in each st around. Sl st to first sc to join. (84 sc)
Leg Opening Edging
With F-5 hook and main color, work 1 round of sc around each leg opening.
Work sc evenly around each opening at approximately 1 sc per row end for the 9 shaping rows (9 sc), 1 sc through the join point, 9 sc along the other side, and 2 sc across the bottom inseam. Approximately 21 sc per leg opening. Adjust as needed.
Sl st to first sc to join. Fasten off. Repeat for second leg opening.
Side Ties for Bottoms (Make 4)
With G-6 hook and main color, ch 32. Sl st back through each ch. (32 sl sts, approximately 8-inch cord)
Attach one pair to each side of the waistband at the midpoint between center front and center back.
Flower Placement
Sew your 5 completed flowers in these positions:
Adjust placement to your preference.
Size Customization Tips
Cup size: For smaller cups (A/B), stop at Row 12. For larger cups (C/D), continue through Row 18 to 20.
Waistband: Work the strip to 2 inches less than your actual waist measurement for a snug fit, or 4 to 6 inches less if you want the ties to do the adjusting.
Hip: Add or subtract 16 sc to the body round count for every 4 inches of difference needed.
Rise: Add or subtract body rounds in Section H. Each round adds approximately 0.22 inches of length.
Finishing and Blocking
1. Weave in all ends securely, running each tail through at least 1 inch of fabric in two directions.
2. Wet block both pieces in cool water for 10 to 15 minutes.
3. Gently squeeze out water without wringing. Roll in a towel.
4. Pin pieces flat on a blocking board. Shape cups into rounded triangles. Pin scallop shells open. Allow to dry completely (24 hours minimum).
5. Sew flowers in final positions after blocking.
Care Instructions
Machine wash gentle cycle in cool water for acrylic yarn. Hand wash cotton blends. No bleach or fabric softener. Roll in towel to remove moisture. Lay flat to dry away from direct heat and sunlight. Do not tumble dry. Store folded, not hung.
You Did It!
Thank you so much for choosing this pattern for your summer crochet project. I genuinely hope you love making this set as much as I loved designing it. Those scalloped edges and tiny layered flowers really do make the whole piece feel special.
If you make one, I would absolutely love to see it! Tag me on Instagram or share a photo in my Facebook group. Seeing your finished projects is honestly one of my favorite parts of sharing patterns.
Save this Lavender Fields Summer Bikini pattern to your Pinterest boards so you can find it when you’re ready to cast on. And please drop a comment below if you give it a try. I read every single one and love hearing how your projects turn out!
