
Last fall, I pulled out my favorite hoodie only to discover it had shrunk in the wash. Not a little. A lot. I stood there holding this sad, misshapen thing and thought, "I could make something better." Something cozy but breathable. Something with that perfect cropped length that actually works with high-waisted pants. Something in those warm, earthy colors I keep gravitating toward every single autumn.
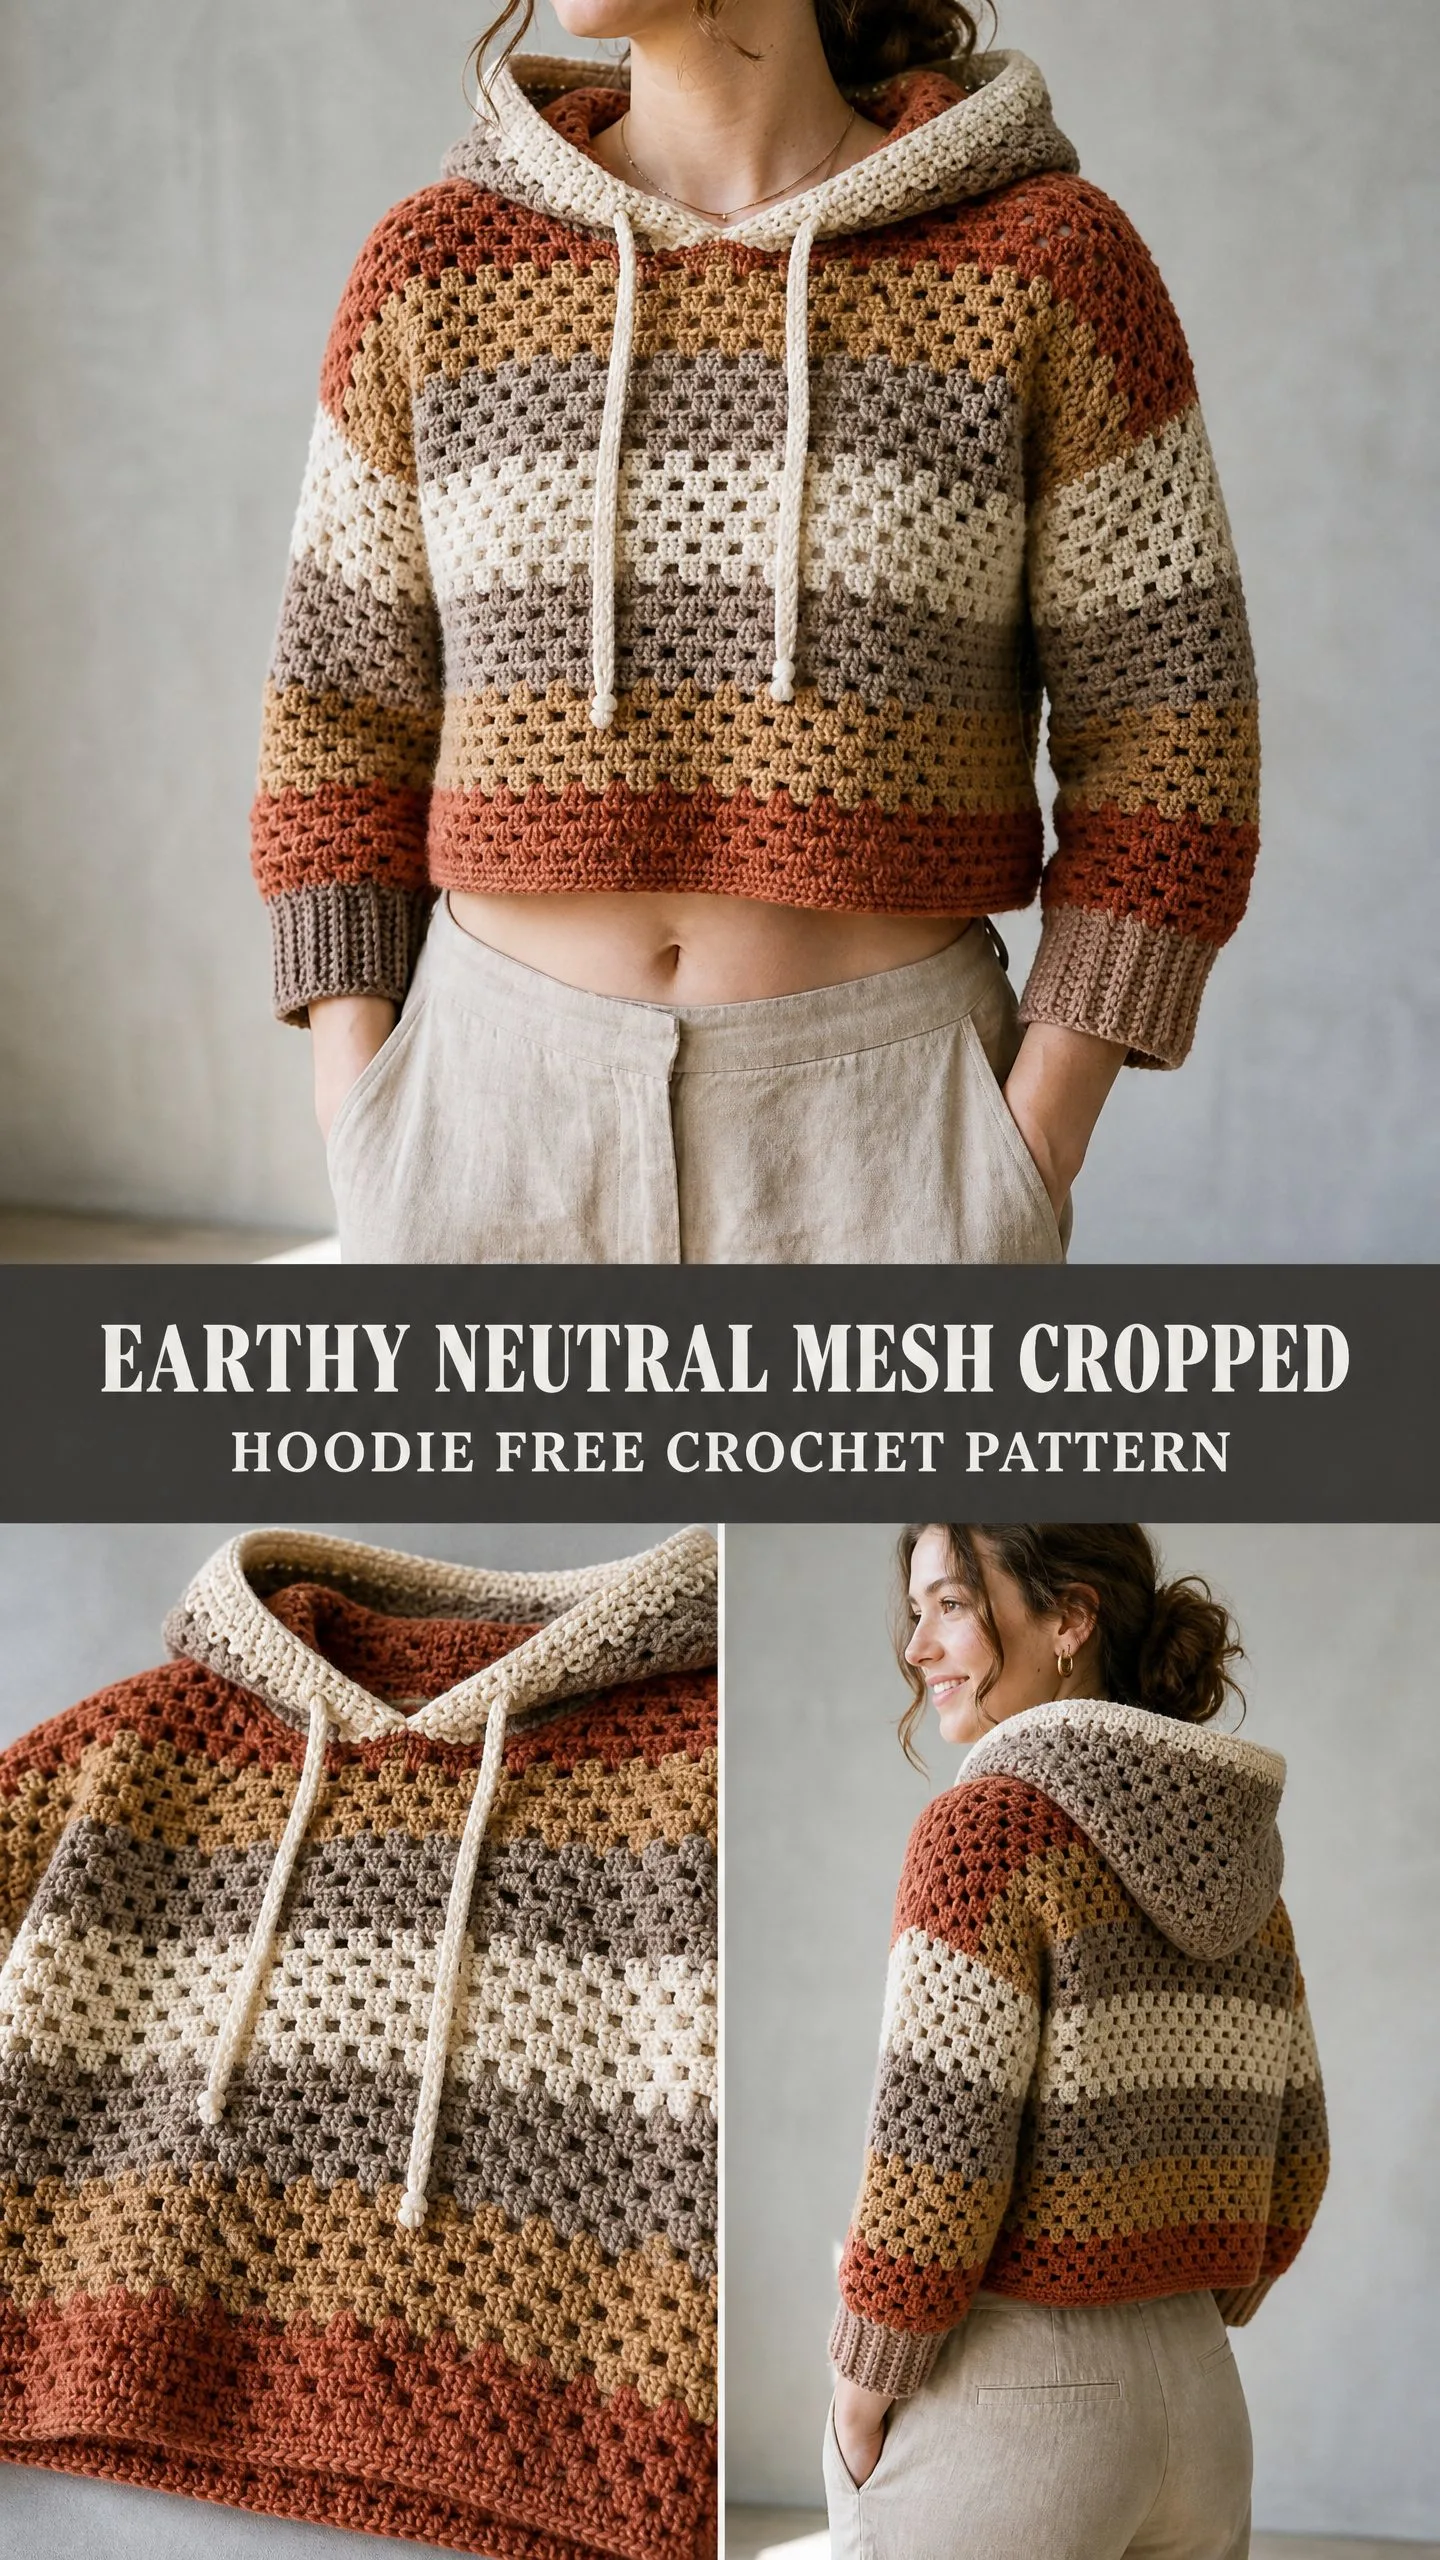
So I did. And honestly? This hoodie turned out even better than I imagined.
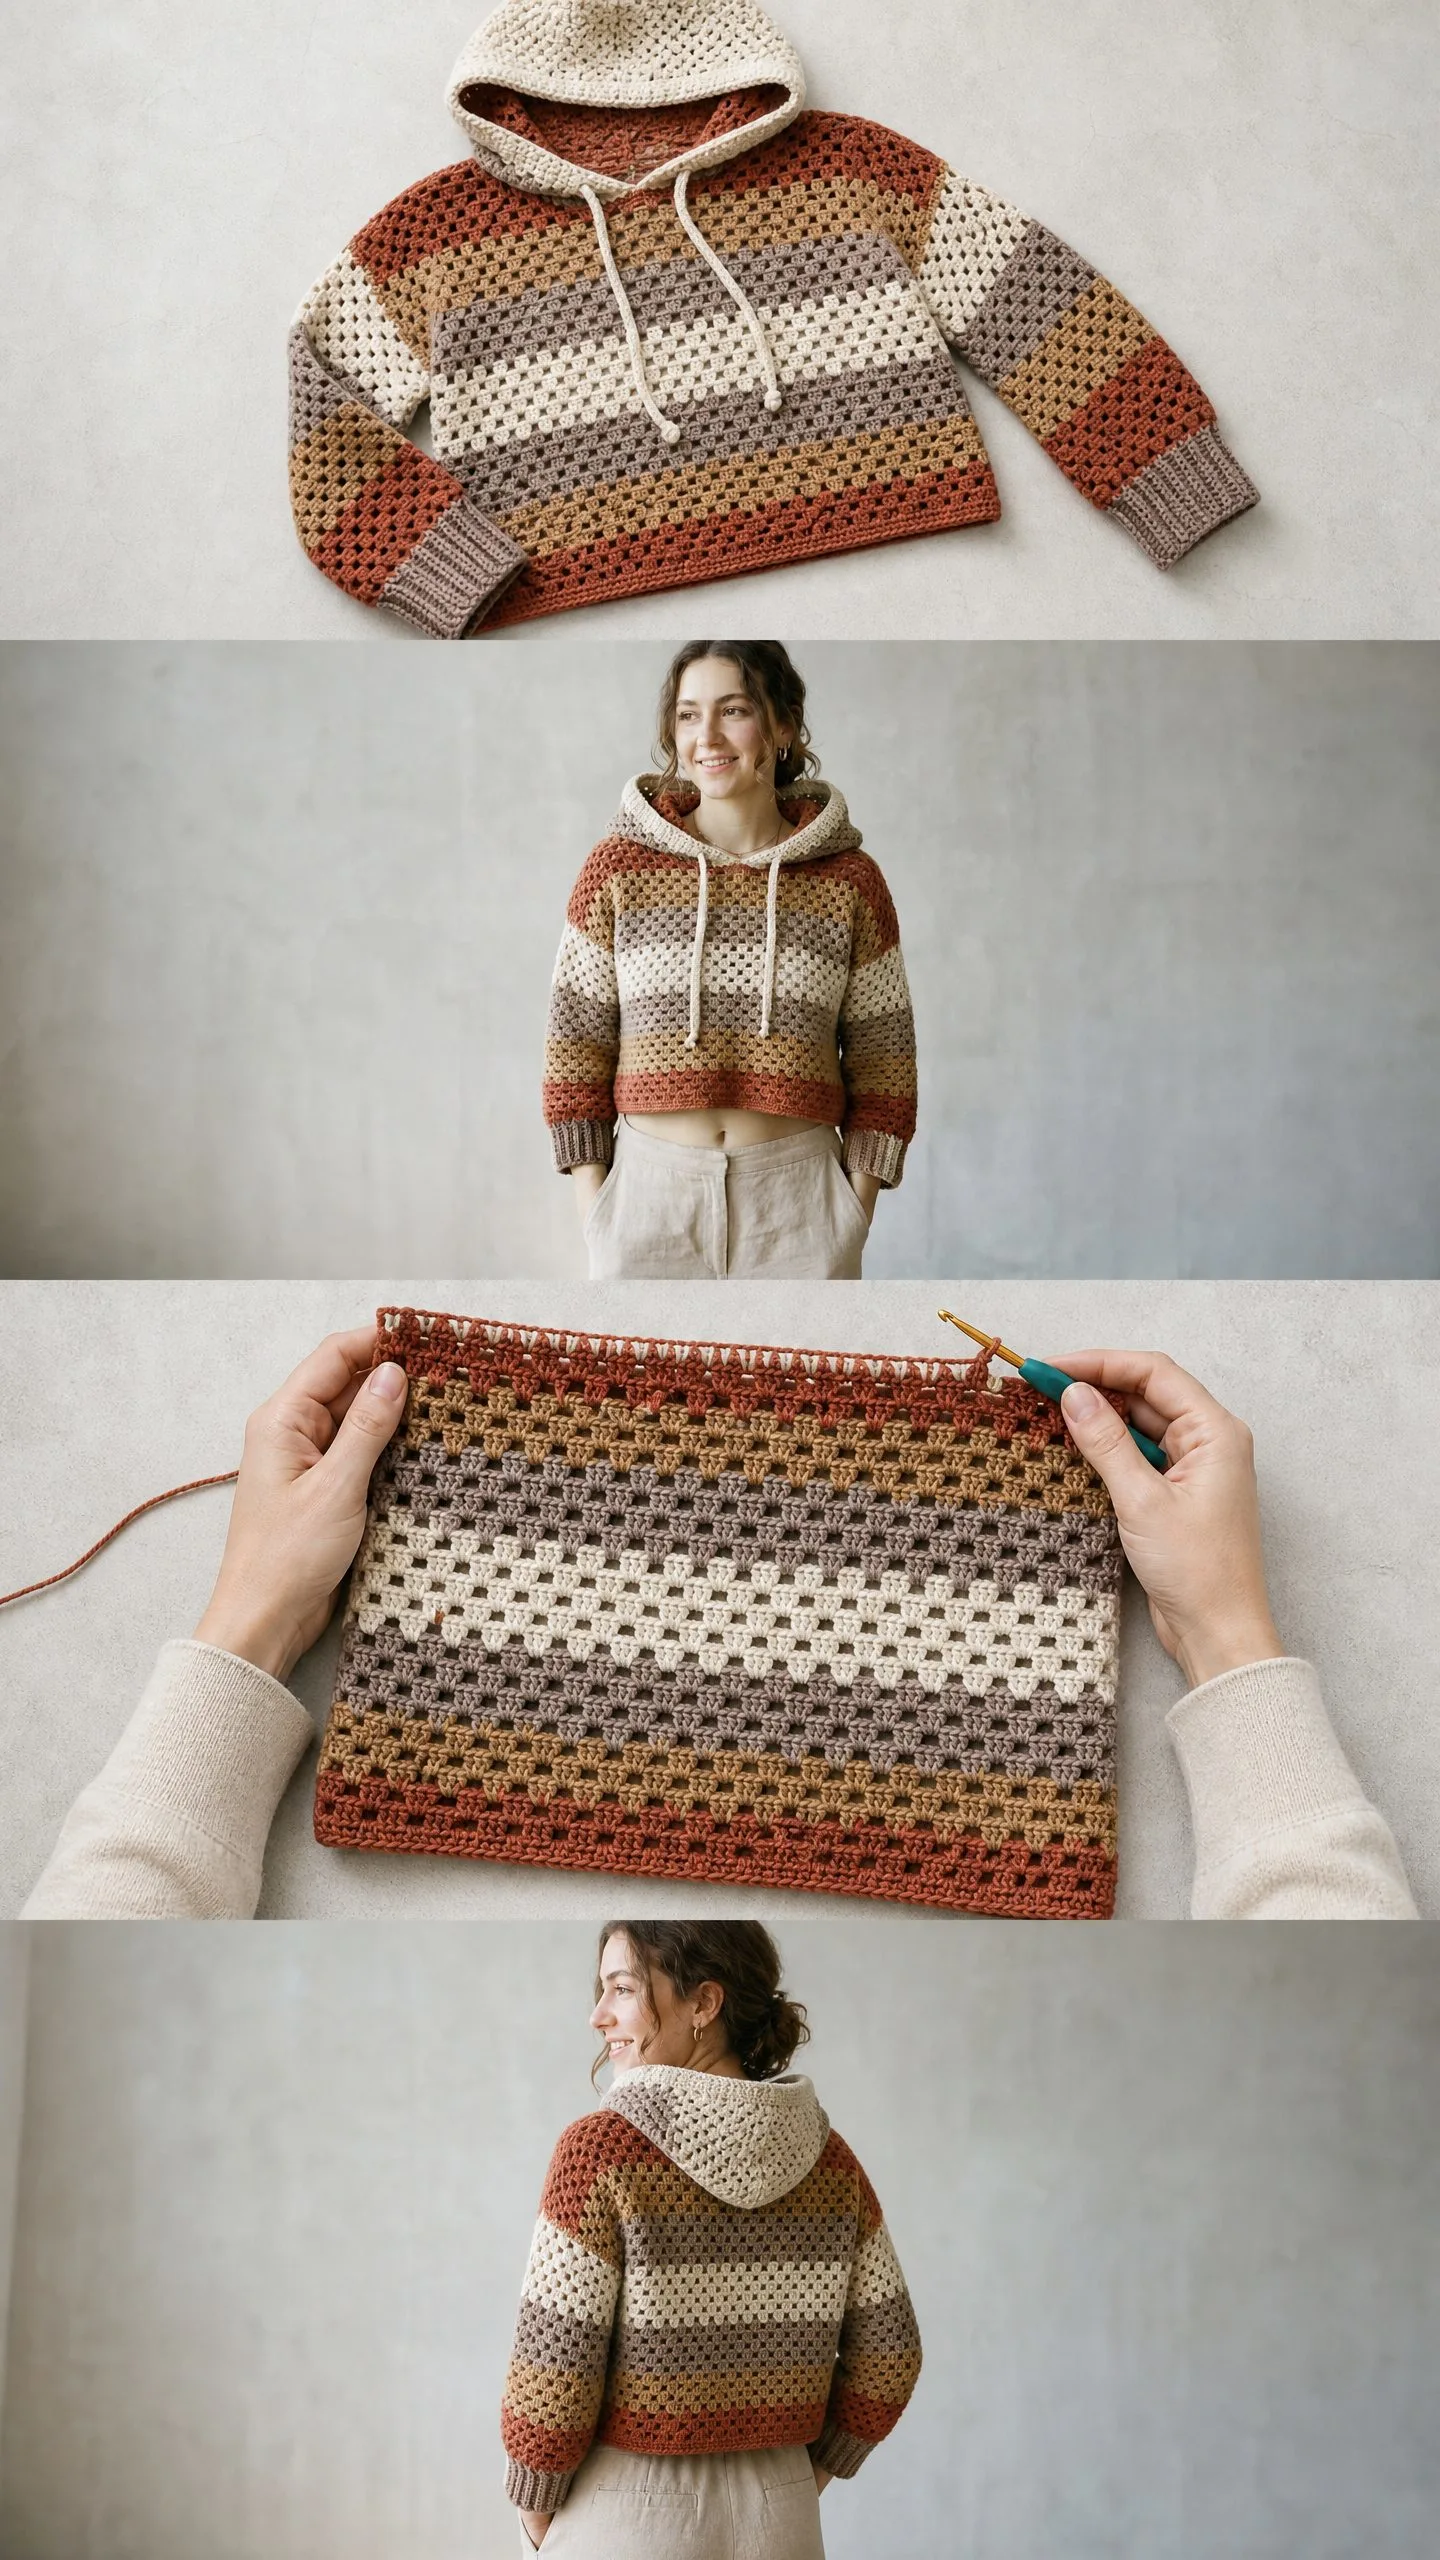
This earthy neutral mesh cropped hoodie crochet pattern combines the classic granny stitch with modern construction techniques to create a garment that looks store-bought but feels handmade in the best way. The color palette shifts from burnt terracotta through caramel and taupe into soft cream, creating this gorgeous gradient effect that catches the light beautifully. If you have been wanting to try your hand at garment construction, this is such a satisfying project to tackle.
Why You Will Love This Crochet Hoodie Pattern
This cropped hoodie hits all the marks for a wearable piece you will actually reach for. The granny mesh construction creates an airy, breathable fabric that works surprisingly well as a layering piece. It is not too heavy, not too delicate. Just right for those transitional weather days when you need a little something extra.
The silhouette is relaxed and slightly oversized, which makes fitting easier and wearing more comfortable. It hits just above the natural waist, making it perfect for pairing with your favorite high-waisted jeans or linen trousers. The ribbed cuffs and hem band add structure and polish, while the hood with its drawstring detail gives it that casual, athletic vibe that makes it feel current.
What I love most is how the stripe sequence creates visual interest without requiring complicated colorwork. You are simply changing colors at the beginning of rounds. The gradient does all the heavy lifting.
Skill Level and Time Commitment
This pattern is rated intermediate. You should be comfortable working in the round, joining pieces, managing multiple color changes, and picking up stitches. If you have made a sweater or cardigan before, you can absolutely handle this. If this is your first garment, take your time and trust the process.
Time estimate: Plan for approximately 25 to 40 hours depending on your experience level and working speed. I recommend breaking it into sections. Work the body one week, sleeves the next, then tackle the yoke and hood. It feels much more manageable that way.
Materials You Will Need
Having everything ready before you start makes the whole process smoother. Here is your complete supply list.
Yarn
You will need worsted weight yarn (size 4) in six colors. Look for smooth or lightly twisted construction for the best stitch definition in the granny mesh. Total yardage needed is approximately 1,400 yards or 1,280 meters across all colors.
Color A (Burnt Terracotta/Rust): 280 yards / 256 meters
Color B (Warm Caramel/Tan): 200 yards / 183 meters
Color C (Warm Taupe/Gray-Brown): 200 yards / 183 meters
Color D (Cream/Off-White): 300 yards / 274 meters
Color E (Medium Brown/Mushroom): 200 yards / 183 meters
Color F (Dusty Rose-Taupe): 100 yards / 91 meters
Colors E and F appear primarily on the sleeves and cuffs. Color D dominates the upper body and hood.
Yarn Suggestions
Option 1: Lion Brand Pound of Love (100% acrylic, 1020 yards per skein). Economical, widely available, and gives excellent stitch definition. Look for Terracotta, Caramel, Taupe, Cream, and Mushroom colorways.
Option 2: Paintbox Yarns Simply DK used doubled. Doubling a DK weight gives a consistent worsted equivalent with beautiful color saturation and an excellent range of earthy neutrals.
Option 3: We Are Knitters The Wool (100% Peruvian wool, 153 yards per skein). Beautiful texture with a slight halo that enhances the granny mesh look. Purchase 2 skeins each of your chosen neutral shades.
Avoid highly textured or bouclé yarns. They will obscure the lovely granny stitch pattern.
Hooks
Notions
Gauge
I cannot stress this enough. Gauge is critical for a wearable garment. Please do not skip swatching.
Main Stitch Gauge (granny mesh, worked in the round):
3 granny clusters x 4 rounds = 4 inches / 10 cm square
Ribbing Gauge (single crochet ribbing worked flat):
14 single crochet = 4 inches / 10 cm with smaller hook
If your gauge is off, adjust your hook size. Too big? Go down a hook size. Too small? Go up.
Finished Measurements
This pattern is written for size Small/Medium with modification notes for other sizes.
Abbreviations
Let me walk you through every abbreviation used in this crochet tutorial. If you are newer to patterns, bookmark this section.
Special Stitches
Granny Cluster (GC)
This is your building block for the entire hoodie. Work 3 double crochet stitches into the same stitch or space. These 3 dc stitches worked together into one location form the basic granny mesh fabric throughout this pattern.
When the pattern says "GC into ch-sp," insert your hook into the chain space (not the chain itself), yarn over and pull up a loop, yarn over and pull through 2 loops. Repeat twice more so that 3 complete double crochet stitches sit in that space.
Granny Mesh Round (worked in the round)
The granny mesh alternates GC groups separated by chain-1 spaces. Each round begins with chain 3 (counts as first dc of the first GC), then 2 dc into same space to complete the first GC. Then work [ch 1, skip to next ch-sp, GC into next ch-sp] repeated around. End with ch 1, slip stitch to top of beginning ch-3 to close the round.
Granny Mesh Row (worked flat, for hood)
RS row: Ch 4 (counts as dc plus ch 1), turn. GC into first ch-sp, [ch 1, GC into next ch-sp] across to last ch-sp, ch 1, dc into top of turning chain. Turn.
WS row: Ch 3 (counts as first dc), turn. 2 dc into first ch-sp (completes first GC), [ch 1, GC into next ch-sp] across, dc into top of turning chain. Turn.
Single Crochet Ribbing
Chain the required number of stitches. Row 1: Sc in second ch from hook and each ch across. Turn. Row 2 onward: Ch 1, sc in the back loop only of each sc across. Turn. Repeat Row 2 for ribbing pattern.
Pattern Notes Before You Begin
Read through these notes before starting. They will save you headaches later.
1. The body is worked as a seamless tube in the round from the hem upward. A ribbed hem band is added at the end by picking up stitches along the cast-on edge.
2. The granny mesh creates an open, airy fabric. Block aggressively before seaming to set stitch definition and open up the mesh holes.
3. Color changes always occur at the beginning of a round or row. Carry unused yarn loosely up the inside of the work when colors will be reused within 2 rounds. Otherwise, cut and rejoin.
4. The ch-3 at the start of each round counts as the first dc of the first GC only when specified. Read each round instruction carefully.
5. The starting chain for the body must be a multiple of 6.
6. Stitch counts in parentheses reflect the total number of GC units in that row or round, followed by the total chain spaces.
Stripe Sequence for Body (Bottom to Top)
The yoke continues in Color A at the underarm, then transitions to Color B, C, and D as it rises toward the neck.
Stripe Sequence for Sleeves (Cuff to Underarm)
Step-by-Step Instructions
Ribbed Hem Band
The hem band is worked first as a long rectangle in single crochet ribbing, then seamed and attached to the body bottom edge. This creates a clean, firm lower edge that does not roll.
Using smaller hook and Color A, ch 9.
Row 1: Sc in second ch from hook and in each ch across. Turn. (8 sc)
Rows 2 onward: Ch 1, sc in back loop only of each sc across. Turn. (8 sc)
Continue in ribbing until the band measures 40 inches / 102 cm long, approximately 140 rows.
Seam the short ends together using mattress stitch or slip stitch to form a tube. Set aside.
Body
The body is worked as a seamless tube in the round. You will work into the top edge of the ribbed hem band to begin.
With larger hook and Color A, join yarn to the seam point of the ribbed hem band.
Setup Round: Work 60 sc evenly around the top edge of the ribbed hem band. Join with sl st. Do not turn. (60 sc)
Verify your sc count before proceeding. 60 sc gives 10 GC units per round once the granny mesh begins.
Round 1 (establish granny mesh): Ch 3 (counts as first dc of first GC here and throughout body rounds). 2 dc in same st as join (first GC complete). [Ch 1, sk 2 sc, GC in next sc] 9 times. Ch 1, sk 2 sc, sl st to top of beg ch-3 to join. (10 GC, 10 ch-1 sp)
You have now established 10 GC clusters separated by ch-1 spaces forming a tube.
Round 2: Sl st into next ch-1 sp. Ch 3, 2 dc in same ch-1 sp (first GC). [Ch 1, GC in next ch-1 sp] 9 times. Ch 1, sl st to top of beg ch-3. (10 GC, 10 ch-1 sp)
Rounds 3 and 4: Repeat Round 2 in Color A. (10 GC, 10 ch-1 sp each round)
Round 5: Join Color B with sl st into any ch-1 sp. Ch 3, 2 dc in same sp. [Ch 1, GC in next ch-1 sp] 9 times. Ch 1, sl st to top of beg ch-3. (10 GC, 10 ch-1 sp)
Round 6: Repeat Round 5 in Color B. (10 GC, 10 ch-1 sp)
Round 7: Join Color C. Work as Round 2. (10 GC, 10 ch-1 sp)
Round 8: Repeat in Color C. (10 GC, 10 ch-1 sp)
Round 9: Join Color D. Work as Round 2. (10 GC, 10 ch-1 sp)
Rounds 10 through 12: Continue in Color D, working as Round 2. (10 GC, 10 ch-1 sp each round)
Round 13: Join Color C. Work as Round 2. (10 GC, 10 ch-1 sp)
Round 14: Continue in Color C. (10 GC, 10 ch-1 sp)
Round 15: Join Color B. Work as Round 2. (10 GC, 10 ch-1 sp)
Round 16: Continue in Color B. (10 GC, 10 ch-1 sp)
Round 17: Join Color A. Work as Round 2. (10 GC, 10 ch-1 sp)
Rounds 18 through 20: Continue in Color A. (10 GC, 10 ch-1 sp each round)
Checkpoint: After Round 20 the body tube should measure approximately 9 inches / 23 cm in height from the base of the mesh (above the ribbing). The tube circumference should be approximately 40 inches / 102 cm. Do not cut yarn yet.
Divide for Front and Back Yoke
At the end of Round 20, you will separate the body into front and back yoke sections and mark the underarm ch-1 spaces.
The tube has 10 GC units and 10 ch-1 spaces. The front and back each claim 5 GC units.
Mark the ch-1 space between GC 5 and GC 6 as the first underarm (left side as worn).
Mark the ch-1 space between GC 10 and GC 1 as the second underarm (right side as worn).
Set the body aside and work the sleeves.
Sleeves (Make 2)
Ribbed Cuffs
Using smaller hook and Color A, ch 9.
Row 1: Sc in second ch from hook and each ch across. Turn. (8 sc)
Row 2 onward: Ch 1, sc in back loop only across. Turn. (8 sc)
Work until cuff measures 8 inches / 20.5 cm long, approximately 28 rows.
Seam short ends together to form a tube. Set aside.
Sleeve Body
With larger hook and Color A, join yarn to the seam of the cuff tube.
Sleeve Setup Round: Work 36 sc evenly around the top edge of the cuff. Join with sl st. Do not turn. (36 sc)
36 sc sets up 6 GC per round. Verify this count before proceeding.
Sleeve Round 1: Ch 3, 2 dc in same st. [Ch 1, sk 2 sc, GC in next sc] 5 times. Ch 1, sk 2 sc, sl st to top of beg ch-3. (6 GC, 6 ch-1 sp)
Sleeve Round 2: Sl st into first ch-1 sp. Ch 3, 2 dc in same sp. [Ch 1, GC in next ch-1 sp] 5 times. Ch 1, sl st to top of beg ch-3. (6 GC, 6 ch-1 sp)
Sleeve Increase Round: To add 1 GC unit, work 2 GC (with ch 1 between them) into one ch-1 sp to create an extra unit.
Sleeve Rounds 1 to 4: Color A, work as Sleeve Round 2 without increases. (6 GC, 6 ch-1 sp)
Sleeve Round 5 (increase): Join Color B. Sl st into first ch-1 sp. Ch 3, 2 dc in same sp, ch 1, GC in same sp (2 GC worked into first ch-1 sp, adding 1 GC). [Ch 1, GC in next ch-1 sp] 5 times. Ch 1, sl st to top of beg ch-3. (7 GC, 7 ch-1 sp)
Sleeve Round 6: Continue in Color B, work as Sleeve Round 2. (7 GC, 7 ch-1 sp)
Sleeve Round 7 (increase): Join Color E. Work increase as Round 5, placing the increase into the first ch-1 sp. (8 GC, 8 ch-1 sp)
Sleeve Round 8: Continue in Color E. (8 GC, 8 ch-1 sp)
Sleeve Round 9: Join Color C. Work as Sleeve Round 2, no increase. (8 GC, 8 ch-1 sp)
Sleeve Round 10: Continue in Color C. (8 GC, 8 ch-1 sp)
Sleeve Rounds 11 through 14: Join Color D. Work as Sleeve Round 2, no increase. (8 GC, 8 ch-1 sp each round)
Checkpoint: The sleeve should measure approximately 14 inches / 35.5 cm from the top of the cuff ribbing. The sleeve circumference at the top should be approximately 13.5 inches / 34 cm.
At the end of Sleeve Round 14, do not fasten off. Set sleeve aside and repeat for second sleeve.
Join Sleeves to Body for Yoke
You will now join all pieces in preparation for working the yoke flat in rows.
The body has 10 GC and 10 ch-1 spaces. Each sleeve has 8 GC and 8 ch-1 spaces.
Total yoke GC units at join: 5 (front) + 8 (right sleeve) + 5 (back) + 8 (left sleeve) = 26 GC, 26 ch-1 sp.
At the underarm join points, skip 1 ch-1 sp from the body on each side and 1 ch-1 sp from each sleeve on each side.
Adjusted yoke start count: 26 GC minus 4 seam ch-sp = 22 GC, 22 ch-1 sp across the yoke worked flat.
With Color A (continuing from body), set up yoke as follows:
Yoke Row 1 (RS): With larger hook and Color A, starting at right front underarm join point.
Work across front: GC into each of the 5 front body ch-1 sp, ch 1 between each. At underarm, ch 1 to bridge.
Work across right sleeve: GC into each of the 8 sleeve ch-1 sp, ch 1 between each. At underarm, ch 1 to bridge.
Work across back: GC into each of the 5 back body ch-1 sp, ch 1 between each. At underarm, ch 1 to bridge.
Work across left sleeve: GC into each of the 8 sleeve ch-1 sp, ch 1 between each.
End row with ch 1, dc into top of starting ch to close. Turn.
Yoke Row 1 total: (26 GC, 26 ch-1 sp)
Raglan decrease points are located at: between right front and right sleeve, between right sleeve and back, between back and left sleeve, between left sleeve and left front. Mark these 4 ch-1 spaces with stitch markers.
Yoke Row 2 (WS, no decrease): Ch 4 (counts as dc and ch-1). Turn. [GC into next ch-1 sp, ch 1] across, dc into top of t-ch. Turn. (26 GC, 26 ch-1 sp)
Yoke Row 3 (RS, decrease row): Ch 4, turn. Work across, skipping the ch-1 sp at each of the 4 raglan marker points. (22 GC, 22 ch-1 sp)
Yoke Row 4 (WS, no decrease): Ch 4, turn. [GC into next ch-1 sp, ch 1] across, dc into top of t-ch. (22 GC, 22 ch-1 sp)
Yoke Row 5 (RS, decrease row): Work decrease at 4 raglan points. (18 GC, 18 ch-1 sp)
Yoke Row 6 (WS, no decrease): (18 GC, 18 ch-1 sp)
Yoke Row 7 (RS, decrease row): (14 GC, 14 ch-1 sp)
Yoke Row 8 (WS, no decrease): (14 GC, 14 ch-1 sp)
Yoke Row 9 (RS, decrease row): (10 GC, 10 ch-1 sp)
Yoke Row 10 (WS, no decrease): (10 GC, 10 ch-1 sp)
Color note for yoke: Work Yoke Rows 1 and 2 in Color A, Rows 3 and 4 in Color B, Rows 5 and 6 in Color C, Rows 7 through 10 in Color D.
Checkpoint: After Yoke Row 10, the neckline opening should span approximately 12 inches / 30.5 cm across with 10 GC units. The yoke should measure approximately 7 inches / 18 cm in height from the underarm join.
Hood
The hood is worked flat in rows in the granny mesh pattern, beginning from the neckline of the finished yoke.
With larger hook and Color D, work a foundation row of sc across the top of the yoke neckline.
Hood Foundation Row: Working across the top neckline edge, sc evenly into every available stitch and ch-sp across. Work approximately 60 sc across the neckline. Turn. (60 sc)
Hood Row 1 (RS): Ch 3, 2 dc in same st (first GC). [Ch 1, sk 2 sc, GC in next sc] 9 times. Ch 1, dc in last sc. Turn. (10 GC, 10 ch-1 sp)
Hood Row 2 (WS): Ch 4 (counts as dc and ch-1). [GC in next ch-1 sp, ch 1] 9 times. GC in last ch-1 sp, dc into top of t-ch. Turn. (10 GC, 10 ch-1 sp)
Hood Rows 3 through 16: Alternate RS and WS rows as established. Continue in Color D throughout hood body. (10 GC, 10 ch-1 sp each row)
Checkpoint: At Hood Row 16 the hood should be a rectangle approximately 20 inches / 51 cm wide (when flat, double thickness) and 11 inches / 28 cm tall.
Hood Seam: Fold hood in half along the top edge, aligning the last row with itself. Seam across the top of the hood using sl st through both layers on WS. Turn RS out.
Hood Edging: With Color D and larger hook, work 1 round of sc evenly around the entire front opening edge of the hood, working approximately 1 sc per dc and 1 sc per ch-1 sp all the way around. Join with sl st. Fasten off.
Drawstring Channel
With Color D and larger hook, working on the RS of the hood at approximately 1 inch / 2.5 cm down from the front opening edge, work surface slip stitches across the front edge of the hood on each side to create a decorative channel line. Alternatively, use a tapestry needle to weave the drawstring in and out of existing ch-1 spaces just inside the hood edge opening.
Thread the 60 inch / 152 cm cord or Color D chain through the channel. Tie knots at each end to prevent the cord from pulling through.
Finishing
Step 1: Weave in all yarn ends securely on the WS using a tapestry needle, working ends back and forth through the structure of the granny mesh rather than just looping around single chains.
Step 2: Seam the underarms closed using slip stitch or mattress stitch. With WS together, align the body underarm ch-1 sp with the sleeve underarm ch-1 sp and join with sl st worked through both layers, working 3 to 4 stitches to secure.
Step 3: Wet block the completed hoodie by soaking in cool water for 20 minutes, gently pressing out excess water in a towel, then laying flat and pinning to finished measurements. Allow to dry completely (24 to 48 hours).
Step 4: Once dry, remove pins. The hood drawstring should slide freely.
Size Customization Tips
To go up one size (Large/XL, 42 to 46 inch bust):
Increase the hem band length to 44 inches / 112 cm and the setup round to 66 sc. This gives 11 GC per body round. Increase each sleeve’s top circumference by 1 GC unit (to 9 GC per sleeve round at top). Add 1 extra increase round to each sleeve.
To go down one size (XS/S, 30 to 34 inch bust):
Reduce the hem band length to 36 inches / 91 cm and the setup round to 54 sc. This gives 9 GC per body round. Reduce sleeve top to 7 GC.
To lengthen the body:
Add additional rounds of granny mesh before the underarm divide. Each additional 2 rounds adds approximately 1 inch / 2.5 cm of length.
To lengthen the sleeves:
Add additional rounds of granny mesh after the cuff setup and before the increase rounds begin.
Blocking and Care
Blocking: Wet block as described in Finishing. If using wool, handle gently when wet to avoid felting. For acrylic, you may steam block gently.
Care: If using acrylic, machine wash cold on gentle cycle, reshape and lay flat to dry. Do not tumble dry. If using wool, hand wash in cool water with wool wash.
Storage: Fold, do not hang, to prevent the mesh from stretching over time.
Final Thoughts
Thank you so much for choosing this pattern for your next project. I genuinely hope you love making this hoodie as much as I loved designing it. There is something really satisfying about watching those earthy stripes build up round after round, and the moment you try it on for the first time is just the best feeling.
I would absolutely love to see your finished hoodies! Tag me on Instagram or share your photos in our Facebook group. Seeing your color combinations and styling ideas is one of my favorite parts of sharing patterns.
If you want to save this earthy neutral mesh cropped hoodie crochet pattern for later, go ahead and pin it to your favorite Pinterest board. That way it will be waiting for you when you are ready to cast on. And if you make one, please come back and leave a comment below. I read every single one, and your feedback means the world to me. Happy hooking!
