
This is a bohemian halter top built around a stunning heart-shaped mandala center. It uses single crochet, double crochet, bobble stitches, and V-stitches worked in the round and flat. The construction combines a front panel, back band, twisted cord ties, and appliqued leaves and flowers.
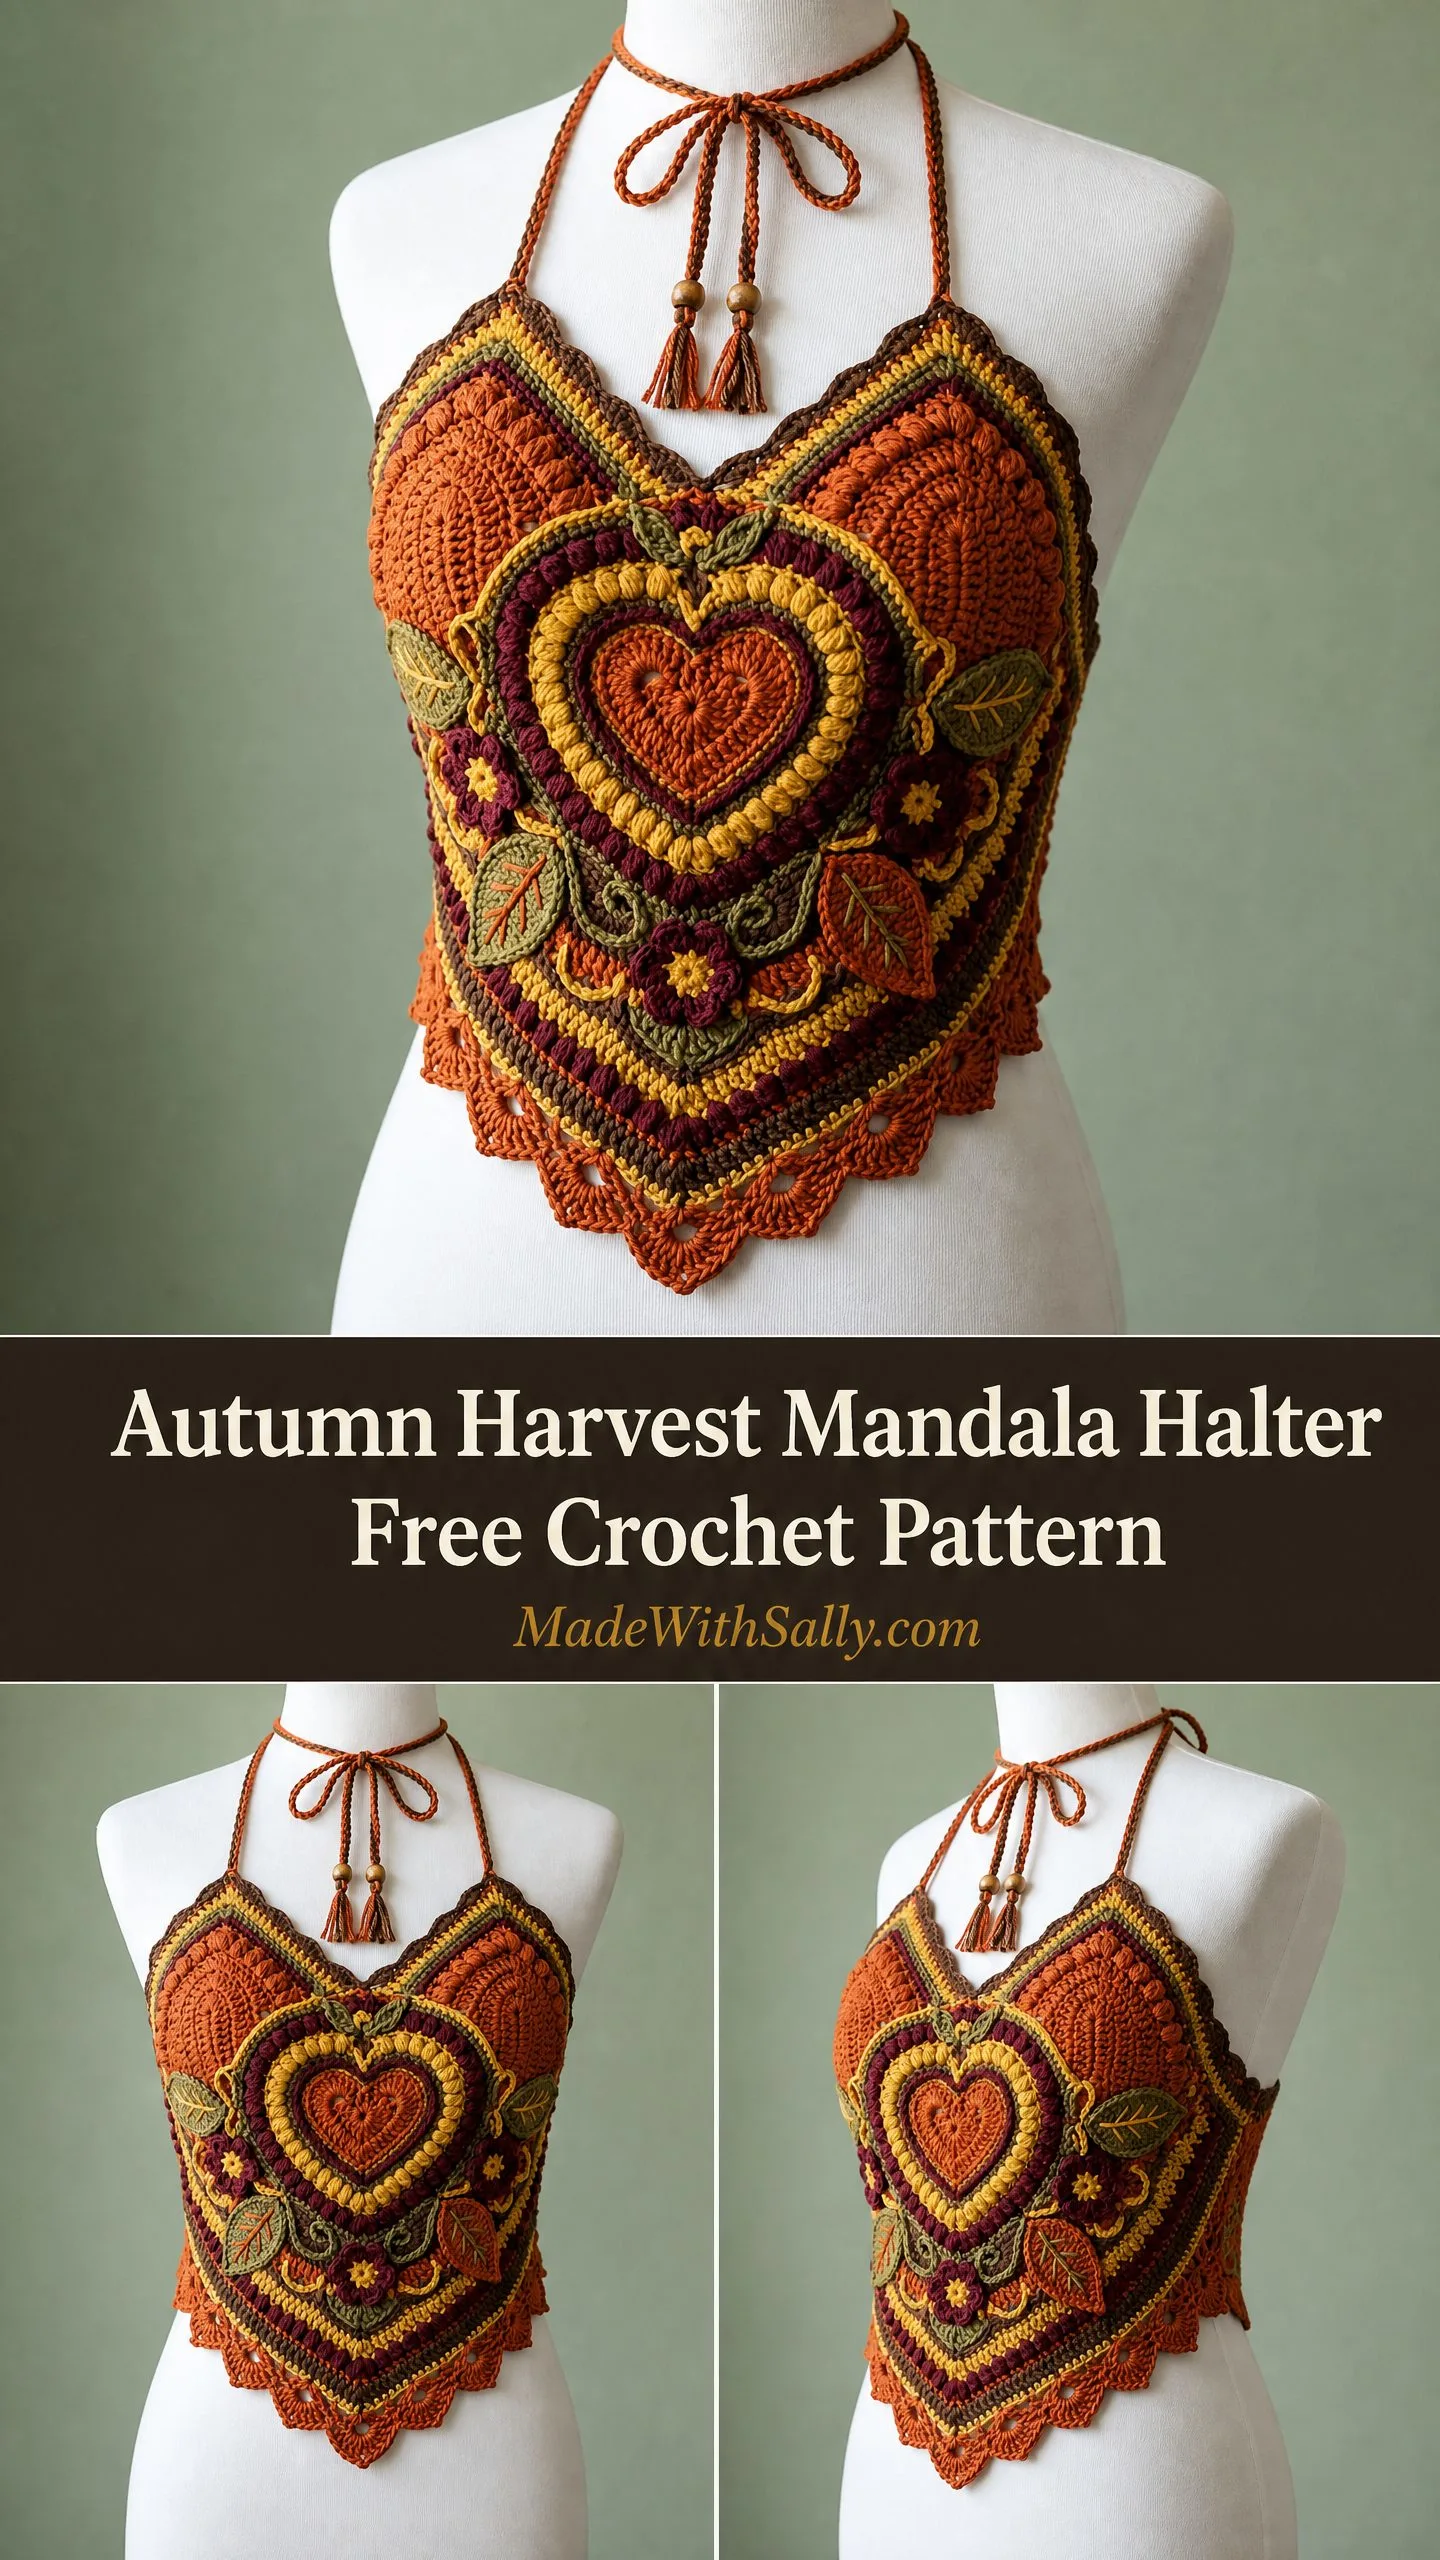
This is an advanced project. You will need comfort with magic rings, multi-color work, shaped panels, and surface embroidery. If those techniques feel familiar to you, this pattern will be an absolute joy to work through.
The finished piece measures approximately 32 to 36 inches at the bust and features warm autumn tones of burnt orange, mustard gold, olive green, burgundy, and chocolate brown. Expect 25 to 40 hours of work depending on your experience level.
Why I Love This Mandala Halter Design
The central heart mandala is the real showpiece here. It radiates outward through concentric rounds, building into a diamond chevron shape with scalloped edges. The combination of textured bobbles, strategic color changes, and dimensional appliques creates something truly special.
I appreciate how this pattern breaks down a complex looking garment into manageable sections. You work the heart center first, then expand into the chevron border, shape the neckline, add the back band, and finish with the decorative details. Each phase builds on the last in a logical way.
The earthy color palette gives this top a festival-ready, vintage feel that works beautifully for summer events, beach days, or layered over a tank in cooler weather.
Materials You Will Need
Yarn (Worsted Weight):
Total yarn needed: approximately 800 yards / 732 m across all colors
Hooks:
Notions:
Yarn Suggestions:
Lion Brand Pound of Love works wonderfully here. Choose shades Butterscotch (A), Mustard (B), Olive (C), Cranberry (D), and Espresso (E).
Paintbox Yarns Simply DK used doubled creates a worsted weight fabric with beautiful color saturation.
WeCrochet Wool of the Andes Worsted gives a slightly rustic look. Choose Amber Heather (A), Canary (B), Forest (C), Hollyberry (D), and Espresso (E).
Avoid fuzzy or bouclé yarns. You want smooth yarn that shows off the stitch definition in the mandala motif.
Gauge
With US H-8 / 5.0 mm hook:
14 sc = 4 inches / 10 cm
16 rows = 4 inches / 10 cm
(In single crochet, blocked)
Mandala gauge check: After completing Round 5 of the Heart Mandala Center, the piece should measure approximately 3.5 inches / 9 cm across at its widest point.
Gauge is mandatory for this garment. The front panel dimensions directly affect fit at the bust. Work a 6-inch gauge swatch in single crochet, block it, and adjust hook size if necessary before beginning.
Finished Measurements
Abbreviations
Special Stitches
Bobble Stitch (bob):
Yarn over, insert hook in stitch, pull up a loop, yarn over, pull through 2 loops. Work 4 more half-closed hdc the same way in the same stitch (5 half-closed hdc total). Yarn over and pull through all 6 loops on hook. Ch 1 to close and lock bobble. This creates a raised bump on the right side.
Shell Stitch (shell):
Work 5 dc all in the same stitch or space. This creates a fan-shaped cluster.
V-Stitch (V-st):
Work (dc, ch 2, dc) all in the same stitch or space.
Picot:
Ch 3, sl st in the first ch made. This creates a small decorative loop.
Scallop Edge:
Sl st in first st, (ch 3, 2 dc) in same st, skip 2 sts, sl st in next st, skip 2 sts, (3 dc, ch 3, sl st) in next st. This forms one full scallop over 6 stitches.
Heart Corner Increase (HCI):
At each designated corner marker, work (sc, ch 2, sc) all in the corner chain-2 space. This creates the upper lobes of the heart shape.
Heart Bottom Point Decrease:
At the designated bottom point marker, work sc2tog over the 2 stitches flanking the point, then ch 1 to maintain spacing.
Surface Slip Stitch (ss):
With yarn held on the WS, insert hook from RS to WS through the fabric, draw up a loop. Continue inserting hook in a line across the surface, pulling each new loop through the loop on hook. This creates raised vine details.
Twisted Cord:
Cut yarn strands 4 times the desired finished length. Hold all strands together, anchor one end, and twist the bundle tightly in one direction until it kinks back on itself. Fold in half, let the two halves twist together, and knot both ends.
Leaf Applique (Make 4)
With Color C and smaller hook:
Foundation: Ch 10.
Row 1: Starting in 2nd ch from hook, sl st 1, sc 1, hdc 1, dc 3, hdc 1, sc 1, sl st 1. Do not turn. Work back along the opposite side of the foundation chain: sl st 1, sc 1, hdc 1, dc 3, hdc 1, sc 1, sl st 1, sl st in tip.
Fasten off leaving a long tail for sewing.
Small Flower Applique (Make 4 to 6)
With Color B (or Color D for variation) and smaller hook:
Rnd 1: MR, ch 1, work 5 sc into ring, sl st to first sc to join. (5 sc)
Rnd 2: Ch 3, 2 dc in same st, sl st to next st, (3 dc in next st, sl st in next st) around. (5 petals)
Fasten off leaving a tail.
Section 1: Heart Mandala Center Panel
Begin with Color A (Burnt Orange) and larger hook.
The heart shape is built by treating the motif as a modified granny square with two corner increases (for the heart lobes) and one corner decrease (for the heart point). Place a stitch marker at each of the three active corners.
Foundation: Make a Magic Ring.
Round 1: Ch 3 (counts as first dc), work 11 dc into ring, sl st to top of ch-3 to join. (12 dc) Pull ring tail to close.
Round 2: Ch 1, 2 sc in each st around, sl st to first sc to join. (24 sc)
Round 3: Ch 1, (sc in next st, 2 sc in next st) around, sl st to first sc to join. (36 sc)
Round 4: Ch 1, (sc in next 2 sts, 2 sc in next st) around, sl st to first sc to join. (48 sc)
Round 5: Ch 1, (sc in next 3 sts, 2 sc in next st) around, sl st to first sc to join. (60 sc)
Checkpoint: After Round 5, the circle should measure approximately 3.5 inches / 9 cm across. If smaller, move up a hook size. If larger, move down.
Change to Color D (Burgundy) at beginning of Round 6.
Round 6: Ch 3 (counts as dc), dc in each st around, sl st to top of ch-3 to join. (60 dc)
Round 7: Ch 1, sc in each st around, sl st to first sc to join. (60 sc)
Now begin shaping into the heart. Mark st 15 as Left Lobe Corner (LLC), st 45 as Right Lobe Corner (RLC), and st 60/st 1 junction as Bottom Point (BP).
Change to Color B (Mustard Gold) at beginning of Round 8.
Round 8: Ch 1. Work sc to 1 st before LLC, (sc, ch 2, sc) in LLC st (HCI), sc to 1 st before RLC, (sc, ch 2, sc) in RLC st, sc to 1 st before BP, sc2tog over next 2 sts (BP decrease), sc to end, sl st to first sc. (61 sts)
Change to Color A at Round 9.
Round 9: Sc around working HCI at both lobe corners and sc2tog at BP. (62 sts)
Round 10: With Color D. Sc around working HCI at both lobe corners and sc2tog at BP. (63 sts)
Round 11: With Color B. Rep Round 9 shaping. (64 sts)
Round 12: With Color E (Chocolate Brown). Rep shaping. (65 sts)
Round 13: With Color A. Work sc across but replace sc with bob in every 5th st on the top arc between LLC and RLC only. Work HCI at corners and sc2tog at BP. (66 sts)
Round 14: With Color D. Sc around working HCI at LLC and RLC, sc2tog at BP. (67 sts)
Round 15: With Color B. Sc around working HCI and sc2tog. (68 sts)
Round 16: With Color C (Olive Green). Sc around working HCI and sc2tog. Place 2 bob stitches flanking each corner ch-2 space. (69 sts)
Round 17: With Color A. Sc around working HCI and sc2tog. (70 sts)
Round 18: With Color D. Dc around working (dc, ch 2, dc) at lobe corners and dc2tog at BP. (71 sts)
Checkpoint: After Round 18, the heart motif should measure approximately 7 inches / 18 cm across at its widest point and approximately 6 inches / 15 cm from lobe dip to bottom point.
Section 2: Chevron Diamond Border (Rounds 19 through 28)
This section surrounds the heart motif with a chevron frame. Identify 4 working corners: LLC, RLC, BP, and introduce LS (Left Side) and RS (Right Side) at the midpoints of the left and right edges.
Round 19: With Color A. Work V-st (dc, ch 2, dc) at LLC, RLC, LS, and RS corner positions. Work sc2tog at BP. Sc around all other sts. (78 sts)
Round 20: With Color B. Work V-st at each of the 4 corners and sc2tog at BP. Work sc around. (85 sts)
Round 21: With Color D. Work V-st at 4 corners, sc2tog at BP. Sc around. (92 sts)
Round 22: With Color A. Work V-st at 4 corners, sc2tog at BP. Work bob in every 7th st across the top arc. Sc around. (99 sts)
Round 23: With Color E. Work V-st at 4 corners, sc2tog at BP. Dc around. (106 sts)
Round 24: With Color C. Work V-st at 4 corners, sc2tog at BP. Sc around. Work 1 bob flanking each corner for 8 bobbles total. (113 sts)
Round 25: With Color B. Work V-st at 4 corners, sc2tog at BP. Sc around. (120 sts)
Round 26: With Color A. Work V-st at 4 corners, sc2tog at BP. Sc around. (127 sts)
Round 27: With Color D. Work dc around, with (dc, ch 2, dc) at each corner and dc2tog at BP. (134 sts)
Round 28: With Color A. Sc around, with (sc, ch 2, sc) at each corner and sc2tog at BP. (141 sts)
Checkpoint: After Round 28, the front panel should measure approximately 14 inches / 35.5 cm across and 12 to 13 inches / 30.5 to 33 cm from top to bottom point.
Section 3: Upper Shaping and Neckline Edge
With RS facing and Color A, attach yarn at the LLC ch-2 space.
Row 1 (RS): Ch 1, sc across the top edge from LLC to RLC. Stop at RLC. Turn. (38 sc)
Row 2 (WS): Ch 1, turn. Sc2tog, sc to last 2 sts, sc2tog. (36 sc)
Row 3: Ch 1, turn. Sc across. (36 sc)
Row 4: Ch 1, turn. Sc2tog, sc to last 2 sts, sc2tog. (34 sc)
Row 5: Ch 1, turn. Sc across. (34 sc)
Row 6: Ch 1, turn. Sc2tog, sc to last 2 sts, sc2tog. (32 sc)
Row 7: Ch 1, turn. Sc across. (32 sc)
Row 8: Ch 1, turn. Sc2tog, sc to last 2 sts, sc2tog. (30 sc)
Do not fasten off. The upper edge now has a gentle V-curve for the neckline.
Section 4: Neck Tie Attachment
For each cord (make 2):
Cut 6 strands of Color A each measuring 100 inches / 254 cm. Make a Twisted Cord as described. Finished cord should be approximately 24 inches / 61 cm long. Knot at both ends. Thread one wooden bead onto the cord near the center and knot on each side.
Attach the looped center of the cord to the corner of the upper panel edge at Row 8 end sts on each side.
Tassel at cord center (make 2):
Cut 12 strands of Color A and Color C mixed, each 6 inches / 15 cm long. Fold in half. Tie together at fold with a separate strand. Attach to the cord knot at the neck front bow point.
Section 5: Lower Scalloped Border
With RS facing and Color A, attach yarn at the BP (bottom point) of the front panel.
Work the Scallop Edge around the entire lower perimeter of the front panel from BP around to the right and back to BP. The lower perimeter is approximately 108 sts. Work 18 complete scallops. Sl st to close. Fasten off.
If your perimeter count does not divide evenly by 6, add or skip single sc sts to reach the nearest multiple of 6 before beginning the scallop round.
Section 6: Applique Motifs
Make 4 Leaf Appliques using Color C.
Make 5 Small Flower Appliques: 3 in Color B and 2 in Color D.
Placement:
Position the 4 leaves symmetrically in pairs flanking the central heart mandala. Angle them outward as if growing from a central vine. Place flowers at the base of each leaf pair, with 1 additional flower at the center base of the mandala just above the bottom point.
Using Color C and a tapestry needle, sew each leaf to the panel with small whipstitches around the perimeter. Sew each flower through its center.
Vine/stem surface embellishment:
With Color C and the smaller hook, work surface slip stitch in curving lines connecting the leaves and flowers. These do not need to be perfectly symmetrical.
Section 7: Back Band
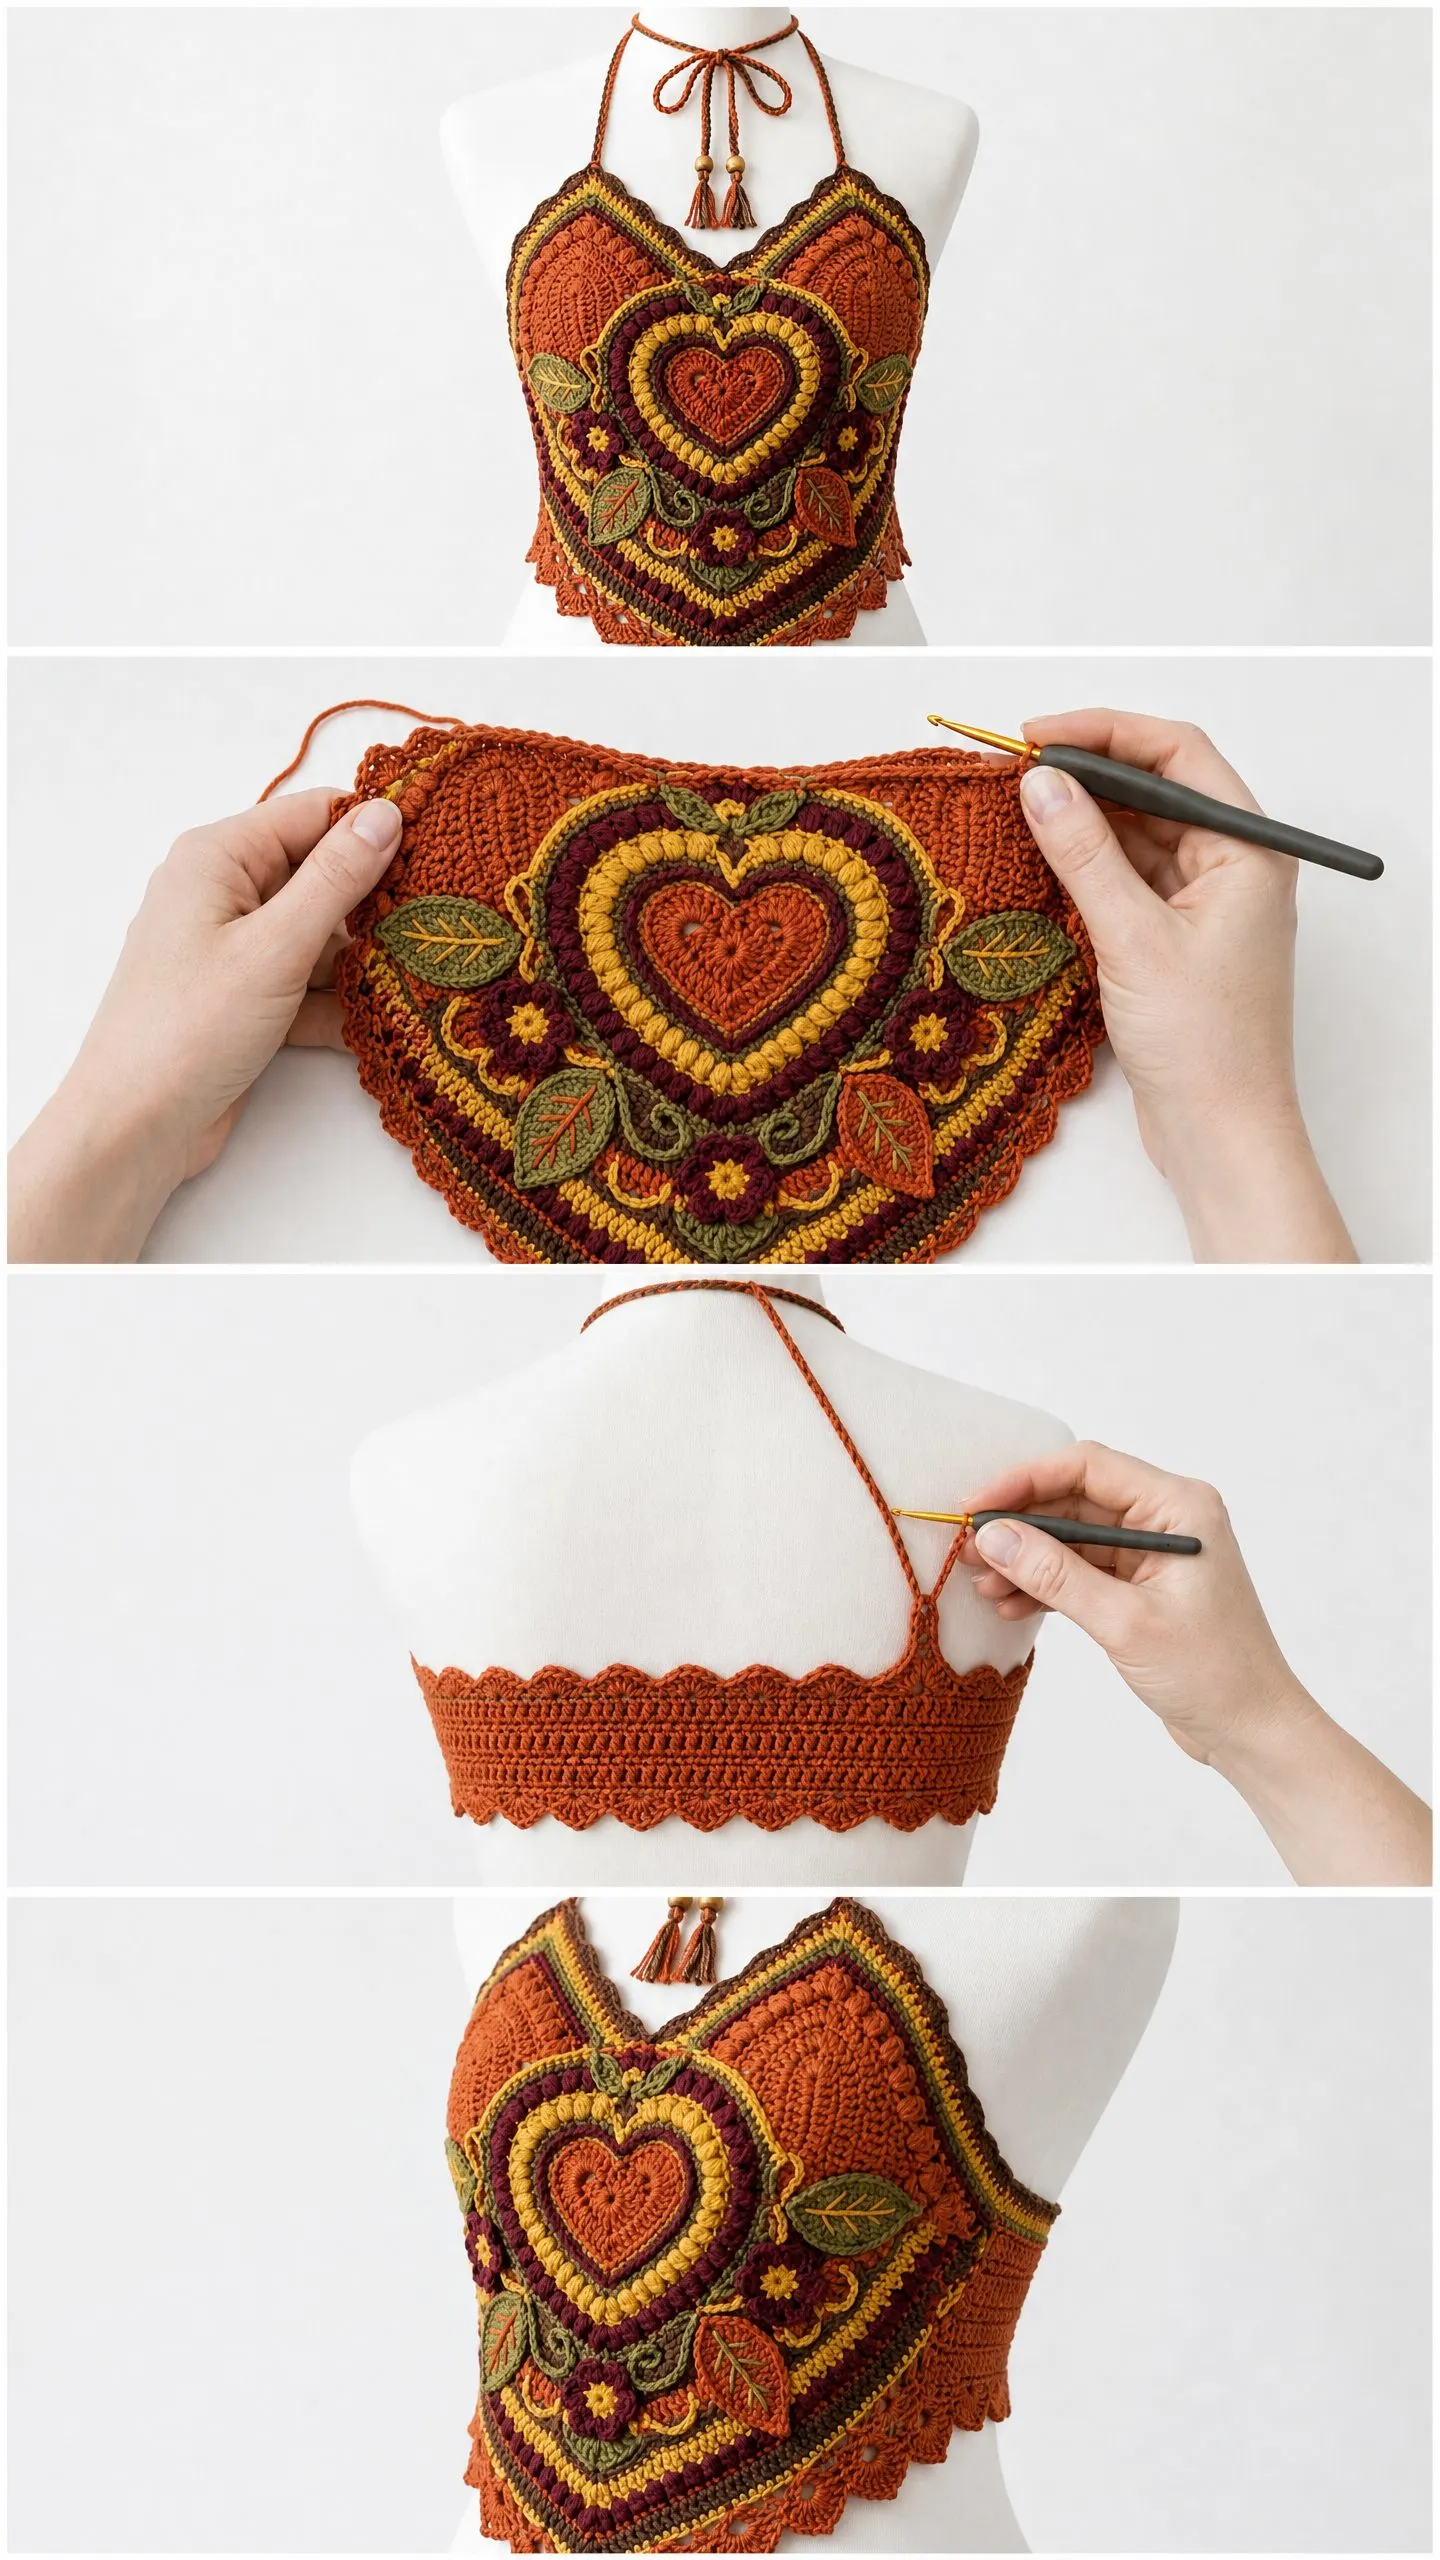
The back band is a separate horizontal rectangle worked flat in rows with horizontal stripes.
Foundation chain: With Color A and larger hook, ch 50.
Row 1 (RS): Sc in 2nd ch from hook, sc across. Turn. (49 sc)
Row 2: Ch 1, turn. Sc across. Color A. (49 sc)
Row 3: Ch 1, turn. Change to Color E. Sc across. (49 sc)
Row 4: Ch 1, turn. Color E. Sc across. (49 sc)
Row 5: Ch 1, turn. Change to Color D. Sc across. (49 sc)
Row 6: Ch 1, turn. Color D. Sc across. (49 sc)
Row 7: Ch 1, turn. Change to Color B. Sc across. (49 sc)
Row 8: Ch 1, turn. Color B. Sc across. (49 sc)
Row 9: Ch 1, turn. Change to Color A. Sc across. (49 sc)
Row 10: Ch 1, turn. Color A. Sc across. (49 sc)
Row 11: Ch 1, turn. Change to Color D. Sc across. (49 sc)
Row 12: Ch 1, turn. Color D. Sc across. (49 sc)
Row 13: Ch 1, turn. Change to Color A. Sc across. (49 sc)
Row 14: Ch 1, turn. Color A. Sc across. (49 sc)
Row 15: Ch 1, turn. Change to Color E. Sc across. (49 sc)
Row 16: Ch 1, turn. Color E. Sc across. (49 sc)
Row 17: Ch 1, turn. Change to Color B. Sc across. (49 sc)
Row 18: Ch 1, turn. Color B. Sc across. (49 sc)
Do not fasten off. The back band is now approximately 4.5 inches / 11.5 cm tall.
Back Scallop Hem:
With RS facing and Color A, work one row of Scallop Edge along the lower edge. Skip 1 st to reach 48 sts. Work 8 complete scallops. Fasten off.
Back Waist Ties (make 2):
Cut 6 strands of Color A each 80 inches / 203 cm long. Make 2 twisted cords, each finishing at approximately 18 inches / 45.5 cm. Thread one wooden bead onto each cord end and knot to secure. Attach one cord to each short end of the back band.
Section 8: Assembly
Step 1: Block the front panel and back band separately before assembly.
Step 2: Lay the front panel flat RS up. Identify the two side points (LS and RS corners).
Step 3: Using Color A and a tapestry needle, whipstitch the upper corner of each short end of the back band to the corresponding side point of the front panel.
Step 4: The back band ties extend from each side seam and wrap around the body to tie in a bow at center back.
Step 5: The neck ties go around the neck. Adjust by sliding the wooden bead up or down before final knotting.
Step 6: Weave in all remaining ends on the WS. Weave at least 1 inch in two directions for security.
Blocking and Finishing Your Mandala Halter
Do not skip blocking for this piece. Blocking opens up the stitch pattern, evens the color work, and sets the final dimensions. Pin the front panel to your blocking mats, shaping the heart and chevron points carefully. Spray thoroughly and allow to dry completely before removing pins.
Block the back band flat and straight. Once both pieces are dry, proceed with assembly.
Pattern Notes and Tips
The front panel is worked in the round outward from a central magic ring. Color changes occur at the beginning of new rounds. Join new colors with a sl st and carry unused colors loosely along the back, or cut and rejoin as preferred.
All measurements are taken after blocking. The RS of the front panel faces you throughout the main mandala rounds.
This pattern is written for size Small/Medium. To size up, add additional rounds to the chevron border section and widen the back band by adding more foundation chains.
Thank you so much for choosing this pattern. I hope you love making this mandala halter as much as I loved designing it. The finished piece is truly a wearable work of art.
If you make this halter, save this pattern to your Pinterest boards so you can find it again easily. And please drop a comment below with your finished photos. I would absolutely love to see your color combinations and how you styled it. Happy crocheting!
