
This is a baby pinafore dress worked in DK weight yarn. It uses fan stitches, shell stitches, and basic single crochet. The bodice works flat, then the skirt works in the round. Adjustable button straps make sizing flexible. The finished piece fits babies 6 to 12 months.
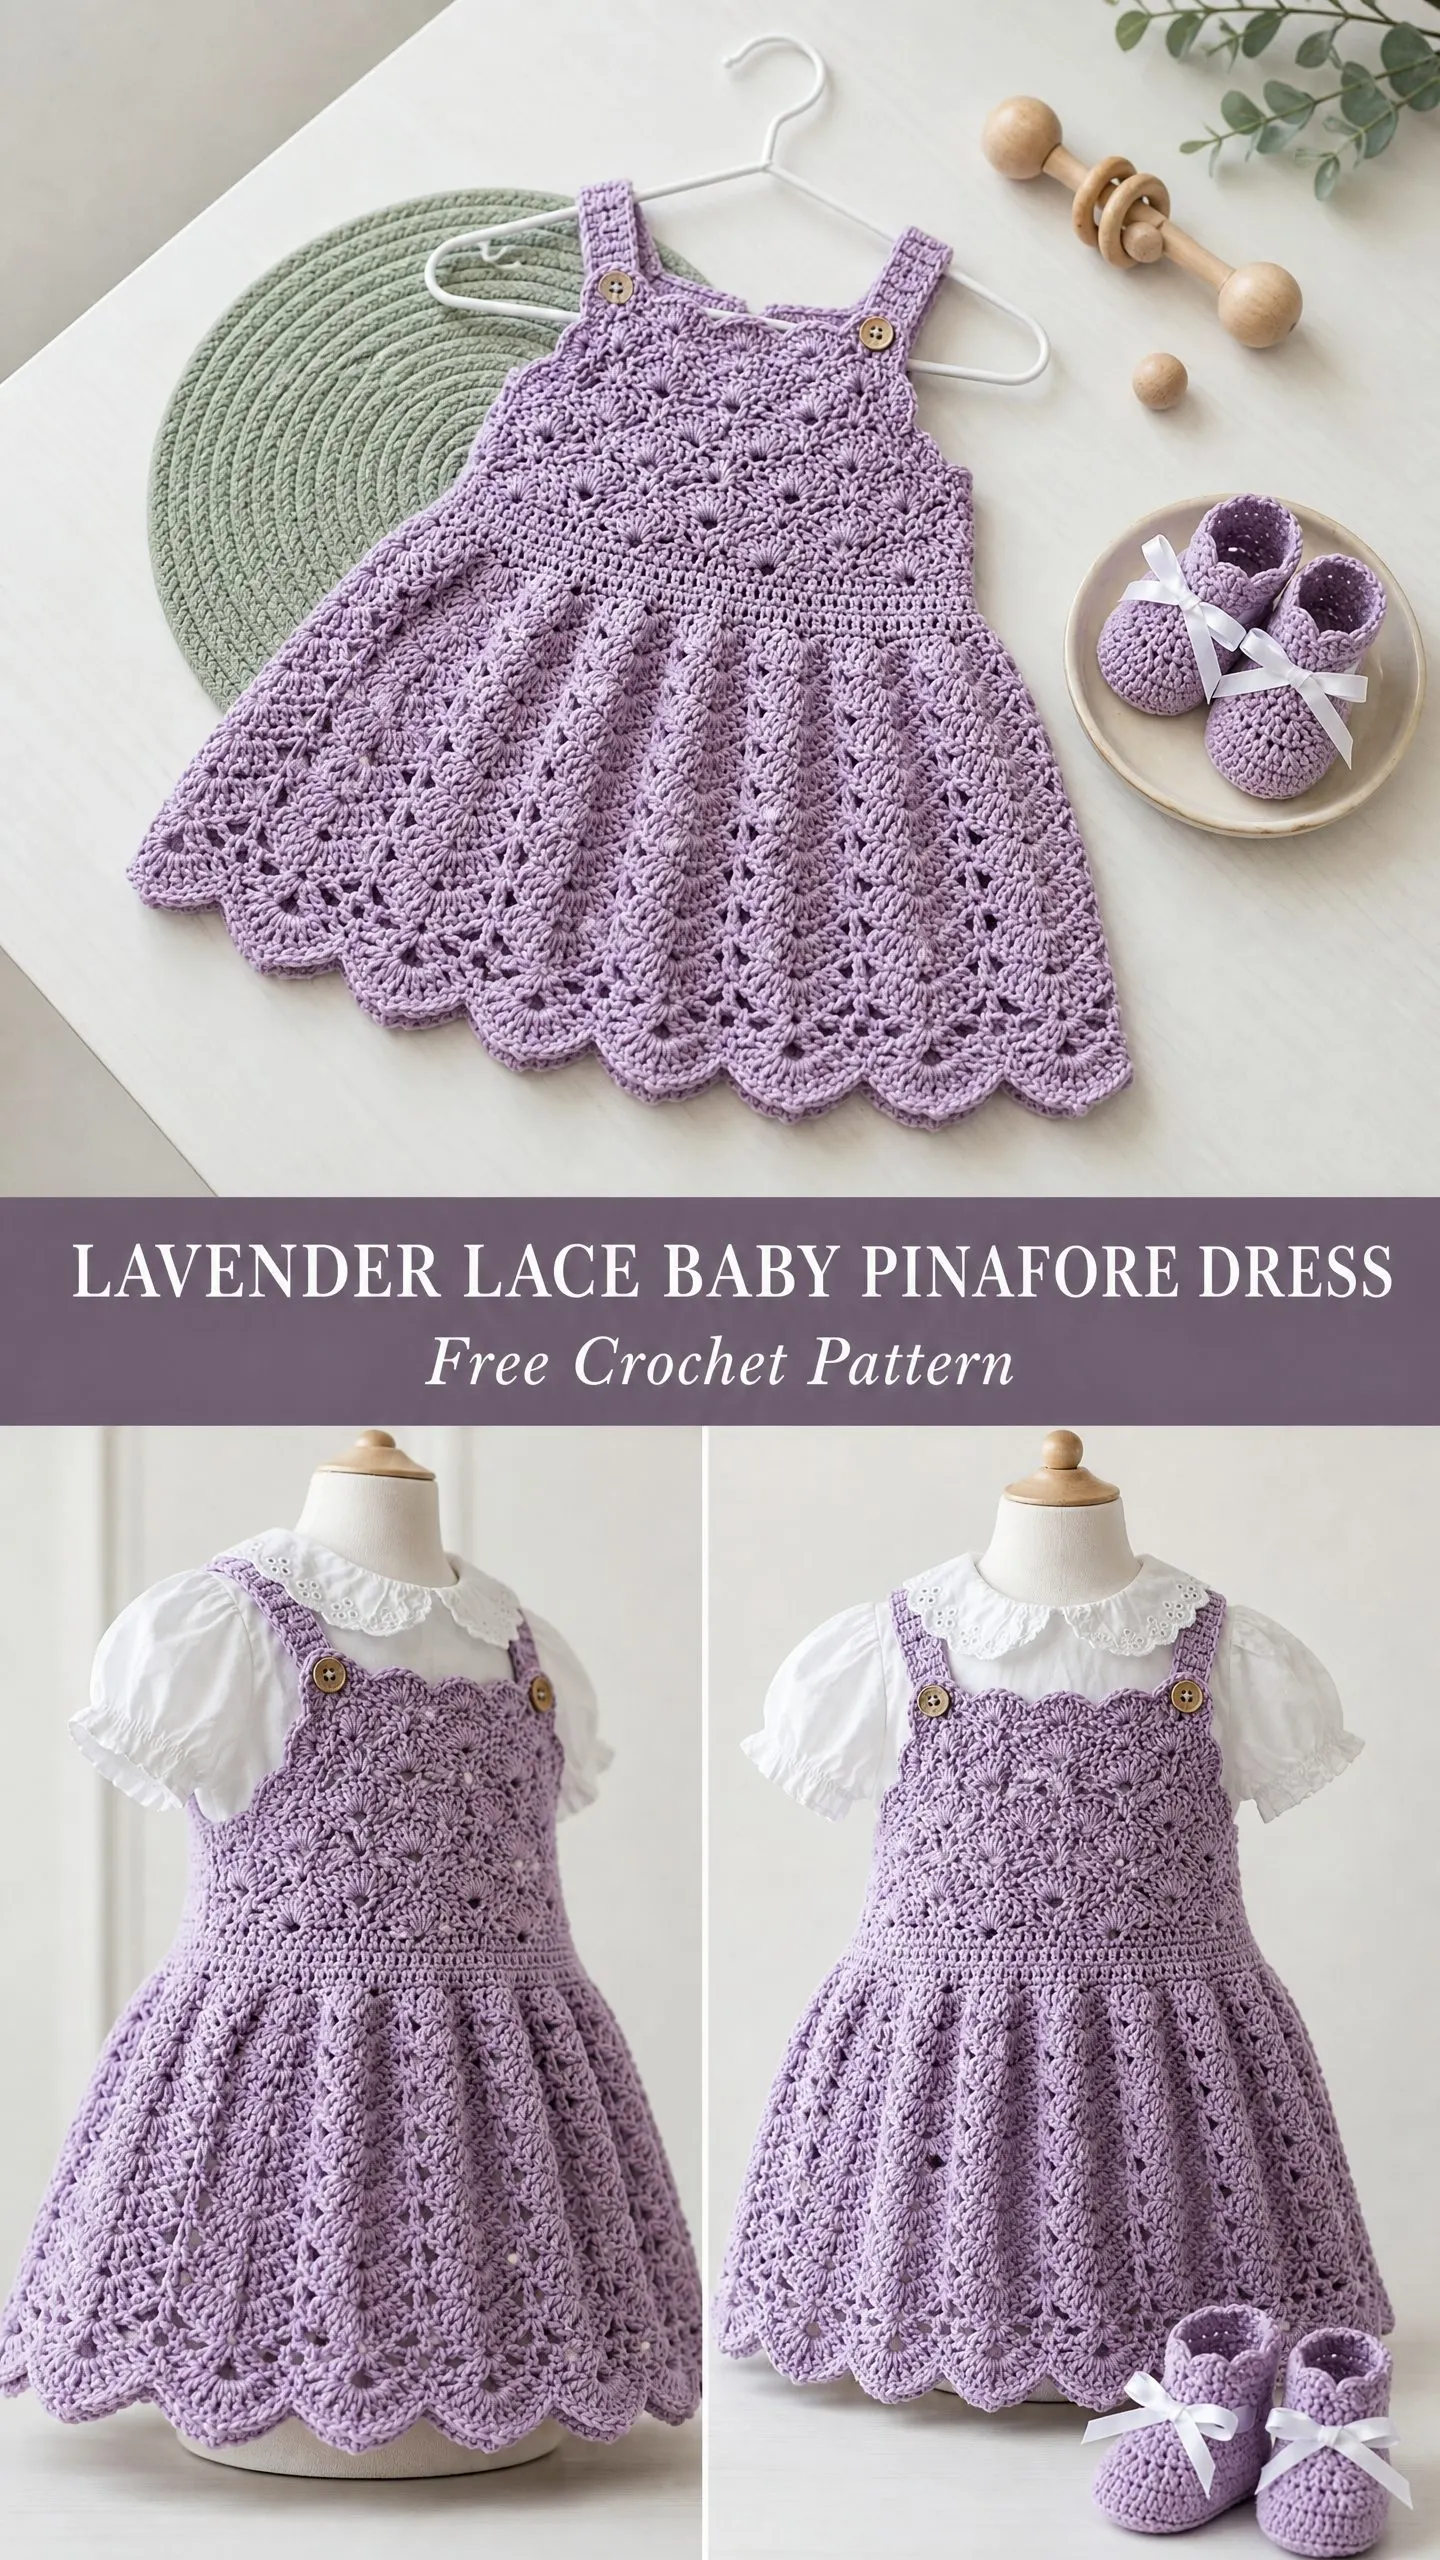
The construction is straightforward once you understand the fan stitch repeat. You will work from the top down, starting with a lace bodice, transitioning through a ribbed waistband, then flaring out into a beautiful lace skirt. The scalloped edges at the neckline and hem give it that classic heirloom look.
If you have completed a couple of lace projects before, you are ready for this one. If you are newer to lace work, take your time with the special stitch definitions below. I have written them out step by step.
Why This Lavender Lace Pinafore Works So Well
The design layers beautifully over a white blouse or onesie. The button straps let you adjust the fit as baby grows. And that flared skirt with its scalloped hem catches the light in the prettiest way.
The color shown is a soft lavender, but this pattern works in any solid color where you want the lace texture to shine. Avoid variegated yarns for this one. The stitch definition matters, and busy colorways can hide all your hard work.
Skill Level
This is an intermediate level crochet pattern. You should feel comfortable with shell stitches, fan lace motifs, working in the round, and top-down garment shaping. Reading stitch repeat instructions is essential.
If you have never worked a lace pattern before, I recommend practicing the fan stitch on a small swatch first. Once you get the rhythm of skip 2, fan, skip 2, single crochet, everything clicks into place.
Time to Complete
Expect 8 to 12 hours if you crochet regularly. Allow 14 to 18 hours if you are newer to lace patterns or like to take your time. This is not a weekend project for most of us, but the results are worth every minute.
Finished Measurements
Size: 6 to 12 months
Size customization tips are included at the end of the pattern for 12 to 18 months and 18 to 24 months.
Materials Needed
Yarn: DK weight (CYCA 3), approximately 300 to 350 yards (275 to 320 m) in lavender
Hook: US size E-4 / 3.5 mm crochet hook
Notions:
Yarn Suggestions
Paintbox Yarns Simply DK in Dusty Lilac works beautifully. It is 100% acrylic, machine washable, and gives great stitch definition.
Drops Safran in Lavender is a cotton option with lovely drape. Cotton shows lace stitches crisply but has a slightly firmer hand.
Lion Brand Pound of Love in Pastel Purple is economical and baby safe. The large skein covers multiple sizes.
Avoid fuzzy or hairy yarns. They obscure the lace pattern. Choose something smooth with good stitch definition.
Gauge
After blocking:
Gauge matters here. This is a garment. If your gauge is off, the fit will be off. Make a swatch, block it, measure it, and adjust your hook size if needed.
Abbreviations
Special Stitches
Fan Stitch
This creates the lacy, petal-like texture throughout the skirt.
1. Yarn over and insert hook into the designated stitch or chain space.
2. Yarn over and pull up a loop.
3. Yarn over and draw through two loops on hook. First double crochet (dc) made.
4. Work 4 more dc into the same stitch or chain space.
You now have 5 dc total in one location. That cluster is one fan.
Shell Stitch
1. Work 3 dc into the designated stitch.
2. Chain 1.
3. Work 3 more dc into the same designated stitch.
This 6-stitch shell with a chain-1 center creates the scalloped hem border.
Scallop Border Stitch
1. Slip stitch into first stitch.
2. Chain 3 (counts as first dc).
3. Work 4 dc into the same stitch (5 dc total).
4. Skip 2 stitches.
5. Slip stitch into next stitch.
6. Skip 2 stitches.
7. Repeat from step 2 across.
Bodice Lace Repeat
1. Skip 2 stitches.
2. Work 5 dc into the next stitch (fan made).
3. Skip 2 stitches.
4. Single crochet into the next stitch.
This 6-stitch repeat creates the open lace texture in the bodice.
Back Post Double Crochet (BPdc)
1. Yarn over.
2. Insert hook from back to front to back around the post of the designated stitch in the row below.
3. Yarn over and pull up a loop.
4. Yarn over and draw through two loops twice.
Front Post Double Crochet (FPdc)
1. Yarn over.
2. Insert hook from front to back to front around the post of the designated stitch in the row below.
3. Yarn over and pull up a loop.
4. Yarn over and draw through two loops twice.
Pattern Notes Before You Begin
1. The bodice works flat (back and forth in rows). This keeps the button strap openings separate. The pinafore body joins and works in the round from the waistband down.
2. Turning chains: Chain 3 at the beginning of a dc row counts as the first dc. Chain 1 at the beginning of a sc row does NOT count as a stitch.
3. Place stitch markers at the side seam points to track increases during the skirt section.
4. Straps work separately and attach with buttons. Front straps use buttonholes built into the strap. Back attachment uses buttons sewn to the bodice.
5. The fan stitch repeat is a 6-stitch repeat. Your stitch counts must be divisible by 6. Math checks are built into the instructions.
6. All rounds in the skirt are joined rounds unless noted.
7. Right side faces outward throughout.
Step by Step Crochet Pattern Instructions
Bodice Front Panel
The bodice front works flat. It joins to the back panel later.
Foundation: Chain 43.
Row 1 (WS): Starting in 2nd ch from hook, sc across. Turn. (42 sc)
Row 2 (RS, scallop neckline setup): Ch 1, sc in first st. [Skip 2 sts, work 5 dc into next st (fan), skip 2 sts, sc in next st] repeat across. Turn. (42 sts in pattern, 7 fans)
Row 3 (WS): Ch 3 (counts as dc), dc in same st, [ch 1, sc in center dc of next fan, ch 1, 2 dc in next sc] repeat across, ending ch 1, sc in center dc of last fan, ch 1, dc in last sc. Turn. (42 sts and ch-sps)
Row 4 (RS): Ch 1, sc in first st. [Skip ch-1 sp, 5 dc in next sc, skip ch-1 sp, sc in space between dc-groups] repeat 6 times, then skip ch-1 sp, 5 dc in last sc, skip ch-1 sp, sc in top of t-ch. Turn. (42 sts in pattern, 7 fans)
Row 5: Repeat Row 3. (42 sts and ch-sps)
Row 6: Repeat Row 4. (42 sts in pattern, 7 fans)
Row 7: Repeat Row 3. (42 sts and ch-sps)
Row 8 (RS, transition to solid bodice): Ch 1, sc evenly across all sts and ch-sps. Turn. (42 sc)
Row 9: Ch 1, sc across. Turn. (42 sc)
Row 10: Ch 1, sc across. Turn. (42 sc)
Row 11: Ch 1, sc across. Turn. (42 sc)
Checkpoint: Bodice front panel should measure approximately 4.5 inches (11.5 cm) tall and 9.5 inches (24 cm) wide.
Do not fasten off. Set front panel aside.
Bodice Back Panel
Work exactly as Bodice Front Panel through Row 11. (42 sc)
Do not fasten off. Both panels should look identical.
Joining Bodice Panels
With RS facing and both panels on your work surface:
Setup Round (joining rnd): Starting with the back panel still on your hook, ch 1 (does not count as st). Place the front panel next to the back panel with RS facing outward. Sc across back panel (42 sc), then sc across front panel (42 sc), then join with sl st to first sc of this round. (84 sc)
Place stitch markers at stitch 42 and stitch 84 to mark side seams.
Waistband
Round 1: Ch 2 (counts as hdc), hdc in each st around, join with sl st to top of t-ch. (84 hdc)
Round 2: Ch 2, FPdc around next st, BPdc around next st, [FPdc around next st, BPdc around next st] repeat around, join with sl st to top of t-ch. (84 sts)
Round 3: Ch 2, [FPdc around FPdc, BPdc around BPdc] repeat around, join with sl st to top of t-ch. (84 sts)
Round 4: Ch 2, hdc in each st around, join with sl st to top of t-ch. (84 hdc)
Checkpoint: After the waistband, your piece should measure approximately 6 inches (15 cm) tall from the top of the neckline.
Skirt Increase Round
Increase Round: Ch 1, sc in first 7 sts, 2 sc in next st, [sc in next 6 sts, 2 sc in next st] repeat around, ending sc in last st, join with sl st to first sc. (96 sc)
Math check: 84 + 12 increases = 96 sc. 96 / 6 = 16 repeats.
Skirt
Work in the round with RS facing outward. Do not turn between rounds.
Round 1 (fan round): Ch 1, sc in first st. [Skip 2 sts, 5 dc in next st, skip 2 sts, sc in next st] repeat around, join with sl st to first sc. (96 sts in 16 fan repeats)
Round 2: Ch 5 (counts as dc plus ch 2), [sc in center dc of next fan, ch 2, dc in next sc, ch 2] repeat around, ending sc in center dc of last fan, ch 2, join with sl st to 3rd ch of beg ch-5. (32 dc/sc, 32 ch-2 sps)
Round 3: Ch 1, sc in first st. [Skip ch-2 sp, 5 dc in next sc, skip ch-2 sp, sc in next dc] repeat around, join with sl st to first sc. (96 sts in 16 fan repeats)
Round 4: Repeat Round 2. (32 dc/sc, 32 ch-2 sps)
Round 5: Repeat Round 3. (96 sts in 16 fan repeats)
Round 6: Repeat Round 2. (32 dc/sc, 32 ch-2 sps)
Round 7 (second increase round): Ch 1, sc in first st. [Skip ch-2 sp, 7 dc in next sc, skip ch-2 sp, sc in next dc] repeat around, join. (128 sts in 16 repeats)
Note: You are adding 2 extra dc to each fan (7 dc instead of 5) to flare the skirt.
Round 8: Ch 5 (counts as dc plus ch 2), [sc in center dc of next fan (4th dc of 7-dc fan), ch 2, dc in next sc, ch 2] repeat around, join with sl st to 3rd ch of beg ch-5. (32 dc/sc, 32 ch-2 sps)
Round 9: Ch 1, sc in first st. [Skip ch-2 sp, 7 dc in next sc, skip ch-2 sp, sc in next dc] repeat around, join. (128 sts in 16 repeats)
Round 10: Repeat Round 8. (32 dc/sc, 32 ch-2 sps)
Round 11: Repeat Round 9. (128 sts in 16 repeats)
Round 12: Repeat Round 8. (32 dc/sc, 32 ch-2 sps)
Round 13 (third increase round): Ch 1, sc in first dc-sp. [Skip ch-2 sp, work 9 dc in next sc, skip ch-2 sp, sc in next dc] repeat around, join. (160 sts in 16 repeats)
Round 14: Ch 6 (counts as dc plus ch 3), [sc in center dc (5th dc) of next 9-dc fan, ch 3, dc in next sc, ch 3] repeat around, join with sl st to 3rd ch of beg ch-6. (32 dc/sc, 32 ch-3 sps)
Round 15: Ch 1, sc in first st. [Skip ch-3 sp, 9 dc in next sc, skip ch-3 sp, sc in next dc] repeat around, join. (160 sts in 16 repeats)
Round 16: Repeat Round 14. (32 dc/sc, 32 ch-3 sps)
Round 17: Repeat Round 15. (160 sts in 16 repeats)
Checkpoint: Skirt portion should measure approximately 5.5 inches (14 cm) from the waistband.
Scalloped Hem Border
Border Round 1: Ch 1, sc in each st across each fan and sc around (work 1 sc in each dc and 1 sc in each sc from Round 17, skipping chain spaces). Join with sl st to first sc. (160 sc)
Border Round 2 (large scallop setup): Ch 1, sc in first st. [Skip 4 sts, 9 dc in next st, skip 4 sts, sc in next st] repeat around, join with sl st to first sc. (160 sts in 16 repeats)
Border Round 3: Ch 1, sl st in first st. Working into the 9-dc scallop: sc in first dc, hdc in next dc, dc in next 3 dc, hdc in next dc, sc in next dc, sl st in last dc of scallop, sl st in next sc between scallops. Repeat around, join. (160 sts shaped into 16 scallop petals)
Fasten off and weave in end.
Straps (Make 2)
Foundation: Chain 8.
Row 1: Starting in 2nd ch from hook, sc across. Turn. (7 sc)
Rows 2 through 28: Ch 1, sc across. Turn. (7 sc each row)
Buttonhole Row 29: Ch 1, sc in first 2 sts, ch 2, skip 2 sts, sc in last 3 sts. Turn. (7 sts including ch-2 sp)
Row 30: Ch 1, sc in first 3 sts, 2 sc in ch-2 sp, sc in last 2 sts. Turn. (7 sc)
Rows 31 through 33: Ch 1, sc across. Turn. (7 sc)
Fasten off, leaving a 12-inch (30 cm) tail for sewing.
Each strap should measure approximately 7 inches (18 cm) long and 1.5 inches (4 cm) wide.
Neckline Finish
With RS facing, attach yarn at upper right corner of bodice front.
Neckline Round: Ch 1, sc evenly around the entire top edge of the bodice (front and back), working approximately 1 sc per row end along the sides and 1 sc per st along the top edges. Join with sl st to first sc. Ensure your count is divisible by 3.
Scallop Edging: [Sl st in next st, ch 3 (counts as dc), 4 dc in same st (5 dc total in 1 st), skip 2 sts, sl st in next st, skip 2 sts] repeat around, ending with sl st at beginning point, join. Fasten off.
Strap Attachment
Front strap placement: Position one strap on the right front bodice top edge, approximately 0.5 inch (1.3 cm) from center front, with the buttonhole end at the top. Sew the non-buttonhole end securely to the WS of the front bodice top edge. Repeat for left front strap.
Back strap placement: Bring the buttonhole end over the shoulder to the back. Sew a button to the RS of the back bodice top edge where the buttonhole falls comfortably. Sew all 4 buttons securely. Double-stitch for baby safety.
Finishing and Blocking
Weave in all yarn ends thoroughly.
Wet blocking: Fill a basin with cool water. Submerge the pinafore and gently press to saturate. Do not wring. Press out excess water between clean towels. Lay flat on a blocking mat. Use rust-proof pins to spread the skirt scallops open. Pin the hem border into its peak-and-valley shape. Allow to dry completely.
Steam blocking (for acrylic): Hold a steam iron 1 to 2 inches above the fabric. Do not touch iron to yarn. Steam and gently shape with fingers. Allow to cool before moving.
Size Customization Tips
To size up to 12 to 18 months: Increase the foundation chain by 12 stitches (chain 55, giving 54 sc). Add 12 more stitches when joining panels (total 108 sc). Begin skirt with 108 sc. Increase to 120 sc for the fan increase round. Add 2 extra rows to each skirt section. Add 4 to 6 additional strap rows.
To size up to 18 to 24 months: Increase the foundation chain by 24 stitches (chain 67, giving 66 sc). 66 x 2 panels = 132 sc joined. Round up to 138 sc (23 fan repeats). Add 4 extra rows to each skirt section. Add 8 additional strap rows.
General rule: Every 6 extra stitches adds approximately 1.3 inches (3.3 cm) of circumference. Every 2 extra rows add approximately 0.4 inch (1 cm) of height.
Care Instructions
Machine wash on gentle cycle in cool water if using acrylic. Use a mesh laundry bag. Lay flat to dry. Do not tumble dry. Do not iron directly on lace sections. For cotton or non-superwash wool, hand wash only in cool water.
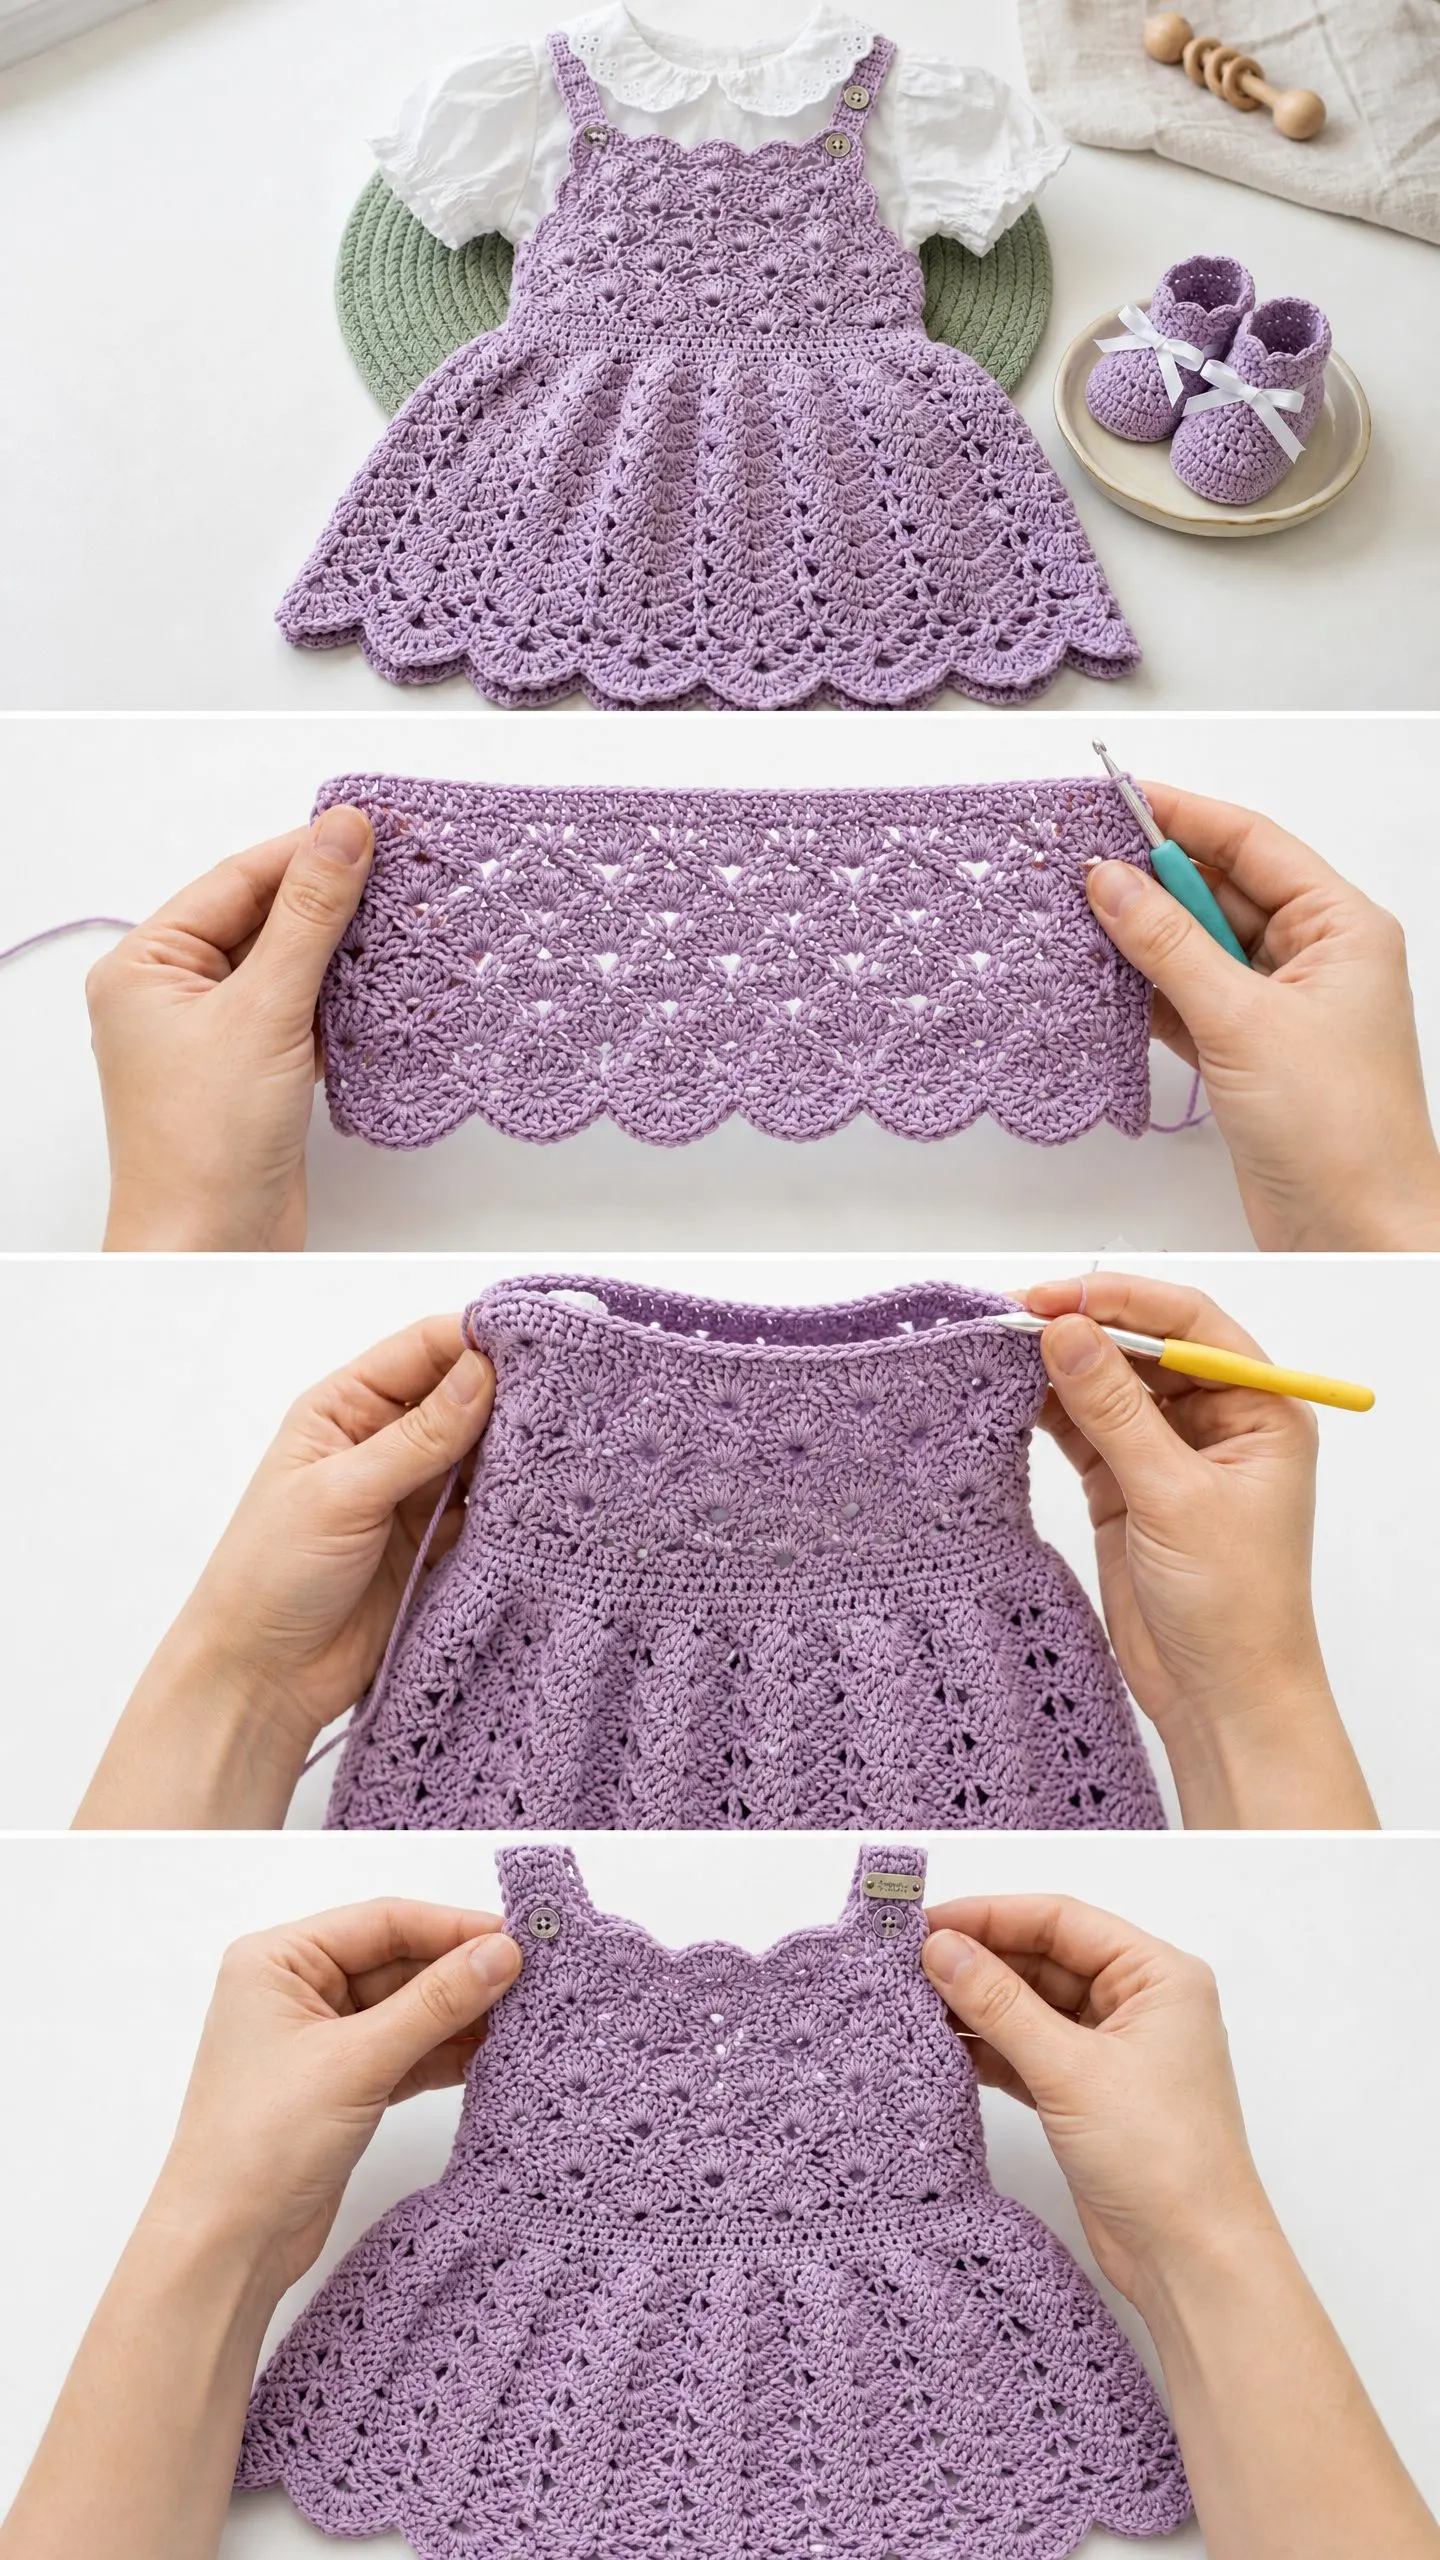
You Made It!
Thank you so much for choosing this lavender lace baby pinafore pattern. I hope the step by step instructions made the process feel manageable, even with all those fans and scallops. The finished dress is an absolute treasure, whether you are making it for your own little one, a baby shower gift, or just because you wanted to create something beautiful.
If you save this pattern to your Pinterest boards, you will have it ready whenever inspiration strikes. And please, if you make this pinafore, drop a comment below. I would love to see how yours turns out!
