
This is ONE of my absolute favorite baby projects to date, and I’m so excited to share it with you! The Lavender Ruffle Baby Playsuit works up faster than you might think, taking roughly 8 to 12 hours depending on your pace. That gorgeous ruffled collar? Way easier than it looks.
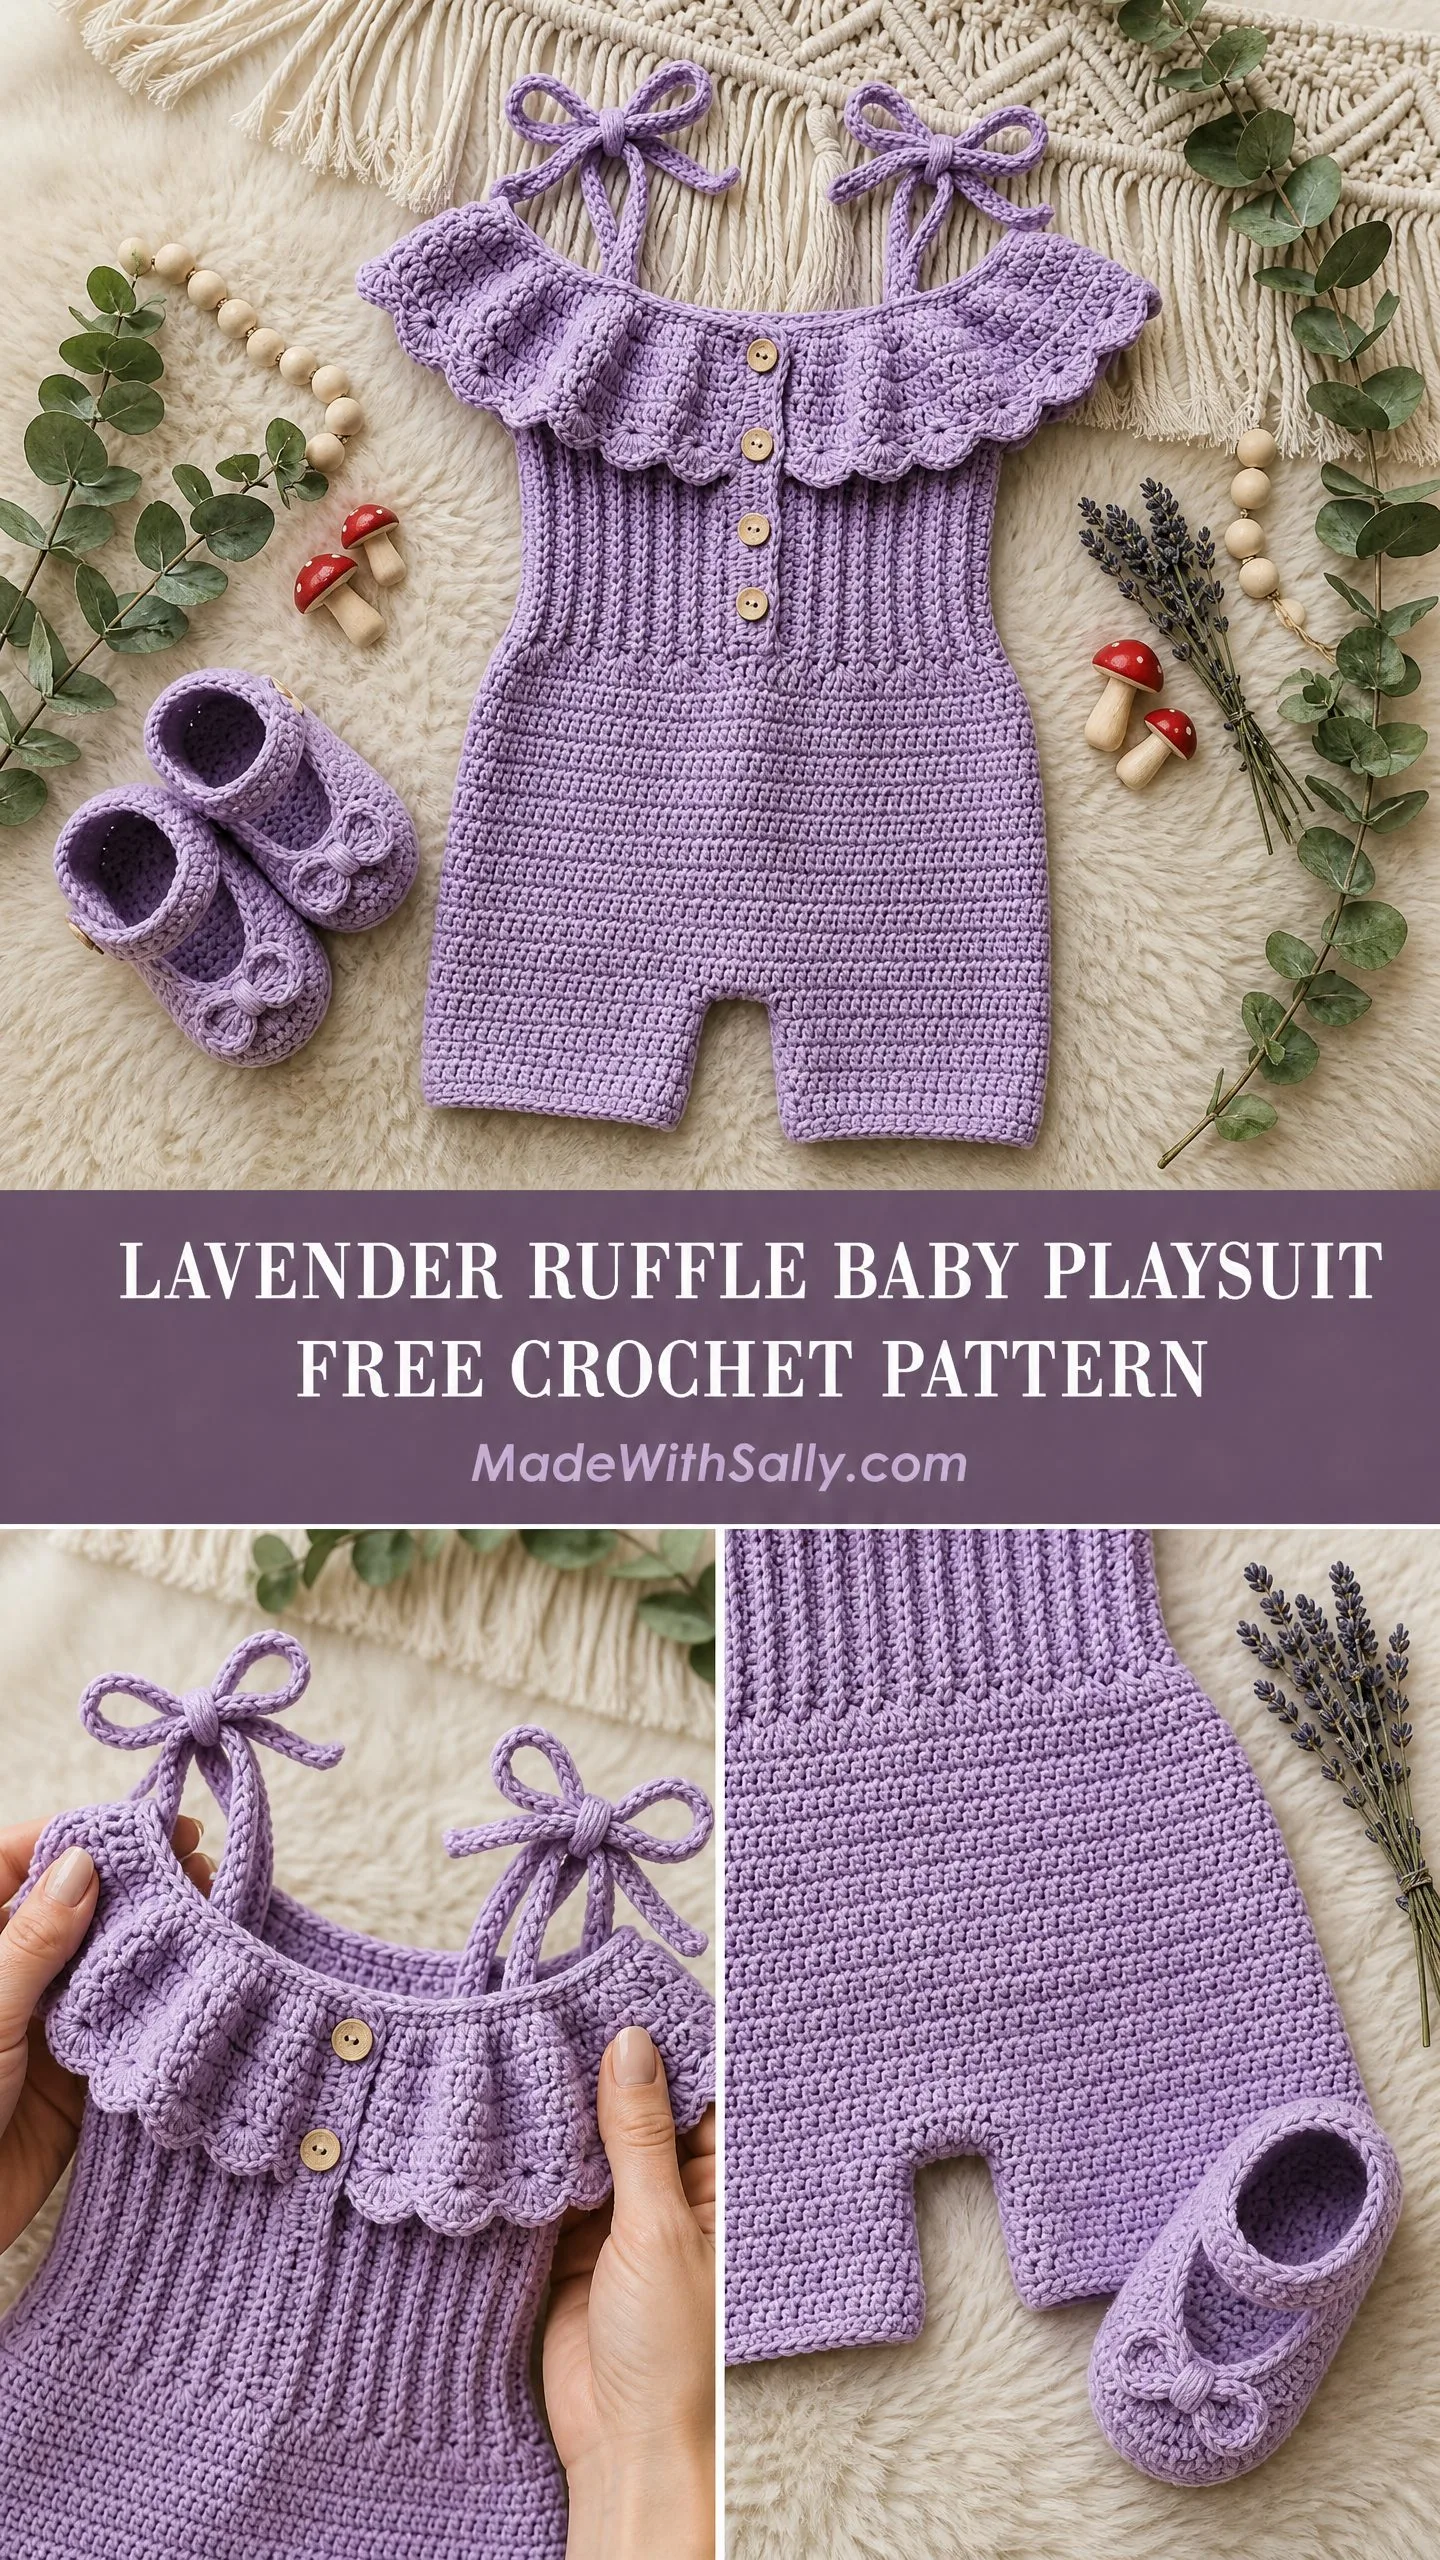
If you’ve been saving a special skein of soft lavender yarn for the perfect project, this is it. The combination of ribbed texture, delicate scalloped edges, and those sweet tie straps at the shoulders creates a showstopper piece that looks like it belongs in a boutique.
Trust me when I say this playsuit makes an incredible baby shower gift. Every person who sees it will assume you spent weeks on it. Our little secret that you didn’t.
Why You’ll Love This Baby Playsuit Crochet Pattern
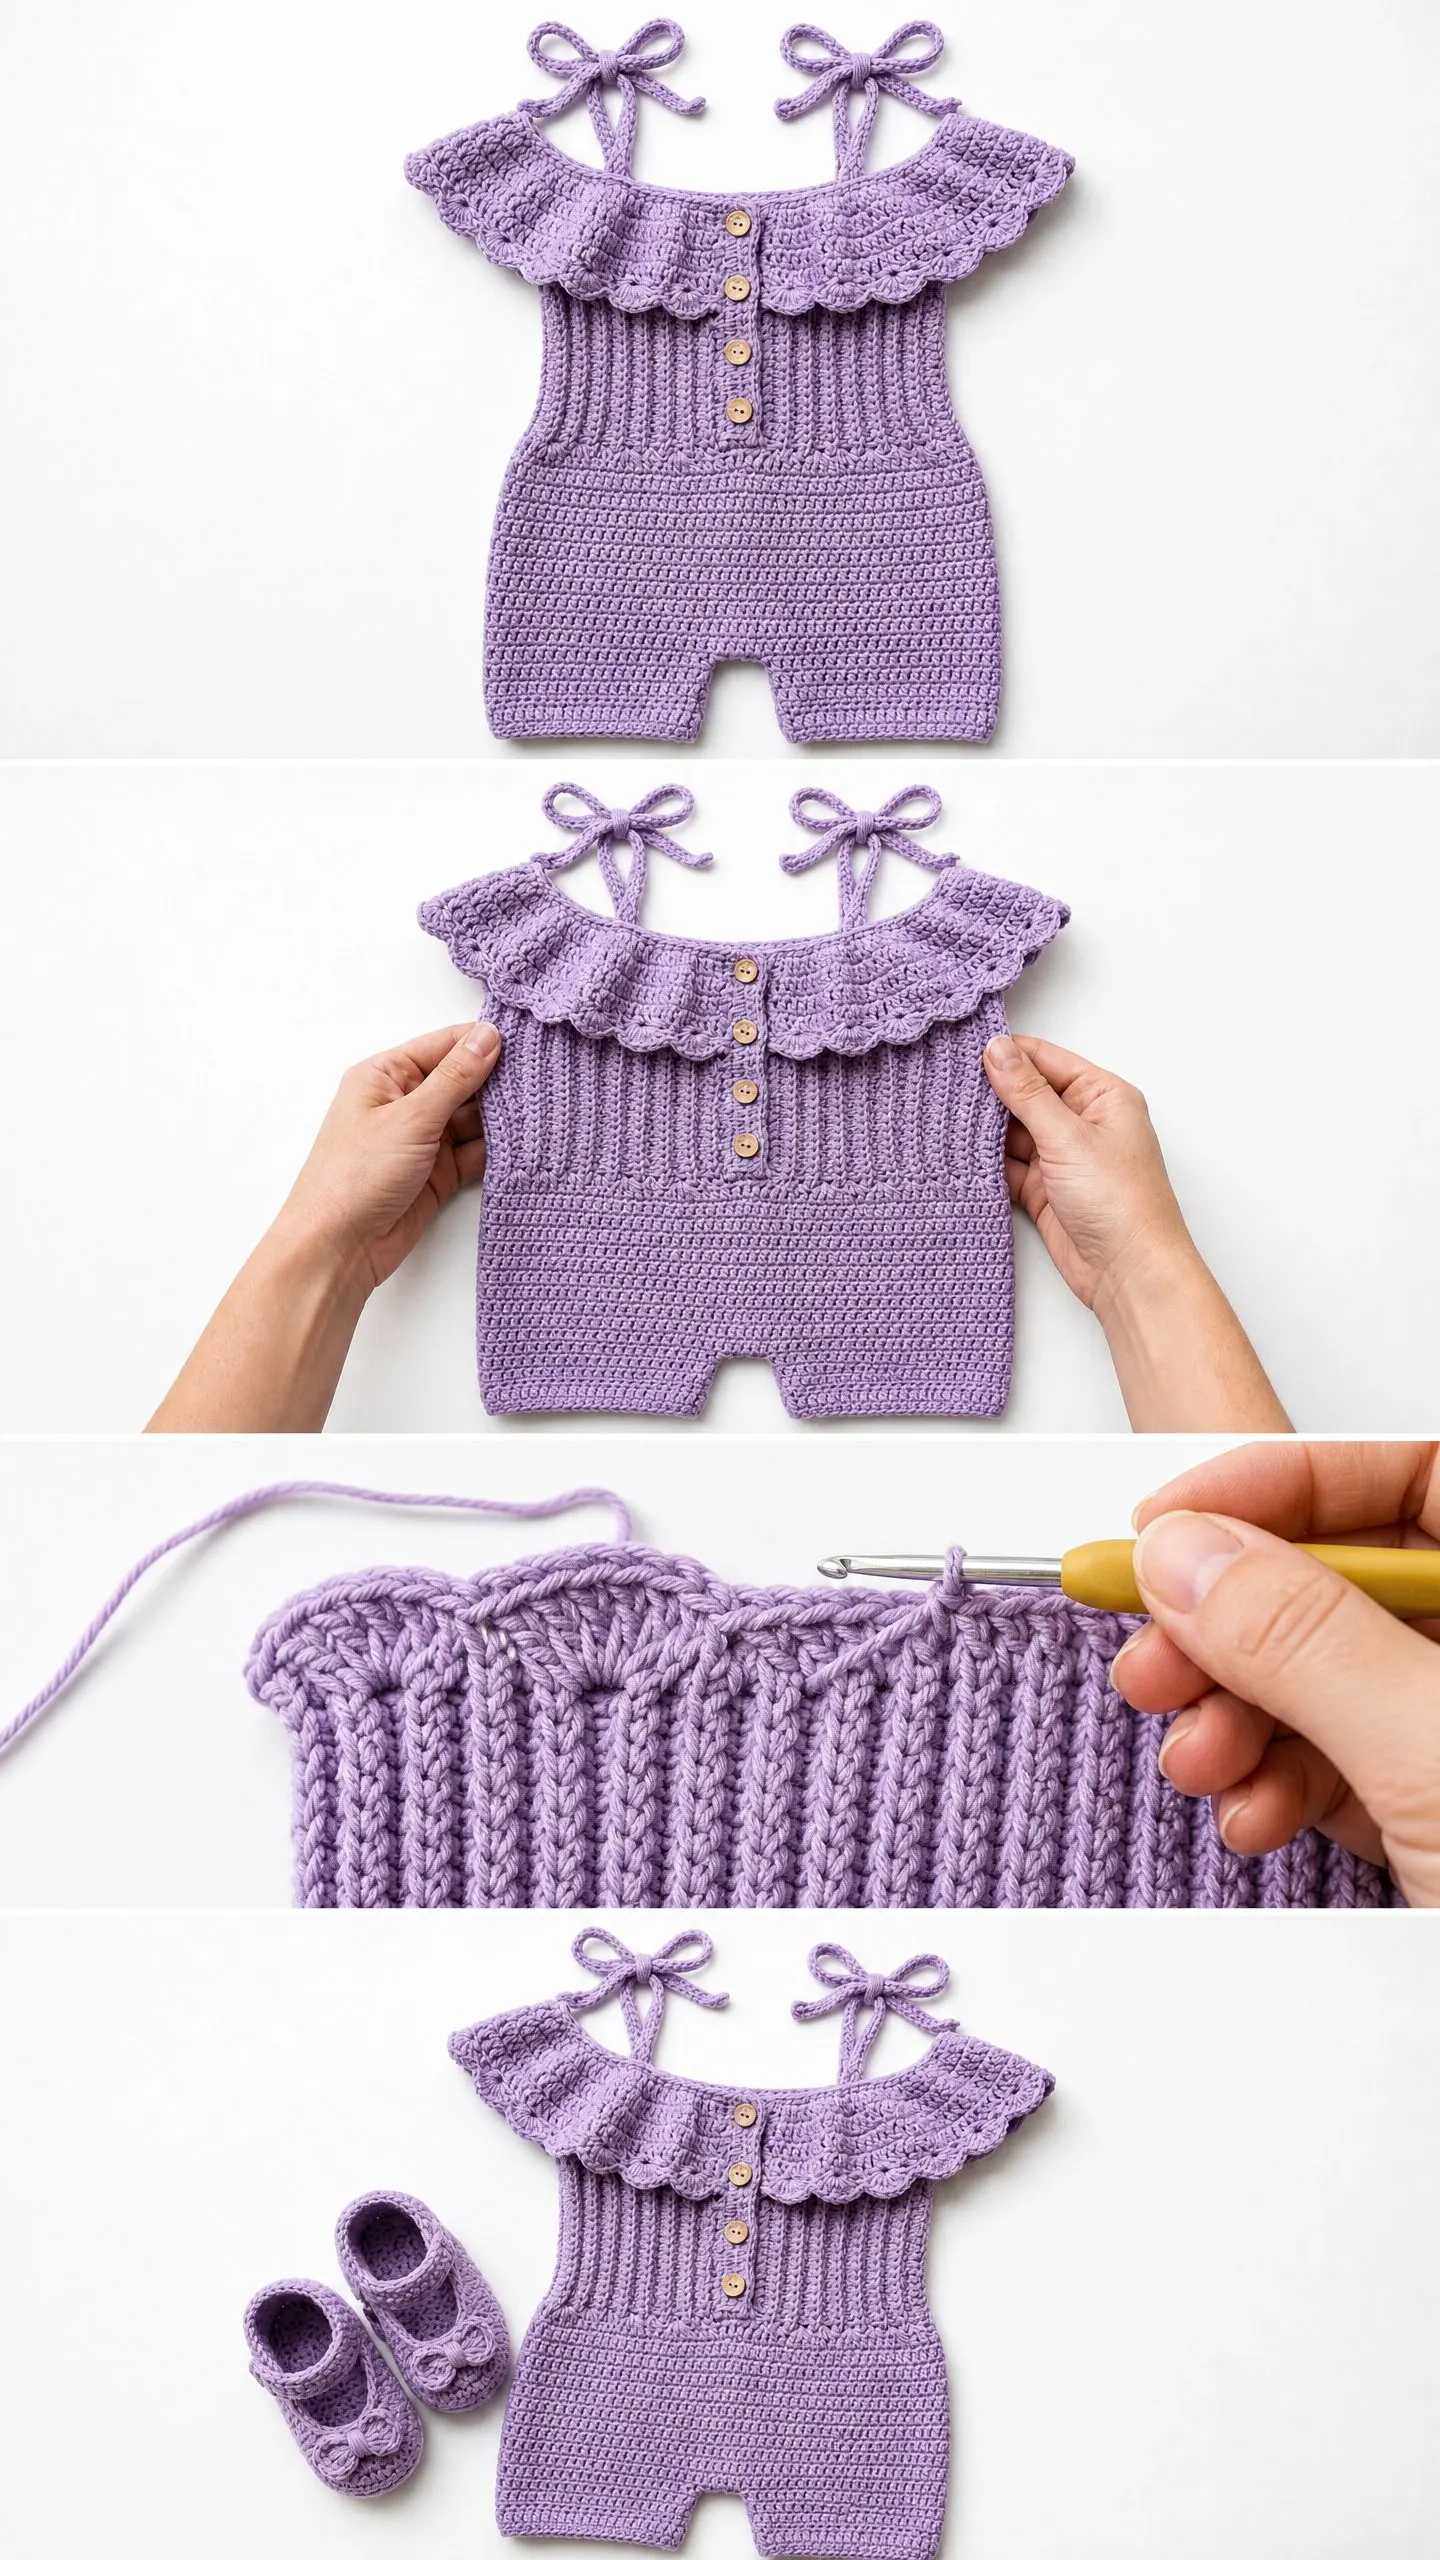
This charming playsuit brings together several beautiful techniques in one cohesive garment. The off-shoulder ruffled collar gives it that vintage sweetness, while the ribbed bodice adds stretch and texture. Three wooden buttons run down the front placket, and adjustable tie straps mean you can customize the fit as baby grows.
The construction is smarter than it first appears. You’ll work the collar separately, build the bodice flat with a front opening, then join everything in the round for the shorts section. This approach keeps the project manageable and lets you see progress quickly.
Skill level: Intermediate. You should be comfortable working in the round, creating ribbed fabric, seaming pieces together, and finishing button bands. If you’ve made a basic garment before, you’re ready for this.
Materials You’ll Need
Gather these supplies before you start:
Yarn: Approximately 300 yards (274 meters) for size 3 to 6 months, or 375 yards (343 meters) for size 6 to 12 months. Use DK weight yarn (CYCA #3) in lavender or your preferred color.
Recommended yarn options:
Choose yarn with good drape and machine washability. Avoid fuzzy or heavily textured yarns since they’ll hide the beautiful ribbing and ruffle definition.
Hook: US size E-4 / 3.5 mm, or whatever size you need to match gauge.
Notions:
Finished Sizes
Size 3 to 6 months:
Size 6 to 12 months:
Throughout this pattern, instructions are written for size 3 to 6 months with size 6 to 12 months in parentheses. When only one number appears, it applies to both sizes.
Gauge (Don’t Skip This!)
18 single crochet (sc) x 20 rows = 4 in / 10 cm worked in single crochet, blocked
14 half double crochet (hdc) x 12 rows = 4 in / 10 cm worked in half double crochet ribbing through the back loop only, blocked
Gauge matters here because this is a garment. If your stitches are too loose, the playsuit will be too big and saggy. Too tight, and baby won’t fit into it. Swatch first and adjust your hook size as needed.
Abbreviations and Stitch Definitions
Let me walk you through every stitch you’ll use in this crochet tutorial:
blo = back loop only (insert your hook under just the back loop of the stitch, not both loops)
ch = chain (yarn over, pull through loop on hook)
dc = double crochet (yarn over, insert hook, pull up loop, yarn over, pull through 2 loops, yarn over, pull through remaining 2 loops)
hdc = half double crochet (yarn over, insert hook, pull up loop, yarn over, pull through all 3 loops at once)
hdc2tog = half double crochet two together, a decrease (yarn over, insert in next stitch, pull up loop, yarn over, insert in following stitch, pull up loop, yarn over, pull through all 5 loops)
sc = single crochet (insert hook, pull up loop, yarn over, pull through both loops)
sc2tog = single crochet two together, a decrease (insert hook in next stitch, pull up loop, insert hook in following stitch, pull up loop, yarn over, draw through all 3 loops)
sk = skip
sl st = slip stitch (insert hook, pull loop through stitch and through loop on hook in one motion)
st(s) = stitch(es)
RS = right side
WS = wrong side
t-ch = turning chain
rem = remaining
rep = repeat
rnd = round
Special Stitches Explained
Ribbing Stitch (hdc blo ribbing)
This creates that stretchy vertical texture you see on the bodice. Here’s how it works:
Row 1: Chain any number. Half double crochet in third chain from hook and in each chain across. Turn.
Every following row: Chain 2 (this does NOT count as a stitch throughout), half double crochet in the back loop only of each stitch across. Turn.
The chain 2 at the start is never counted as a stitch in this pattern. This is important! Always work your first hdc directly into the first stitch at the base of that chain 2.
Scallop Edging
This decorative edge appears on the collar and leg openings:
Step 1: Join yarn in any stitch.
Step 2: Slip stitch in first stitch, chain 3, work 4 double crochet in same stitch, skip 2 stitches, slip stitch in next stitch.
Step 3: Chain 3, work 4 double crochet in the same slip stitch you just made, skip 2 stitches, slip stitch in next stitch.
Step 4: Repeat Step 3 across or around.
Each scallop shell uses 3 stitches total. Your foundation count must be a multiple of 3 for this to work out evenly.
Ruffle Shell Stitch
This creates the gorgeous collar ruffle:
Step 1: Chain a multiple of 3 plus 2.
Step 2: Single crochet in second chain from hook, skip 2 chains, work 5 double crochet in next chain (shell made), skip 2 chains, single crochet in next chain.
Step 3: Repeat Step 2 across.
Step 4: Turn. Chain 3, work 2 double crochet in first single crochet, single crochet in center (3rd) double crochet of shell below, 5 double crochet in next single crochet, single crochet in center double crochet of next shell below.
Step 5: Repeat Step 4 across, ending with 3 double crochet in final single crochet.
Adjustable Tie Strap
Step 1: Join yarn at shoulder marker position.
Step 2: Chain 30 (or desired length for adjustability).
Step 3: Slip stitch back down the chain to form a firm cord.
Step 4: Fasten off and weave in end. Tie into a bow at top.
Step by Step Crochet Pattern Instructions
Section 1: Collar Ruffle
The collar is worked flat and attached later. It creates that beautiful off-shoulder look.
Foundation Chain: Ch 92 (98).
Row 1 (WS): Sc in second ch from hook, sk 2 ch, 5 dc in next ch (shell), sk 2 ch, sc in next ch. Rep from (sk 2 ch, 5 dc in next ch, sk 2 ch, sc in next ch) across. Turn. 15 (16) shells, 16 (17) sc
Row 2 (RS): Ch 3, 2 dc in first sc, sc in center (3rd) dc of first shell, (5 dc in next sc, sc in center dc of next shell) across to last sc, 3 dc in last sc. Turn. 15 (16) shells total
Row 3 (WS): Ch 1, sc in first dc, (sk 2 dc, 5 dc in next sc, sk 2 dc, sc in center dc of next shell) across, ending sc in top of t-ch. Turn. 15 (16) shells, 16 (17) sc
Fasten off after Row 3.
Scallop Edging on Lower Edge:
With RS facing, join yarn at right end of the foundation chain edge.
Row 1: Sl st in first available st along foundation chain edge, (ch 3, 4 dc in same st, sk 2 sts, sl st in next st) across. Fasten off.
Set collar aside. You’ll attach it at the end.
Section 2: Bodice
The bodice uses that lovely ribbing stitch and has a center front opening for the buttons.
Front Bodice Panel:
Foundation: Ch 38 (44).
Row 1 (WS): Hdc in third ch from hook and in each ch across. Turn. 36 (42) hdc
Rows 2 to 16 (2 to 18): Ch 2, hdc in blo of each st across. Turn. 36 (42) hdc
Don’t fasten off yet.
Front Placket Split:
Now you’ll divide the panel to create the button opening.
Left Front Half:
Row 17 (19): Ch 2, hdc blo in first 18 (21) sts. Turn. Leave remaining sts unworked. 18 (21) hdc
Rows 18 to 22 (20 to 24): Ch 2, hdc blo across. Turn. 18 (21) hdc
Fasten off.
Right Front Half:
Rejoin yarn in next unworked st after the split point.
Row 17 (19): Ch 2, hdc blo across remaining 18 (21) sts. Turn. 18 (21) hdc
Rows 18 to 22 (20 to 24): Ch 2, hdc blo across. Turn. 18 (21) hdc
Fasten off.
Back Bodice Panel:
Foundation: Ch 38 (44).
Row 1 (WS): Hdc in third ch from hook and in each ch across. Turn. 36 (42) hdc
Rows 2 to 22 (2 to 24): Ch 2, hdc blo across. Turn. 36 (42) hdc
Fasten off.
Seaming the Bodice:
Hold front and back panels with wrong sides facing outward (right sides together). Using your yarn needle, whipstitch or mattress stitch the side seams. Leave the top edge open for collar attachment and the bottom edge open for the body join.
Turn right side out.
Checkpoint: Your seamed bodice should measure approximately 6 in / 15 cm from top to bottom (6.5 in / 16.5 cm for larger size) and 16 in / 40.5 cm (18 in / 45.5 cm) around.
Section 3: Lower Body and Shorts
Now we join in the round for the body and shorts section.
Join yarn to the bottom edge of the seamed bodice at the right side seam with RS facing.
Set-Up Round: Sc evenly around the bottom edge of the bodice, placing 72 (81) sc total. Place marker at start of round and at center back. Join with sl st to first sc. 72 (81) sc
Rounds 1 to 6 (1 to 7): Sc in each st around. 72 (81) sc
Crotch Shaping:
Round 7 (8): (Sc 7, sc2tog) around. 64 (72) sc
Round 8 (9): (Sc 6, sc2tog) around. 56 (63) sc
Round 9 (10): (Sc 5, sc2tog) around. 48 (54) sc
Round 10 (11): Sc in each st around. 48 (54) sc
Divide for Legs:
Place stitch marker at the midpoint of the round (stitch 24 for smaller size, stitch 27 for larger size).
Work across first 24 (27) sts (front leg opening), ch 2, sl st to stitch 25 (28) to close crotch. Work across back 24 (27) sts.
Leg One (Right Leg):
Join yarn to the right side of one leg opening.
Set-Up: Sc evenly around leg opening picking up 27 (30) sc including across the ch-2 bridge. Join to first sc. 27 (30) sc
Rounds 1 to 3: Sc in each st around. 27 (30) sc
Leg Edging Round: (Sl st in next st, ch 3, 4 dc in same st, sk 2 sts, sl st in next st) around. Fasten off.
Leg Two (Left Leg):
Repeat Leg One instructions for the second leg opening.
Checkpoint: Your playsuit body should measure approximately 7 in / 18 cm from underarm to hem (8 in / 20.5 cm for larger size).
Section 4: Button Band
With RS facing, join yarn at the top right corner of the center front opening.
Row 1: Sc evenly down the right front placket edge, placing approximately 1 sc per row end. Work 3 sc across the bottom of the split, then sc evenly up the left placket edge. Turn. Approximately 47 (51) sc total
Row 2 (Buttonhole Row): Ch 1. On the right front side of the band, sc in first 3 sts, (ch 2, sk 2 sts, sc in next 6 sts) 3 times. Continue sc across bottom and up left front edge with no buttonholes. Turn. 3 buttonholes made
Row 3: Ch 1, sc in each st and 2 sc in each ch-2 sp across entire band. Turn.
Row 4: Ch 1, sl st in each st across for a firm finished edge. Fasten off.
Section 5: Straps (Make 4)
You’ll make two straps for the front and two for the back.
Join yarn at the upper right corner of the front bodice (approximately 2 stitches in from the right edge).
Ch 30.
Sl st back down the chain from the hook to the base, forming a firm cord.
Fasten off, leaving a 6 in / 15 cm tail.
Thread the tail through your yarn needle and secure the strap base to the bodice edge with 3 to 4 whipstitches. Tie the free end into a bow above the shoulder.
Repeat for the left front strap and both back straps, positioning them to mirror the front placement.
Section 6: Collar Attachment
Hold your finished collar piece against the upper edge of the bodice. The scalloped edge should face downward with the ruffle cascading toward the chest. Pin in place across the full upper edge, beginning and ending at the center front placket edges.
Using your yarn needle and a length of working yarn, whipstitch the straight top edge of the collar to the upper edge of the bodice. The strap ties will sit on top of the collar where they pass over the shoulders.
Weave in all ends.
Finishing and Blocking
Wet blocking method:
1. Submerge the finished playsuit in cool water with a small amount of gentle wool wash or baby shampoo for 10 to 15 minutes.
2. Gently press out excess water. Do not wring or twist.
3. Lay flat on a clean towel and roll the towel to absorb remaining moisture.
4. Unroll and lay the playsuit flat on a blocking mat. Pin to the finished measurements.
5. Allow to dry completely before unpinning, approximately 12 to 24 hours.
Blocking opens the ruffle shells, relaxes the ribbing, and evens out the scallop edging. It makes a real difference!
Button attachment:
Mark the positions of your three buttons on the left front placket band, aligning them with the buttonholes. Using a sewing needle and thread, sew each wooden shank button securely through both the button band layer and the bodice fabric. Knot securely on the wrong side.
Care Instructions
Tips for Customizing the Size
To size up beyond 6 to 12 months: Add 6 stitches to the bodice foundation chain for each size increment. Add 2 more rows to the bodice section. Add 2 more plain sc rounds before crotch shaping. Adjust the set-up round to the nearest multiple of 9.
To size down for newborn: Subtract 6 stitches from the bodice foundation. Work 2 fewer bodice rows. Reduce the set-up round to 63 sc. Reduce strap chains to 24.
You Did It!
I hope you love making this Lavender Ruffle Baby Playsuit as much as I loved designing it. There’s something so satisfying about watching all those pieces come together into such a special little outfit.
Thank you so much for choosing this pattern. I’d absolutely love to see your finished playsuit! Tag me on Instagram or share a photo in my Facebook group. Seeing your creations honestly makes my whole day.
If you want to save this baby playsuit crochet pattern for your next project, go ahead and pin it to your Pinterest boards. And please drop a comment below when you finish yours. I love hearing which colors you chose and who the lucky little one is!
