
Last fall, I was scrolling through photos of pumpkin patches and apple orchards when I realized something. Every single cozy autumn outfit I loved had one thing in common: sunflowers. Those cheerful golden faces just scream harvest season to me. I started sketching ideas for a cardigan that would capture that warm, nostalgic feeling of late September afternoons.
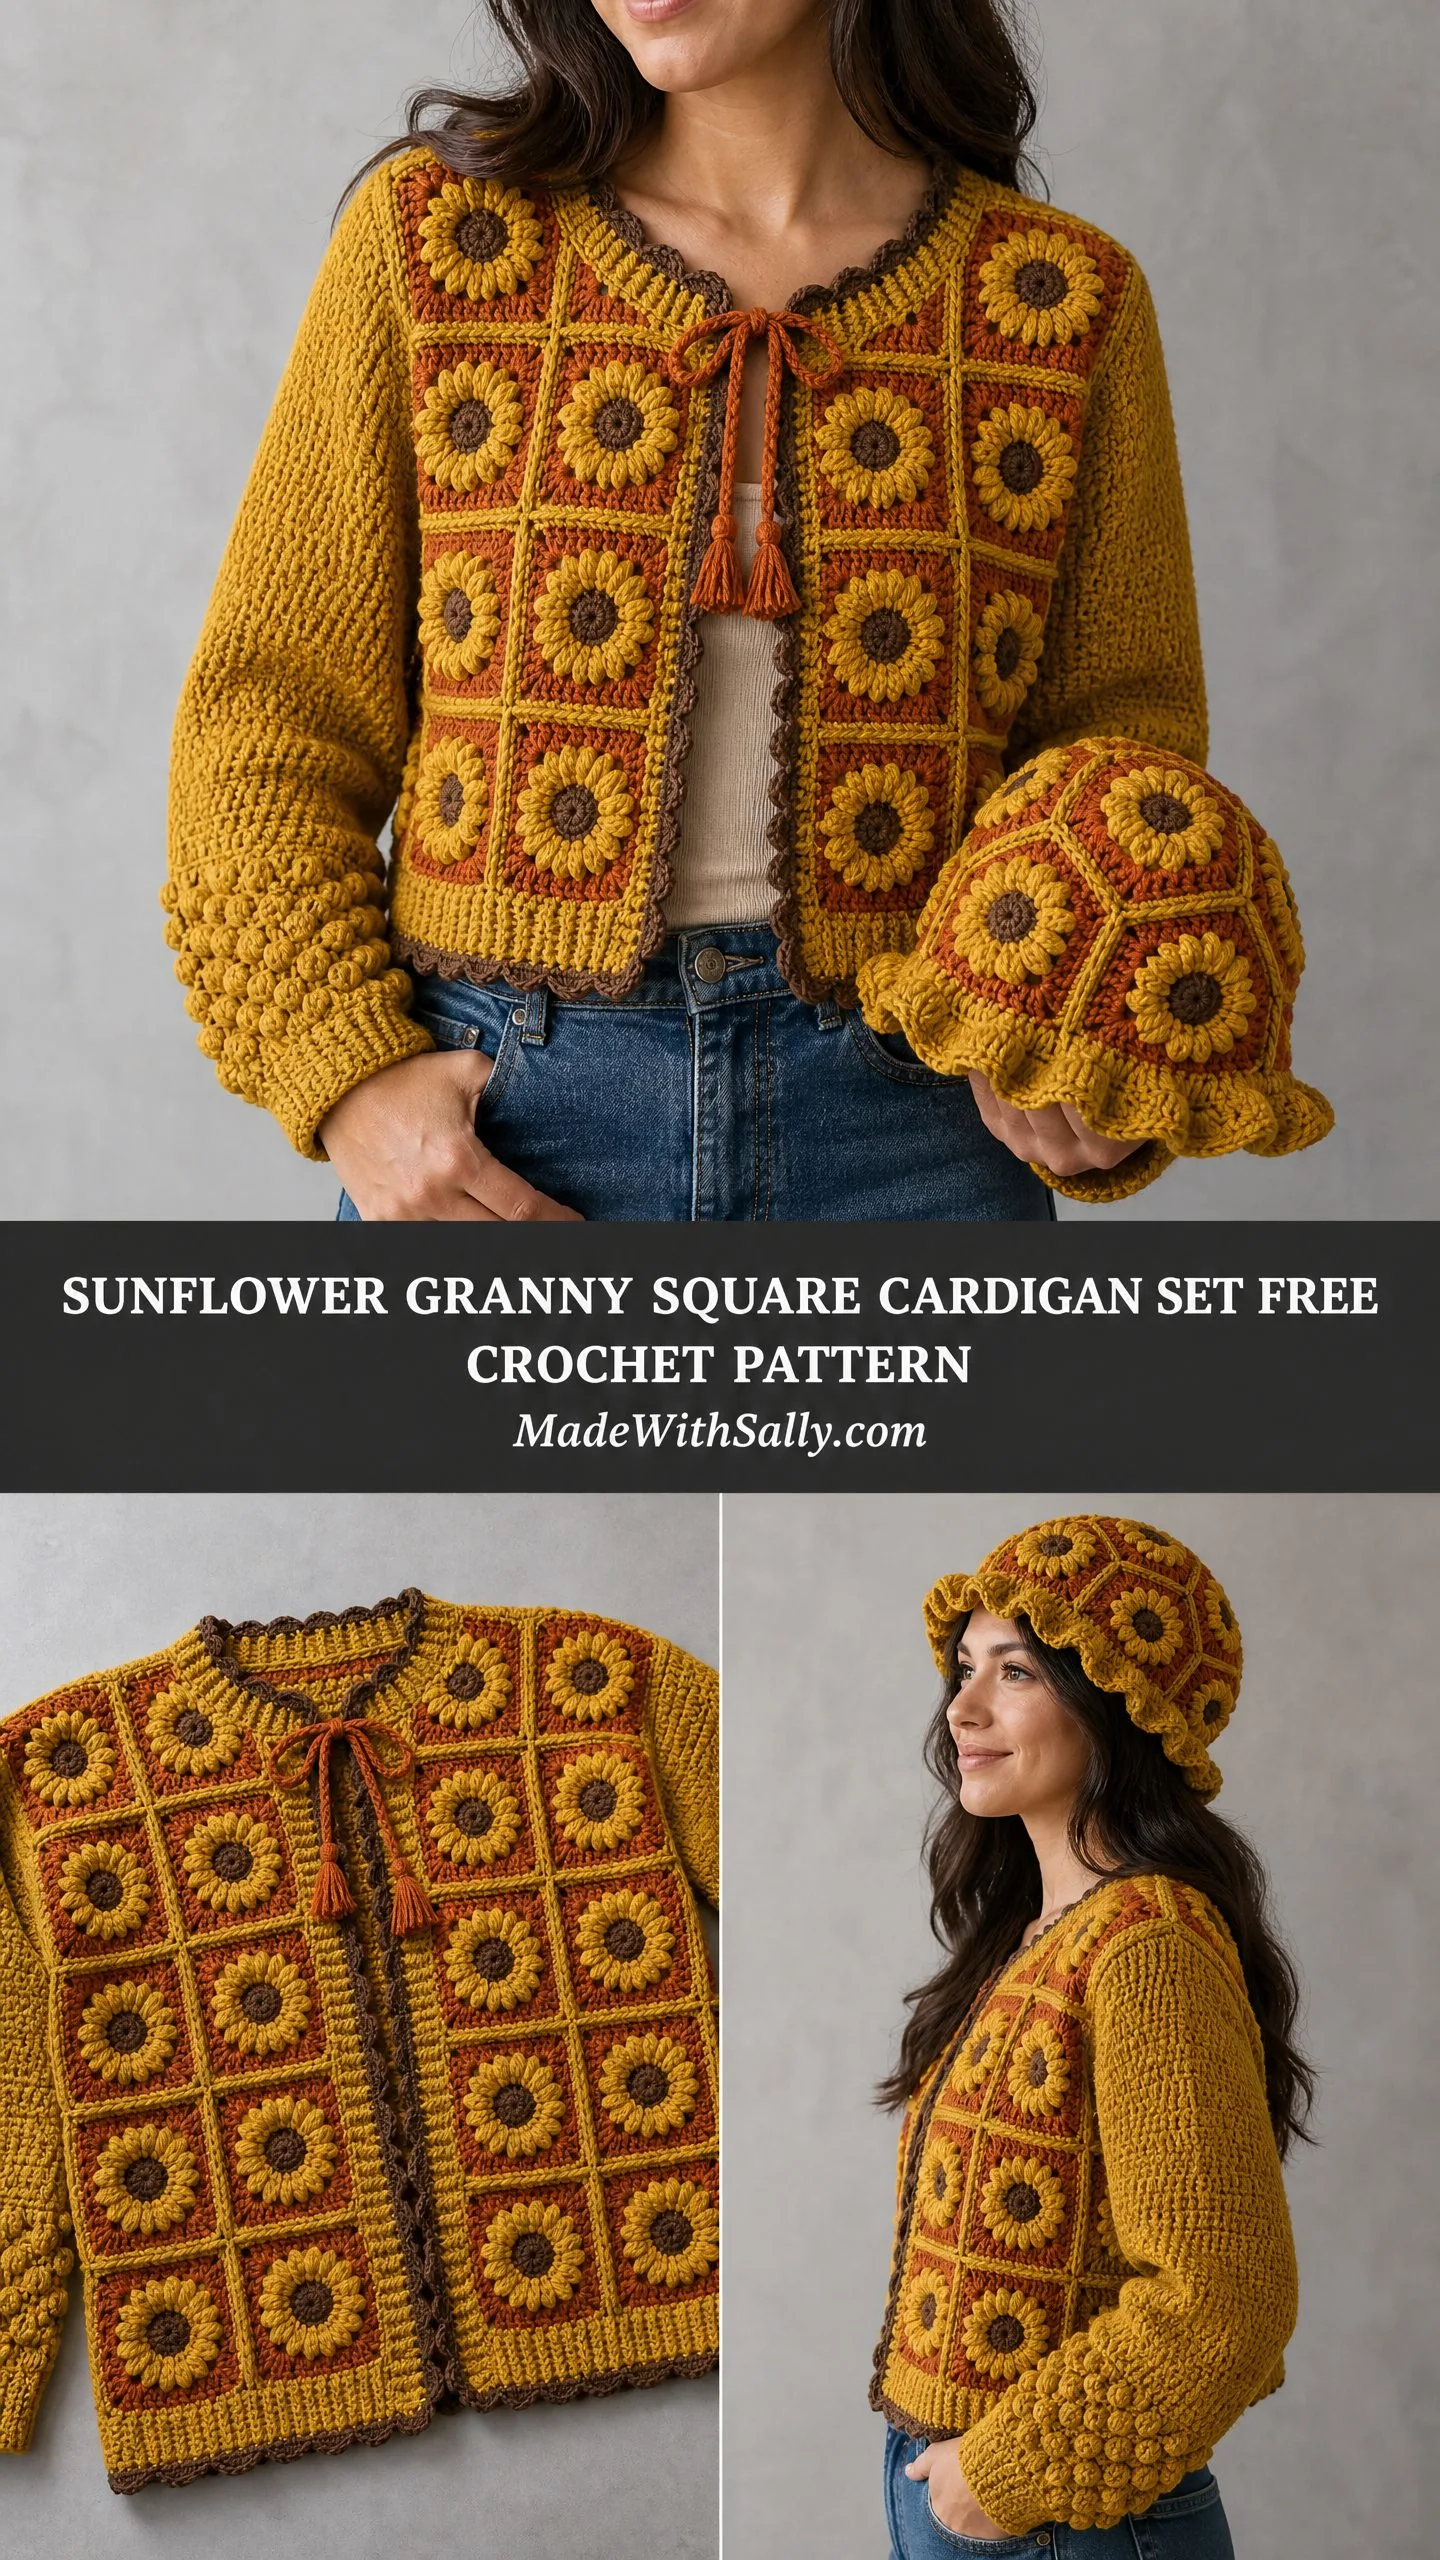
What came out of that creative spiral was this sunflower granny square cardigan and matching bucket hat set. The kind of project that makes you want to grab your warmest mug of cider and settle in for some serious crafting time. I designed it with three-dimensional petals that actually pop off the fabric, bobble stitch sleeves that add gorgeous texture, and a scalloped hem that gives it that perfect vintage finish.
Fair warning: this is not a weekend project. But if you have been crocheting for a while and want something that will genuinely impress everyone who sees it, keep reading. I am walking you through every single step.
About This Crochet Pattern
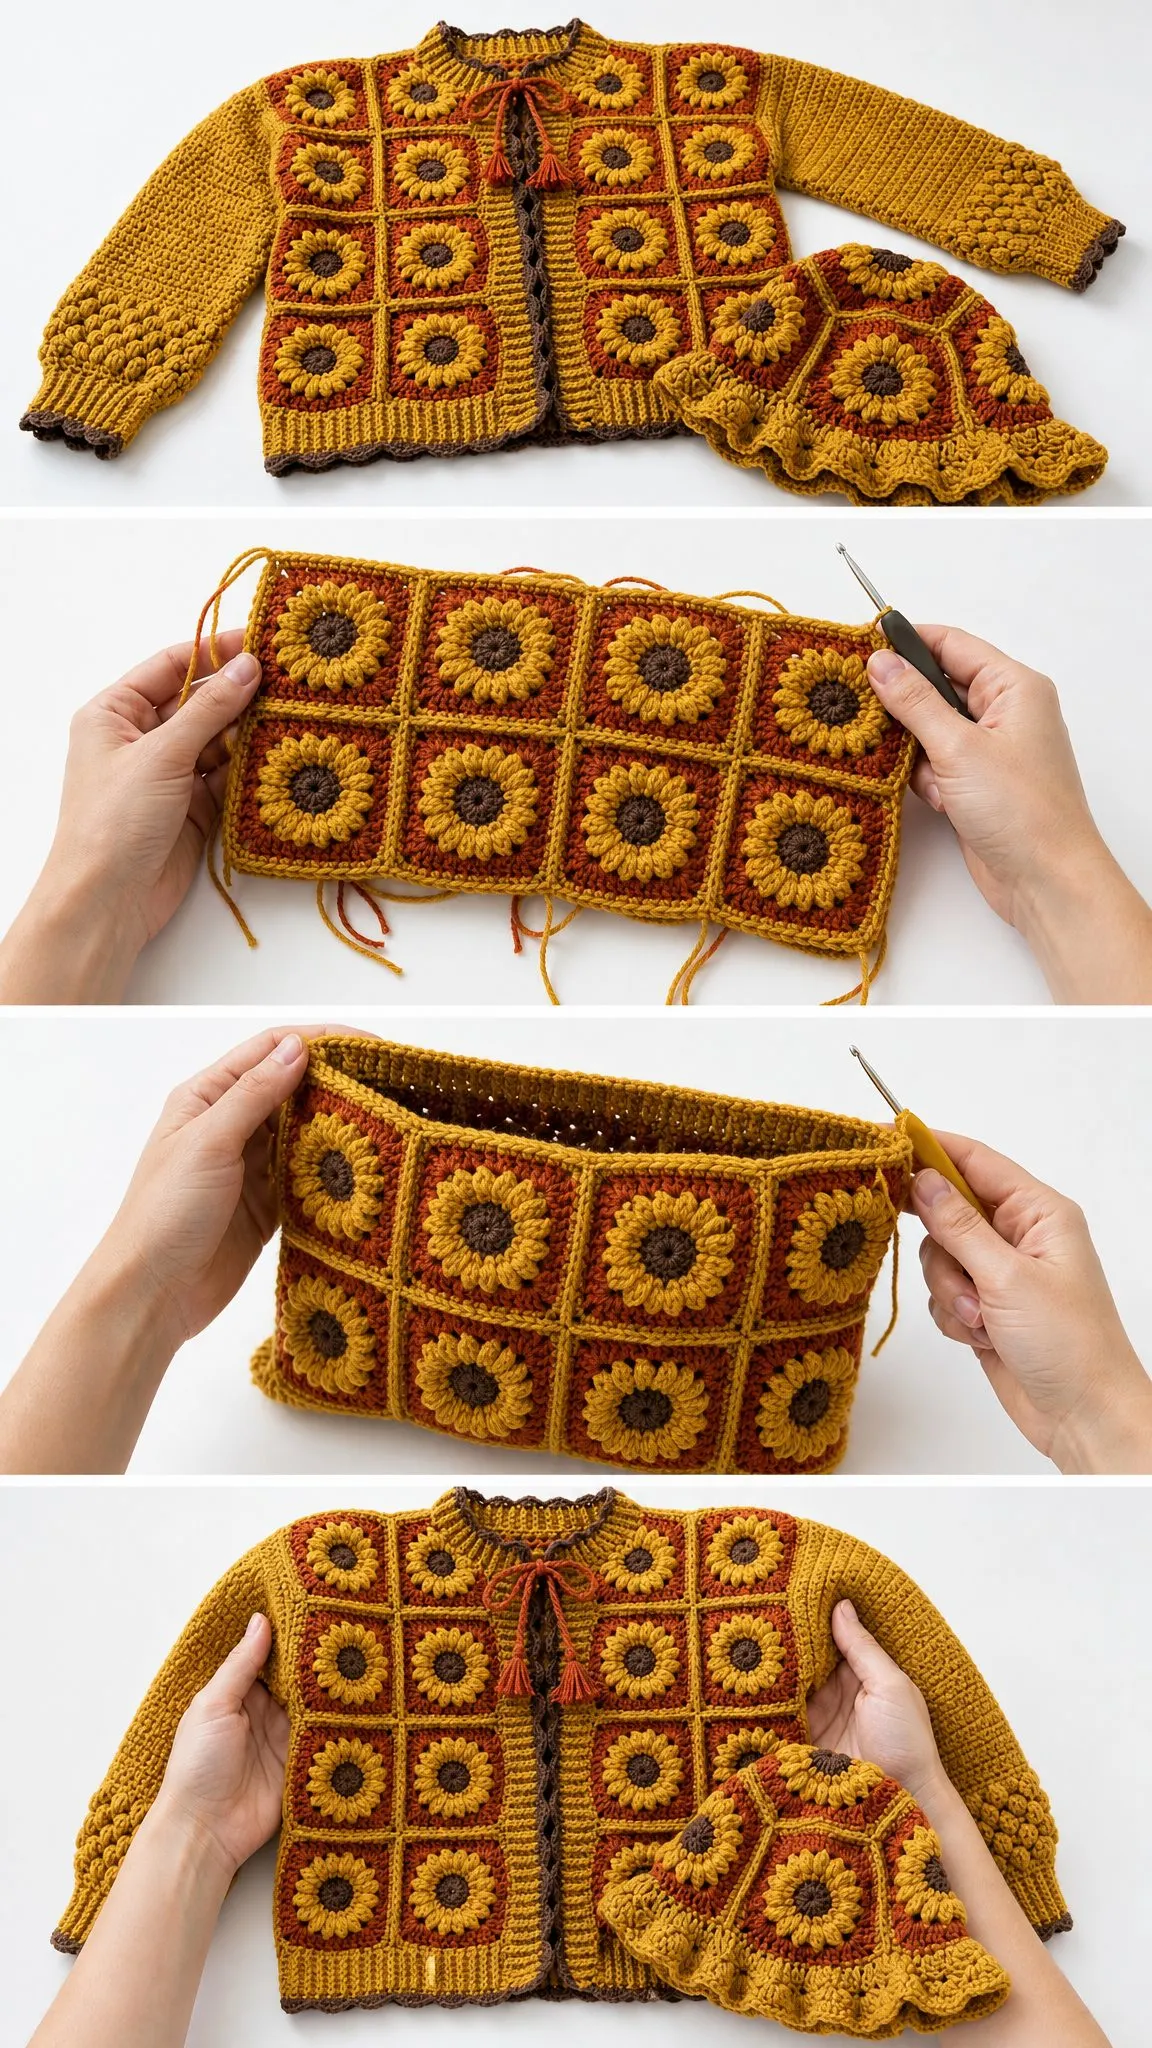
This coordinating set features a drop-shoulder cardigan with a granny square body panel, textured bobble sleeves, a ribbed neckband, and a matching bucket-style hat. The body is constructed from individual sunflower granny squares that get seamed together using the flat join method for clean, decorative seams. The sleeves are picked up directly from the armhole opening and worked downward. No separate sleeve pieces to sew on later.
The color palette uses three shades that work beautifully together: golden mustard yellow, burnt orange rust, and dark chocolate brown. These colors create that authentic sunflower look with the dark center, bright petals, and warm background.
Skill Level: Advanced Intermediate
You should feel comfortable with granny square construction, working stitches into rounds below your current working round, bobble stitches, and basic garment assembly including shoulder seaming and picking up stitches for neckbands. If you have made at least one garment and worked with granny squares before, you can absolutely handle this.
Time Estimate: The cardigan takes approximately 30 to 40 hours. The hat adds another 6 to 8 hours. Plan for 36 to 48 total hours depending on your working speed.
Finished Measurements
This crochet pattern is written for one size with the following finished measurements:
Cardigan:
Hat:
Materials Needed
Yarn (Worsted Weight):
Hooks:
Notions:
Yarn Suggestions
Option 1: Lion Brand Wool-Ease in Golden Yellow (Color A), Pumpkin (Color B), and Chestnut (Color C). This yarn is 80% acrylic and 20% wool, giving you warmth with easy care. 197 yards / 180 meters per 3 oz / 85 g skein.
Option 2: Cascade 220 Superwash in Lemon Yellow (Color A), Burnt Orange (Color B), and Chocolate (Color C). 220 yards / 201 meters per 3.5 oz / 100 g skein. This wool-based yarn blocks beautifully and gives excellent stitch definition for those raised petals.
Substitution note: Any smooth worsted weight yarn with good stitch definition will work. Avoid highly textured, mohair, or fuzzy yarns as they will hide the three-dimensional petal detail.
Gauge
With J-10 / 6.0 mm hook:
Gauge matters here. Make and block at least two swatches before you begin: one in single crochet and one sunflower square. Adjust hook size as needed.
Abbreviations and Stitch Definitions
Let me walk you through every stitch abbreviation you will encounter. I am defining them all here so you can reference back easily.
Special Stitches
These are the techniques that give this set its distinctive look. Take your time learning them before diving in.
Bobble Stitch (bo)
This creates those bumpy, textured sleeves. Yarn over, insert hook into indicated stitch, yarn over and pull up a loop, yarn over and pull through 2 loops (you now have 1 incomplete double crochet on your hook). Repeat this step 4 more times in the same stitch, for a total of 5 incomplete double crochets on your hook. Yarn over and pull through all 6 loops on hook. One bobble made. Always push the bobble to the right side of your work.
Sunflower Raised Petal (srp)
This is what creates those gorgeous three-dimensional petals. Yarn over twice. Insert hook from front to back to front around the post of the corresponding stitch two rounds below. Yarn over and pull up a long loop (pull up enough slack so the stitch lies flat without bunching). Yarn over and pull through 2 loops, three times. One srp made. The hook literally goes down and under stitches already worked, and the long stitch folds upward to sit on top of your current round, forming a petal.
Scallop Edging
Skip 1 st, 5 dc in next st (this forms a shell), skip 1 st, sl st in next st. Repeat across.
Flat Join
This seaming method creates a decorative ridge on the outside of your work. Hold two squares with wrong sides together. Insert hook through the outer loop of the edge stitch on the front square and the outer loop of the corresponding edge stitch on the back square at the same time. Yarn over and pull through both loops. Yarn over and pull through the loop on hook (slip stitch seam).
Step by Step Crochet Tutorial
Section 1: Sunflower Granny Square
Make 20 squares for the cardigan body.
Make 7 squares for the hat.
Total squares: 27
Use Color C for Rounds 1 and 2 (center and petal base).
Use Color A for Round 3 (petals).
Use Color B for Round 4 (background).
Use Color A for Round 5 (outer border).
Round 1 (center ring):
With Color C and J-10 hook, make a magic ring.
Ch 3 (counts as first dc). Work 11 dc into ring. Join with sl st to top of ch-3. Pull ring tail to close center hole. (12 dc)
Round 2 (petal base round, Color C):
Ch 3 (counts as dc). Dc in same stitch as join. 2 dc in each remaining st around. Join with sl st to top of ch-3. Do not fasten off yet. (24 dc)
Round 3 (petal round, Color A):
Fasten off Color C. Join Color A with sl st to any stitch of Round 2.
Ch 1. Work 1 srp (sunflower raised petal) around the post of the corresponding stitch in Round 1 below, ch 1, skip the current Round 2 stitch, sc in next Round 2 stitch, ch 1. Repeat from 11 more times, working 12 srp total with sc between each petal. Join with sl st to first sc. (12 srp, 12 sc, 24 ch-1 sps)
Each srp is worked down into a Round 1 dc stitch, skipping a Round 2 stitch behind it. The srp folds up and forward, creating a petal that overlaps the surface of the square.
Round 4 (square ground round, Color B):
Fasten off Color A. Join Color B with sl st to any sc between two petals.
The 12 petal groups divide into 4 sides of 3 petals each, with a corner worked at the space between petal groups.
Ch 3, (2 dc, ch 2, 2 dc) in corner ch-sp, ch 3, sc in sc between petals, ch 3, sc in next sc between petals. Repeat from 3 more times, ending with sl st to first ch-3. (4 corners each with ch-2 sp, 8 sc total on sides)
Round 5 (outer border, Color A):
Fasten off Color B. Join Color A with sl st to any ch-2 corner sp.
Ch 3 (counts as dc). (2 dc, ch 2, 3 dc) in same corner sp.
Work 3 dc in each ch-3 arch on the side (2 arches per side = 6 dc per side), then (3 dc, ch 2, 3 dc) in next corner sp. Repeat from around, ending with sl st to top of beg ch-3. Fasten off Color A. (72 dc total + 4 ch-2 corner sps)
Each finished square has 18 dc per side edge. Each square should measure 5 in x 5 in / 12.7 cm x 12.7 cm blocked.
Section 2: Cardigan Body Assembly
Lay out your 20 granny squares as follows:
Square seaming: Join squares in horizontal rows first, then join rows to each other. Hold two adjacent squares with wrong sides facing. Using Color C and the flat join method, sl st through the outer loop of each corresponding edge stitch along one full side (18 sts per side). At the corner ch-2 sp, work 1 sl st through both corner sps together.
Join back panel (4 squares wide, 2 squares tall). Join right front panel (3 squares wide, 2 squares tall). Join left front panel (3 squares wide, 2 squares tall).
Attach front panels to back panel at side seams. Do not join shoulder seams yet. Leave center front edges open for the cardigan opening.
Section 3: Yoke and Shoulder
Yoke Setup Row (RS, Color A, J-10 hook):
Join Color A with sl st to the top right front corner. Ch 1. Work sc across the top edge of all squares.
Total: 180 sc across. Do not join, work flat.
Row 1 (WS): Ch 1, sc across all 180 sts. Turn. (180 sc)
Row 2 (RS): Ch 1, sc across all 180 sts. Turn. (180 sc)
Row 3 (RS): Work 54 sc across right front. PM. Work 72 sc across back. PM. Work 54 sc across left front. Turn. (180 sc)
Rows 4 through 8 (neckline shaping):
Row 4 (WS): Ch 1, sc across. Turn. (180 sc)
Row 5 (RS): Ch 1, sc to last 2 sts of right front, sc2tog; work across back 72 sc; sc2tog at beginning of left front, sc to end. Turn. (178 sc)
Row 6 (WS): Ch 1, sc across. Turn. (178 sc)
Row 7 (RS): Ch 1, sc to last 2 sts of right front, sc2tog; work across back 72 sc; sc2tog at beginning of left front, sc to end. Turn. (176 sc)
Row 8 (WS): Ch 1, sc across. Turn. (176 sc)
Continue working even for 4 more rows after Row 8, ending with a WS row. (176 sc)
Shoulder seaming: Fold the piece so right front aligns over right back shoulder, wrong sides together. Using the flat join method and Color C, sl st through both layers across the shoulder seam, 50 sts. Repeat for left shoulder.
Section 4: Neckband
With Color C and I-9 / 5.5 mm hook, join yarn at the right center front neck edge. Pick up and sc evenly around the entire neckline opening. Approximately 120 sc total.
Row 1 (ribbing, WS): Ch 2 (counts as first hdc), FPdc around next st, BLO hdc in next st; repeat from across. Turn. (120 sts)
Row 2 (RS): Ch 2, FPdc around FPdc from row below, BLO hdc in next st; repeat from across. Turn. (120 sts)
Rows 3 and 4: Repeat Row 2. (120 sts)
Fasten off after Row 4.
Tie closure: Thread the 20 in Color B cord through the ch-2 space at the center top of the neckband. Attach tassels to each end.
Section 5: Sleeves (Make 2)
The sleeves are worked in the round from the armhole down to the cuff.
Sleeve pickup: Join Color A with sl st at the underarm point. Using J-10 hook, ch 1, pick up and sc evenly around the armhole opening. 56 sc around. Join with sl st to first sc. PM at underarm.
Rounds 1 through 3: Ch 1, sc in each sc around. Join. (56 sc each round)
Round 4 (begin bobble texture): Ch 1. Bo in next st, sc in next st. Repeat from around. Join with sl st to first st. (28 bo, 28 sc, 56 sts total)
Round 5: Ch 1. Sc in bo, sc in sc. Repeat from around. Join. (56 sc)
Round 6: Ch 1. Sc in first sc, bo in next sc. Repeat from around. Join. (28 sc, 28 bo, 56 sts)
Round 7: Ch 1. Sc in each st around. Join. (56 sc)
Continue working Rounds 4 through 7 until sleeve measures 18 in / 45.5 cm from underarm pickup.
Sleeve taper: Work a decrease round every 8th round, 4 times total. On each decrease round, work sc2tog evenly spaced 2 times. (56 sc decreases to 48 sc at cuff)
Cuff (Color C, I-9 hook):
Round 1: Ch 1, sc in each st around. Join. (48 sc)
Work cuff ribbing flat in BLO sc for 10 rows. Join cuff band with sl st seam. Fasten off.
Scallop cuff edge (optional): Working along the outer edge of the cuff band in Color A, work scallop edging around.
Section 6: Lower Hem and Scallop Border
With Color A and J-10 hook, join at the lower right front corner.
Pickup row: Ch 1, sc evenly along the entire lower hem. (180 sc across)
Row 1 of hem extension (Color B): Ch 1, sc across. Turn. (180 sc)
Row 2: Ch 1, sc across. Turn. (180 sc)
Row 3 (Color A): Ch 1, sc across. Turn. (180 sc)
Scallop border (Color A): Do not turn. Work scallop edging: Skip 1 st, 5 dc in next st, skip 1 st, sl st in next st. Repeat from across. (45 shells)
Center front edges: Work a simple sc border along both center front edges in Color C.
Section 7: Cardigan Finishing
Weave in all ends. Wet block the entire cardigan. Pin to measurements and allow to dry completely.
Section 8: Hat
Make 7 sunflower granny squares following the same instructions as above.
Hat crown assembly: Place 1 square as the crown center. Join 6 squares around the center square, one per side, using the flat join method. The squares form a hexagonal crown shape.
Brim: Pick up stitches around the lower edge of the crown and work the brim outward. Work several rounds of sc, increasing evenly to create a slight flare. Finish with a ruffled edge by working 2 dc in each stitch around, creating the decorative ruffle visible in the finished piece.
Work a scallop edge or simple ruffle around the outer brim edge in Color A to match the cardigan.
Blocking and Care Instructions
Wet blocking is essential for this set. Soak both pieces in lukewarm water with a splash of wool wash. Gently squeeze out excess water without wringing. Lay flat on blocking mats and pin to the stated measurements. Allow to dry completely before unpinning.
This opens up the granny squares beautifully and evens out the bobble texture on the sleeves. The raised petals will really pop after blocking.
For ongoing care, hand wash in cool water and lay flat to dry. If using a superwash wool, you can machine wash on gentle, but I recommend hand washing to protect those dimensional petals.
Size Customization Notes
To make this cardigan larger or smaller, you will need to adjust the number of squares. Each square adds approximately 5 inches to your measurements. For a smaller chest circumference, reduce the back panel to 3 squares wide. For a larger size, add one square to each section width.
Keep in mind that changing the square count affects your yardage requirements. Add approximately 50 yards of Color A and 20 yards each of Colors B and C for every additional square.
I really hope you love making this sunflower granny square cardigan set as much as I loved designing it. It is the kind of project that feels like an accomplishment when you finish, and you will get compliments every single time you wear it. Thank you so much for choosing this pattern for your next crochet adventure.
If you want to find this pattern easily later, go ahead and save it to your Pinterest boards. And please, if you make this set, drop a comment below or tag me on social media. I would absolutely love to see your finished cardigans and hats in all the beautiful autumn colors you choose.
