
Last summer, I hosted a garden party that turned into a minor disaster when my store-bought placemats started blowing away in the breeze. There I was, chasing paper rounds across the lawn while my guests tried not to laugh. That evening, I sat down with my hooks and decided I needed something with actual weight and beauty. Something that would stay put and make people ask, "Wait, you made that?"
Get the Ad-Free PDF Pattern
You can find the free pattern below, or you can purchase the ad-free printable PDF from my shop.
Get the Printable PDF →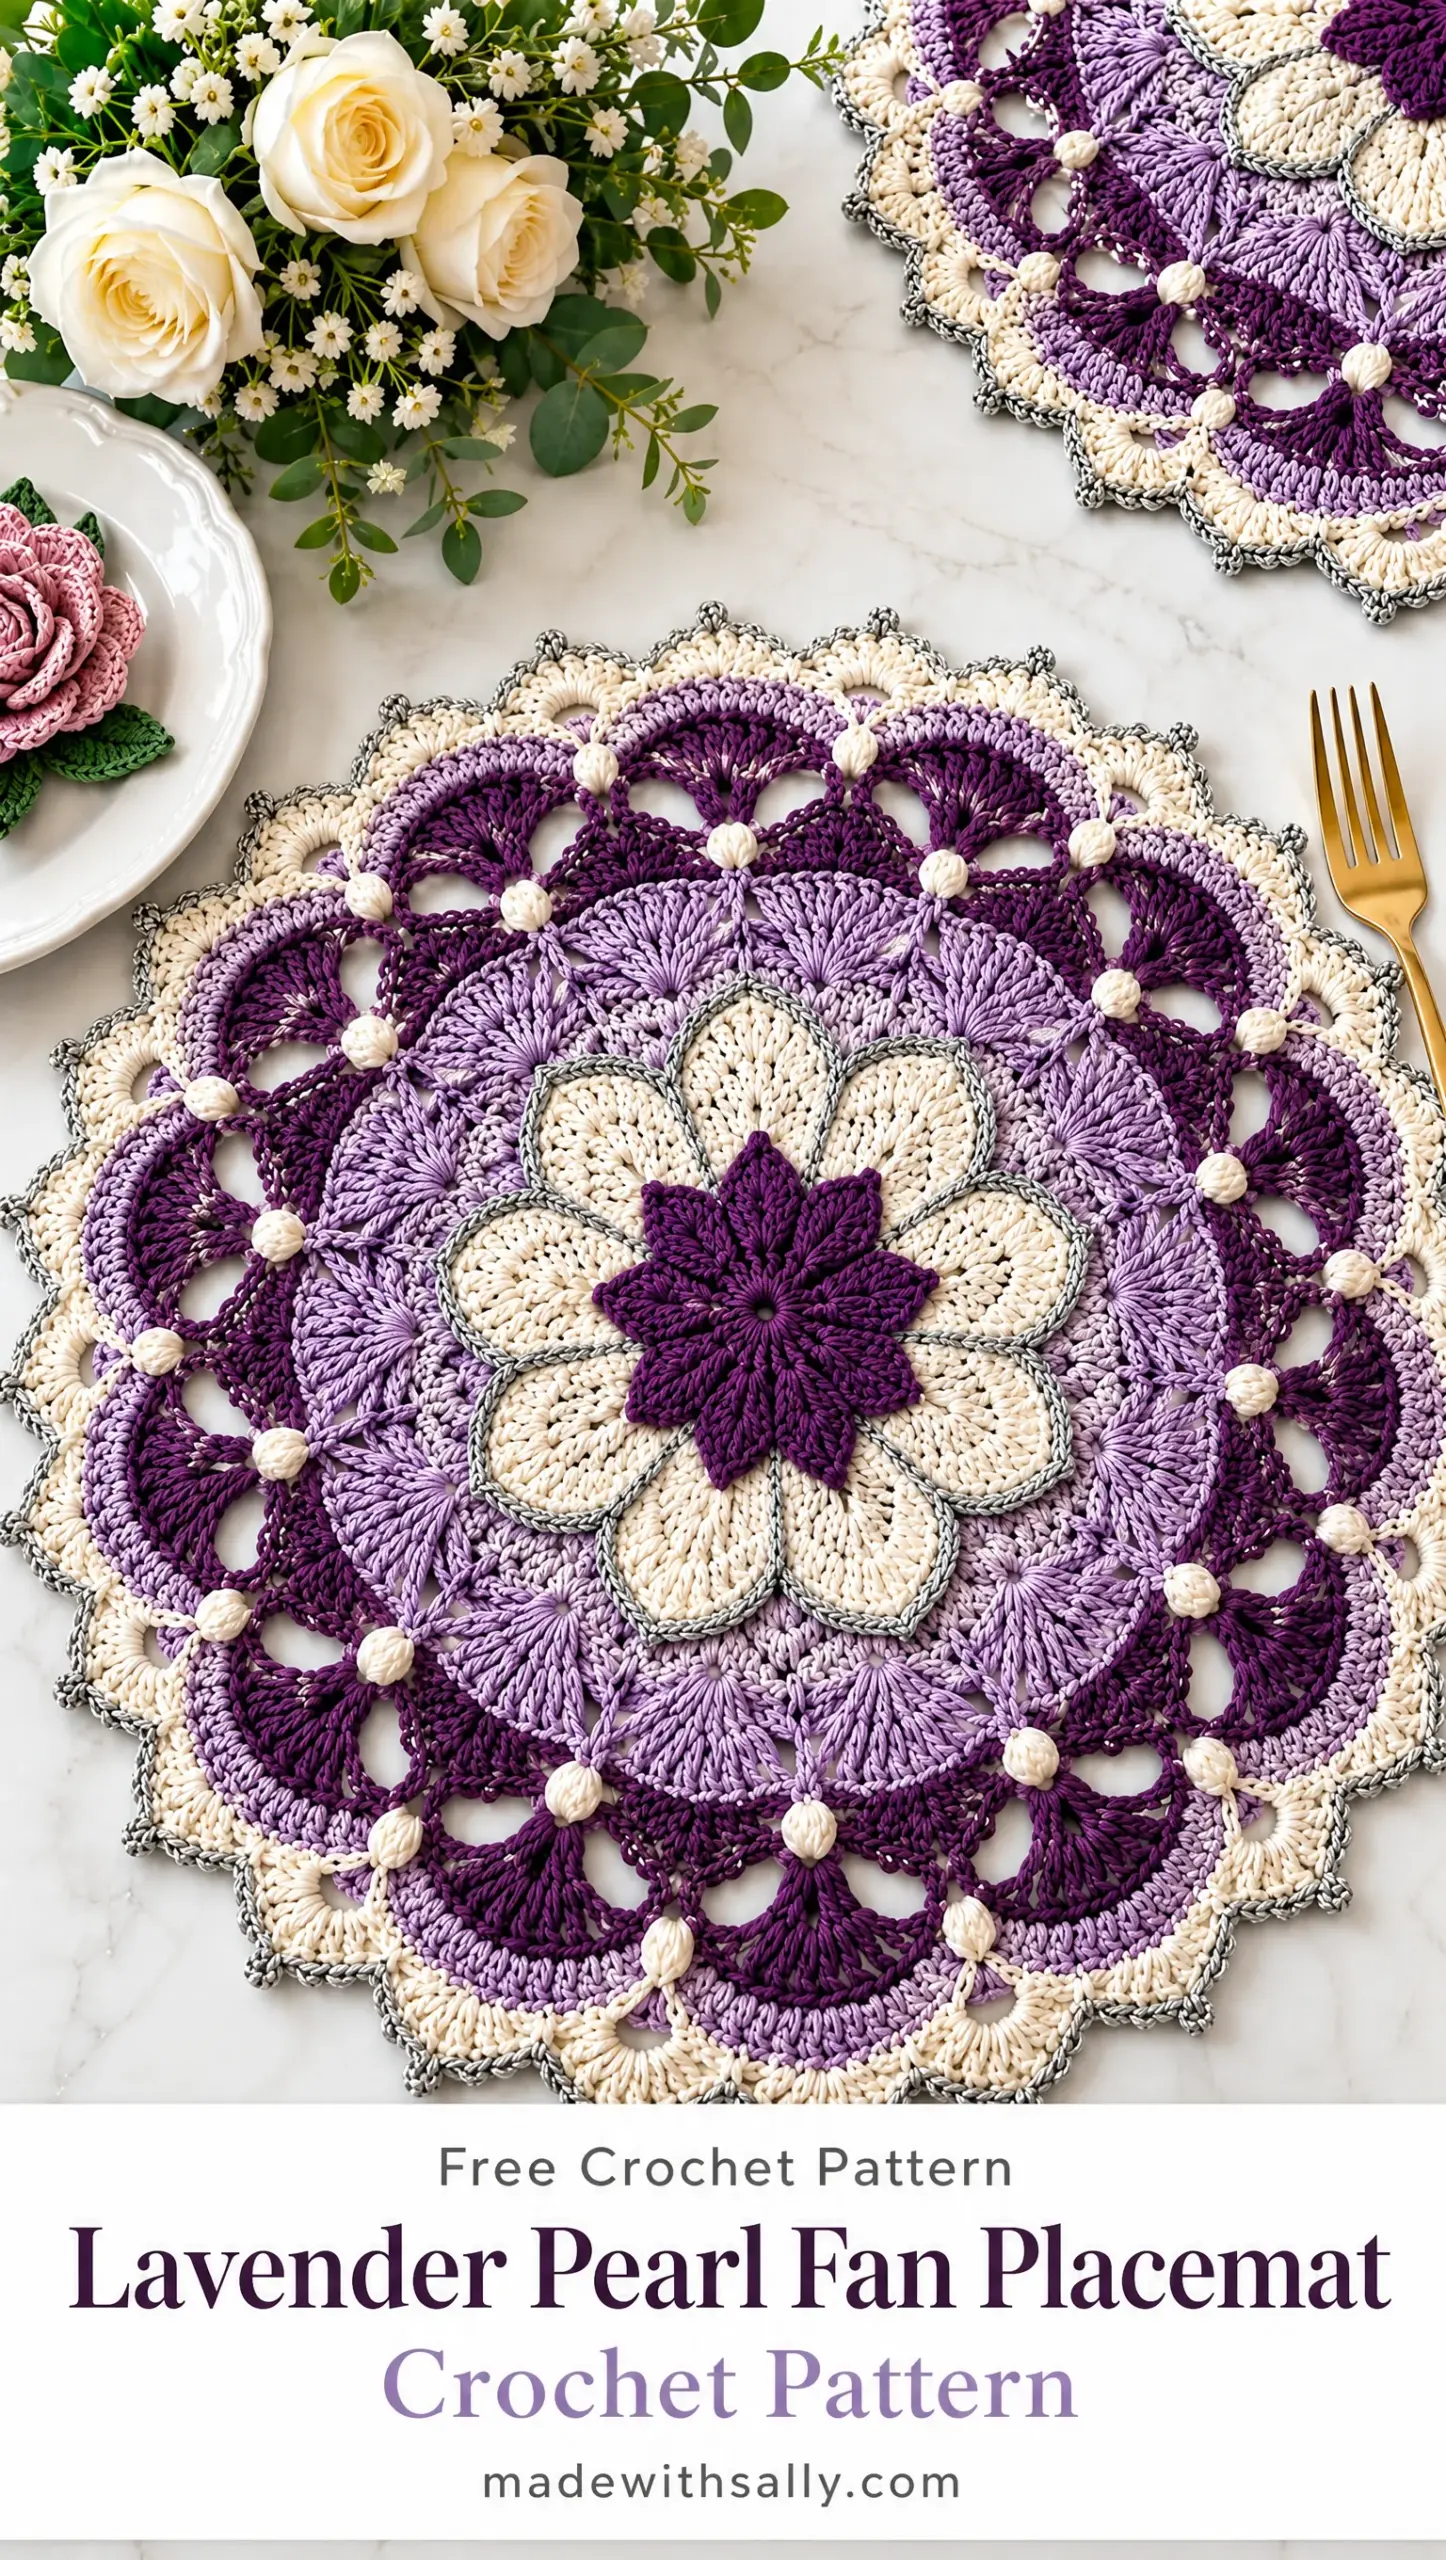
This Lavender Pearl Fan Placemat became my answer. The layered design with its concentric lace rings and those sweet pearl bobbles at every junction gives me all the vintage doily vibes I love, but with a practical purpose.
If you have been wanting to try something beyond basic rounds, this is your project. It looks intricate, but I promise the construction is logical and the pattern builds on itself in a way that makes sense as you go.
About This Pattern
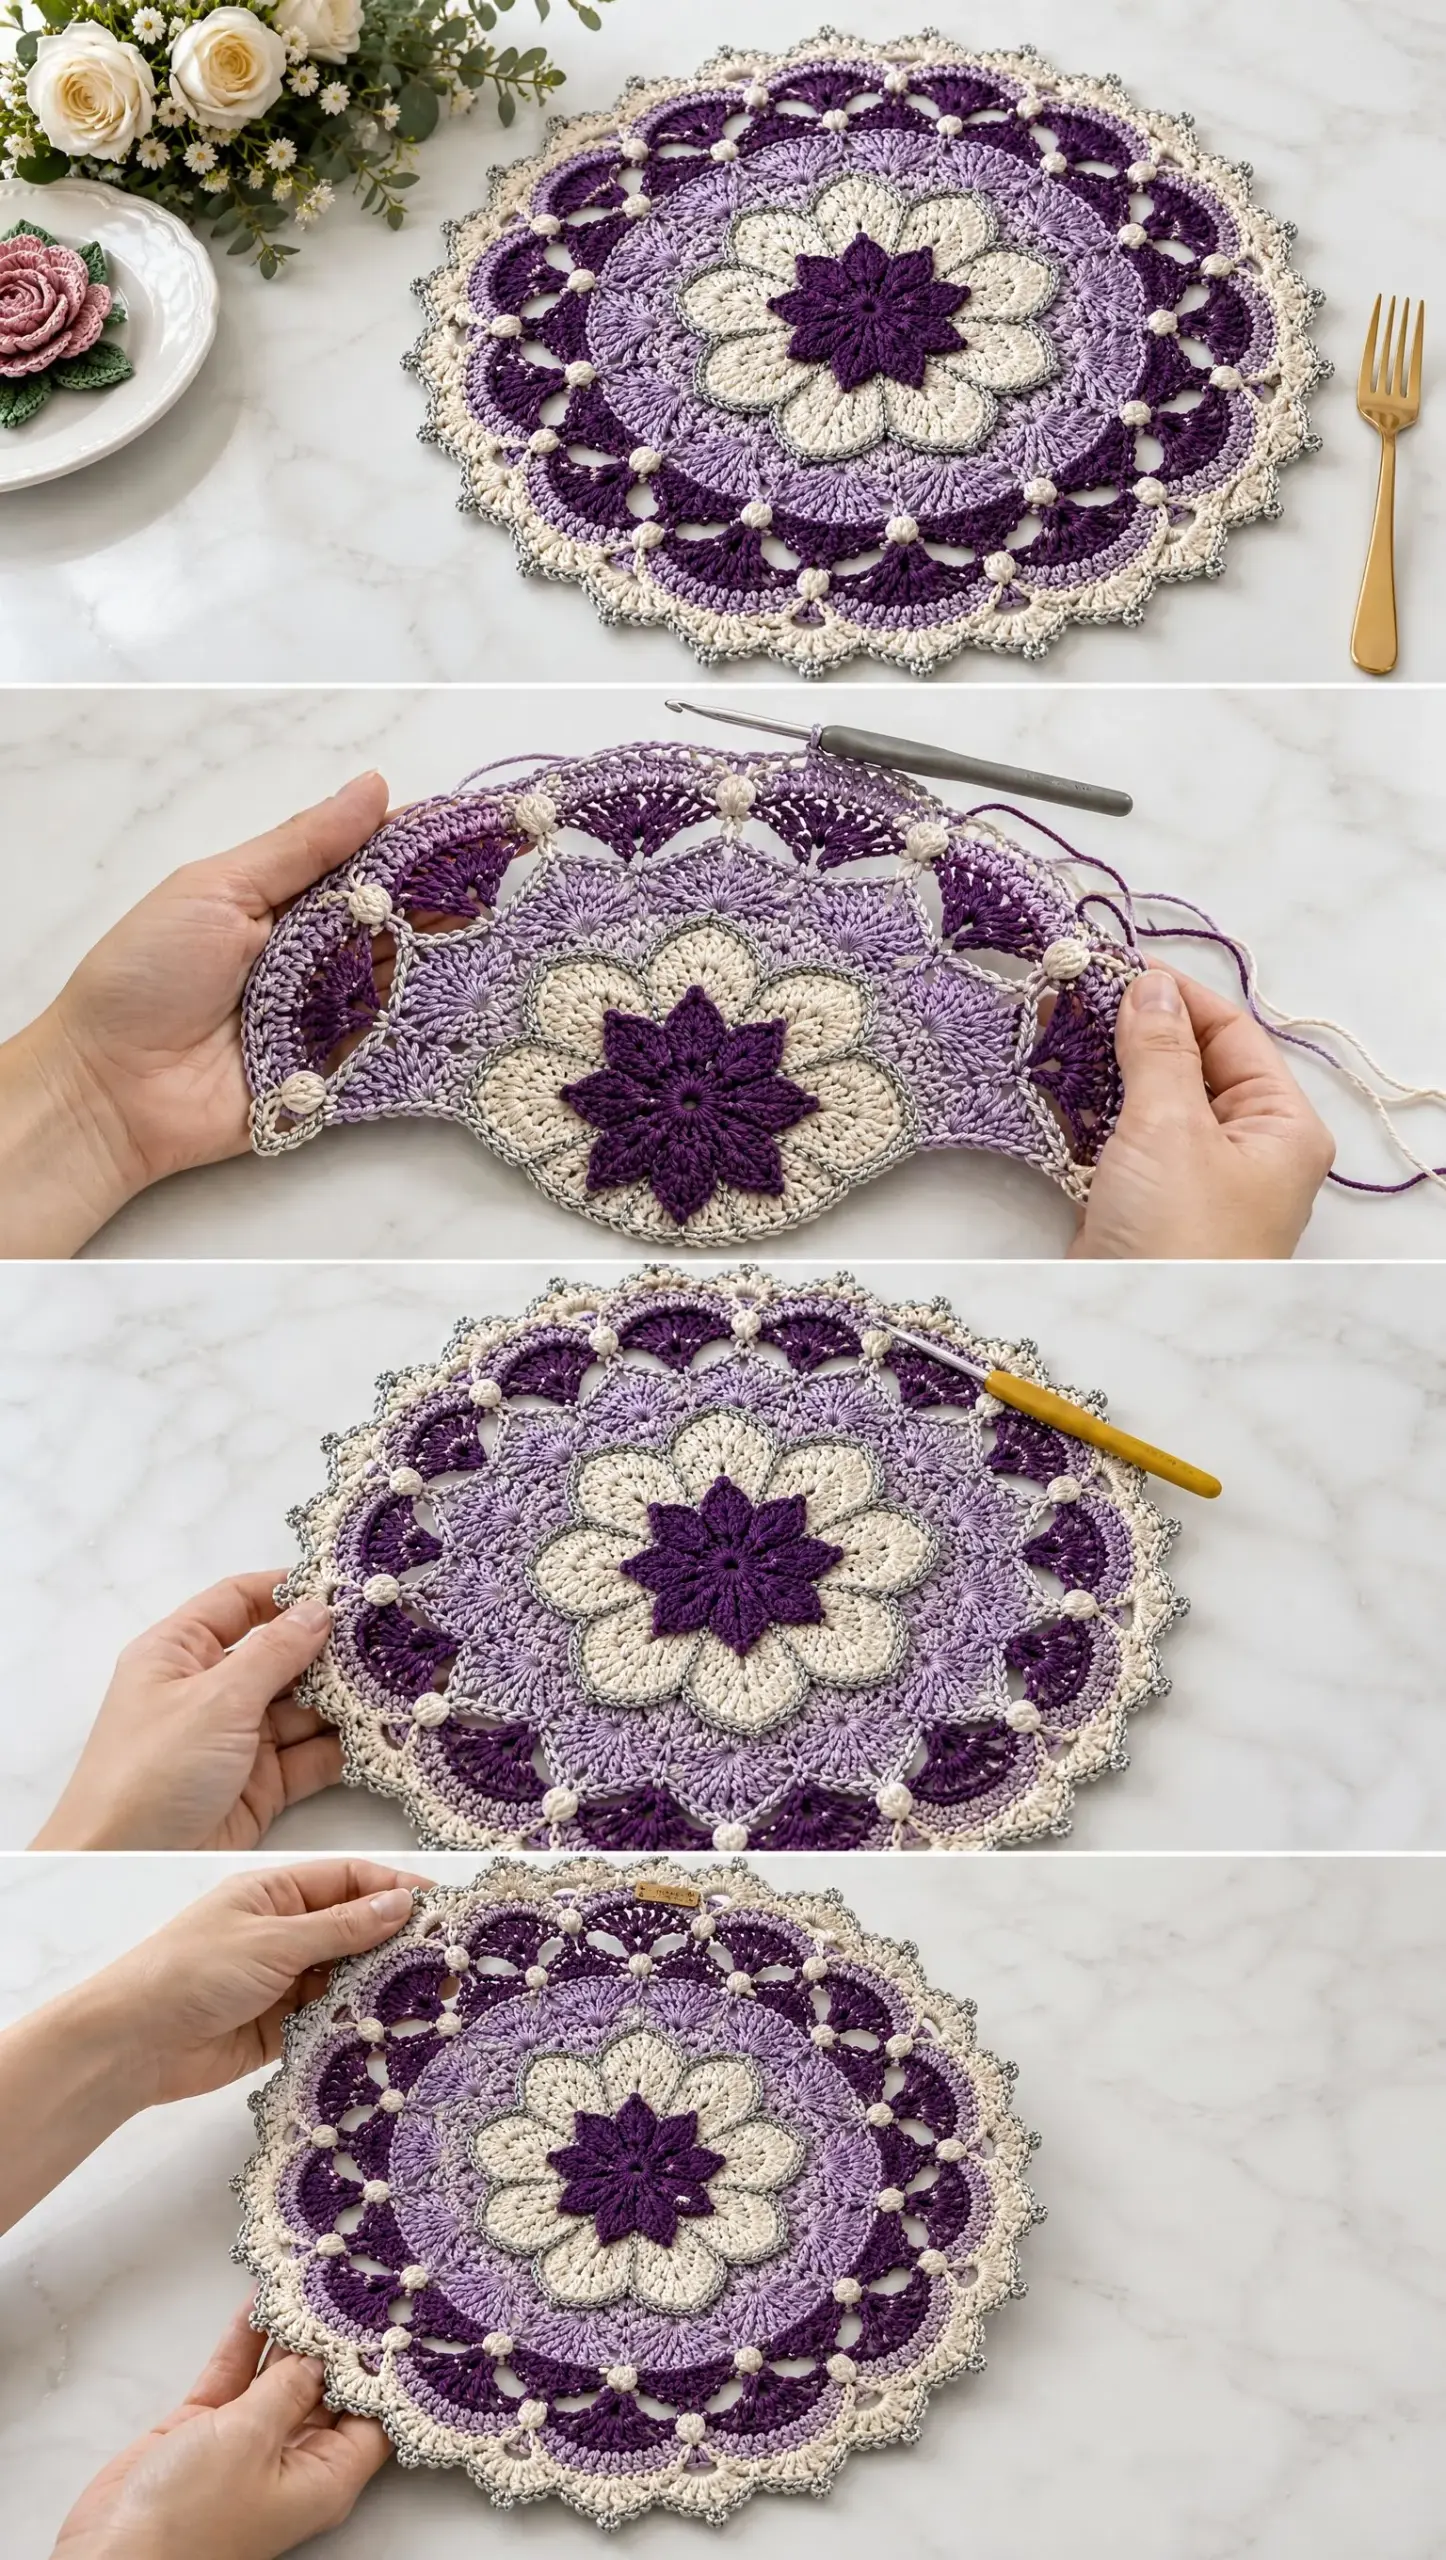
This flat circular placemat is worked from the center outward, creating a stunning mandala-style design that measures approximately 15.5 to 16.5 inches (39 to 42 cm) in diameter after blocking. The center portion takes up roughly half the finished diameter, giving you that beautiful layered look you see in the photos.
The construction method uses joined rounds with a separate center medallion and star that you sew on at the end. Surface crochet is added after blocking to create those gorgeous silver-gray radial outlines that really make the petals pop.
Skill level: Intermediate. You should be comfortable with basic stitches and working in the round. The special stitches are explained fully, and the bobbles are easier than they look.
Materials You Will Need
Yarn: Fine cotton crochet yarn, CYC #2 sport-weight or fine mercerized cotton. You will need approximately 450 to 550 yards (410 to 505 meters) total, broken down by color:
Optional: For a subtle sheen on Color F, carry one strand of very fine metallic sewing or crochet thread with the silver-gray cotton. This is completely optional but gives that restrained sparkle you see in the finished piece.
Hook: 2.25 to 2.75 mm crochet hook. Use whichever size gives you a flat, firm fabric without stiffness.
Notions: Tapestry needle, locking stitch markers, rustproof blocking pins, ruler or tape measure, blocking mat.
Important note about the pearl accents: The pearl bobbles are crocheted, not beaded. Do not add hard beads or sewn-on embellishments if you want the soft tabletop finish shown in the design.
Gauge and Sizing
Gauge matters less for flatness than it does for final diameter, but here is a useful target: 20 to 22 double crochet (dc) stitches equals 4 inches (10 cm), and 10 to 11 dc rounds equals 4 inches (10 cm) after light blocking.
Measure your solid center after completing Round 12. You should have a diameter of about 7.5 to 8.25 inches (19 to 21 cm).
If your center cups upward: Increase your hook size slightly or add a few extra increases evenly distributed.
If your center ripples: Reduce your hook size slightly or omit 2 to 4 increases in the affected round.
Keep any changes symmetrical in multiples of 12 whenever possible so your radial design stays orderly.
Stitch Abbreviations and Definitions
Let me walk you through every abbreviation you will encounter. I am defining them here so you can refer back anytime.
Special Stitches
Pearl Bobble (PB): This creates those lovely pearl-like dots at the arch junctions. Here is how to make one: Yarn over, insert hook in the indicated stitch or space, yarn over and pull up a loop, yarn over and draw through 2 loops. Repeat this four more times in the same stitch or space. You will have 6 loops on your hook. Yarn over and draw through all 6 loops. Chain 1 firmly to close. Push the bobble to the right side of your work.
Picot: Chain 3, then slip stitch into the first chain you made. This creates a tiny decorative point.
Surface Slip Stitch: With yarn held on the underside, insert your hook from the right side to the wrong side at your starting point. Catch the yarn and pull a loop to the right side. Insert your hook at the next stitch gap and pull the new loop through the loop on your hook. Keep your tension loose enough that the fabric stays flat.
Joining tip: For the cleanest concentric look, close each joined round with an invisible join or a neat slip stitch. Begin the next round at a point that will be hidden beneath a fan or surface crochet line.
Part 1: Solid Lavender Center
Use Color A (Lavender). Chain 3 at the beginning of a round counts as the first dc unless you prefer a standing dc. Join each round to the top of the beginning ch-3. Place a marker at the first true stitch after the join.
Round 1: Magic ring, ch 3, 11 dc in ring; join. (12 dc)
Round 2: Ch 3, dc in same st, 2 dc in each remaining st around; join. (24 dc)
Round 3: Ch 3, 2 dc in next st, dc in next st, 2 dc in next st around; join. (36 dc)
Round 4: Ch 3, dc in next st, 2 dc in next st, dc in next 2 sts, 2 dc in next st around; join. (48 dc)
Round 5: Ch 3, dc in next 2 sts, 2 dc in next st, dc in next 3 sts, 2 dc in next st around; join. (60 dc)
Round 6: Ch 3, dc in next 3 sts, 2 dc in next st, dc in next 4 sts, 2 dc in next st around; join. (72 dc)
Round 7: Ch 3, dc in next 4 sts, 2 dc in next st, dc in next 5 sts, 2 dc in next st around; join. (84 dc)
Round 8: Ch 3, dc in next 5 sts, 2 dc in next st, dc in next 6 sts, 2 dc in next st around; join. (96 dc)
Round 9: Ch 3, dc in next 6 sts, 2 dc in next st, dc in next 7 sts, 2 dc in next st around; join. (108 dc)
Round 10: Ch 3, dc in next 7 sts, 2 dc in next st, dc in next 8 sts, 2 dc in next st around; join. (120 dc)
Round 11: Ch 3, dc in next 8 sts, 2 dc in next st, dc in next 9 sts, 2 dc in next st around; join. (132 dc)
Round 12: Ch 3, dc in next 9 sts, 2 dc in next st, dc in next 10 sts, 2 dc in next st around; join. (144 dc) Fasten off Color A.
Checkpoint: Lay your center flat without stretching. It should look like a smooth dinner-plate circle. If the diameter is already much larger than 8.25 inches (21 cm), use a smaller hook for the lace rounds or omit one center round and adapt Round 13 over the resulting stitch count in 12 equal sections.
Part 2: Pale Lilac Shell Fan Band
Join Color B (Pale Lilac) with the right side facing.
Round 13, Small Shell Fans: Sc in next st, skip 2 sts, 5 dc in next st, skip 2 sts around; join to first sc. (24 shells and 24 sc anchors) The repeat uses 6 center stitches.
Round 14, Paired Large Fans: Sl st to the center dc of the first 5-dc shell. Ch 1, sc in same st. Ch 3, 7 dc in the center dc of the next shell, ch 3, sc in the center dc of the following shell around; join. You will have 12 large 7-dc fans, separated by paired ch-3 bridges and sc anchor points. Fasten off.
Flatness cue: The large fans should spread rather than fold. If they crowd together, substitute 6 dc for 7 dc in each fan. If the band pulls inward, use 8 dc in each fan. Make the same adjustment in every fan.
Part 3: Deep Violet Open Arches
Use Color C (Deep Violet). These rounds create the open, elongated lace ring. Keep all chain spaces relaxed and equal in length.
Round 15, First Open Arch Row: Join in the 4th dc (center) of any 7-dc fan. Ch 1, sc in same st, Pearl Bobble in same st. Ch 7, sc in the center dc of the next 7-dc fan, Pearl Bobble in same st around; ch 7, join to first sc. (12 ch-7 arches and 12 pearl junction positions)
For true pearl-white bobbles, work each PB with Color D using the tapestry/carry method described below.
Round 16, Elongated Treble Fans: Sl st into first ch-7 sp. Ch 1, sc in same sp, ch 2, work (tr, ch 1) 5 times in the same sp, tr in same sp, ch 2, sc in same sp. Ch 4; in next ch-7 sp work sc, ch 2, (tr, ch 1) 5 times, tr, ch 2, sc around; ch 4, join. (12 elongated treble fans with ch-4 connectors)
Round 17, Staggered Arch Row: Sl st to the first ch-4 connector. Ch 1, sc in connector, Pearl Bobble in same connector. Ch 6, sc in the center ch-1 space of the next treble fan, ch 6, sc in next ch-4 connector, Pearl Bobble in same connector around; join. (24 ch-6 arches arranged in a staggered rhythm) Fasten off Color C.
Working the Pearl-White Bobbles
For distinct pearl-white dots without carrying a second yarn around the whole round, use Color D only at the marked junctions:
1. Work the sc at the junction in violet, but stop before the final pull-through.
2. Pull Color D through to complete that sc, make the Pearl Bobble in Color D, then complete the closing ch 1 of the bobble.
3. Drop Color D to the back. Pick up Color C through the last loop and continue the round.
4. After finishing, trim Color D leaving 3 to 4 inches (8 to 10 cm) tails and weave them securely through the backs of nearby stitches.
For a reversible mat, carry Color D loosely along the back instead of cutting at every bobble.
Part 4: White Fan Ring and Silver Picot Edge
Round 18, Pearl-White Fan Ring: Join Color D in any ch-6 arch. In each ch-6 arch work (sc, hdc, 3 dc, hdc, sc). Repeat in every ch-6 arch around; join. (24 compact white fans) Do not fasten off if you want a white foundation beneath the silver edging.
Round 19, Silver-Gray Picot Points: Join Color F at the first sc of any white fan. Sc in first 3 sts of fan, (sc, picot, sc) in the center dc of fan, sc in last 3 sts of fan; repeat for every fan. If needed, place 1 extra sc in the valley between fans so the edge lies flat. Join invisibly and fasten off.
Metallic restraint: For the subtle sheen shown in the design, hold one strand of fine silver metallic thread together with matte silver-gray cotton only on Round 19 and the surface crochet outlines. Avoid a full metallic yarn, which can make the edge stiff and visually overpower the cotton.
Part 5: Pearl-White Flower Medallion
Make this separately with Color D. The medallion is an overlay and should lie smoothly on the lavender center. The instructions below create 12 rounded petals.
Medallion Round 1: Magic ring, ch 1, 12 sc in ring; join. (12 sc)
Medallion Round 2: Sc in next sc, ch 7 around; join. (12 ch-7 petal loops)
Medallion Round 3: In each ch-7 loop work (sc, hdc, 2 dc, 3 tr, 2 dc, hdc, sc). Repeat around. (12 rounded scalloped petals) Join and fasten off, leaving a 24-inch (60 cm) sewing tail.
Optional Medallion Round 4: If you want a broader, more defined flower, join Color D in the first sc of a petal and sl st loosely around each petal, placing (sl st, ch 1, sl st) in the middle tr at each petal tip. Fasten off.
Part 6: Plum Crochet Star
Make this separately with Color E (Plum). This compact eight-point star sits on top of the white medallion.
Star Foundation: Magic ring, ch 1, 16 sc in ring; join. (16 sc)
Star Points: Sl st in next sc, ch 5. Working back down the chain: sl st in 2nd ch from hook, sc in next ch, hdc in next ch, dc in last ch. Sl st in next base sc; repeat 8 times. Fasten off leaving a 12-inch (30 cm) tail.
Star shaping: Finger-block each point while slightly damp. The points should be crisp but soft, not stiff. If the star is too large for the medallion, remake it with ch 4 points and omit the hdc step.
Part 7: Assembly and Silver Radial Outlines
1. Block the main placemat lightly before attaching overlays. Pin the circle to the target diameter, making sure all 12 main fan sections are evenly spaced.
2. Center the pearl-white medallion over the lavender disc. Align one petal with every main radial section. Sew only along the inner half of each petal and at the center ring so the outer petal edges retain dimension.
3. Center the plum star over the medallion and sew around the inner base of each point. Hide all ends between layers.
4. With Color F, work 12 loose surface slip stitch lines from the outer valley of each white petal toward the shell band. Follow the natural radial column between increase lines. Stop each line before the open arch band so the lace remains flexible.
5. For a more continuous silver outline, add a second short surface slip stitch line around each white petal edge, especially along the valleys between petals. Keep tension very loose and consistent.
Part 8: Finishing and Blocking
1. Weave in all ends on the wrong side, changing direction at least once so the ends do not pull free during laundering.
2. Soak the placemat in cool water with a small amount of gentle wash. Do not wring.
3. Roll in a towel and press to remove excess moisture.
4. Pin on a blocking mat to 15.5 to 16.5 inches (39 to 42 cm) diameter. First pin the 12 main radial points, then add pins between them to round the circumference.
5. Shape the white fan ring and silver picots individually. Straighten the surface crochet lines so they radiate evenly.
6. Allow to dry completely before unpinning. Steam only if your cotton yarn manufacturer permits it, and avoid direct high heat on metallic thread.
Round-by-Round Construction Map
| Round | Color | Feature | Target |
|---|---|---|---|
| 1-12 | Lavender | Solid dc circle | 12 increases per round; 12 to 144 dc |
| 13 | Pale Lilac | Small shell fans | 24 five-dc shells |
| 14 | Pale Lilac | Large paired fans | 12 seven-dc fans |
| 15 | Deep Violet + Pearl White | Open arches + bobbles | 12 ch-7 arches / 12 junctions |
| 16 | Deep Violet | Elongated treble fans | 12 treble fans |
| 17 | Deep Violet + Pearl White | Staggered arches + bobbles | 24 ch-6 arches |
| 18 | Pearl White | Narrow fan ring | 24 compact fans |
| 19 | Silver Gray | Picot edging | 1 picot per fan |
| Overlay | White + Plum + Silver | Flower, star, surface outlines | 12 petals / 8-point star / 12 radial lines |
Troubleshooting Common Issues
Center cups upward: Not enough circumference. Increase hook size 0.25 mm, loosen tension, or add 2 to 4 extra dc increases evenly in the affected round.
Center ripples: Too much circumference. Reduce hook size, tighten tension slightly, or omit 2 to 4 increases evenly.
Shell band ruffles: Reduce each Round 14 fan from 7 dc to 6 dc.
Arch band pulls tight: Make chain spaces more loosely or add 1 ch to each arch consistently.
Outer edge waves: Remove the optional valley sc in Round 19 or use a smaller hook for the edging.
Outer edge draws inward: Add the optional valley sc between white fans or use a slightly larger hook for Round 19.
Silver lines pucker: Surface slip stitches are too tight. Remove and redo them with a larger hook or looser tension.
Medallion buckles: Sew fewer points down; anchor the center and inner petal bases only, then re-block.
Care Instructions
Hand wash or use a gentle mesh-bag cycle if your yarn label allows. Reshape flat and dry flat. Store flat or loosely rolled. Do not iron directly over the silver-gray or metallic surface details.
Personalization Options
Smaller charger size: Stop the lavender center at Round 10 (120 dc) and distribute 20 small shells in Round 13; continue with 10 large radial sections instead of 12.
Larger centerpiece: Add 1 to 2 additional dc increase rounds before the shell band, preserving 12 evenly spaced increase points.
Softer contrast: Replace deep violet with a medium lavender and use matte silver-gray without metallic carry thread.
More dimensional center: Lightly tack only the bases of the white petals and plum star points so their tips remain raised.
Final Quality Check
The finished mat should lie fully flat. The center should occupy roughly half the diameter. The 12 radial sections should be evenly spaced. The bobbles should sit at regular junctions. No yarn ends or joins should be visible from the right side.
You Did It!
Thank you so much for choosing this pattern for your table. I hope you love making it as much as I loved designing it. These placemats make stunning gifts, and a full set of four or six is absolutely showstopping at any dinner party. (And they stay put, even in a breeze.)
If you make one, I would absolutely love to see it! Tag me on Instagram or share your finished piece in our Facebook group. Seeing your creations is honestly the best part of sharing patterns.
Save this Lavender Pearl Fan Placemat crochet pattern to your Pinterest boards so you can find it when you are ready to start. And please drop a comment below if you make one. I love hearing how your projects turn out and seeing which color combinations you choose!
Want a Quick & Easy Printable Version?
Get a clean, beautifully formatted PDF of this pattern — easy to follow step by step, ready to print or save on any device. No scrolling, no distractions, just the pattern.
Get the Printable PDF →